Hello,
Welcome to today’s edition of Kitchen Projects. Thank you so much for being here.
Today we’re settling into something bright and tangy: It’s the rhubarb index! All the recipes in this love letter to the pink stuff.
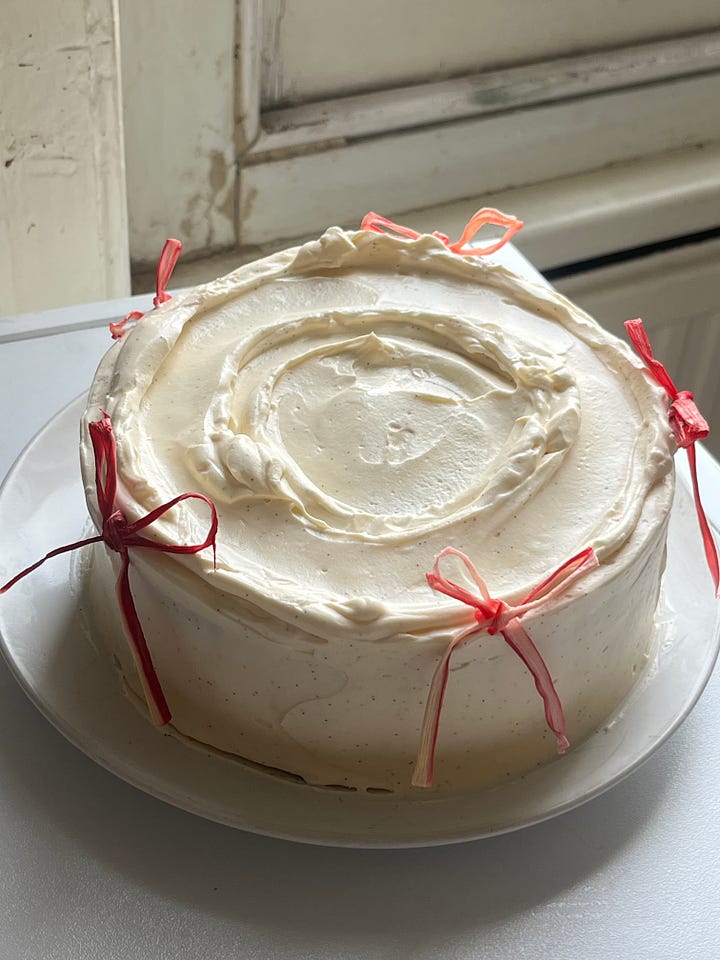
Over on KP+, the rhubarb recipes continue with recipes for jammy rhubarb cookies plus a very cute rhubarb and cream mini cake with the lushest cream ever. Click here for the recipe!
What’s KP+? Well, it’s the level-up version of this newsletter. By joining KP+, you will support the writing and research that goes into the newsletter (including the commissioning - and fair payment - of all the writers), join a growing community, access extra content (inc., the entire archive) and more. Subscribing is easy and only costs £6 per month or just £50 per year (£4.10 per month). Why not give it a go? Come and join the gang!
Love,
Nicola
PSST… I’ve written a book!
I can finally say that my debut book SIFT: The Elements of Great Baking out THIS YEAR!!! and it’s available to pre-order now. Across 350 pages, I'll guide you through the fundamentals of baking and pastry through in-depth reference sections and well over 100 tried & tested recipes with stunning photography and incredible design. SIFT is the book I wish I'd had when I first started baking and I can’t wait to show you more.
Rhubarb, how I love thee… let me count the ways
There are two certainties in January: Rhubarb and Taxes.
Last year, our brilliant preserving columnist Camilla Wynne told us everything we needed to know about the forced rhubarb season. She built a foundation for us, teaching us how to prolong the bright pink flashes of colour in our kitchens long after the season is over. And if you haven’t read it yet, here’s the link.
Today, I’m continuing on with the glorious path she laid for us, building lots of rhubarb houses along the way (and revisiting the rhubarb palaces and monuments I’ve shared before): This is the rhubarb index!
Though the season is yet to peak (more on that soon) and while I realise Rhubarb can be tricky to source, I wanted to get this inspo out early doors so it’s here for you whenever you need it. I’ve shared a LOT of rhubarb recipes so far, and today I’m putting them all in one place, along with some new ones.
A little refresher for you, in the words of Camilla Wynne: “Rhubarb is technically a vegetable, but since we treat it like a fruit, that’s what I’m going to call it. Field rhubarb—essentially rhubarb left to its own devices—certainly has its unique charms, but if you’ve never had forced rhubarb, I encourage you to seek it out. Depending on where you live, however, this might not be easy. Discovered by accident in London in the 19th century, it’s essentially a method for tricking plants into thinking spring has arrived.”
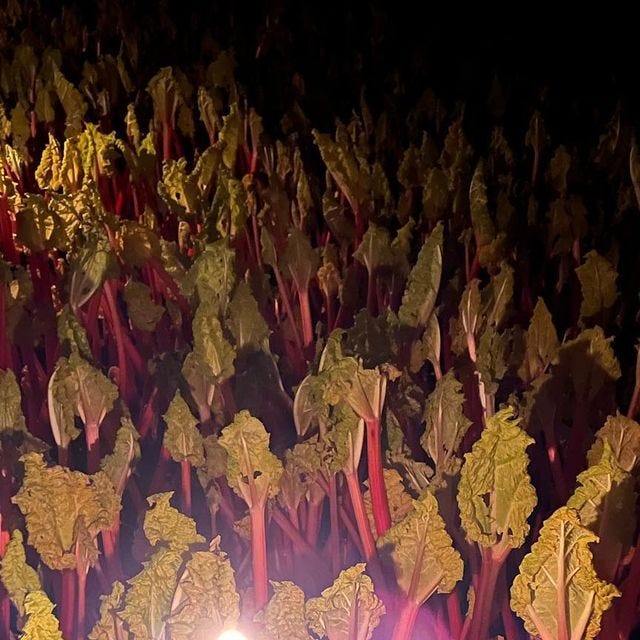
Rhubarb has an intense, tart flavour. It pairs well with creamy, mellow flavours, offering a glorious podium for the rhubarb to ascend. Containing some 95% water, it needs to be cooked carefully - its fibrous structure paces quickly from firm to tender to stringy mush (often in a good way, as long as you intended it!). I’m not saying we only love rhubarb for it’s colour, we’re much more cultured than that, but it does help. Ranging from hot dark pink to pale pastel salmons, the exact hue depends on the variety, but is enhanced and encouraged by the Yorkshire growing methods: Unlike other growers (we’ll get to that soon), forced Rhubarb grows entirely without light in warm forcing sheds. By preventing photosynthesis, the fibres don’t grow as thick and the acidity is mellowed. Even harvesting happens by candlelight to further restrict the rhubarb from light.
Though my access to Yorkshire rhubarb is limited, so comparing these varieties has not been possible (though I’ll try for next year), the Yorkshire rhubarb Triangle growers - who have PDO status, have registered the following varieties: Timerley Early, Stockbridge Harbinger, Reeds Early, Superb / Fenton’s Special (Regarded as the same), Prince Albert Stockbridge Arrow and Queen Victoria.
What about Dutch Rhubarb?
But there’s an interloper at the Yorkshire rhubarb party. And that visitor is Dutch Rhubarb. Available all year round and resplendently pink and red, it’s a saviour to food stylists everywhere shooting outside of the UK’s forced rhubarb season. And even though it is plentiful (likely thanks to the modern marvel that is cold storage) for the whole year, I have an intentional blind spot for it. Yorkshire forced Rhubarb is one of the real prideful crops of the UK, laced with history and romance, and I feel like I’m having an affair when I buy the Dutch Rhubarb. It’s a shame, since they grow specifically for the UK, meaning their harvests aren’t available til Spring for local consumers.
Unlike Yorkshire Rhubarb, it is not grown under such stringent conditions. For a start, it does not have the benefit of the Yorkshire soil, which is apparently capable of producing the most superior and resulting in the highest quality yields. Compared to Yorkshire, which grows its rootstock on ridged beds, producers in The Netherlands use flat beds. Much of Yorkshire's designation (a fascinating read!) relates to comparing the growing methods between Dutch and Yorkshire Rhubarb, from the equipment used to cut the roots to the growing quarters.
But is it an acceptable replacement?
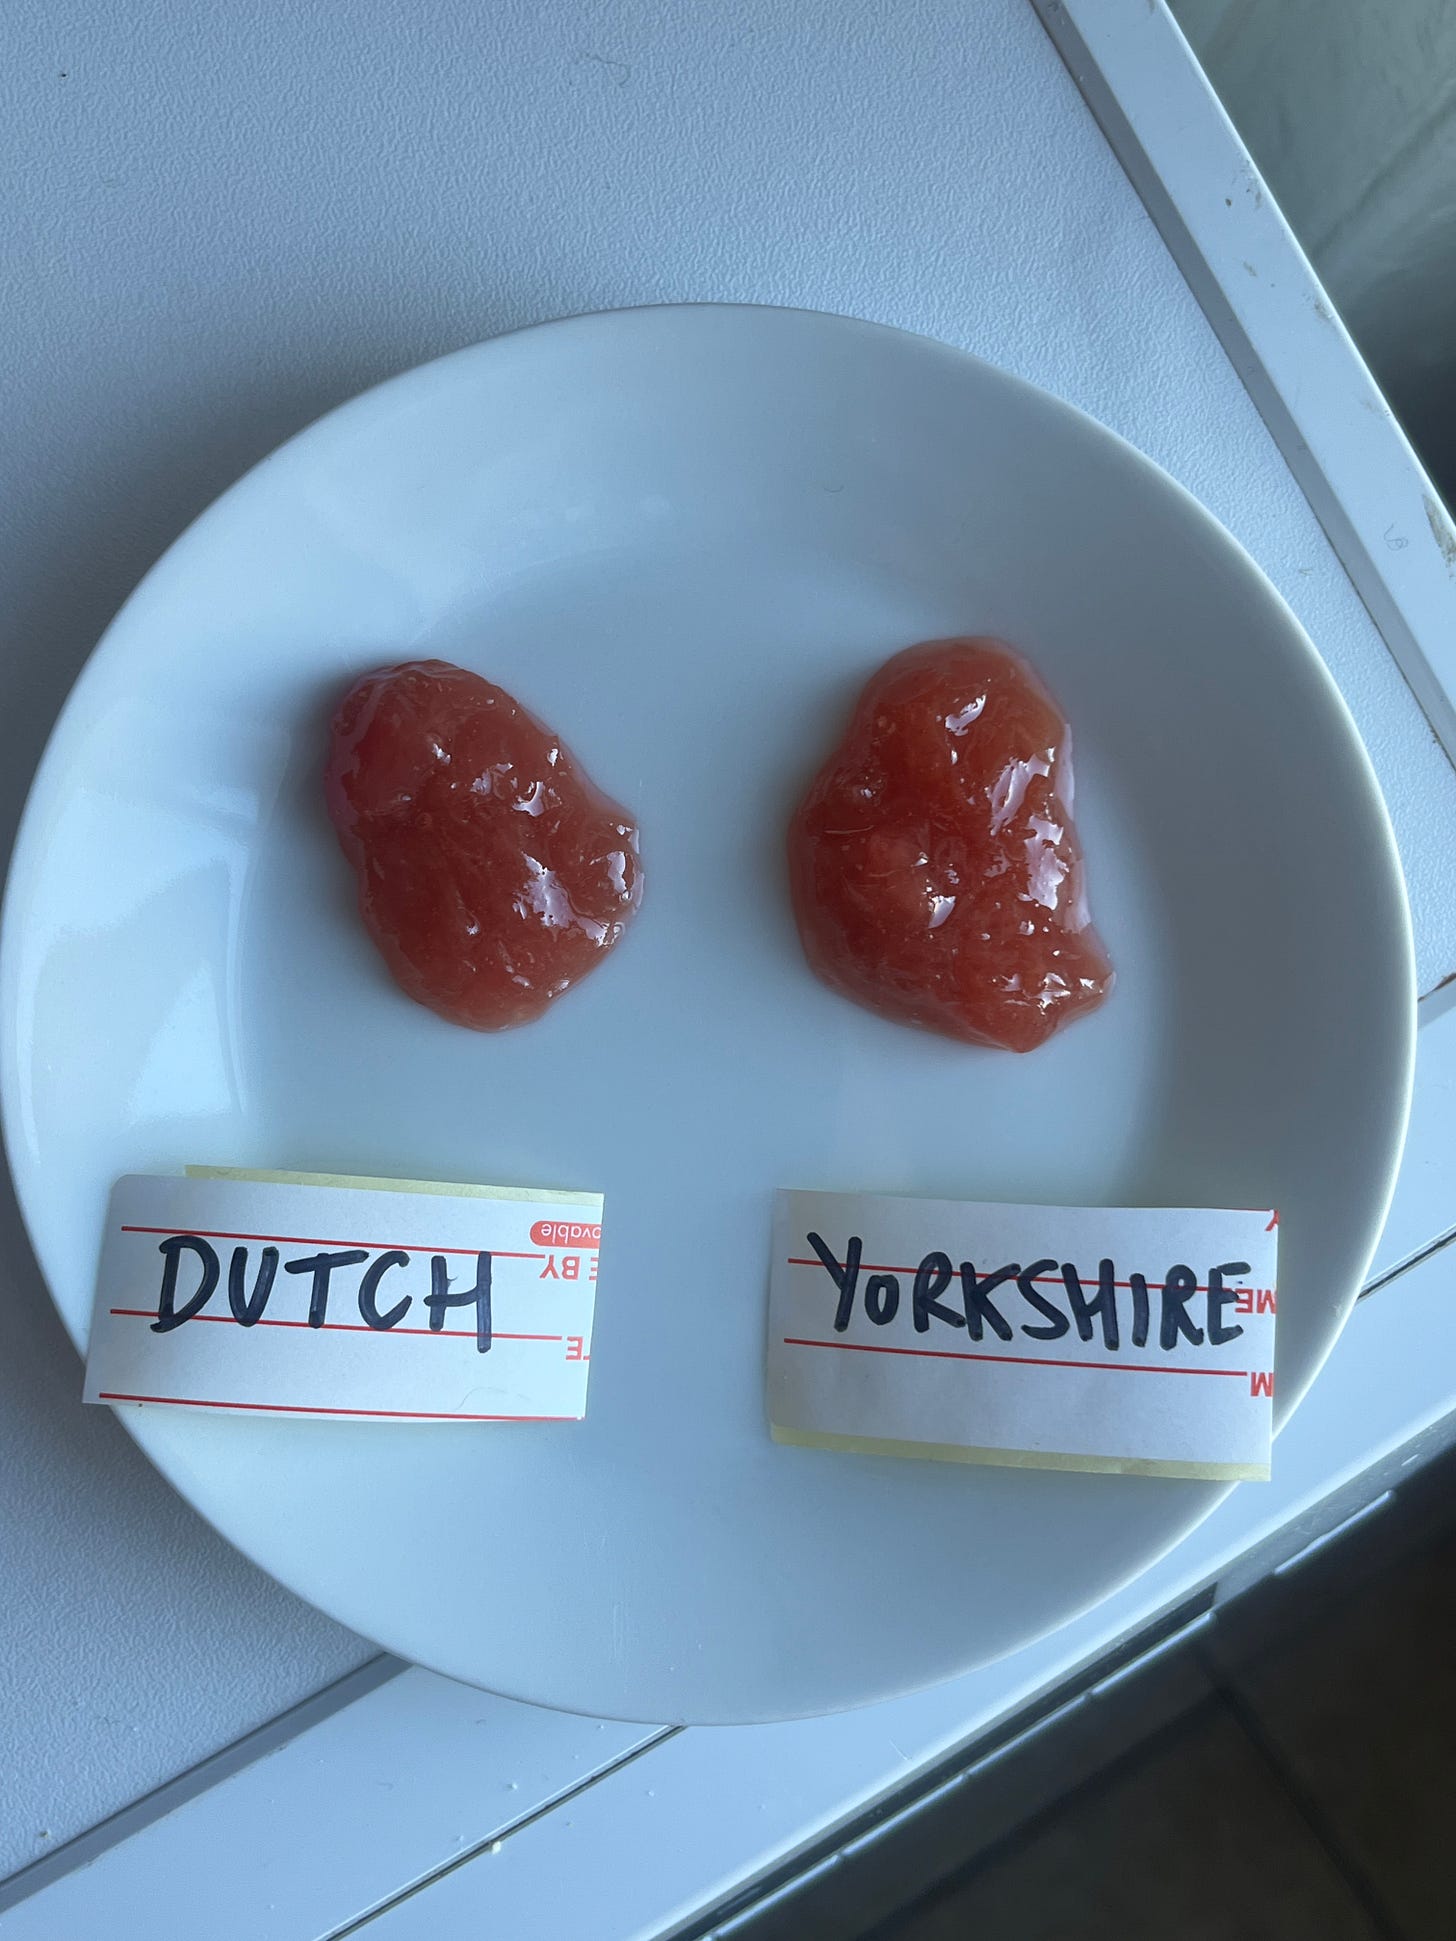
In my tests this week, I compared Dutch Rhubarb with very early Yorkshire rhubarb, which I don’t think was the best quality. The only place I could get Yorkshire rhubarb was from Waitrose, and the sticks were pale, thin and definitely from an early harvested crop. Tasting the two raw, the Dutch was slightly more vegetal and acidic, though the difference was minimal. I expect this to change as the Yorkshire season gets into swing. To quote my favourite rhubarb Instagram account @rhubarbrobert from just a few days ago, “Quality [is] getting better now as we get into full swing” and judging by his posts from 2023, the best is still yet to come.
So how do we get the best colour?
Rhubarb owes its dramatic colour to anthocyanins, the compound responsible for quince's ruby red transformation. When raw, the skin is dramatic against the pale flesh. During the cooking process, the pigment is drawn out with the water, or syrup (depending on your method) and redistributed as it sits in its own, colourful liquid.
Maceration is a very effective way of drawing liquid out of Rhubarb - sugar strongly attracts water, dissolving into it and creating a syrup. Though it is semi-effective at distributing the colour, the result is a pale pink syrup and patchy, stripy Rhubarb. Heat is essential because as the temperature increases, so does the movement of the water molecules, meaning more effective distribution of the syrup containing the pigment.
You probably already know this: You can’t out-game pale Rhubarb… except maybe with blood orange (see my compote recipe). Rhubarb that starts as pale pink, will stay pale pink. If you get a mixed batch, the best thing to do is add some dark, ruby sticks with the paler ones. It will all wash out on balance, provided enough heat and liquid are applied.


In today’s newsletter, we’ll run through all the ways to cook Rhubarb, revisiting Camilla’s preserving methods, along with recipes to make from the archives, as well as glorious, new ones for today's special.
Poached vs. Roasted Rhubarb + a note on sugar content
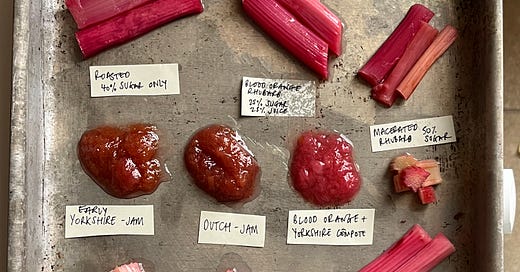
I tried many cooking methods this week, including stove top poaching, potting (as per Camilla’s method) and oven roasting. Overall, I found the oven cooking the Rhubarb the absolute best method.
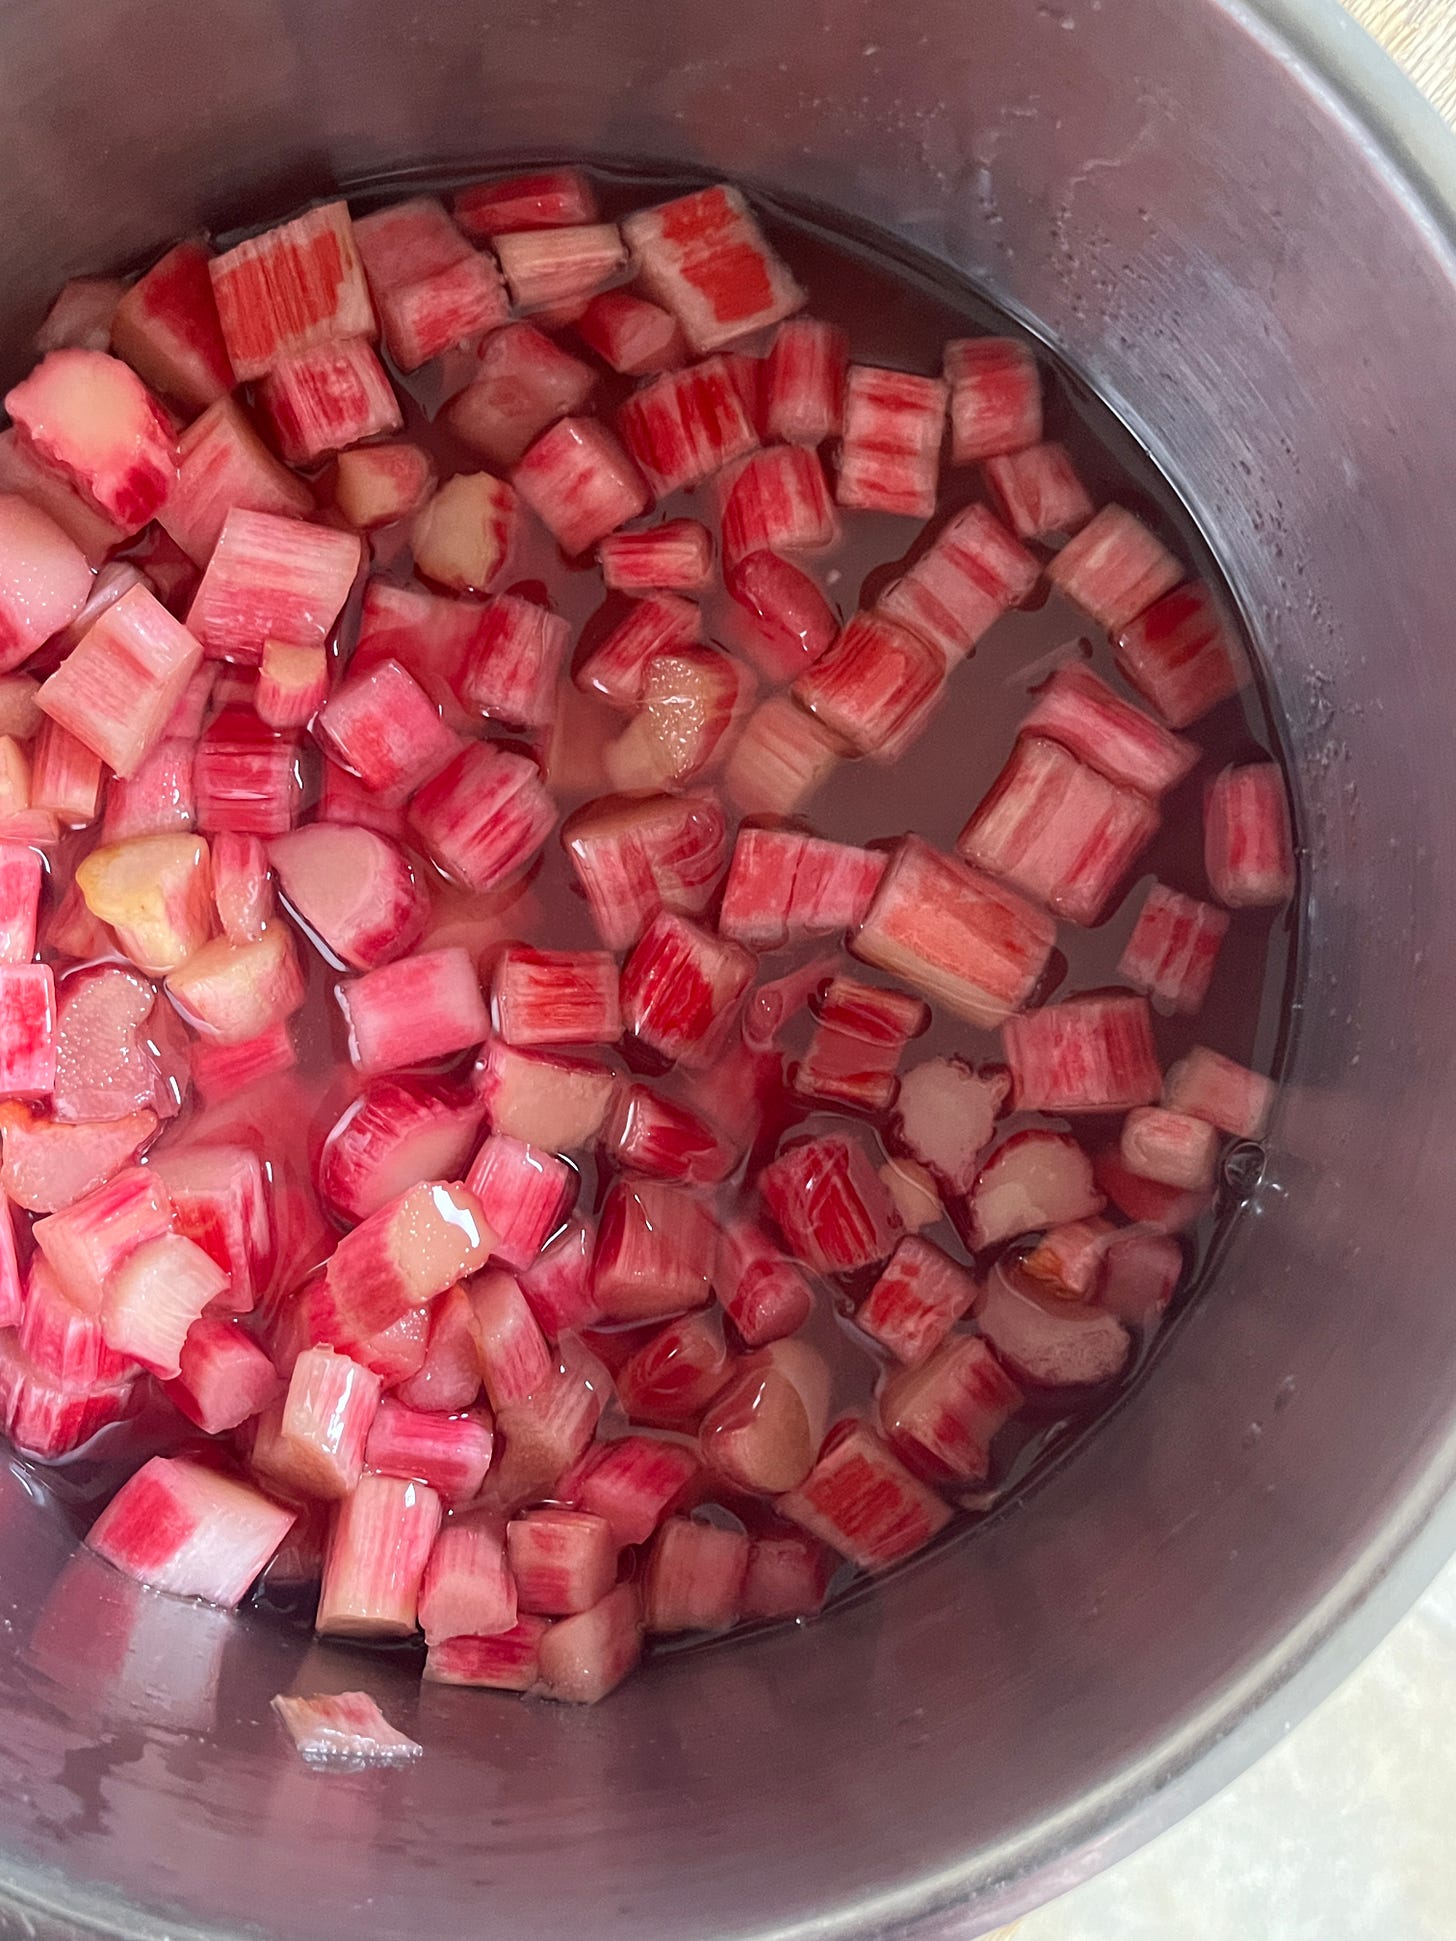
I find poaching the fruit on the stovetop too dangerous for my liking, with over-cooking being far too easy and requiring transferring between containers so as not to end up with mush. I also found the liquid-to-rhubarb ratio far too high in a saucepan, meaning the flavour was very diluted. I personally think it is better to poach in the oven by submerging in a bit of liquid, either blood orange juice or water, and gently cooking with a little parchment paper encouraging steam. Oven roasting, which is similar to poaching but without additional liquid, is best for Rhubarb, which already has a gorgeous colour, and you want a little sass in the form of caramelised sugar. The poaching method, with the liquid to help migrate the colour, is better for Rhubarb that you want to be uniformly pink.
The amount of sugar you want to use is up to you - the biggest difference is how much syrup you get! I tested increments from 10% to 100% and found that 30%-40% suited my palette for the Dutch and early Yorkshire Rhubarb. I imagine this will change depending on the variety - peak Yorkshire will likely need less sugar. I also found that macerating in advance of poaching / roasting made very little difference in the final results and did not impact the cooking time significantly.
Macerating a fibrous fruit like Rhubarb is pointless if the surface area isn’t very high - in batons, as you would normally roast, the sugar can barely penetrate the thick skin. In small pieces, as you’d cut it up for compote or jam, the sugar can get to work drawing out liquid without the barrier of the skin preventing or limiting the action,
Basic poached rhubarb recipe
Pre-heat oven to 170c fan
Cut rhubarb into equal sized batons. About 5cm is my preferred size. Lay in a single layer on a shallow baking dish. Cover with 30%- of the rhubarb’s weight in sugar, followed by around half the sugar weight in water or juice, like blood orange juice. You can add vanilla or other spices at this stage, citrus zests etc. You want the rhubarb to be at least 50%-75% submerged. Place a piece of baking paper on top.
Depending on the thickness, bake the rhubarb for 10 minutes but potentially up to 20 (it will likely be close to 12-15min), checking every 2 minutes after you reach the 10 minute point. You want to be able to pierce the rhubarb with a sharp knife tip with only a tiny bit of resistance to show the fibres are still in tact. Remove from the oven and leave to cool in the syrup. Move to the fridge once cool and leave for at least 8 but ideally 24h for the flavours to meld and colour to dissipate throughout the batons.
For roasted rhubarb, follow the above but increase oven temp to 190c fan and add no liquid - the cooking time will be 8-10 minutes.
How to use it?
I’ve used roasted and poached rhubarb in a number of ways but here are a few of my favourite on the newsletter. Poached or roasted rhubarb makes the best puree, which I’ve utilised in Marshmallows and my Neapolitan Panna Cotta. The sticks are gorgeous in Rhubarb maritozzi, and mille feuille, as well as this rhubarb custard crumble cake. I’ve also have a technique for these special white chocolate miso frangipane tarts.
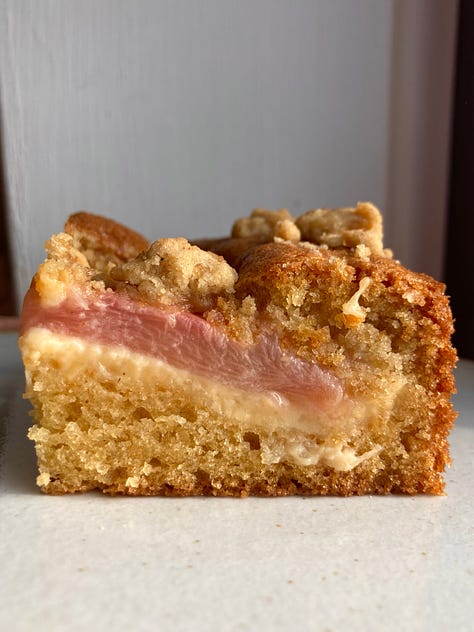
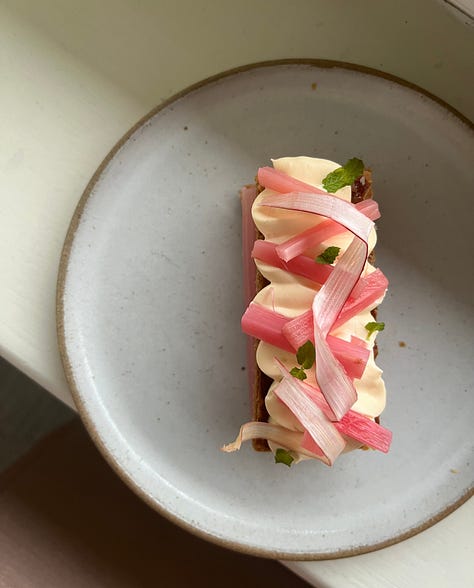

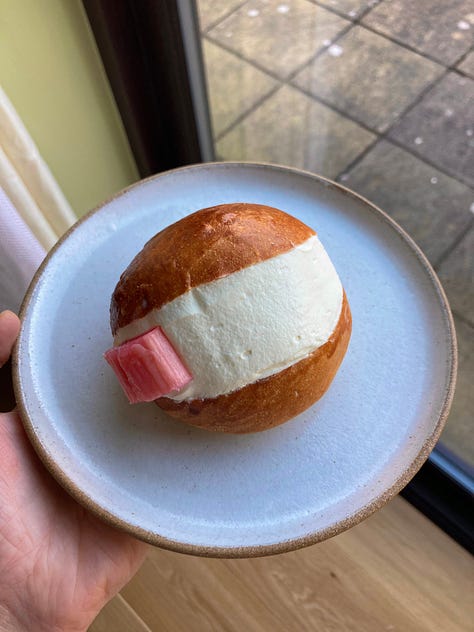

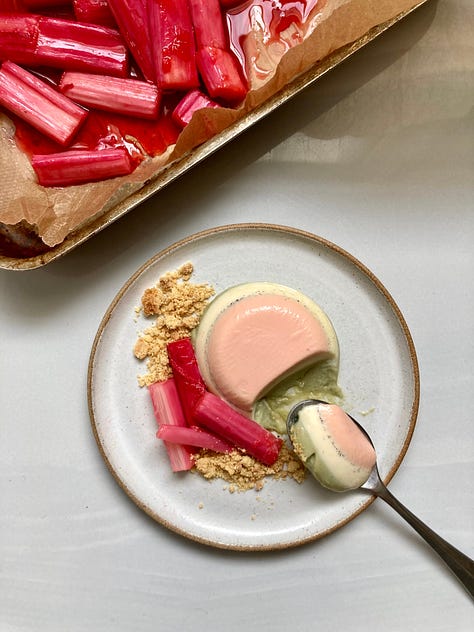
Over on KP+ today I’m sharing a recipe for a mini rhubarb cake decorated with compote, but stuffed with roasted rhubarb. It has the most glorious stabilised custard whipped cream which is perfect for swooping, piping and coating cakes:
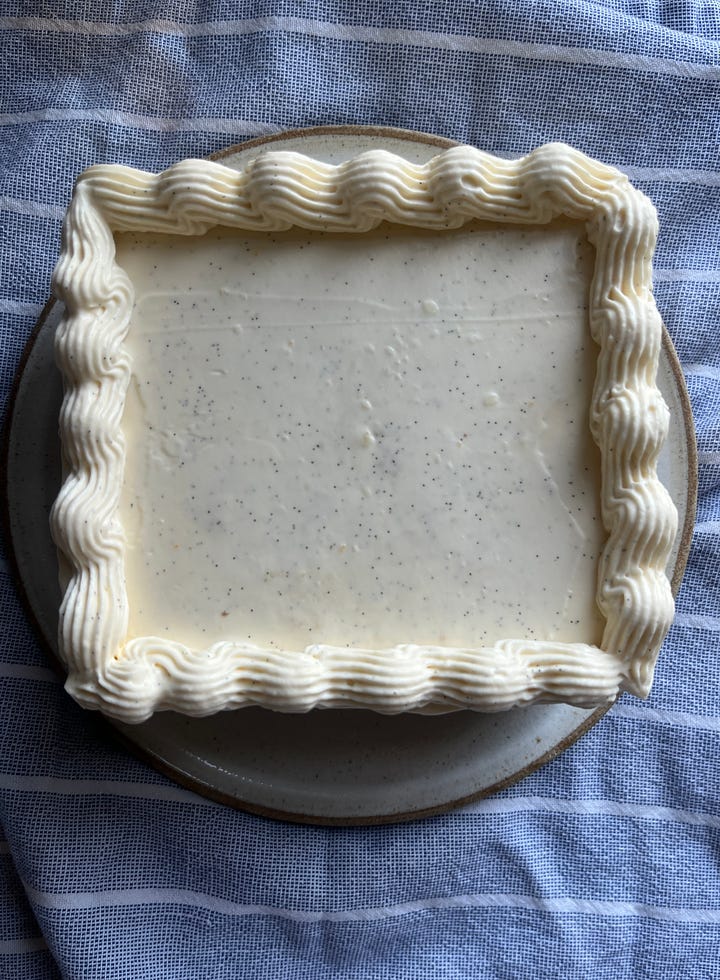

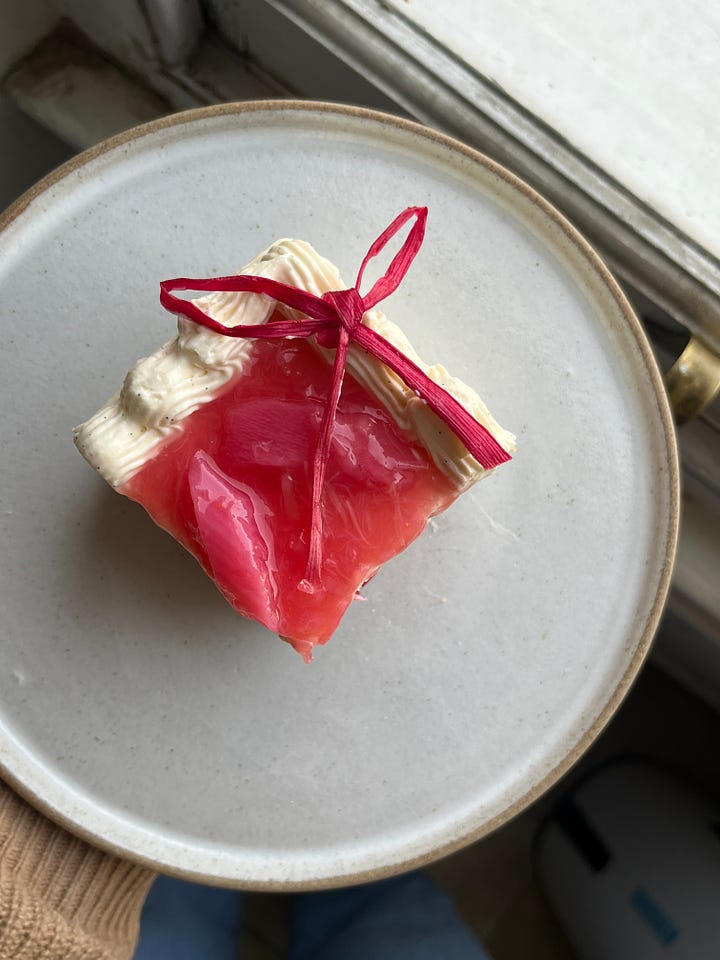
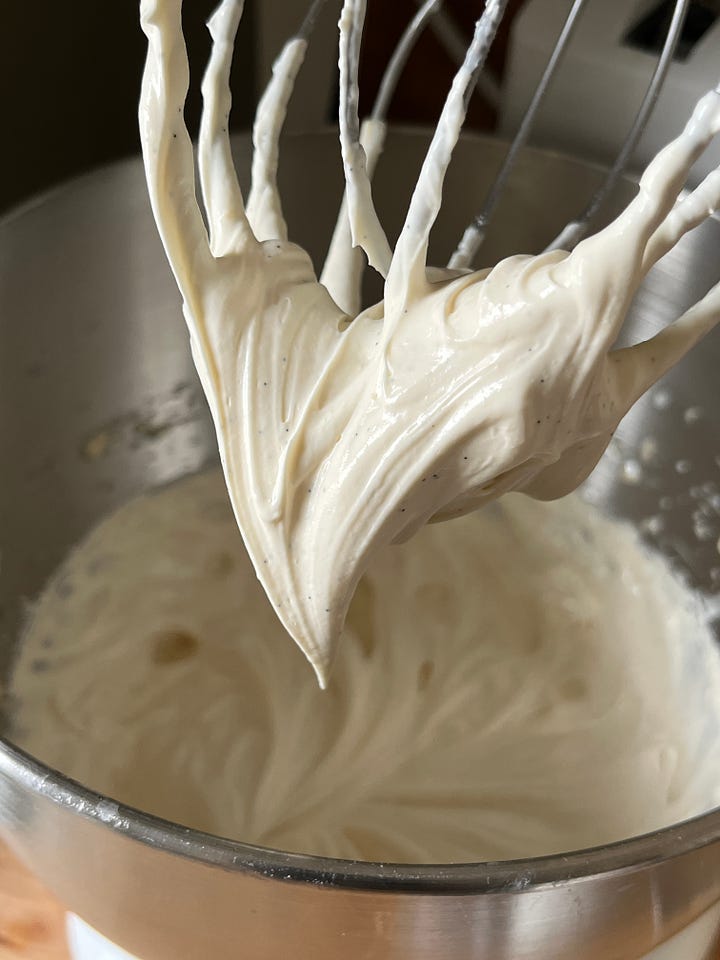
Candied Rhubarb strips
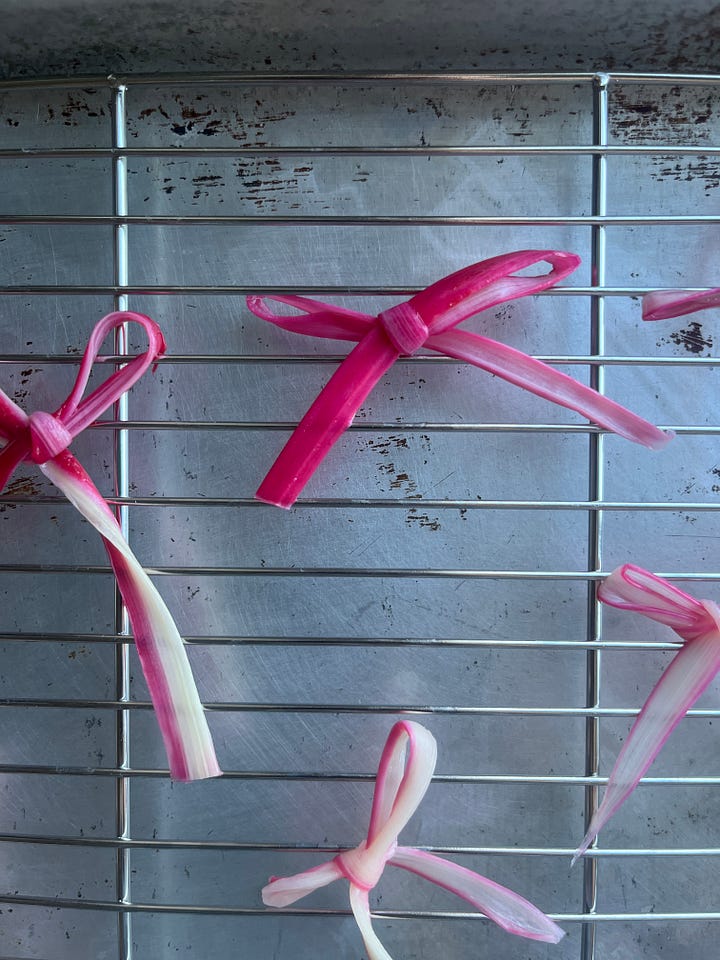
I used a variation on Camilla’s method to create very, very, faffy candied rhubarb bows. Rather than an overnight soak, I dropped my thinly sliced rhubarb into warm simple syrup (1:1 sugar/water) for about 3 minutes - it was then pliable enough to shape into bows. I laid them on a rack and pre-heated the oven to 80c. I put the bows into the oven, turned off the heat and left just the light and fan on for 1.5 hours. I then turned off the fan and left to dry with the light for another 1.5 hours. I then turned off the light and left them to dry in the oven overnight. I found these bows very hard to work with, but that’s how it is done… and I will tell you now that I gave up after making six. They do look glorious though, don’t they? Word of warning - these are way more for aesthetic than for flavours; They aren’t that enjoyable to eat!
Will it curd? Rhubarb edition + a note on juice
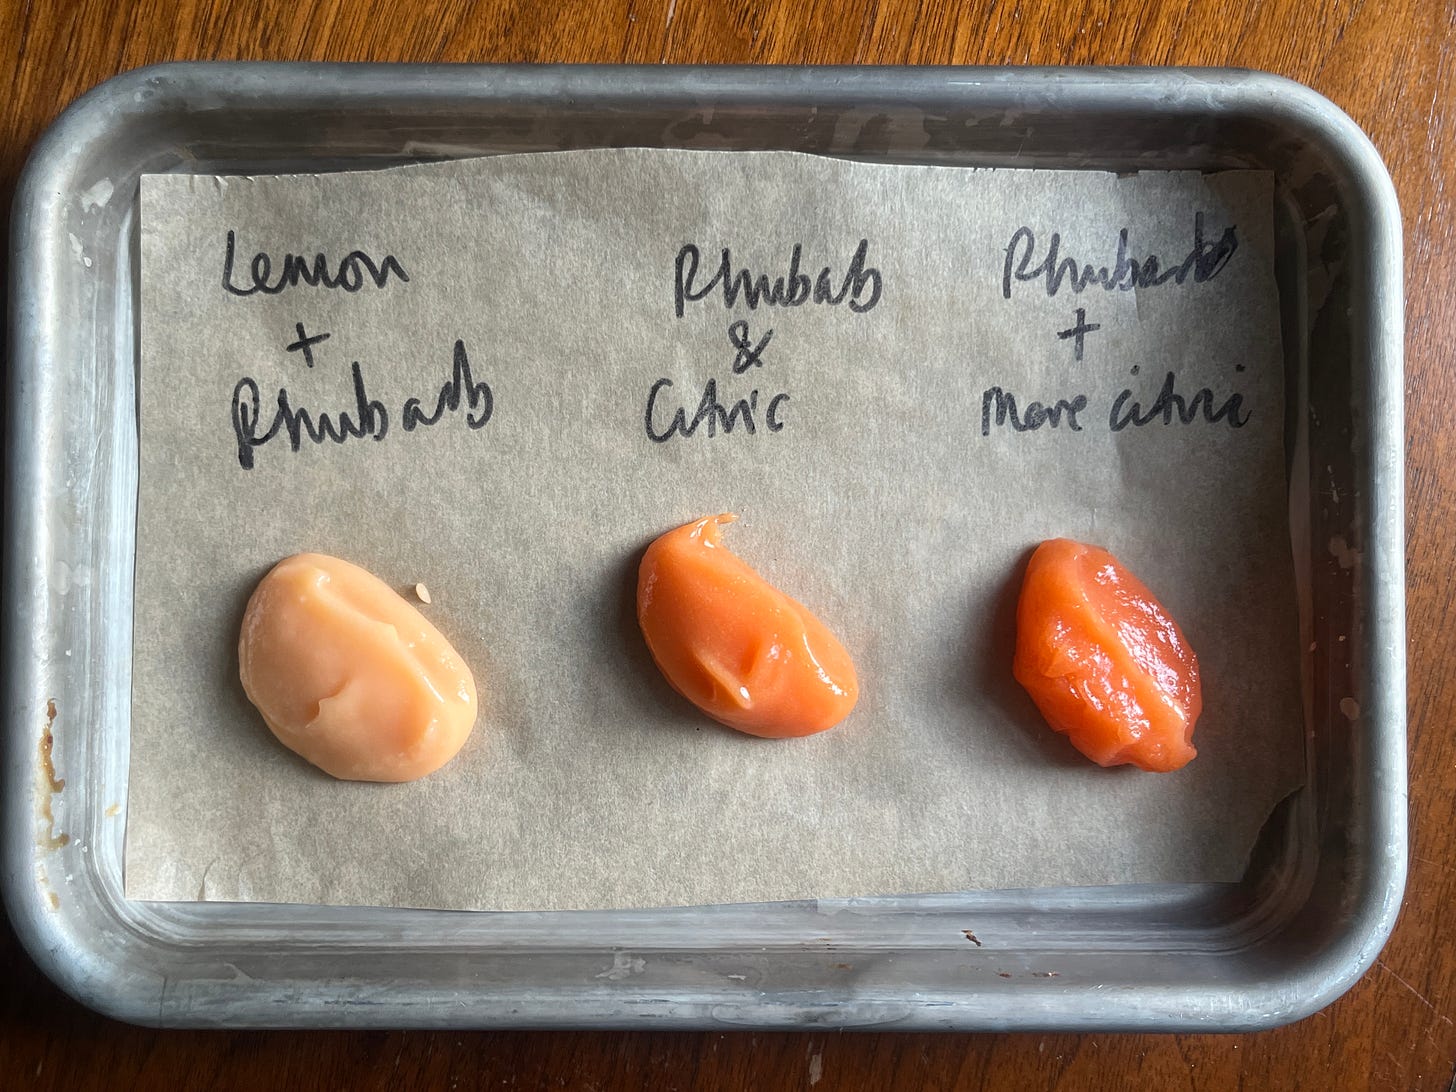
Because I am a curd nerd (thanks to my dear friend Jordon for coining that), I took a few shots at making rhubarb this week. I started by making rhubarb juice - blending rhubarb in my nutribullet then pressing it through a sieve until the juice separated from the fibres. The squeezed out fibres are amazingly weird - like wet cardboard.
I was able to produce about 170g juice from 200g rhubarb just by pressing and squeezing it. I can’t figure out a use for the fibres, though I might chuck them into the next batch of jam I make. I tested the pH- it’s more similar to grapefruit and orange than lemon, which means rhubarb will need a bit of help to set the curd.
The three versions I made were okay, but not perfect. The version with lemon and butter, the rhubarb flavour was lost completely. In the versions with no butter, plus rhubarb and citric acid, the flavour was okay, but not perfect. I’m going to continue working on this and once I’ve nailed it, I’ll share the recipe! I already have a plan!
Rhubarb Compote
Camilla provided us with everything we needed to make great jam, but for a quick fix, rhubarb does make a satisfying compote.
I’ve shared a basic recipe for compote in the past that relies on reducing it until thick, but I wanted to revisit the recipe for this index. Following wisdom from Anna Higham, author of The Last Bite and owner of the soon-to-open Quince Bakery here in North London, I make my compote in two parts, leaving half the rhubarb to become gorgeous pink mush, and putting the rest in at the end of cooking to soften in the heat of the compote. Remember, you need to cut the rhubarb into smallish pieces to cook, otherwise the compote will be full of far too long, unwieldly strings.
The addition and use of blood orange is a match made in heaven - not only does its gentle acidity and sweetness bring out the best of the rhubarb, the colour helps create a perfect, bright flash of pink. It’s a perfect marriage of two of the season’s most glamorous offerings. Vanilla is optional, but welcome.
Without the cornflour, this makes a very loose compote. A touch of starch brings it together, but is not essential - you can increase the starch depending on what you are making. By increasing it 50% you get a much more solid compote that may suit you better for cake fillings etc. or in recipes that ask for a rhubarb jam.
Ingredients
150g Rhubarb (i), in approx 1cm pieces
50g Blood Orange juice
½ Blood orange, zested
30g caster sugar
100g Rhubarb (ii), sliced into 2-3cm pieces
Optional:
5g cornflour dissolved in 10g water (increase by 50% for a thicker compote)
½ vanilla pod, seeds scraped
¼ tsp citric acid
Method
Add chopped rhubarb (i) into a saucepan with the blood orange juice, zest, vanilla (if using) and sugar. Heat over a low heat until simmering and some of the juices release, then turn up the heat and stir well until the rhubarb has completely broken down into gorgeous, stringy pieces.
If using the cornstarch, mix it with water and pour into the boiling liquid. Bubble for 1 minute until it thickens.
Turn off the heat and stir in the sliced rhubarb and citric acid if using. Move into a clean container and put on the lid - the steam will help soften and cook the raw rhubarb.
Keeps well in the fridge for a week
How to use it?
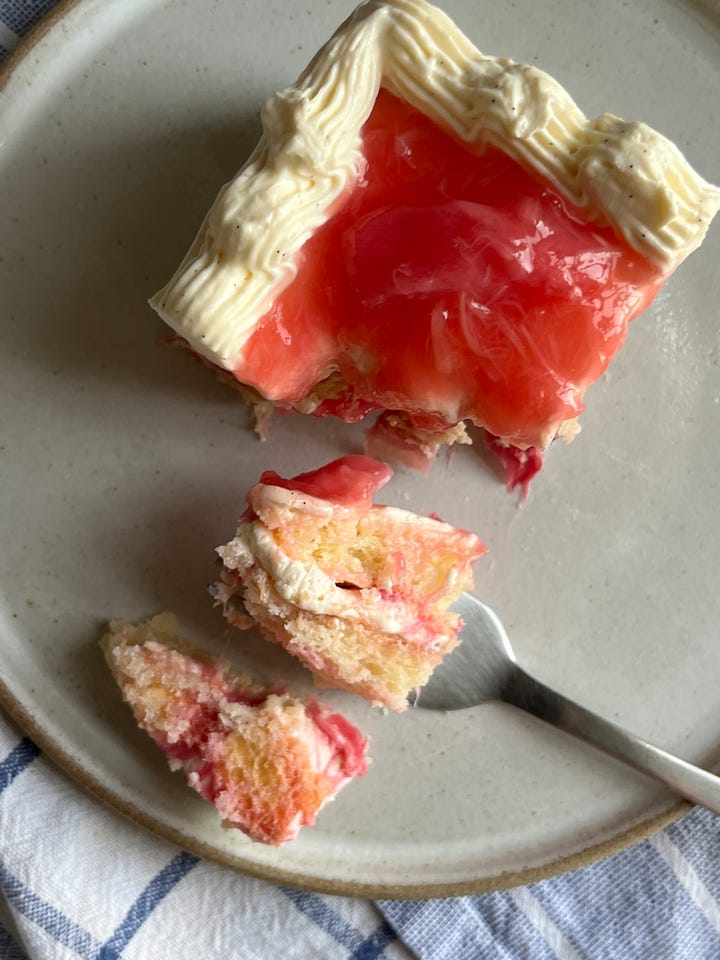
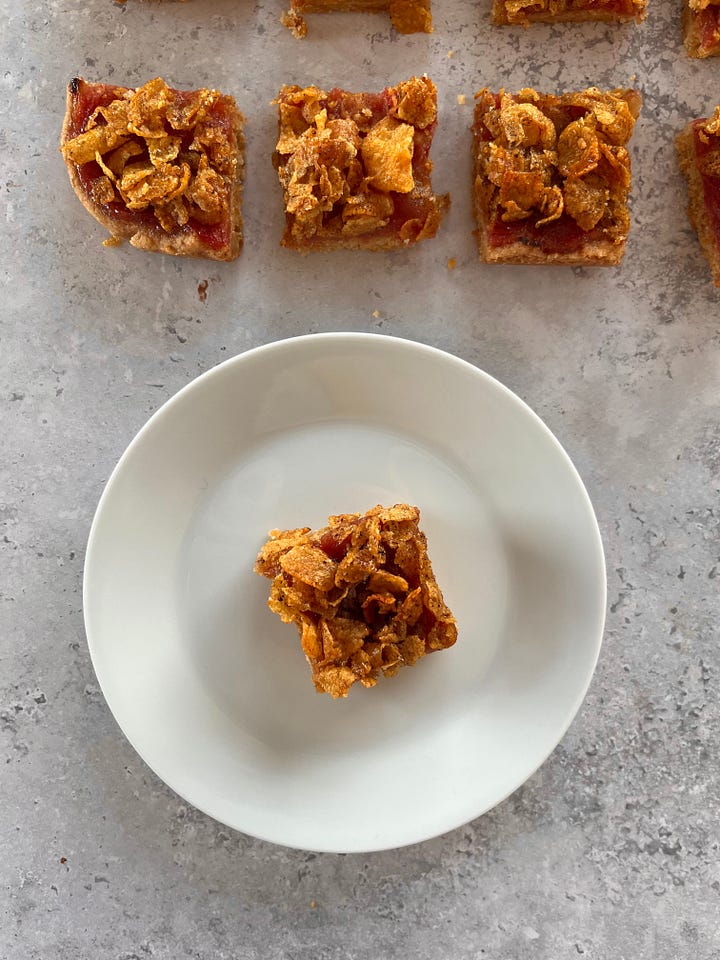
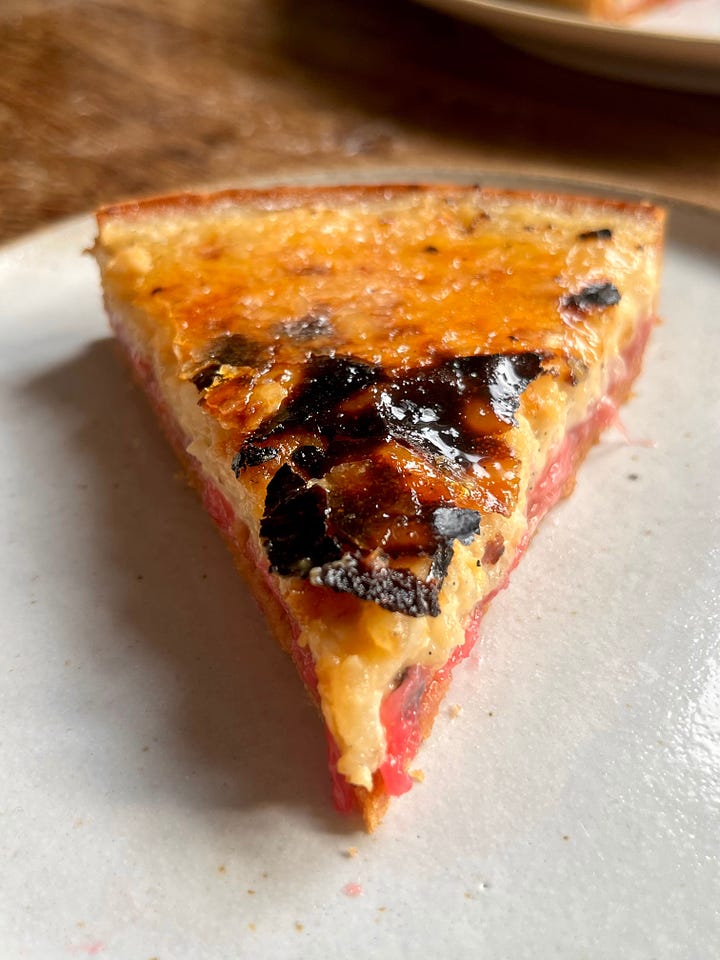
I’ve featured compote in a few ways - I’m a big fan of this caramelised rice pudding tart and I have a soft spot for these cornflake bars. You could certainly use rhubarb jam (below) in place of compote. I also enjoyed decorating this cute, square rhubarb cream cake with it, available on KP+:

Rhubarb Syrup
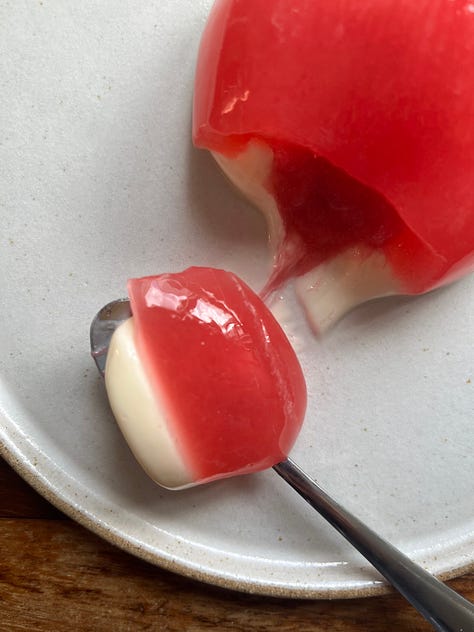
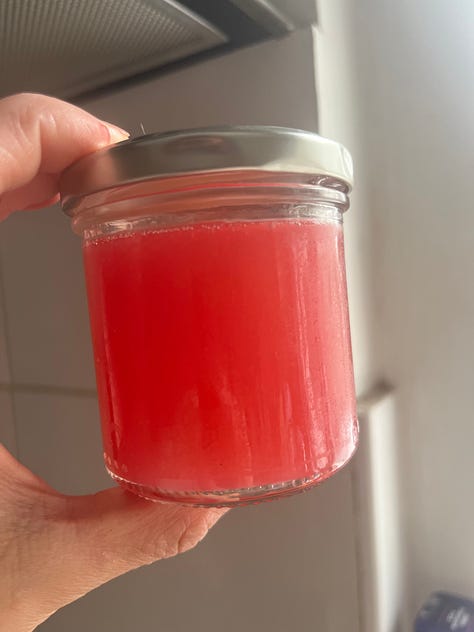
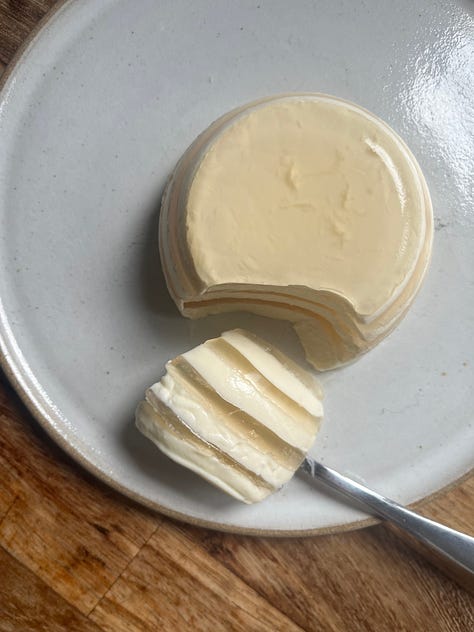
I love Camilla’s recipe for Rhubarb Syrup (find it here) and though it would make a gorgeous base for cocktails, it makes tremendous jelly. I’ve shared the recipe for a stripy buttermilk rhubarb jelly panna cotta duo here, as well as a version with a gooey, sticky rhubarb middle (kind of like rowntrees randoms).
Rhubarb Jam
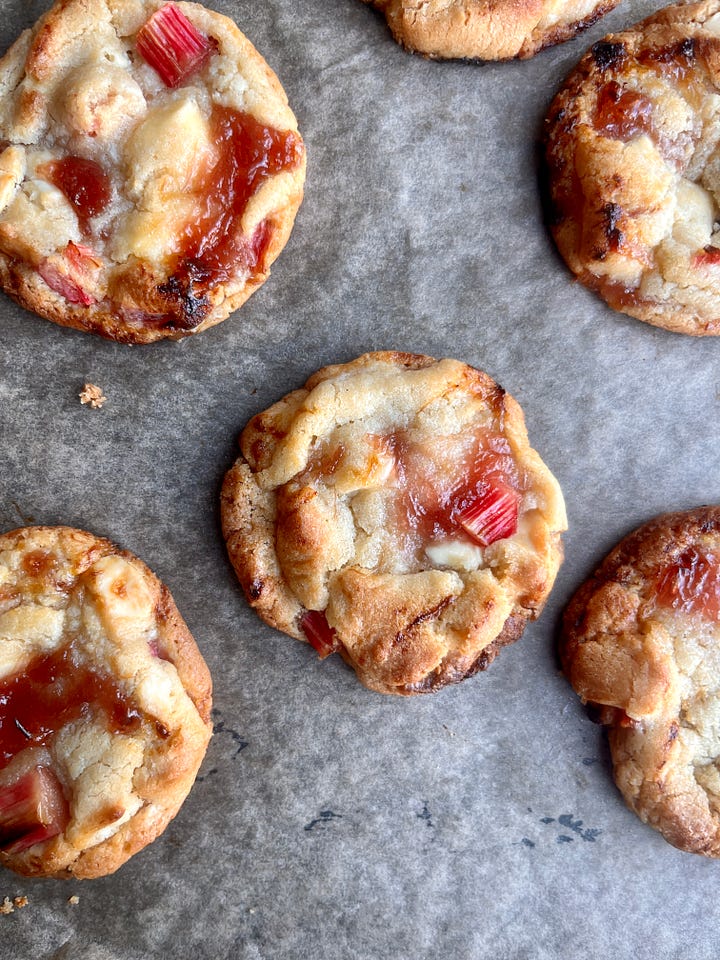
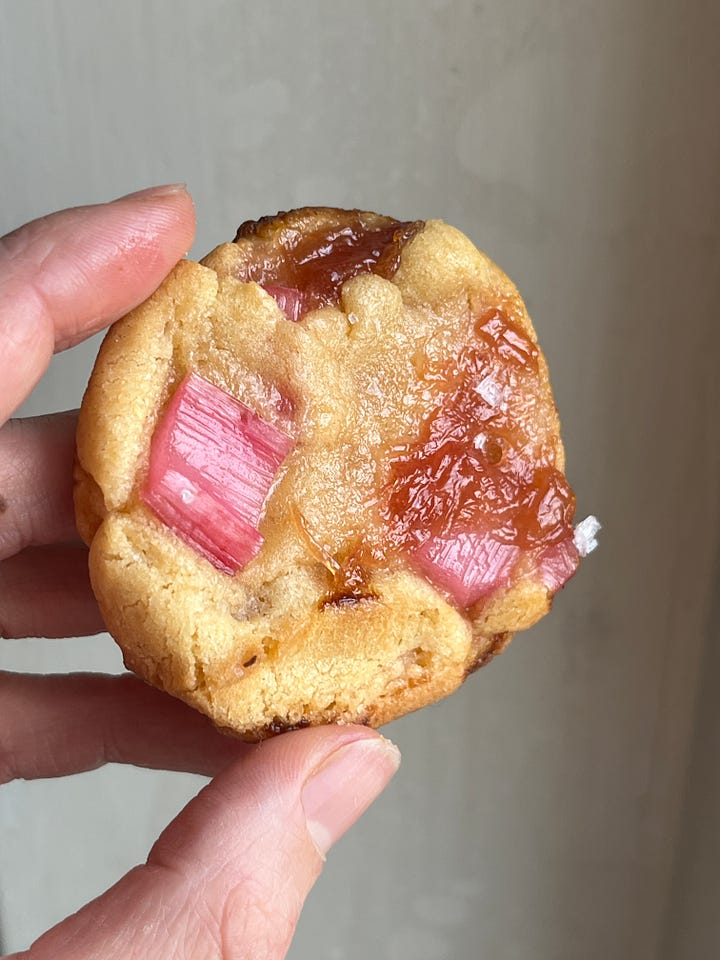
Camilla’s excellent recipe for rhubarb jam can be found here. I made the most of it this week by using it cakes, choux (below) and in cookies. While you could use a thickened compote which does have brilliant freshness, you cannot beat the set of a jam, gloriously goopy. Of course, you can use jam in the simplest way - spooning it onto toast, or enjoying with your morning porridge, or with a scoop of yoghurt. But this week I developed a jammy rhubarb & custard cookie especially for the newsletter, which you can find on KP+
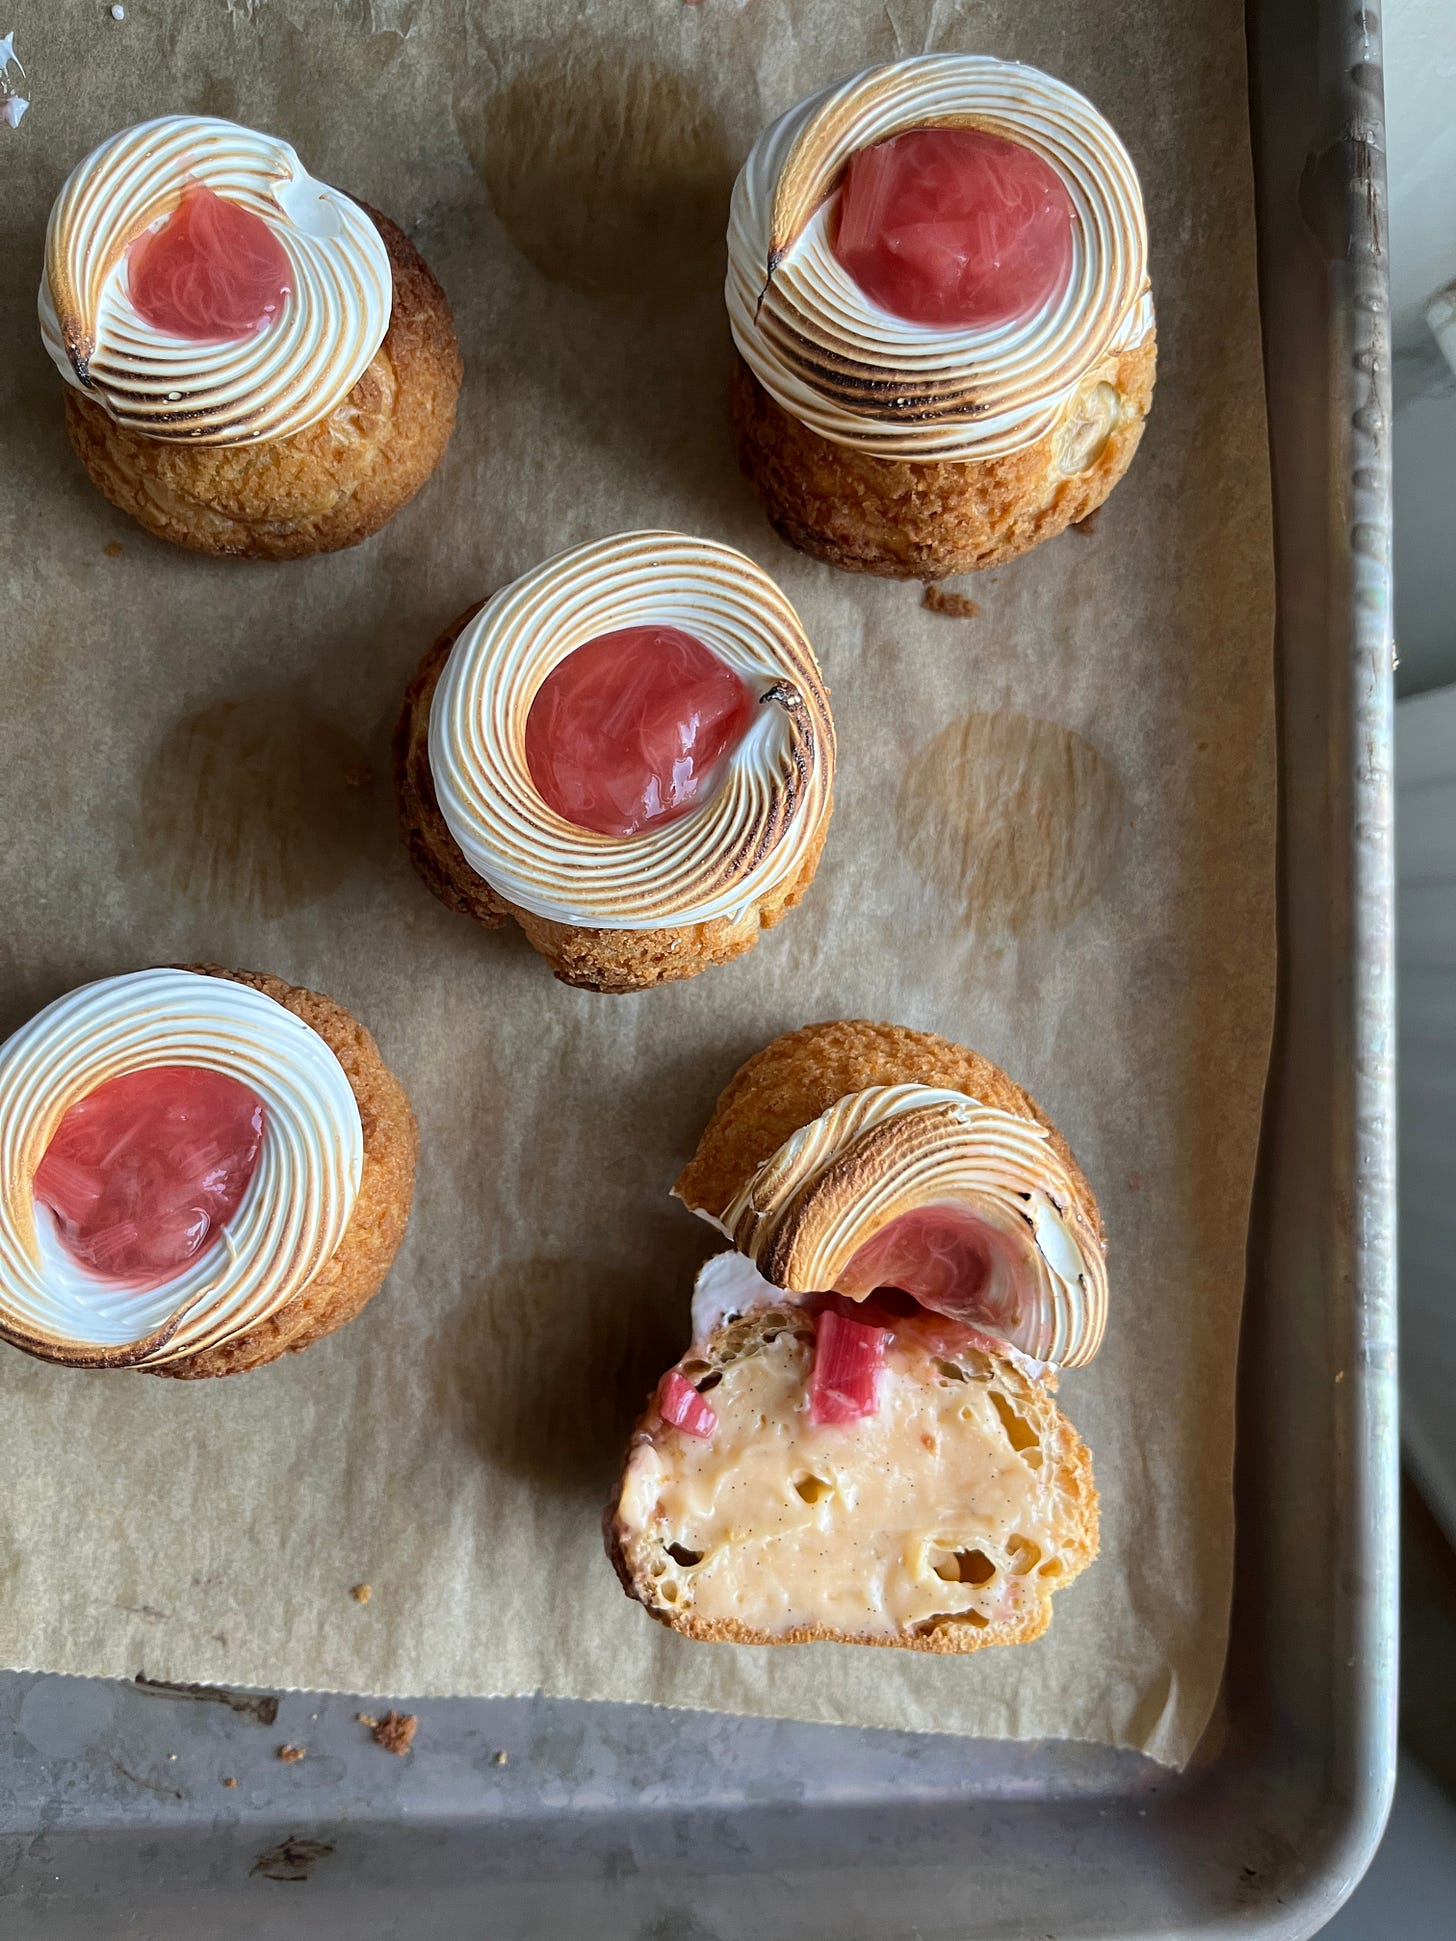
Fancy rhubarb choux
Makes 8

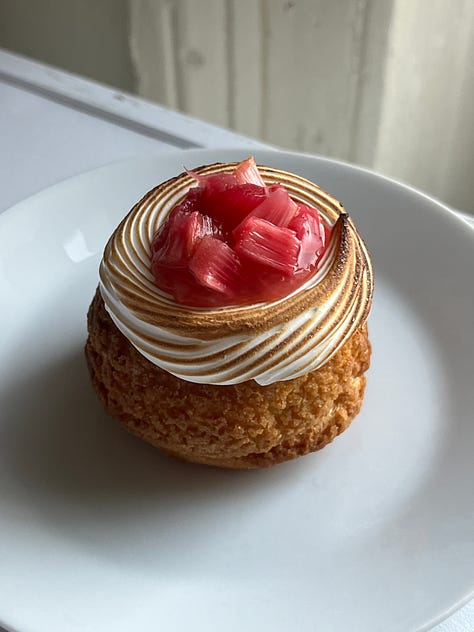
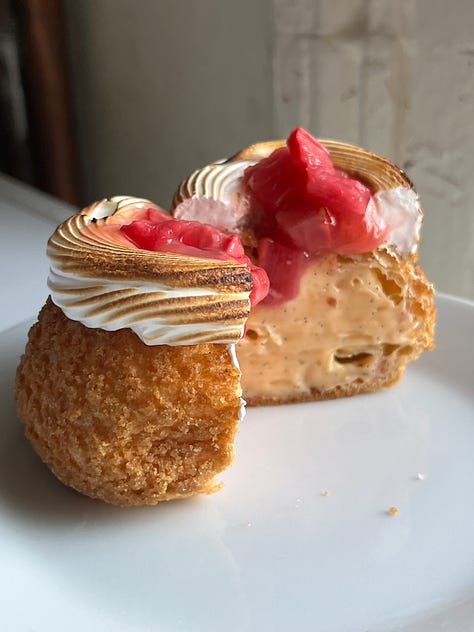
I love nothing more than choux recipe as it is the most satisfying way to deliver a generous helping of fillings - in this case custard and rhubarb - into your mouth in one go. You have two options here: Make the choux, fill from the base and let the inside be a surprise. Or if you’re feeling like making something super gorgeous, a swirl of torched swiss meringue to hold jam or compote is a nice touch. I tested a few fillings for this recipe, but classic vanilla pastry cream was the absolute best. This choux was actually inspired and based on a recipe that didn’t make it into sift - a peach choux which I’ll definitely share come summer :)
Choux
30g Butter
35g Water
25g Milk
¼ tsp flaky salt
½ tsp sugar
45g Plain flour
50-70g Whole egg
Craquelin
30g Butter
30g Light brown sugar
30g Flour
Pastry Cream
260g Whole milk
1 vanilla pod, scraped
50g Whole Egg
15g Egg Yolk (about one)
45g Caster sugar
18g Cornflour
10g Butter
Swiss meringue decor
40g egg white (about one large)
70g caster sugar
To finish
Rhubarb jam, about 150g. You can also use thickened compote.
Optional: 8 x 5cm batons of roasted or poached rhubarb to dice and decorate.
Choux Method
Start by making the craquelin: Mix together (not cream - you don’t need any air in this) soft butter and sugar. Then stir in the flour. Roll out to 3-4mm thickness between two sheets of paper and chill until needed. When ready to use, cut circles approx the same size as the piped choux. It’s best to warm the craquelin up slightly with your hands before cutting otherwise it could crumble.
Make the choux according to this recipe. Pre-heat oven to 200c fan. Put paste into a piping bag. Pipe 15-20g buns and top with craquelin.
Put into the oven and turn down the temp to 180c fan. Set a timer for 15 minutes. Reduce temp to 160c fan and bake for a further 15 minutes. They should be risen, crisp and firm. Leave to cool completely.
Pastry Cream method
Heat milk with vanilla and half the sugar until simmering. Meanwhile, whisk egg yolks with cornflour and other half of the sugar. Temper the egg yolks with by pouring a little hot milk on the mixture and whisking well - then return the whole mixture to the stove
Heat on medium until thickened and boiling. Add butter then pass through a sieve then. Leave to cool completely.
As the cornflour has a jellying effect, you must beat the creme pat before using it to make it smooth and lush. You can do this with a paddle attachment or a whisk. Set aside until ready to use. It will last for 5 days in the fridge.
To assemble
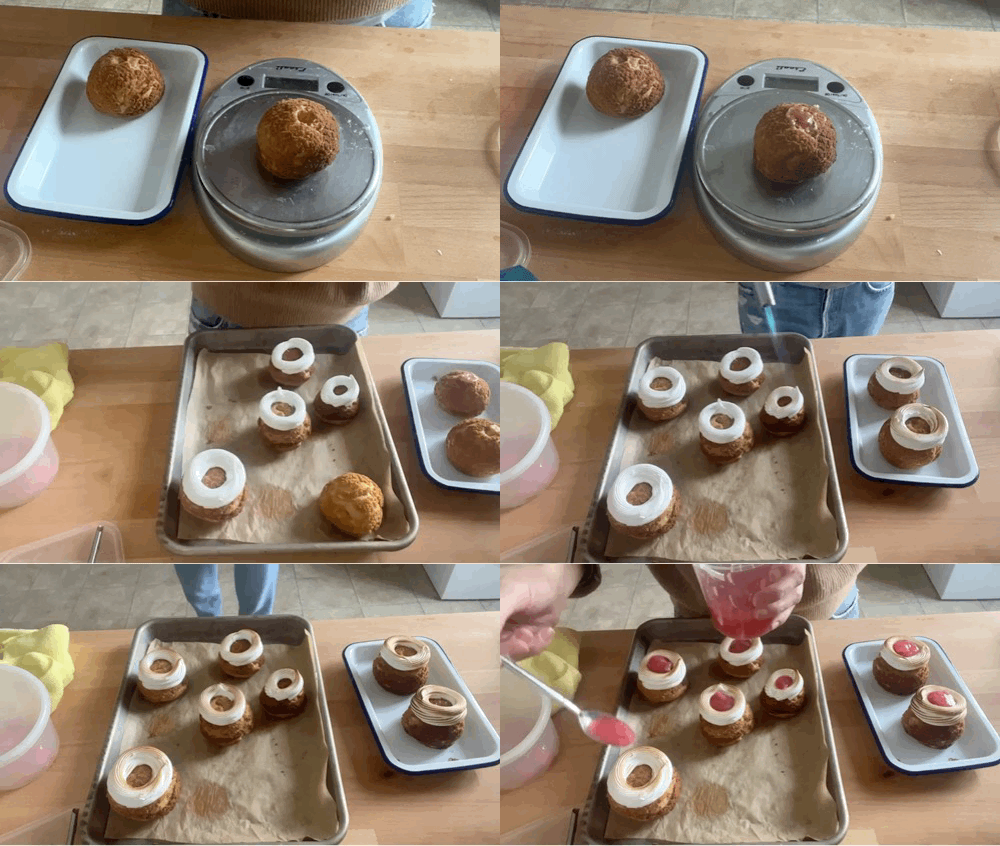
Stab a hole in the top of each choux and pipe around 30g of pastry cream inside, followed by 15-20g of jam.
Make the swiss meringue by whisking together the egg whites and sugar in a heatproof bowl until combined then heating on a double boiler until it reaches about 70c. Then whip until stiff peaks and no longer warm to the touch, about 10 minutes. This is a small batch, so a handmixer might be your best bet if your stand mixer isn’t picking up the contents of the bowl enough. Transfer to a bag with a star nozzle (mine is about 7.5mm). Pipe a swirl of meringue, around 10-12g around each bun. Lightly toast with a blowtorch.
Fill in the meringue with a spoon of jam or compote. If desired, finish with some miniature cubed poached or roasted whole rhubarb for texture.







So many recipes to try! Thank you 🙏🏼
Have you ever tried grapefruit juice and zest with baking rhubarb? Seems to almost make the rhubarb taste sweeter. I’m sure you’d know why!
This is amazing Nicola! How long would the choux last? Could I make today to take to work tomorrow?