Kitchen Project #15: Rhubarb cream buns
A tribute to Maritozzi, a guide to pre-ferments and a little dough maths (FUN, promise!)
Hello,
Welcome to another edition of Kitchen Projects, my recipe development and cooking journal. So excited to have you here!
This week, it’s all about dough. We are going to do a bit of a deep dive into pre-ferments - the what, why, how etc. This does mean there is going to be a bit of spreadsheet action. My fave.
Now, perhaps I shouldn’t say this right at the top but I do want you to know that this dough totally works without the preferment stage… but it is definitely not as good. I hope to convince you to take the extra step but I promise I won’t be mad if you just bung it all in the mixer and bloody go for it.
If you’re enjoying the newsletter, I’d be delighted if you shared it with your friends:
Thank you so much for subscribing, as always. It means the world to me.
Love,
Nicola
PS. Here’s the playlist for this week, all appropriately inspired by the Frank Ocean Pink + White tune
A bun for lovers
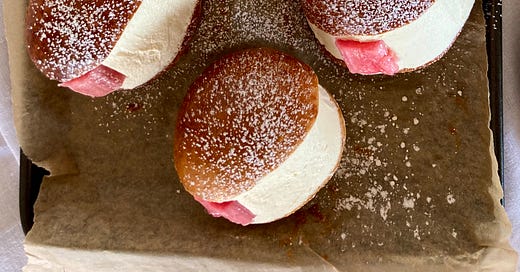
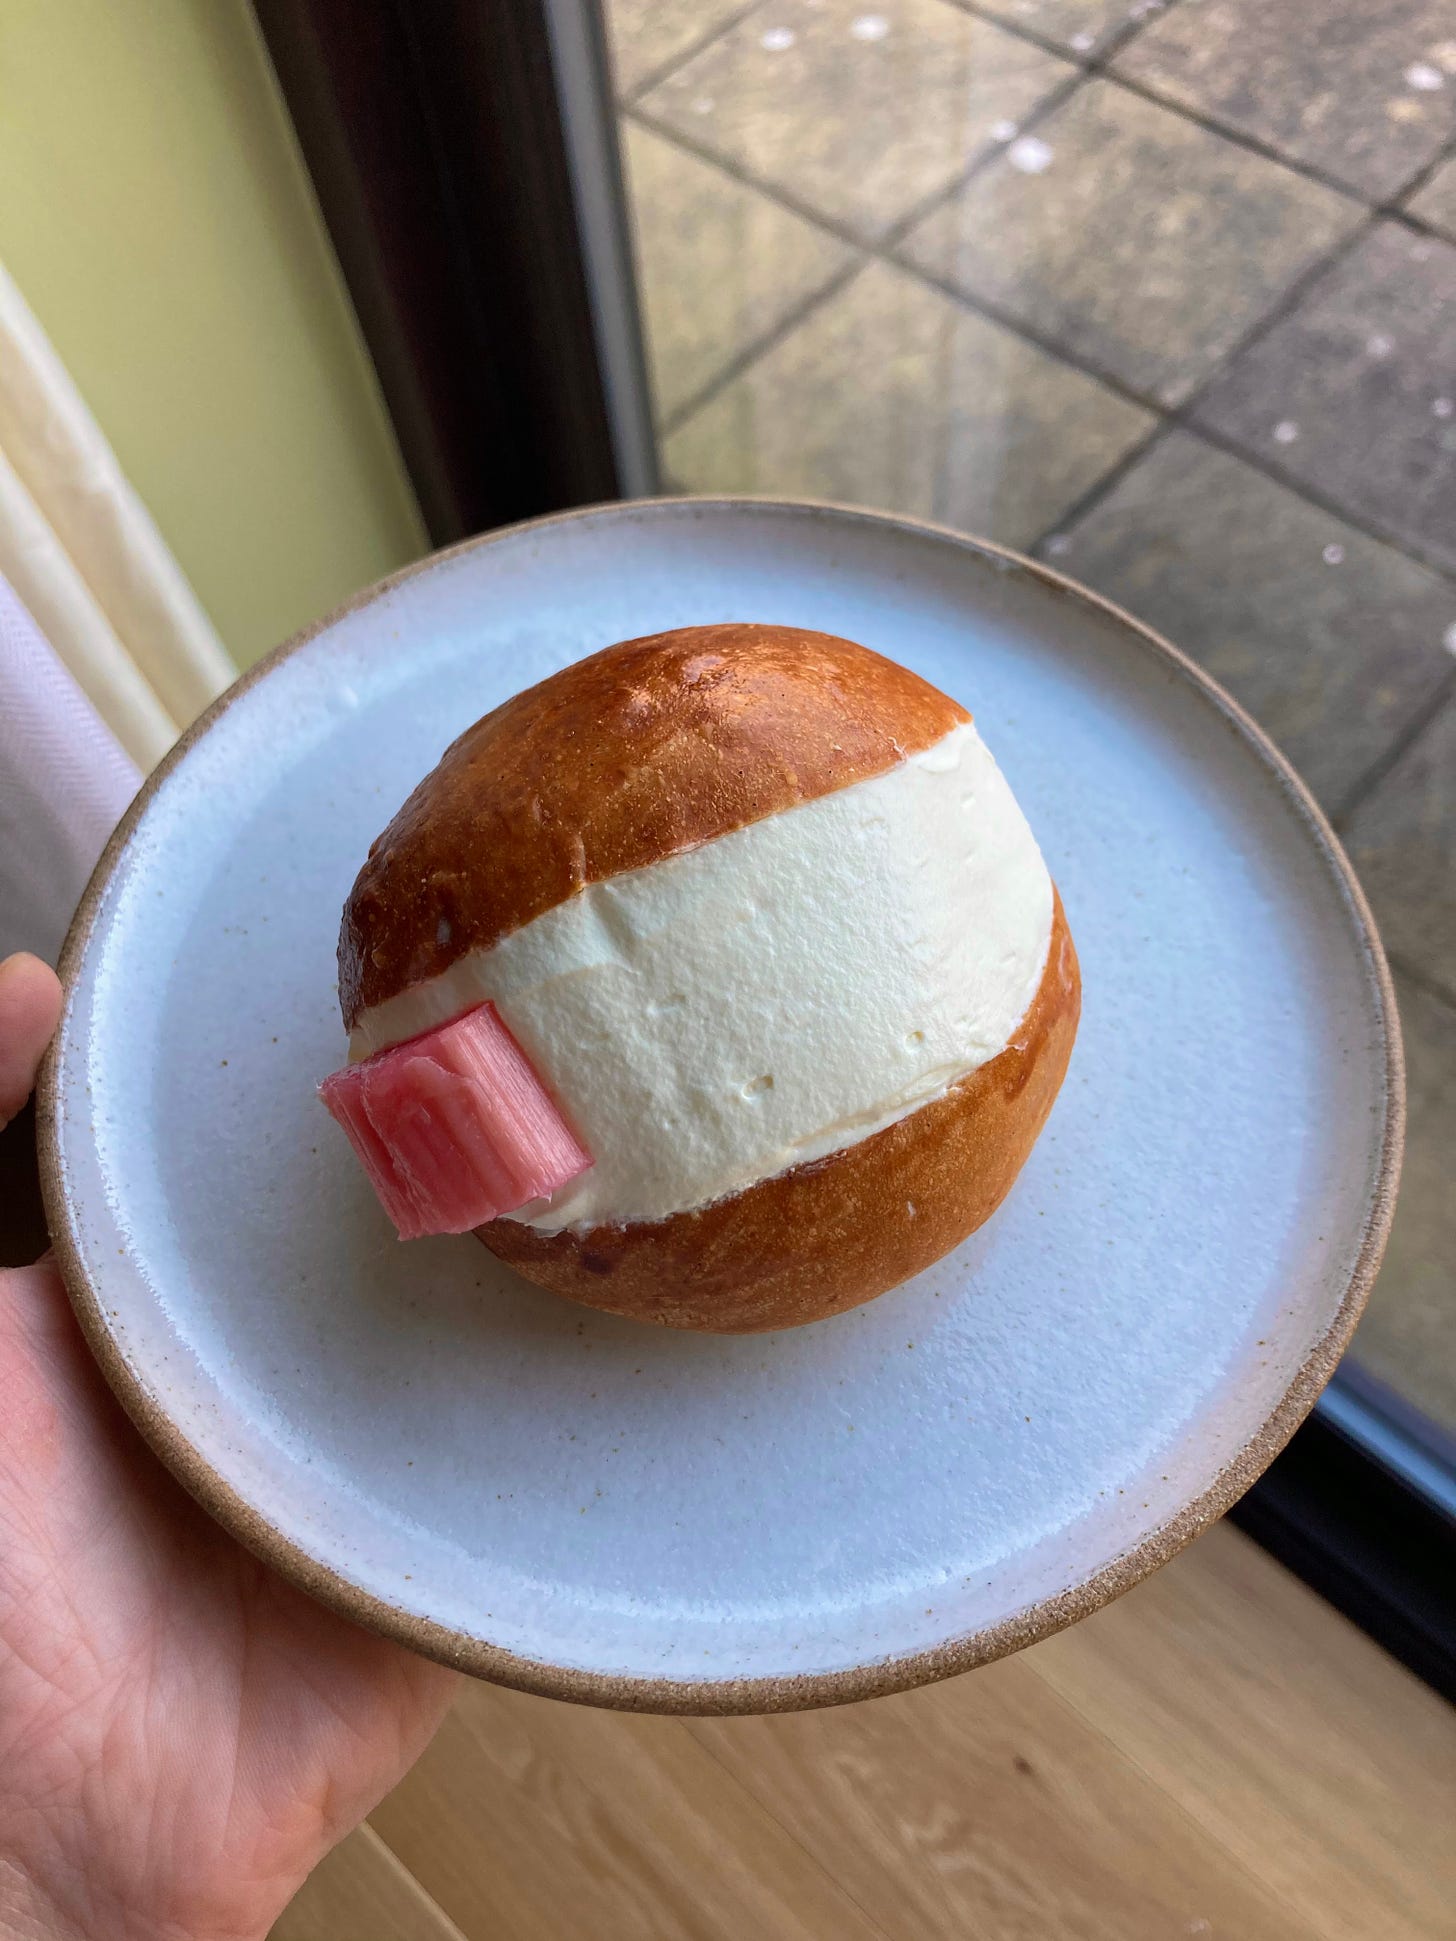
It’s been a while since I made dough. And I miss it. With rhubarb really coming into its own, I wanted to create a beautiful and soft bun that could be filled with cream and roasted rhubarb.
If the last year of no travel and staying-at-home-ness has taught me anything, it’s to eat absolutely EVERYTHING the next time I am fortunate enough to go abroad. The last time I was in Rome was almost four years ago – it was glorious. But tragically, I missed eating the magical maritozzi (a beautiful sweet bread with cream) when I was there. That hasn’t stopped me from obsessively googling and youtubing them – I absolutely adore the slick of cream, the puffy looking dough, the ultra shiny crust, the loveliness of it all. I am a fan (well, visually) of Melbourne’s Monforte Viennoiserie in particular.
The story goes that these soft cream buns are made for lovers. In particular, they would be given to women on their wedding day – “mariti” is the word for husband in Italian and “maritozzo” is a name of endearment shared between them.
From what I can tell, Maritozzi appears to be the exotic cousin of Devonshire splits, that traditional British treat where jam and cream is stuffed inside a soft white bun. Maritozzi, however, appears to use a dough with more butter, more eggs and they seem altogether richer – I also adore the super slick finishing of smooth whipped cream finished in a way that looks like a smile.
I’ve never been able to try the real Maritozzi so today’s bake is simply an ode, a piece of fan art! It’s somewhere between the British classic and the Italian counterpart. Hopefully one day I’ll be able to try the proper buns and I can come back here to Kitchen Projects and share something altogether more authentic. For now, we’ll borrow the shape, with gratitude. Grazie mille Roma!
Making a dough plan
This week I want to talk to you about pre-ferments. Preferments are something that *sound* scary but actually aren’t. We are going to do a little bit of maths today, too. But only a little bit.
To make this week’s recipe I decided to start totally from scratch. To create a new dough recipe, there are a few rules to stick to. Here’s my thinking:
Objective 1: Create a dough that is soft but easy to work with - no sloppy doughs, PLEASE
Solution: Aim for a hydration of around 65%-68% (baker’s percentages in action)
Objective 2: Ensure that the dough has a complex flavour and is fluffy and light with a squishy texture
Solution: Use a pre-ferment - this is going to help with the soft texture, too, without having to go mad hydrated
Objective 3: A rich flavour with good mouthfeel aka fun/feels good to eat
Solution: Use a mixture of milk and eggs for the liquid and mix in soft butter at the end
Objective 4: A complex flavour profile that is well infused into the dough
Solution: Make a hot infusion and proof the yeast whilst warm and use this for the preferment liquid, giving the dough max time to become fragrant
Let’s figure this out.
The deal with pre-ferments
A pre-ferment is simply a mixture of flour/liquid/yeast from your recipe that you mix ahead of time. There are lots of names for pre-ferments - bigas, poolish, sponge, pate fermentee. It goes on. The reality is, they are all sort of… the same. All the variations achieve the same goal: an improved flavour and texture.
I would spend time giving you the lowdown on each ‘type’ of preferment but, guys – I have looked through all of my bread books and I have scoured the internet and here’s what I found: there does not seem to be a internationally approved/agreed method or formulation! Some recipes use all the yeast required for the whole recipe, some prefer just to use a tiny bit. Some recipes require salt, others don’t. There are lots of other varying factors that make this appear – at least at first – like a minefield.
This makes things confusing, I know. The only thing there is general(ish) agreement on is hydration. A poolish, for example, tends to be high hydration and quite sloppy, whilst a biga may be stiffer. I’m not going to give today’s pre-ferment a name...
I know the pre-ferment might seem like an inconvenient extra step but let me try and convince you:
Time
When you make dough, time is an ingredient.
As the dough ferments, the yeast converts sugar into carbon dioxide and alcohol (which burns off when you bake!). Flavour compounds are also produced here. So, spending a bit more dedicated time on the ferment stage is a great way to improve the overall aroma and flavour happenings in your dough.
Maybe you’re thinking – why not just proof the WHOLE thing for longer, instead of just a small portion? Well that’s a good question. It’s possible that the whole dough might go too far, meaning it runs out of juice by the time you bake it.
Making a pre-ferment is like giving your dough a kickstart and allows you to build layers of flavour and complexity: the pre-ferment goes into the dough, the dough rises, the dough is shaped, and the dough is risen again before baking. With the pre-ferment, we’ve been able to sneak in an extra few hours of flavour building, creating new dimensions of dough-zen, without the worry of over-fermenting that leads to the potential issue of dough structure breakdown.
Texture
While you ‘lose’ time by pre-fermenting the flour, you can actually gain some of that back during the mixing process and rise.
First let’s talk gluten: As the dough is fermenting and the flavour is building, gluten – the result of the proteins gliadin and glutenin lining up into long strong chains – is also developing.
Although most recipes require you to develop gluten by mechanically beating the proteins into order, there is another way! You might have heard about ‘no knead bread’ before. This was developed by Jim Lahey who, instead of slapping the dough around to create strength, simply mixed the flour and water and gave it time to develop without touching it at all, around 16hrs – the result? A light loaf with a complex network that boggled the brain. How was this possible?
Well, flour – once hydrated – will immediately begin to form gluten bonds and, in a process known as ‘autolyse’, the enzymes present in flour will begin to break down the proteins which makes the dough really stretchy and developed. As the yeast processes the sugars, the CO2 expands which has the effect of very gently ‘kneading’ and stretching the dough. Cool, right?
When you make a pre-ferment, you’re benefiting from all of these processes. You get to add in an already flavourful dough that has a good amount of gluten development which makes your actual mixing process shorter since you already have the beginnings of a strong structure which really improves your texture and fluffiness later on.
Enriched dough, slow to rise
Enriched doughs, like brioche or anything with sugar, eggs or fat, can be very slow to rise. This is because it takes longer for the yeast to actually reach the flour to begin fermenting it. Plus, sugar is a real water hog and so hydration can be slow which, in turns, slows down fermentation.
By pre-fermenting some of your dough, you have circumvented this issue. You have been able to ferment some of your flour without the pesky butter or egg yolks getting in the way. You have also been able to ferment your dough without all of the sugar around which gives it a real head start.
All of that PLUS your yeast is already active and ready to take charge so your second rise – even with an enriched dough – will be shorter.
Yes, you could just add more yeast and then your dough would rise quicker – but it would also be flabby, unstable and at risk of deflating. Let’s avoid that, please.
Spring it
Oven spring is the term that bakers use to describe how much a dough rises in the oven. The additional gluten achieved from the pre-ferment makes an overall stronger dough and really helps your yeast ‘pop’ when it gets hot. At temperature, the yeast gives out its last burp of CO2 before it dies (that sounds brutal I know) and the dough rises as the gas fills and expands the gluten network, like balloons.
Remember, to get the absolute best spring, you don’t want to push your yeast too far once the buns have been shaped – it still needs a bit of ‘gas in the tank’ ready for its final lift. That’s why judging proof is so important.
Dough maths
ANY dough can be amended to use a pre-ferment. All you have to do is take a portion of your recipe and start it ahead of time. For today’s buns, I am going to show you how to make a stiff pre-ferment. I am also going to use all of the yeast, a little bit of sugar and all of the perfumey bits – vanilla and citrus peels.
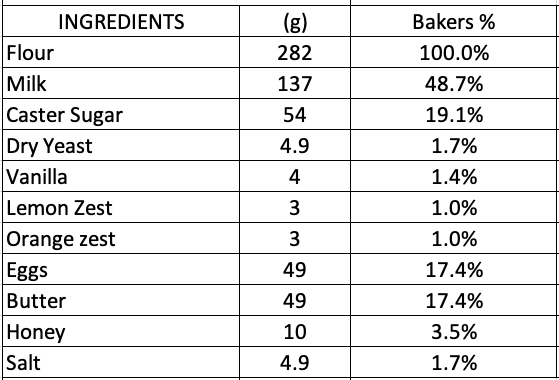
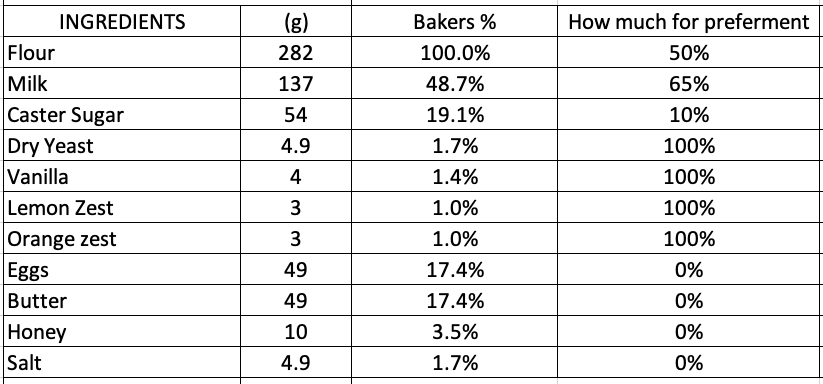
I started off by creating my base recipe. I do this with the help of bakers %! Remember, a bakers % is the recipe proportional to the amount of flour:
Next I thought about how much of the flour I wanted to pre-ferment. It can be anything from 10% all the way up to 80%! I decided to go for 50% of the flour. This would give me lots of flavour. 50% preferment seems pretty standard for baguettes, but I don't see why I can’t go that high for my enriched dough.
The next choice was thinking how ‘wet’ or hydrated to make the pre-ferment. I wanted it to be quite easy to work with so I decided to make it quite squishy – but not pourable – so decided on 65%. This keeps the preferment fairly proportional to the dough.
The next choice was how much yeast to include. If you are going to take your pre-ferment slowly, it is advisable to use a smaller amount of yeast. However, for this recipe I wanted a reasonably FAST pre-ferment so I am going to use all of the yeast. To help speed things up, I also chose to include a bit of sugar since I am using ‘dry active’ yeast that needs to be bloomed with sugar. If you have a different dry yeast, you can still use the same method as me with no adverse effects.
Finally, I chose to include all of the flavour bits – a whole vanilla pod, the zest of one lemon and one orange:
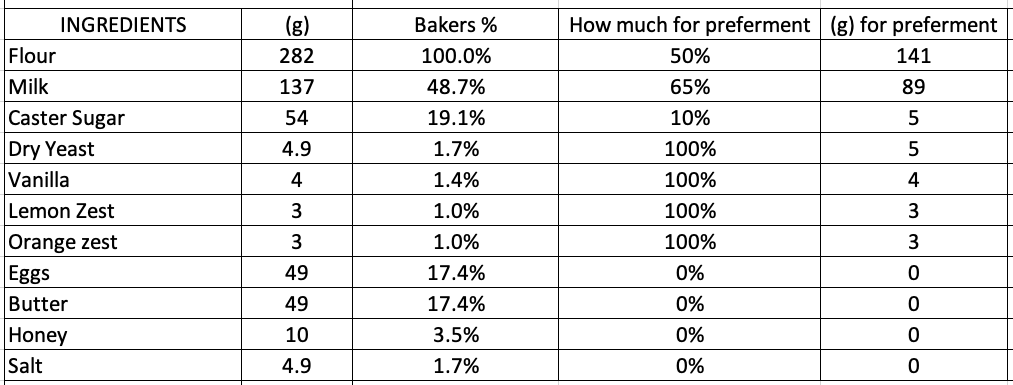
Now that is decided, I calculated the (g) amounts by multiplying the chosen preferment % with the original weights:
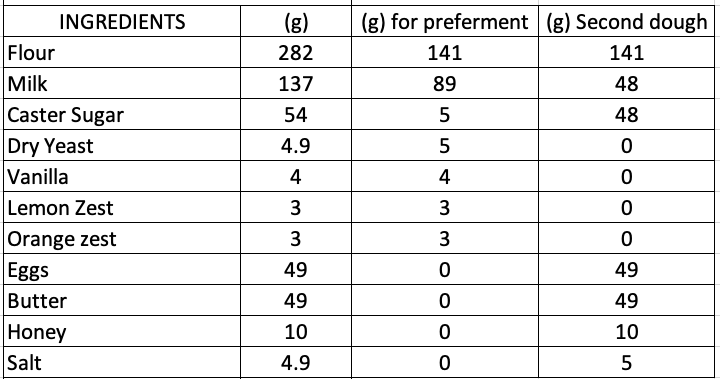
Finally, I subtracted the (g) for preferment from the original recipe to give me my final formulations for both stages:
Wasn’t that fun?
Infusion confusion
When you add flavours into bread, they often don’t get enough time to infuse properly. By adding raw spices into your dough, you’re rarely giving the ingredients the space and conditions needed to open up and become truly fragrant.
In savoury cooking, spices are often toasted and ground to release maximum fragrance but in baking? Spices generally get chucked in without a second thought.
Well, for the soft and squishy sweet buns I was dreaming of, I wanted to open up the flavours as much as possible. To do this, I heated the milk and infused it with the citrus peels and vanilla, and allowed it to cool before blooming my yeast in it and then using it to mix the pre-ferment. This gives me maximum dough flavour infusing time.
Soo… can you make these buns without the pre-ferment?
OF COURSE! But I think they are much better with it. Although it is more effort, you will be delighted at how soft and flavourful the dough is. That being said, you can mix this as a straight dough and still be satisfied.
Let’s make it!
Sweet spiced buns with honey cream and rhubarb
Special equipment:
KitchenAid - I used a KitchenAid to mix my dough but I actually think this would work by hand. Eggs are a bit awkward when you’re hand mixing but if you have lots of patience, I reckon it would work
Dough recipe
Pre-ferment
140g strong white bread flour
90g milk
5g caster sugar
5g (¾ tsp, ish) dry yeast
Zest of 1 orange
Zest of 1 lemon
1 vanilla pod
Final dough
All of pre-ferment from above
140g strong white bread flour
50g caster sugar
5g (¾ tsp) salt
50g milk
10g honey
55g egg (approx 1)
50g soft butter
Egg for eggwash
Honey cream
300ml cream
35g honey
Rhubarb
400g rhubarb
40g sugar
40g water or orange juice
Method
Pre-ferment
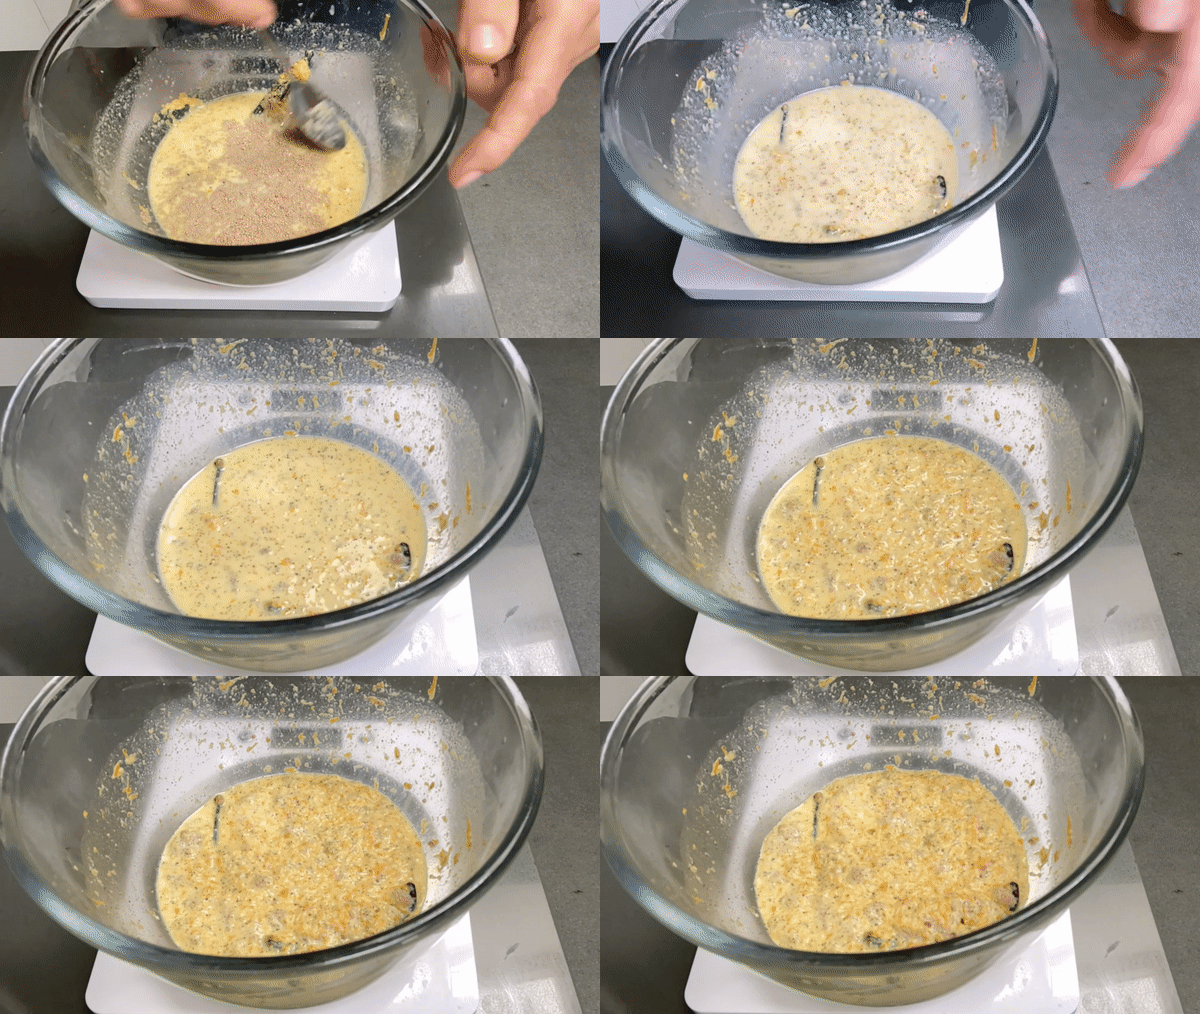
Heat milk, vanilla, sugar and citrus zests until simmering to infuse
Pour into a bowl and cool to around 40C. This is the perfect temp to get yeast going! Even if you have the yeast that doesn’t need to be reactivated (or is usually just mixed into dry ingredients), please do this step!
Stir in dry yeast and leave for 10 minutes. Don’t do this while the mix is too hot otherwise the yeast will die
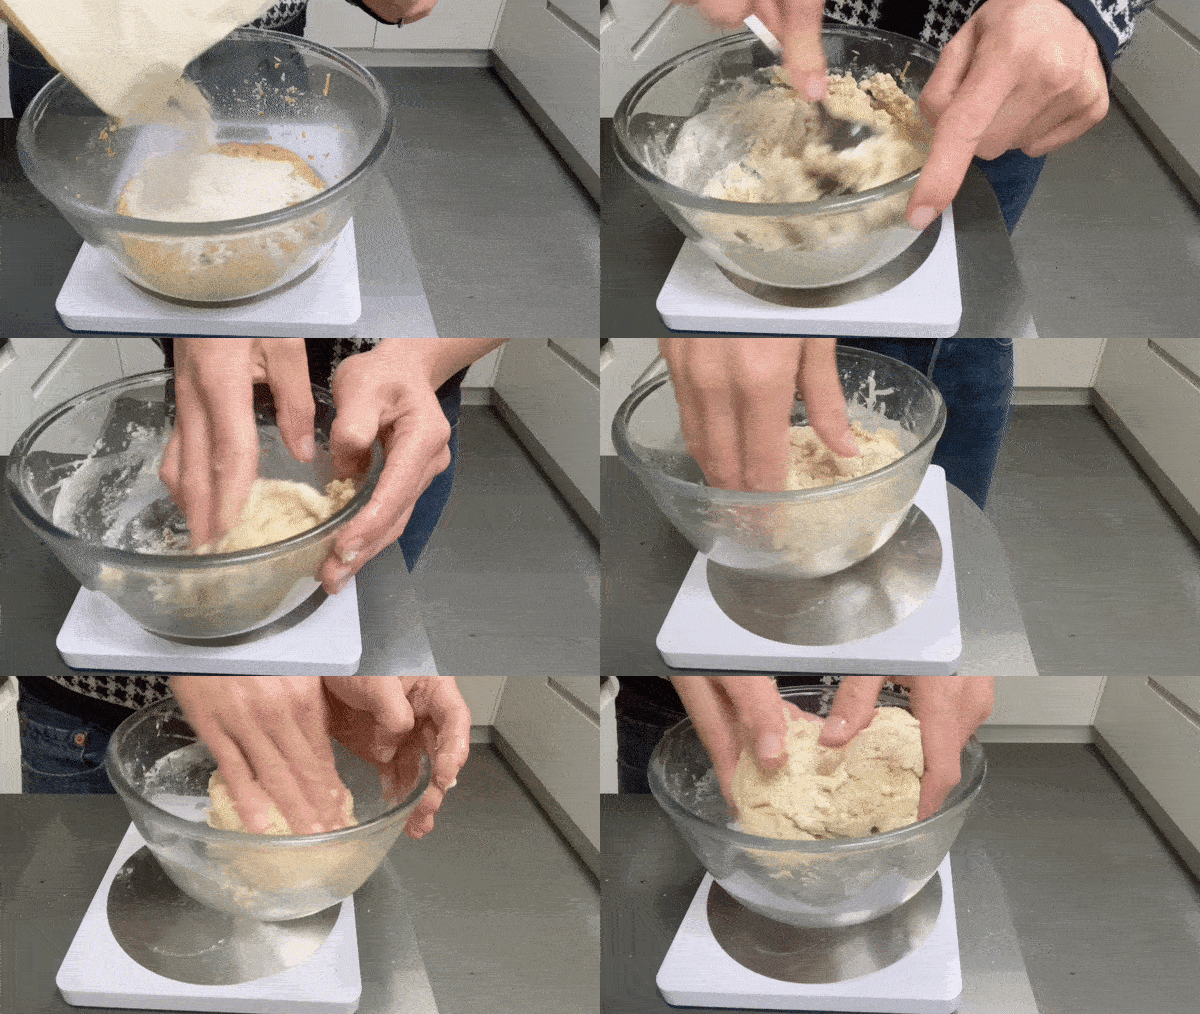
After 10 minutes and the mixture is bubbly, stir in strong bread flour and mix into a stiff dough. If it looks a bit dry, don’t worry! Just do your best mixing it and squash it together with your hands – a little bit of milk will have been absorbed into the vanilla pod but it will redistribute during the resting phase
Cover the bowl and leave for 2 hours in a warm place
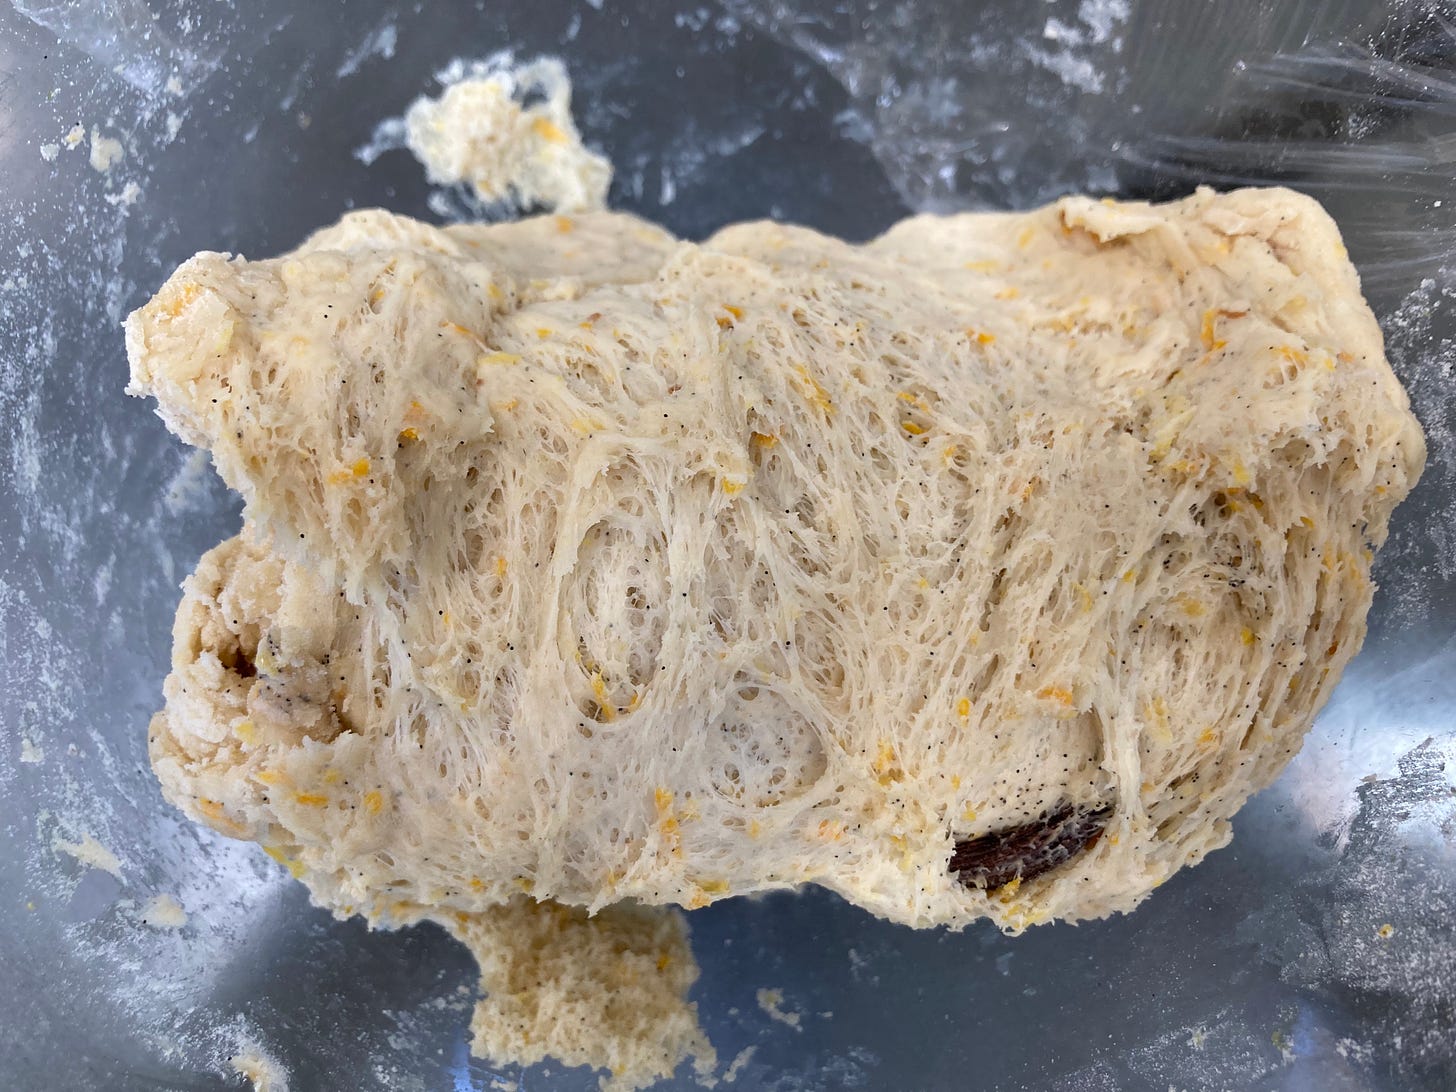
After 2 hours, the sponge should be risen, very fragrant and airy – you can see the structure if you pull on it - gluten and yeast at work!
You can keep your pre-ferment in the fridge for up to 3 days and use it anytime. But remember, if you are using it from cold, it will take longer to reactivate and the other ingredients must be warm to help it along
Dough
Add egg, honey and milk to the mixing bowl
Tear up the pre-ferment into small pieces and add to the bowl. Remove the vanilla pod!
Finally add the flour, salt and sugar
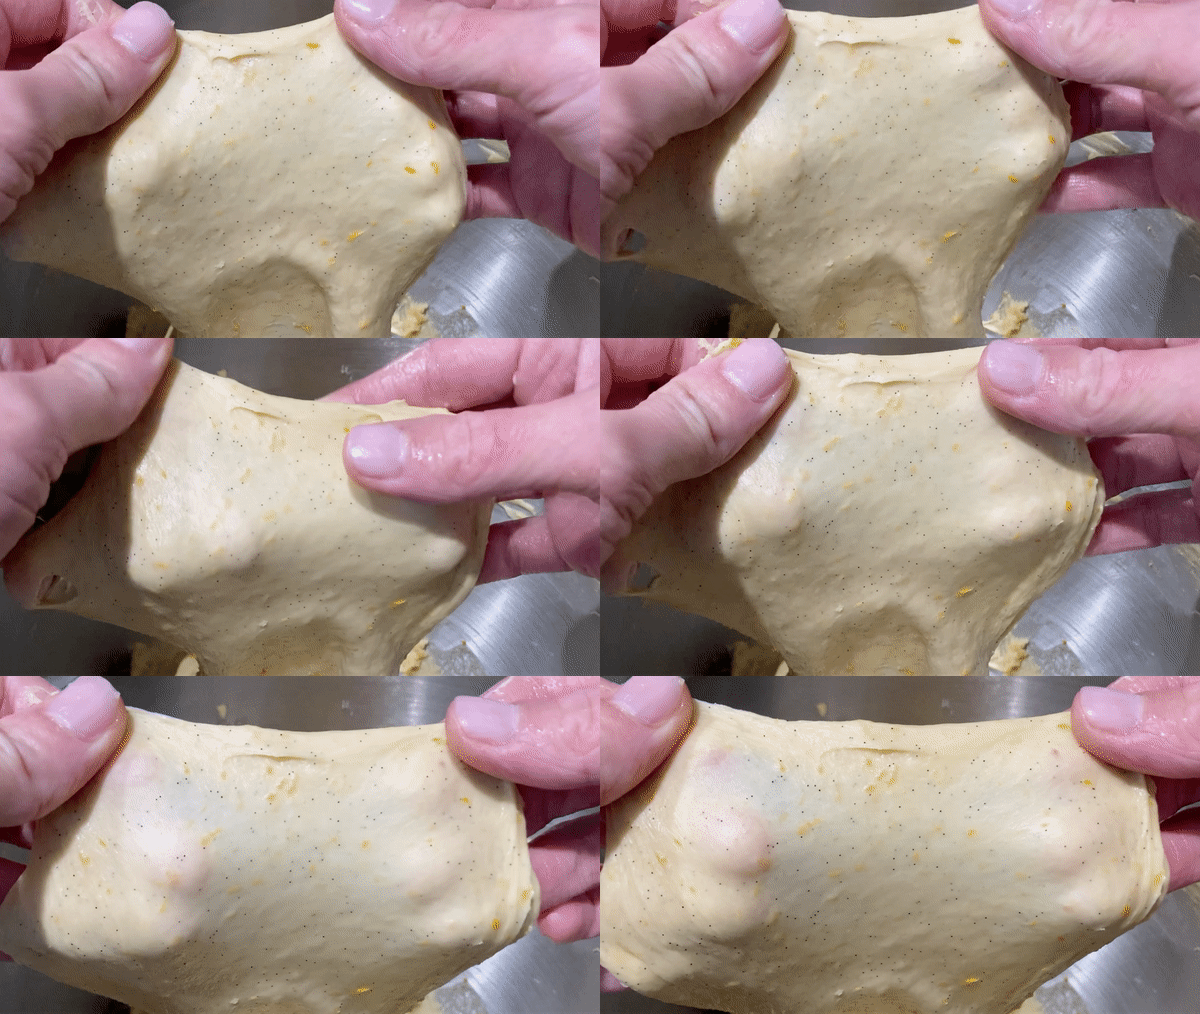
Mix on a medium speed for about 8-10 minutes until medium gluten development is reached – this is when you can pull on the dough and it stays together but it is still quite fragile. You can take it further than this but this is the minimum requirement before adding butter
Add in the soft butter a teaspoon at a time with the mixer running. Mix until very smooth – another 8 mins – and full gluten development is reached. This is when you can pull a thin almost translucent layer with the dough
Cover the bowl and let proof for around 2 hours until the dough is quite puffy
Shaping
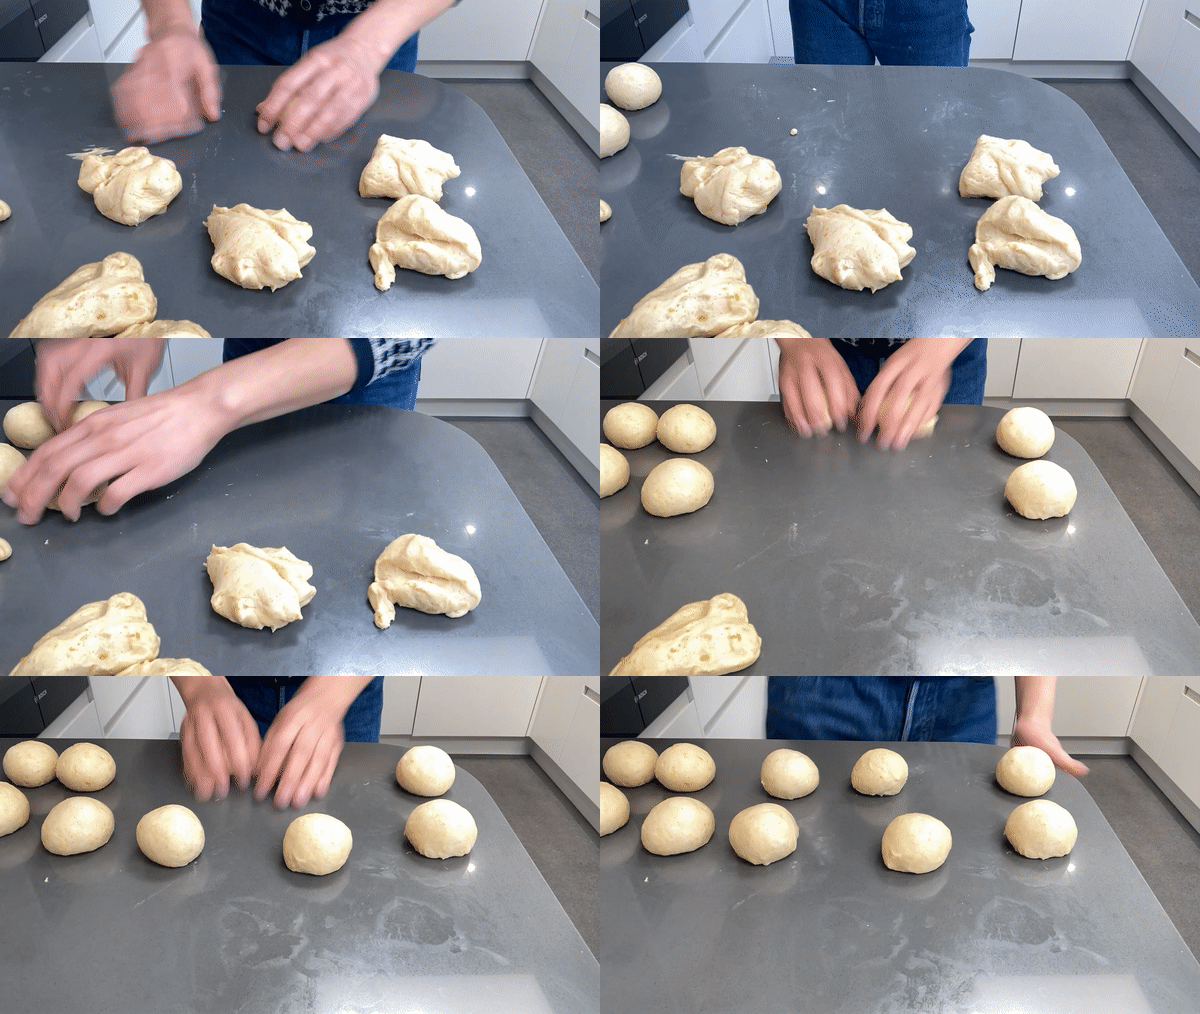
Divide dough into 55g-60g portions
Pre-shape into balls and rest
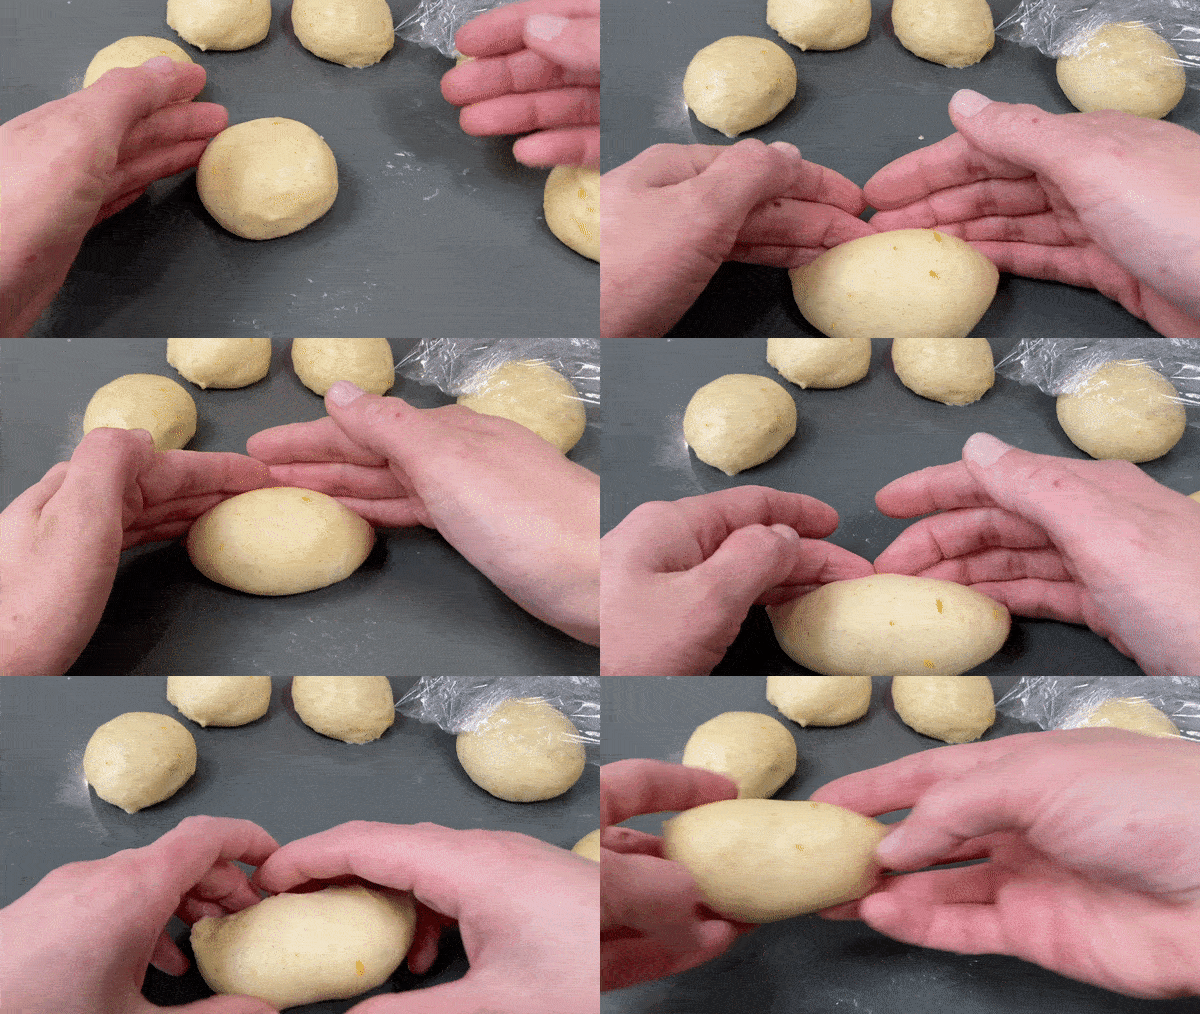
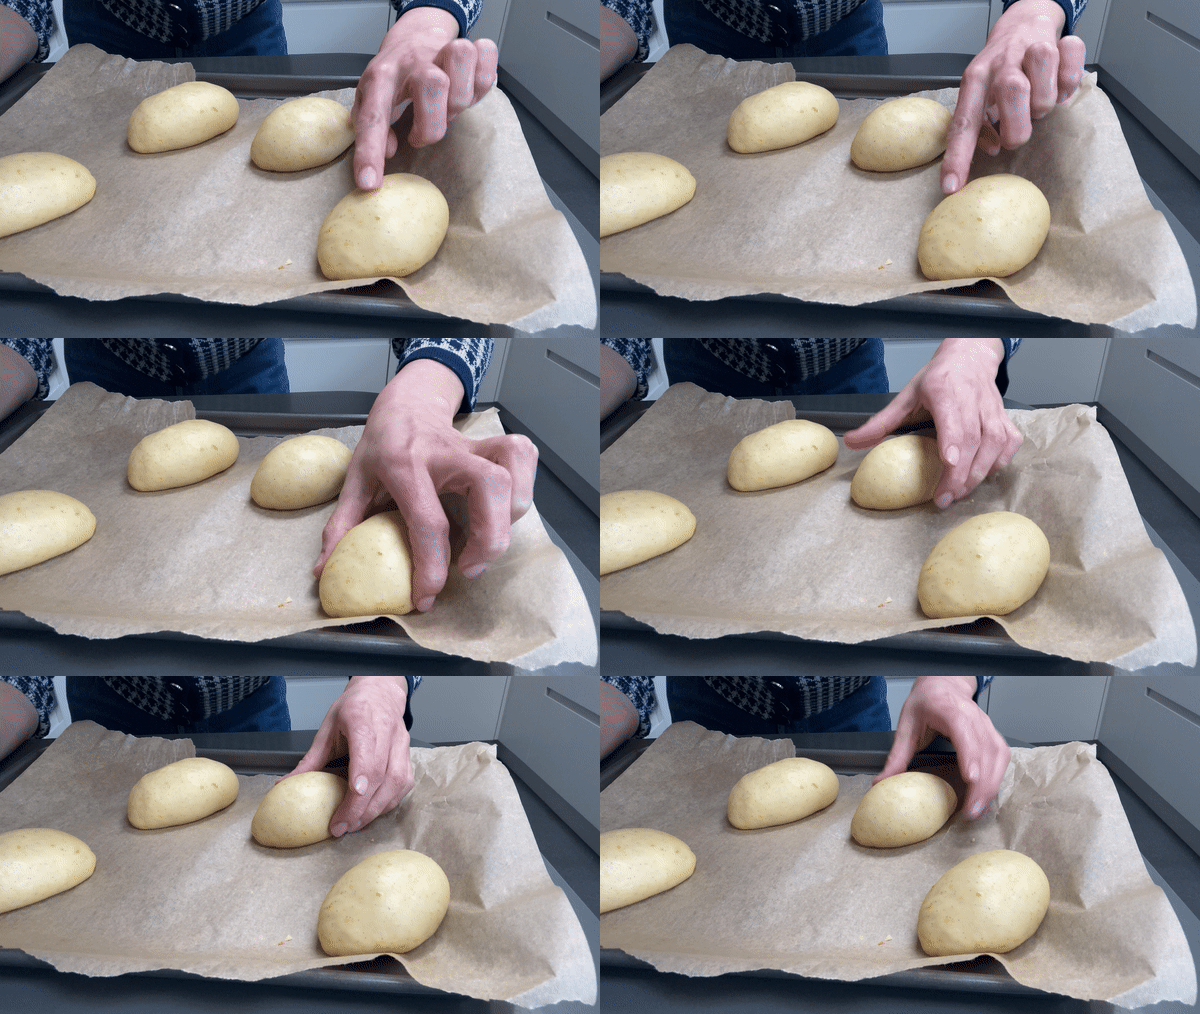
I like to make these into a slightly elongated oval shape – I love the way it looks and you have more surface area to put cream in. We aren’t going for a hot dog style bun! But if you want to do a simple ball shape, you can leave it
Starting with the first ball (that has been resting the longest) shape into a slight sausage using your hands in a ‘v’ shape and put onto a tray. Try to do it quite tightly otherwise it’ll go into a strange shape in the oven
Repeat with rest of dough. Make sure you leave 2-3 inches of space on the trays so they can proof and bake
Proof for around 1.5 hours until very puffy
Baking
Pre-heat oven to 175C
Eggwash the buns carefully. They rise quite a lot in the oven so try and get all the way around the edges
Bake for 12 minutes – they will be very golden and risen! Check the internal temp is 95C if you’re not sure if they are ready
Leave to cool before filling. If you are filling the next day, wrap the buns well. They are best on the first day but still lovely on day 2 and 3
Rhubarb
Cut rhubarb into 2/3cm pieces
Toss with sugar
Roast at 170c for 12-15 mins until poke-able but firm
Remove a quarter and set aside – this will be your rhubarb to decorate, you don’t need much
Return the rest of rhubarb to the oven and cook until quite soft, another 10 minutes – this will be the rhubarb for the middle
Once cooked, pour the leftover syrup over the ‘pretty’ rhubarb and reserve the soft rhubarb in a separate container
Leave overnight for the best colour
Use the soft rhubarb for the middle of the buns, reserving the very best pieces for the top decor
Honey Cream
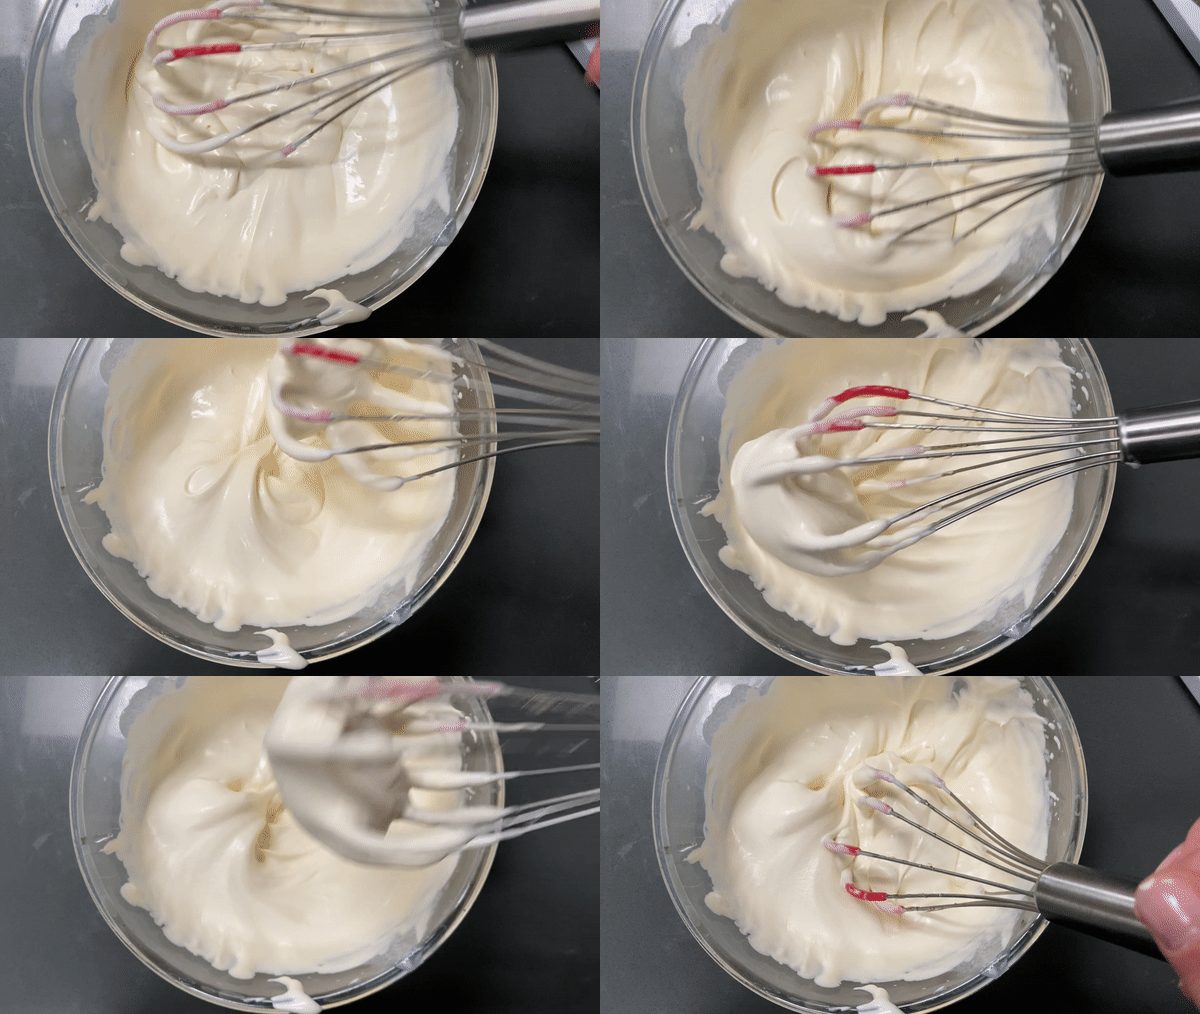
Whip the cream until it is as thick as the honey
Add honey
Whisk until thickened and smooth – don’t over-whip it! It should just be ‘soft’. It will firm up as you move it around so watch out! Err on the side of caution and go under!
To finish the buns
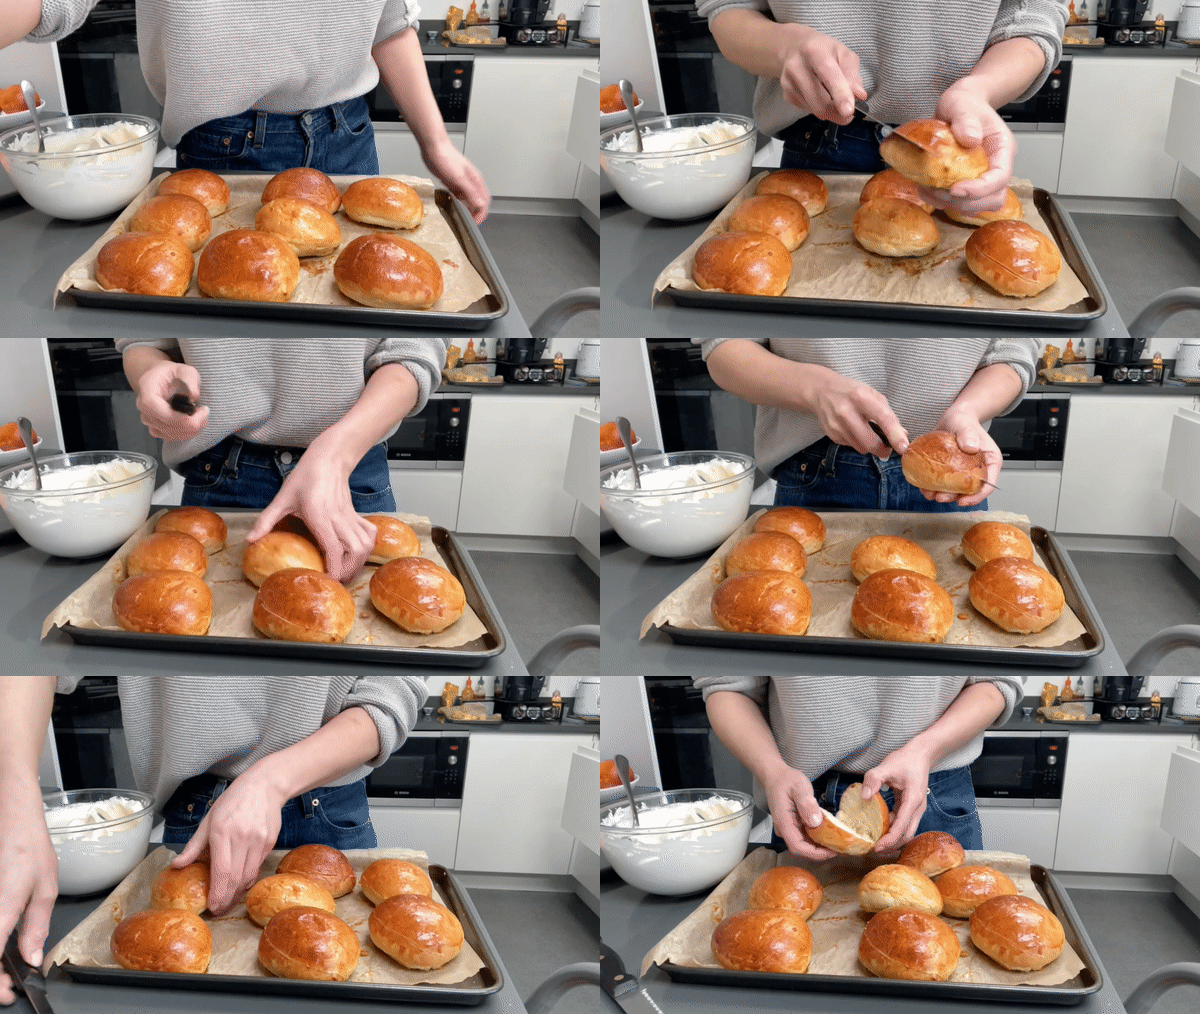
Split the buns diagonally and fairly deeply - open the buns up a bit. I would do one and check, otherwise they might go into two pieces
Spoon rhubarb generously inside, followed by a big spoonful of cream
Close the buns slightly and use a palette knife to smooth the edge. You can wipe off any messy cream later
Add a piece of rhubarb to finish
Sprinkle with icing sugar if desired
Serve – eat within 3-4 hours for the best experience






Bonjour Nicola, for how much maritozzi can this recipe make ? Thank you
Hi Nicola, how many roughly does the recipe make?