Kitchen Project #20: All about tarts
White chocolate miso frangipane + fancy rhubarb let's GO!
Hello!
Welcome to another edition of Kitchen Projects. It’s so lovely to have you here.
Firstly, Happy Easter! I hope you’re having a lovely break wherever you are.
Today it’s all about tarts: Lining, baking and figuring out all the things that can go wrong (but won’t anymore I hope!). Plus I’ve got an absolute winner of a recipe for you this week for you to use your new tart lining skills on.
I’ve been wanting to do a newsletter on tarts for a while and a suggestion on the KP+ Ideas sketchbook thread pushed me over the edge. Thanks to Sam for sharing his tart traumas and asking the questions that inspired this deep dive.
On the KP+ April whats cooking thread we’ve also been chatting about flavours for April! Miso is one that has come up A LOT so I’ve developed a rather delicious white chocolate frangipane version for this week’s tart. Thank you for all your suggestions. If you’d like to join us over on KP+ and help shape future newsletters and get extra recipes to your inbox, I’d love to see you there:
I’ll be taking a week off the Sunday newsletter next week, so the Kitchen Projects Sunday newsletter will return on Sunday 18th April. For those subscribed to KP+, I’ll be sharing a white chocolate cheesecake recipe - perfect for your new tart lining skills - on Wednesday, too.
Let’s do this
Love,
Nicola
Tart Life
I once went to a trial for a fancy patisserie and they asked me to do just one thing - line a tart shell. It was terrifying. I managed it and all ended well. But I left wondering… why does this freak me out so much?
So I got to thinking - there are several classic areas of pastry stress: The rolling out, the actual lining (omg the pastry is melting HELP) and of course the dreaded shrinking.
Today I’ll take you through the lining styles so you can see what’s out there. I’m also hopeful that going through these tests will mean that we can do lots more tarts in the future on KP now that we’ve covered our bases.
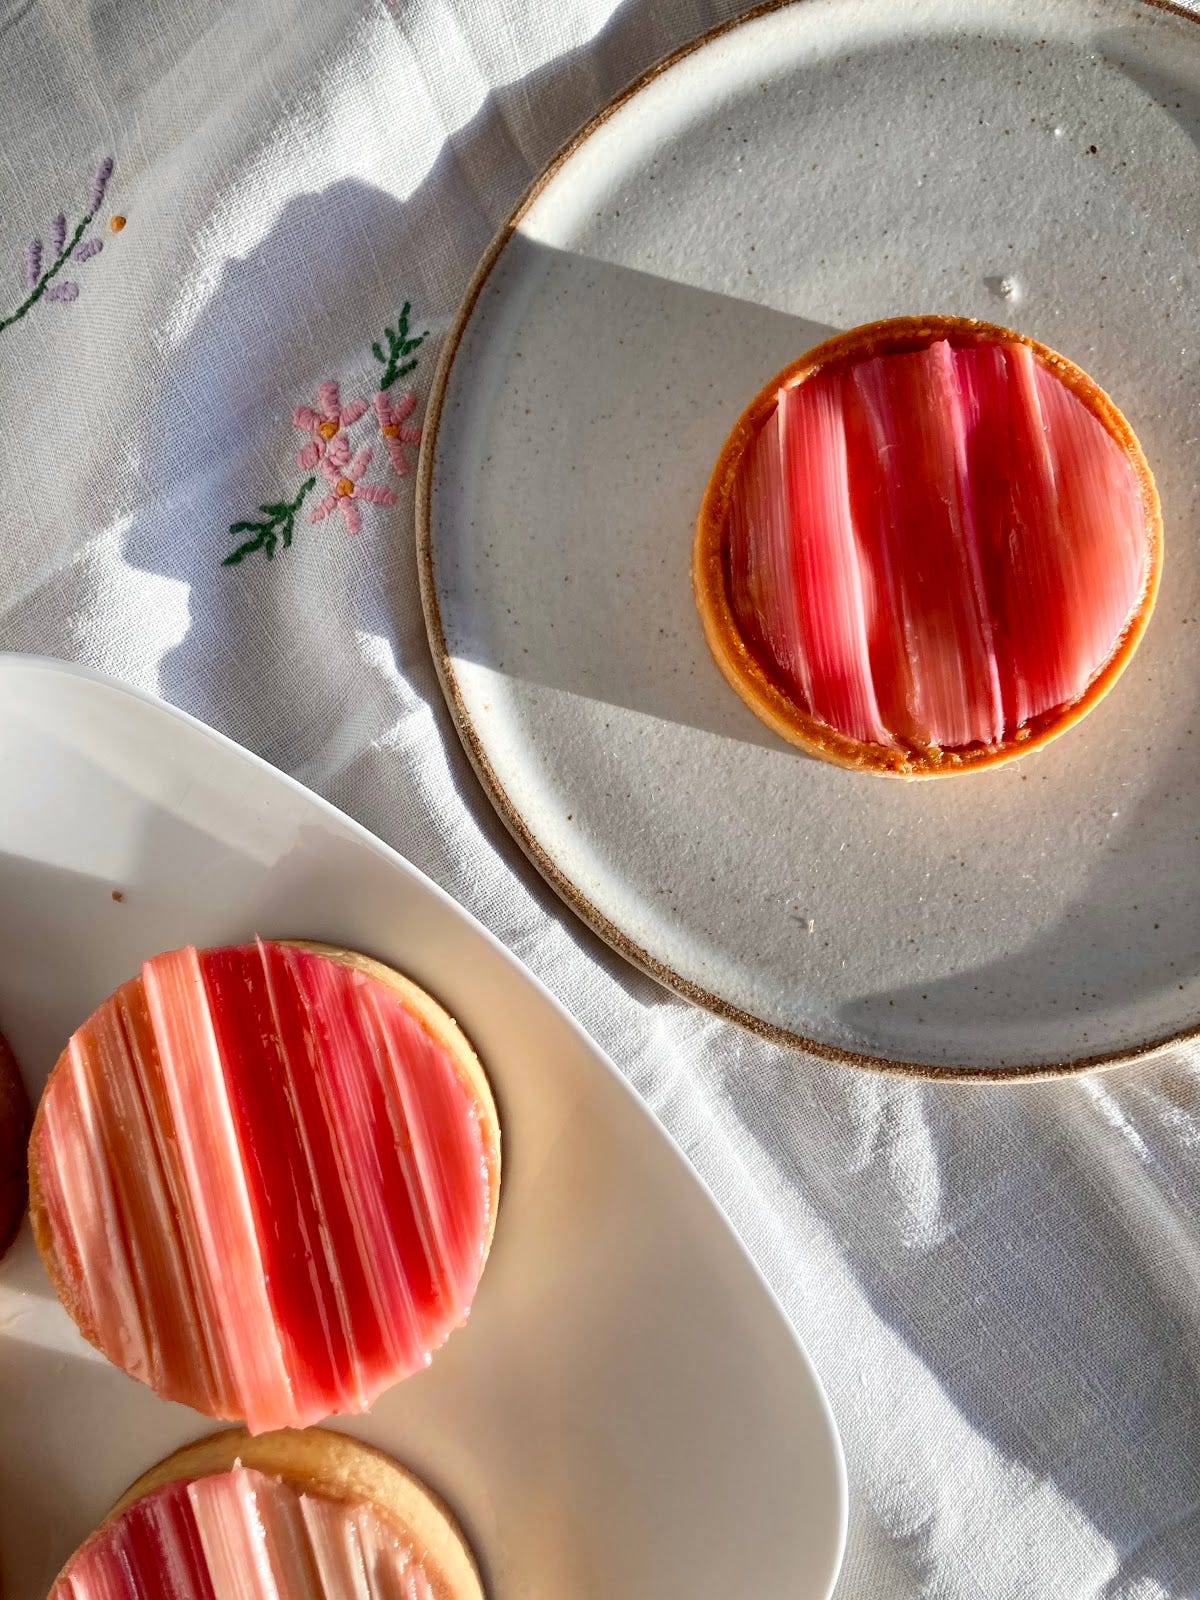
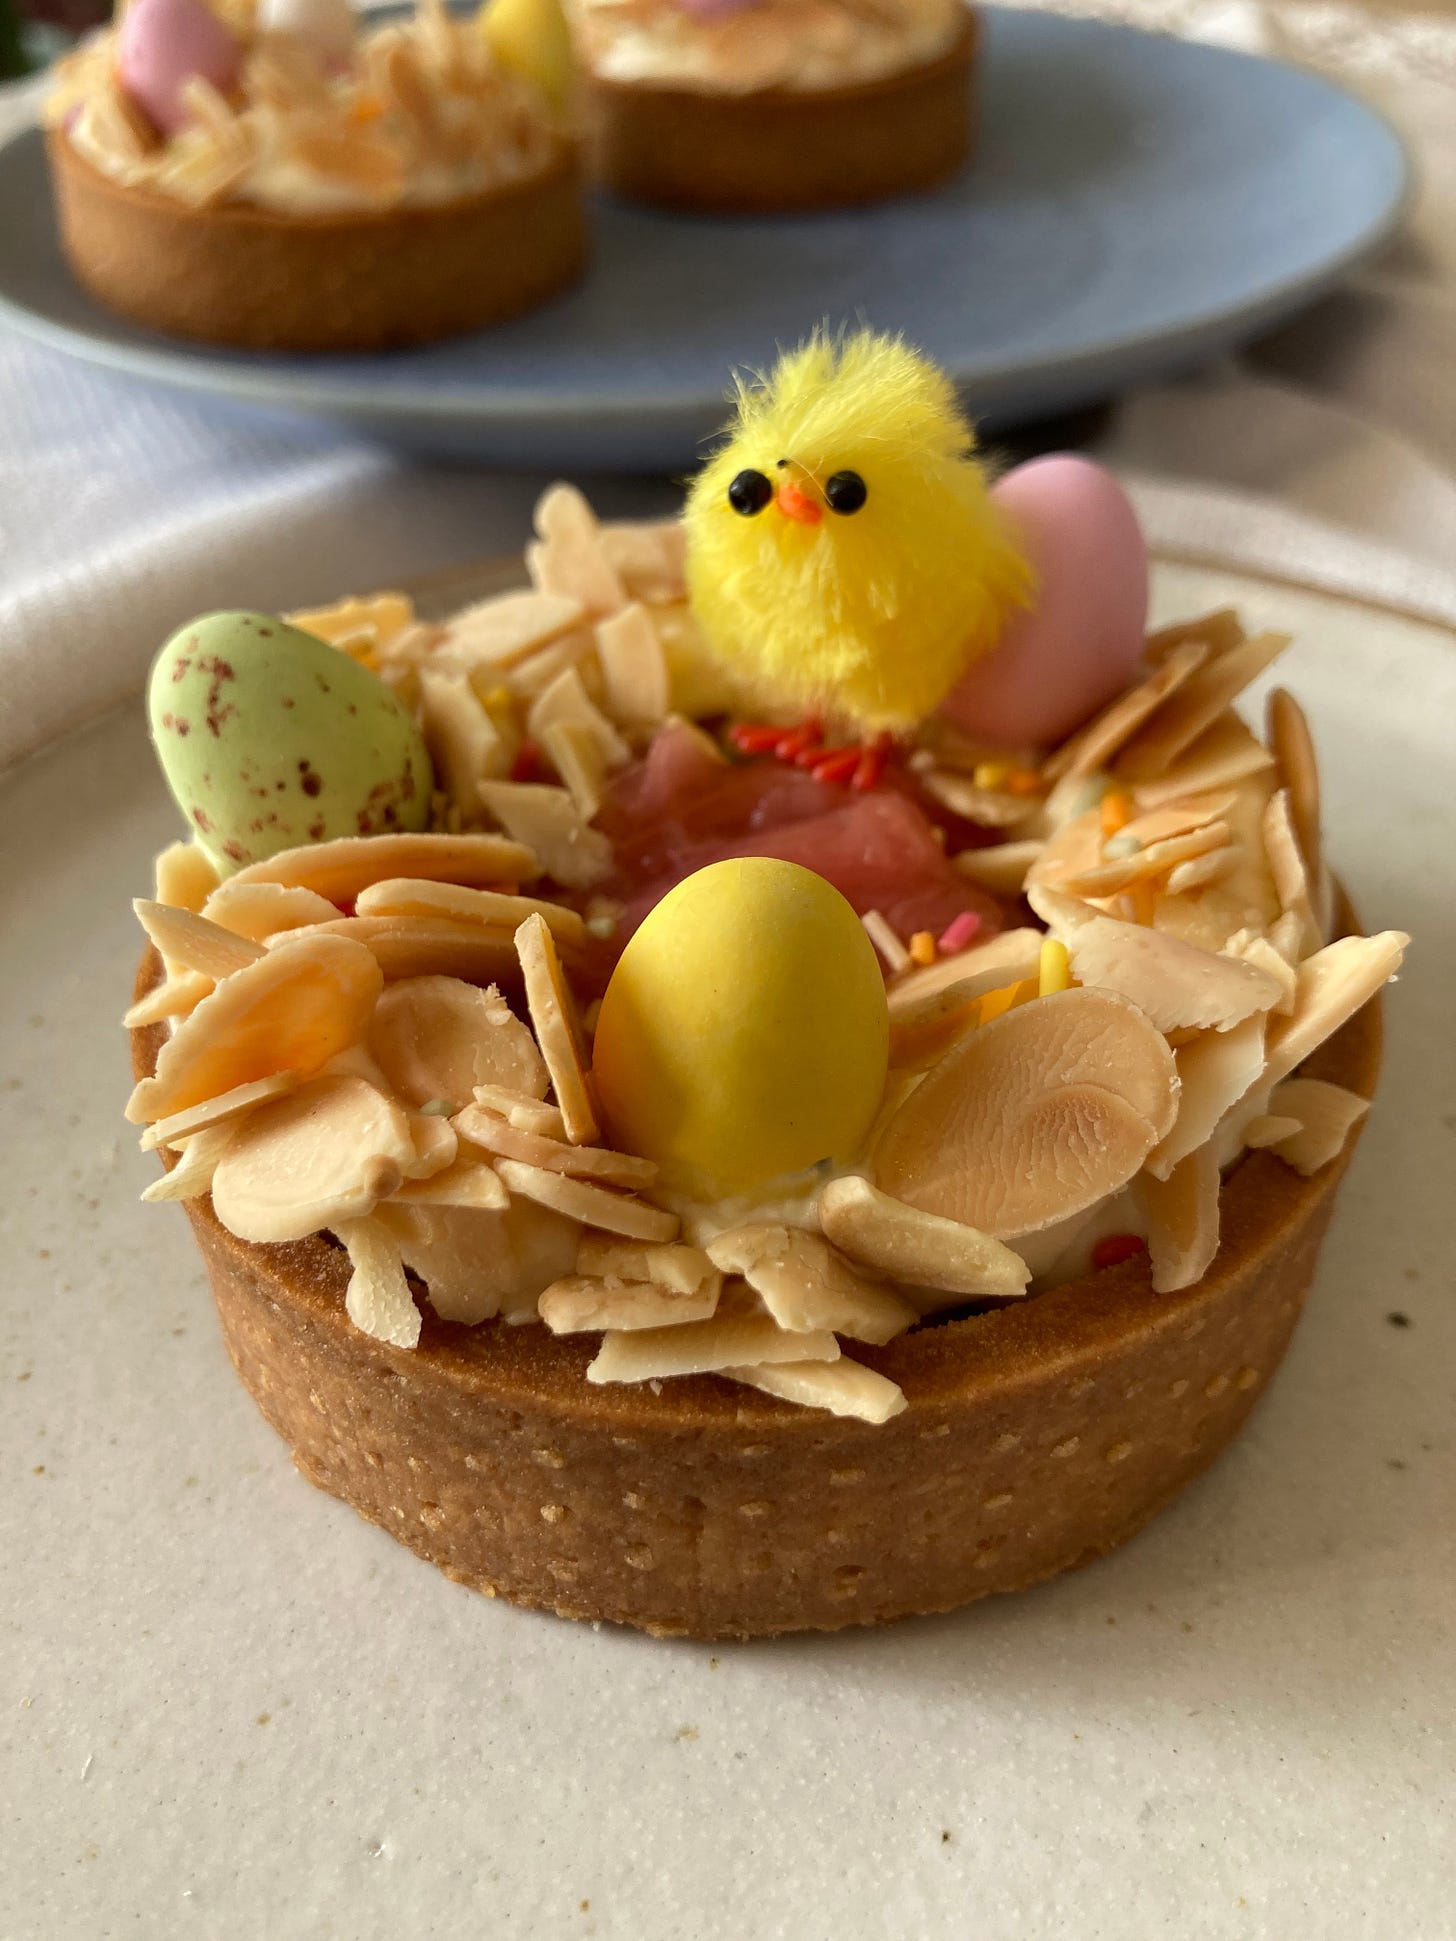
And although this newsletter is mainly focused on the techniques of the lining, we’ll end today with a recipe for a gorgeous and chic rhubarb tart, a real celebration of its pink beauty to enjoy whilst we’ve still got it! I’ve also included a *slighty silly but ridiculously cute* alternative Easter decorating version in case you’re feeling festive:
So, let’s get down to it! Super excited about this one.
The perfect tart shells
When I was working at my first job at Dominique Ansel in New York, I was sent downstairs to help line tarts. I got to the basement to see Chef Christian (the sous chef at the time) surrounded by mini tart rings… hundreds of them. He asked if I knew how to line tart cases. I said ‘yeah of COURSE’ (which was half true… I’ve since learned it’s much better to say ‘I’ve done it before but can you show me how?’ because I definitely got myself into hot water by saying ‘YES’ all the time when actually what I meant was ‘Yes aka I made it once 2 years ago and it was only half successful.’
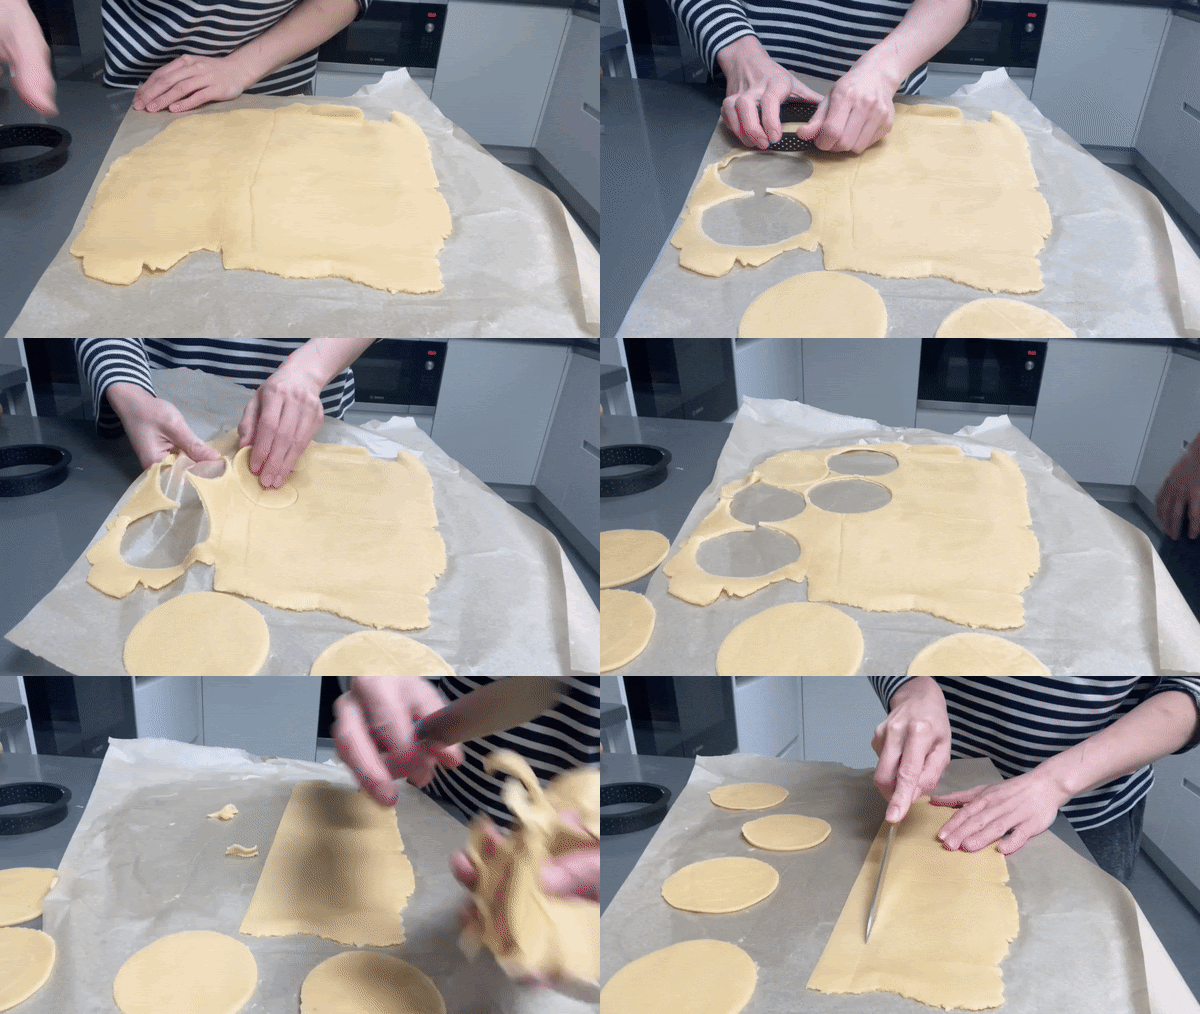
He went into the walk-in freezer and produced sheets of ultra thin rolled out sweet pastry. I had never seen pastry prepared like this - it was genius! Rather than cutting out circles and then lining a single piece, Chef Christian took a knife and cut perfect 2cm strips of pastry and then used one of the tart rings to cut perfectly sized circles. Then, using these two pieces, he masterfully placed them in the ring and gently fused them together… and BEHOLD: The perfect tart case appeared.
After we’d lined them all (me, not so masterfully) they took a snooze in the freezer for 20 minutes whilst the oven pre-heated. Just as we were about to load them in, I had a brainwave - ‘Chef’, I said, ‘What about the baking beans?!’, sure that I had saved us all from imminent doom. He looked at me for a moment and then, without replying, loaded all of the tart shells into the oven and shut the door. ‘You’ll see!’ he said.
And so I did. Not one of the tart cases shrank, nor did the bases billow. What magic was this?! And HOW?! I had lived in fear of shrinkage and I had always used baking beans. This was the first time I’d seen this technique and it blew my mind. Although I’ve still struggled with it (masterful I am not… yet), it opened my eyes to other ways to work with pastry for the best finish.
Let’s talk through the options.
The techniques
It’s worth mentioning first that not all tart shells are created equal! In the pastry world you’ve got two main types: Fluted and tart rings.
Fluted tins - popular for quiches, classic tarts - usually have a loose bottomed base.
Tart rings are usually solo operators with a flat edge and no base, meaning you effectively use the tray you’re baking on as the base of the tart. I’m using the 8cm x 2cm tart rings with perforated edges. I’m at my mum’s house and these are the ones she has (fancy)
The reason I want to clear this up is that different lining styles are appropriate for different tins. You’ve got three main options options:
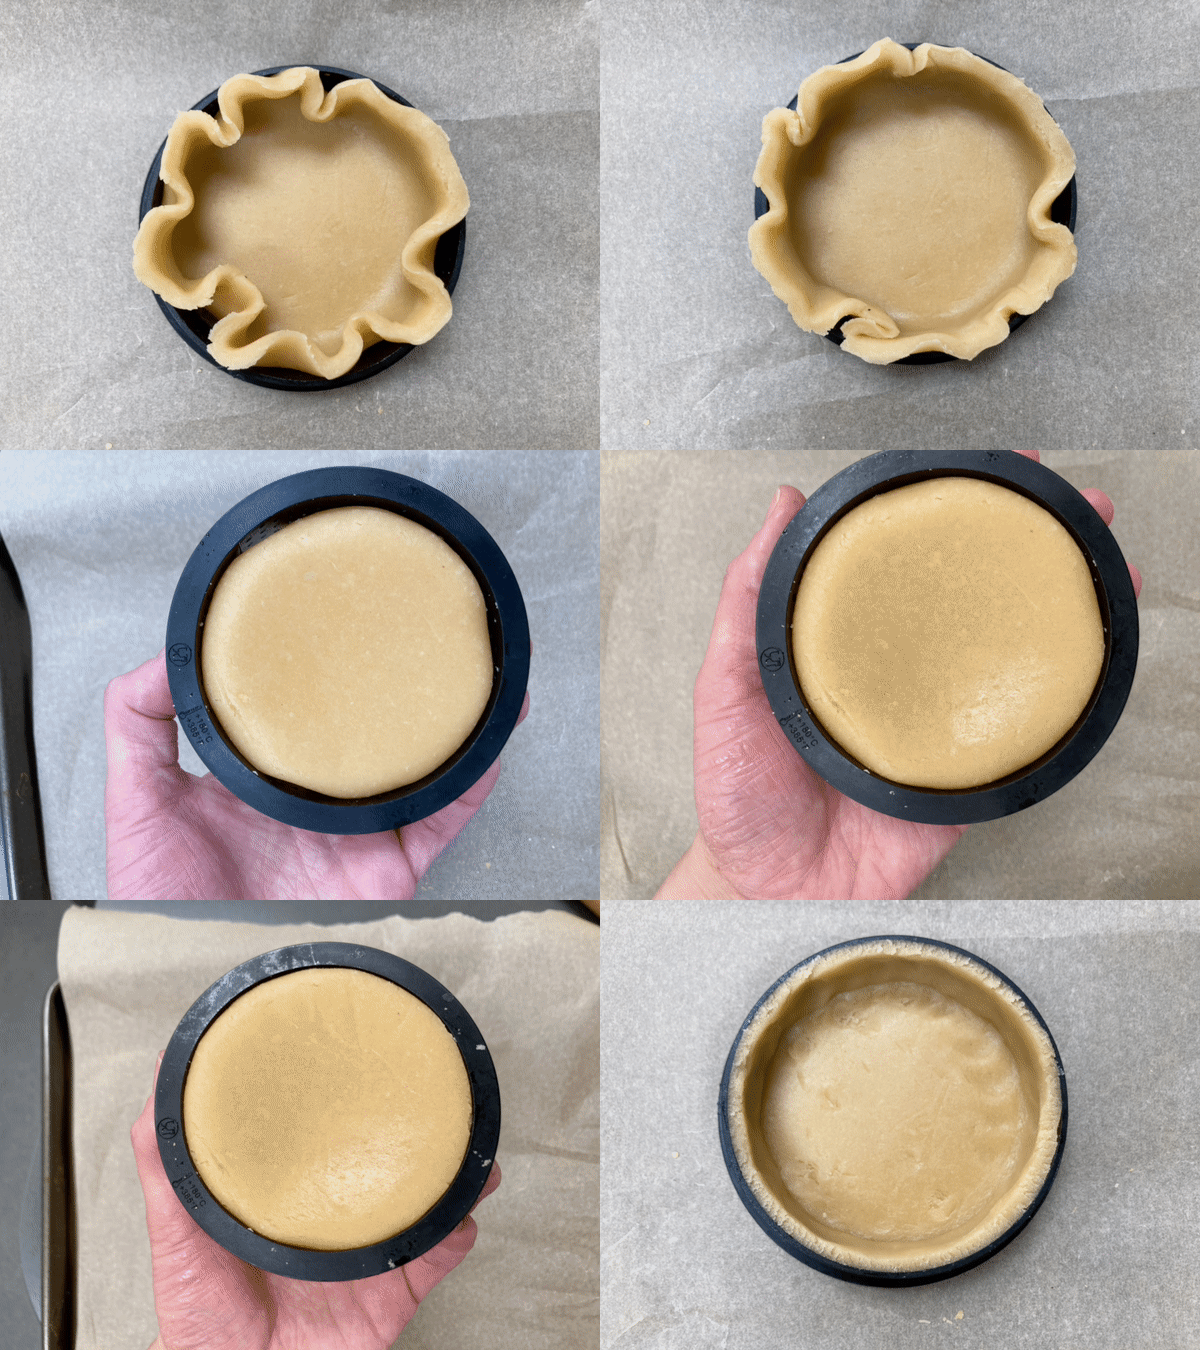
Method ‘A’ aka the classic: Take a single piece of pastry, slightly larger than your tin, and lay it across, gently pressing it into the edges of the case, checking often that it has gone all the way into the corners
Best for: Fluted tins / it does also work for tart rings but I think it’s a bit harder to nail
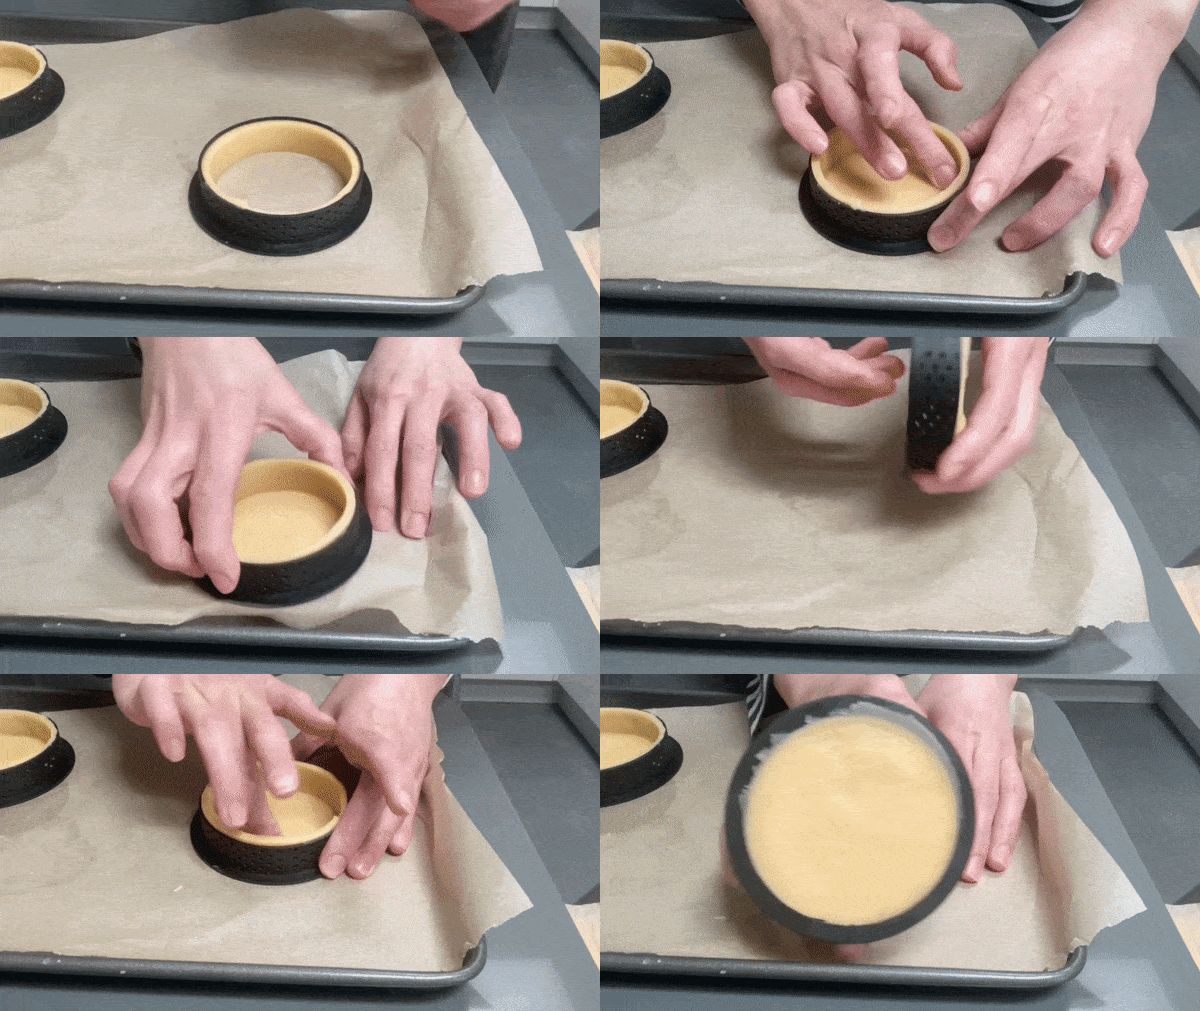
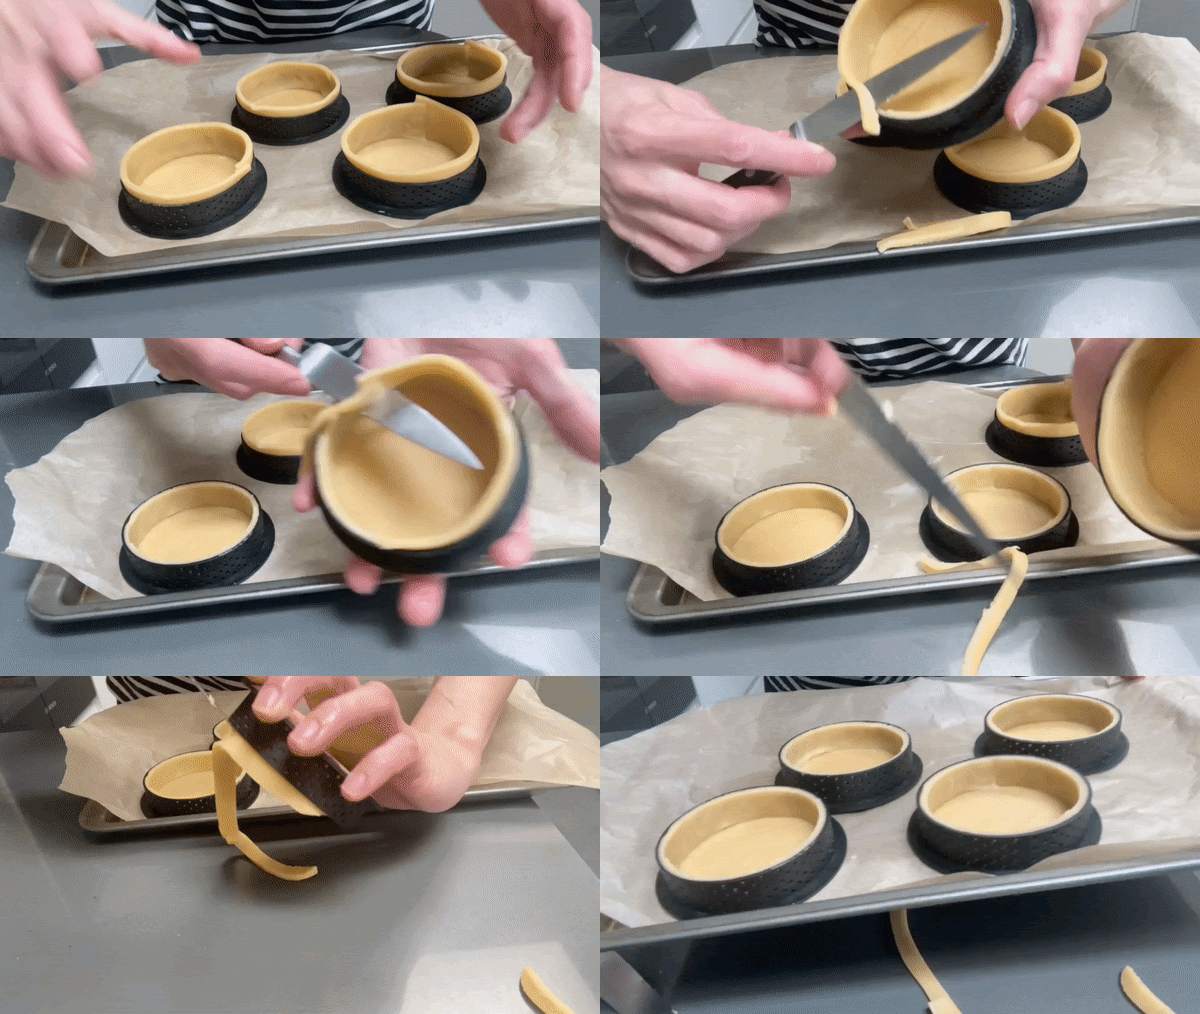
Method ‘B’ aka the ‘omg why didn’t I think of that sooner’: Roll out your dough and cut strips to the same width of your pastry ring. Use the pastry ring to cut bases to the correct size and fuse them together. You can either put the sides in first OR the base in first. I have done it both ways. I actually prefer to put the side in first then fuse it to the base as I think I get a better airtight seal this way
Best for: Tart rings. This would 100% not work with a fluted case
Method ‘C’ aka the ‘screw the rules’ method: Freeze your pastry block, grate it and then press the bits of grated pastry into the case, trying to work as evenly as possible. I want to credit the brilliant Tarunima for this method. If you haven’t seen her work before then go go go, she is a genius!
**I won’t be demonstrating this technique this week - staying traditional!**
Best for: Fluted tins
So, let’s go deeper into methods ‘A’ and ‘B’, shall we?
Baking beans
Baking beans are weights used to hold pastry in shape as it cooks. In the form of rice, coins (!), ceramic beads, or anything really, baking beans are supposed to prevent the base of a tart from rising up but - apparently - are also supposed to stop the sides of the tart case from collapsing inwards. Half way through blind baking, once the pastry has set, the weights are removed to allow the pastry to colour.
I’ve long relied on baking beans to hold the edges of my constantly shrinking pastry in place, forgetting that their real role is to stop the base rising up. But why does the base rise up? Well, as the butter melts and produces steam, the pastry sometimes puffs up as air tries to escape. Also, if there are any gaps in your lining, the air trapped here will expand and this will also make your pastry lift.
Although some chefs like to dock their pastry, I’ve not found this makes a huge difference. I think the main culprit for bases rising is air trapped underneath the pastry rather than the steam from the butter itself.
Baking blind without baking beans does feel a bit scary to be honest. But I’m not sure that fear is well placed. I lined some tart rings using and ran some tests. Here’s what I found.
With Baking Beans
I used scrunched up baking paper + rice for this
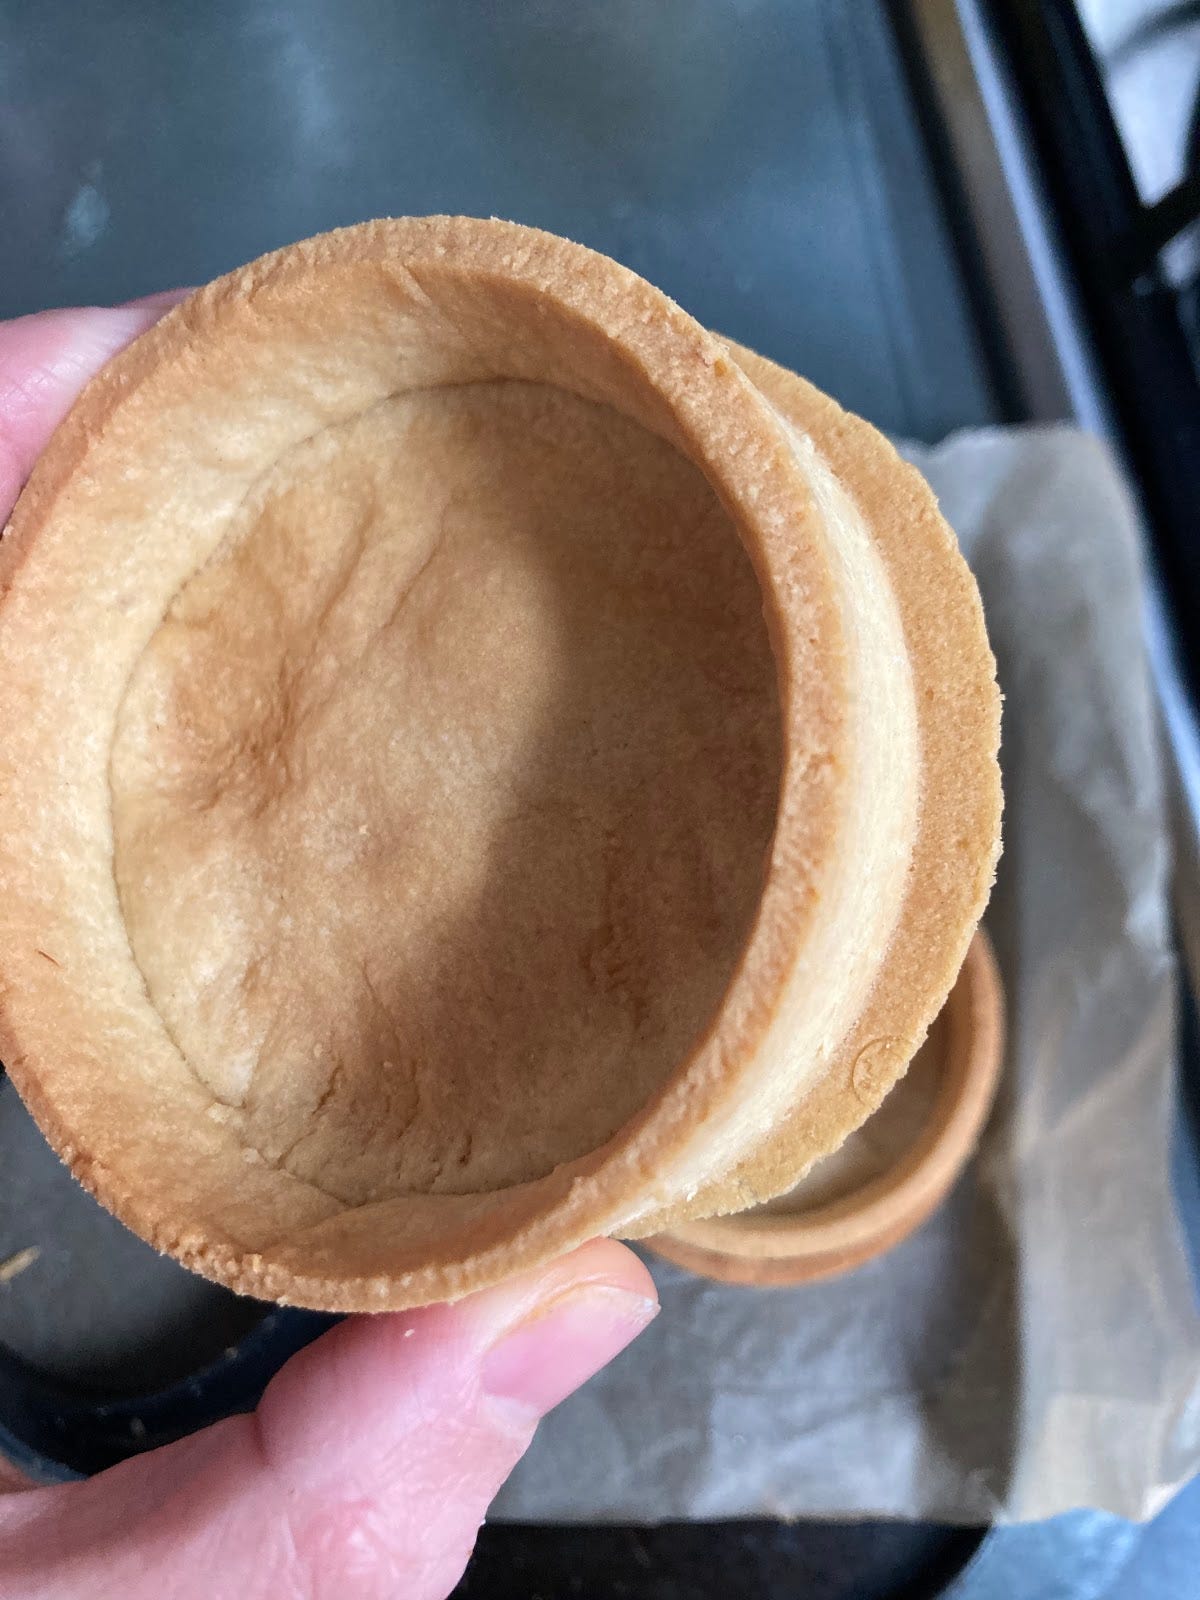
Although I tried to get the paper into the edges and used rice to compact it as much as possible, the final result was a slightly jagged inner ring and even my perfectly trimmed edges were pushed into jagged oblivion by the baking paper. The pastry had formed around the paper so although the base and sides baked well, I wasn’t totally happy with the final finish. I could probably have used a heatproof cling film instead, so the edges are smooth, but I didn’t have this on hand (who does?) to test. Oli in the comments suggests Stella Park’s foil method which sounds genius!
Without baking beans:
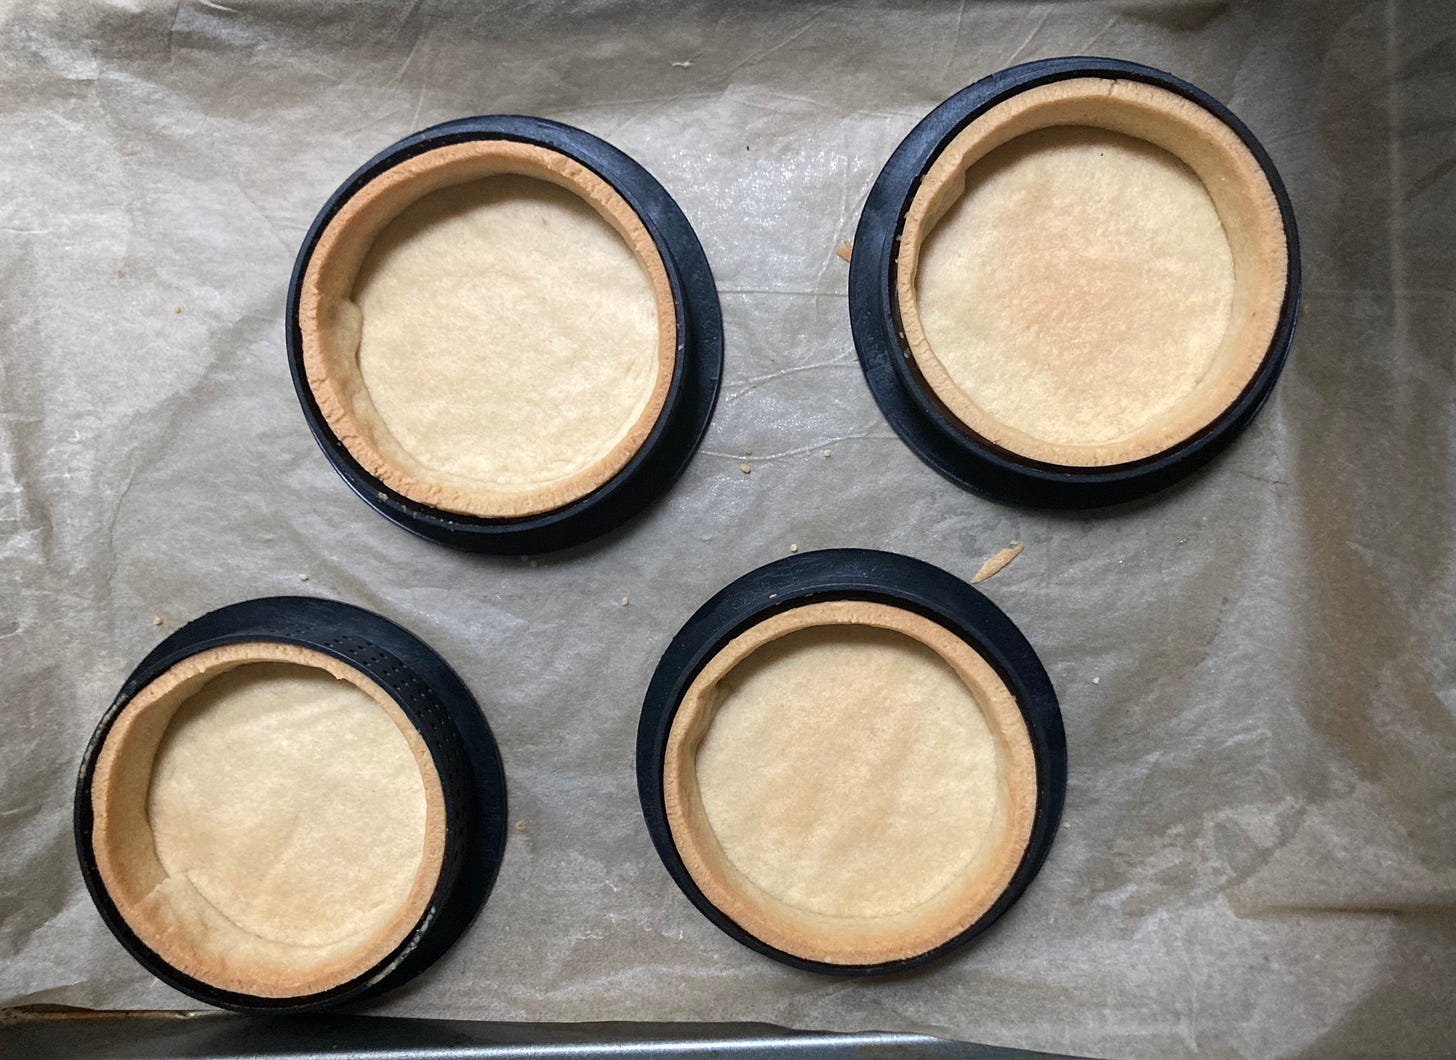
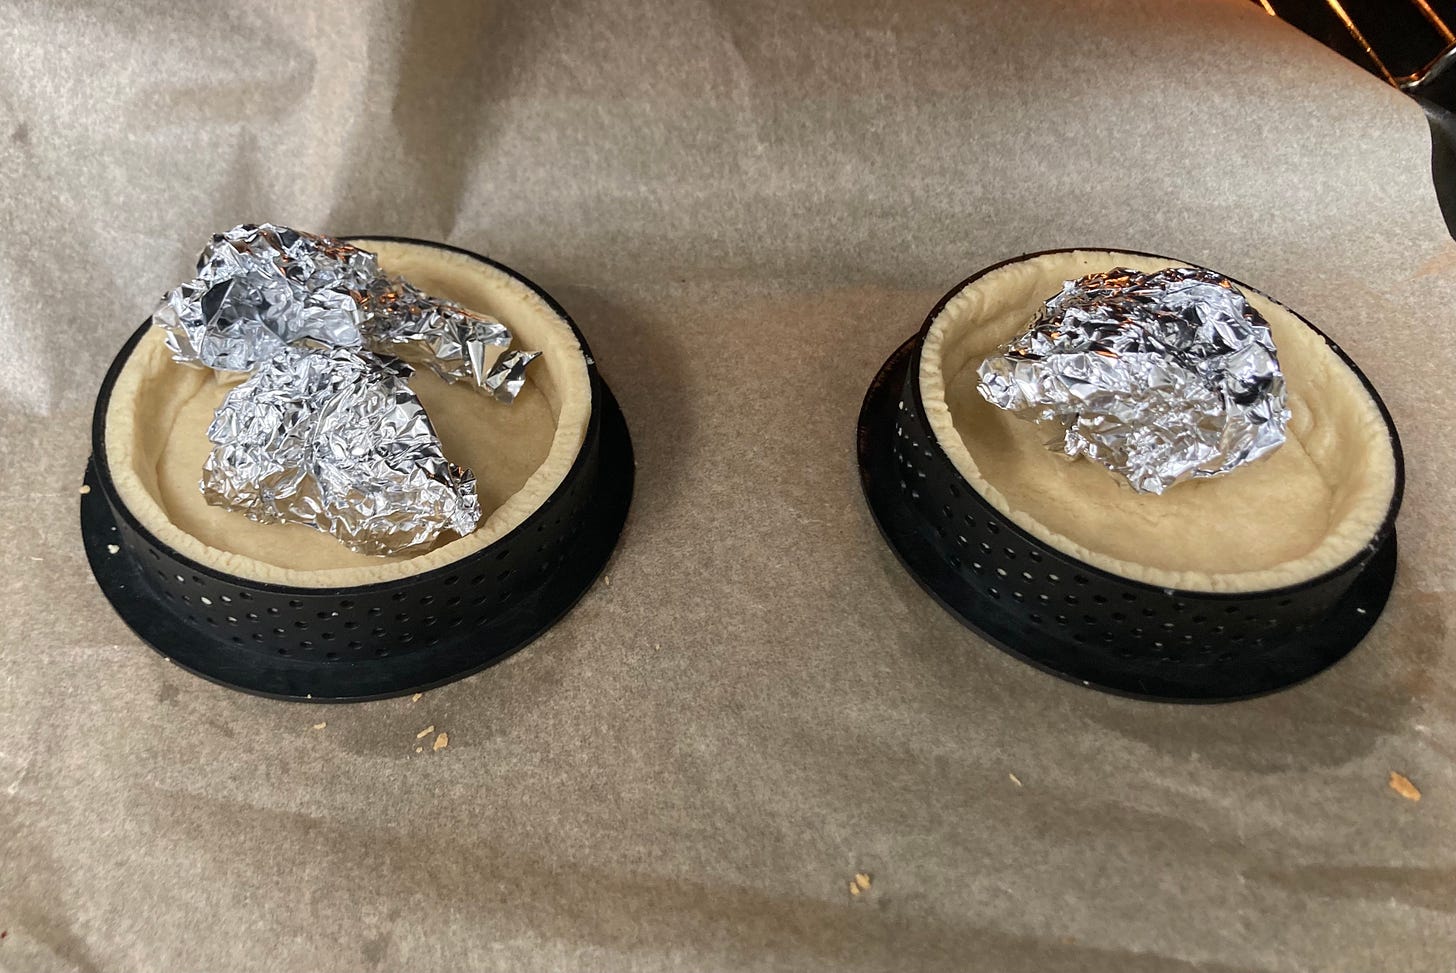
In general, there was hardly any movement. Absolutely no slippage on the sides but there was some billowing on the base. This was much worse for tarts lined with method ‘A’ than ‘B’. To counteract the rising (and because I chickened out), I popped a ball of foil into the middle of the pastry for the last 5 minutes of cooking and this was adequate to weigh things down in middle:
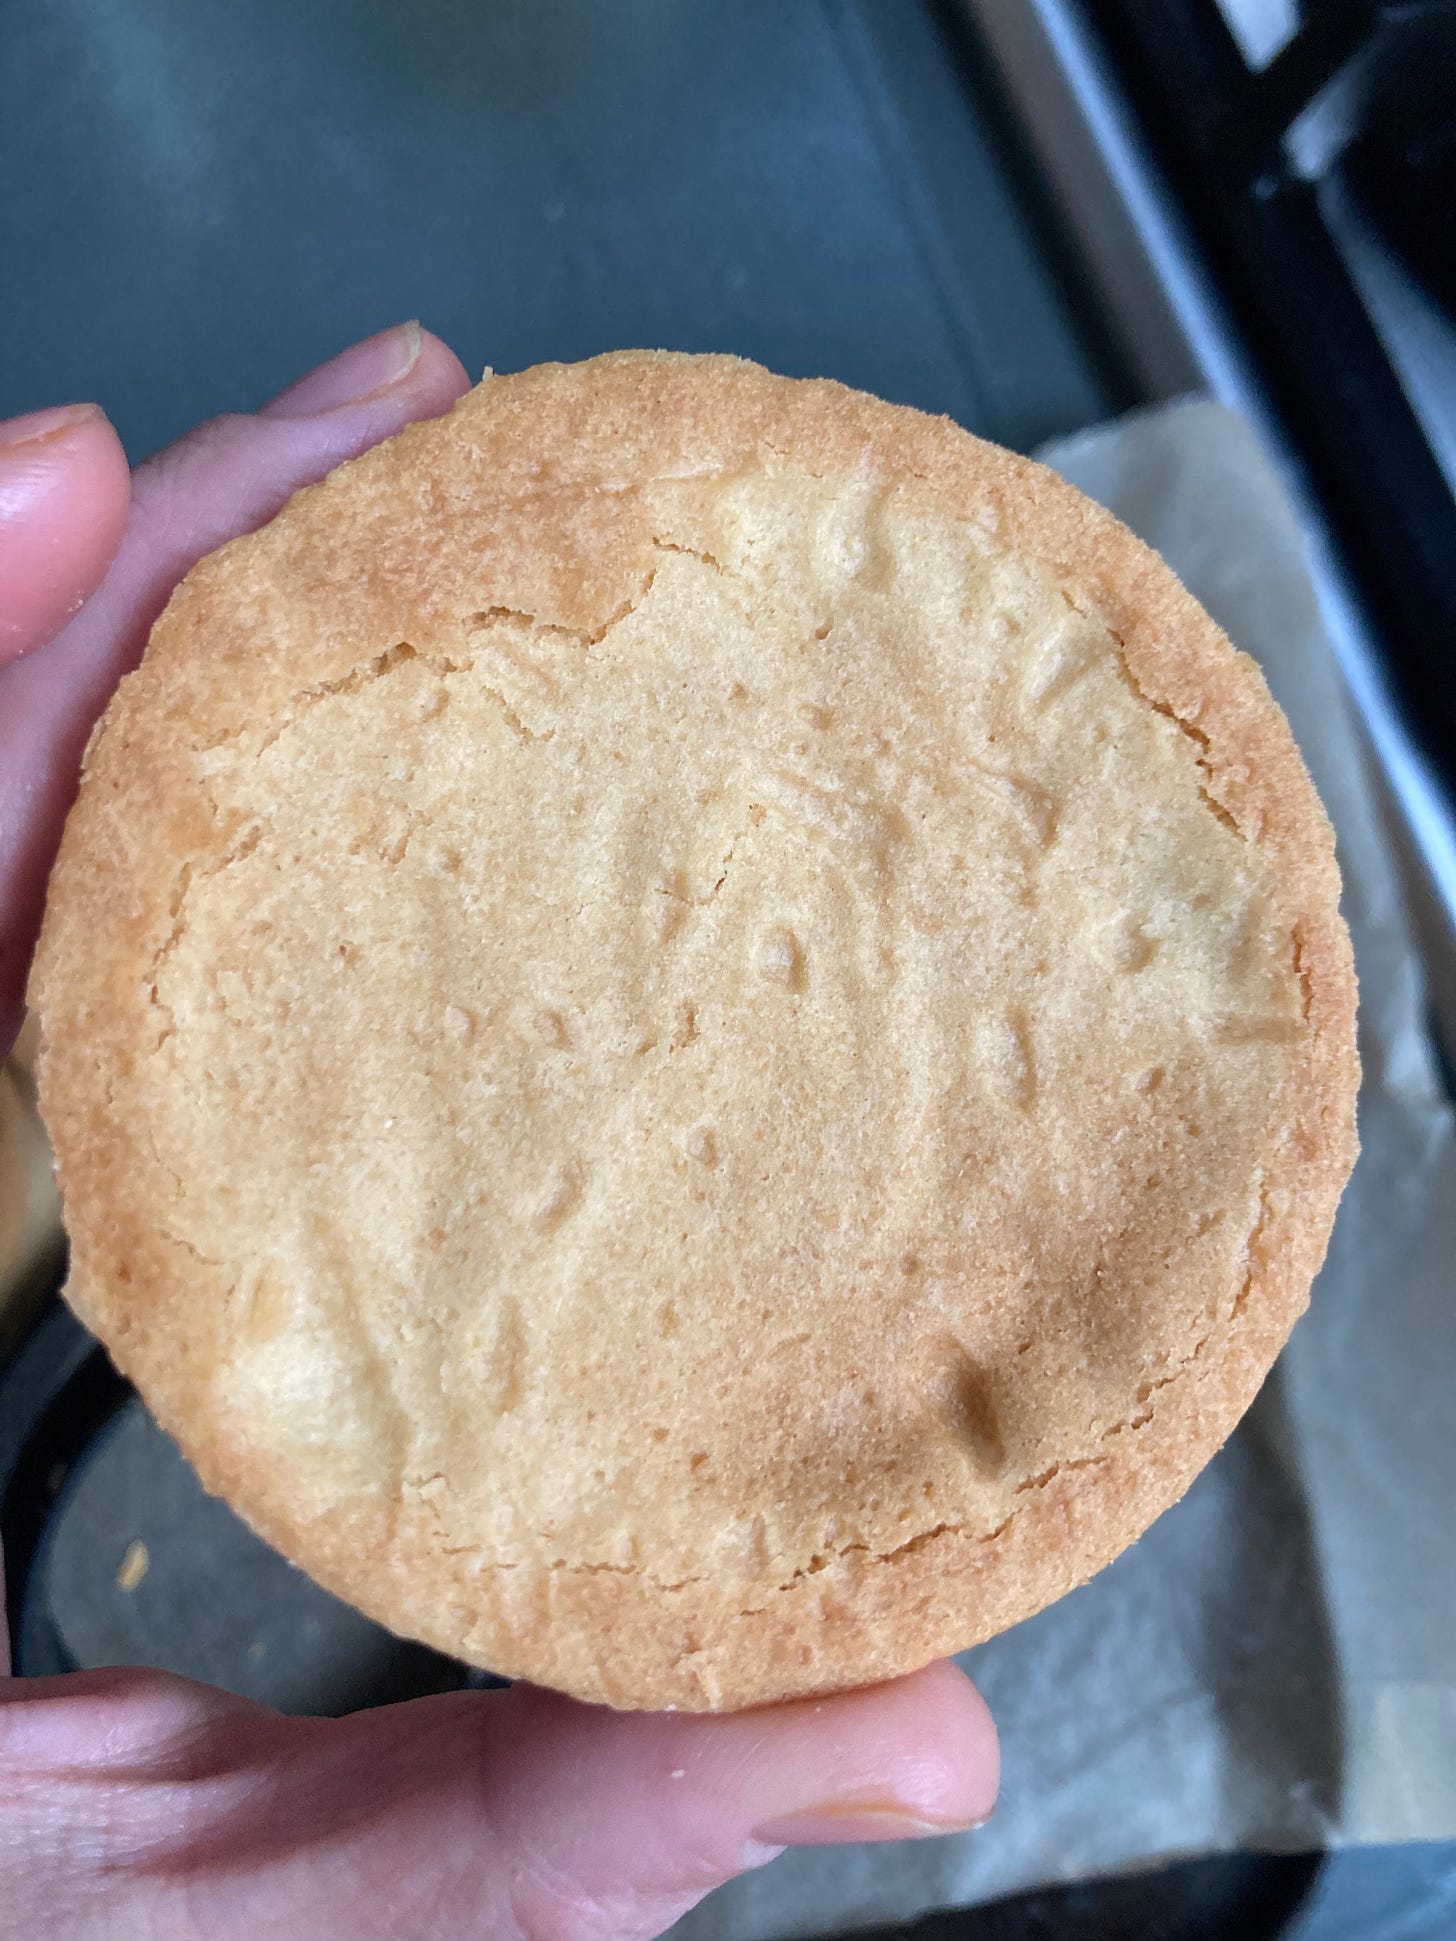
Although the shells domed very slightly, the only issue was having a slightly concave base with a few aesthetic cracks:
Observations:
For a start, I think that method ‘B’ really limits the trapped, expanding air during baking, especially if you put the sides in first and the base after. Although the slightly domed base is not perfect, it’s subtle enough not to bother me in the future. And if it means I don’t have to deal with stinky baking beans, then that’s good enough for me. It’s worth noting that for the most part, tarts lined in this method with the edge strip first didn’t rise up at all.
For larger tarts in the future, I think having something on hand in case the middle balloons up is sensible. Since there is such a larger gap between the edges of the tart, it is much less stable and more likely to billow.
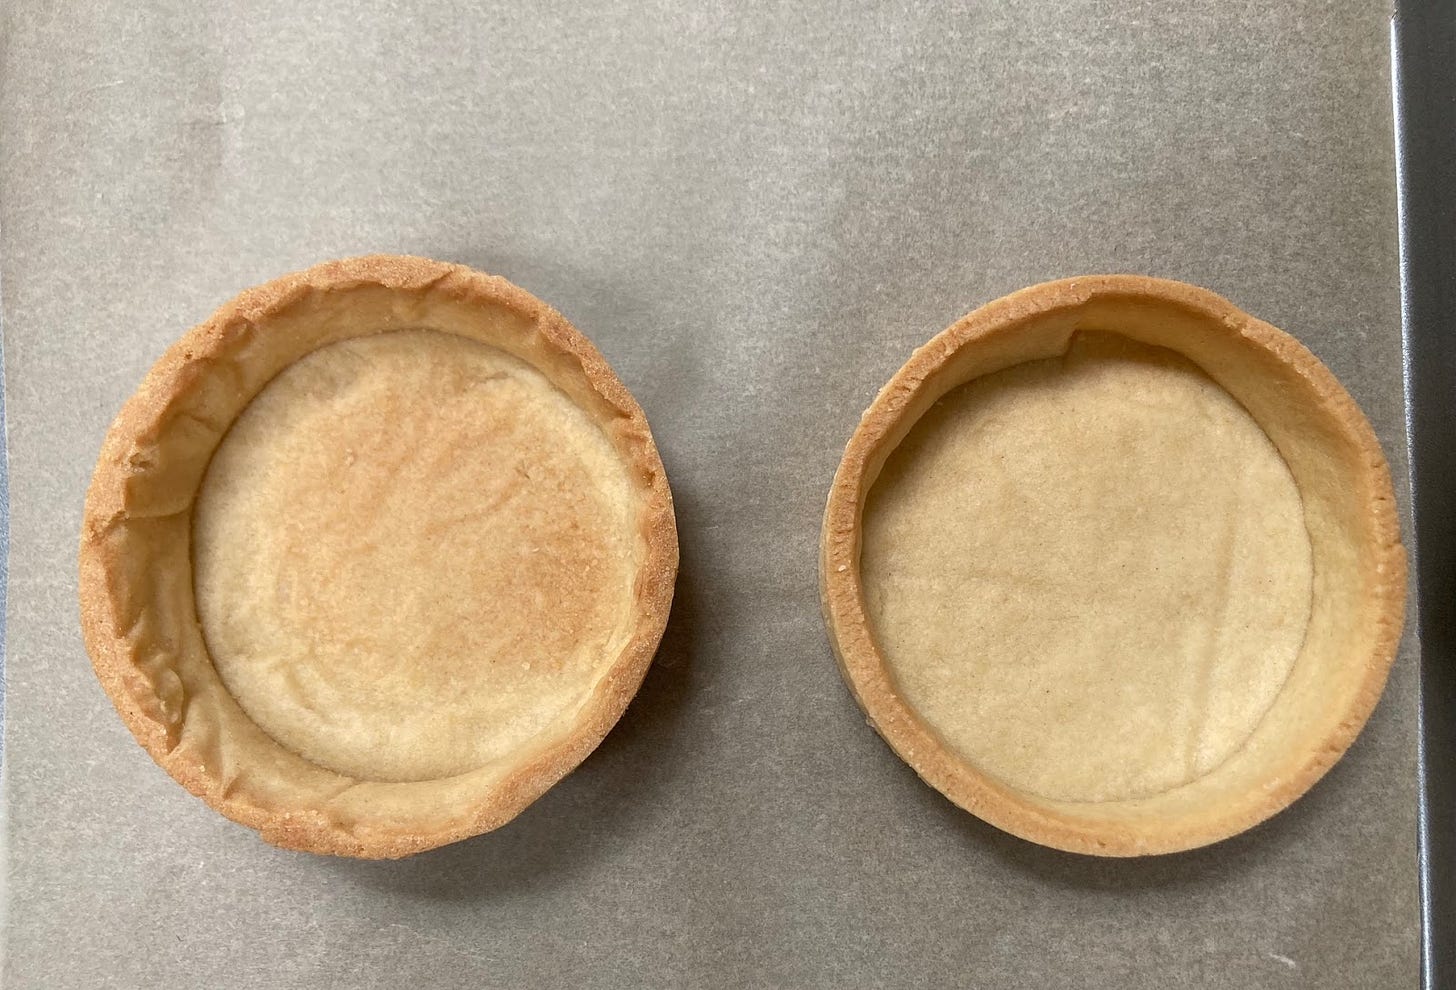
Final comparison picture of baking beans v no baking beans:
The reality is, if the edges of your pastry is going to shrink, a bunch of coins or rice ain’t gonna help you that much. When lining tarts in the future, I would definitely put something to weigh down the centre of the pastry for the first 7-8 mins but I wouldn’t bother trying to press the beans all the way into the edges. All that does is give you a slightly dodgy finish, in my opinion.
Does this mean you should ditch your baking beans? Not at all! BUT it’s really important that you distinguish what their role is in your kitchen and not treat them as a crutch. Having something to weight down the centre of your pastry is going to be important in many cases, but for mini tart cases/for a really stable pastry, you don’t have to pack things in like a nutter!
**please note that this section is discussing baking beans with sweet paste which! If you’re cooking a pie/flaky pastry/something with lumps of butter in, baking beans are likely essential**
Honestly, focusing on how to avoid the shrinking in the first place is a much better place to start. Shall we?
Getting to the bottom of shrinking
It happens to us all. Trust me. I have to say the exasperation around shrinking is REAL. I’ve even read one article that suggests to just ‘put less filling in’ to your tart to make up for the fact that the edges are going to shrink. Although I appreciate this is very much a last resort type move, WE CAN DO BETTER! That sort of defeatist attitude is not allowed around here at KP. No way.
Trying to understand why pastry shrinks will help us stop it from happening in the future.
Here are a few reasons why:
Bad or difficult formulation: Sometimes it really is as simple as this. The recipe, ingredients and methods are always at the heart of your baked goods. Sometimes recipes just have an inappropriate amount of liquid or butter in and by the time it gets to the oven it’s already hopeless. The pastry will likely shrink whatever you do. So, please always be aware that you might have been using a bad or super advanced formula in the past and it AINT ALWAYS YOUR FAULT!
The elastic factor: Ok, little recap on the sciency bit. Firstly, your pastry contains flour which means it contains gluten. Gluten, as you know, is the chain of proteins that form between glutenin and gliadin once flour is hydrated. Gluten is developed naturally (as flour hydrates) but is also developed as a dough is worked. The result? A dough becomes both stretchy and elastic. When you make sweet pastry, you really want to limit the gluten formation as much as possible. Although elasticity is a favourable characteristic in pizza dough, it’s really not something we’re after for pastry.
Of course, some gluten will be formed whilst making the sweet pastry and ofc, some will develop as we roll it out to line a case. So, we need to perform some preventative measures to make sure it doesn’t spring back during the bake (ie. shrinks!)
First and foremost we need to adequately rest/chill our dough. First rest period will be immediately after you’ve made the dough. The second rest period will be once you’ve rolled out your pastry into the 2-3mm sheet you want it to be (and btw you need to roll with a deft touch if possible to make sure you’re not stretching the dough in strange directions) and you need to let it firm up before it’s safe to move it. The third rest period will be after you’ve lined your tart. At a minimum, the first period needs to be about an hour (because the butter will be soft) and the second should be around 10 mins, just to let things firm up again. And the last? Around 30 mins minimum. You can also bake straight from the fridge/freezer if you choose to store your dough in this wayDodgy lining - Guys, I’m pretty sure this is a very common reason for all my personal lining troubles. During baking, the butter in the pastry will melt before the crumb has a chance to set which means the pastry is in a bit of a sensitive situation at the beginning so you have to ensure that there is nowhere for the pastry to shrink to! If there are any gaps or holes, the pastry will move to fill it in whilst in its soft state. It’s as simple as that.
There’s a few things to be aware of here: Firstly, the more you squish, squash and pull your pastry, the higher the chances that it will shrink later - as well as putting pressure on the dough, you’re essentially leaving unsupported gaps for that soft oven melted pastry to go into. Remember, your pastry has a memory (gluten=elastic!) so if you don’t treat it nicely from the beginning, it’ll likely be payback time when it comes to baking.
Secondly, you need to carefully check your lining as you go. It’s easier to do with tart rings as you’ll be able to see any gaps by simply lifting the ring up and looking at the base. You’ll be able to see that the pastry isn’t filling the corners. It’s those pesky corners that will give your pastry room to shrink so don’t give it even a millimetre to do so!
To trim or not to trim?
Once you’ve managed to get your pastry in the tart case, there’s a good chance you’ll have overhang. There are a few options here:
Trim it now
Trim it later, but before baking
Leave it, bake it and THEN trim it after baking
Options 1 and 2 are quite similar. I normally trim the cases immediately unless the kitchen has gotten too warm in which case, I’ll wait til just before baking when everything has firmed up. You don’t want to drag a knife through warm pastry as it has the potential to upset the whole thing and ruin your lining. When you are baking with tart rings, it’s good to check if there’s anything trapped on the base too. Here’s an example of when there’s overhang on the base:
Option 3 is something that I used to do a lot but I’ve relegated it to my absolute last resort now. I used to think that the additional overhang of pastry was a sort of insurance policy against shrinkage, but now I realise it hurts me more than it helps! For the most part, I find that baking with an overhang actually pulls my pastry out of the tart ring and I’m left with an out of shape pastry shell.
I tested this out for you:
You can see in this large tart that it has actually broken off in places where the pastry has become too heavy and melted which has pulled the pastry away from the ring giving me an uneven slightly angled tart - this is a case of hindering more than helping! By the way, this tart was baked with no baking beans!
The other issue with leaving an overhang is the baked pastry trimming. It can be quite a scary task to trim it after baking as things can sometimes get disastrous. Since the pastry has set at different angles and - sometimes - in strange formation, so when you go to trim it, the pastry might break off in random bits and leave jagged edges, or little holes. I’ve certainly experienced that and it is heartbreaking:
So although it might feel safer, I’m now officially of the opinion that you’re potentially creating problems for later.
*If you must leave an overhang and trim once baked* then please make sure your knife is ultra sharp! OR you can use a microplane. But be gentle. Please. Be. Gentle.
How dark to bake
Depending on your final plans for the tart, you need to watch how much to bake your tart shells during blind baking. If you are not going to cook the tart shell again, you need to blind bake your shells until you have reached the perfect golden colour.
If you are going to cook something like custard tart which has a relatively low baking temp (sub 130c, lets say) then you can also cook your pastry to the perfect golden colour. Low temperatures aren’t going to colour your pastry anymore and won’t do much cooking either so it’s best to get it exactly where you want it to be.
If you are baking something like frangipane, or any sort of filling that needs a high temperature/fairly long baking time, then you should stop your blind bake whilst the pastry is still pale otherwise your pastry may end up too dark after its second round in the oven. It’s worth checking how long the next baking stage is, and at what temp, so you can make an informed decision about the colour.
The deal with re roll
Once you’ve cut your pastry shapes out, you’re bound to be left with some random bits of dough. So, how many times can you squish this all back together and re-use?
Although it would be a sin to even think about re-rolling pastry in some kitchens, I happily do it 2-3 times at home. You need to be prepared that the pastry, on roll 3, is likely to be getting a bit tough (as gluten forms) but if lined thinly and baked well, you wouldn’t notice too much. In a professional environment I might cap it at two times, but at home I’ll usually roll until it's totally exhausted.
If you don’t fancy re-roll, then bake it off as crumbs and use it to decorate future tarts/pastries/eat it on ice cream!
The formulation and mixing
Today I’m going to share a really reliable and classic sweet pastry recipe with you. I know there are so many recipes out there but this one is a keeper. This was adapted from my pastry school curriculum. Although I only attended the French Culinary Institute aka the International Culinary Centre for a couple of months (more on that another time!), their recipes have often been a great base for adaptation for me. Tried and tested!
You might come across recipes that use all egg yolks or have a higher % of butter. These are so delicious! BUT they aren’t quite as stable. This recipe is a really reliable, easy to roll and use pastry that uses a whole egg (Is it just me or are you sick of your egg white stash in the freezer? I’ll do my best to fix that soon!), which adds both flavour and moisture. It has a relatively low butter content compared to other sweet pastries which means it is very stable to work with. Once you’ve got this pastry nailed you can start exploring other formulations!
The ground almond stabilises by adding body without adding gluten. You can swap the quantity for flour but I think it makes a really lovely addition to the dough. Icing sugar is essential because it absorbs so quickly into the butter without having to introduce too much air. Caster sugar would never really do the trick here as you’d have to spend so long dissolving it into the butter that you’d aerate the pastry too much. For the love of pastry Gods, please please please sift your icing sugar or you’ll get into trouble way too quickly.
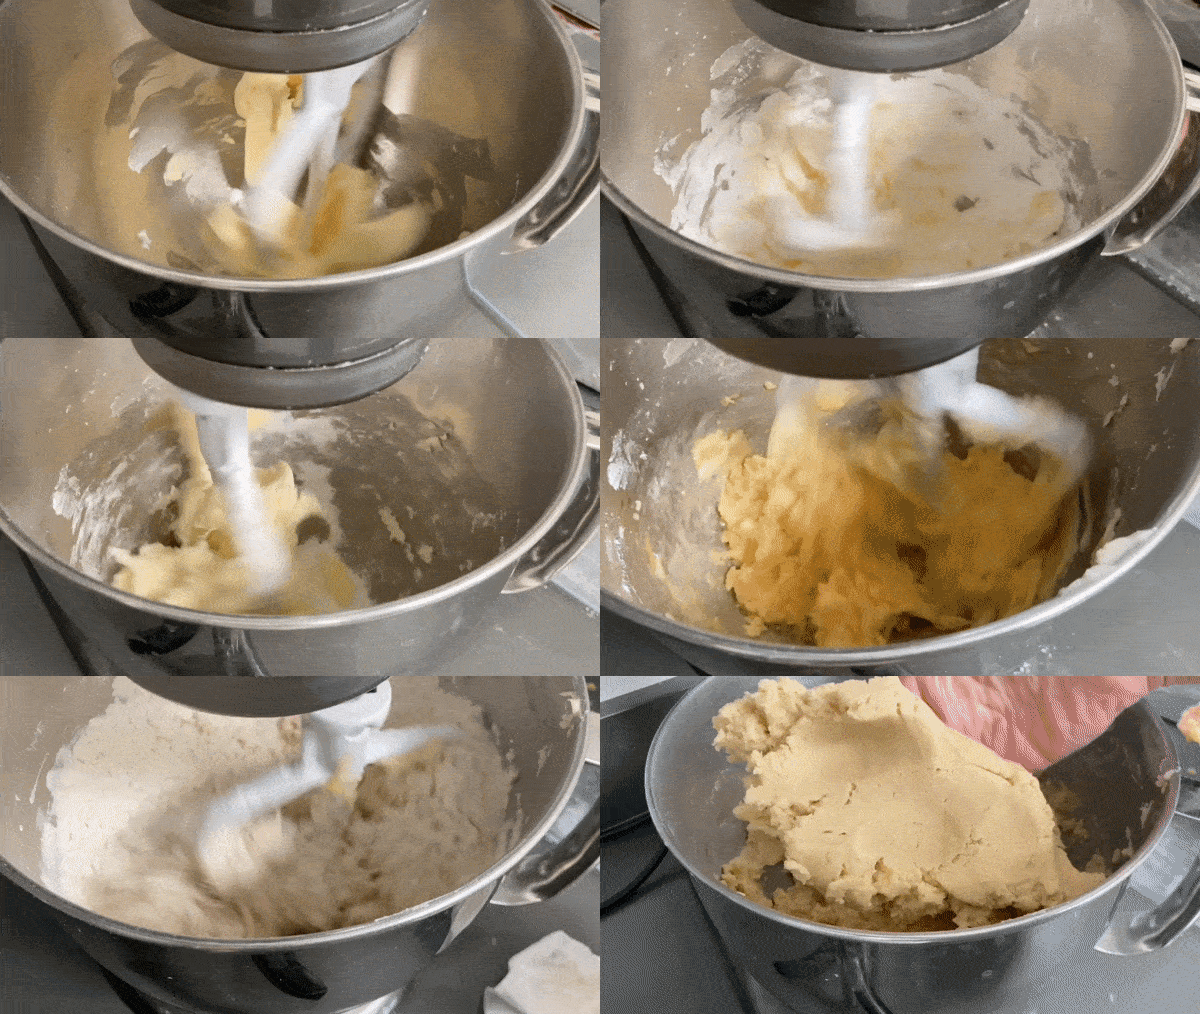
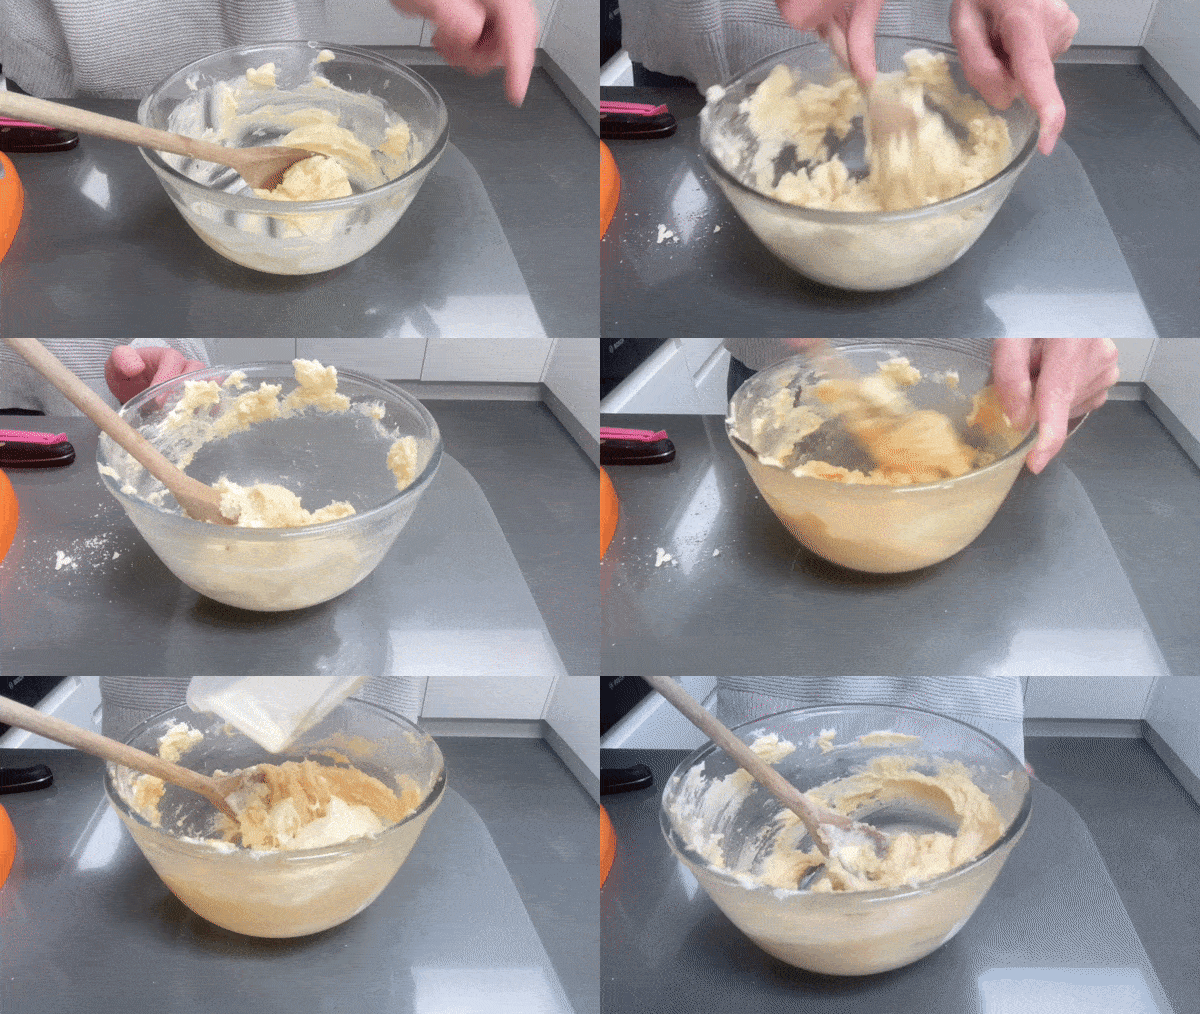
Although there are several ways to mix sweet pastry, today we are going to cream butter/sugar, add the eggs and then finish off by stirring in the dries. This is a really simple and stable way to mix your pastry. The mixing technique is fairly important as you don’t want to overwork the dough. You also need to remember that you are not trying to aerate the mixture.
Aerating the mixture will make it much harder to work with so you really only need to mix until it has come together. When you add the eggs, it totally splits apart and looks horrendous but it doesn’t matter here - it all comes back together once you add the dries.
Our star, rhubarb!
Rhubarb is like a paintbrush for pastry chefs. It is a beautiful colour and you can cut it to all sorts of shapes. I often see raw rhubarb cut to beautiful geometric shapes and then baked. During the bake, the rhubarb shrinks and doesn’t look as good so I’ve taken inspiration this week to show you how to get perfectly pink lines.
I found that the rhubarb available now isn’t quite as pink it was at the beginning of the season. You really need the pinkest stalks possible for the colour to permeate the whole of the stalks overnight. I was worried that the rhubarb was going to look a bit crap but I actually ended up with a mixture of light pink and dark pink stalks which was quite fun as I was able to make striped/ombre style patterns. This was a great lesson not to judge fruit in its natural form and to realise that it can be beautiful in a number of ways, even if it isn’t the pinkest of the bunch.
A note on wet fillings for the future
You might have seen that some recipes call for a blind baked tart to be brushed with egg wash and then return to the oven to create a protective seal. Some chefs even do this 2-3 times. This is an effort to create a liquid tight barrier between the wet filling and the pastry shell. This is sensible for something like custard tart as the mixture is thin and would immediately seep into the biscuity pastry. Unfortunately, the egg wash/sealing rule is not one answer fits all. If you are planning to keep something in for 3 days (like a cheesecake or wet filling) then it could be advisable to brush the cooked tart case with melted chocolate to create another sort of delicious seal. But again, you’re good for a few days.
At Ottolenghi, we used to gently squeeze our filled tarts to see if they had gone soft! If they passed the squish test, they’d go back for sale. If they didn’t? Staff treats! Although the soft pastry isn’t ideal, its still delicious if a little imperfect.
Regarding the roll out
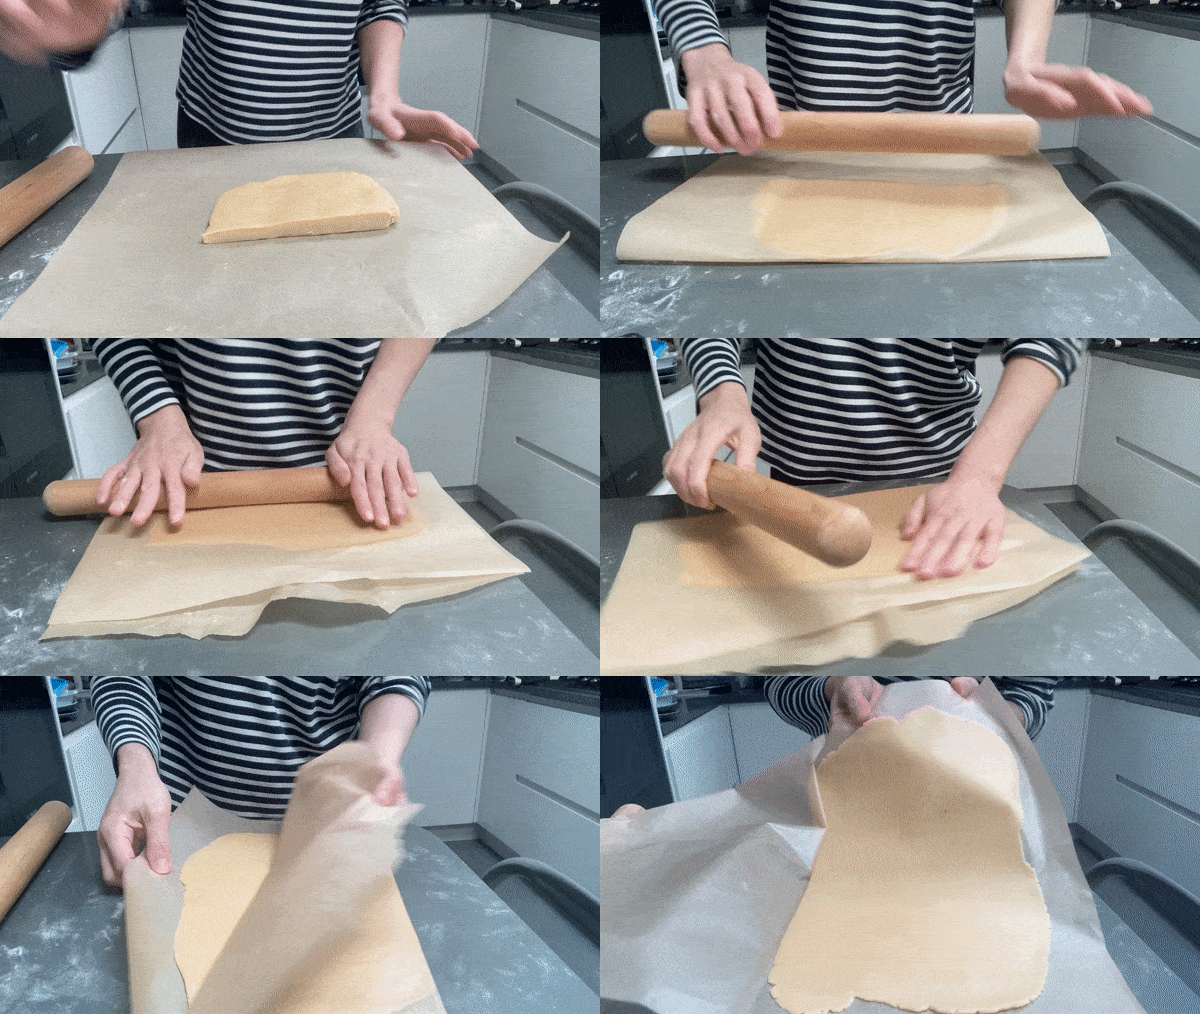
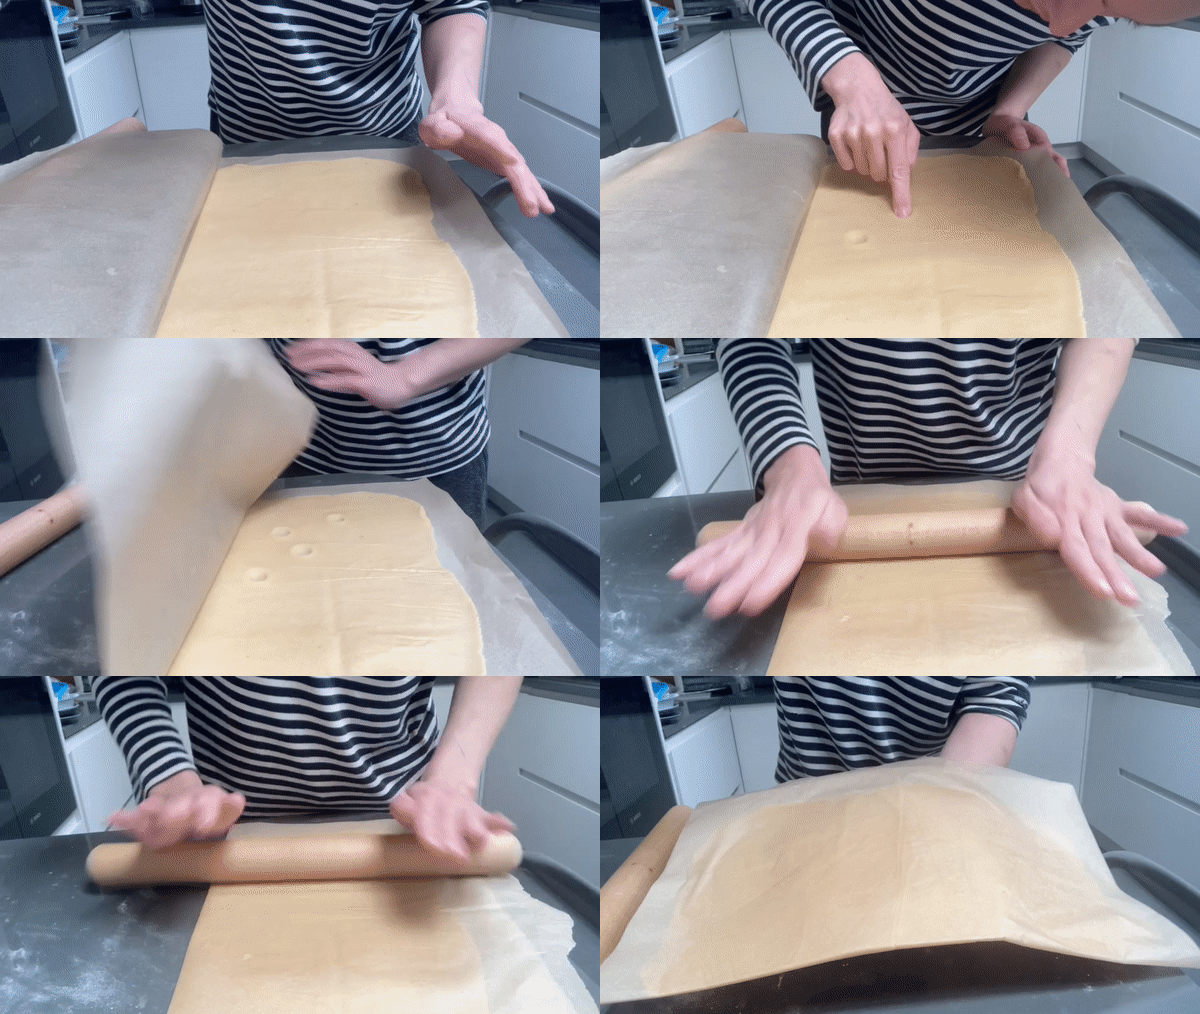
I always ALWAYS roll out my pastry between two sheets of paper. Doing this means you can avoid adding extra flour into your pastry and it is much much tidier. It also means that when you put your pastry back into the fridge to rest, it is protected from the dry air of the fridge or freezer. I highly recommend it.
A final note
Remember, everything in pastry takes practice. You don’t need to get it perfect right away. I’ve made averagely lined tarts for years and some days I just have a bad day! It’s frustrating. But as with anything… practice and all shall come. You’ve got this!
Rhubarb, white chocolate and miso tarts
This is such an adaptable recipe. You could forgo the fancy rhubarb and simply spread compote in the base of the tart shell and cover with frangipane (Classic bakewell tart style), or swap out the rhubarb for any jam you’ve got lying about. If you don’t fancy miso then just leave it out!
Your new fave sweet pastry
Makes approx 8 x 8cm tarts (or more with re-roll)
90g icing sugar, sifted (actually do this!!! It is essential there are no lumps. Don’t try and skip this, even though it’s tempting I know)
90g butter
1 egg (50g)
30g almond meal
230g plain flour
1g salt (nice pinch!)
White chocolate & miso frangipane
This makes way more than you need but it’s the smallest quantity you can make with one egg! Sorry about that. You can freeze this/make a larger tart/make other things with leftovers. IF you want to divide an egg in half, you can
If desired, omit the miso and put a bigger pinch of salt in there if you prefer!
105g soft butter
30g sweet white miso
15g caster sugar
1 egg
100g almonds
30g plain flour
2g salt (optional - I like the extra kick this gives but taste before you add!)
100g white chocolate
+ 30 - 50g white chocolate finely chopped to sprinkle on the tart
Rhubarb compote
This makes more than you need but you can freeze it, or add it to yoghurt for brekkie. You could just use chopped up poached rhubarb inside the tart but I really like the texture/flavour of a compote. Up to you.
200g rhubarb
50g sugar
30g water
Fancy rhubarb strips
I’ve been watching the brilliant people at Brawn making a stunning rhubarb tart, as well as my friend Marie (A TART QUEEN) getting in on the rhubarb action too. I decided to figure out how to make this fancy rhubarb too! And now I share that technique with you! It’s such a fancy finish!
200g rhubarb, cleaned but whole (cut the ends off)
30g sugar
Enough water to cover, depending on what baking tray you use
Method - Sweet pastry
Cube your butter (cold is fine, using soft butter can lead to over mixing or accidental whipping so best to start with cold!) and mix with sifted icing sugar using the paddle attachment until well combined on a low speed. It does NOT have to be creamed! You just want to check there’s no lumps of butter or sugar and it is homogenous
Scrape down the sides of the bowl and add the egg. It will break up and look gross and split but don’t worry!!! Just scrape down the sides of the bowl and mix it in as best you can. Again, just use a low speed
Mix the dries together - flour, almonds and salt - then pour into the mixer and mix on a low speed until it comes together. That’s it!
Take it out and pat it into a flat shape and wrap in clingfilm
Chill for an hour in the fridge (or longer)
Rolling out the dough
Roll out the dough between two sheets of paper to around 2-3mm thickness. Once you have got an even dough (hold the paper up to the light to check for any thick areas!), check the thickness by pressing with your finger into the dough and seeing how deep it is! You can then roll over the little press finger mark before chilling
The thinner you roll it, the crisper your final product will be. But the thinner you go, the harder it is to handle. I would say 2mm is the thinnest
Chill the rolled out dough on a flat tray for 20 minutes to firm up
Lining the tarts
First, pick your method! Remember, the goal is to ensure there’s absolutely nowhere for that pastry to slide when you line it so try both methods out. Remember, you can re roll the dough and start again if you need to so don’t worry!
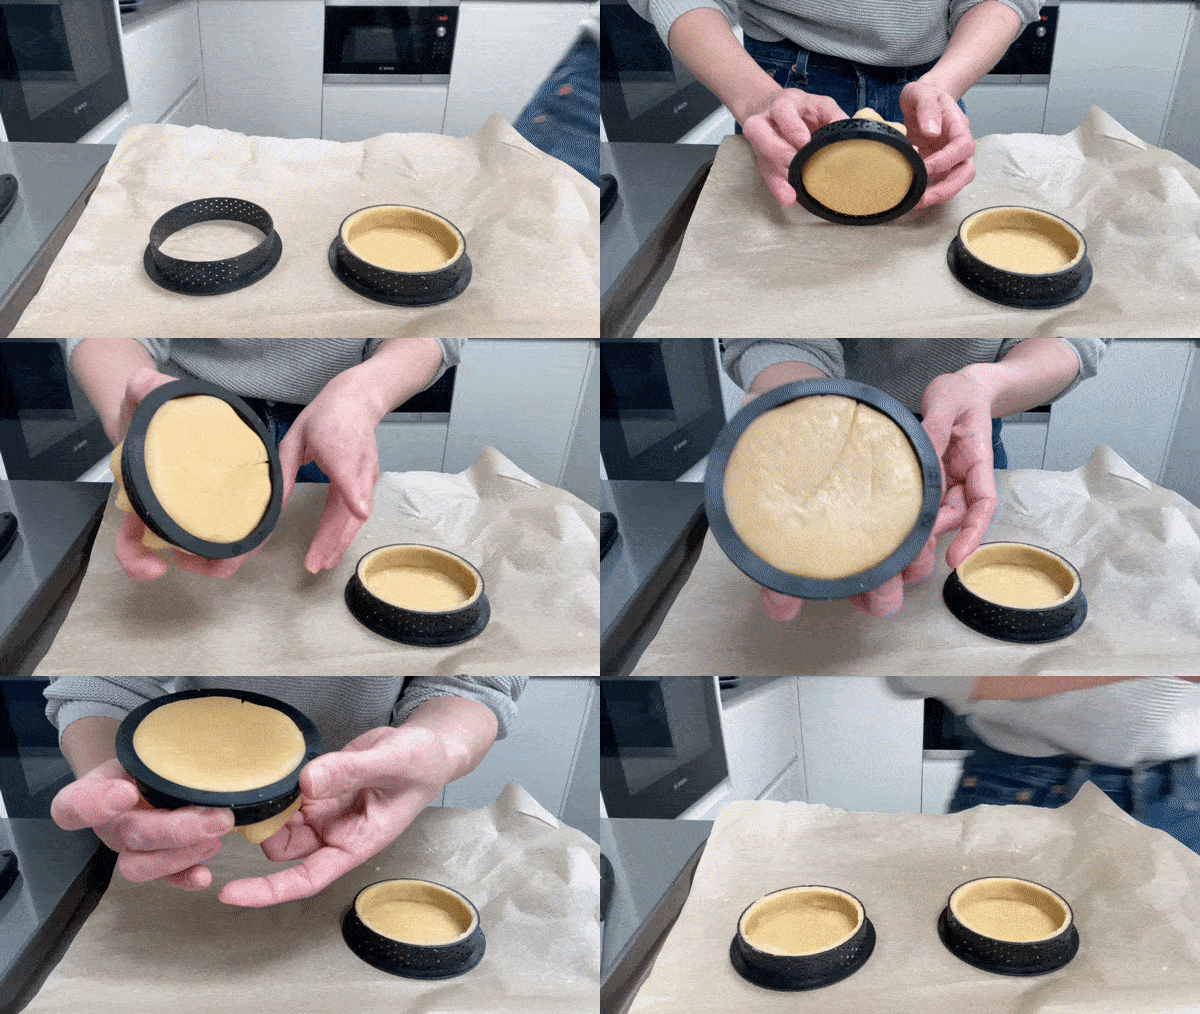
For A: Cut circles about 1.5cm wider than your tart ring. Place the dough carefully inside the tart ring, lightly rouching the edges to get it all in. Start pressing it into the edges as much as possible. You can use the overhang to your advantage by lifting the pastry then placing it back down to really get into the corners. Check your work as you go by turning the tart case upside down and seeing if the dough is at the edges.
If your tart dough is feeling a bit soft then don’t turn it upside down as it might break, which is so sad. Pop it in the freezer for 2 mins and then continue. Remember, the freezer is your friend!
Continue to press the tart pastry in until you have got pastry all the way to the edges - keep checking the base to see where you’re at! If the pastry is still fairly cold/firm, trim it with a sharp knife. If it has gone a bit soft (v normal) then wait to trim once it has chilled. You don’t want to accidentally drag the knife through and ruin all your hard work
Here’s a demonstration on a larger tart case so you can see the ‘lift’ and ‘press’ action better. You’ll notice I trim the really heavy overhang with scissors before flipping it over - physics dictated a disaster would happen if I didn’t do this. Its kind of scary flipping a big tart btw so just warning you!
For B: Cut strips the width of your tart ring (mine are 2cm) and use your tart ring - or an equivalent cutter - to cut circles. A ruler can be super helpful here.
If your dough has become quite soft during this cutting process, return to the fridge for 10-15 mins or the freezer for 5 mins. As the shape has been perfectly cut, you don’t want to pull on it whilst it is soft and accidentally stretch it out of shape. Once the dough is CHILLED but pliable (ie won’t crack if you lift it up - and if it has become too hard in the fridge/freezer, move your hands over the paper to warm it slightly), place an edge strip into your tart ring, using a knife to trim it to the right length, and ensuring it goes right to the base of the ring - lift it upside down to check!
Once these are in place, place the pastry circle on the tray and press the ring down onto it and then use your fingertips to seal it together.
Check the base once again to see it is all together and! If the pastry is still firm enough, trim with a knife, otherwise wait until after it has rested. Try and keep the knife flat and not at an angle here if possible
Put your lined tarts in the fridge to rest for 20-30 mins
Pre-heat oven to 170c fan
Put your tarts into the oven. If you want to weigh down the base then a little ball of foil/something heavy (baking beans would work!) in the centre to stop the base from billowing. You don’t need to press your weights all the way to the edges in any case. I usually put my cases in without any beans and then check to see if it needs weights
Bake for approx 15 mins until pale golden. Your oven might take longer so keep an eye. We are baking these cases again with frangipane in so don’t take things too golden as it will get darker in the second bake but you must make sure it is cooked through!
Allow to cool. Baked cases can be stored in an airtight container for 5 days no problem
Frangipane method
Beat together butter, white miso paste and caster sugar until combined. You don’t need to aerate but make sure there are no lumps of butter
Add in your egg and mix until it is all together. Don’t worry if it looks a bit split as it’ll come back together and bake beautifully
Stir through your dries
Melt the white chocolate and finally stir this through
Frangipane is now ready to use immediately or it can be stored in the fridge for 5 days
Method for the rhubarb decoration is available for KP+ subscribers below.


