
Kitchen Project #161: Vol-Au-Vent
A guest special for Valentine's Day!

Love is in the air (and pastry)
Valentine’s Day, love it or loathe it, is a good time to remind us of the things we enjoy in life. And even if you can’t stand it, you must admit that Valentine’s Day has a camp, 70s energy that cannot be denied. Its mascot is a costumed cherub, after all. So what, friends, could be better to behold this day than a newsletter dedicated to the most dashing cad of all things puffed and golden? THE VOL-AU-VENT. Translating literally as “flying in the wind” or “windblown”, they soared (literally - these things are lofty) to popularity in the 1970s, the era that saw ‘endless love’, Carol King, Barry White and (endless) creamy chicken and mushroom centrepieces at (endless) dinner parties. But it’s time they came back. Open your hearts, would you?
Since LOVE is in the air, I thought it was time to show a bit of appreciation for the savoury side of things (but don’t worry, there’s still dessert). So, I’ve gathered some brilliant chefs and writers to romance us with their best fillings and answer a Q&A about their food loves and hates.
From Sri Lankan Crab Curry to Rum and Vanilla Custard Creme Brûlée, it’s quite the line-up with eight incredible fillings to meet all your heart’s desires. Half of the recipes will be available on KP+. Check them out here!
What’s KP+? Well, it’s the level-up version of this newsletter. By joining KP+, you will support the writing and research that goes into the newsletter (including the commissioning - and fair payment - of all the writers), join a growing community, access extra content (inc., the entire archive) and more. Subscribing is easy and only costs £6 per month or £50 for the whole year. Why not give it a go? Come and join the gang!
Love,
Nicola
Vol-Au-Vents, an overview
Making a good vol-au-vent case needn’t be hard - roll out your puff pastry, stamp circles (or cut squares!), cut out half the middles, then stack, egg wash and bake. You can do it in advance (months!) and bake to order, or bake, store at room temp for a few days, then refresh when you’re ready to eat them. There are a few ways to make the absolute best cases, and here’s my guide:
The Prep
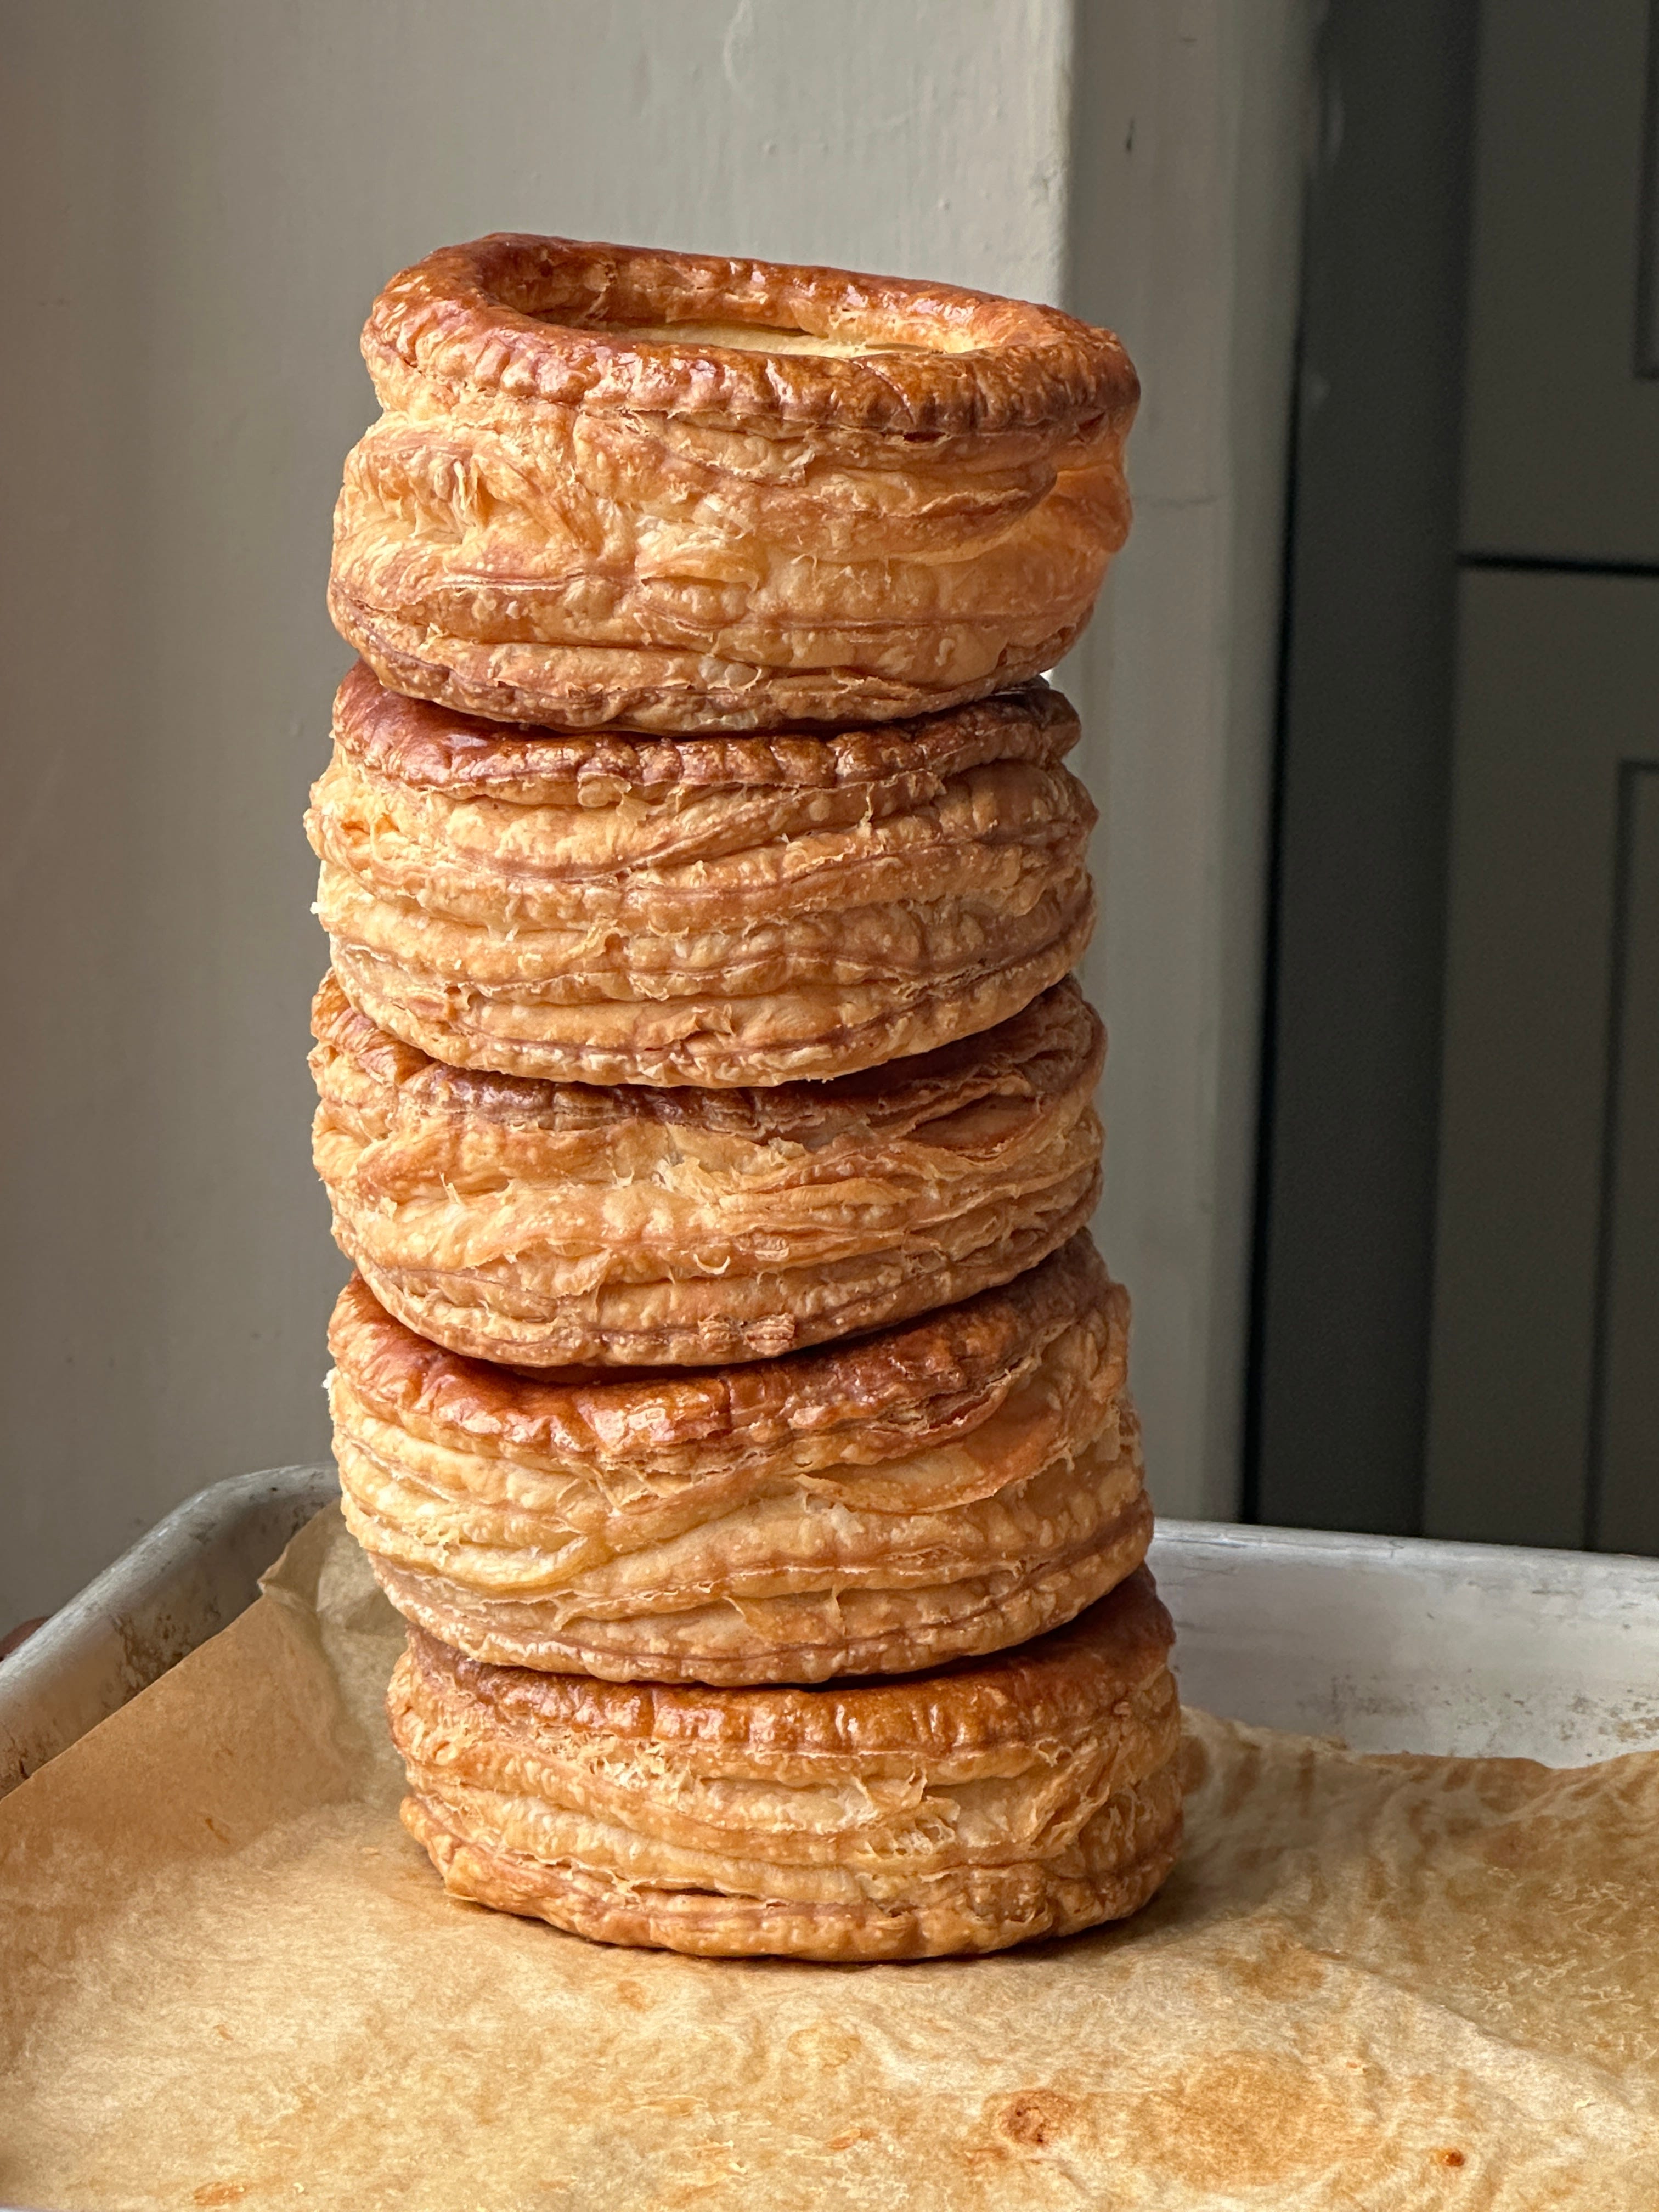
Size matters: Though the mini or canape size vol-au-vent is probably the most well-known, think of a vol-au-vent as a deep dish, free-form pie which can be eaten as a main course, served with lots of sauce and gravy, plonked right in the middle of a plate. A somewhere-in-the-middle size is perfect for a starter, too! The mini-cases will always look most dramatic - this is because the width-to-height ratio is at its most extreme
What about hats? Some recipes will ask you to bake the circles made by stamping out the middle of the vol-au-vent and adding it back later as a hat. This is a design choice and entirely up to you!
Pastry type: I tested the VAV cases with a few pastry types. Inverted puff pastry made the neatest, tallest cases with the cleanest layers, followed by classic homemade puff, then shop-bought. I also checked to see how different fat-content puff pastries performed. The lower fat content (and hydration) doesn’t rise as tall, so if you’re looking for drama, making your own is essential
Resting: The fridge and freezer are your best friend! Resting, and doing it often, is the best way to get clean, tall, cases that don’t stress you out when you’re making them. Resting after roll-out, after cutting (before moving!), then after building/before baking
The Roll Out & build
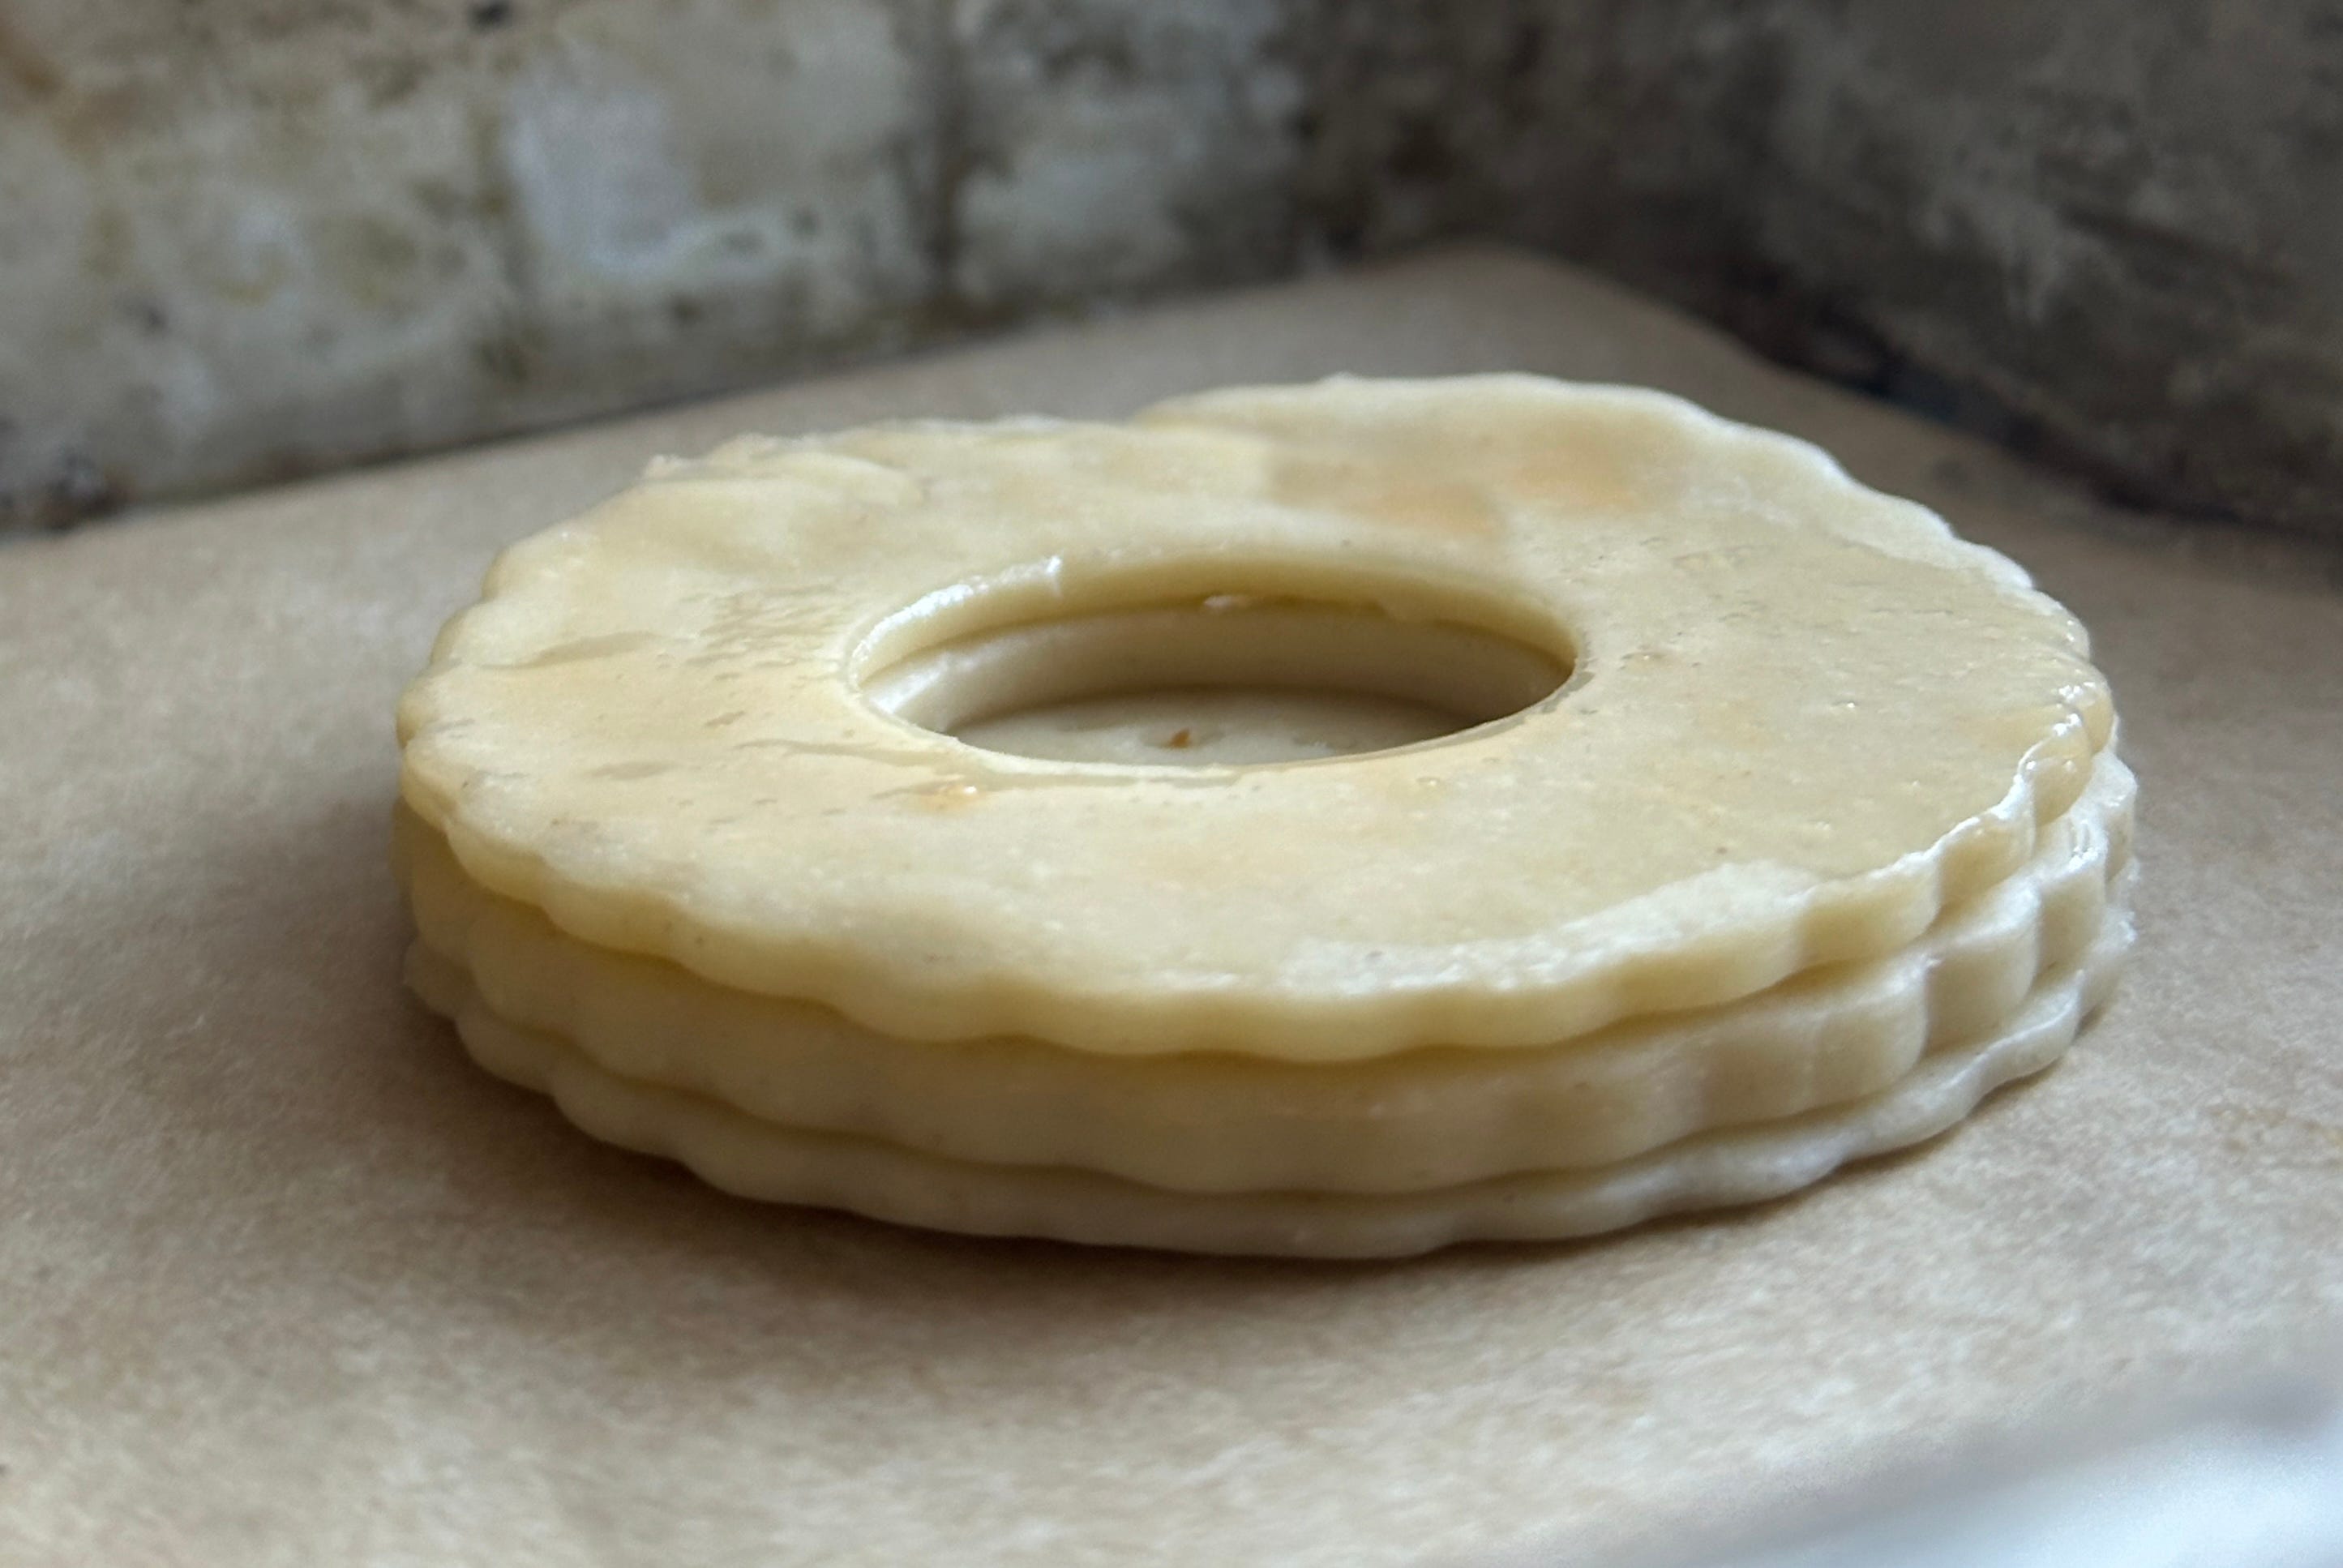
Stacking: Your puff will rise approximately 6-8 times its height, so we want to be aiming for about 6-8mm once the pastry is stacked. But, you can also sneak another layer in there. If height is what you are after, you can stack three layers of pastry - adding another base, or ring, making it a triple, rather than double, layer. The additional base (rather than an additional ring) makes the tallest and most stable case, but uses more pastry, so it’s up to you. I found anything more than three layers would fall over.

The triple stack Pastry thickness: Since stacking seemed to work, couldn’t we just…roll the pastry thicker, rather than stack? And yes, yes you can! If you aren’t working with pre-rolled sheets, you can alter the thickness and use two pieces of pastry, rather than adding an extra pastry layer.
Stability: Due to that aforementioned height to width ratio, the smallest vav cases are the most likely to fall over in the oven. During the tests, I was expecting to have to solve this problem (they are called ‘vol-au -vents’ after all) a lot, but I found that most of my cases really behaved. Ultimately there will be a few wiggly cases - if you are very worried about this happening, I would suggest baking with no fan and increasing the oven temp by 20c.
The cutter: I hate to rely on equipment, but you will get the cleanest edges and most beautiful cases from using a sharp pastry cutter. You could cut out each ring with a sharp knife, but I know this is unlikely, and impossible if you want the classic fluted edge. Dull cutters sometimes seal the edges - rather than cutting through the pastry, it has the effect of pressing them together and instead of a flaky rise, the pastry is fused together. The only way around this is to use a non-fluted cutter to guide you and cut with a knife, or to invest in new, metal cutters with sharp edges. And cut with confidence!
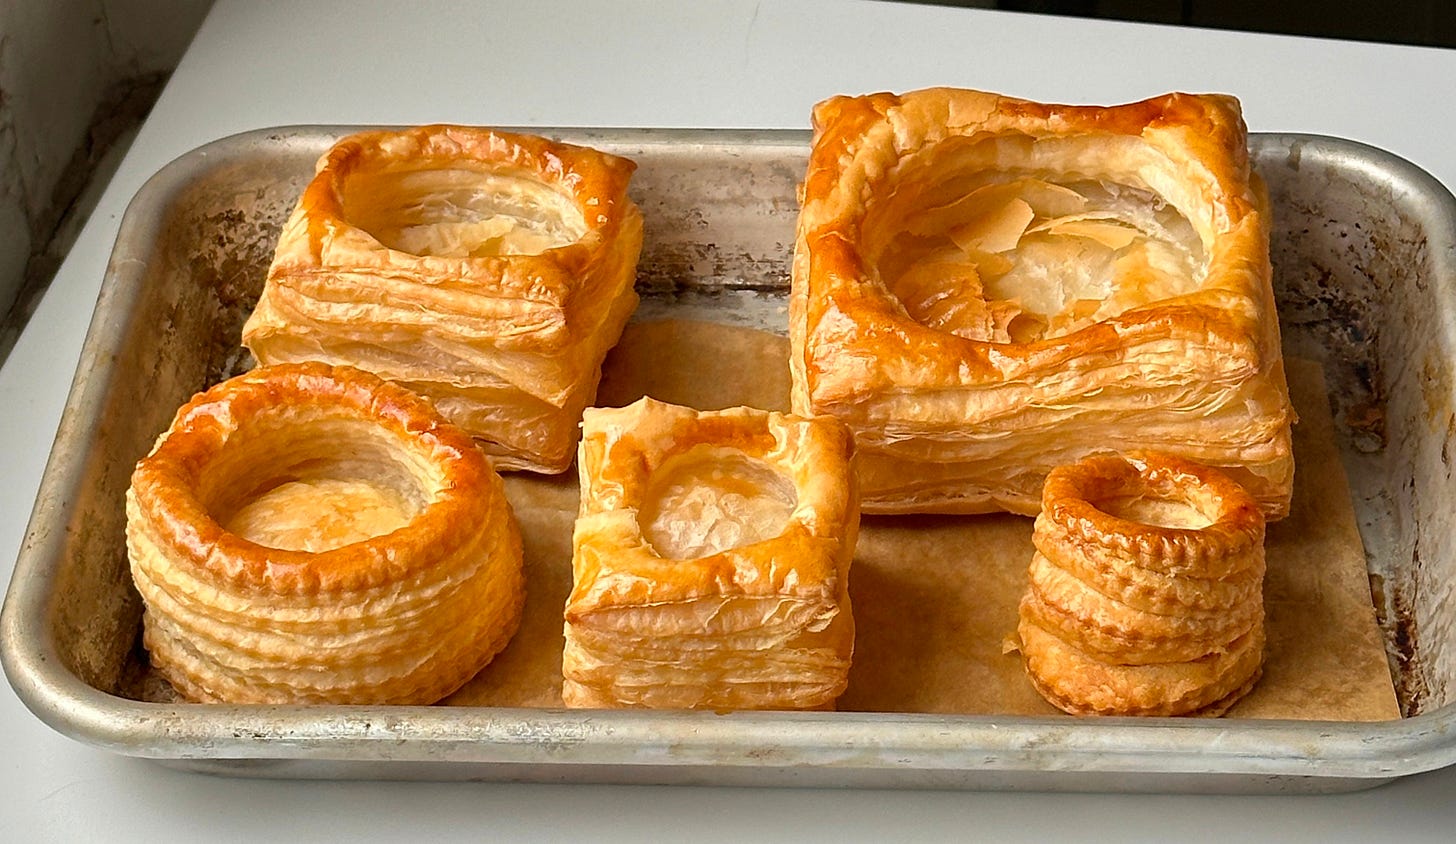
A few shapes for you to consider The shape: A way around dull cutters is to do away with them altogether - who says vol-au-vents have to be round? Cutting squares is more efficient, and you get beautiful, clean, flaky edges from using a sharp knife.
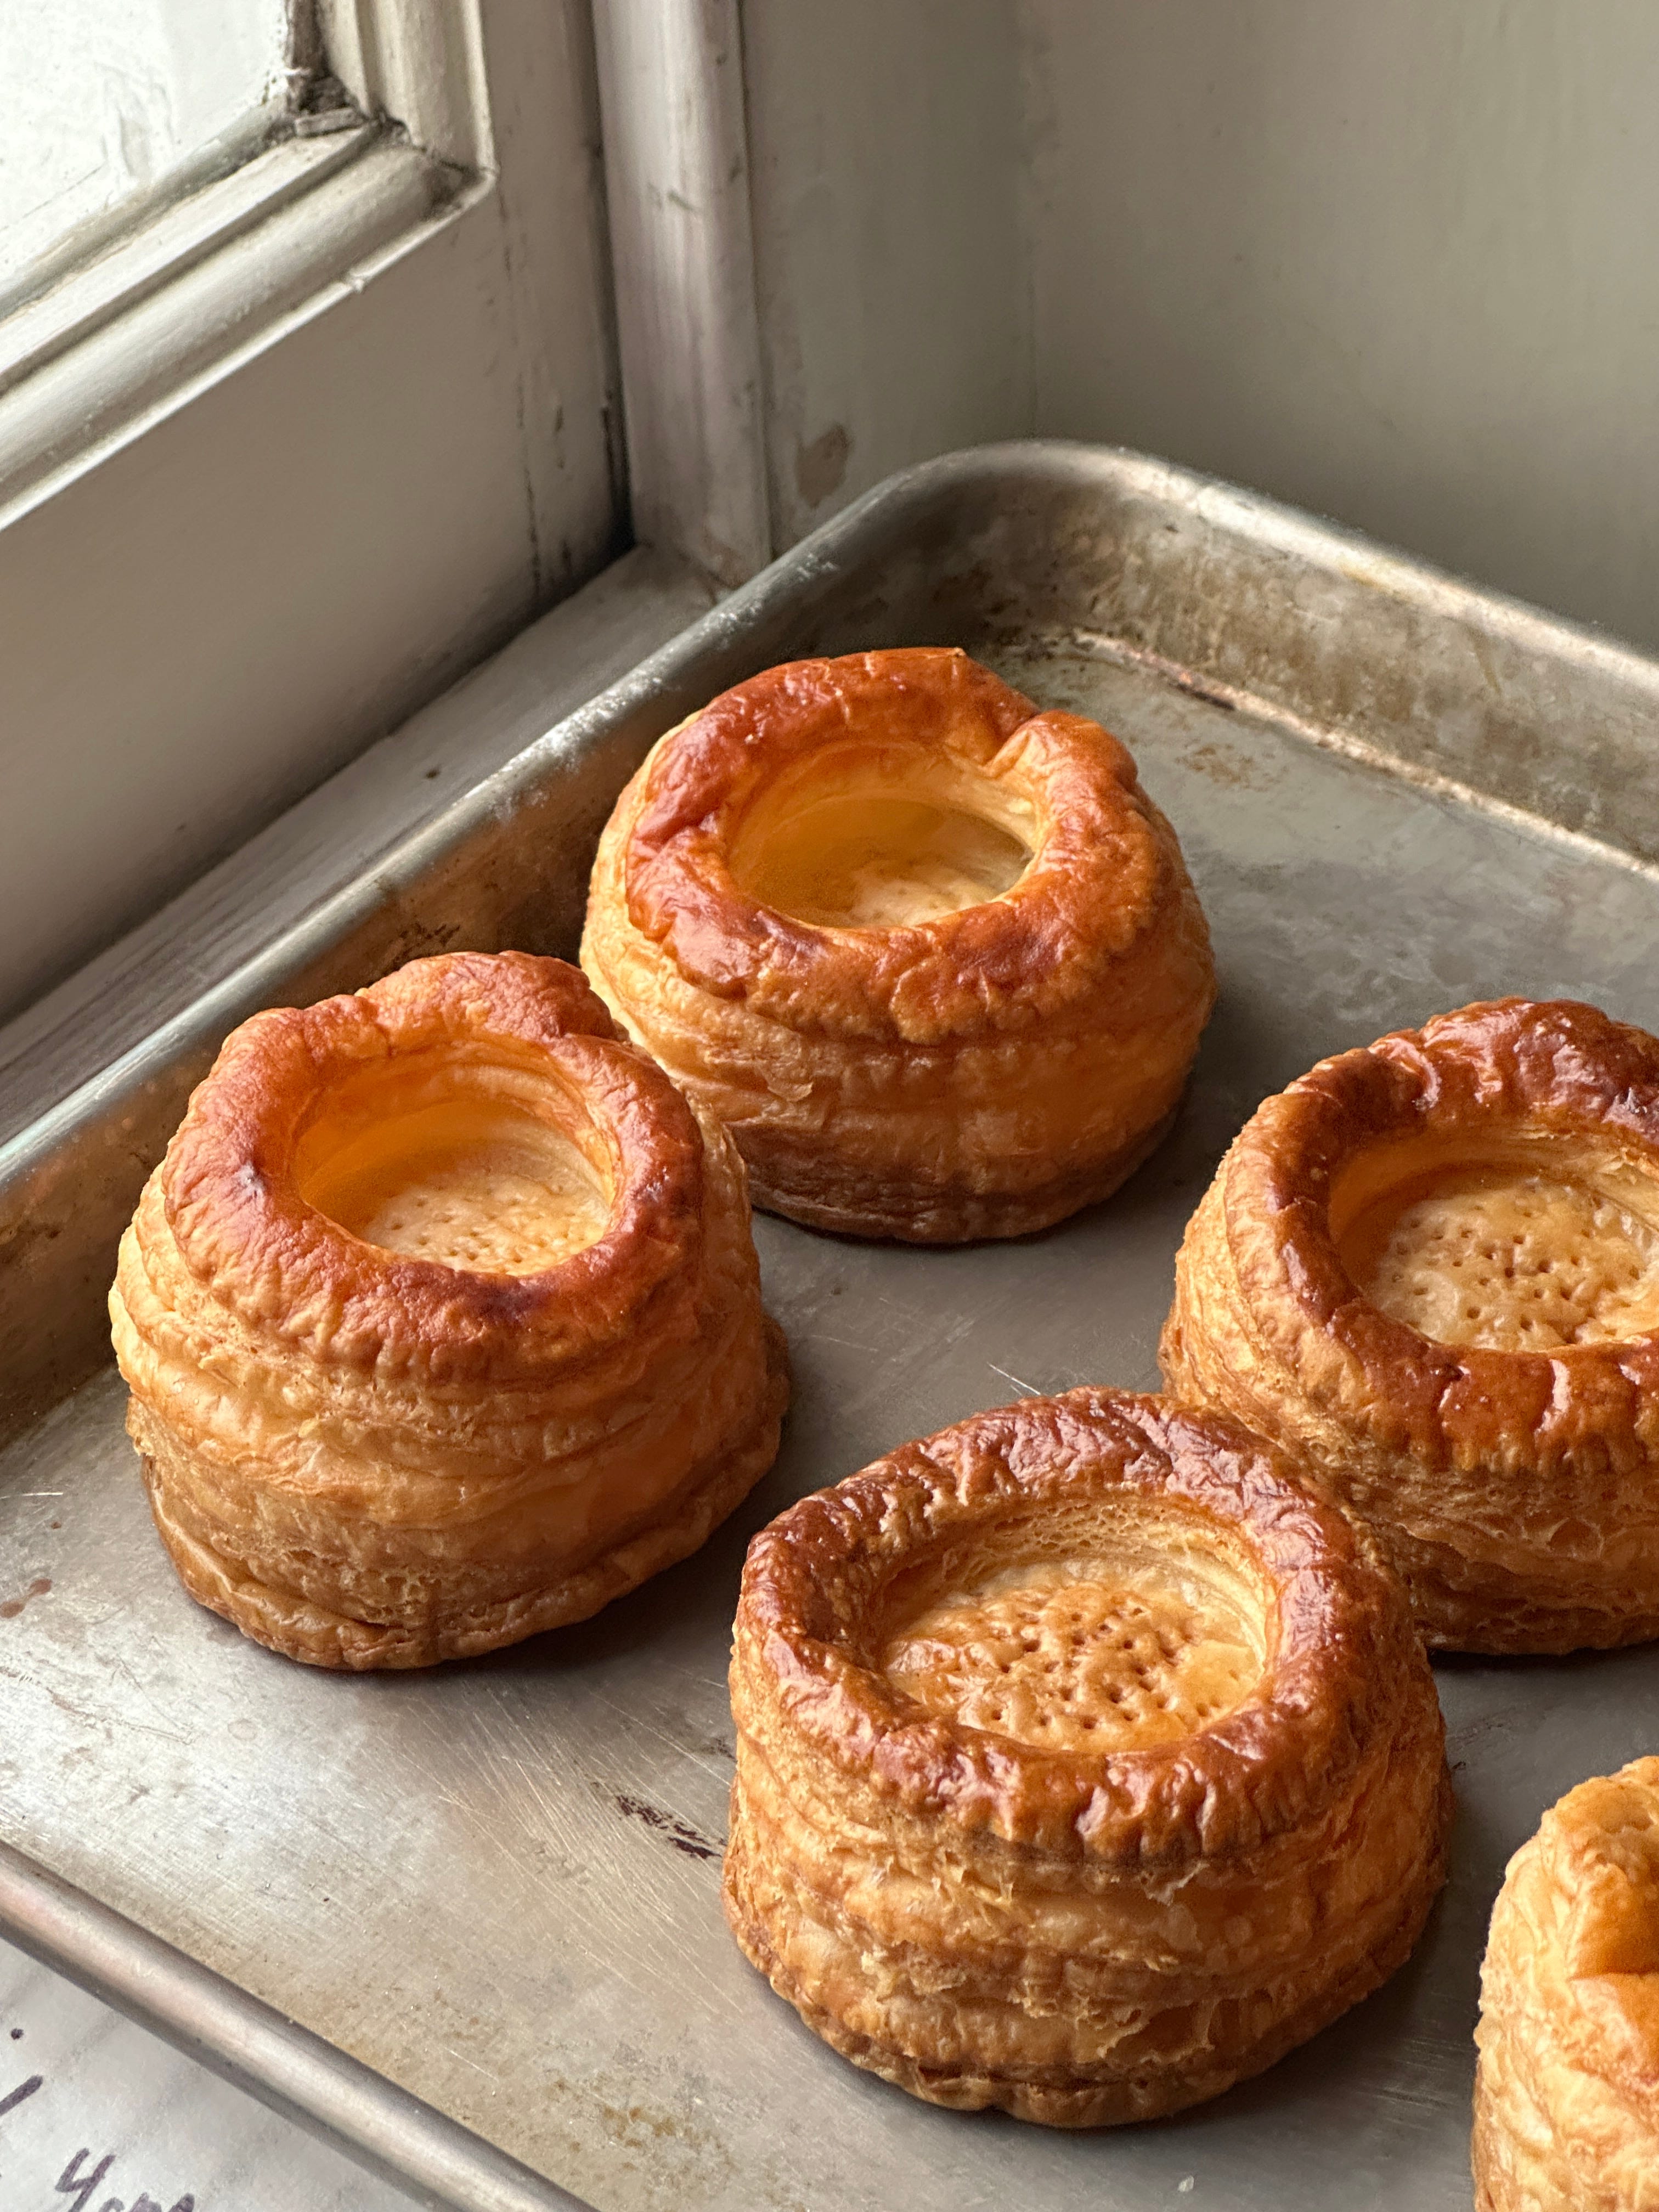
Docking: Docking (the action of pricking holes into your pastry to prevent it from rising), the middle of your VAV is not essential - if the pastry rises up, which it will a bit, you can press it down after baking and before filling.

The stick
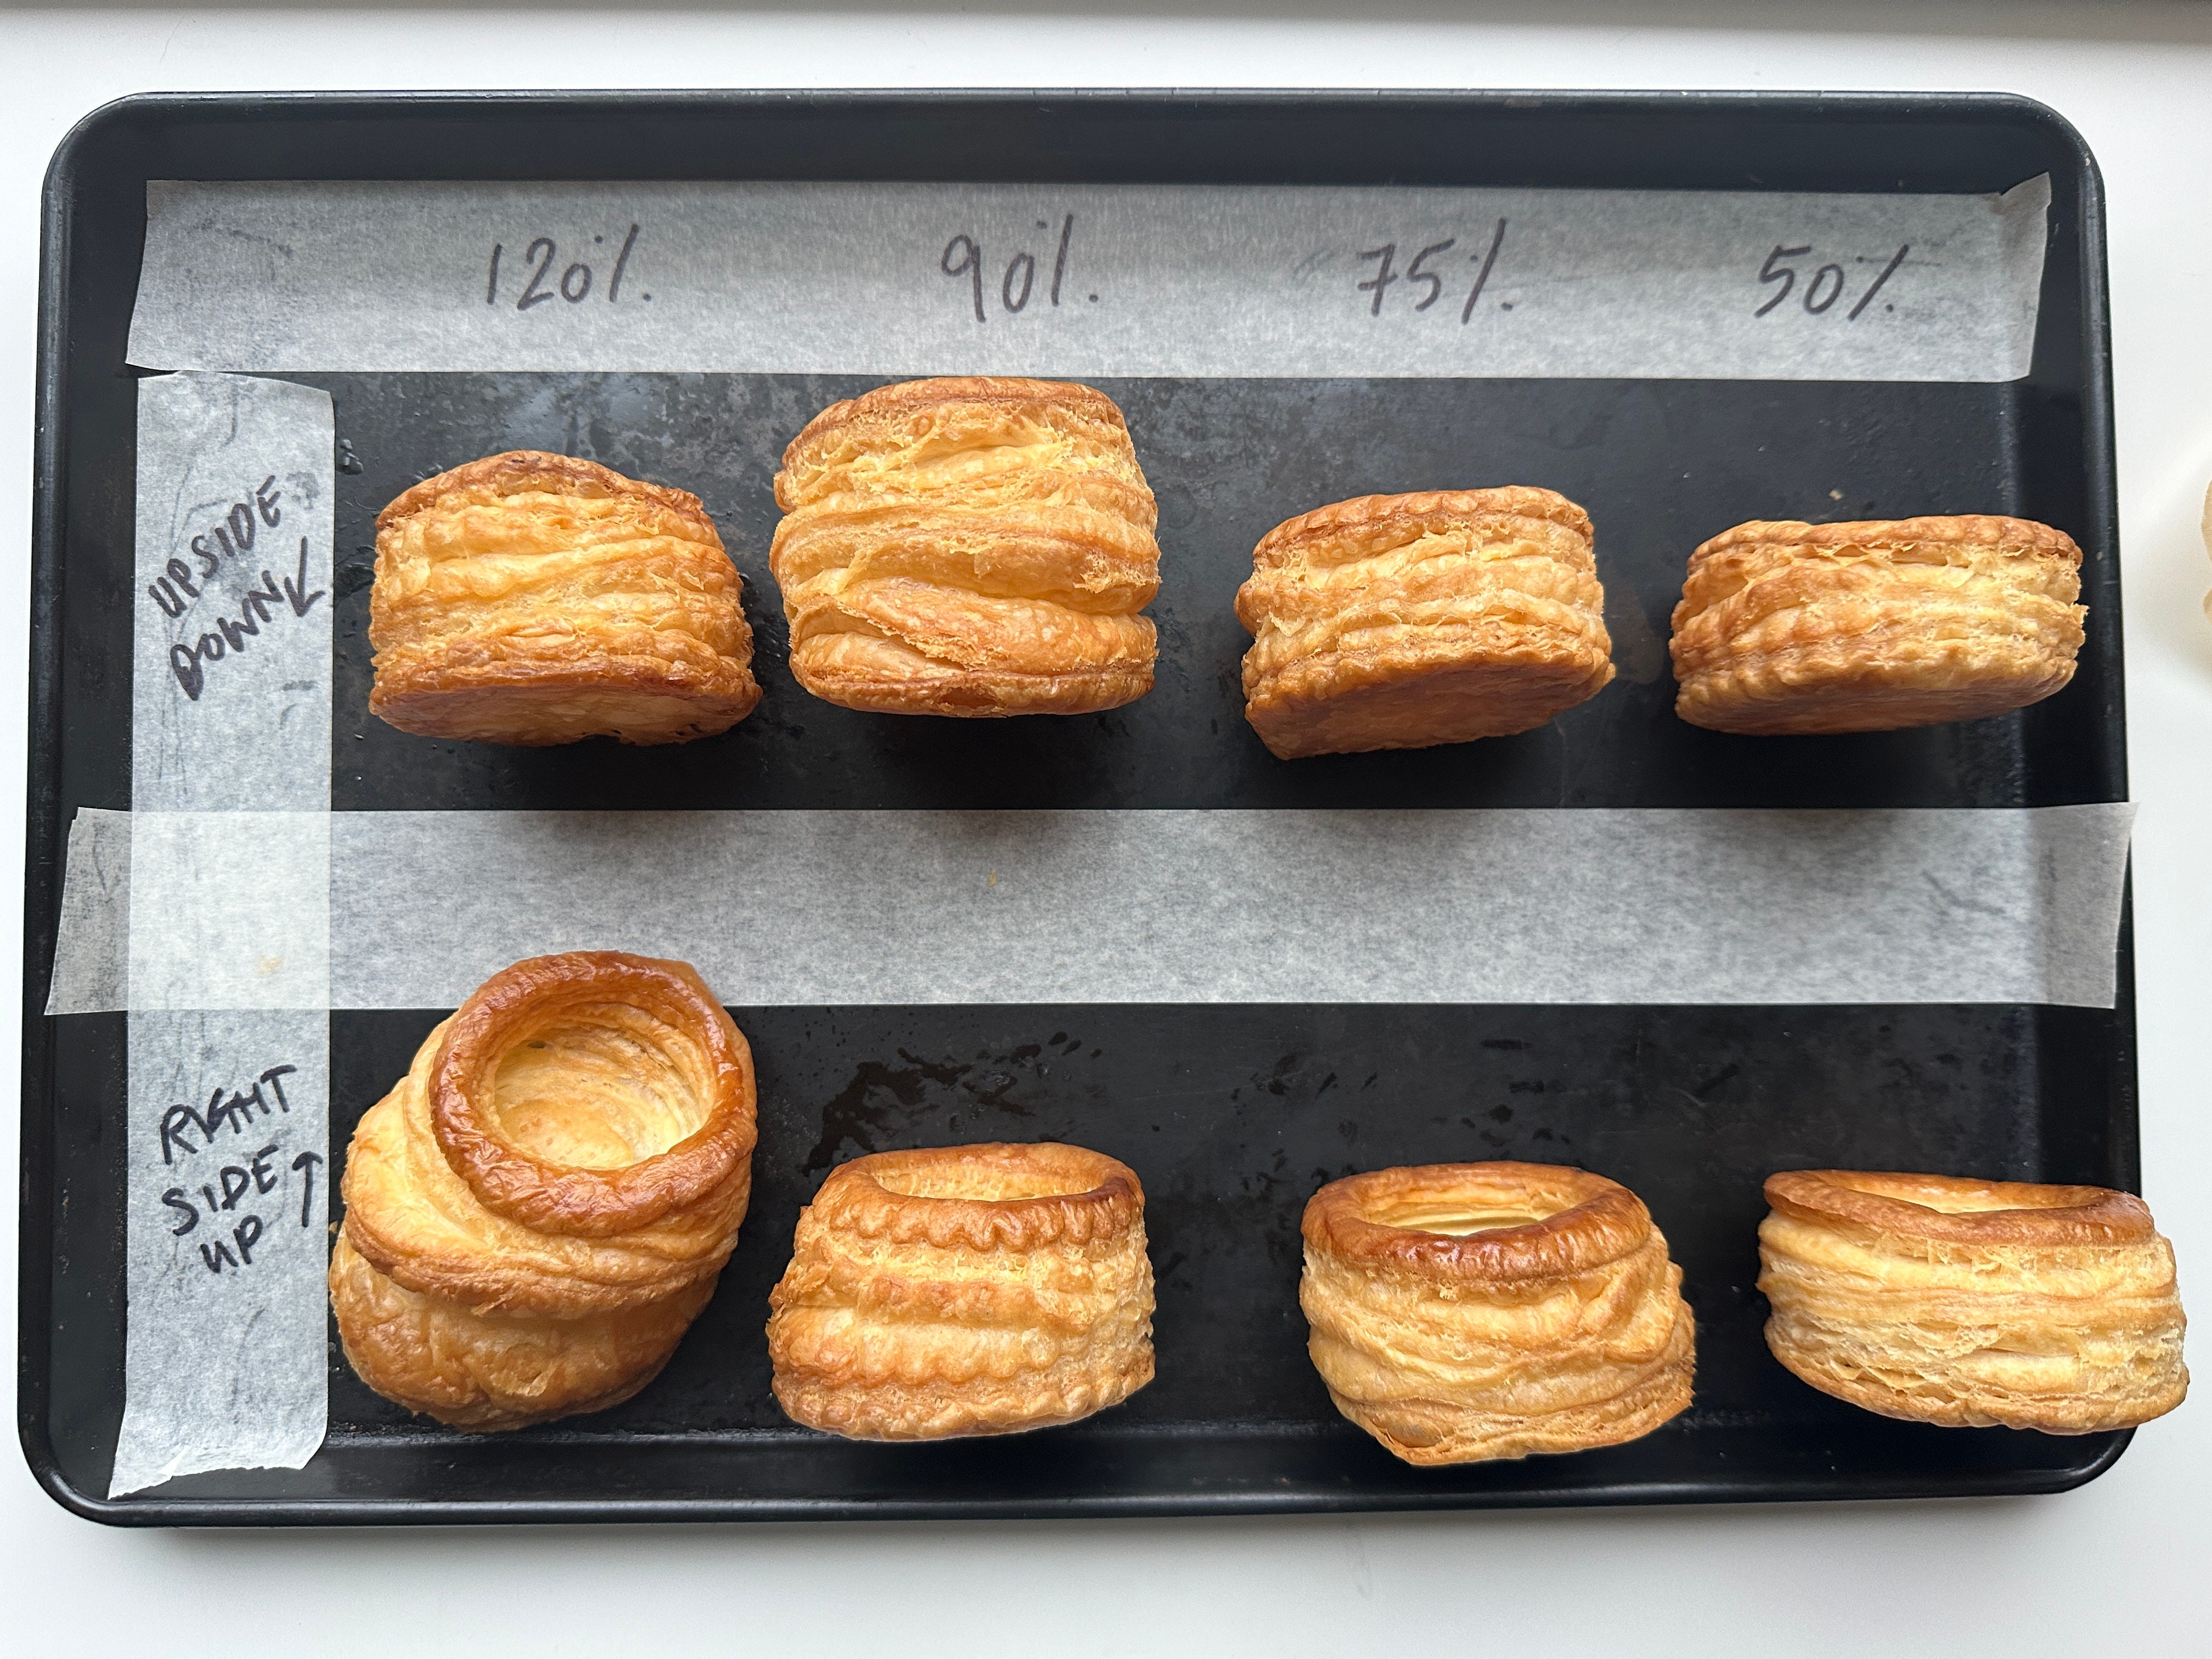
Upside down: There’s an old technique that says we should flip our pastry over before stacking it; The theory is that the downward action of the cutter presses the layers down, so turning it over before baking will help reverse this. I put it to the test:

Fat comparison plus upside down / right side up tests Overall, the VAV baked upside down rose more evenly, and even taller in some cases. It’s well worth doing, but not the only factor for success. Using good quality puff pastry and having the correct cutting technique (along with ample resting is key) so if you forget - don’t worry!
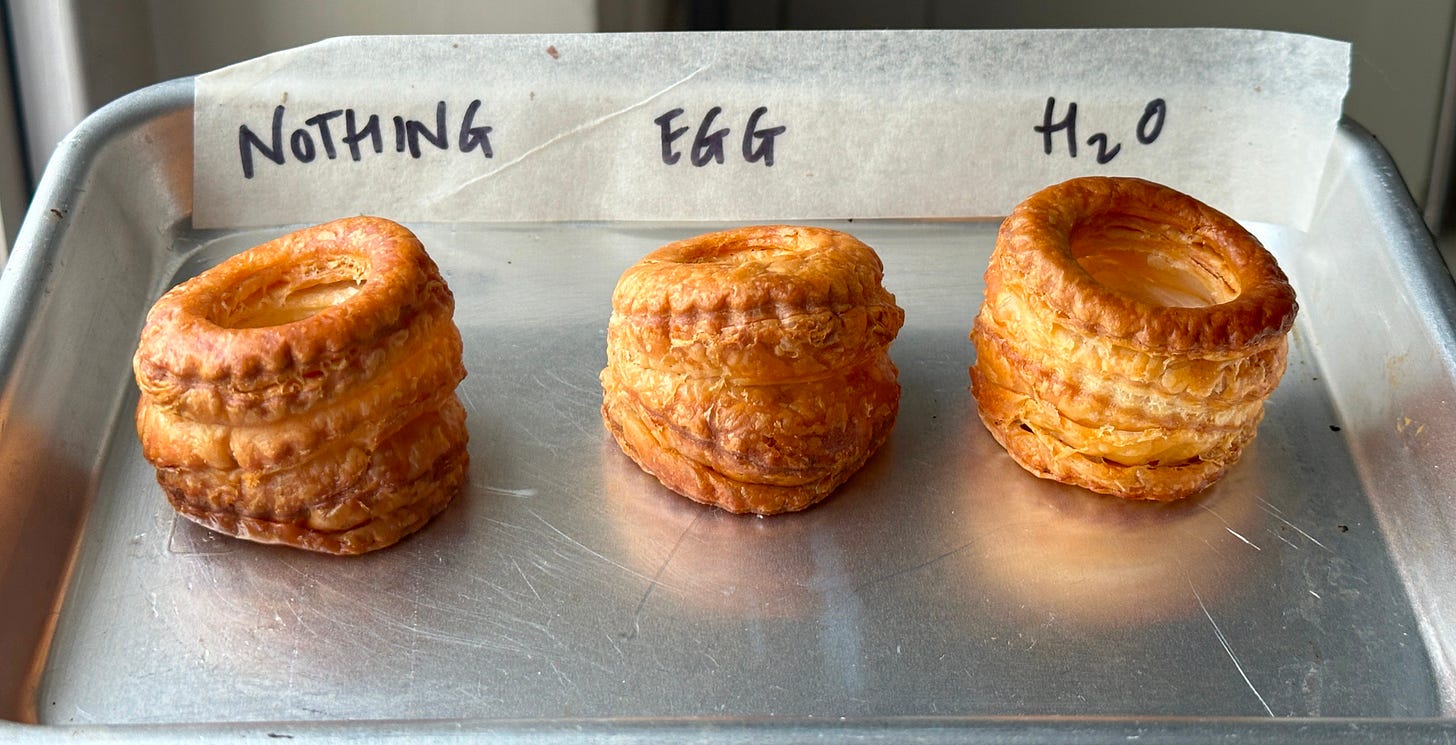
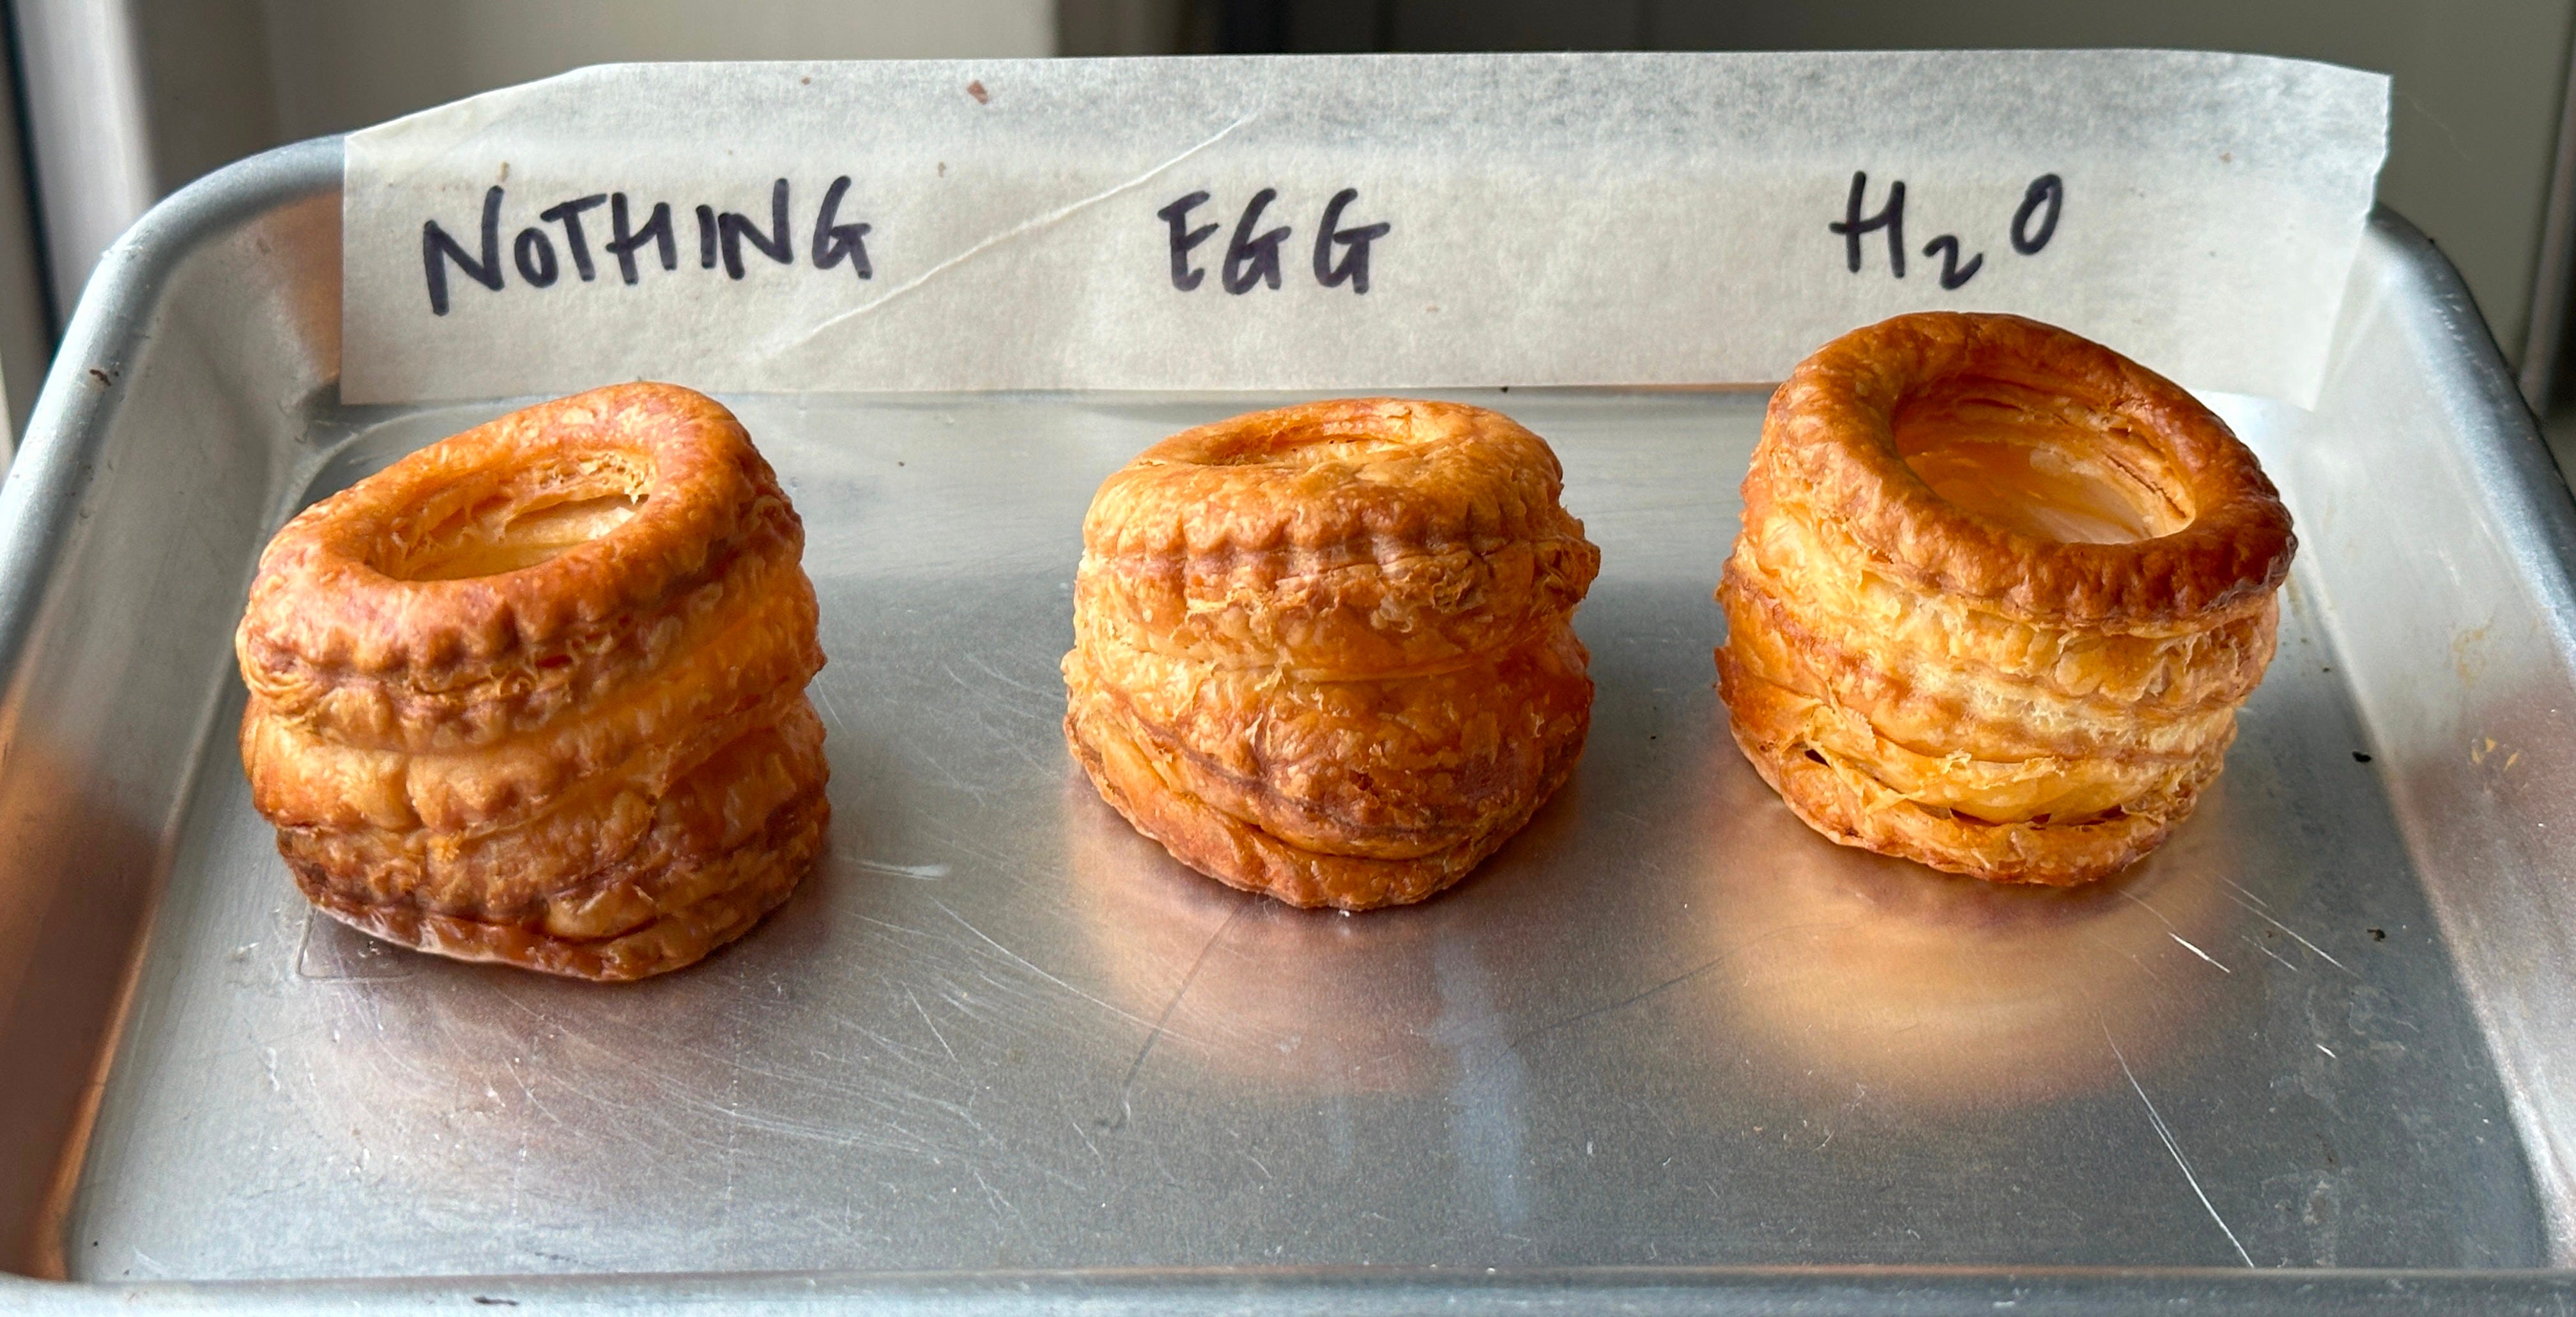
Pastry glue: To stick the pastry together, I tested using water, eggwash and nothing; None of them fell apart, though I would say the ones with egg wash or water were slightly more stable. For recipes that require your cases to be ‘water tight’, like Helen Goh’s Creme Brûlée, go for egg wash. Be careful that egg wash doesn’t drip down the outer edges of your VAV though as this can stick the layers together
im sticking with you The Bake: Finally, you get to bake your cases! I go for 180c fan. You can decide how dark you want to bake them. They’ll be fully baked between 15-20 mins, depending on the size, and after that, you can decide if you want it more golden (and crunchy) or light (more tender)
You’ll find the recipe at the bottom of this email. Now, let’s talk about fillings!
You Complete Me: The Fillings
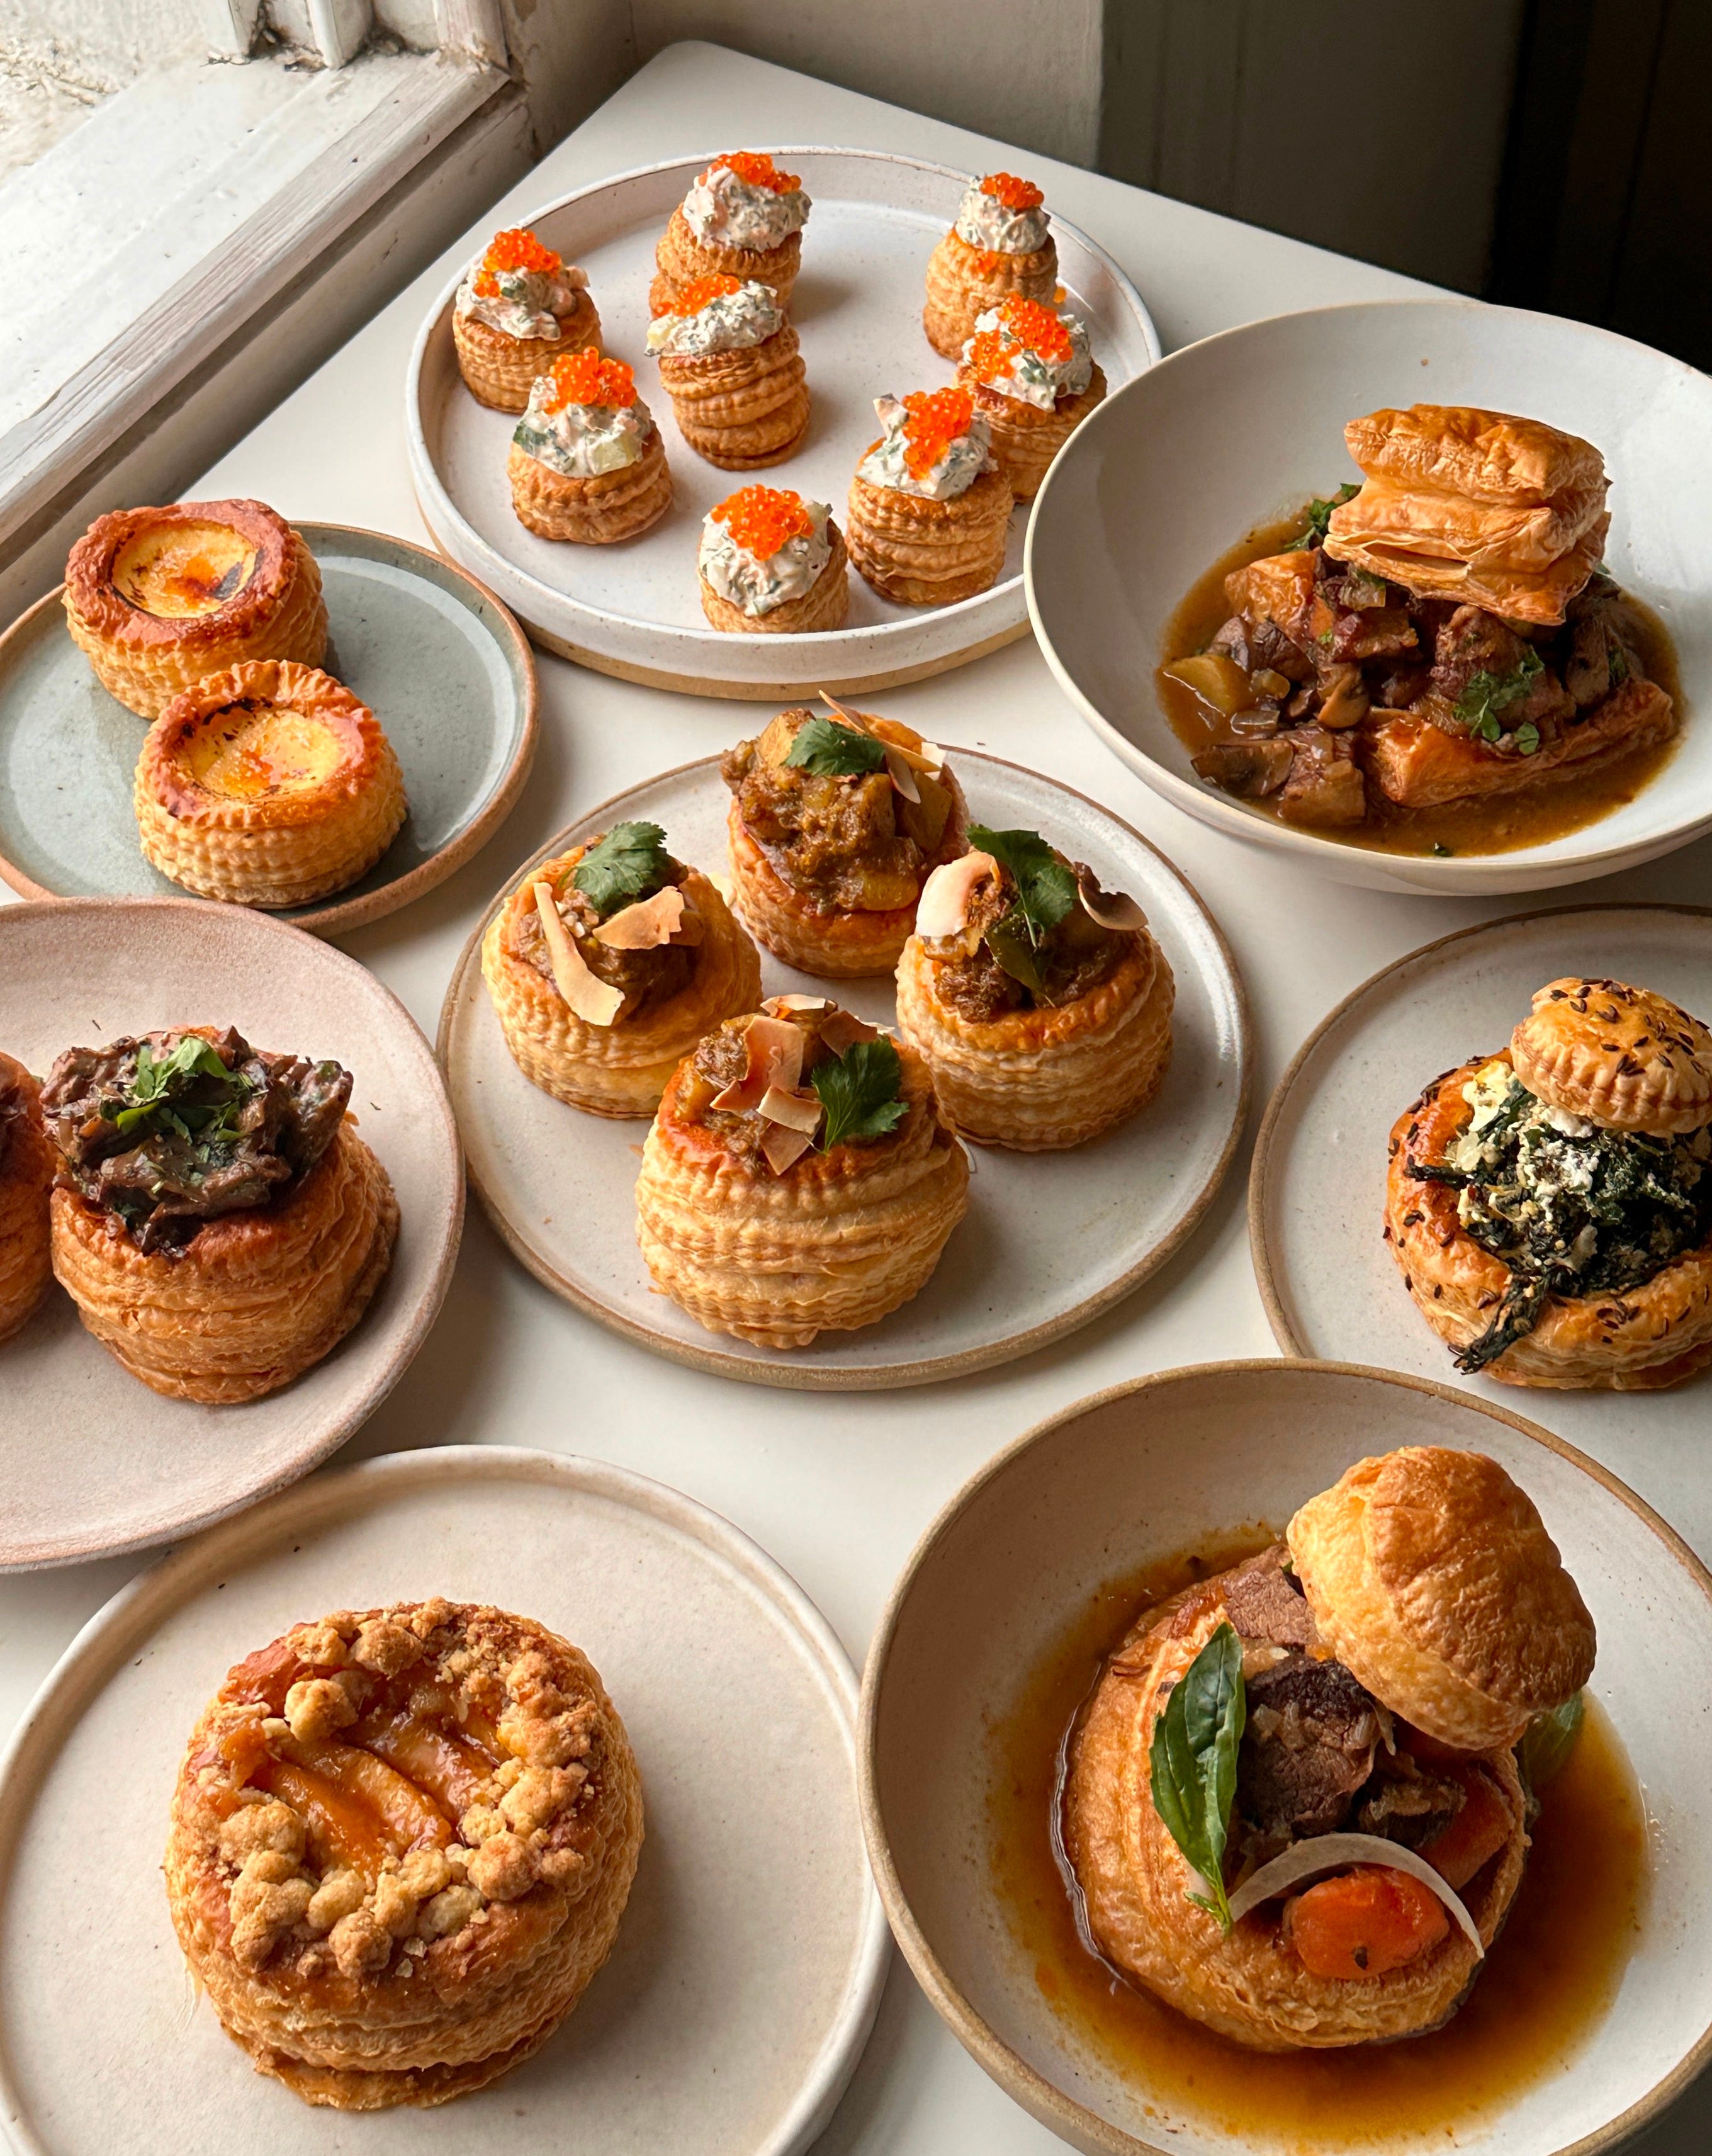
So, now you’ve got your cases, what should you put in them? I’m thrilled to have LOTS of options for you, thanks to the de-facto Avengers of puff pastry?! Would you look at this:
Sri Lankan Crab Curry by Helen Graves (Recipe on KP+)
Bo Kho (Vietnamese Beef Stew) by Ha's Đặc Biệt
Classic Creamy Mushroom by Susan Spungen
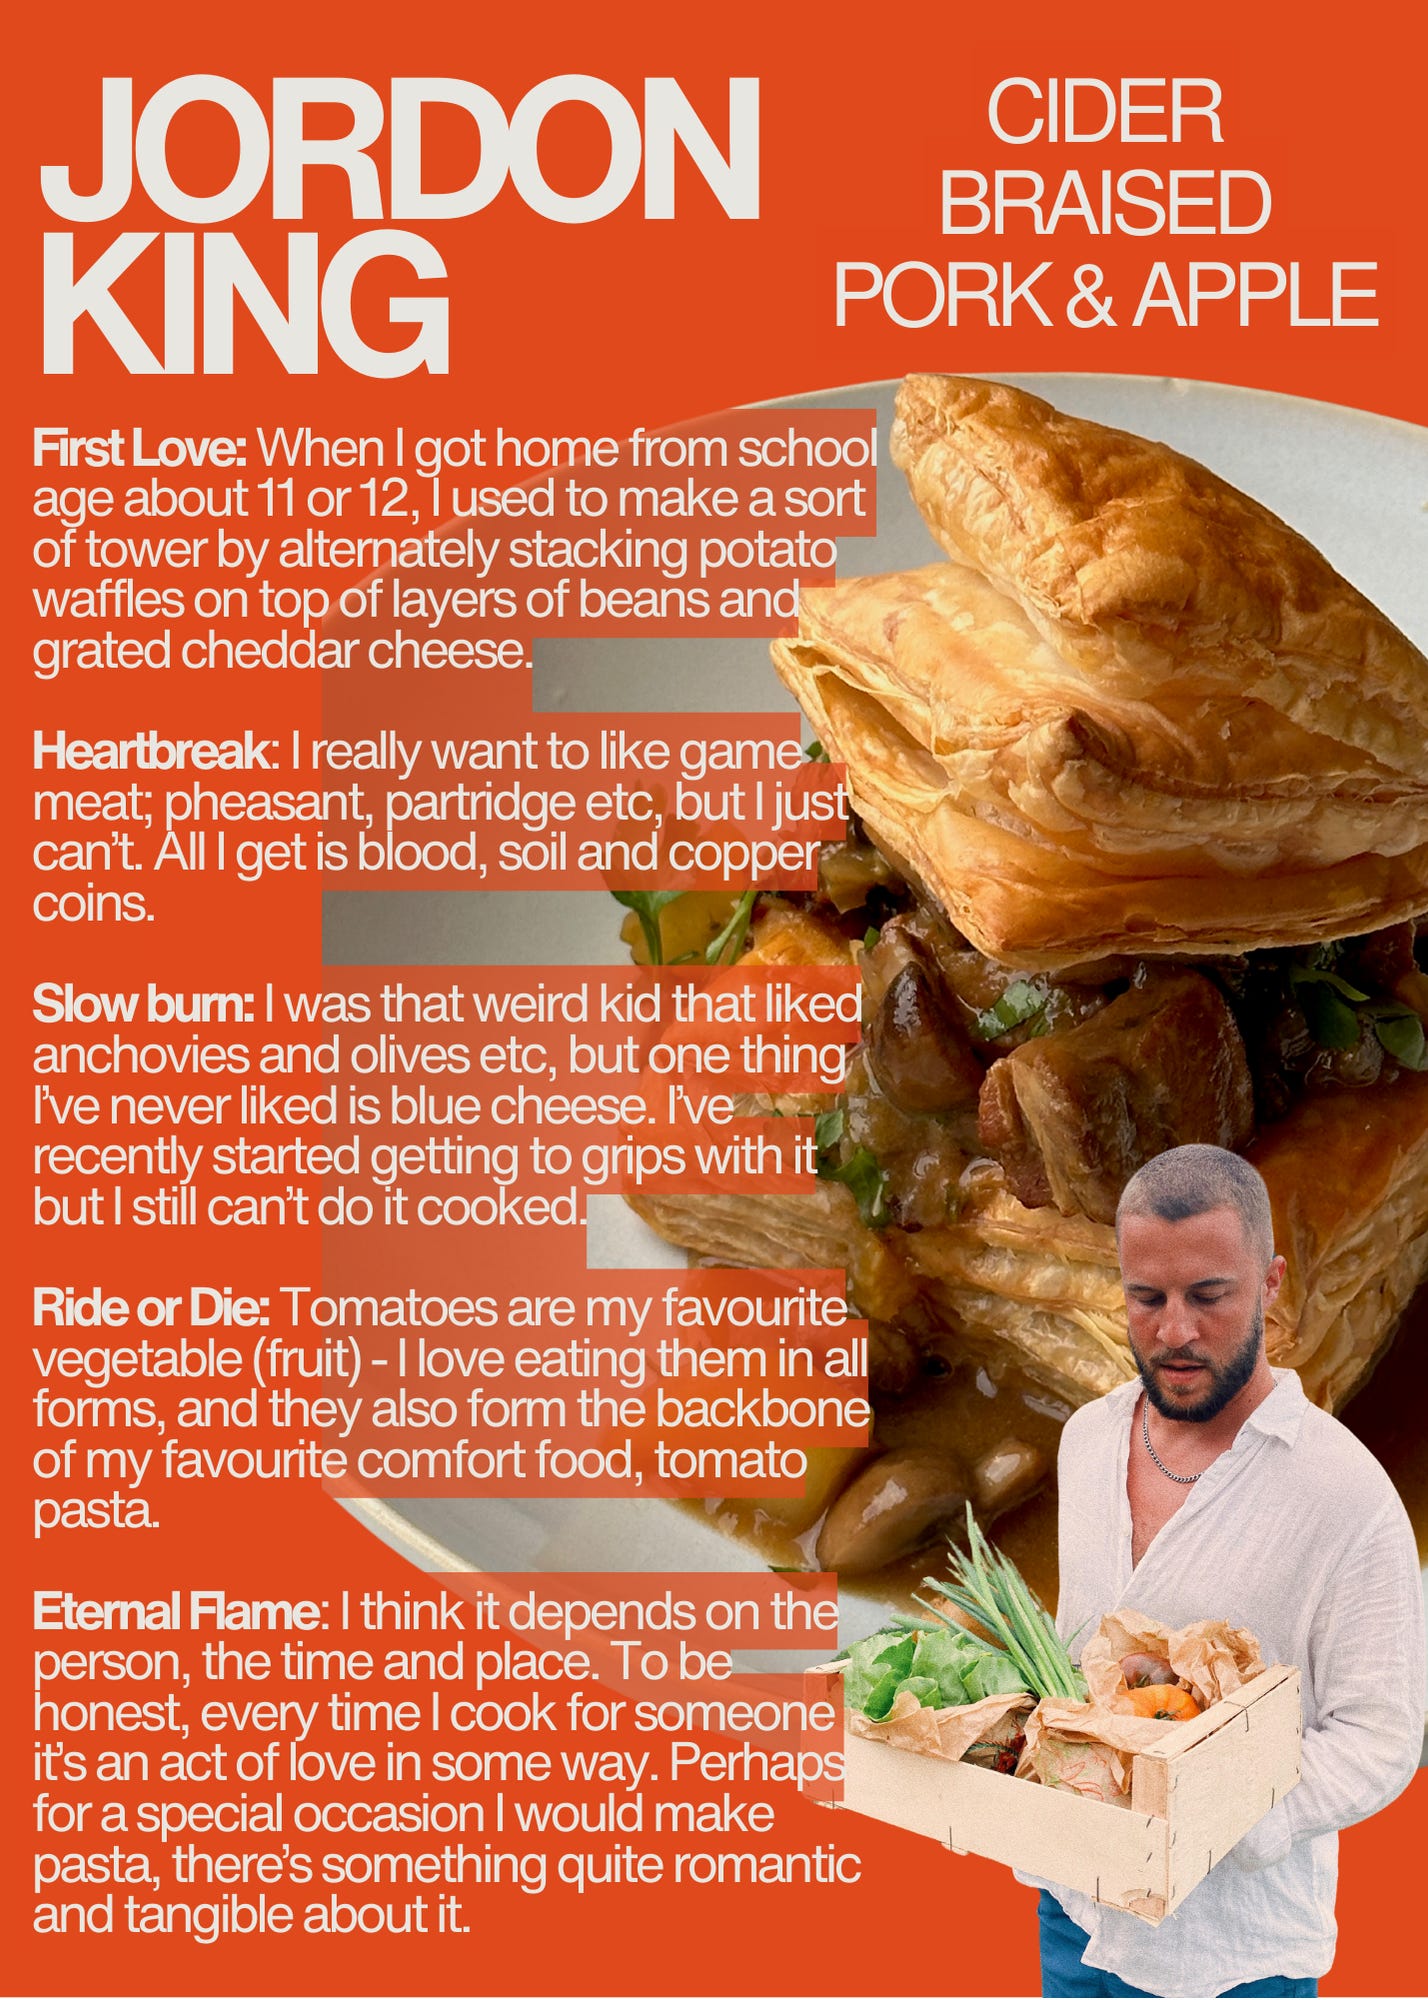
Pork braised in Cider with Apple by Jordon King (Recipe on KP+)
Hot Smoked Trout Rillette by Ben Lippett
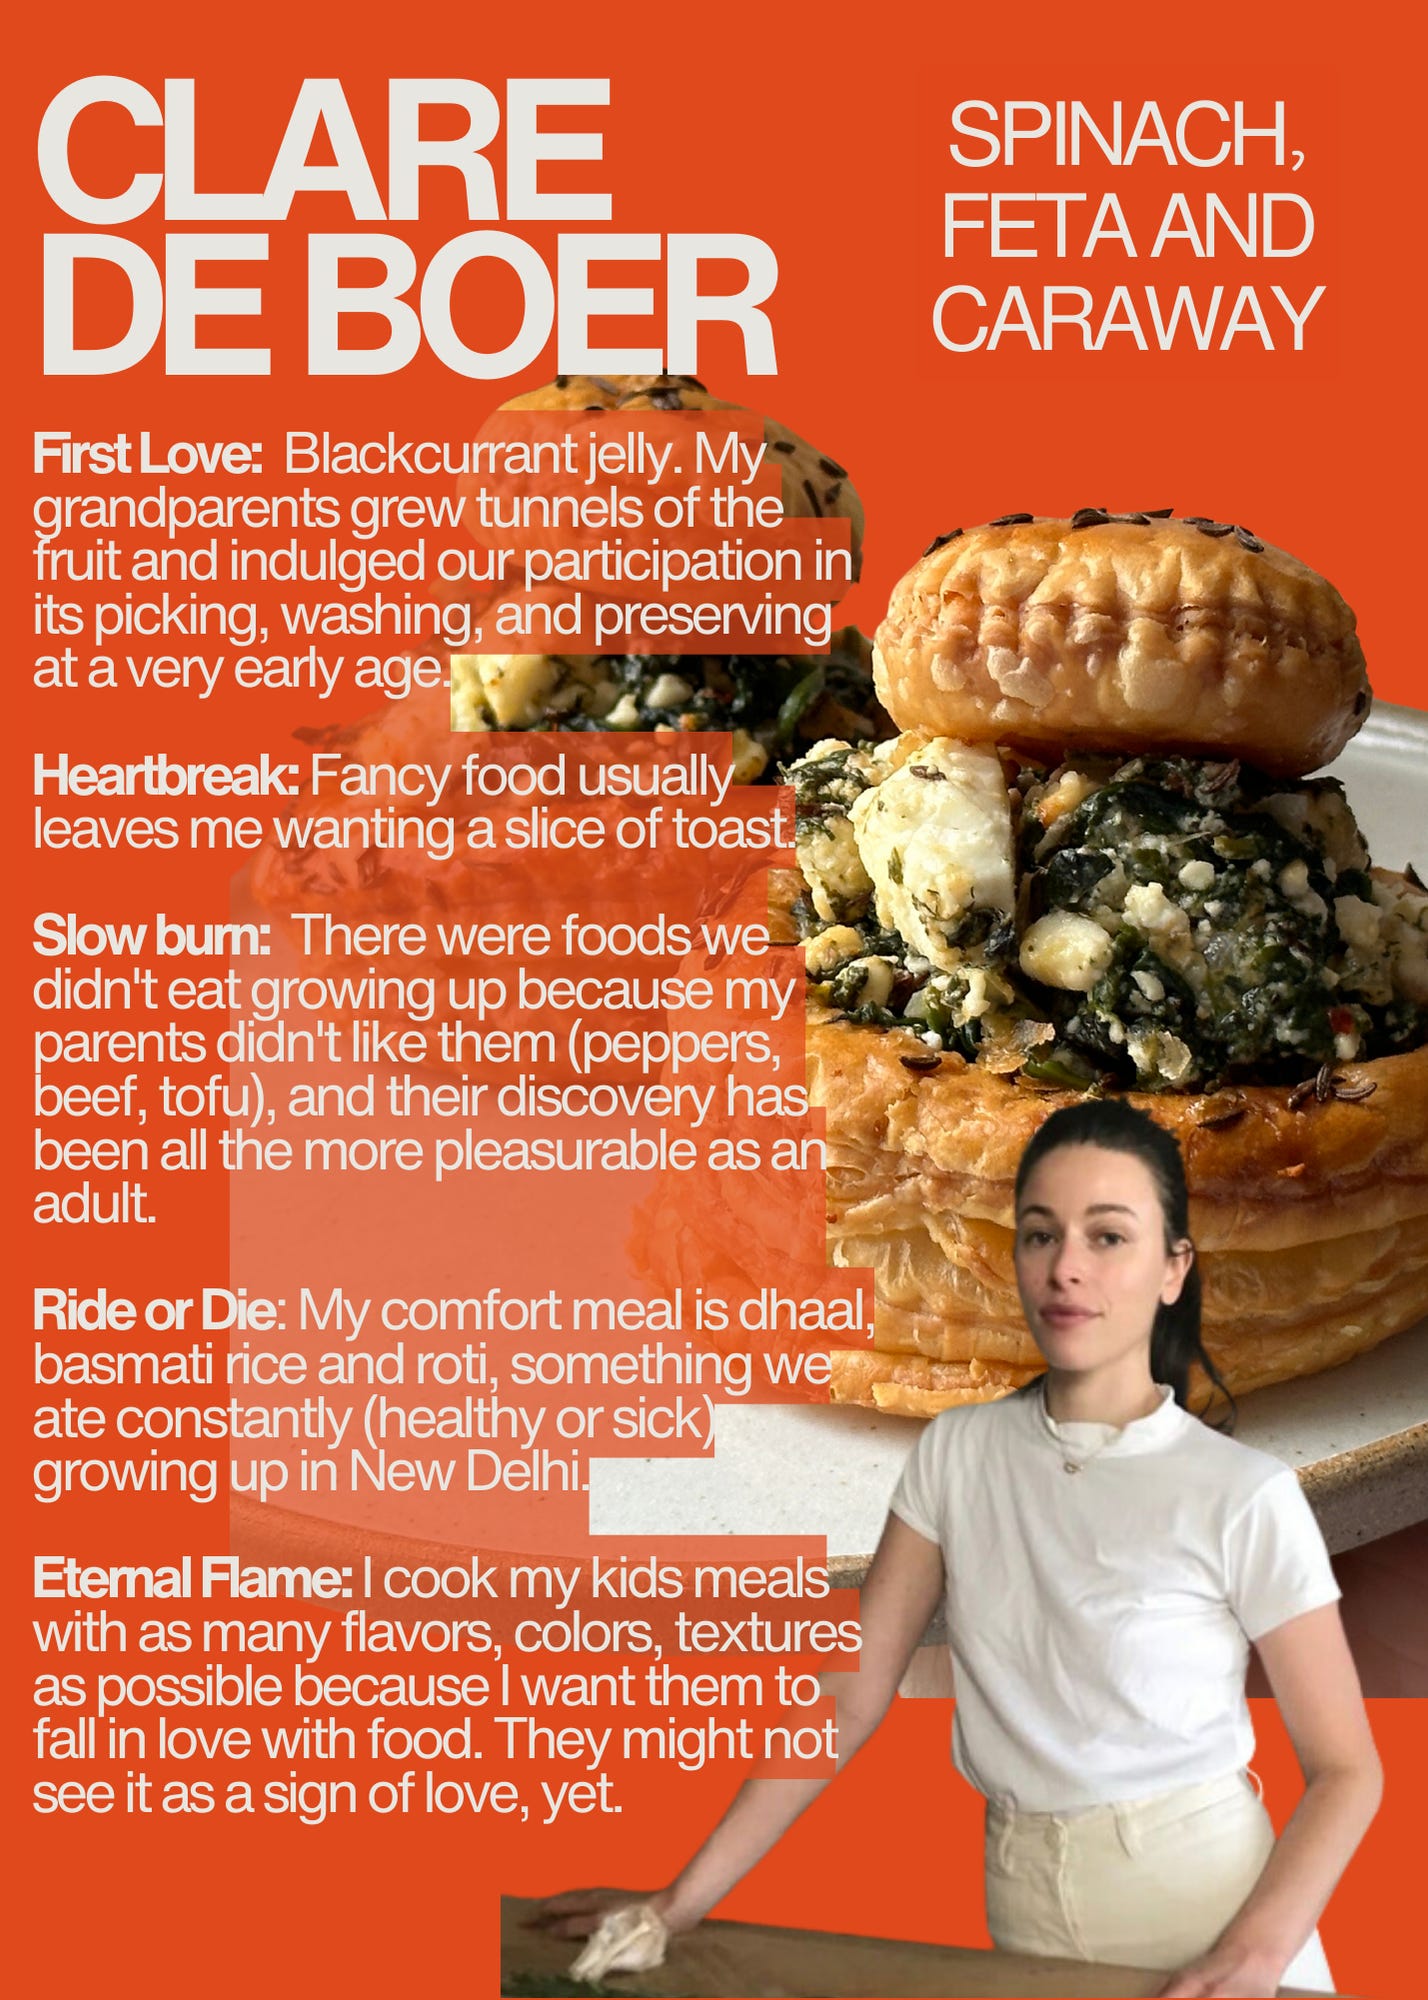
Feta, Spinach and Caraway by Clare De Boer (Recipe on KP+)
Rum and Vanilla Custard Brûlée by Helen Goh
Apple Crumble by Me! (Recipe on KP+)
They have generously shared their best-ever fillings for vol-au-vents, from classic to leftfield, sweet to savoury, along with a quickfire Q&A (ask your friends/lovers/mate on your next hang): First Love (hat was your first food love?), Heartbreak (Are there any foods or dishes you have a love/hate relationship with?, Slow burn (Any ingredients or flavours that you have grown to love?), Ride or Die (What is your go-to comfort ingredient) and Eternal Flame (What do you cook to show someone that you love them?). Let’s dive in.
Helen Graves
Helen Graves is a London-based author, editor and cook. She co-founded and edits Pit Magazine, and writes the Flavour Nuggets newsletter here on substack. Helen has written two books - Live Fire and BBQ Days, BBQ Nights; The former was my absolute bible a few year’s back when we realised our holiday rental had a bbq and no one was sure how to use it - thanks to Helen, we absolutely smashed the cooking on that trip. Her books are keepers!

Ha's Đặc Biệt
I couldn’t be more obsessed / a fan girl of Ha's Đặc Biệt aka Sadie and Anthony, co-founders and owners of the former roving pop-up and now bricks and mortar Ha’s Snack Bar in New York. The two’s take on Vietnamese-French-American cooking is what dreams are made of - I can still remember every single dish I ate at the two pop-ups of theirs I attended in 2023 - the boudin blanc with nuom choc, cabbage and rice is the best thing I ate all year. Beg, steal, borrow etc your way into their restaurant and NEVER MISS A Ha's Đặc Biệt party!
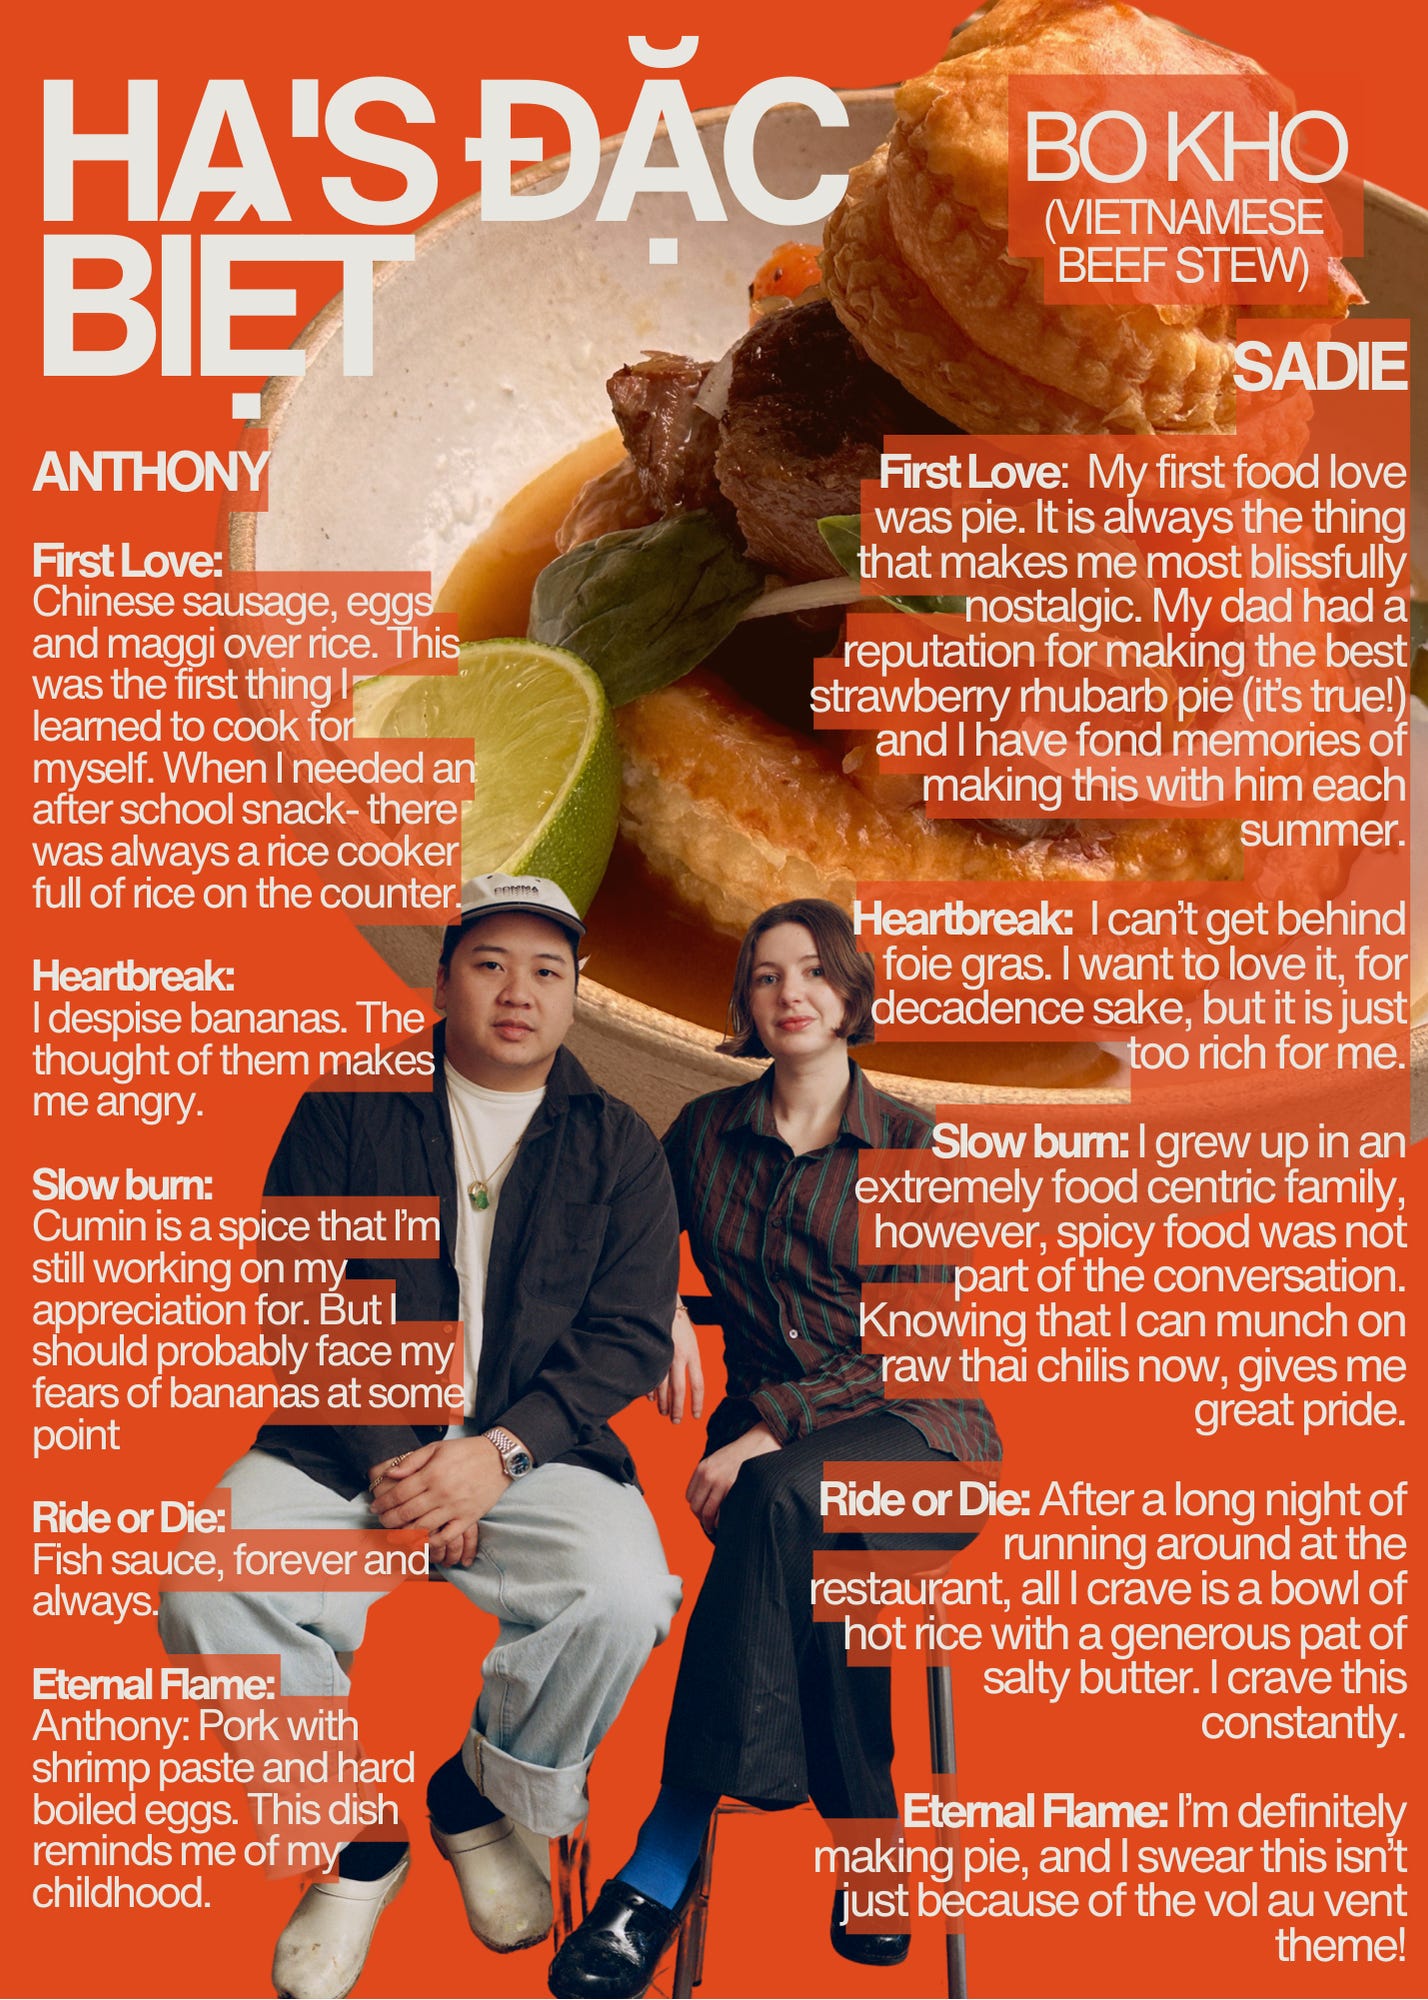
Find Ha's Đặc Biệt’s recipe for Bo Kho below
Jordon King
Jordon Ezra King King is a London-based chef, recipe developer, and writer. He is the author of A Curious Cook which explores food culture, politics and history. When you cook Jordon’s recipes, you always end up with a delicious plate of food in front of you, but also an understanding of how it came to be. Whether it’s the technique or the origin of the ingredients, you’ll be both intellectually and literally fed.
Ben Lippett
Ben Lippett is a London-based chef, food writer, and recipe developer. He co-founded and authors the How I Cook newsletter. You’ll know and love him for his killer technique, commitment to bold, effective flavours (he did co-found Dr Sting's Hot Honey afterall) and always serving you recipes you always want to cook. I’ve often run to the shops after getting his newsletter and I’m NEVER let down (try his meatballs!)
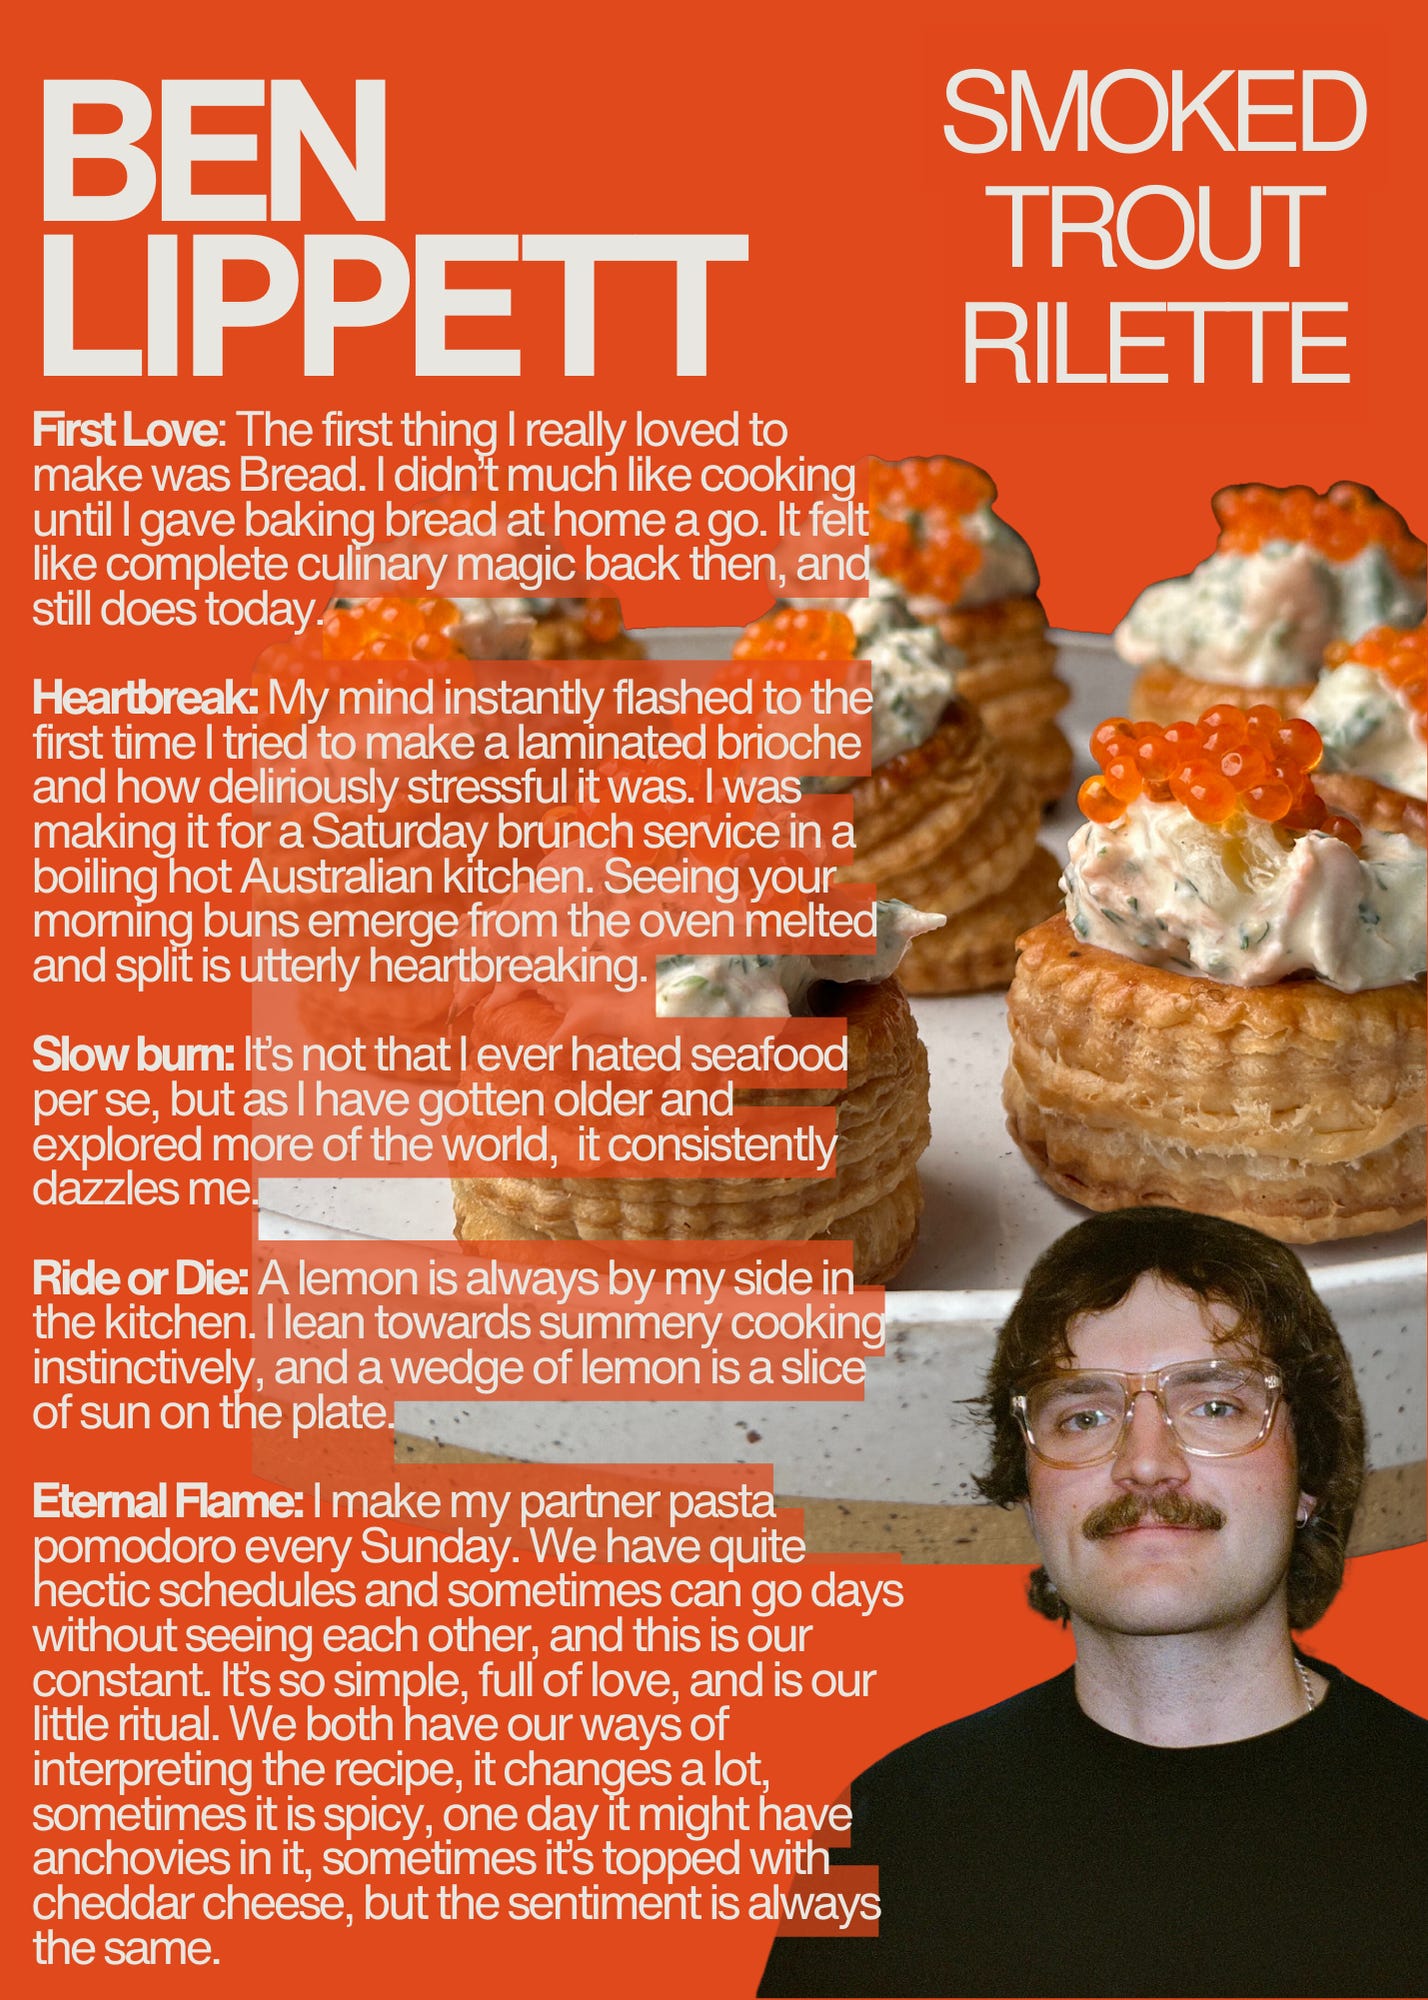
Find Ben Lippett’s recipe for Hot Smoked Trout Rillette below
Susan Spungen
Susan Spungen is a food stylist, cookbook author and fellow substacker based in the US. From being the founding food editor of Martha Stewart Living, the culinary consultant for Julie & Julia, It’s Complicated and Eat, Pray, Love, as well as authoring of four books (and another on the way - a cookie book) I LOVE Susan’s straightforward, brightly coloured and textured recipes. Make sure to follow Susanality!
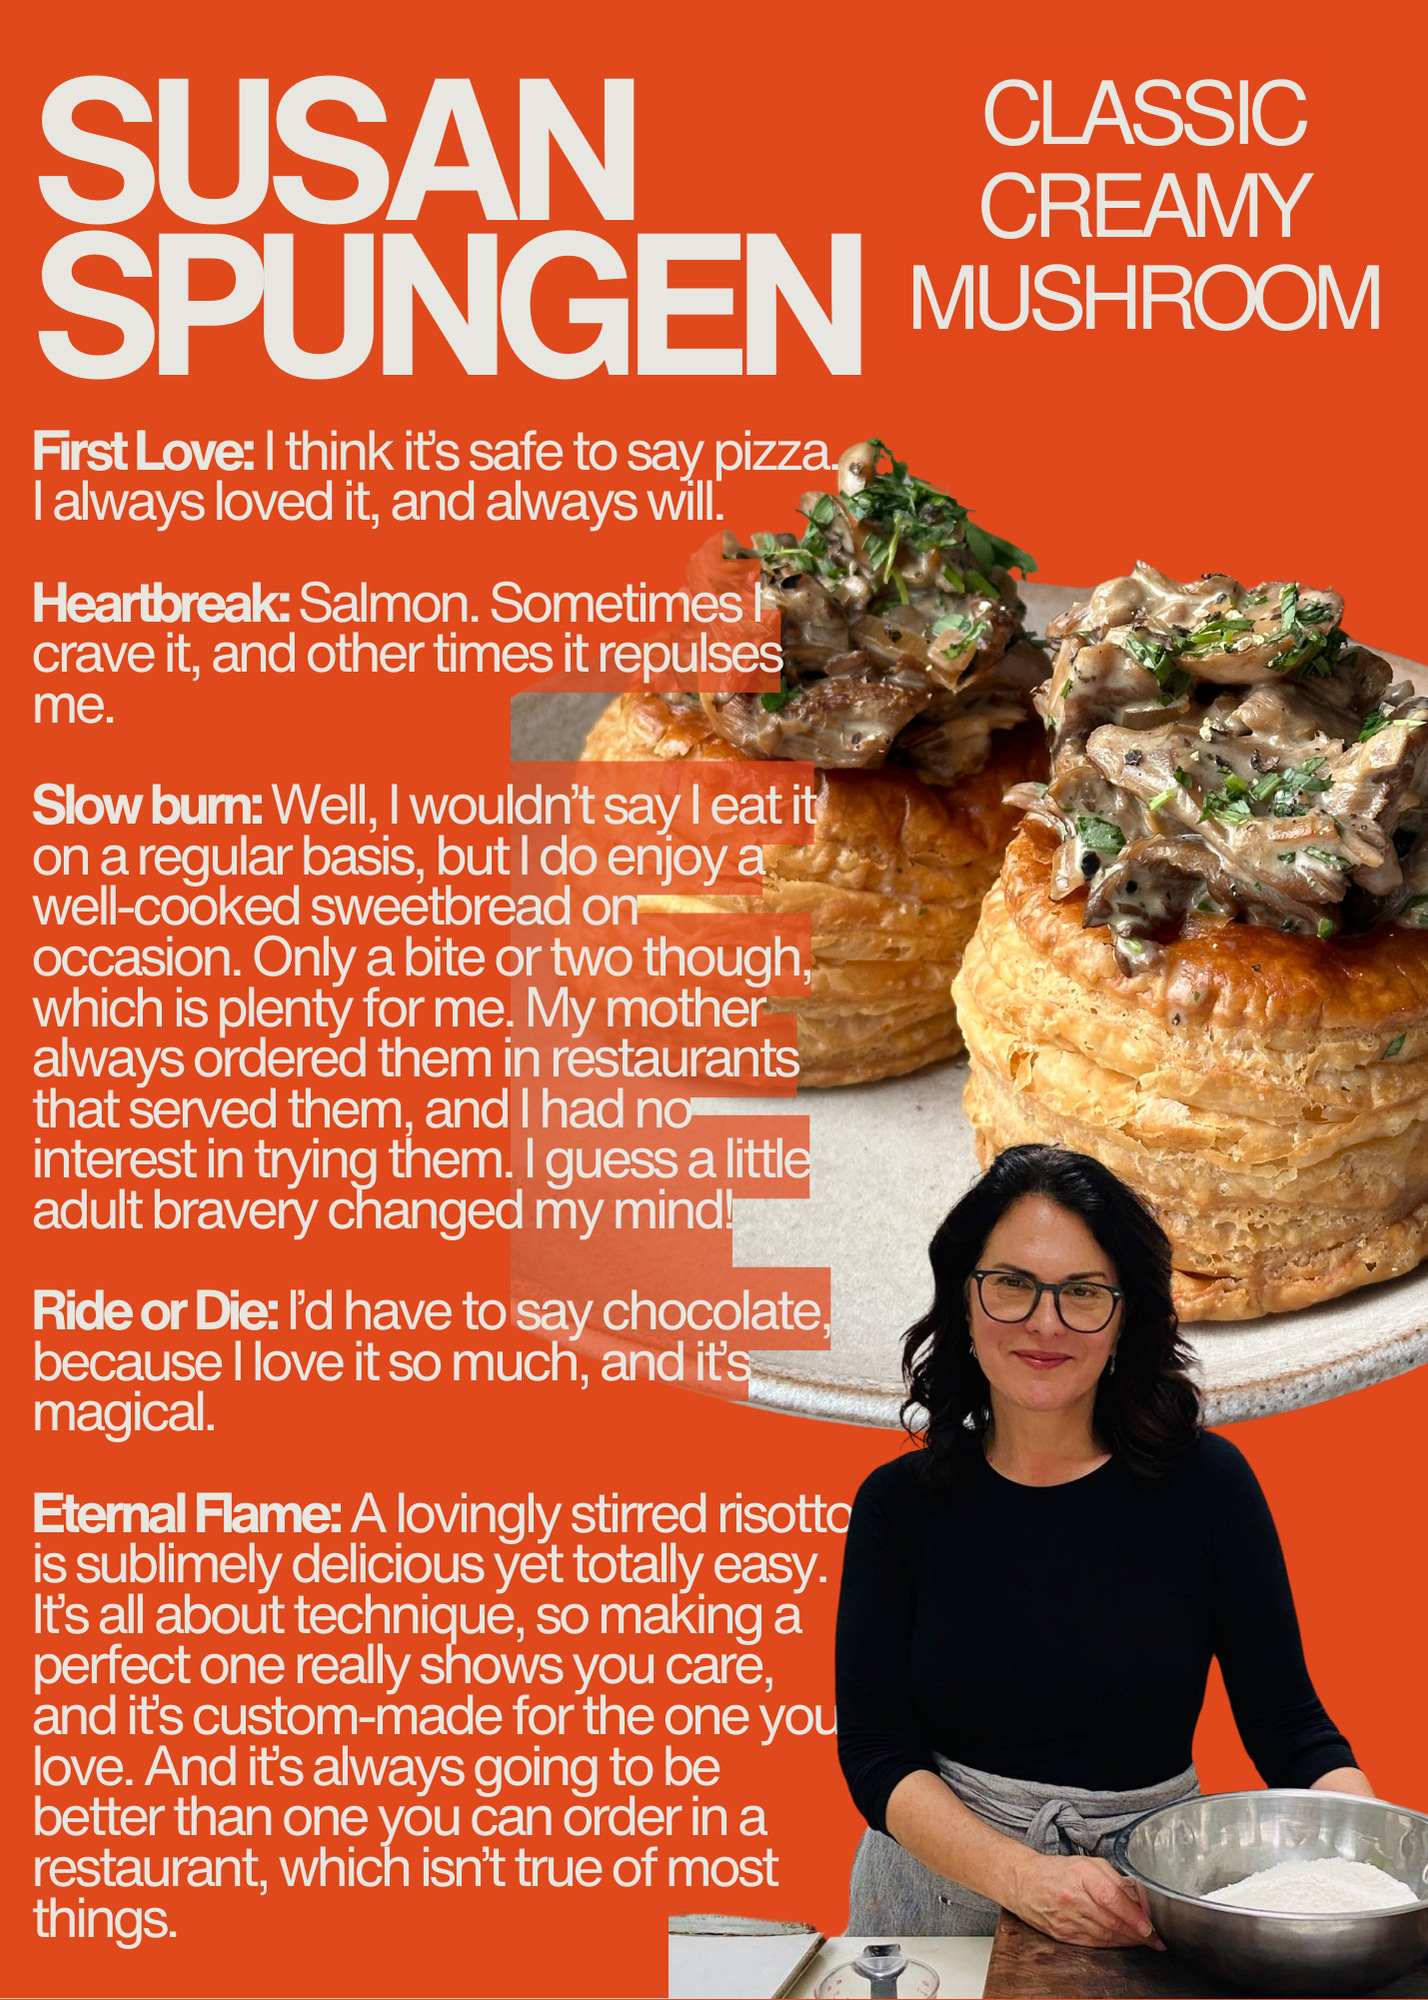
Find Susan Spungen’s recipe for Creamy mushroom vol-au-vents below
Clare De Boer
Clare de Boer is a chef and restaurateur based in New York. After studying at Ballymaloe and working at the River Cafe, she moved to the US and co-founded King in Manhattan. Clare recently opened Stissing House in Pine Plains, upstate New York and somehow finds time to write The Best Bit here on substack, with beautiful, generous cooking you’ll go back to again and again.
Helen Goh
When I worked at Ottolenghi I was fortunate to get to know Helen Goh’s recipes up close and personal. The techniques and flavours in those recipes have been fundamental to my baking repertoire and have been a real foundation for understanding how to put recipes together - if you don’t already have a copy of the two books she has co-authored - ‘Comfort’ (2024) and ‘Sweet’ (2017), what are you doing?! You can also find her work in her bi-weekly column in the Sydney Morning Herald.
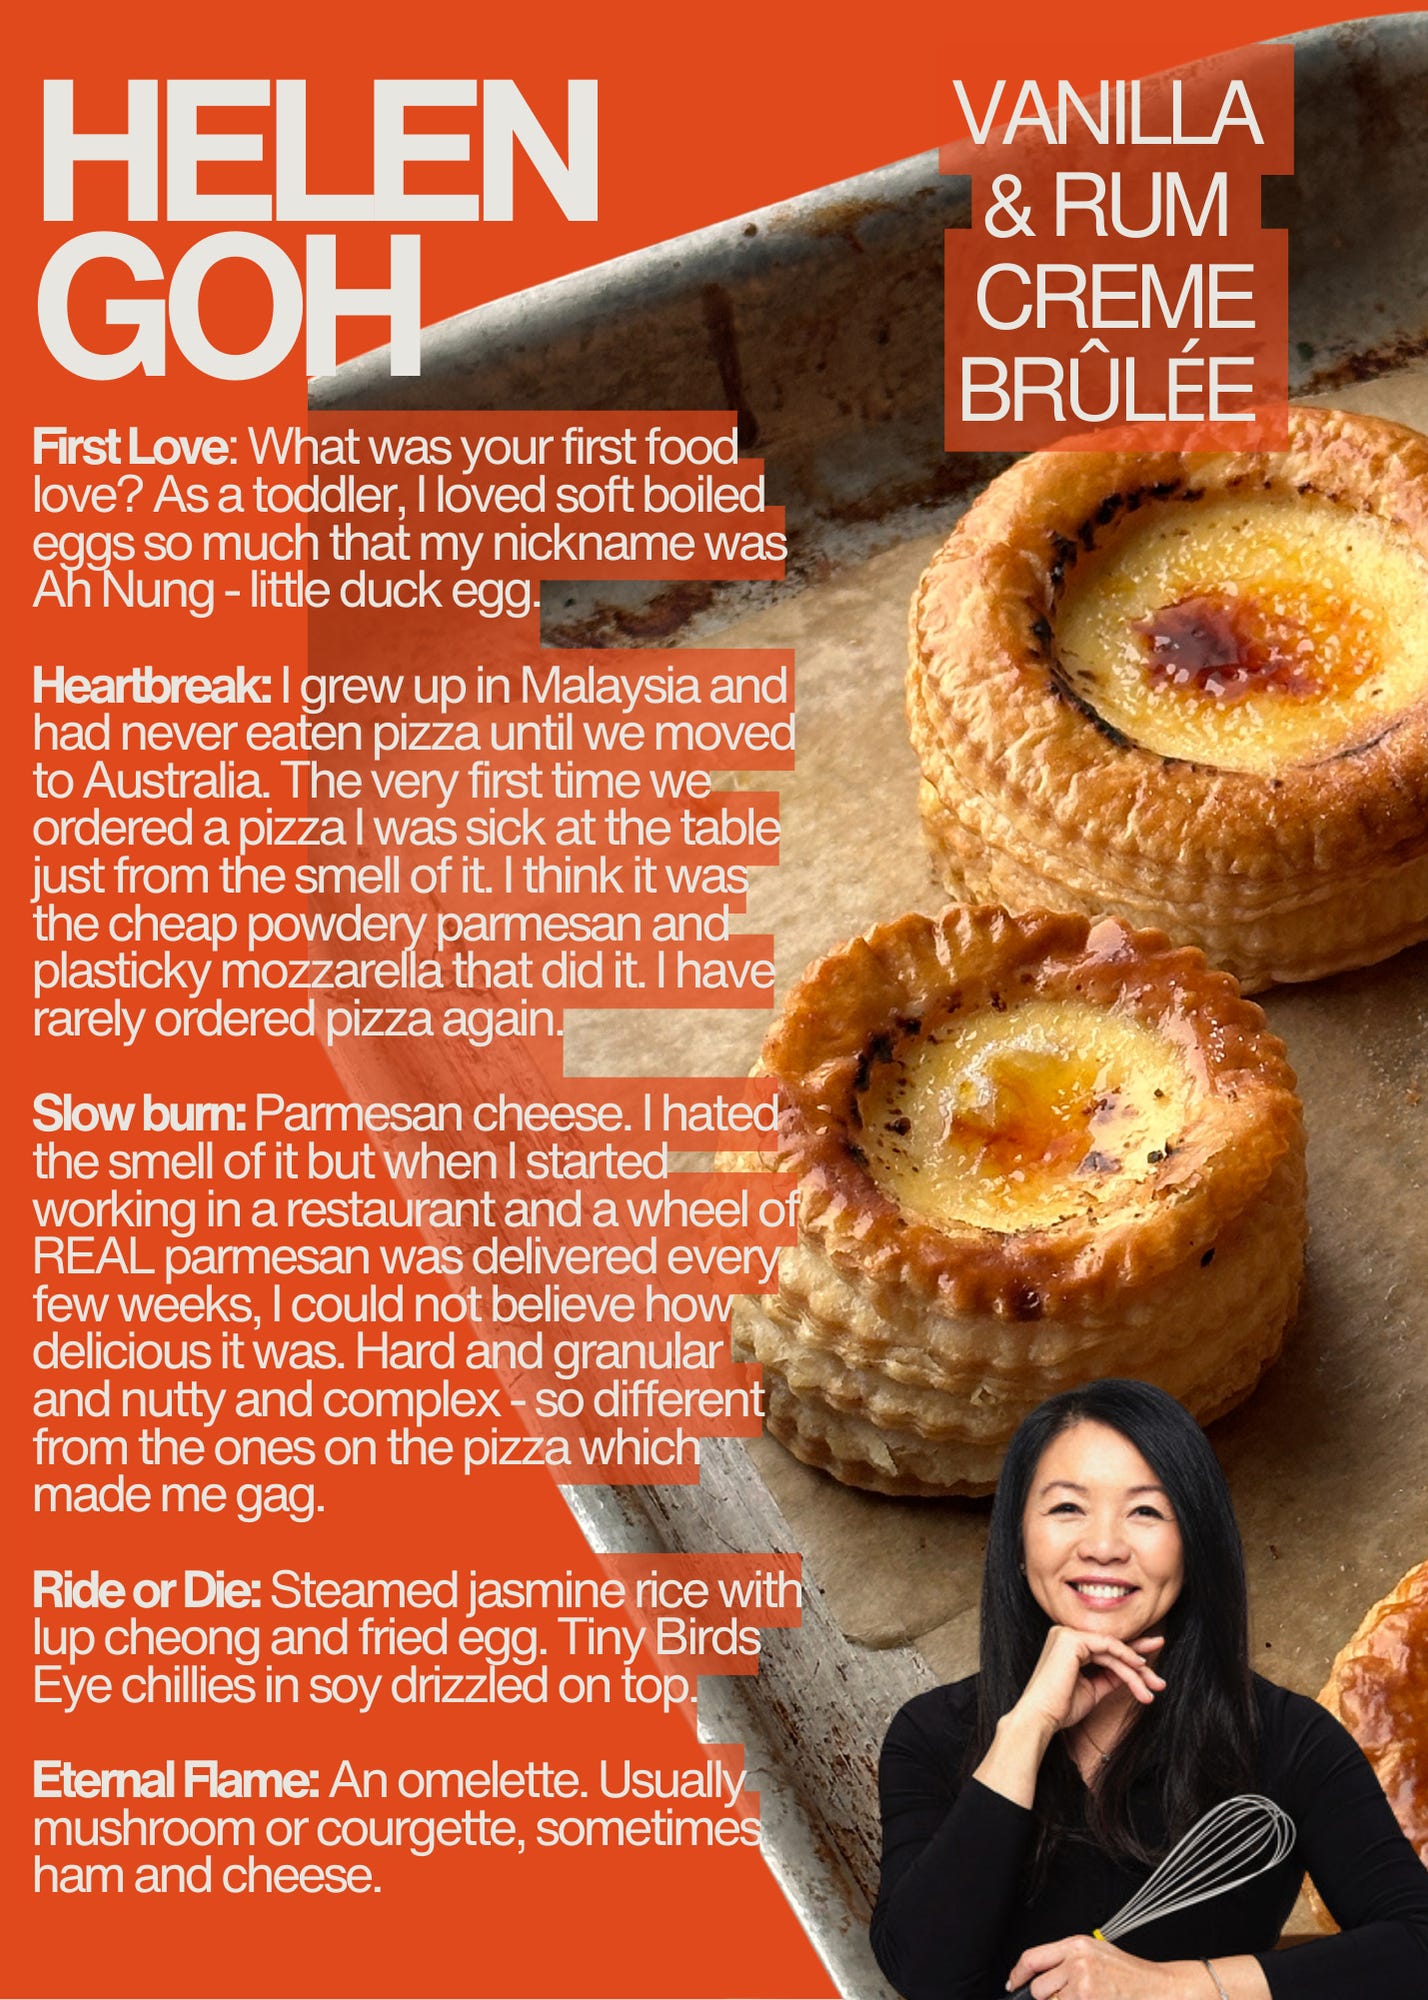
Find Helen Goh’s recipe for Vanilla and Rum Creme brûlée below.
And a little bonus from me: Apple Crumble
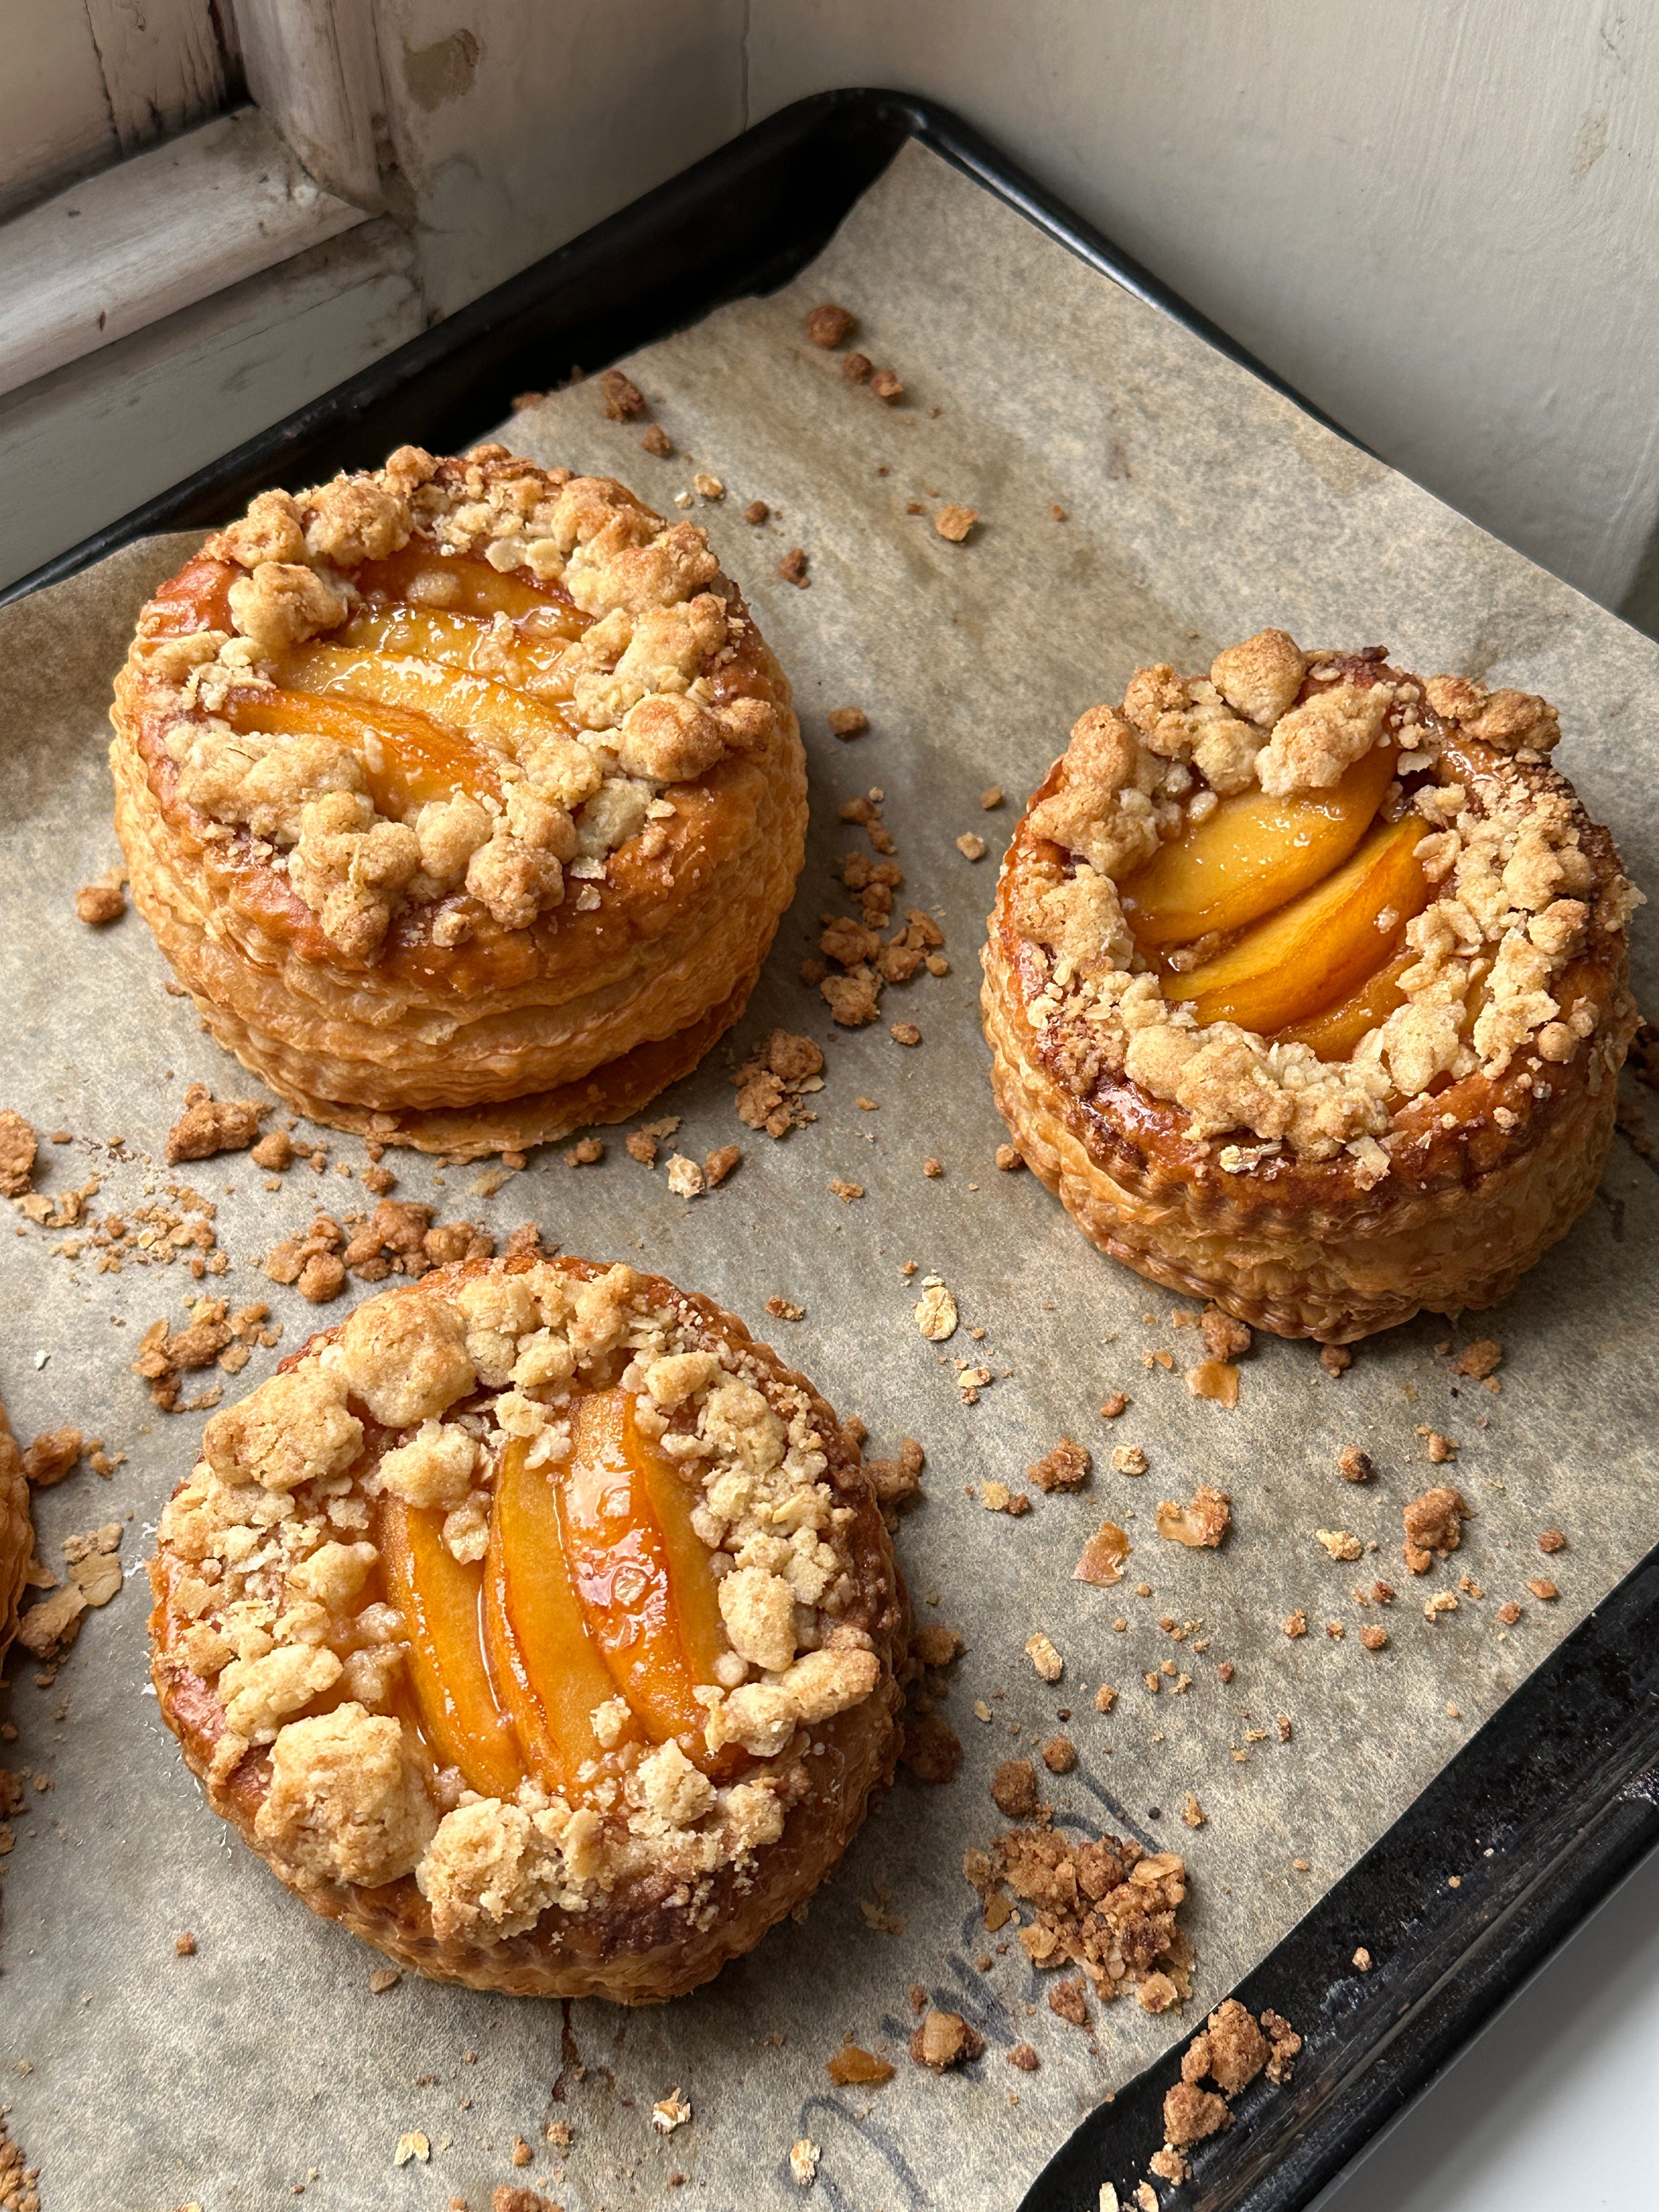
I never give up an opportunity to eat apple pie and this might be one of the most satisfying and easy ways to make one. Not only is the deep dish, crisp pastry a joy to eat, but all the fillings mingle and get to know each other during the bake - caramelised apples, tender compote and vanilla custard. What’s not to love?
Vol-Au-Vent Cases
Yield: Makes around 6 large vol-au-vents (9-10cm with 5-6cm middles), 12 medium vol-au-vents (around 6.5-7.5cm diameter with 4-4.5cm middles) or 20-24 small vol-au-ventss (4.5-5cm with 2-2.5cm middles)
Note: If you go for a triple-stacked vol-au-vent, you will get a ⅓ less yield.
Equipment: Fluted cutters - sharp!, a pastry brush
Ingredients
1 x batch of Puff Pastry or Inverted Puff Pastry, around 500g, laminated with 2 singles and 2 doubles. You can also use good quality all butter shop-bought pastry, either in sheets or in a block
Egg Wash or water
Method
Roll out pastry to 2-4mm thickness, depending on your final desired height. I like to go for 4mm. Move onto clean paper then chill and rest in the fridge for at least 30 minutes, but well-wrapped up to 2 days.
Once the dough is cold, use a cookie cutter to confidently stamp out circles in your desired size. Do not wiggle - press firmly and strongly to get the cleanest cuts. No room here for dilly-dallying! Pretend you are a machine on a production line and stamp stamp stamp, hard!
To form the VAV shapes, for half of the circles, use a smaller cookie cutter to cut out the centres to create rings. Alternatively, you can cut the dough into squares with a sharp knife and use a small circular cutter to remove the centres if desired. Place the cut pastry sheet on a tray, cover it, and let it rest in the fridge for 30 minutes or the freezer for 10 minutes to firm up.
Flip the pastry over, remove the paper, and then any excess pastry, leaving your rings and bases. The cut-out centres can be used to make more Vol-au-vents or baked and added back onto your Vol-au-vents as hats. Your pastry is now upside down and ready to build! Reserve any offcuts - you can stack and re-roll.
Place the pastry bases on a lined baking tray, leaving a few centimetres of space between them. Lightly brush the tops with egg wash (or water, if you don’t want any colour), ensuring it doesn’t drip down the sides, as this can seal the layers and stop the pastry from rising properly.
Place a ring on top of each circle of pastry, taking care to align them neatly. Brush the top of the rings with egg wash. Again, watch out for drips!
Chill Vol-au-vent cases in the fridge for at least 30 minutes or well-wrapped for up to 2 days. You can also freeze and store well-wrapped in the freezer for 3 months.
To bake, preheat oven to 180c fan. Place cases into the oven and bake until golden. This is around 15 minutes for small cases, while larger cases will take closer to 20-25 minutes. Hats will take around 15 minutes. If the centre has risen up, press it down gently after baking. Use VAV cases immediately, or leave to cool completely then store in an airtight container for 3 days then refresh before enjoying.

Hot Smoked Trout Rillette
by Ben Lippett
Vol-au-vents ought to be over the top and a bit retro, and for me, a caviar-topped fish rillette ticks all of these boxes, with a very bougie Parker pen. The principle of a rillette is pretty simple: take a tough or underappreciated cut of meat, cook it in its own fat and then once extremely tender, shred it, season it and pack it into a jar for a rainy day. These days, the definition of rillette has extended to more of a catch-all term for preparing shredded, preserved proteins, and you can make a rillette “a la minute” by shredding cooked meat, fish or veggies and mixing them with other tasty, rich ingredients.
Smoked fish are perfect for rillette-ing as they’re ordinarily pretty high in fat (mackerel & trout take the crown here, haddock, I’d swerve) and deliver punchy flavour. A neutral, rich dairy-based foundation allows the fish to sparkle and a handful of acidic, clean and fresh flavours enhance the whole bite. It’s not a vol-au-vent without a little pzazz, so we’re finishing the whole lot with elegant trout roe, or if you’re feeling really flush, caviar.
Yield: Approx 500g, enough to fill about 7 large, 12 medium and 30 small
Make ahead: Mix all ingredients except for cucumber, lemon and herbs, which should be added as close to serving as possible to retain freshness and brightness.
Ingredients
1 Medium Egg
1/8th Cucumber, about 50g
100g Cream Cheese
100g Creme Fraiche
150g Hot Smoked Trout Fillets
35g Bread & Butter or Dill Pickles
3 tsp Nonpareille Capers
8g Dill, plus extra for garnish
8g Tarragon, plus extra for garnish
10g Chives
1/2 Lemon
1-2 Tbsp Trout roe or Caviar
Fine sea salt and pepper to season
Method
Set up a bowl of ice water. Use the heel of your knife to pierce a small hole in the base of each of the eggs. Bring a small saucepan of water to a boil and use a spoon to gently lower in the eggs. Leave to boil for 7 minutes and 30 seconds before fishing them out and plunging
into the ice bath. After they’ve had 30 seconds, tap the eggs on your countertop to crack the shell all over. Return to the ice bath while you prepare the other ingredients.
Cut the cucumber into small dice. I aim for around 1 cm. (you can peel it if you like, but I don’t bother), tip into a bowl and season generously with salt. Leave to hang out for 10 mins or so. Now pour off the excess liquid and rinse the cucumber briefly with cold water. Drain and dry. In a medium mixing bowl, beat together the cream cheese and sour cream until smooth. Peel the shells from the egg and cut in half. Remove the yolks from the whites and roughly chop. Finely chop the whites and then mix both parts of the egg through the cream.
Remove the skin from the trout fillets and flake into the bowl. Keep the pieces pretty chunky, as you fold the rillette together, they’ll break down. Cut the pickles into a 1cm dice and fold through the mix along with the capers and cucumber. Finely chop the dill, tarragon leaves and chives and add to the bowl. Finish with the zest of the lemon and a squeeze of juice and season generously with around 18 twists of pepper and a good pinch of fine sea salt.
Divide the mix between your warm vol-au-vents and top with a spoon of trout roe or caviar and a few leaves of dill and tarragon.
Follow Ben’s newsletter ‘How I Cook’ here / find his Instagram here.
The Recipe: Mushroom Vol-Au-Vent
I used to make vol-au-vent back in my catering days, or did I just order them? These were probably bite-size ones for hors d’oeuvres or mini desserts. They are good for the home cook for the same reasons they are good in a fancy French restaurant or a catering kitchen; you can turn out something very fancy and finished just by combining two simple elements. You can’t imagine the joy on my husband’s face when he saw these two amply filled vol-au-vents in the fridge. Even pre-filled, they re-heated beautifully. I like the idea of filling them with a creamy seafood velouté, or even a Thai-style curry, but my favorite way to fill these would be with a very mushroom-y mixture finished with crème fraiche and tarragon.
Yield: Approx 530g, enough to fill approx 6 large cases, 14 medium, 28 small
Make ahead: Can be made up to 3 days in advance. For best results, add the fresh herbs when ready to serve
Ingredients
14g/½ ounce dried porcini mushrooms
30g/2 tablespoons olive oil
30g/2 tablespoons butter
425g/ 8 ounces mixed fresh mushrooms, trimmed and sliced (I used a mix of oyster, shiitake, and cremini) [Editor’s Note: You can cut the mushrooms in a rough chop if you are filling small vol-au-vent cases]
Salt and pepper to taste (I use kosher salt)
1 medium shallot, minced (approx ⅓ cup/35 g)
1 sprig fresh thyme
60ml/ ¼ cup Marsala, Madeira, or dry sherry
Optional: A few teaspoons of stock concentrate e.g. better than bouillon, yondu
80g/ ⅓ cup crème frâiche or heavy (double) cream
Fresh tarragon or parsley, roughly chopped (optional)
Shaved black truffle, optional
Method
Place dried porcini in a one cup measure and pour boiling water over to reach the top, about 200ml. Let sit until softened and cool enough to handle. Lift the mushrooms from the water (reserving the liquid), squeeze out excess and chop medium--fine.
Heat a 12-inch skillet or frying pan over high heat. Add 1 tablespoon of oil and 1 tablespoon butter. When butter melts, add half the fresh mushrooms and season lightly with salt and pepper.
Toss to coat everything, and cook until golden, tossing frequently, for 4 to 5 minutes, reducing heat if they start to scorch. Transfer to a dinner plate.
Add the other tbsp oil and butter, then repeat cooking process with remaining mushrooms, but after 3 minutes, add the shallot, thyme, and reserved dried and sauteed mushrooms, and cook until shallots have softened, another 2 to 3 minutes.
Reduce heat to medium and add the Marsala, Madeira, or sherry. It will almost instantly reduce, but if not, wait until it does. Add the porcini liquid, decanting slowly to leave any grit behind. Add the stock concentrate, if using. Cook until thickened but still saucy, 3 to 4 minutes.
Add the crème frâiche and cook until melted and heated through, 2 to 3 minutes. Season to taste with salt and pepper, and add tarragon or parsley if using.
Serve piping hot in a vol-au-vent case and shave black truffle over top.
Follow Susan’s newsletter ‘Susanality’ here / find her instagram here.
Ha's Đặc Biệt’s Bo Kho
Bo Kho is a classic Vietnamese beef and carrot stew, a cooking method which was popularized during French colonization of Vietnam. It takes all the elements of traditional French stews- slow braising, meant to be eaten with bread etc, and makes them punchier and more complex with the addition of aromatics, fish sauce and fresh herbs. This is one of our favorite dishes to make, both comforting and sexy (ideal). The dish is typically served with warm, fluffy baguette for dipping, but we have actually made this exact version, as a filling for vol-au-vent, many times over the years. It is always a show stopper and is such a fun, interesting way to combine techniques.
Yield: Makes around 3kg stew total, which would fill approx 8-10 large cases, with plenty of gravy for pouring and leftover stock to enjoy.
Make ahead: Can be prepared 3 days in advance then reheated.
Ingredients
2lb beef shank (bone in leg), cut into large chunks approx 2-3 inches [Editor’s Note: In the UK I got boneless shin, then two marrow bones]
2 tbsp neutral oil
1 white onion, sliced
4 cloves garlic, minced
2 tbsp Vietnamese beef stew seasoning (OR an equal mix of paprika, coriander, fennel and black pepper)
2 tbsp tomato paste
1L red wine
1 large knob of ginger, peeled and sliced
3 stalks lemongrass, pounded and cut in half
2-3 pods star anise
1L chicken or beef stock
1L coconut water
4 tbsp fish sauce
2 tbsp sugar
4 carrots, peeled and cut into large chunks, approx 2 inches
To Finish
Lime wedges
Small white onion, thinly sliced
1 bunch thai basil
Freshly ground white pepper
Method
Season beef generously with salt and pepper. Heat neutral oil in a large Dutch oven and sear the beef well on both sides. Remove from the pan and set aside.
Add in onions and garlic, as well as your spice mix, and saute until softened. Add in tomato paste and then deglaze with the red wine. Allow the red wine to reduce slightly, around 2-3 minutes.
Add the beef back into the pan, along with the ginger, lemongrass and star anise. Followed by the stock, coconut water, fish sauce and sugar. Bring this to a boil, then add in your carrots. Simmer the stew until the beef is completely tender, approx 2.5 hours.
Adjust seasoning as needed, with more fish sauce and sugar.
Spoon the beef and carrots onto the vol-au-vent, garnish with thai basil leaves and sliced white onions, a generous squeeze of lime and the white pepper. Top with a hat and serve with broth poured on top.
Keep up to date with Sadie and Anthony on instagram here and substack here.
Vanilla and Rum Creme brûlée Vol-au-Vents
by Helen Goh
Yield: Approx 350ml, enough to fill 6 large or 12 medium cases
Make ahead: Custard can be made up to 3 days in advance and kept in the fridge. Reheat until about 60c before pouring into cases. If you have made vol-au-vent cases in advance, too, these should also be warmed for best results.
For the custard
180ml double/heavy cream
90ml milk
1/2 vanilla bean
3 egg yolks
30g caster sugar, plus extra 20g for brûlée-ing
A pinch of salt
1 tsp rum or vanilla essence (the imitation kind, that tastes alcoholic)
Method
In a small saucepan, whisk together the cream, milk, scraped vanilla seeds (and the pod) then place over medium heat. Stir occasionally until the mixture begins to steam, then remove from the heat.
Whisk the egg yolks, sugar and salt in a medium mixing bowl until fully combined and slightly paler, then pour about a third of the hot cream mixture into the eggs, whisking continuously. Now pour the egg mixture back into the pan with the cream mixture, whisk together, then place it over low heat. Stir gently and continuously with the whisk until slightly thickened but still a pourable consistency - about 5 minutes.
Strain the custard through a fine mesh sieve into a clean bowl or jug. Wash and dry the vanilla bean to save for another use later. Cover the custard with cling film, making sure it is in contact with the custard, then set aside to cool. If making the custard ahead, refrigerate it once it has cooled until ready to use.
Heat oven to 170C fan-forced.
Fill vol-au-vents with custard (see note about ‘make ahead’ if your custard is cold and do not press down the VAV centres after baking as you want these to be as structurally stable as possible!) then return to the oven and bake for 6-10 minutes until the custard is just set - it may puff up a little but should not brown.
Remove from the oven and cool for a few minutes on the tray before transferring to a wire rack to cool completely.
When ready to serve, sprinkle the tops of the vol-au-vents evenly with the extra sugar and use a domestic blowtorch to slowly caramelise until golden and crisp.
Follow Helen on Instagram here.
An honour and a privilege!
Is there a typo in the rillette. It says only one egg in the ingredients but the instructions refer to multiple🤔