Hello,
Welcome to today’s edition of Kitchen Projects. Thank you so much for being here.
It’s a brand new year, so today we are taking 2024 by the collar and diving right into the deep end with the queen of breads: A laminated brioche, the flakiest, fluffiest richest loaf you can dream of. Why, you ask, are we going so hard in the first week of January?
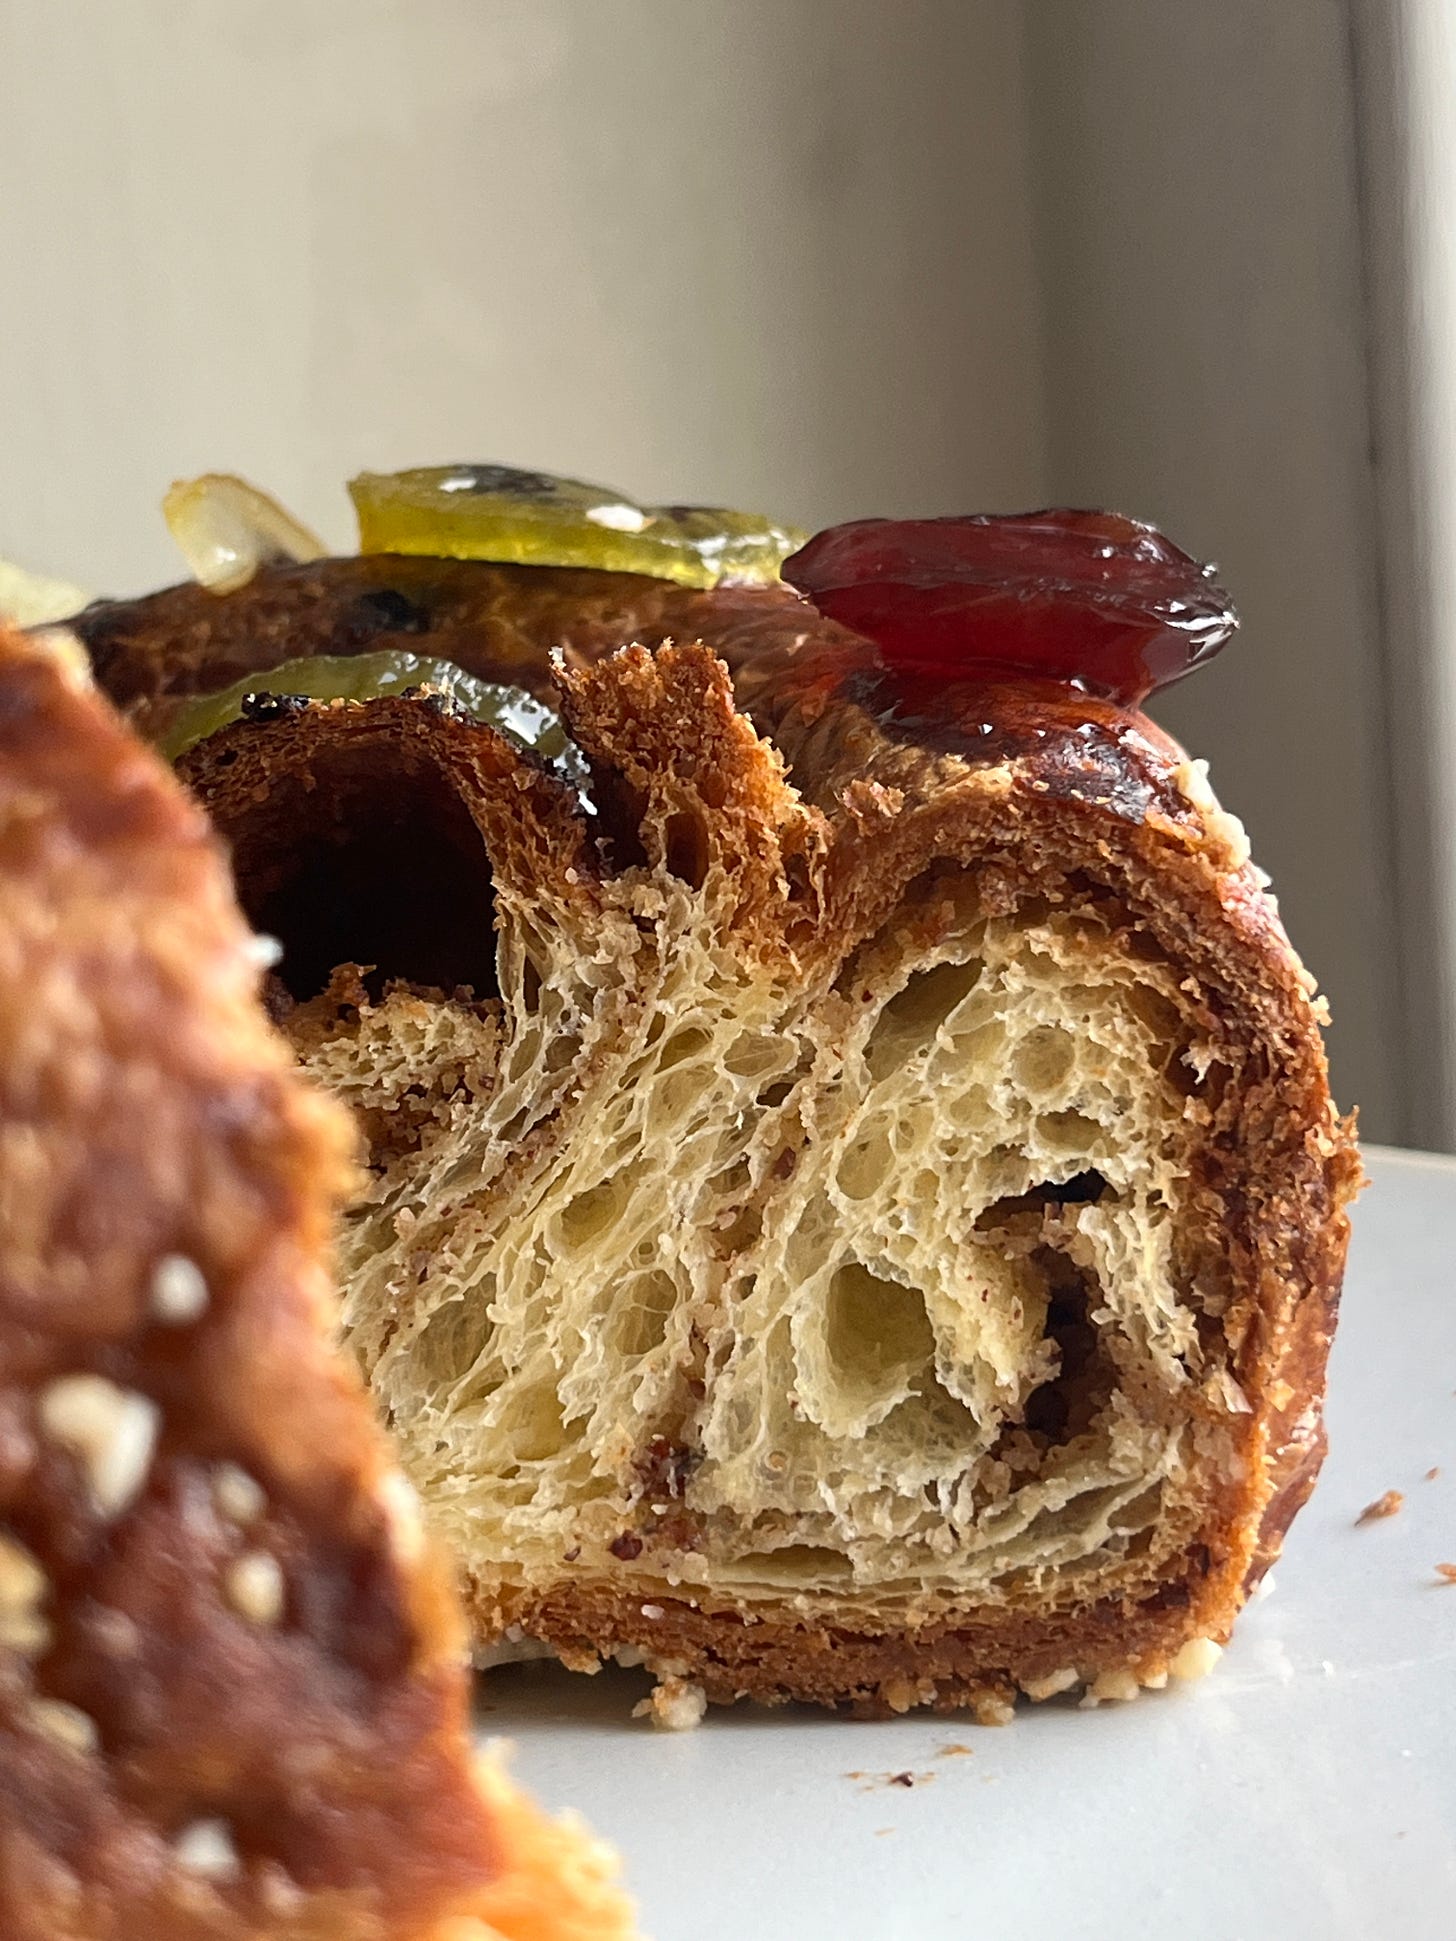
Well, you can blame the galette des rois, the flaky round pastry eaten every year in January. This year, I’ve made a hybrid of the galette and traditional brioche gâteau to create the ultimate combination: Flaky laminated brioche with cinnamon frangipane aka my Queen Cake. You can find the recipe for that over on KP+ - click here to make it.
What’s KP+? Well, it’s the level-up version of this newsletter. By joining KP+, you will support the writing and research that goes into the newsletter (including the commissioning - and fair payment - of all the writers), join a growing community, access extra content (inc., the entire archive) and more. Subscribing is easy and only costs £5 per month. Why not give it a go? Come and join the gang!
Love,
Nicola
PSST… I’ve written a book!
I can finally say that my debut book SIFT: The Elements of Great Baking out THIS YEAR!!! and it’s available to pre-order now. Across 350 pages, I'll guide you through the fundamentals of baking and pastry through in-depth reference sections and well over 100 tried & tested recipes with stunning photography and incredible design. SIFT is the book I wish I'd had when I first started baking and I can’t wait to show you more.
The Queen of Brioche
The first week of January means different things to everyone. Perhaps you get into this week and find yourself charmed with the promise of a fresh slate. Maybe you start cycling to work. Maybe you find yourself putting booze to one side and joining the cult of dry January. For me, the first week of January means only one thing: It's time to eat Galette Des Rois.
The glorious Galette Des Rois, aka. King's cake is a tradition that falls on the first week of January. If you thought that the excesses of Christmas were over, how about a slice of puff pastry stuffed with frangipane? I've said it before, and I'll say it again: the Galette Des Rois, as a tradition for the first week of January, is like jumping into the deep end of pastry. It's a technical, involved bake that really wakes you up from any post-festivities slump. Every year, the push to make, bake and -sometimes- recreate this recipe snaps me into focus. And though we'll have plenty of more relaxing bakes to combat January's sometimes austere feeling energy, I love the way this challenging, delicious bake sets the tone for the year
A traditional French Galette Des Rois is a beautiful marriage of puff pastry and frangipane. To make it, you first cut two discs of rolled-out puff pastry (my method and deep dive here). These are sealed together with a hefty helping of frangipane inside. The whole glorious thing is then egg-washed (usually several times for maximum drama and golden looks), scored and baked.
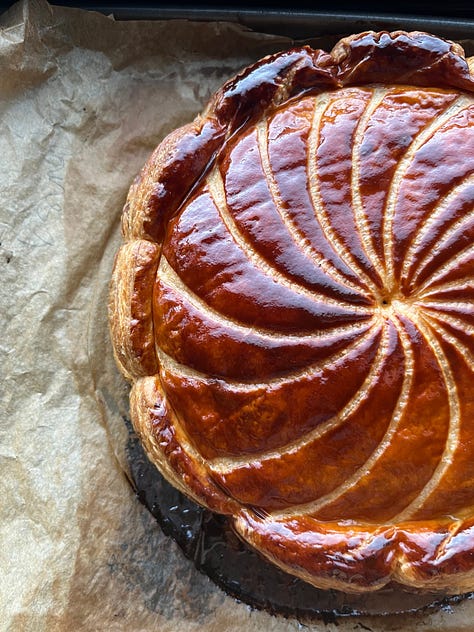
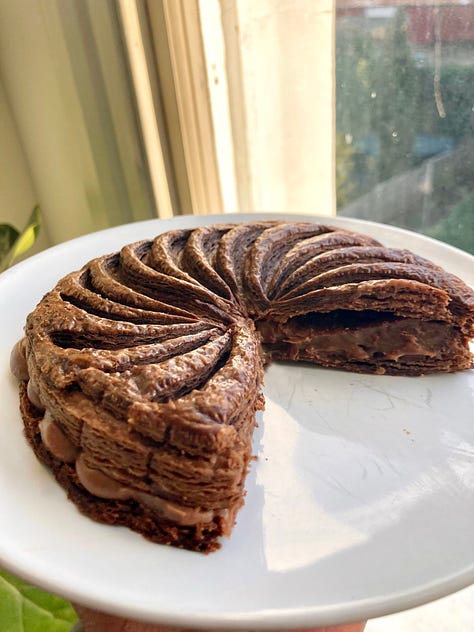
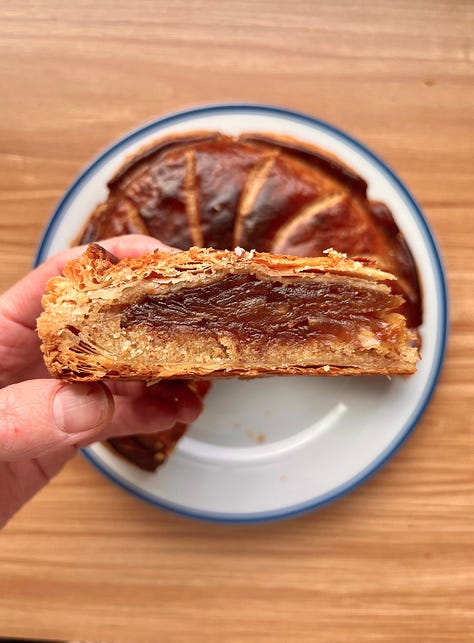
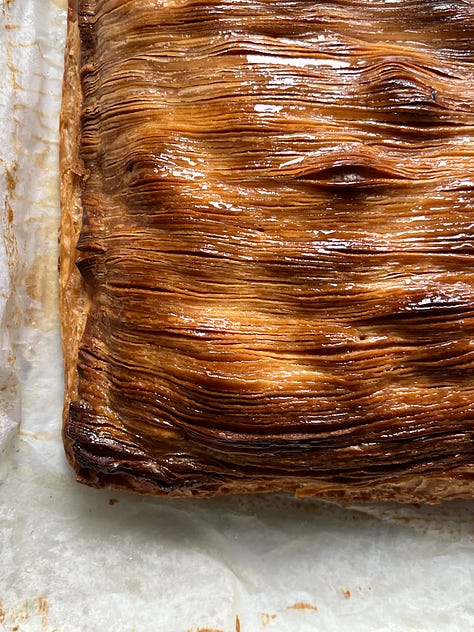
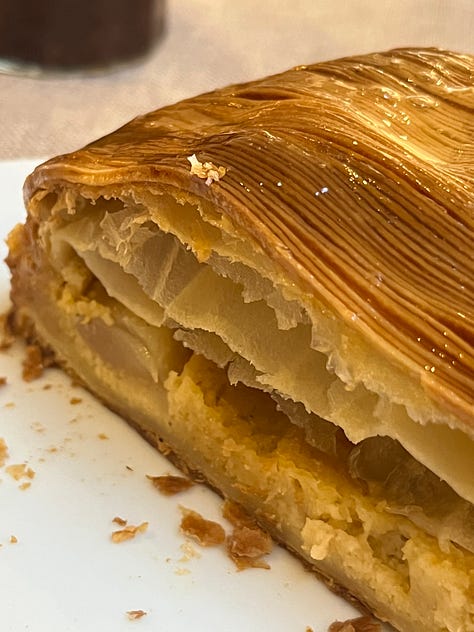
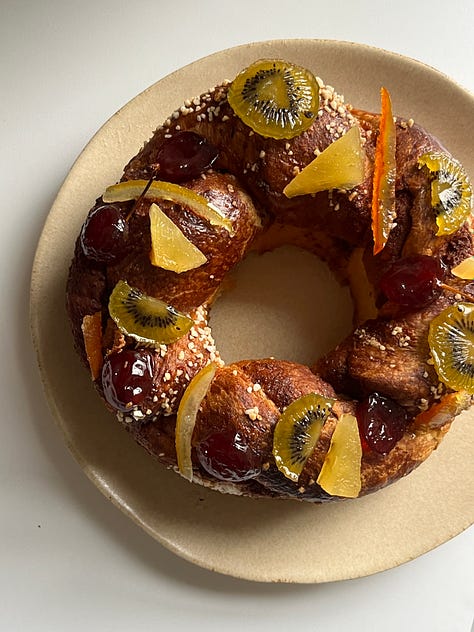
This version of 'King Cake', however, was not the original. This dessert began its life as the 'Gâteau des Rois', a loop of brioche adorned with candied fruits that can be traced back to at least the 16th Century. While the flaky galette has since soared in popularity, the original gâteau is mainly only consumed in the South of France nowadays. But worry not for the brioche - it has thrived in other countries. The Roscón de Reyes is enjoyed in Spain and Latin America, and the 'King Cake', a giant cinnamon-like roll decorated splendidly with multicoloured icing and sprinkles, is an iconic bake in New Orleans, likely introduced by either French or Spanish settlers (or likely both, independently).
The 'rules' of the king cake, flaky or otherwise, remain the same. Enjoyed on Epiphany, a feast day in the Christian calendar occurring 12 days after Christmas, each cake or galette is complete with a 'feve', a token, either on top of or baked inside the cake. So the tradition goes, whoever gets the slice containing the five gets to be King for the day. These feves range from beans, almonds or little ceramic tokens, to little naked plastic babies in the case of the New Orleans tradition. If you want to learn how to make a traditional New Orleans King Cake, look no further than Bronwyn Wyatt aka Bayou Saint Cake, who runs classes on the subject.
This week’s recipe
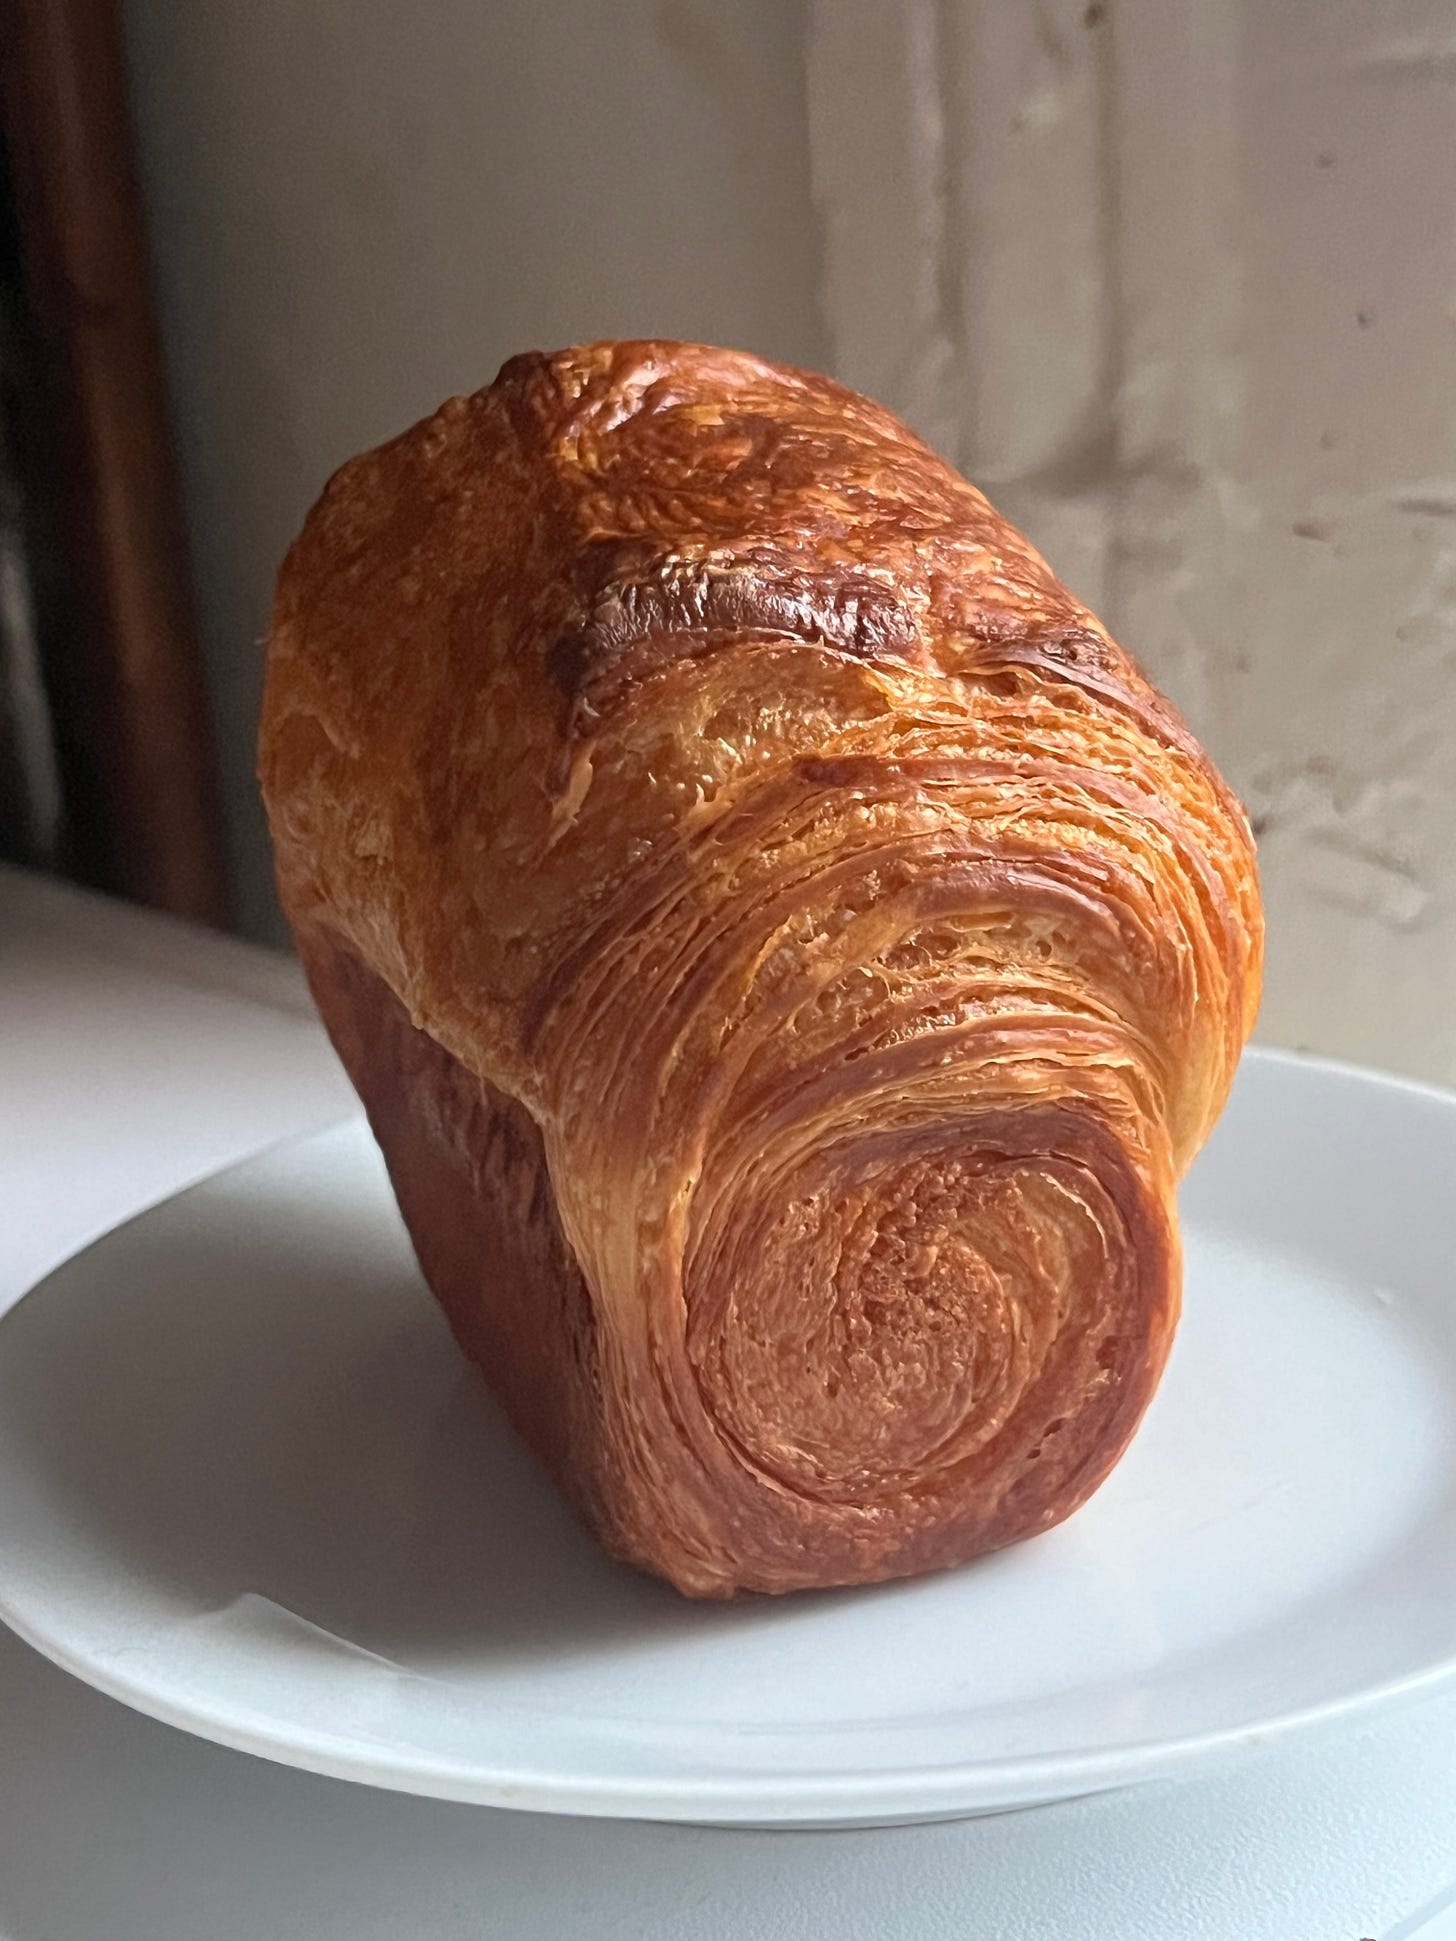
I've a wealth of galette des rois recipes and puff pastry know-how in the newsletter archive. And though lamination is probably my favourite kitchen task, I've been meaning to make a brioche version of a king cake for a while. But then it hit me. Why choose? Enter Laminated brioche. Brioche dough interspersed with (even more) butter to create an ultra-light and flaky final loaf.
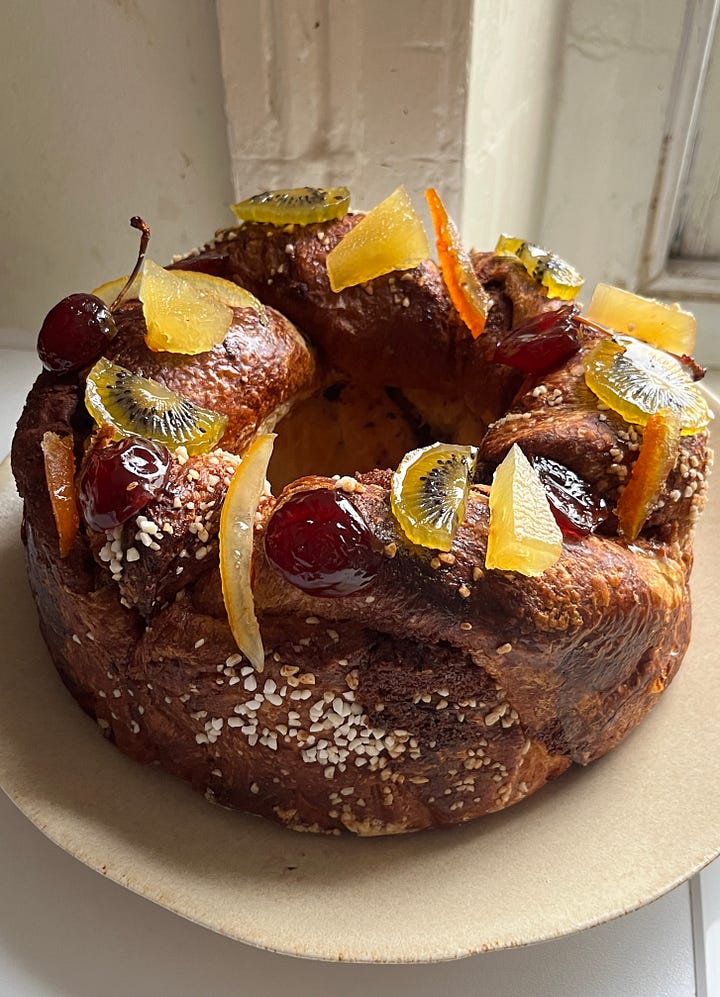
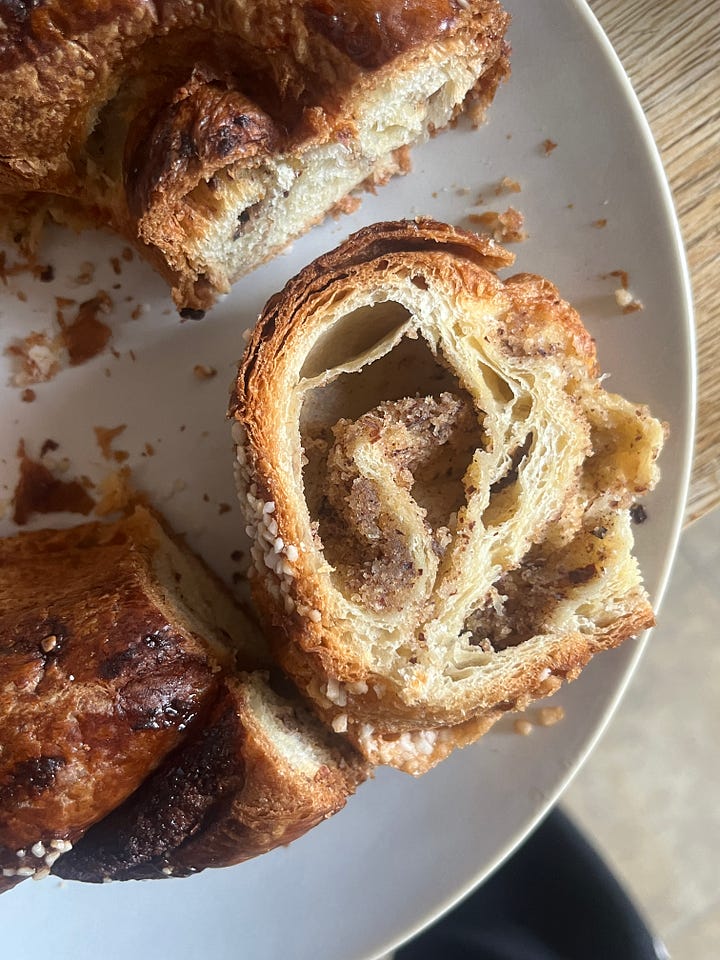
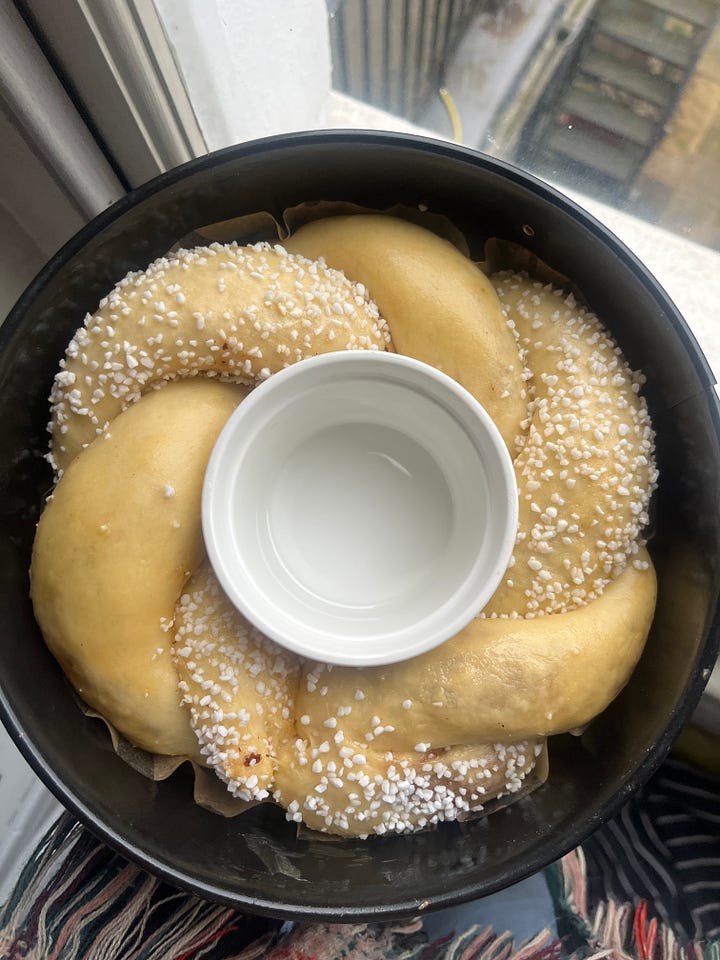
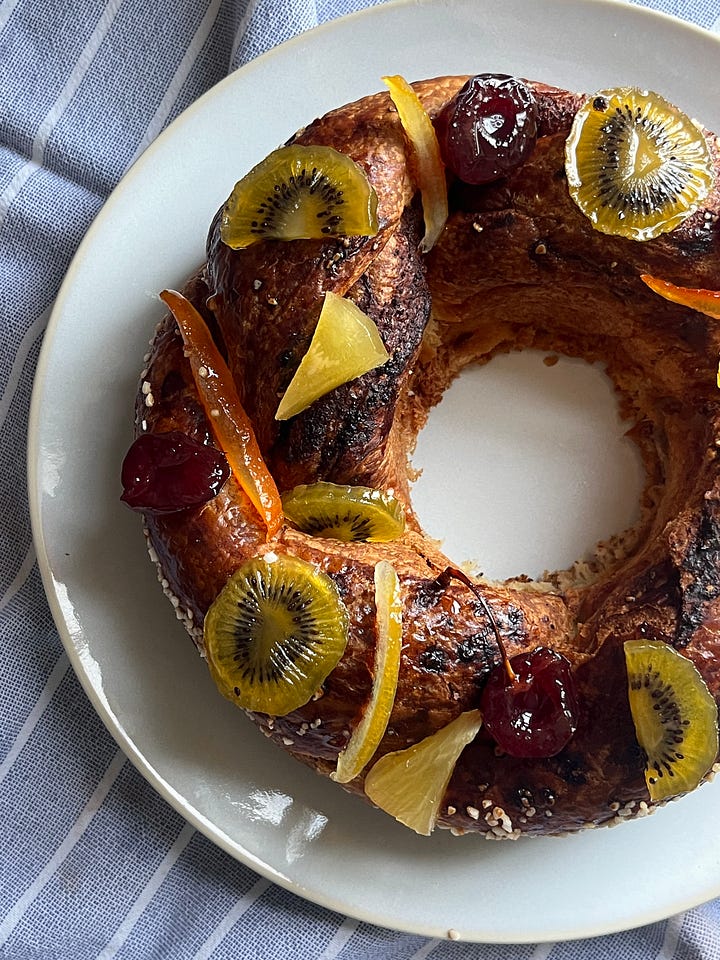
Shockingly, it's actually *easier* to make. Over on KP+, I've fangled a baby between the laminated brioche, galette des rois and New Orleans King cake with a flaky ring of cinnamony, frangipane joy which I’ve called, thanks to Marie in my DMs, the QUEEN cake. It's basically a giant, round almond croissant, and I cannot get enough of it. I've also shared my 'cheats' version of laminated brioche (think rough puff style!) for anyone who still wants to take a shot at this flaky bread.
What IS lamination?
Simply put, lamination is the process of adding layers, separated by fat, into dough. As it bakes, the fat melts, enriching the dough around it and leaving a little hole in its place. This creates flakiness and layers.
Laminated pastries exist on a vast spectrum. One day, I'll draw it out properly for you, but for now create your own magical mind bakery.
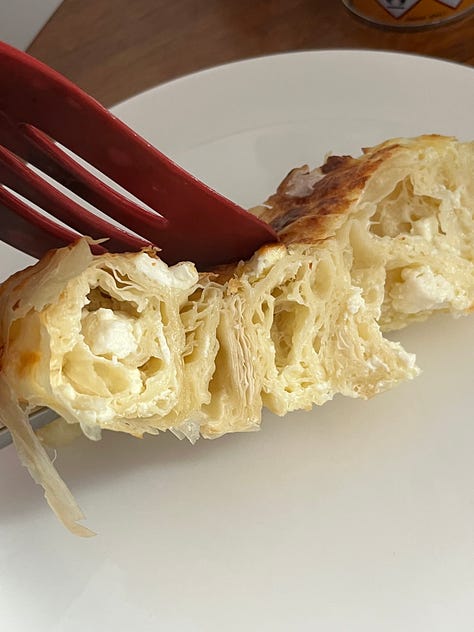
There are two basic sides to the family, yeasted and unyeasted. Within these categories, there's an expansive complexity of lamination, from perfect, long, uninterrupted layers of fat to bold chunks leaving their mark. On the unyeasted side, you can see lamination in it's simplest form in bakes like flaky scones or Southern American biscuits, progressing through pasteis de nata shells, flaky pie dough and running all the way up to arduously layered puff pastry in all its glory. Oh, and there's sfogiatelle. That's a recipe I've been promising for several years, and I think it is almost time to revisit (you can see my first sorry attempts here). I'd even take a punt (and am prepared to be shouted down) that swirled-up filo pies like banitsa, or borek earn you lamination points.
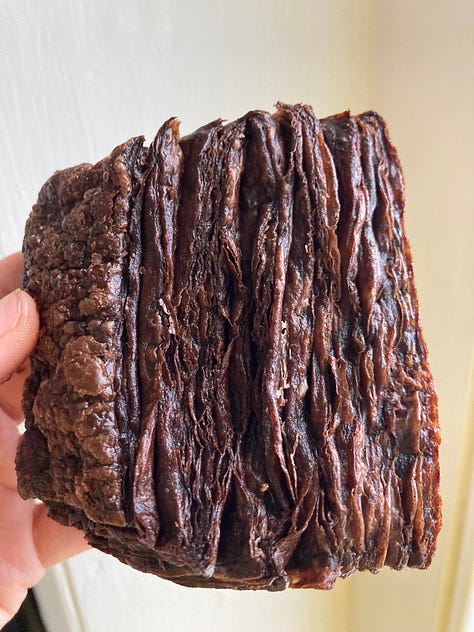
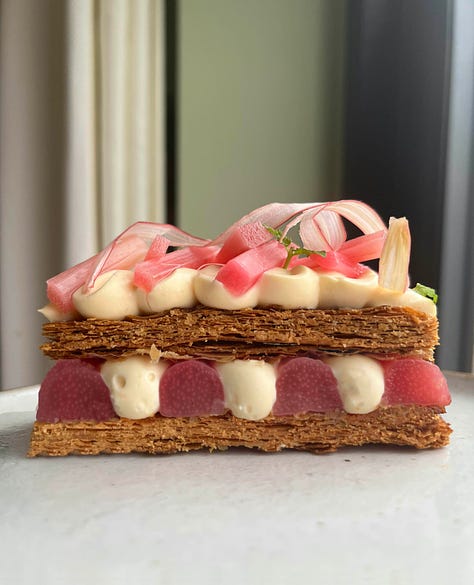
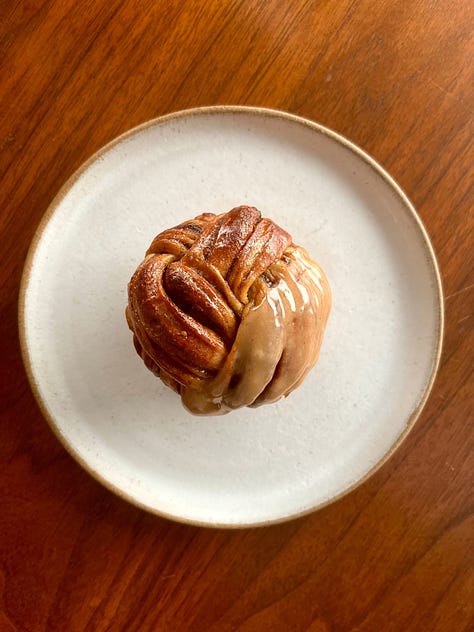
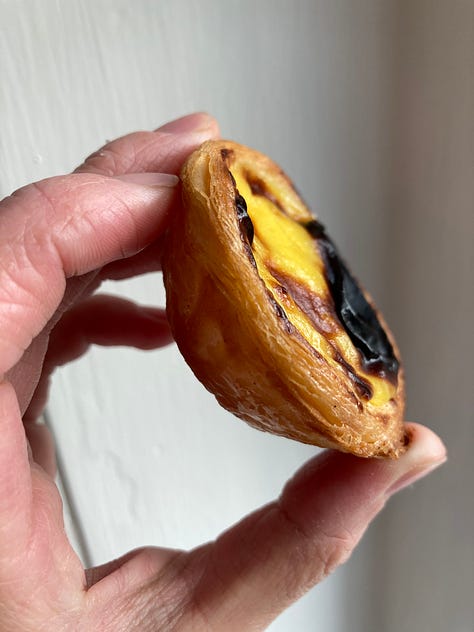

On the yeasted side, spreading a thick layer of spiced butter onto bun dough and rolling, swirling and folding to make cinnamon buns is probably the first step on the ladder to more complex laminating tasks. Babkas are laminated with buttery fillings and twisted and swirled to gorgeous effect, and the ensaïmada, the famous swirled Mallorcan pastry has an unconventional laminating techniques. But, of course, the crown jewels in the yeasted laminated pastry family is, no doubt, the croissant and its associated parties.
Though all tasks have their own unique set of challenges, getting yeast involved takes things up a notch. As well as adding in time for fermentation and proofing, there's also a crucial tension between the fat and the dough: the temperatures that both are happiest are at odds with one another. Winter is good for laminating as your butter is less likely to melt and smear, but more challenging for fermentation. So it's a good time to learn, as long as you can be patient.
So what about 'laminated brioche'?
‘Laminated Brioche’ is a combination of words I first heard bandied around in 2017/18, and my goodness, I can't even begin to tell you how compelled I was by it. But other than seeing it on Instagram, I had no idea where to find it and taste it, nor was I actually sure what it was. Was it actually something distinct from croissants, or was it just marketing spin?
According to Google trends, laminated brioche has never been searched enough to warrant any data, but it's french translation 'Brioche Feuilletée' has piqued interest over the years. I struggled to find much on the history, though it was apparently created in 2008 by Alain Barbier, of Au Roi de la Brioche in Moulins-la-Marche, North West France. But is this flaky brioche really distinct enough from croissant dough? We'll get to that later.
I've tried to make laminated brioche every few months in the last four years. The results, let's put it this way, have been mixed. Sometimes heavy and too dry, other times collapsing badly under its own weight. It's a topic I've wanted to write about for a while on the newsletter, but I've been avoiding it. In the spirit of the New Year, I'm forging ahead. Let's get into it!
Brioche, but butterier.
Brioche is an ultra rich dough with a super fine crumb. I've covered it extensively in the newsletter (click here to see a list of all the recipes and brioche specific here) but if you haven't enjoyed this gorgeous bread before, let's go in gently.
To quote myself from this Serious Eats article on brioche from last year. "When you slice open a loaf of well-made brioche, you'll be greeted with an ultra-fine crumb. This is partly thanks to the yeast, which ferments the flour and produces bubbles of carbon dioxide that expand in the oven, causing the bread to rise. The rest can be attributed to the butter. As the bread bakes, the butter (which was dispersed throughout the dough during the mixing process) melts, lubricating the dough around it and leaving pockets of air bubbles in the gluten structure. Once it cools, all the melted fat re-solidifies in the crumb, yielding a springy yet delicate bread."
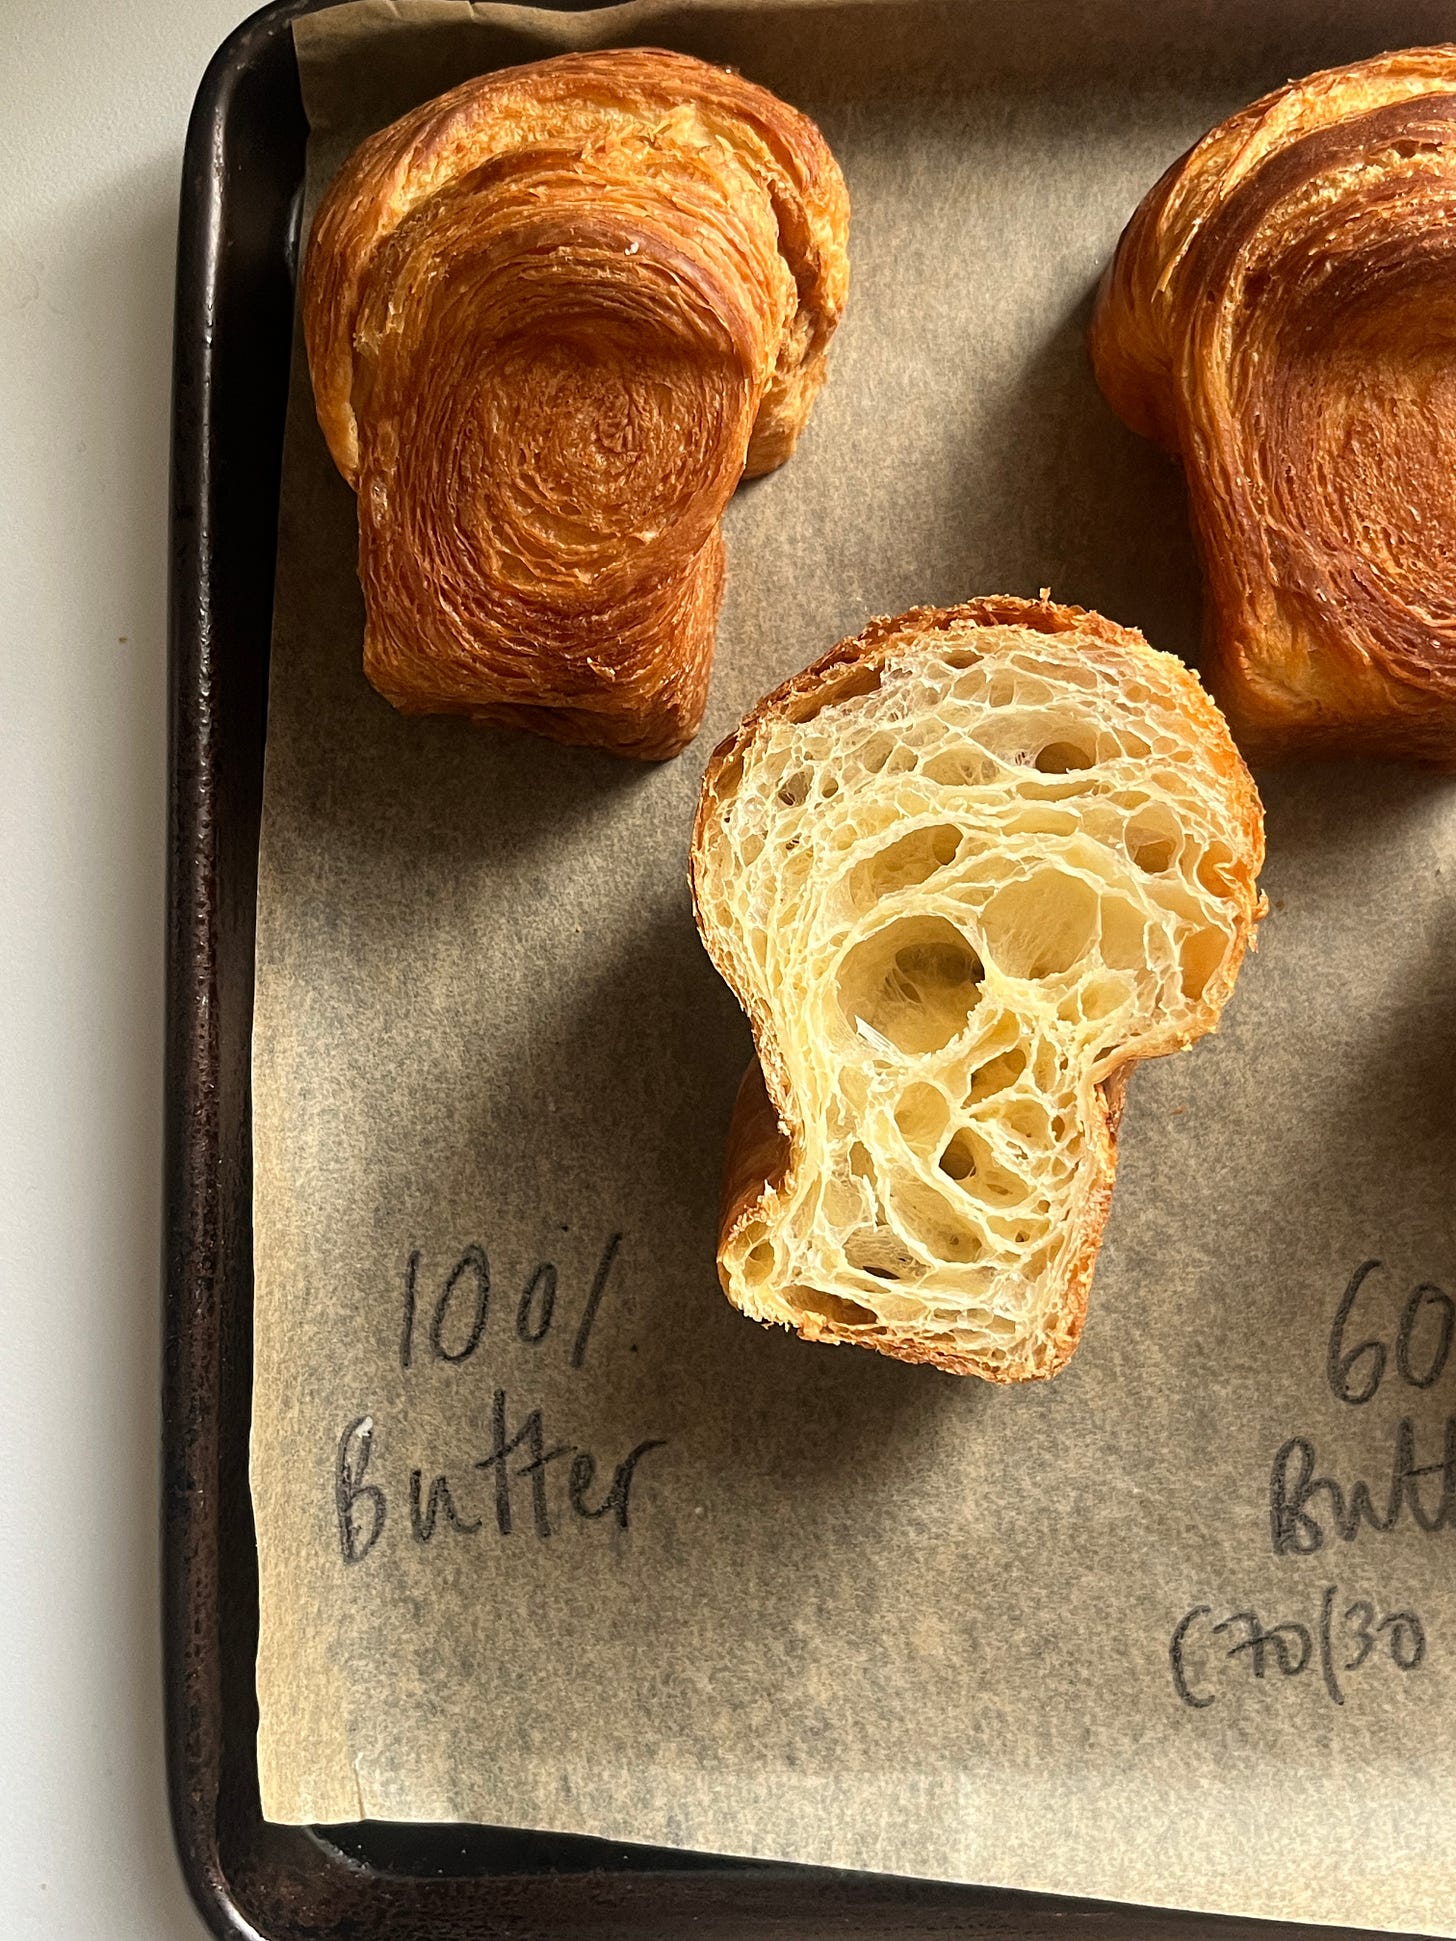
Brioche, by nature, is kind of.. dry? As the brioche cools, the butter hardens. So rather than being an airy texture, it is more melt-in-the-mouth. Because of the even dispersion of butter, standard brioche is already filled with lots of very small holes and the more butter you put in it, the more ‘naturally laminated’ it looks - there’s more pockets created by the fat.
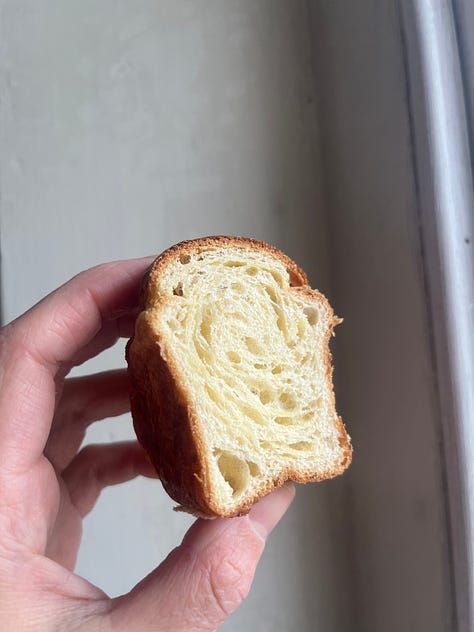
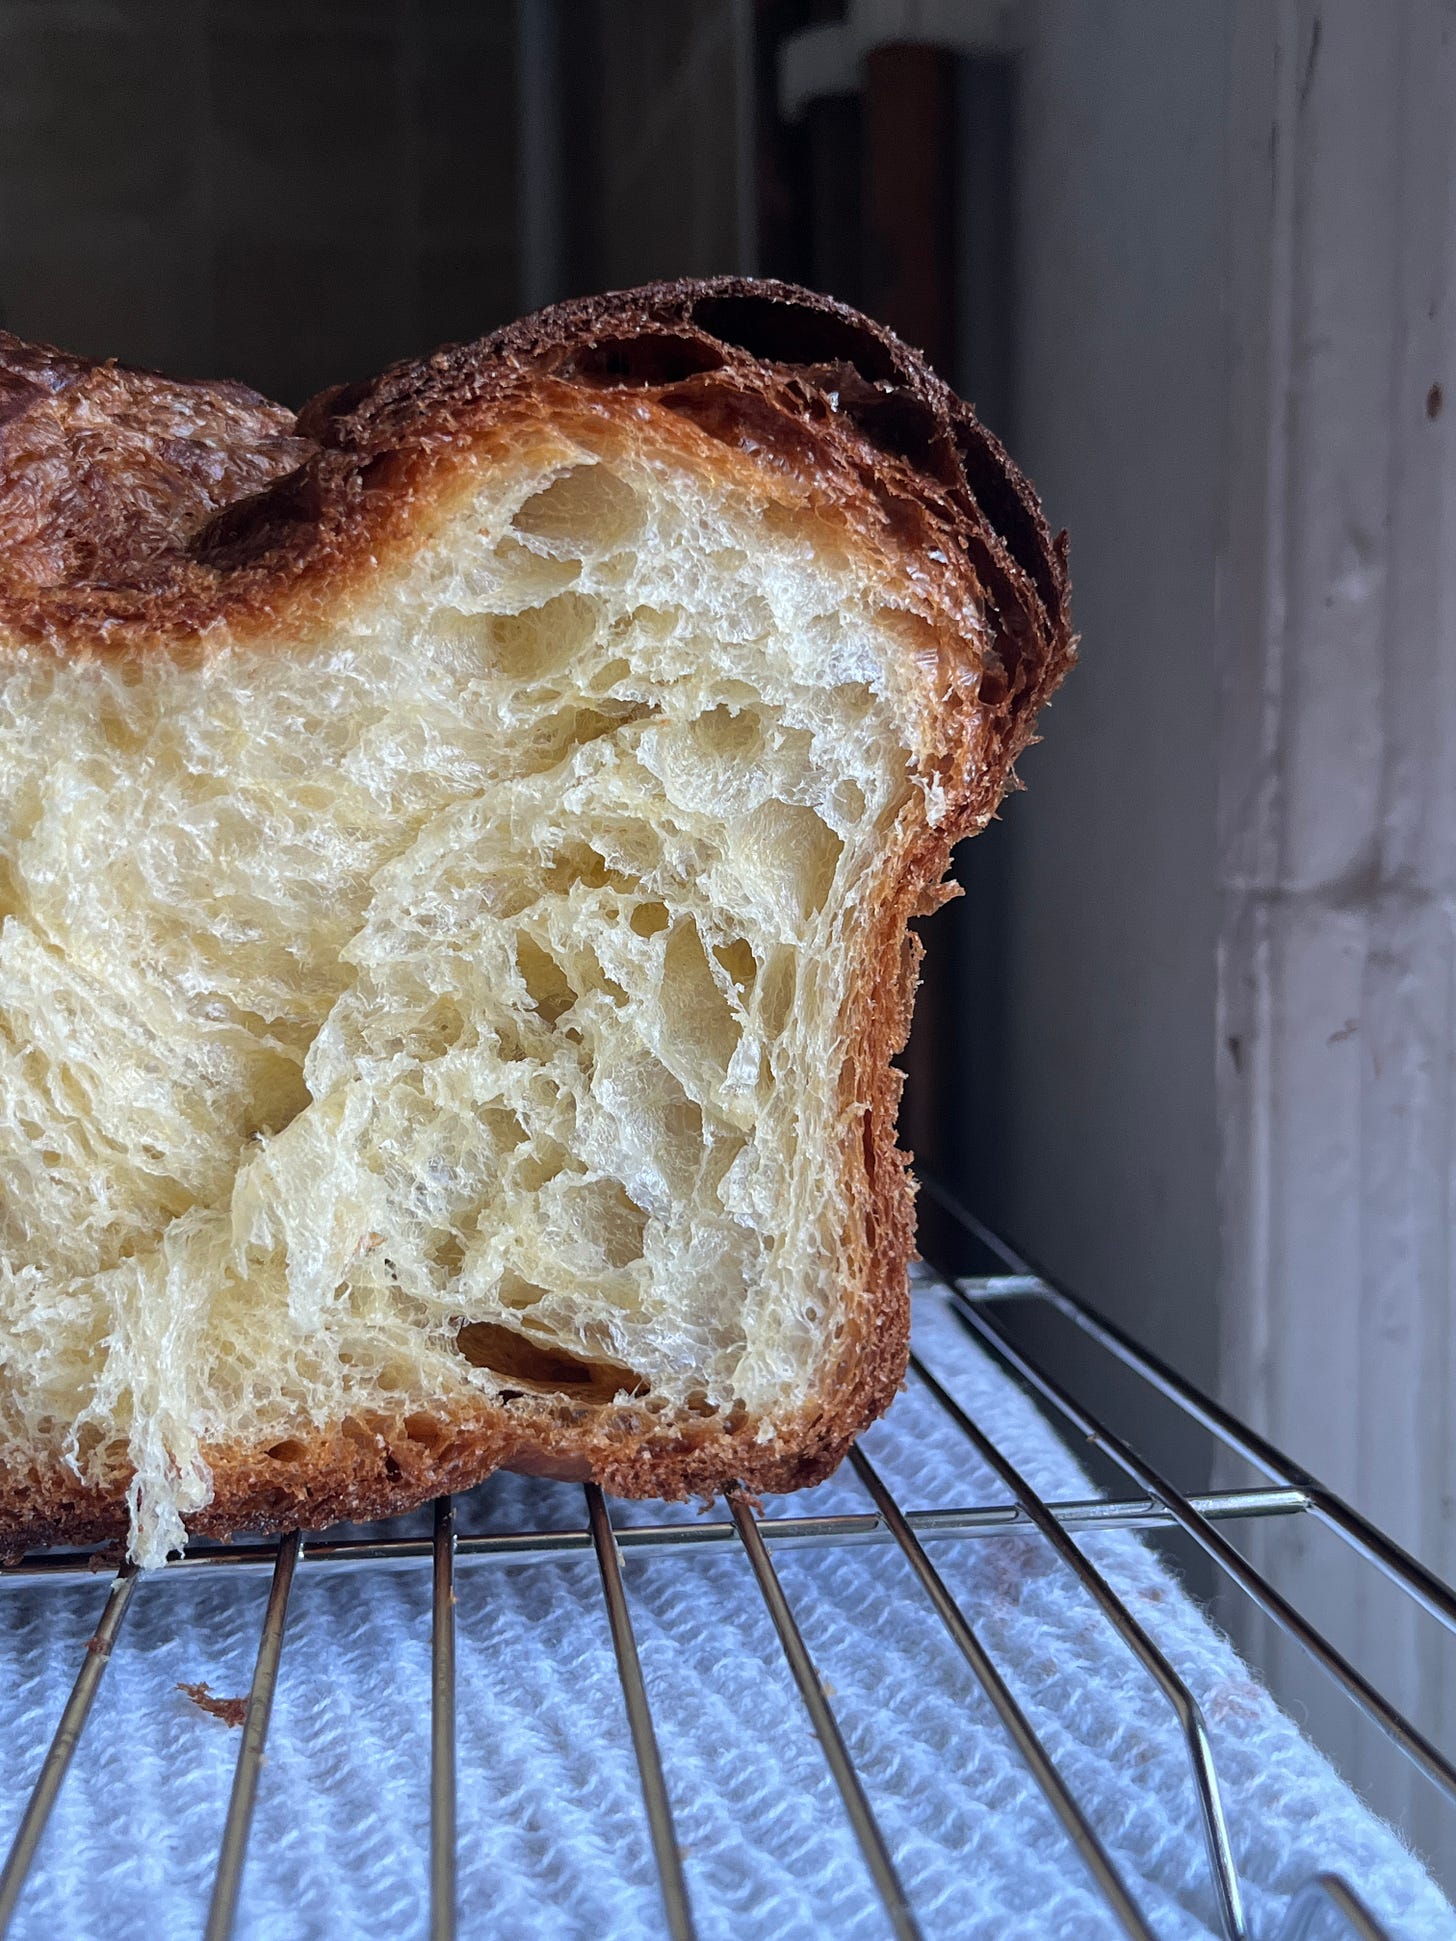
But when you laminate butter into the dough, you create an even airier structure by creating larger, distinct layers of fat which leave more significant layers. Just compare this standard 60% brioche crumb with the laminated version:
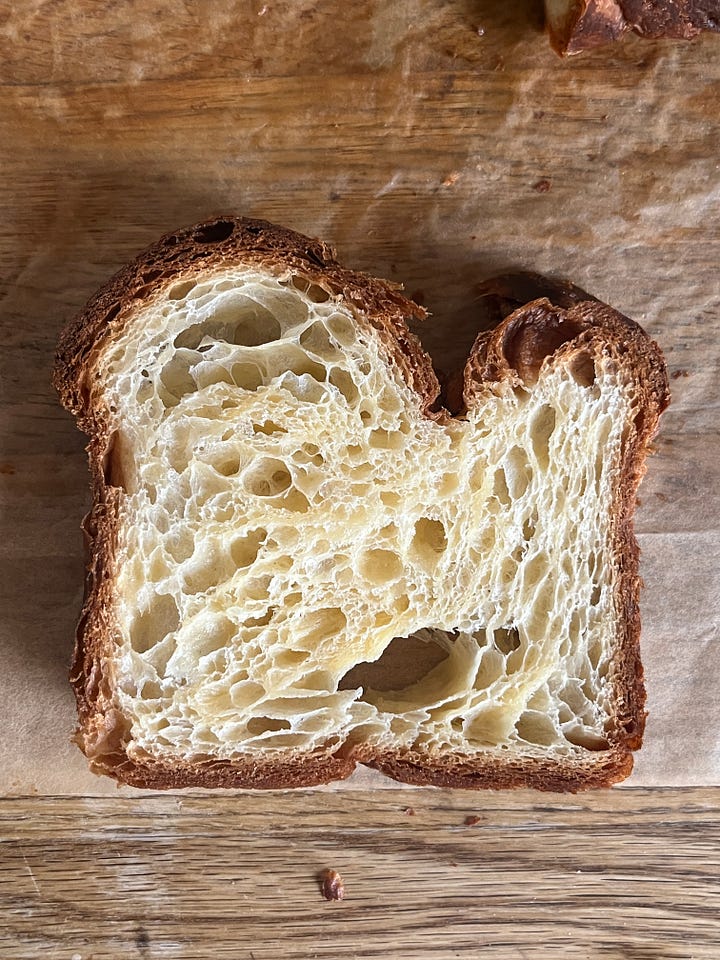
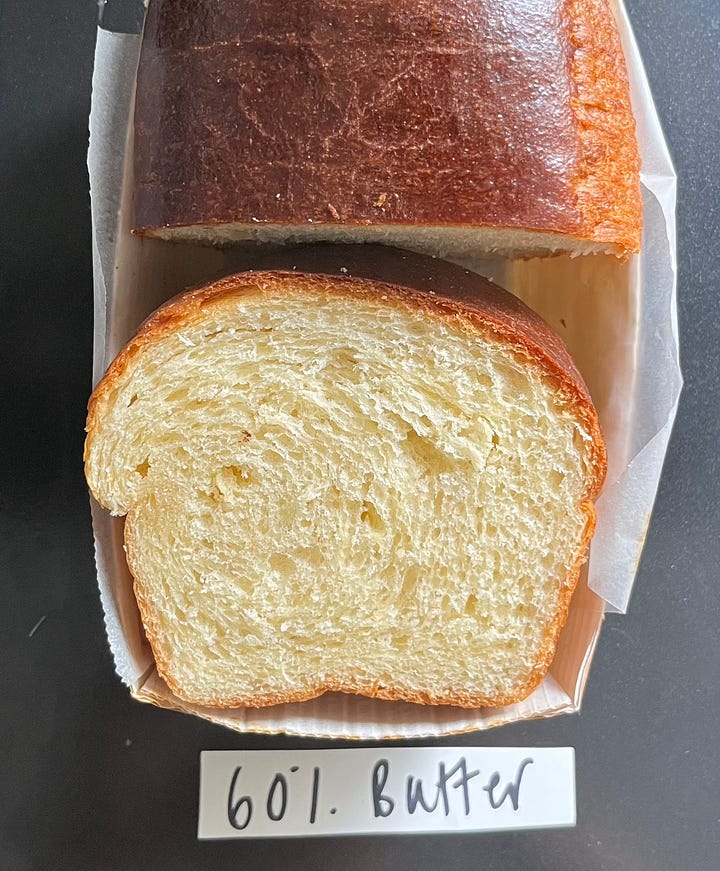
So what is the difference between a flaky brioche and a croissant? Is it the use of eggs in the dough? Bakers have been hybridising brioche and croissant doughs for years - though the croissant I learnt at the bakery was all milk, you'll find plenty of books and recipes that utilise eggs or egg yolks for additional lift, smoothness and flavour for croissant dough and the word 'brioche' is nowhere to be seen. So what does this mean?
Croissants vs. Laminated brioche
An average croissant is about 28-30% butter in relation to its total weight. This figure is adjusted depending on the baker, while an average brioche comes in a bit lower, at 23% of the total weight. Where the maths gets curious (and I swear I'll try and make this as painless as possible) is the baker's percentages. This is the percentage where you consider how much of an ingredient there is compared to just the flour, rather than the total weight. Let’s look at the numbers:
A laminated brioche is 100% butter to flour, but only 35% of the total weight.
An average brioche is about 60% butter to flour, and around 23% of the total weight.
An average croissant is about 65% butter to flour, and around 28% of the total weight.
It's where and how the butter is incorporated that makes a difference.
For croissants, a little is in the base dough, but most of it (90%!) is incorporated via lamination. For today's laminated brioche recipe, 60% of it lives inside the dough, incorporated during the mixing process, and the rest is folded into create flakiness. This means croissants are more airy, with bigger holes, while laminated brioche is richer and flaky, with a dissolving, melt-in-your-mouth texture.
This is why I think there's no point making a 'laminated brioche' unless you are going to be working with a very buttery base dough. Otherwise, it's just a rich croissant. And before we move on, it’s worth nothing that, contrary to what you might expect, the less fat laminated in, the more defined the crumb - with less fat to enrich the surrounding dough, the layers appear more severe.
Comparing ratios
This week, I set out to nail down my brioche recipe and test a few different ratios, as well as folding techniques. As you'll know from this puff pastry deep dive, the number of layers you put into your dough makes an impact. As a rule of thumb, more layers = finer lacy crumb and less layers = enlarged, wilder crumb.
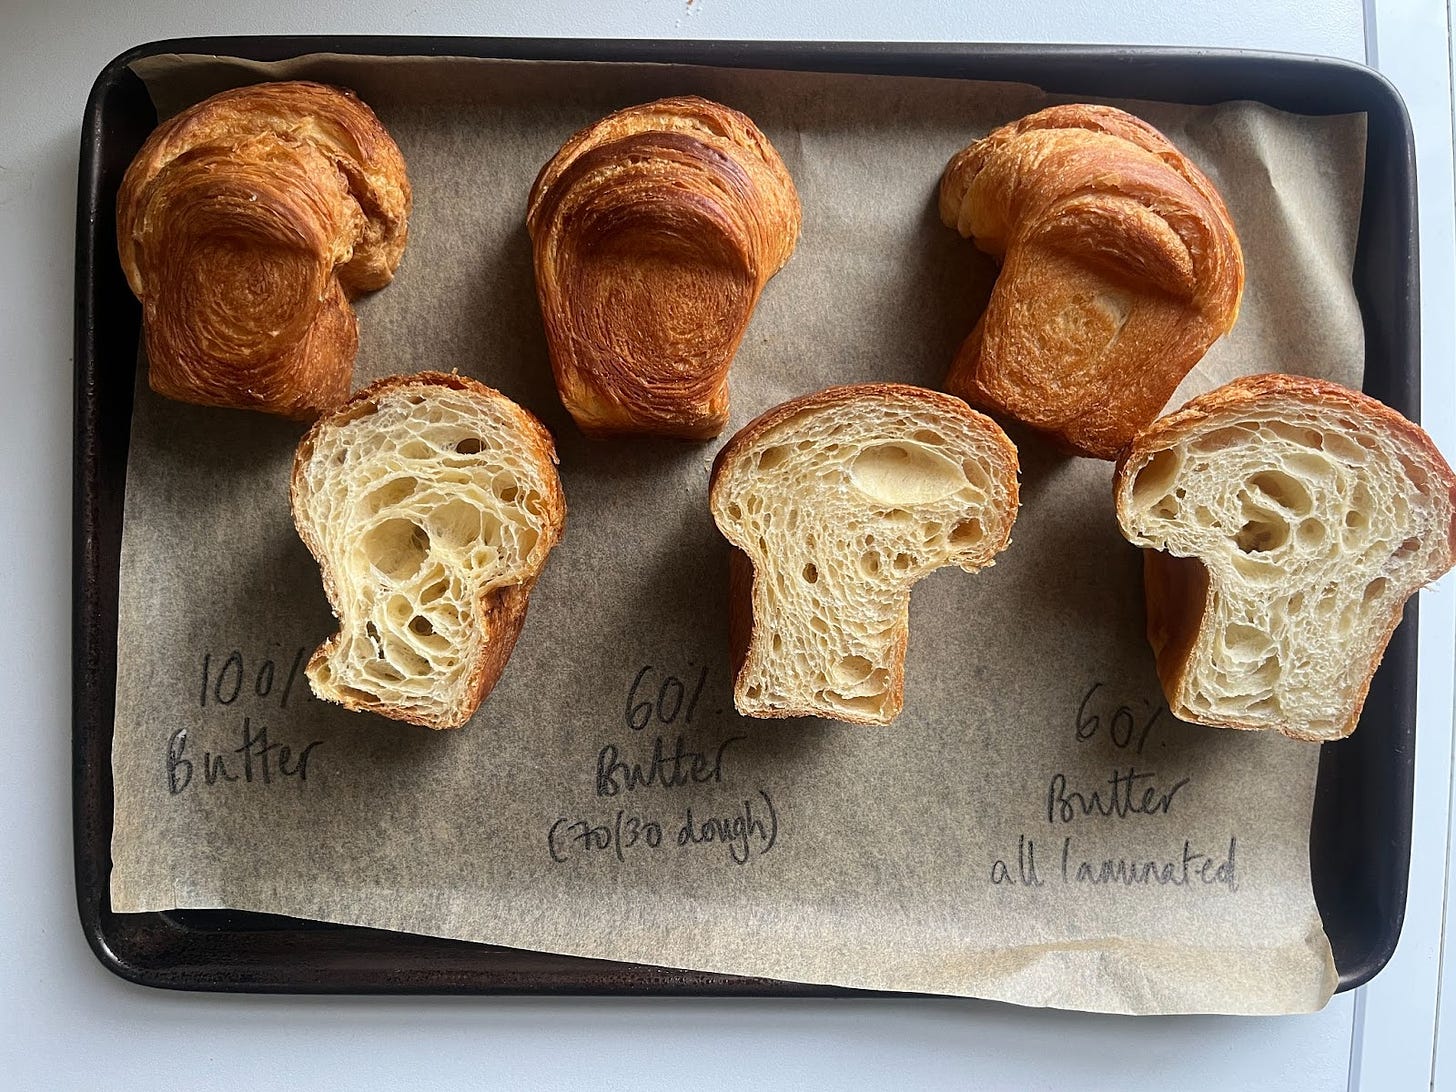
To investigate the role of butter and how laminating it into the dough vs. already having a buttery base dough makes an impact, I mixed up three variations. The first was my standard brioche dough (60% butter) which I laminated 40% butter into, bringing the total to 100% butter to flour. The second was a less rich brioche dough, laminated with butter to be 60% butter to flour, to bring it in line with my standard brioche dough. The third was a completely lean (no butter) dough, laminated with 60% butter. I laminated these doughs with three single turns.
By far, the buttery base dough recipe with 100% butter was supreme. It was the lightest to eat and was incredibly easy to work with. The other two were nice, flaky and light, though the leanest dough had a slightly airier crumb. The mini loaves show the lamination more clearly than the larger loaves, so if you’re looking for drama, make mini ones. The answer was obvious: Let’s go all in. More butter, it is.
The mixing
Brioche has a long mixing process which might lead you to think - hey, with that long mix PLUS all that lamination isn't it going to be tough? This is why it's important not to skimp on the butter in the dough.
If you've ever made inverted puff pastry before, the pastry where you wrap a buttery block around a doughy block, you'll know how the butter-rich dough is actually a dream to work with. The first time you roll it out, it's a bit clumpy and sticky, but once you've put a few turns into it, it's smooth and gorgeous and a dream to work with.
Because fat inhibits gluten, working with a buttery dough actually means your dough will 1) shrink less as you roll it and 2) need less resting time. As well as this, the butter in the dough chills making it firm and very pliable. The resultant dough is actually more similar in composition to the butter block, making the two easier to work with. When you make croissants, it can be a struggle to match the dough and butter consistency, the dough being much softer. But working with brioche is surprisingly more forgiving.
'Quick' lamination
When I make laminated pastries at home, I'm not looking for perfection. I'm not cutting away excess dough like I might if I was making them professionally. The result is a wilder, wackier and more organic crumb.
Maybe it's because it's the first of the year, but I had a few flop attempts at laminating. Being impatient, I didn't let my dough chill firmly enough before attempting to laminate the butter in - unsurprisingly, soft dough + firmer butter is not a combination for success. I also broke one of my cardinal rules of laminating - I worked with butter that was too cold. Trying to get ahead of my tests for Friday, I made the butter blocks the night before and left them in the fridge. I foolishly thought that, having made possibly hundreds of batches of croissants and other laminated goods at home, I could skip the step of making the butter block fresh each time from cold butter.
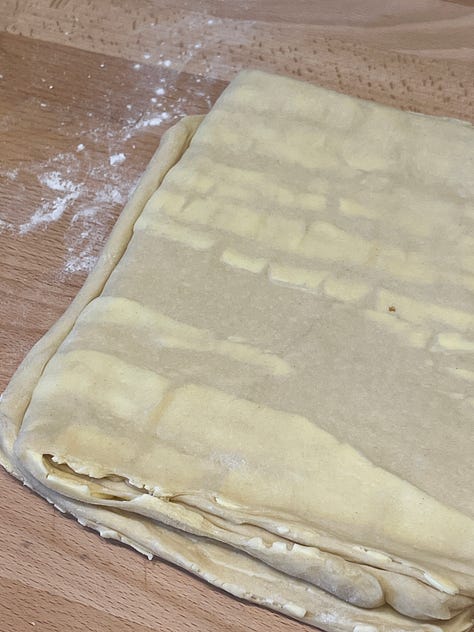
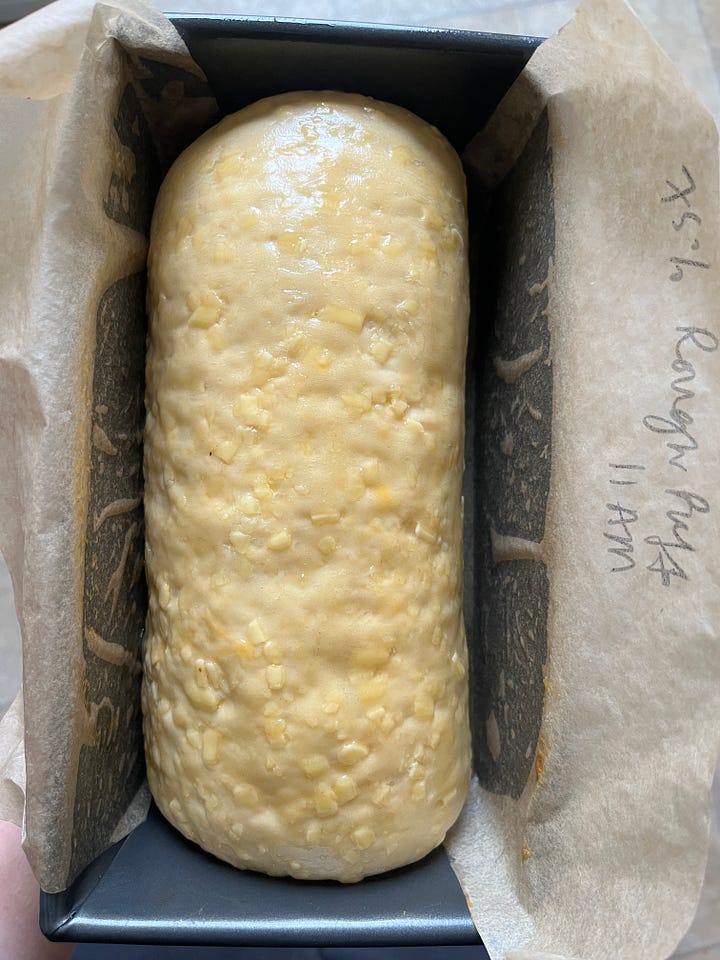
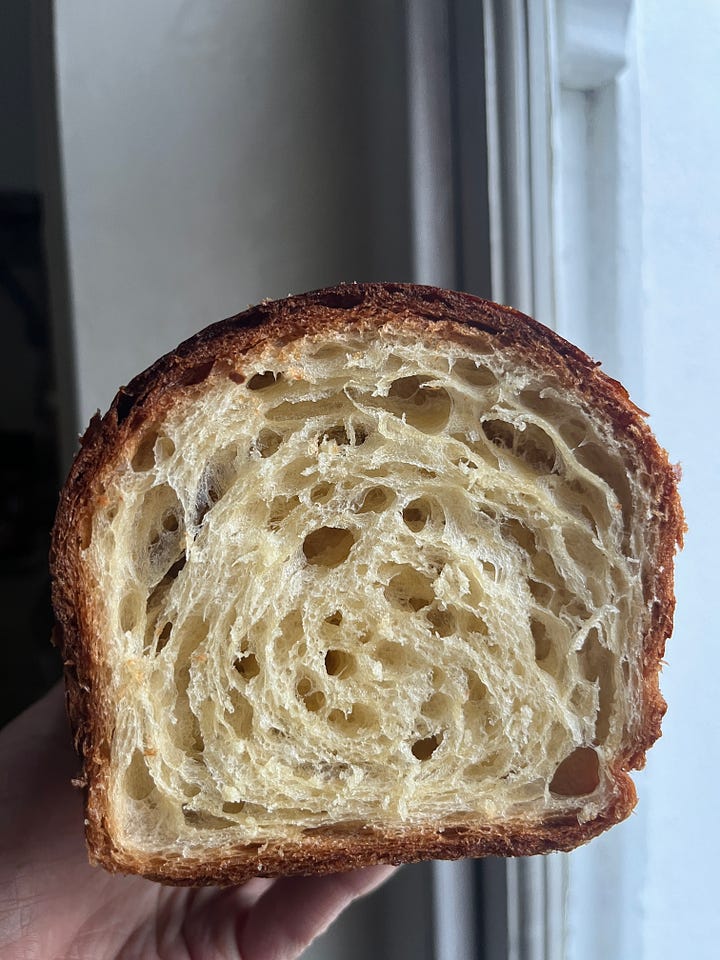
Alas, it wasn't meant to be. Managing the temperature of the pre-made blocks, especially as they were only about 50g each, meant that the butter swung from being too cold to too warm. Remaking the blocks fresh from fridge cold butter, bashing them into shape, and leaving me with perfect 12c butter, bendy but cool, pliable but not smearing, got me back on track. It was a good reminder that these processes I preach are there for a reason!
But what if we took some inspiration from Rough Puff? If expedient versions of non-laminated pastries exist, could it work for brioche? The sight of undissolved butter in brioche makes my baker senses scream 'Nooooooooo' and yet, I had to try it. I explored this concept a few years ago in my 'quick kouign amann' recipe, but rather than use the same technique, I decided to take inspiration from a flaky Southern biscuit recipe I saw on the NY times: Hello frozen grated butter.
There's no way to make this recipe really quick, because you still need to properly mix and ferment the brioche dough (you could always make the base dough in the food processor, a technique I outlined here.), but if you're feeling anxious about lamination and want a first step on the ladder, then I've devised a no-stress technique. It isn't pretty - the clumps of butter might give you anxiety, and as you roll it out and it looks quite weird, but the results are impressive for the effort. I’ve affectionally called it my no-stress / ugly brioche. Click here to make it!
Baking and proofing
I won't sugar coat it for you. Proofing brioche takes a long time and requires patience. Doughs with a lot of fat, like brioche, take their time; Not only does it take time for the centre of the loaf to fully proof, I theorise that by adding a lot of fat into your dough, you're reducing your yeast's readily available supply of starch to ferment. The yeast has to work its way AROUND the butter incorporated throughout the dough, making the entire process slower.
A standard 500g white loaf will provide the yeast with plenty of food, some 300g of flour available to ferment. Compare this to a 500g loaf of brioche, which has ⅓ less flour. To compensate for this, I've increased yeast. But the dough still moves slowly. The sugar also steals precious water from the yeast, slowing down its ability to ferment. I’d leave yourself at least 3 hours for a good proof for a loaf, and that’s with using a makeshift proofing chamber in your oven (details in the method)
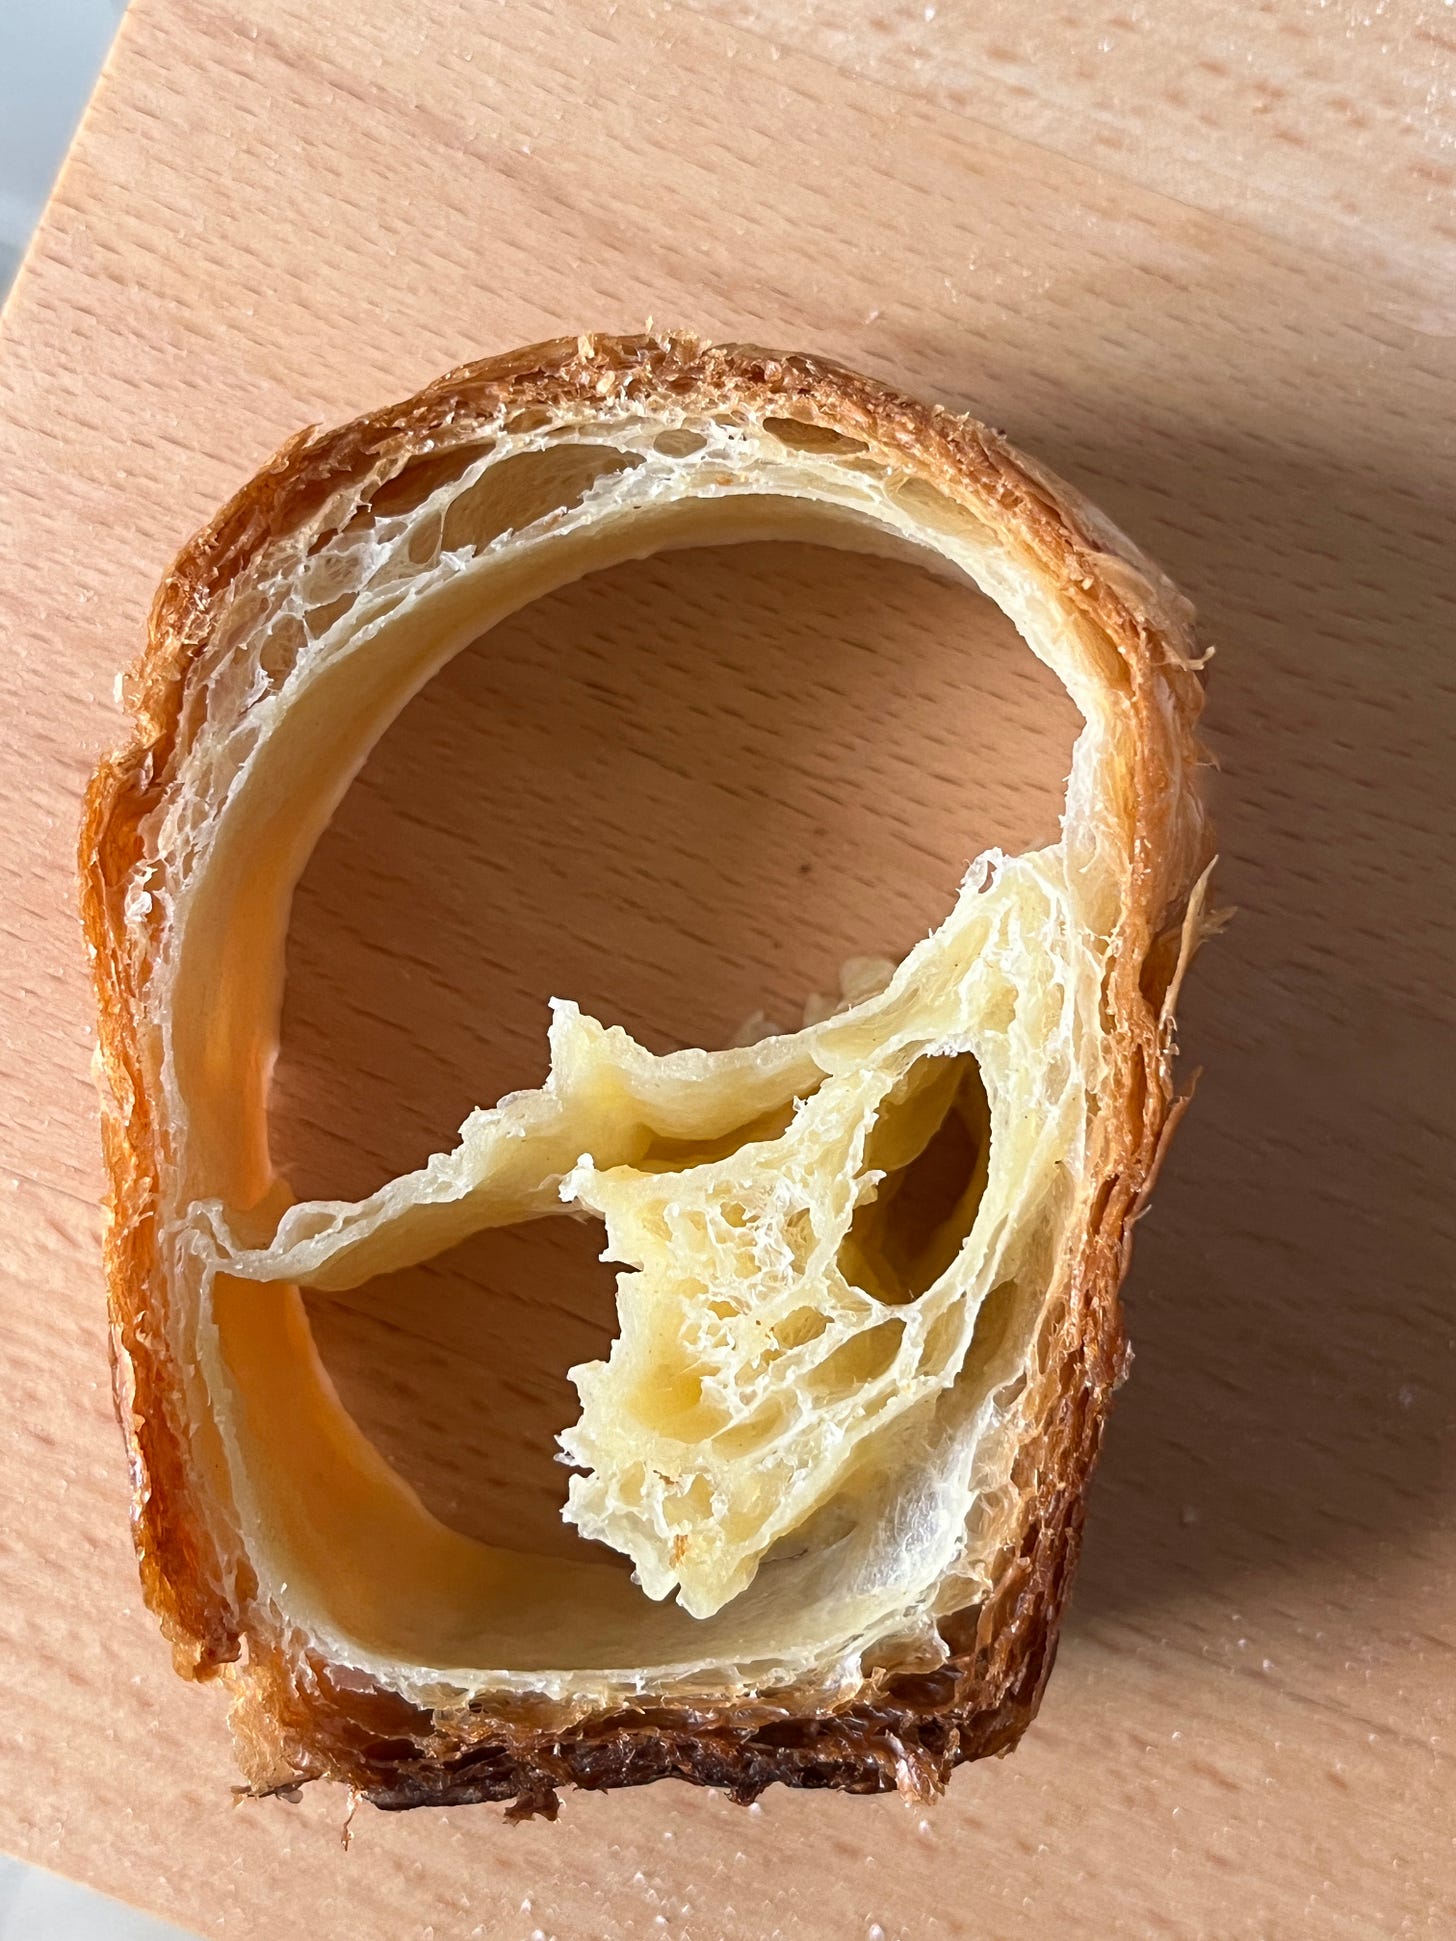
Underproofing is one of the biggest culprits of issues in your final dough. You know your dough is underproofed if you end up with big, undesirable holes in your bread like this, or if your crust rips. This happens because, to put it in simple terms, your yeast has got WAY too much energy left when it goes into the oven. Remember, yeast activity is directly correlated to temperature. That means when you put your dough in the oven, there is a sudden feeding frenzy, and the yeast lets out one final 'yippee ki yay' level burst of CO2. This is known as oven spring - it's the rapid growth of a dough usually during the first 10 minutes of baking as the yeast die.
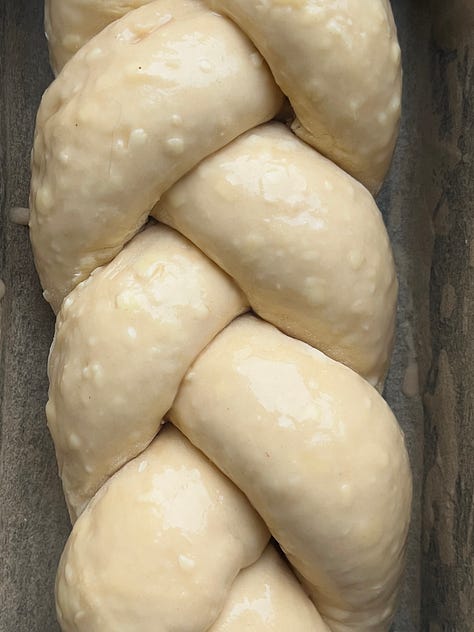
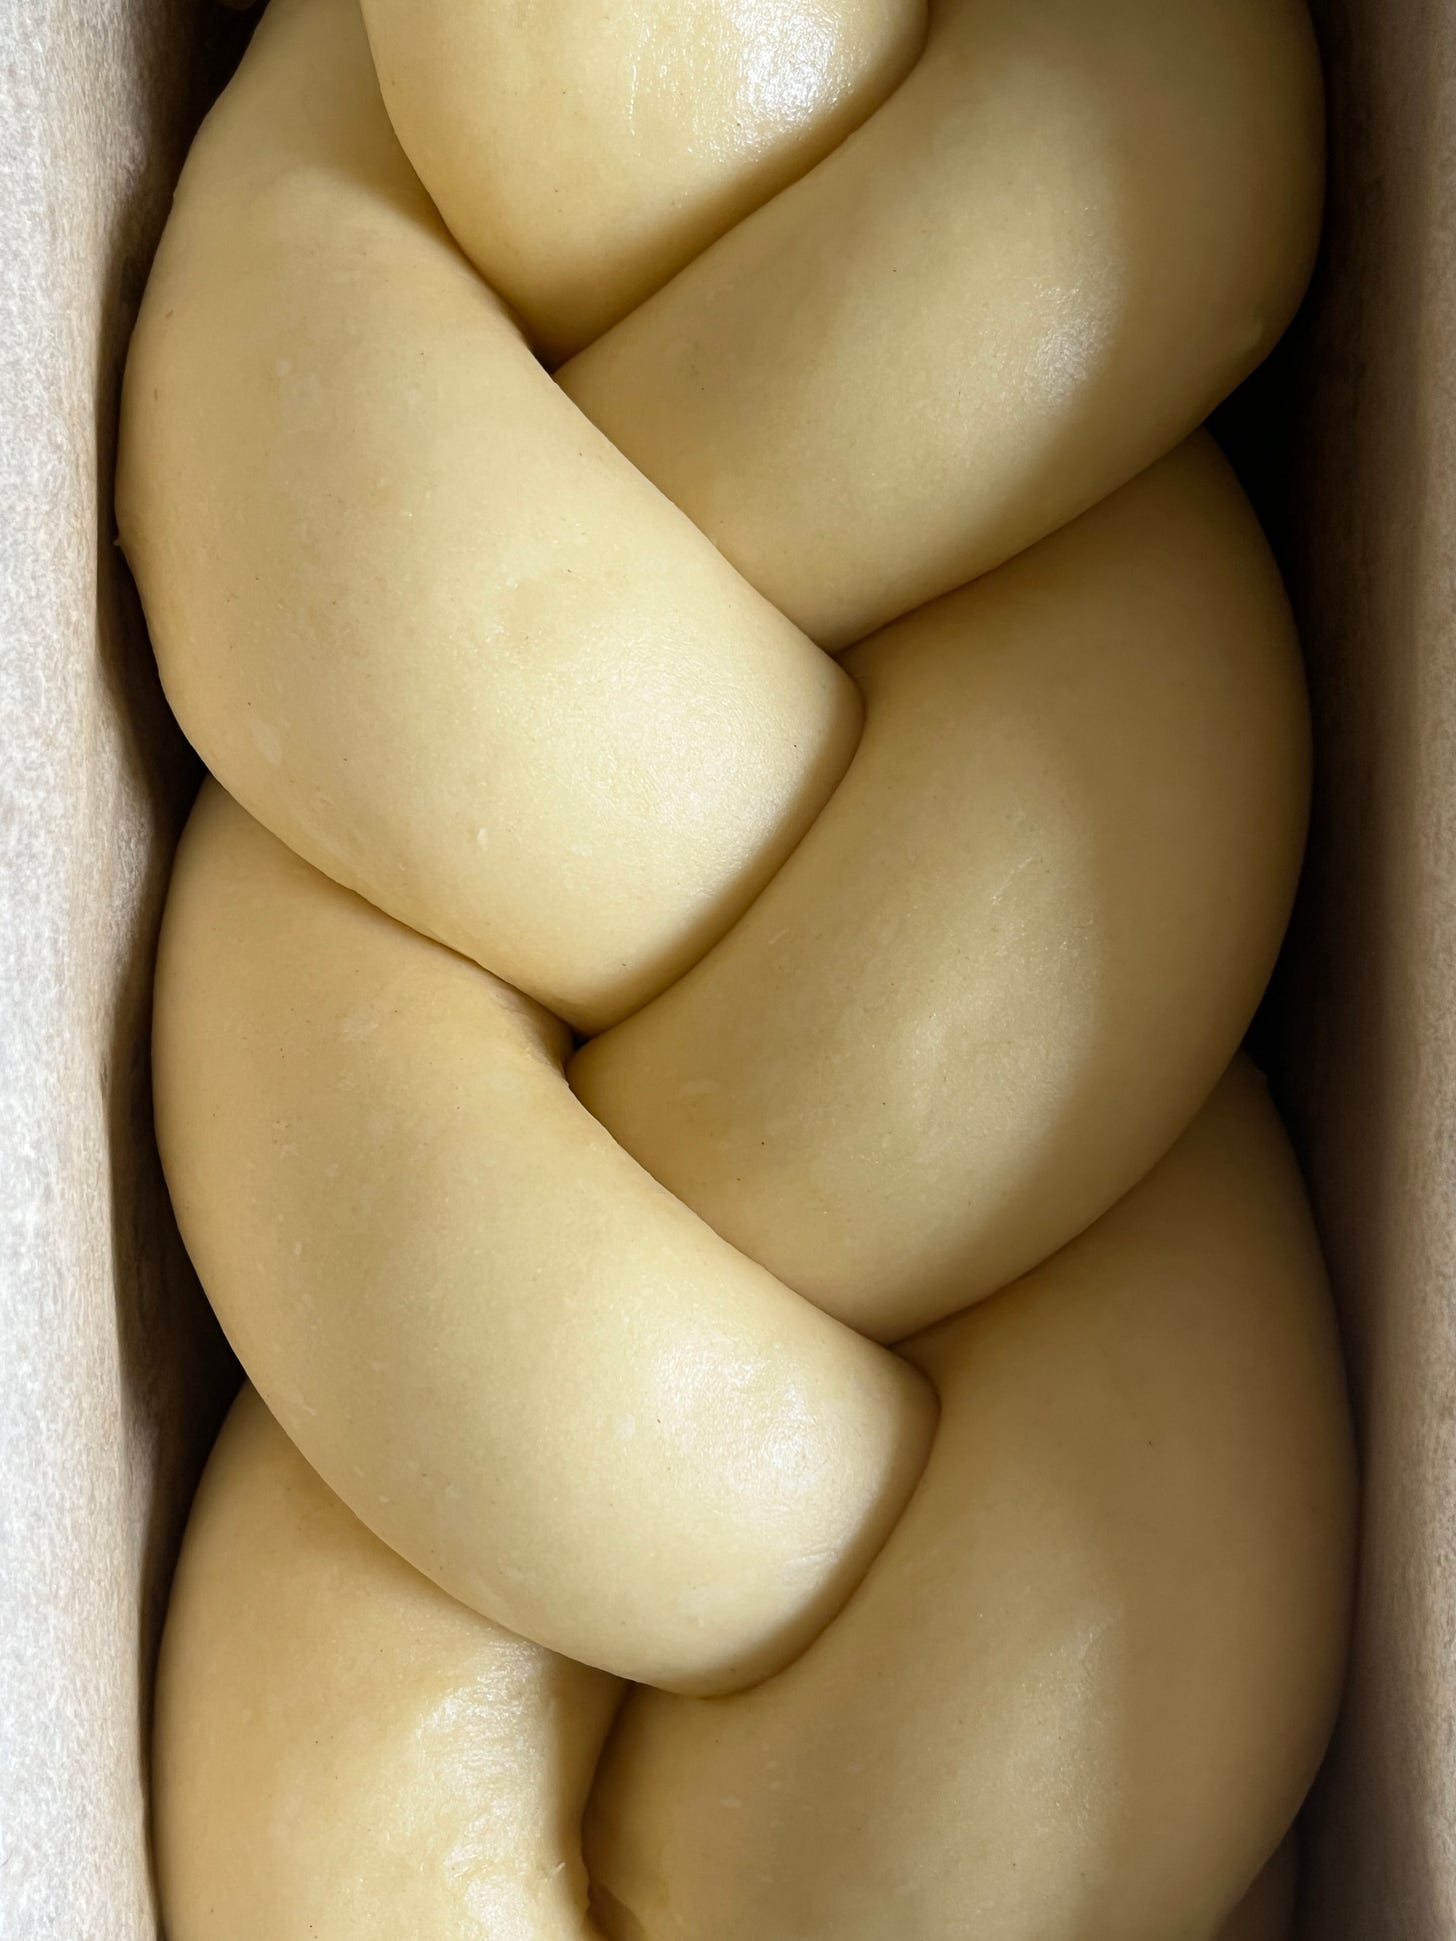
Consider a deep loaf - the yeast in the centre of the dough are furthest from the heat of the oven. Though the yeast cells around the edge of the dough may die quickly, the ones in the centre will simply be warmed up and ferment like crazy - this is why you get rips as the centre grows beyond the confines of the crust. For the braided loaf, I plait the strips loosely to leave room for expansion, and push the proof right to the edge. By maximally proofing, you are hopefully minimising any extreme cases of tearing.
When you're baking a butter-rich dough, thoroughly baking your dough to set the structure is essential. I find with fragile breads like laminated brioche, you can't rely on a thermometer to tell you when it's ready - a standard brioche is ready around 90c, but a laminated one? It will fall. I took this brioche out of the oven early, even though it was reading 96c and look what happened as it cooled: Tragedy.
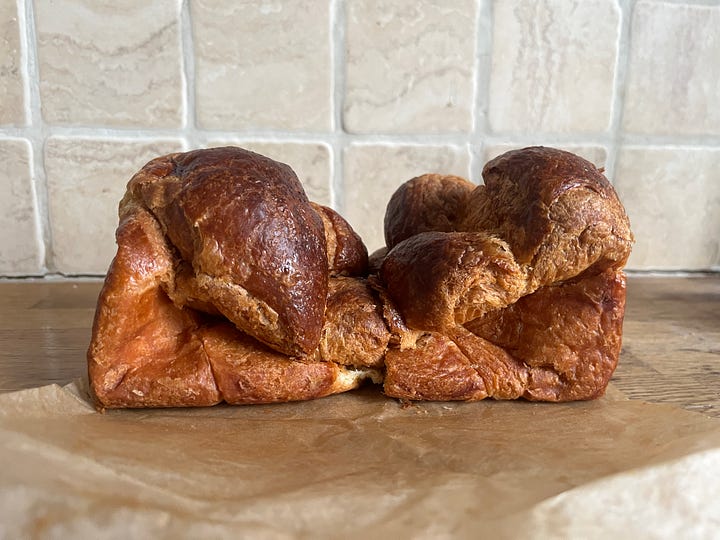
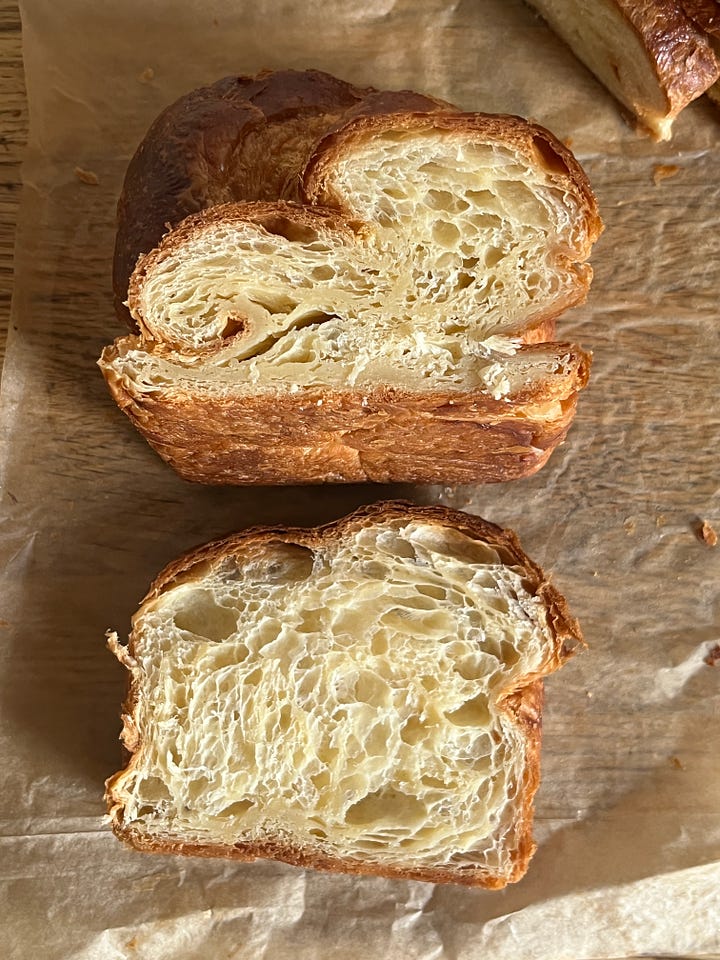
You have to remember that when you're baking laminated bread, you're basically losing half the structure as it bakes. The butter that was once holding your dough up has melted into the crumb, which means you're relying on the hardening of the eggs and gluten, now laden with butter, to hold everything together (and up!) as it cools. This means a thorough bake is essential - a rich crust, whilst also being delicious, helps provide a firm structure for the airy crumb to hang, a bit like a buttery cobweb. To additional mitigate shrinking, leaving to cool in the tin in the oven with the door open for 10 minutes before cooling completely can help.
Alright, let's make it.
The recipe: Laminated Brioche
Makes 1 x 400g Loaf in an 8.5 x 4.5 inch loaf pan or 6-ish mini loaves (mine are from Samuel Groves). Mini loaves will have a more open texture. Large loaves will have fluffy, candy floss like crumbs
Ingredients
135g Strong bread flour
20g Caster sugar
3g Salt
4.5g Instant Dry Yeast (about 1.5 tsp)
25g Whole milk
75g Whole eggs, approx 1.5 (save the other half for egg wash)
75g Soft butter
—
60g Cold Butter for lamination
Method
In the bowl of a stand mixer, mix and mix together. Add milk and eggs on top. Start with the paddle attachment and mix on a slow speed until a cohesive dough forms, 30 seconds - 1 minute. Switch to the hook attachment and mix on a medium speed for about 6-8 minutes until medium gluten development is reached – this is when you can pull on the dough, and it stays together, but it is still quite fragile. You can take it further than this, but this is the minimum requirement before adding the fat. If it hasn't reached it by this point, rest for 2 minutes, then mix for another 6 minutes.
When you and the dough are ready, start adding the softened butter piece by piece with the mixer running. Mix until very smooth – another 6-8 mins – and full gluten development is reached. This is when you can pull a thin, almost translucent layer with the dough. This stage can take a while. If after 6-8 minutes it hasn't come together, rest for 2-3 minutes then mix for 2-3 minutes. Continue until you reach the full gluten development. SEE HERE FOR GIFS
The dough will be very shiny and smooth and quite tacky. Remove from the bowl and press onto a greased baking tray. Lightly oil the top of the brioche and cover. Leave to rise at room temp for about 1-1.5 hours. It will be visibly puffed. If your house is cold, it may take longer. For the most expedient proof in these cold winters, heat a saucepan of water until simmering on the stove and place into your oven, leaving the door closed (and oven switched off!) for 10 minutes. Then place your dough in there - it should be warm and steamy, about 28c.
Once proofed, press the dough down into a rectangle approx 28 x 15cm and refrigerate ideally overnight. If you are attempting this recipe in one day, put it into the freezer for 30 minutes and then put into the fridge until thoroughly chilled and firm, 1 hour.
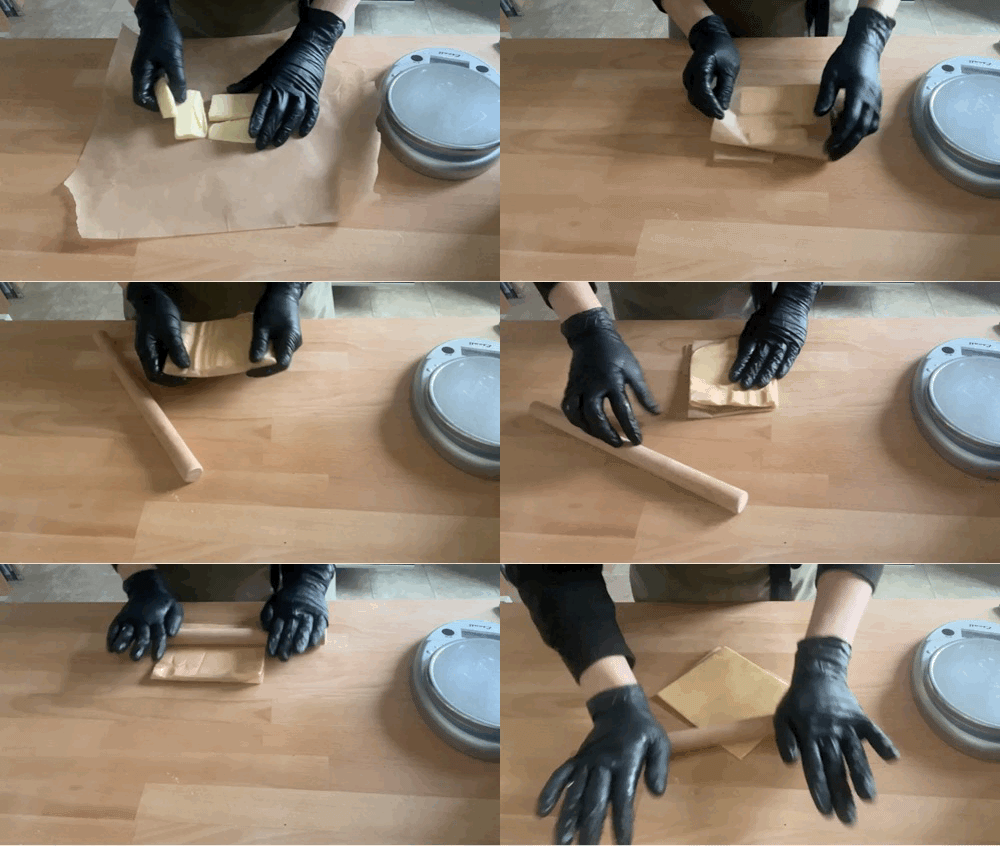
To laminate, first make the butter block. Cut the butter into 1cm pieces and lay in an approximate rectangle shape on a large piece of greaseproof paper. Fold the edges of the greaseproof paper in to create a guide for your butter block, approximately 12 x 15cm. Flip your paper over and bash the cold butter with a rolling pin into shape. Once it is pliable, roll over it several times. The temp of the resultant butter should be 12c, which is perfect for laminating. It should bend easily without breaking and have an even temperature throughout. It is a very cute, small thin butter block! It is crucial for success that the butter is at the right temp, or it will just splinter throughout the dough (too cold) or melt (too warm).
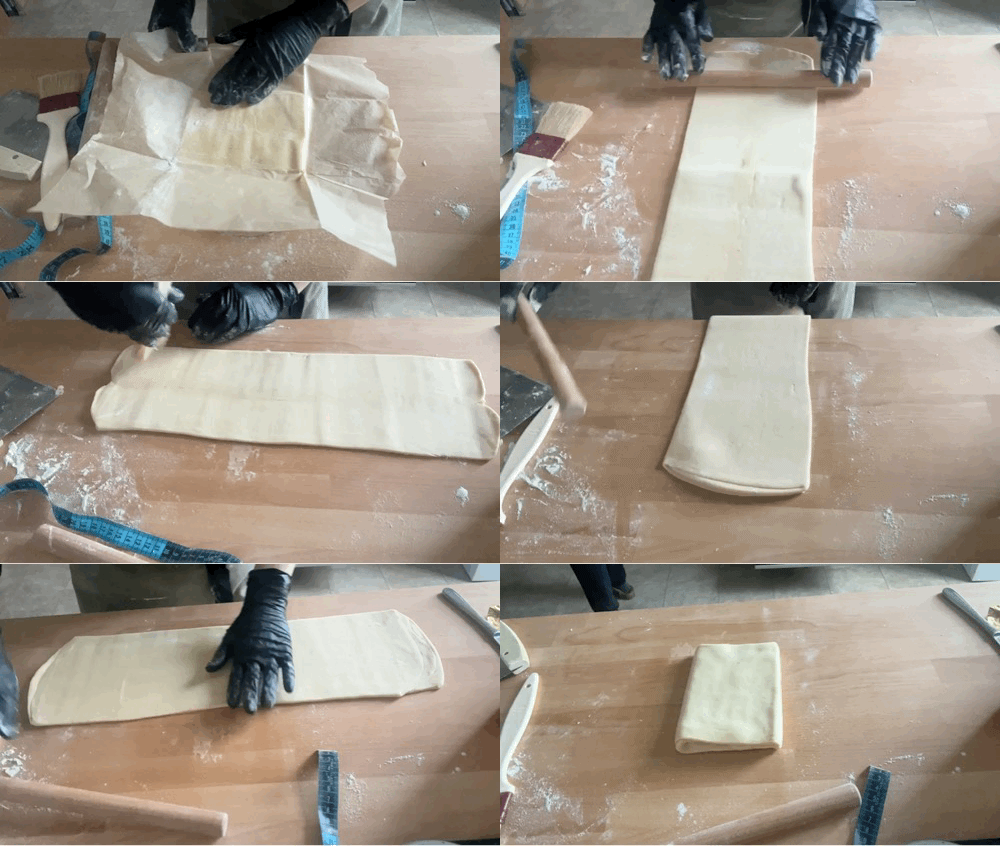
Place the chilled brioche dough on a lightly floured work surface. Before adding the butter, brush any excess flour off the dough with a pastry brush. Unwrap the butter block and plonk it into the middle of the dough. Bash it a few times with a rolling pin to ensure it adheres. Remove the paper, then bring in either side of the dough to fully enclose the butter.
Gently roll the dough to three times its length, approx 48 x 16cm and perform a single fold, aka a letter fold, bringing the top third down to the middle, and the bottom third on top. Follow this up with a double or 'book' fold - roll the dough to just over three times its length, then fold the edges into the middle, then over on itself again (like a book). For more detailed information and gifs on lamination turns, click here.
Wrap the dough well and chill for 45 mins - 1 hour in the fridge.
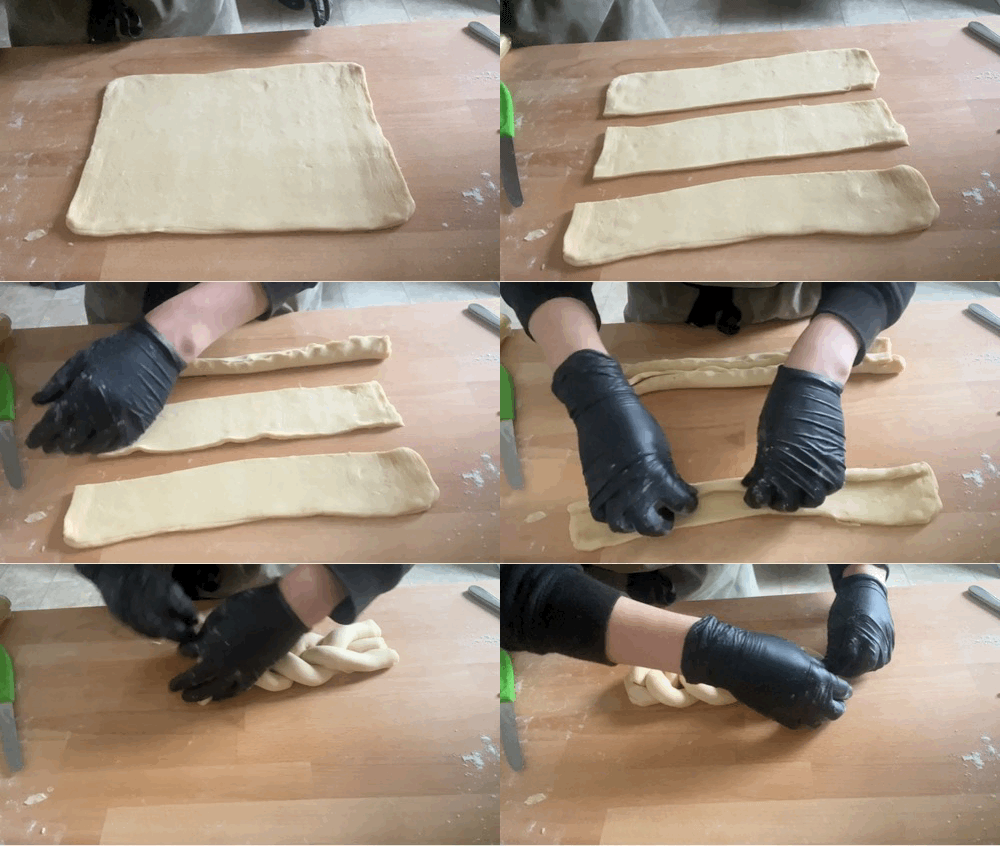
Roll out the chilled dough to 32 x 24cm and cut into three long rectangles, approx 8cm x 24cm. Roll each rectangle, pinching to seal, then plait the three strips together loosely. Leave your bread room to expand - too tight and you will almost certainly get rips. Lay in a loaf pan lined with paper.
You can also simply roll the loaf up for a more traditionally shaped bread, but you will need to roll the dough to be the width of your loaf pan, rather than use my measurements above. For my loaf pan, this means rolling the dough to be about 22cm wide and rolling up from there (GIF here). For mini loaves, cut strips approx 60g and roll up, nestling into lined loaf pan. Many recipes for croissant loaves choose a squiggle - cut in strips then zig zag, lamination side up -
Proof in a steamy environment (see advice earlier) for 2-4 hours or until very puffy. You really want to push the proof. See here for visuals:
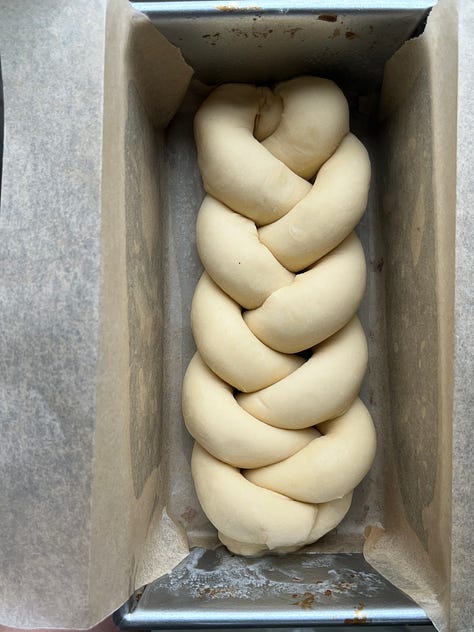
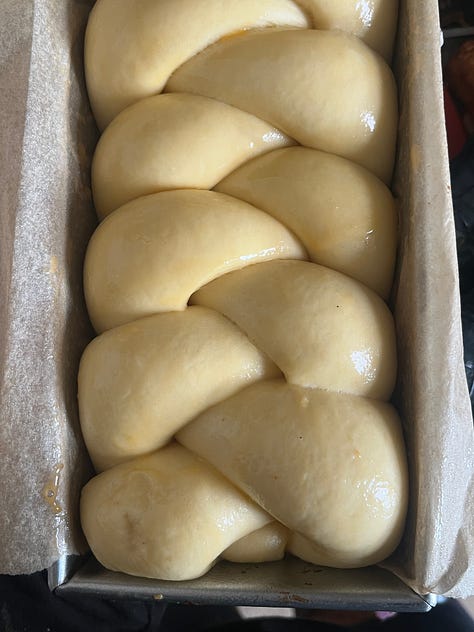
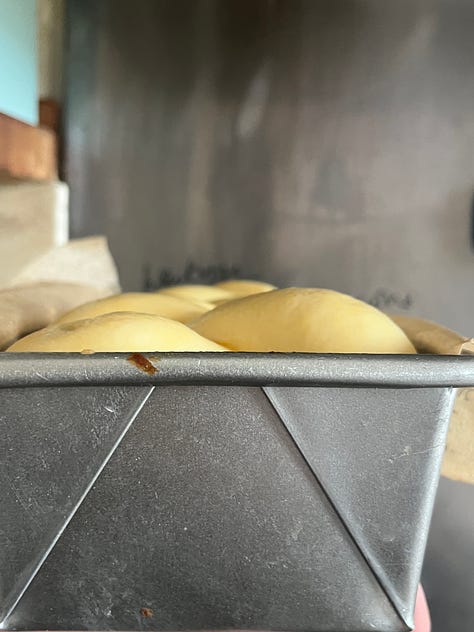
before proofing, fully proofed When ready to bake, heat the oven to 180c fan. Egg wash the loaf. Bake for 35-40 minutes or until dark golden and well risen. If you don’t like it too dark (though I love the flavour of a dark crust), cover with foil after 20 minutes.
Switch off the oven and leave the door open with the bread inside for 10 minutes. Then remove from tins and cool on a rack completely.
Best eaten fresh, but this also stores and re-heats well. Refresh in the oven for 5-10 minutes at 150c fan. You can also wrap cooled loaves and freeze. Defrost overnight and refresh as before.
Want more? Find the recipe for flaky brioche gateau des rois with cinnamon frangipane aka ‘Queen cake’ a long with the ‘no-stress’ quick lamination dough here.


Hello! I was wondering if you have any tips for making brioche without a stand mixer? Or would you not recommend this at all?
I’m also very curious about how to effectively reduce fat in recipes - i have a very low fat threshold (digestive issues follow suit which make me unable to function) which doesn’t match my love for baking and baked goods. I’ve figured out some tricks but I’m very curious about what experts say!
MORE BUTTER FOR EVERYONE