


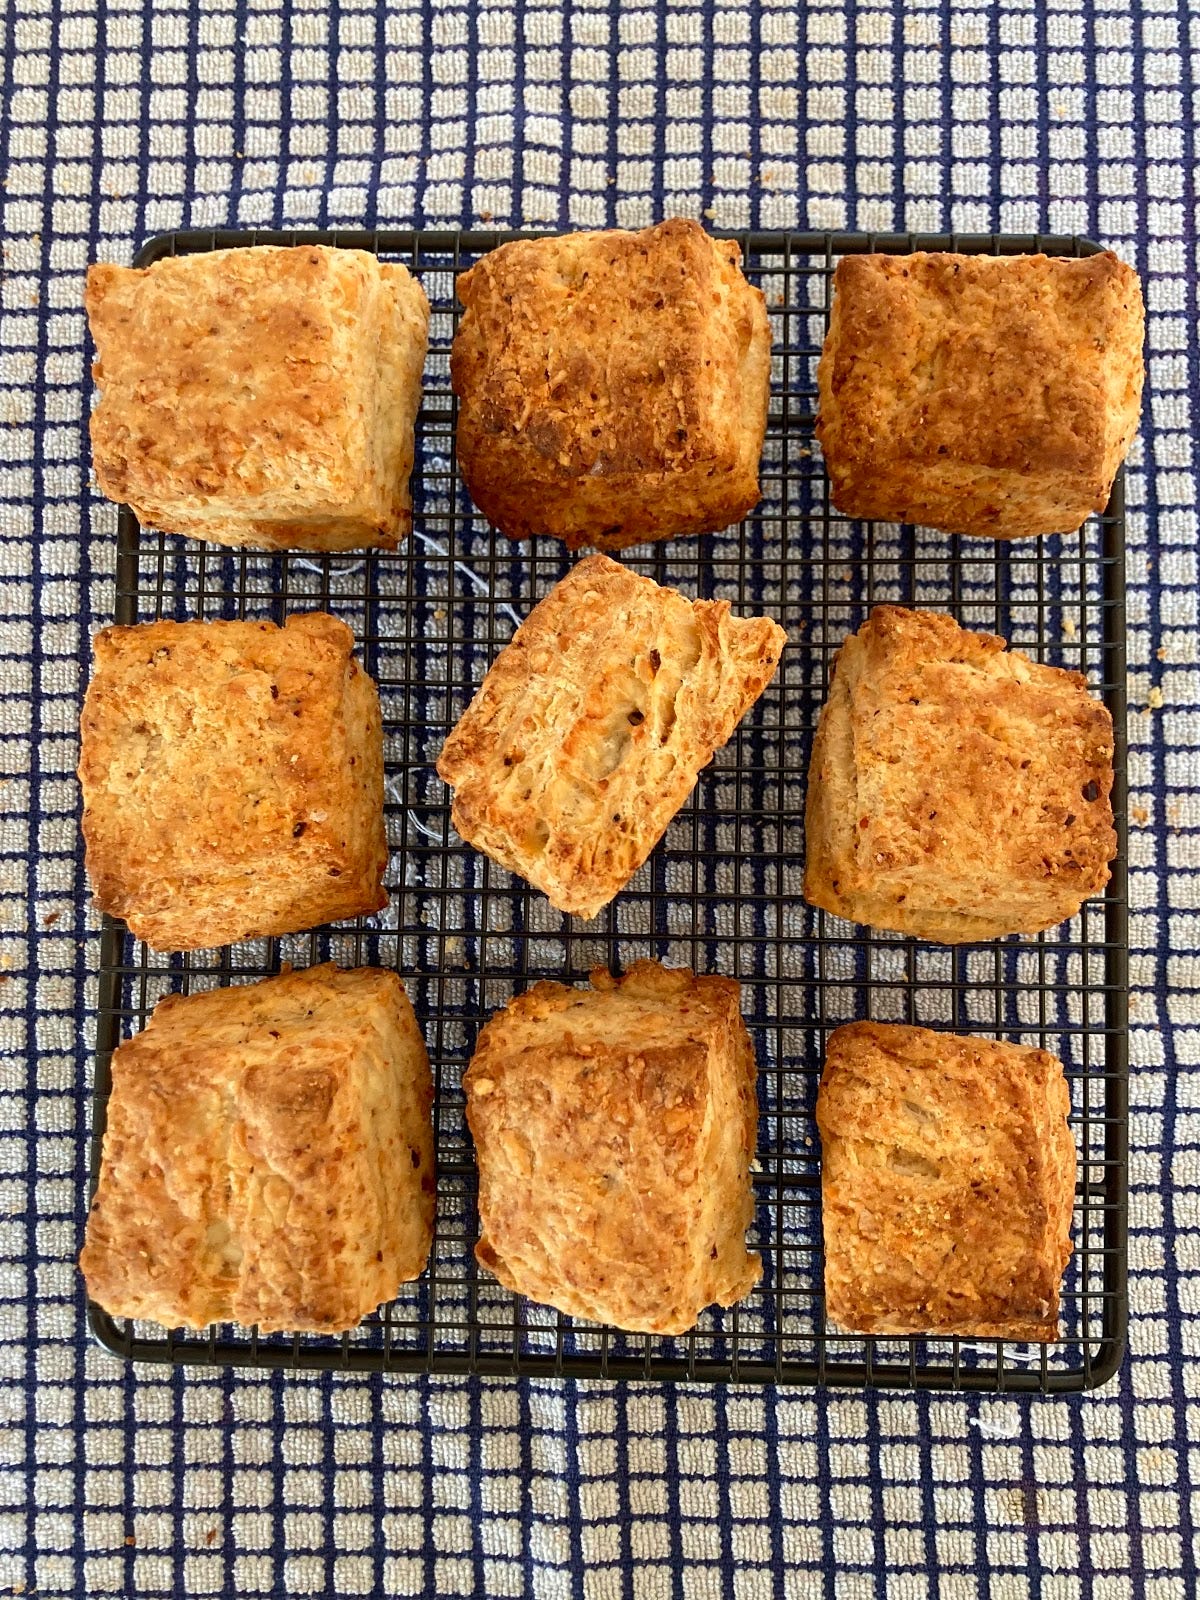
Kitchen Project #16: XXL Cheese Scones
Outrageous. Flaky. Tall. I got you.

Hello,
Welcome to another edition of Kitchen Projects, my recipe development and cooking journal. So excited to have you here!
This week, we’re going on a cheese scone expedition. With restrictions beginning to (lightly) lift from tomorrow in the UK, I’m hoping to offer you something park-walk appropriate for you to share with a long-missed loved one (singular, of course, I’m very lawful over here at KP). My fingers are crossed for sunshine.
As ever, thank you so much for subscribing. It really does mean the world to me.
Love,
Nicola
PS. Here’s the playlist for this week, filled with songs that make me happy and feel good. Its quietly celebratory for 1) all of this sunny weather 2) the thrill of restrictions slowly lifting.
A cheese scone expedition
The other day I could not get cheese scones off of my mind. I have no idea why. They burrowed into my imagination and sat there until I dropped everything and walked to the kitchen to make them.
To be totally real with you, I haven’t made many cheese scones in my time. In fact, the last time I made them was in 2006 at home economics class. Thinking about it, I don’t come across many, either! I only really see them at National Trust cafes and they sometimes look like they’ve seen better days. Not quite cheesy enough and slightly stale.
Now, I bloody love a cheese straw. I love the way the puff pastry shatters and I think they have the perfect salt content. So, I set out to translate all the best bits of those but with the added tenderness of a scone, and hopefully with some gooey cheese pockets throughout.
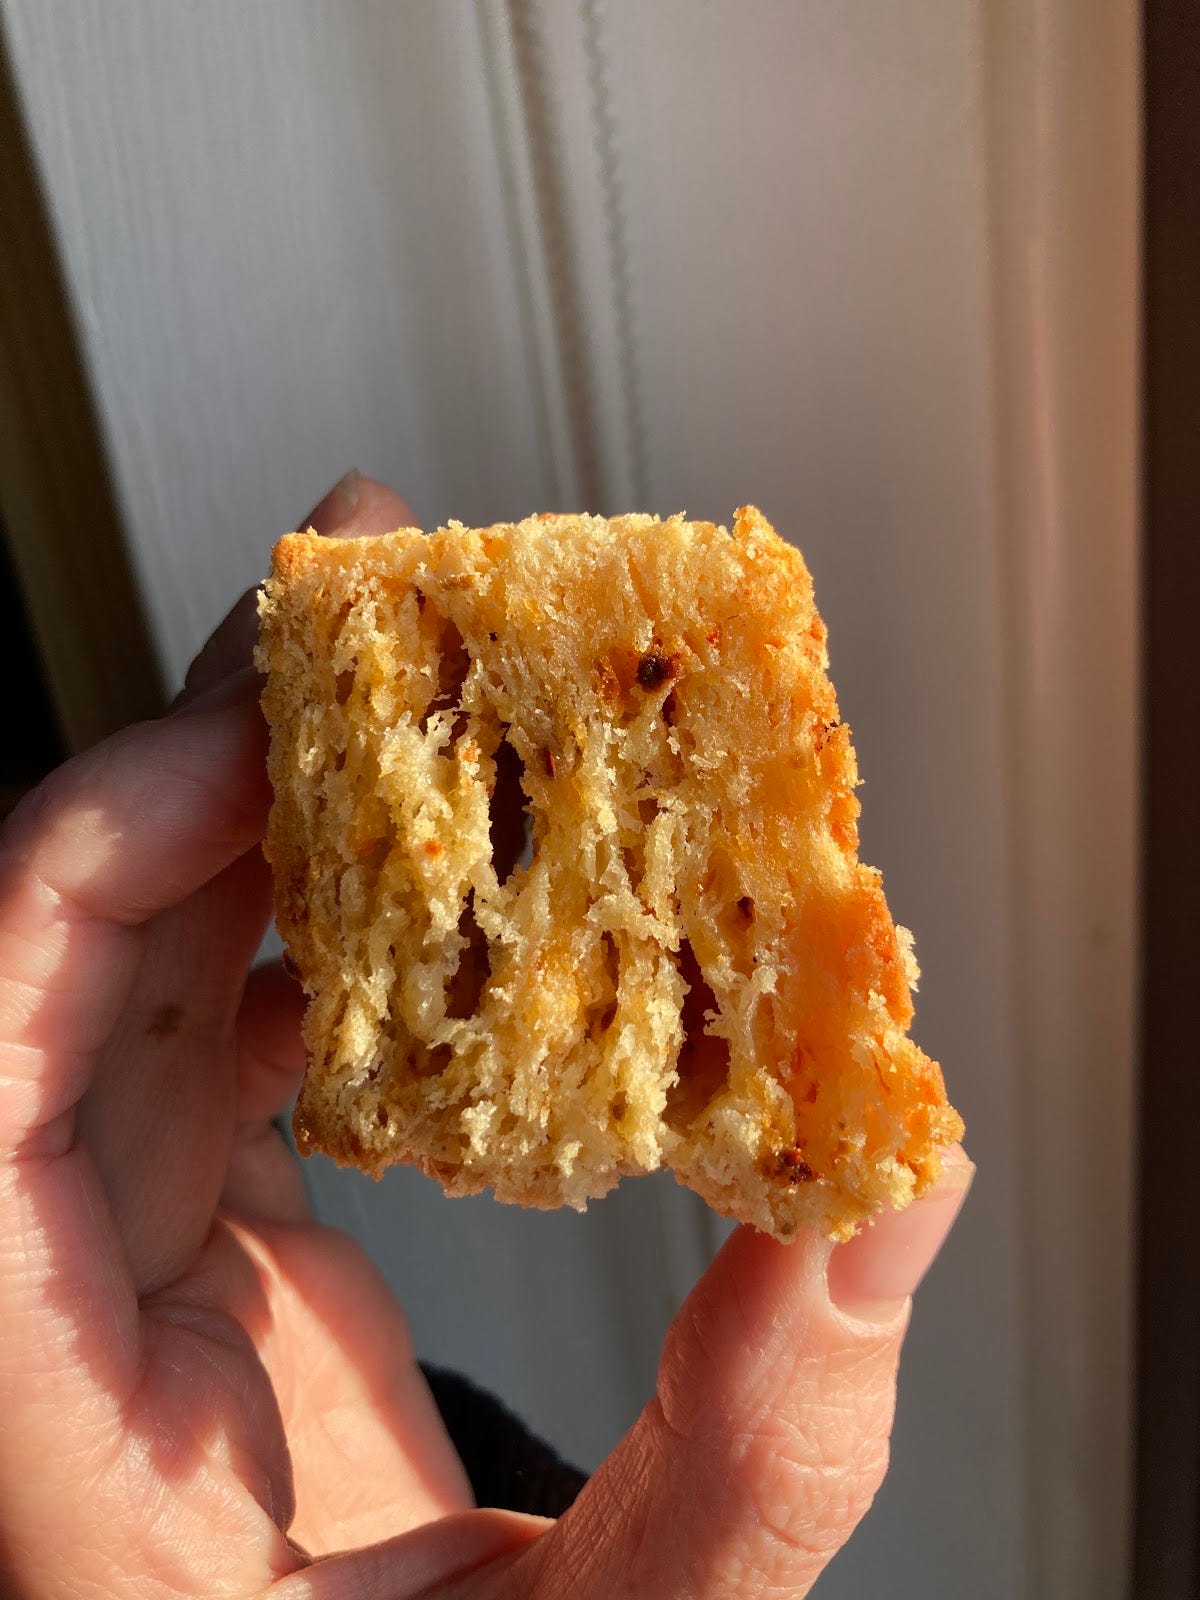
After the last two weeks of obsessive baking, I am a total cheese scone addict but you have GOT to do it right. Even if cheese scones aren’t something you are immediately drawn to, I’m here to convince you to give them a try. There are a few extra steps but it’s worth it: the real trick to these scones is physically folding additional cheese and therefore additional cheesy layers into your dough. Boom.
Side note: For anyone who is reading from the US, I’m pretty sure a scone is like a ‘biscuit’? Which is basically a savoury scone? However I am open to be proved wrong about this... Please hit me with ALL of your intel
The lowdown on scones
Ok so I know I totally just outed myself and I have to admit I haven’t tried *that* many in the past, but I do know that there’s nothing sadder than a dry, flavourless scone. In my mind, a cheese scone needs to be outrageously flavourful, ultra tender, flaky on the outside and tall. As Felicity Cloake says in her ‘perfect cheese scone’ article “the success of a scone can be largely determined with a ruler – they stand, or indeed fall, on their height”.
So, what can we do to achieve that height? Today we are definitely going to be covering raising agents but we’re also going to take a bit of a cave man approach and physically build up layers to get the ultimate flaky/tender combo. It is all about the lift – and how to get there.
Achieving lift through layers
One of the best parts of baking is watching the total transformation. For me, the most entertaining is vertical expansion. I think that’s why I’ve always loved making croissants and puff pastry. But, guys, as satisfying as it is, laminating is so time consuming and we don’t always have capacity for that. So, how can we reap the benefits of that vertical expansion without spending ALL DAY on it?
When I sat down to formulate this recipe I didn’t actually have a scone recipe to go on. But I did have a brilliant formulation for rough puff pastry. This very useful pastry holds a special place in my heart – you get all that transformation with a lot less work.
Let me fill you in on the basics: it is basically a super speedy version of puff. Instead of creating distinct layers of butter and dough, chunks of butter are suspended throughout the dough. Several folds are performed and then, when baked, those little chunks of butter melt, steam evaporates and little buttery pockets are formed.
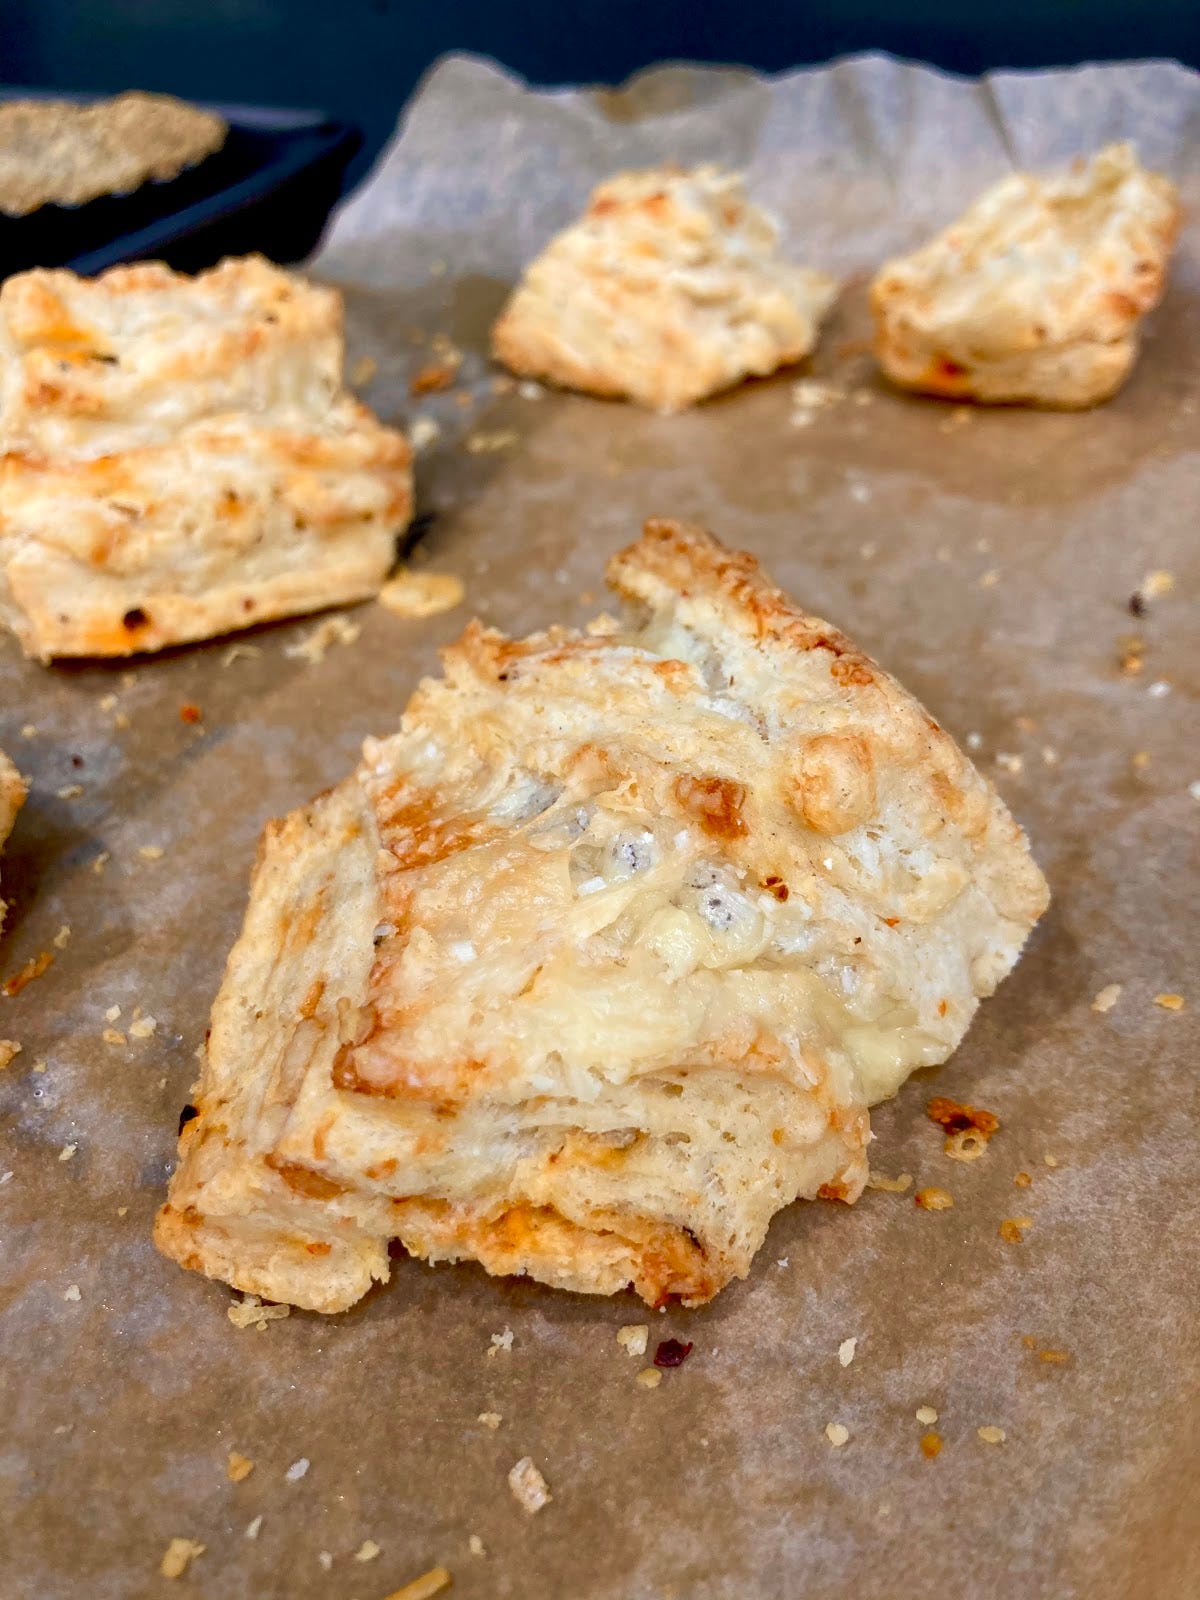
You don’t get the symmetrical lift you would from standard lamination but you do get something outrageously flaky, buttery and full of joy.
The problem with rough puff in terms of scones, however, is that it shatters, flakes and breaks apart like mad. Whilst I’d normally be seeking out these qualities, I need something a bit more tender for a scone.
Adapting the puff
While rough puff is a simple combination of flour, ice water, salt and butter. For the scones, we can use all the techniques involved but change the ingredients (for tenderness) to get the absolute best of both worlds. Plus, I’m going to use the folds as an extra opportunity to sprinkle more cheese into the dough, leaving incredible cheesy pockets throughout.
To adapt the recipe, I first reduced the butter. My original rough puff recipe had a massive 70% butter to flour weight. Although I want my scones rich, this needs to come way down so we can make way for other fat… namely in the form of cheese, ofc.
The plain flour has changed to self-raising/will have additional raising agents in (more on that in a sec) and the water was converted to something altogether more flavourful: buttermilk (more on that later)
For the cheese, I decided on a two-pronged approach – ultra mature cheddar and parmesan. That being said, any cheese would work well here, so long as you watch the hydration AND be aware of the salt content – nothing too gooey too early, and if you go ultra salty then watch how much flaky salt you add! The first time I made the scones, they simply weren’t cheesy enough which was totally not appropriate. A cheese scone really ought to make an impression on the palate! So, I upped it to a rather more generous 50% of flour weight. Much better.
To add some other flavour dimensions, I settled on a combination of red pepper flakes (not spicy but very tasty) and black pepper, letting the cheese speak for itself. That said, these scones would fly with a number of additions: rom spring onion to bacon, mustard powder or capers, jalapenos to herbs, these are the perfect base for all your savoury baking dreams. Promise.
The fold
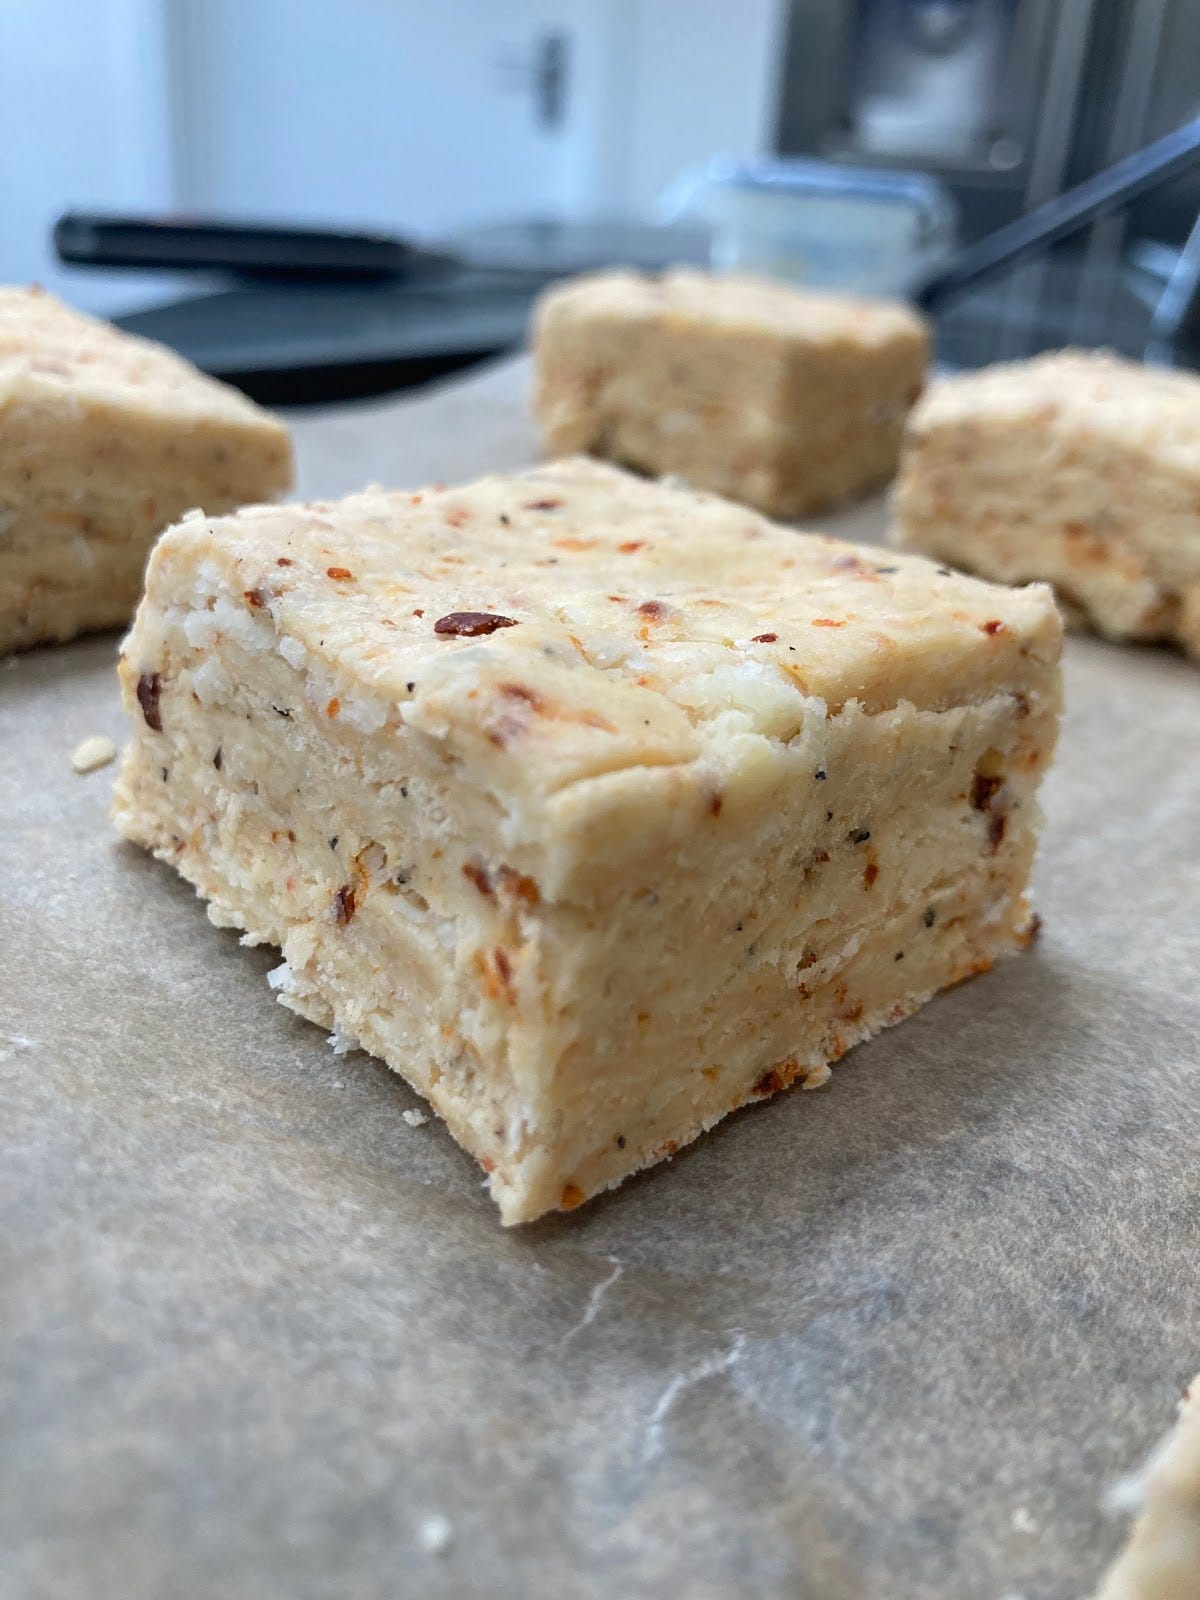
When making rough puff, an essential part of the process is the physical creation of layers by way of folding the dough several times. When you cut your scones, you’ll reveal a beautiful menagerie of butter and cheese layers before baking.
For the scone dough, we don’t need to go too crazy on the number of folds, especially since we’re adding cheese. There isn’t actually an officially accepted number of turns required for a rough puff dough (as far as I know) and all kitchens do it differently. For these, I tested a few and I found that two single folds worked perfectly. I did a version with more and all of the cheese scones fell over in the oven...
Steps to success:
Keep everything COLD. Especially your butter and your liquid. And, if you’ve got time, you should even consider chilling your flour and other dry ingredients
Get the butter just right: when you mix the dough you want uneven pieces of butter distributed through the mix. This will ensure you get lots of lovely buttery pockets. If you take it so far that the butter is at breadcrumb stage, it’ll still be nice but you won’t get the definition you deserve
Keep mixing to a minimum – for the ultra flaky results, we need to keep gluten development seriously at a minimum. This means you need to work with intention and not overwork the dough at any stage. I make this sound scary but it’s really just a case of being light-handed in your approach
Roll fast, roll firm – when you are adding your layers in with the cheese, please make sure to roll as confidently as possible. Keep it fast, keep it firm and don’t hang around. Once your butter has been blended into the flour during the first mix, it begins to melt so you do want to act fairly fast
Second chill – As well as keeping things cold from the beginning, this dough definitely benefits from a second chill. 45 mins in the fridge or – if you’re impatient like me, 10 mins in the freezer
Raising agents
It’s definitely important for scones to make an impact. One of the ways to do this is using raising agents. Although there are a few options out there, raising agents effectively do one thing: chemically react to create gas (CO2).
As the CO2 is released, it is trapped by molecules like gluten and fat. This trapped air leaves a light and fluffy structure behind. Dreamy.
Bicarbonate of soda is a ‘single action’ raising agent and it begins to react as soon as it is hydrated and encounters an acid. This means that you must add something acidic to your recipe in order to kickstart it.
Baking powder is a combination of an alkaline (like bicarbonate of soda) and an acid (like cream of tartar) but these two don’t react until heated AND hydrated. It is known as a ‘double action’ raising agent because it reacts twice: the initial reaction is when you add an acidic liquid (just like baking soda) and the second reaction comes when it is heated and the acid and alkaline present in the powder itself get together. This means that you don’t really have to add anything acidic to your mix to get the reaction as long as it's hydrated – the baking powder does it all itself.
How much baking powder?
Scones are supposed to be tall. But how much baking powder do you actually need to achieve great heights? As I had self-raising flour on hand, I decided to simply use that. But would that give me enough lift? I decided to check out the other cheese scone recipes on the market to see what’s what.
Self raising flour is simply baking powder + plain flour. And although I can’t seem to find any official info from the flour producers, I totally trust Nigella when she says 2 tsp of baking powder per 150g plain flour = self raising flour. That’s the quantity I used as my reference point in the comparison below:

Although Mary Berry and the BBC Good Food recipes utilise both self-raising AND additional baking powder, they are in the minority. And although I never like to question Queen Mary, this research didn’t leave me convinced that I should add additional chemical leavening in addition to the self-raising I was already using.
Just to check my conversion ratio was correct, I did test the scones with a plain flour + baking flour combo and it worked wonderfully. Phew.
Before we move on, I just wanted to say that when you’re making a recipe, you do need to make sure that you add enough raising agent to get the lift, but not so much that you have a strange, chemical bitter taste left over. You also need to make sure you’ve got enough acids or liquids to guarantee a reaction otherwise you might end up with a funny aftertaste, too.
The role of buttermilk
This recipe definitely needs the acidic buttermilk – firstly, to react with the raising agents for additional lift and secondly, to help cut through the intense cheesiness and make the scone a bit more complex.
I’m not gonna lie, I groan every time I see buttermilk in a recipe list. Not because I don’t like it – I love it! But I’m always so disorganised about it: I never, ever seem to have it on hand, or if I do, I never seem to be able to use it all up, OR, even worse, I forget I’ve bought it and it has a very sorry end indeed. I have no idea why.
The number of times I’ve googled ‘buttermilk alternative’ is embarrassing. Generally, the idea is to combine whole milk with white wine vinegar. Although this works in a sense that it gives you a liquid that has similar properties of buttermilk, you don’t end up with a uniformly smooth mixture. What you get is a slightly curdled but overall thicker mixture with an acidic taste.
So, you’ll be glad to know that these scones work just as well if you simply use a combination of whole milk and white wine vinegar. It isn’t as lush as the original, but it’s pretty good, and once it’s in the scones you really don’t notice.
Alright, shall we get on with the recipe?
