Hello,
Welcome to today’s edition of Kitchen Projects. It’s so wonderful to have you here.
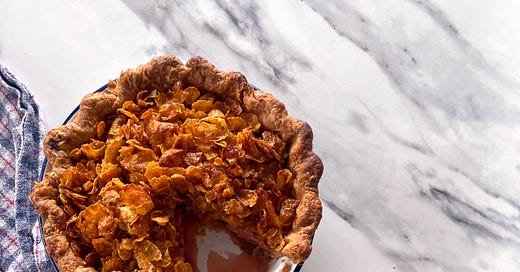
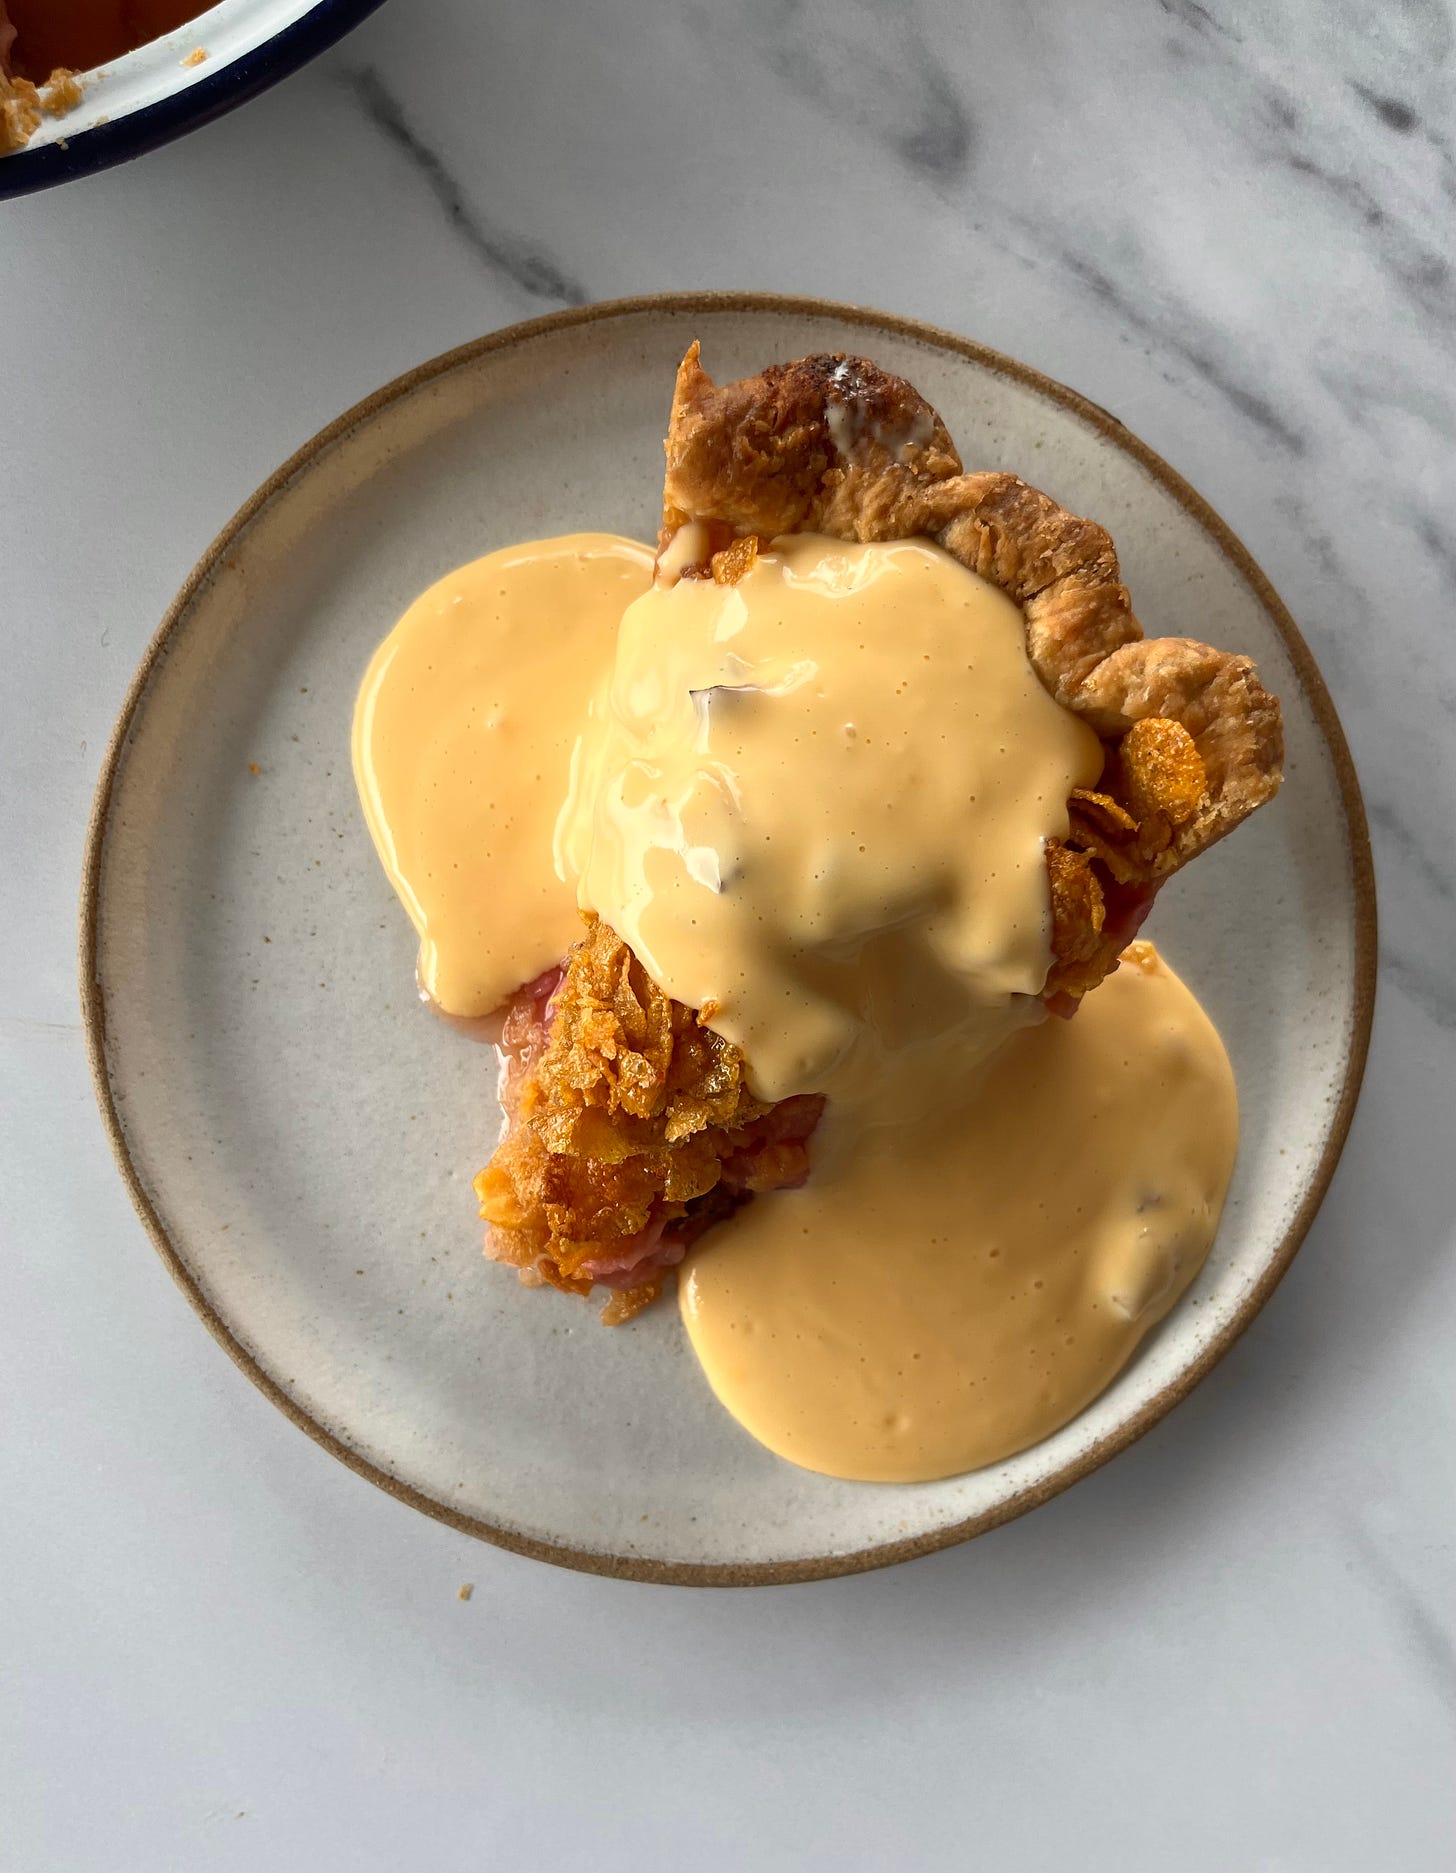
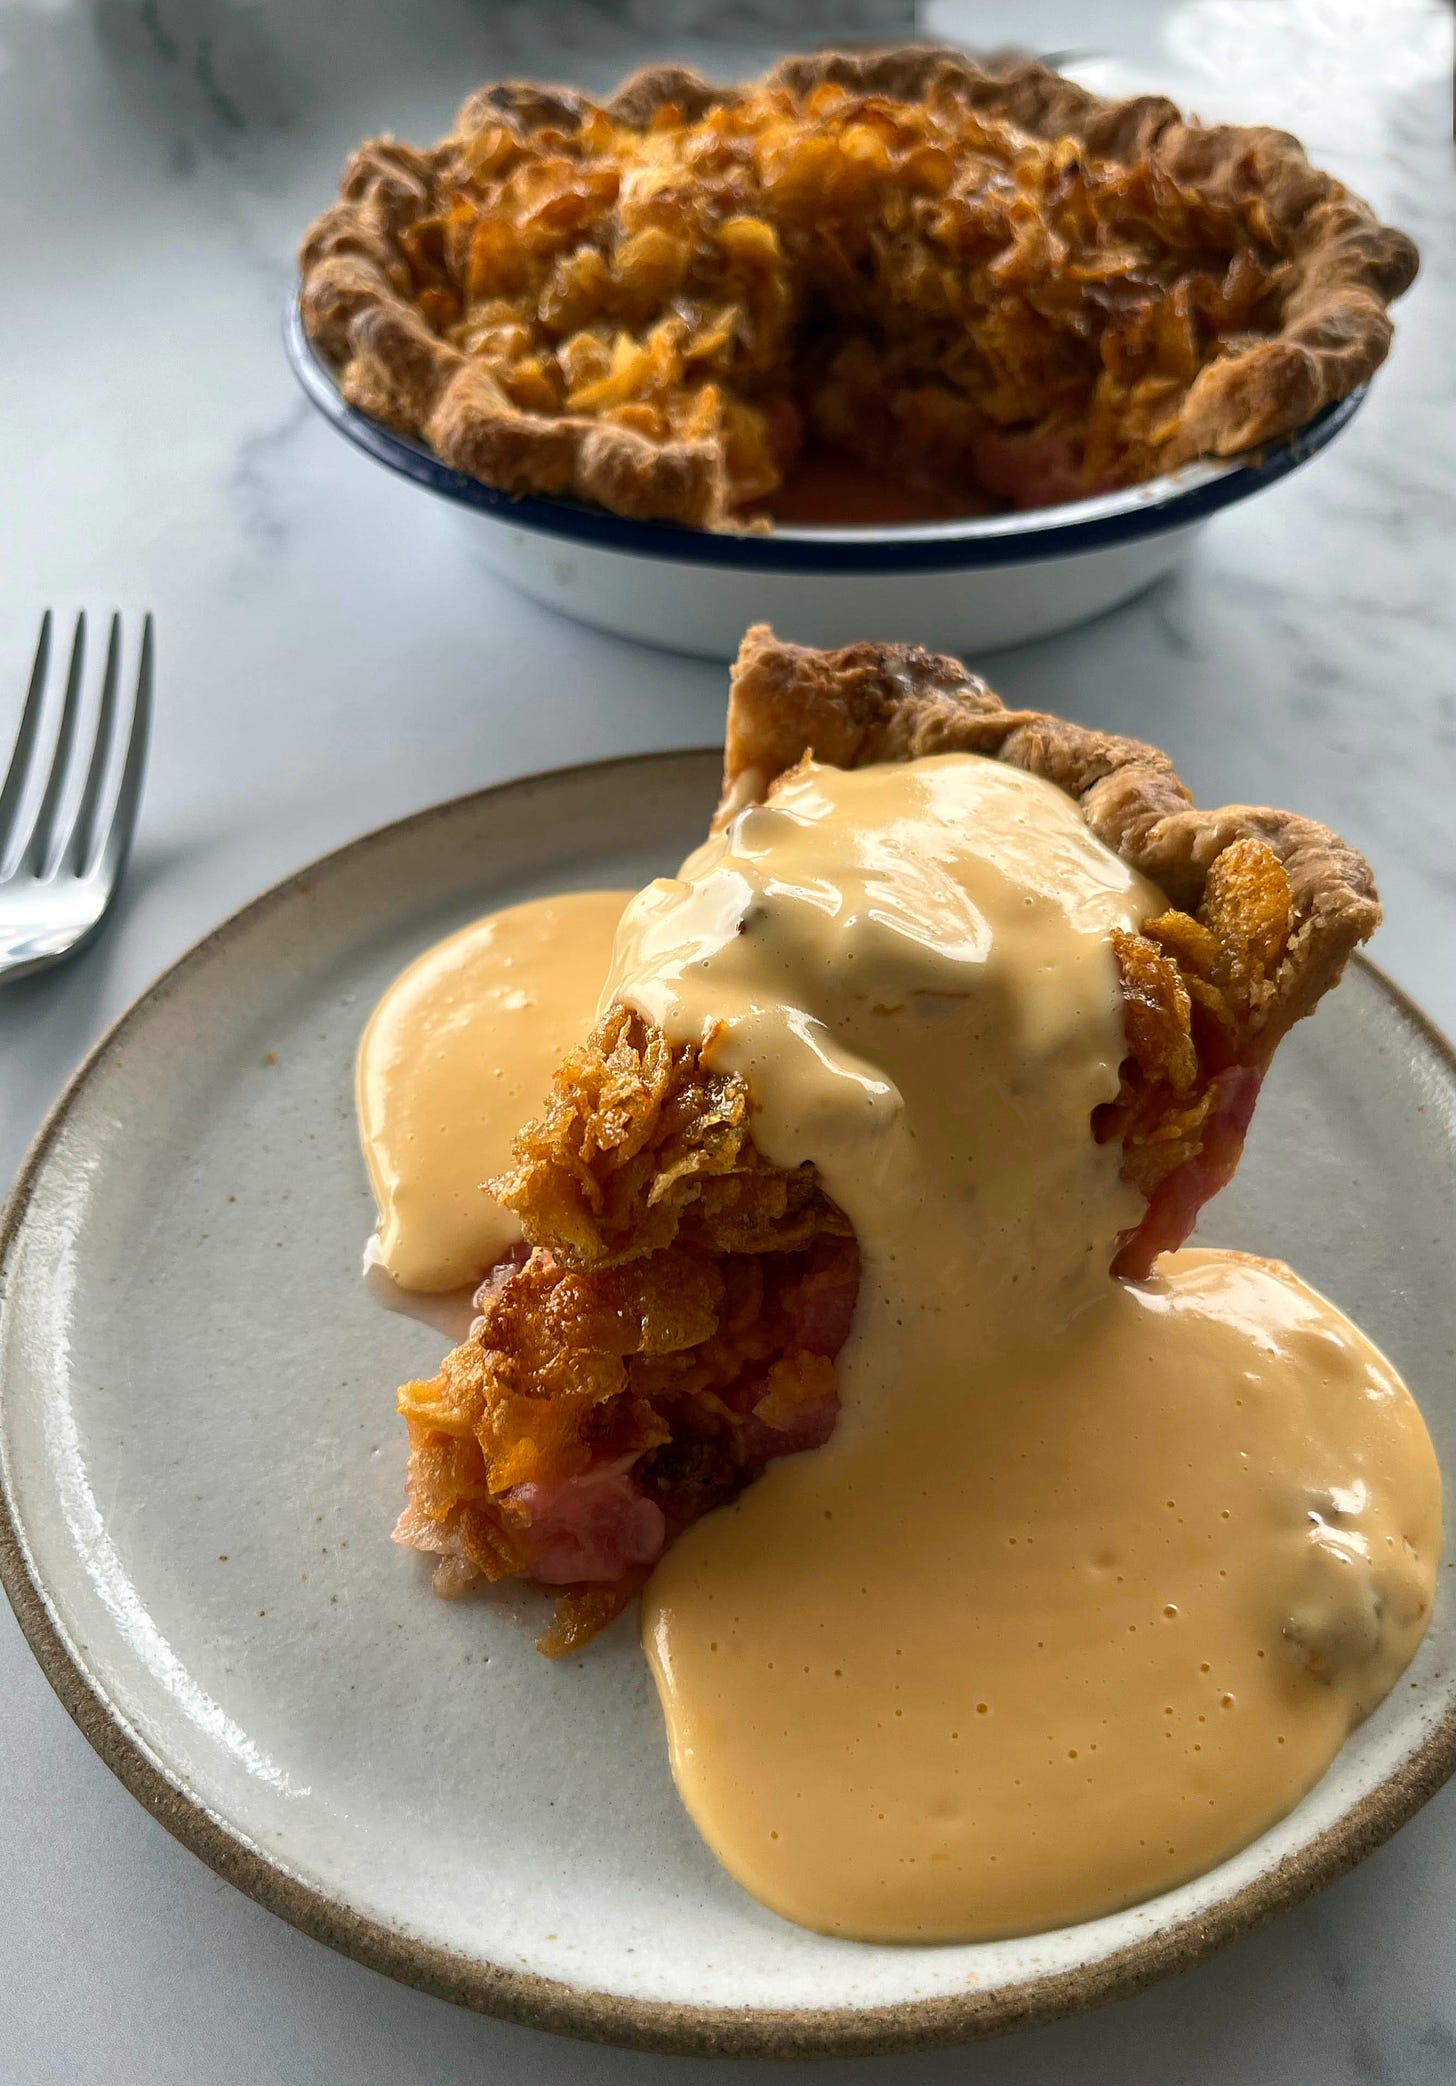
Today I’ve been inspired by childhood memories of glorious cornflake tart - IYKYK, but IYDKDWCIGY (that means If You Don’t Know Don’t Worry ‘Cos I Got You) - and I present my Cornflake Tart 2.0: This time it’s Rhubarb. PLUS, the thickest most gorgeous ‘school custard’ that you will use again and again.
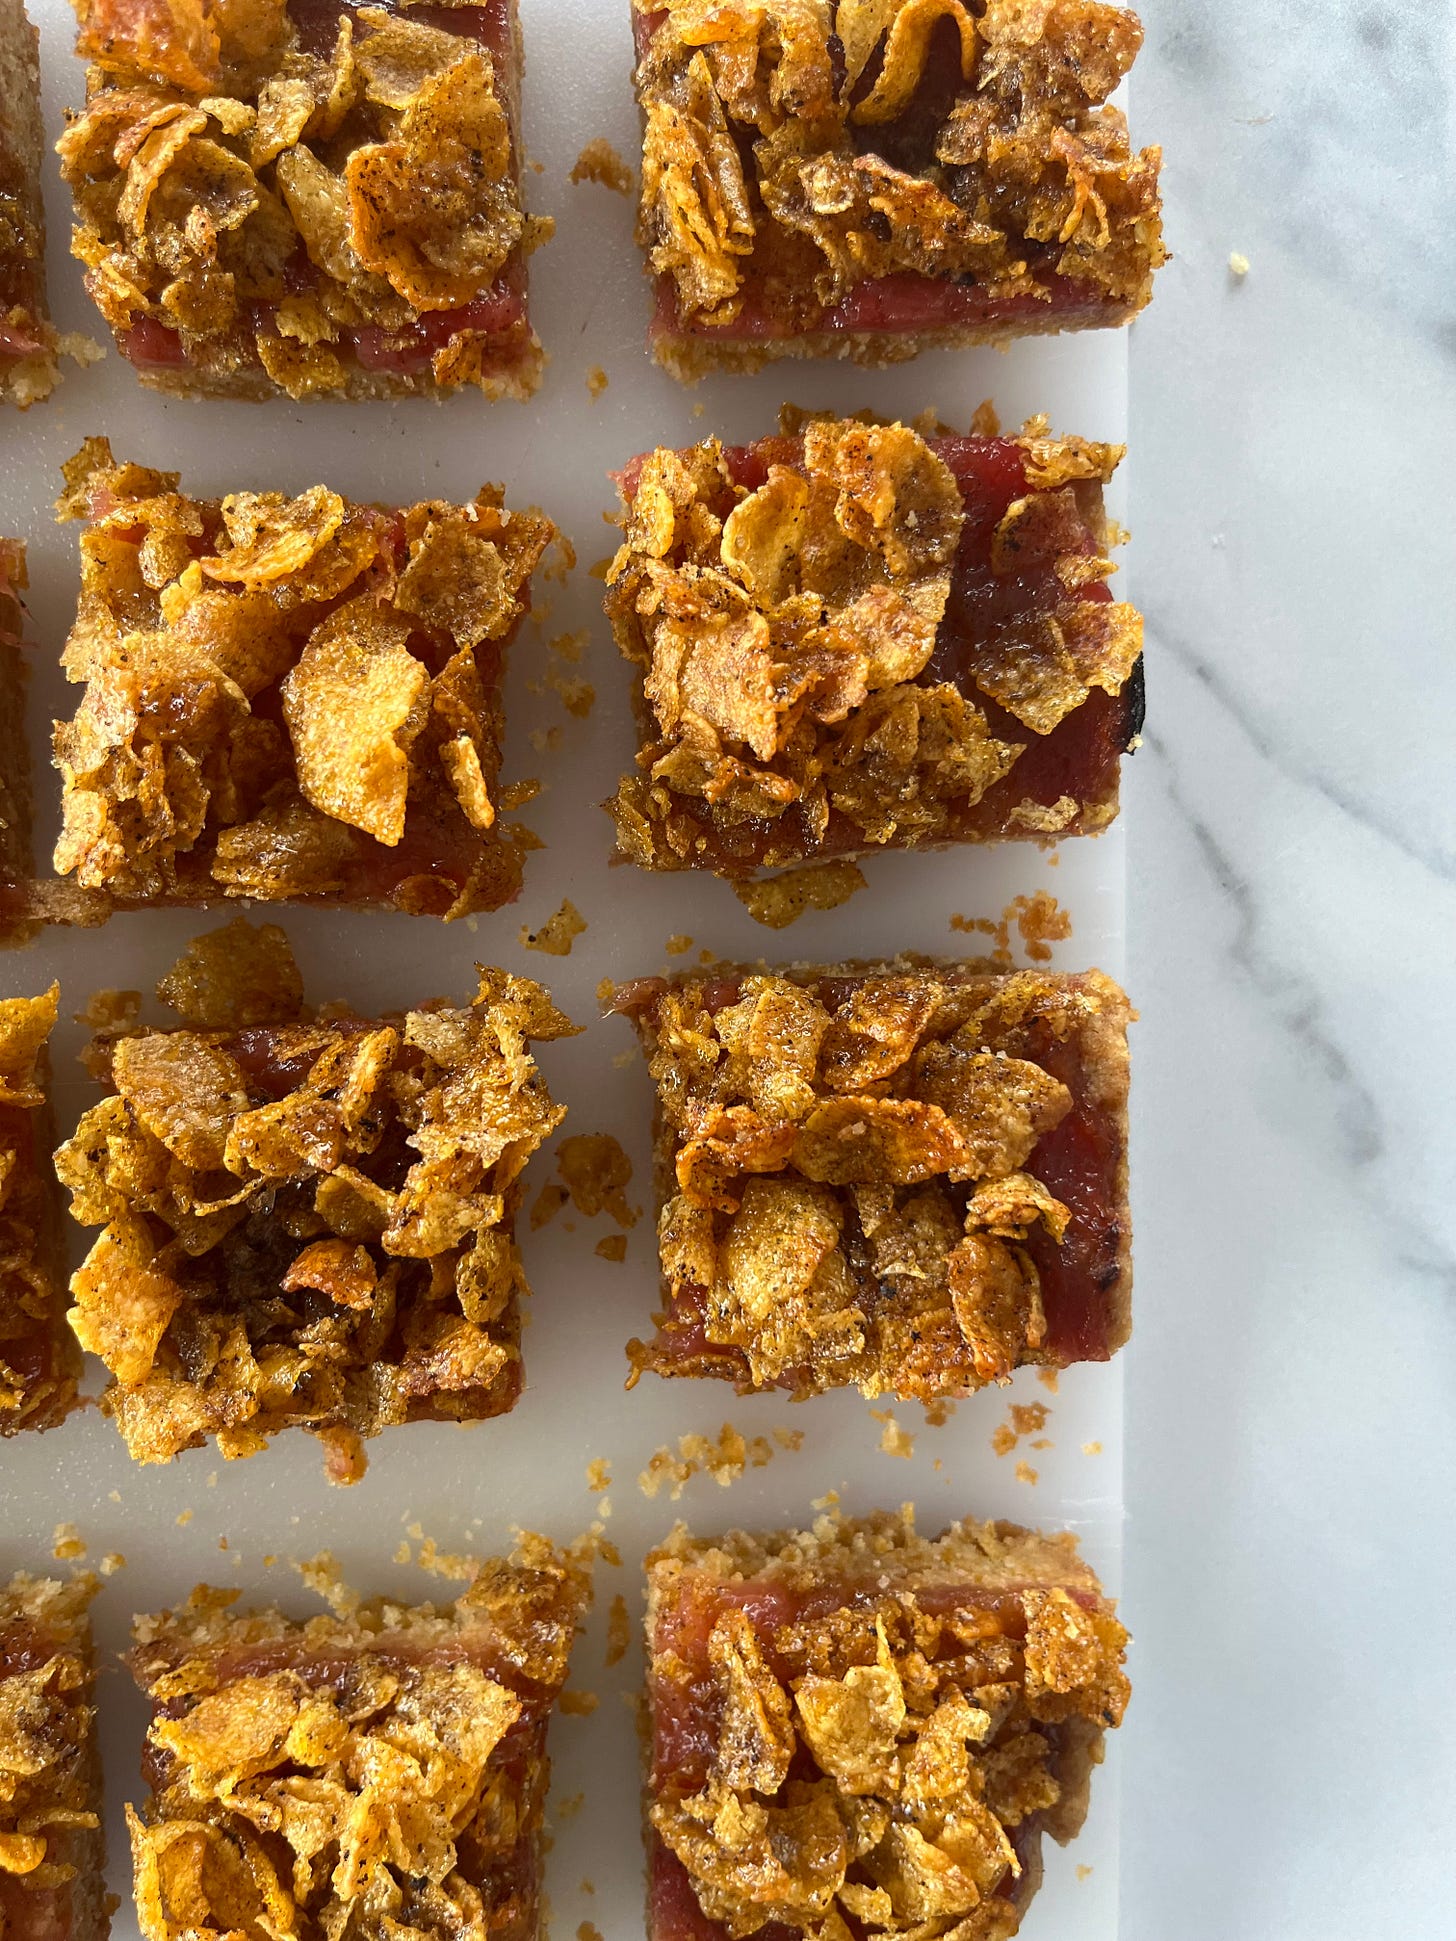
Over on KP+, I’m sharing a variation on the cornflake theme with double cornflake rhubarb bars. These have gone straight into my biscuits hall of fame and make the perfect share-with-the-office treat. If you’re enjoying this newsletter, I hope you’ll subscribe to KP+. It costs just £5 and you get access to lots of extra content, inc the full archive all while supporting the writing (yay! thank you!), so please click here to check it out:
Lots of love,
Nicola
Nostalgia as an ingredient
I love how much emotion is locked into our food and taste. It always amazes me how certain flavours are made even better with a side of nostalgia. My boyfriend grew up in the Midwest USA which means we rely on totally different foods for comfort: I don’t get the same hug-in-a-bite from a Reese’s Butter Cup, or a spoonful of Kraft Macaroni and cheese. He would pick Campbell tomato soup over Heinz any day (madness). And if I offered him a slice of cornflake tart? He would probably be confused.
If you grew up eating school dinners in the UK, there’s a high probability you know the joy of cornflake tart, a dessert that holds a very special place in my memory. Until this week, I hadn’t thought about cornflake tart in a very long time. But as soon as it came into my head I urgently had to have it, and so this newsletter was born.
For the un-initiated, cornflake tart is a school dinner classic - a square of shortcrust pastry with a lick of jam and a golden syrup-y cornflake topping served with custard. I was always happy when cornflake tart was on the menu - it was much better than the pallid chocolate sponge & custard combo, in my opinion.
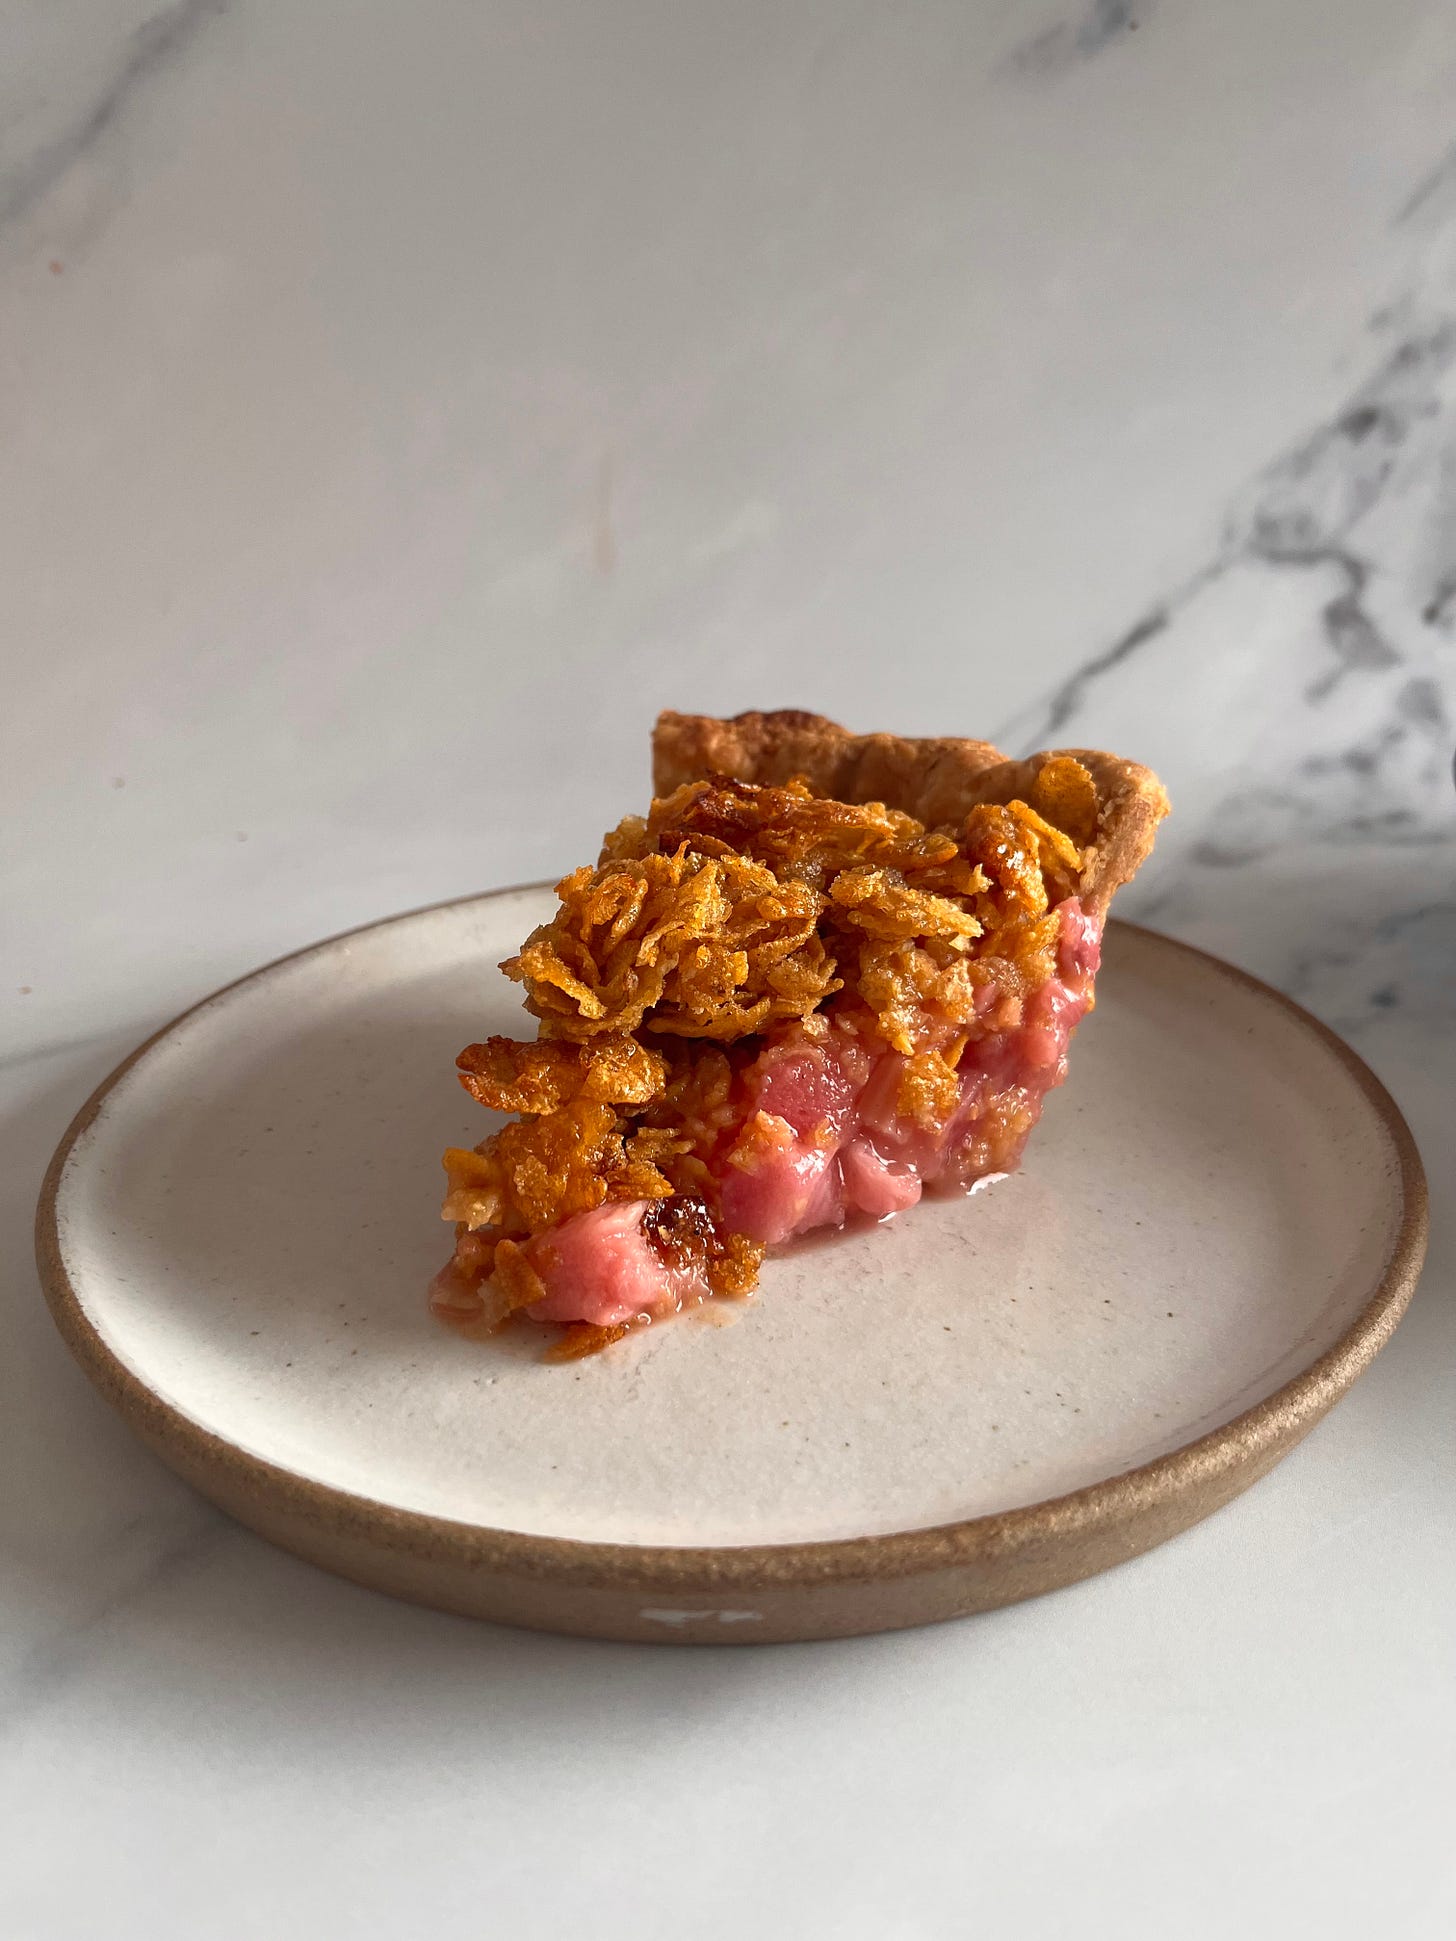
To re-experience this Proustian cornflake joy, I mixed up a batch of topping to taste - cornflakes, brown sugar, golden syrup, butter and a little salt. And you know what? It’s very legit. Even better than I remembered. It is surprisingly complex - corn is an underrated flavour in desserts, I think. It has a homely comforting toasty flavour. Once re-baked, it is extra crunchy and fun to eat, especially with splodges of butter and caramelised sugar throughout. And it’s even better with brown butter.
Although I could have easily thrown back several portions of a pure cornflake/pastry combo as an 8 year old, 29 year old me needs a little acidity to cut through all the beige (even though beige is my favourite flavour). So for today’s recipe, I’ve decided to do a take on the fruit crumb topped pie and have paired it with a bright rhubarb filling. It’s pretty classic but I estimate that it’s about 100 x better with that extra sprinkle of nostalgia on top. It jumps to about 1000 x better once you add super thick, bright yellow custard which I’ve affectionately named ‘school custard’ (spoiler alert: It’s not from a tin or powder):
For the love of crunchy stuff
As I’m sure you know, there is a whole category of pastry chef embellishments which I affectionately call ‘crunchy stuff’. From caramelised nuts to tuiles to honeycombs to cookie crumbs, pastry kitchens are filled with tubs of addicting nibbles that are added to desserts for texture, or sprinkled on top of tarts as a design flourish. One of a pastry kitchen’s BFF is feuilletine - thin crispy french pancake shards. It’s often used to add a crunchy texture to chocolate or caramel confections. Although it is lovely, it’s quite hard to come by or you need to buy it in kilo sacks which is about 500x more than you’ll ever be able to sensibly use at home before it goes off. So, my friends, cornflakes are a decent swap-in. This week’s testing brought on a full blown cornflake obsession.
Although I wanted to stay true to the cornflake tart for the main newsletter, I also tested out using ground cornflakes as a mix-in for shortbread. The result? DIVINE; The chunks of cornflake added both a crunchiness and a chewiness. So, if you don’t fancy making an entire pie and want something a bit more transportable, I can highly recommend these rhubarb double cornflake bars which is available on KP+ now:
Pie dough refresher
I was really inspired by the beautiful crumb top fruit pies for this week’s recipe which means making a batch of super flaky pie dough. Although I have a soft spot for that slightly raw and soggy school-dinner pastry, I think that’s an experience I’m happy to leave as a memory.
I’ve chronicled my adventures in search of my ideal pie dough before and we’ll be using that as our base today. Although I highly recommend reading through it if you want to understand the variables that make the difference between flaky and really-really-flaky / the difference between a decent pie dough and a brilliant pie dough, here’s a reminder of the basics:
I like to mix my pie doughs by hand - you don’t have to mix the dough by hand but it really is a great way to get in tune with your dough. It gives you overall more control which is good if you are still dialling in your pastry making skills. My favourite technique goes like this: Weigh dries into a bowl, add 1 inch pieces of butter, squish into flat blobs, add liquid, scrunch together and then put a few simple folds into it until it comes together.
The mixing method is extremely important as it will ascertain how much hydration is required. Basically, the more you rub in the butter, the less liquid you’ll need to bring it together as a dough because the butter itself is hydrating the flour. This is why shortcrust pastry doughs seem to have relatively low hydration (this recipe for shortcrust on the Great British Chefs website has just 15ml water to 250g flour, but all the butter is rubbed in) compared to today’s pie dough.
Depending on what recipe you are following, you will be instructed to rub the butter into the flour to varying degrees. We’ve discussed this before in the XXL Cheese scones and quiche recipe, but when it comes to flaky doughs, (butter) size matters. A lot.
For a flaky pie dough, chunks of butter are suspended throughout which, when baked, turn to steam and leave little buttery pockets behind in the baked pastry which easily flake apart and have an amazing flavour and texture. Depending on the recipe and technique, you’ll be asked to take the butter to various sizes which will ascertain the size of the butter holes ie. flakes later on.
So, to sum it up: The more you rub in the butter, the less liquid you need and therefore the less water that comes in contact with the flour resulting in gluten (potential for toughness). You can turn any pastry recipe from shortcrust style into a flaky dough style by changing up the butter size and liquid proportionally.
Par-baking Pie dough
Rhubarb, as we know, is a juicy juicy fruit. And when your filling is juicy-juicy? Blind-baking is essential. As we’re dealing with chunks of butter that melt, enrich then steam, this pastry wants to MOVE. Like, unless it is held down and fully shackled, it’s going to try and run away from you.
Pie dough takes longer to blind bake than standard sweet pastry dough. The butter in the pastry is melting and then evaporating which creates steam. Since the steam has nowhere to go (held down by baking beans!) the moisture is retained in the pastry for much longer.
As well as this, you really need to blind bake the pastry hotter than you would normally - 180c! And even with this extra heat, the pastry needs about twice as long to blind bake than a regular tart case - I start with around 30 mins with the beans, then another 10 minutes without the beans until it is fully dry. This pastry also requires something I don’t normally advocate: Docking. Docking is the action of putting small holes in your pastry to ‘allow steam to escape’ - as we are dealing with a semi laminated dough that is filled with large chunks of butter, this is genuinely necessary and it does help the pastry from billowing up. Trust me, you’ll see - it really needs it.
An ode to school custard
Although I do like creme anglaise, I’ve never found it as satisfying as proper thick yellow custard. The bird's powdered stuff is the classic of my childhood but I wanted to create a recipe for what I’ve affectionately named ‘school custard’. I took a simple creme anglaise recipe and played around with it to get it to the texture (and hue) deserving of its name.
For a start, I increased the yolks for both flavour and colour, making sure to use a ‘rich’ yolked egg, like a Clarence Court or St Ewes. We’ve discussed the topic of egg yolk colour before but here’s a reminder of what’s going on with those brightly pigmented yolks:
In recent years, we’ve all become discerning consumers of eggs and their golden yolks and have become collectively obsessed with this ultra orange hue, believing that the mark of a ‘good egg’ is inextricably linked to the colour. But this is not strictly accurate. You can get a perfectly healthy and free-range egg but still have a pale yellow yolk. So why is this?
The colour of an egg yolk is exclusively determined by pigment molecules called ‘carotenoids’. These pigments appear naturally in plants and are available to animals entirely via diet. So, hens with access to a very broad diet are likely to have more vividly coloured eggs. But farms *do* game this. By introducing brightly coloured foods into the diet of their hens via plants like marigolds or vegetables like carrots and sweet potato, farms are able to achieve a superbly bright yolk. These enriched diets are carefully formulated by nutritionists to give optimal health to the hens and optimal results in the eggs - strong shell, deep orange-y golden yolks, dream.
Clarence Court, purveyors of the gorgeous Burford Brown eggs, use both marigolds and paprika to achieve the orange yolk, too. All of this to say, you can still have a bright yellow yolked egg that has come from a good, free-range environment but it probably just means the hens didn’t have the same access to the biodiverse pastures or specially engineered diet.
It’s worth keeping in mind that the look of your yolks is a wonderful reminder of the food chain that we are very much part of. Speaking to the power of the supermarket buyers, egg yolks have long been engineered to suit the preferences of the consumer - the pale yellow sunshine-y yolk has been the signature trademark of the egg in cartoons, media and advertising for the last 50 years, with the deep orange yolk only really coming into fashion in the UK and US in more recent years. The American Egg Board insists there is no relationship between egg quality to egg yolk, for example.
All this to say is, today’s school custard MUST be made with super pigmented yolks to have max nostalgia factor. Birds custard (which, plot twist, is vegan) powder uses the natural colour ‘Annatto Norbixin’ for that bright yellow shine, as does Sainsbury’s fresh custard, so although the increased egg yolk overall % helps, get the super bright yolks for highest impact.
The importance of starch
The next important addition for the school custard is a bit of starch. When you make a creme anglaise it is thickened only by the egg yolks - we gently heat the sugar, milk and yolks together until it reaches 84c. At 84c, the proteins in the yolks have unravelled and linked together in a process called ‘coagulating’ (As a side note, if you take it beyond 84c, the proteins continue to make bonds which makes them clump together, resulting in a cursed and lumpy / split custard). So, egg yolks only have so much power which means we need the help of starch to get a really thick luscious texture.
Starch-bound custards don’t play by the same rules though. In fact, you’ll find it hard to curdle a starch-bound custard. This is because egg yolks/proteins are coated with starch which, in theory, prevents the proteins from interacting. Instead the starch absorbs the liquid, swelling. The liquid is unable to move (as much) and the swollen starch granules result in a thickened texture. The swollen starch granules then burst, resulting in even more starch molecules being released throughout the mixture - this is known as gelatinisation. To reach full thickening power, it’s recommended to boil the starch-bound mixtures for a minute or so, which can also help meld the starch flavour.
For our school custard, we don’t need as much starch as pastry cream, which is about 4% of the overall. I tried a few different ratios and I ended up with around 1.5% of the overall.
Let’s compare the three custard types:
Juicy, juicy rhubarb
Rhubarb is 90% water which means I usually proceed with serious caution.
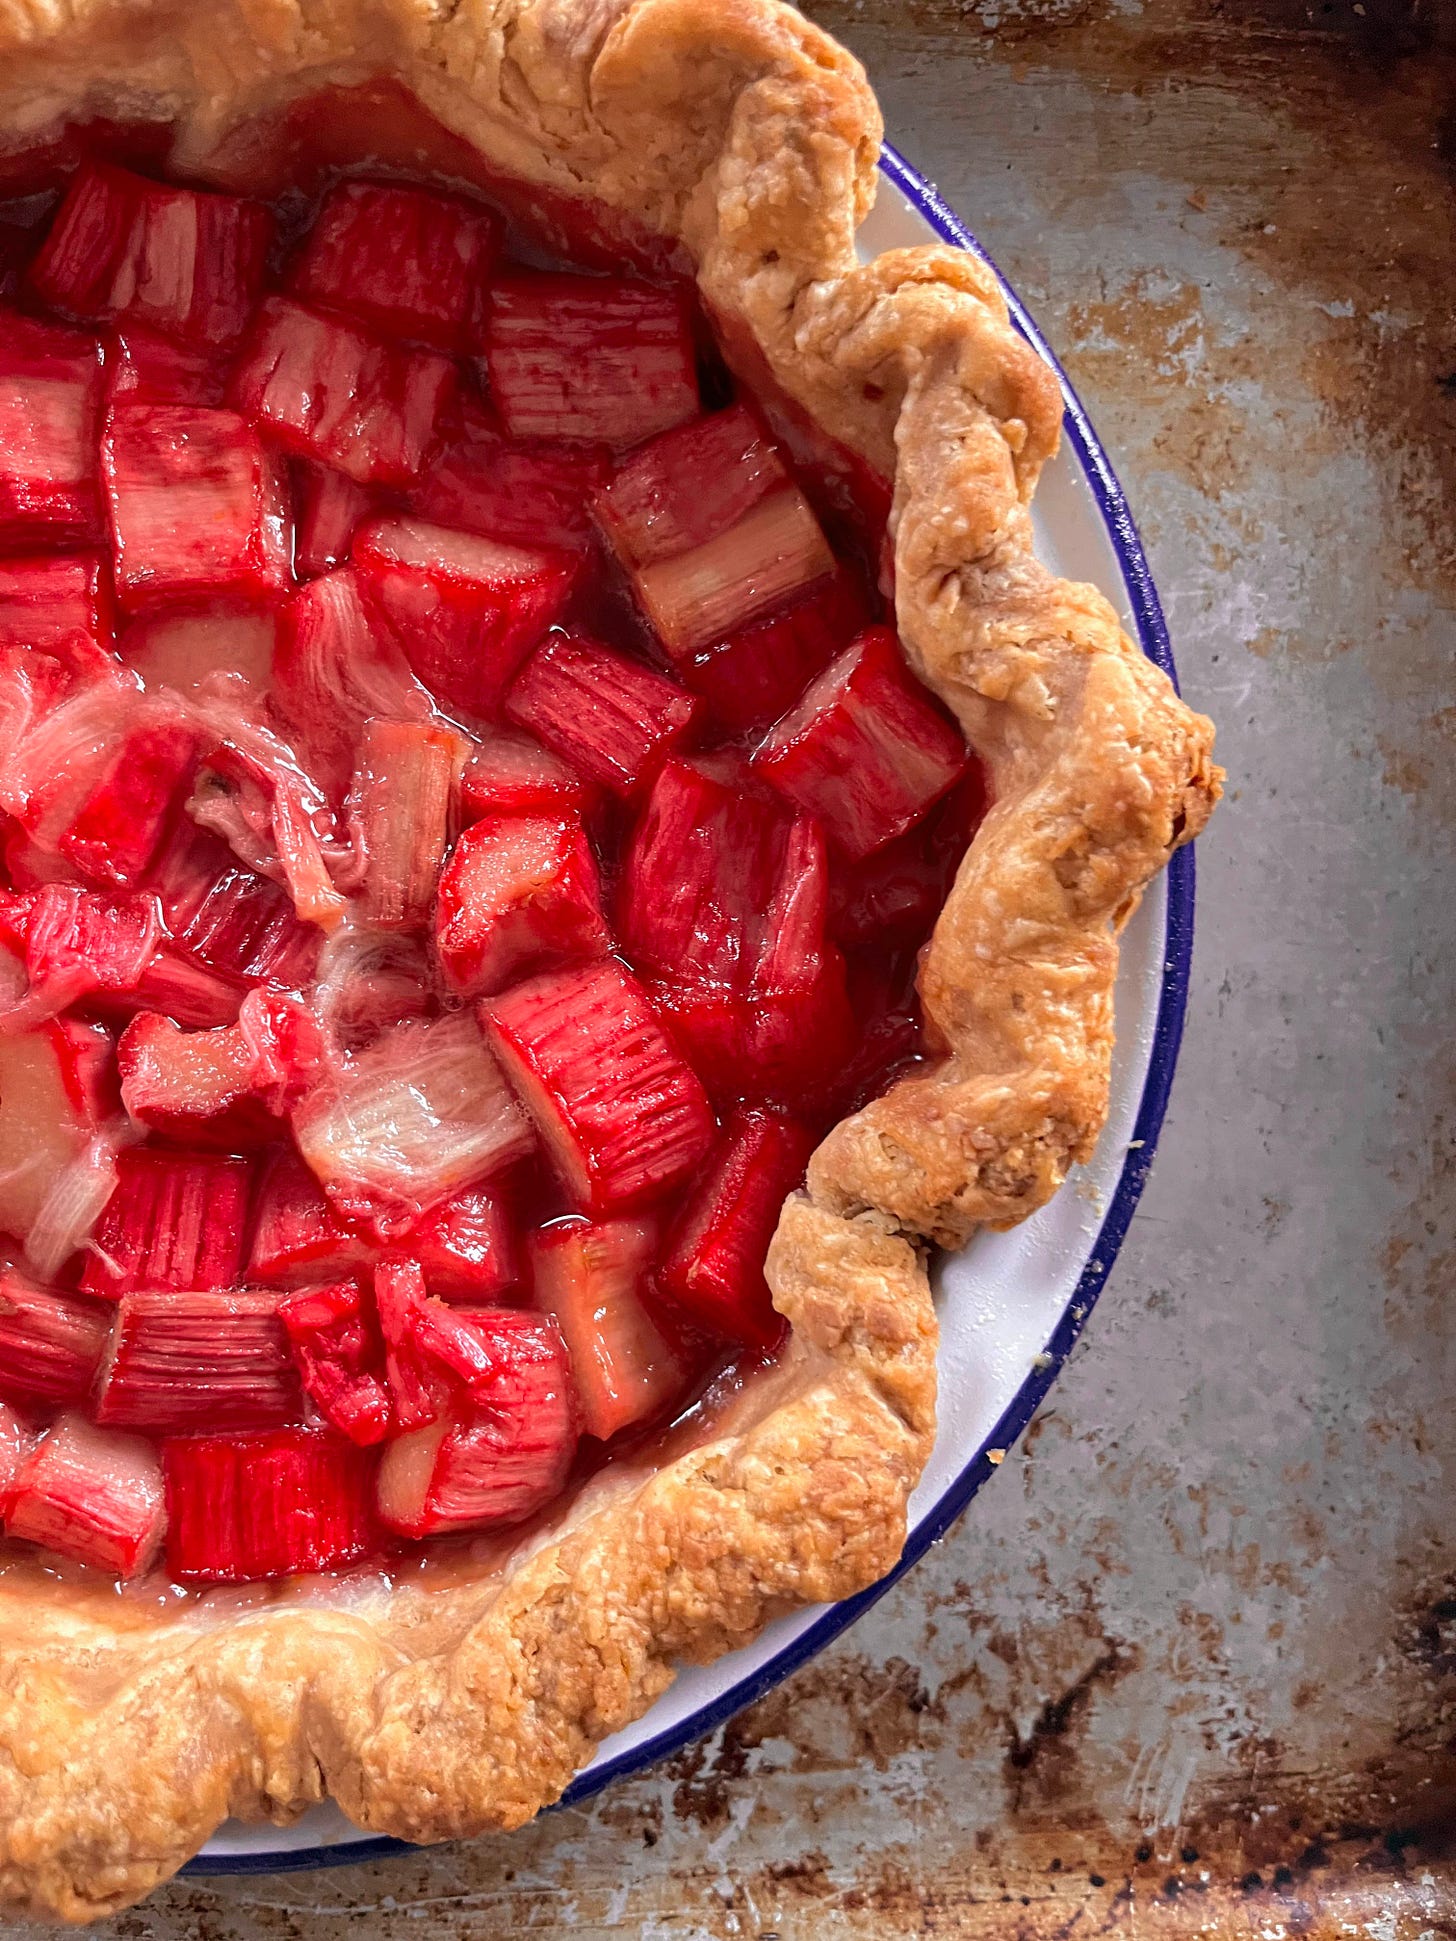
Although I spend most of my life trying not to keep rhubarb in ‘just cooked’ and shapely state, I have a different motive when it comes to pie. For I just give in to the softness and juicyness. But you do need to make sure it cooks for long enough - remember, when you’re cooking a fruit pie filling, especially one with so much water, it needs to bubble before you proceed with the next step. This is because you need to make sure two things have happened: 1) Enough water has evaporated from the fruit and 2) the starch has reached gelatinisation temperature
I decided to use standard flour rather than cornstarch as my thickener - cornstarch is great for a more jelly-like set, but to properly lean into the wanton ways of the ribbony rhubarb, I felt flour was the best. I’ve definitely erred on the side of ‘danger’ with the level of thickener - this is a juicy pie at its best!
Cornflake Tart 2.0
Makes 1 x 7 inch pie, serves 6
Adaptations
You could totally make this in a tart case with shortcrust pastry - you will need a little less rhubarb, probably.
If you fancy a classic cornflake tart, spread a thin layer of jam (rhubarb compote recipe here) in the base of a fully baked tart/pie case and make a 1.5x batch of the cornflake topping and bake til just golden
Ingredients
1 x recipe Ideal pie dough (you will need about 2/3rd of it) OR 1/2 recipe go-to pastry, if using a tart case
Rhubarb filling
450g rhubarb
75g caster sugar
20g orange juice
18g plain flour (for thicker set, use cornflour)
Cornflake topping
70g browned butter, warm (you can also just use plain melted butter)
40g light brown sugar
60g golden syrup
3g flaky salt
80g cornflakes
School custard
Makes 500g, enough for one pie (but you can half it)
190g milk
190g double cream (you could also do all milk)
45g caster sugar
8g cornflour
70g egg yolks
Pinch of salt
Custard - method
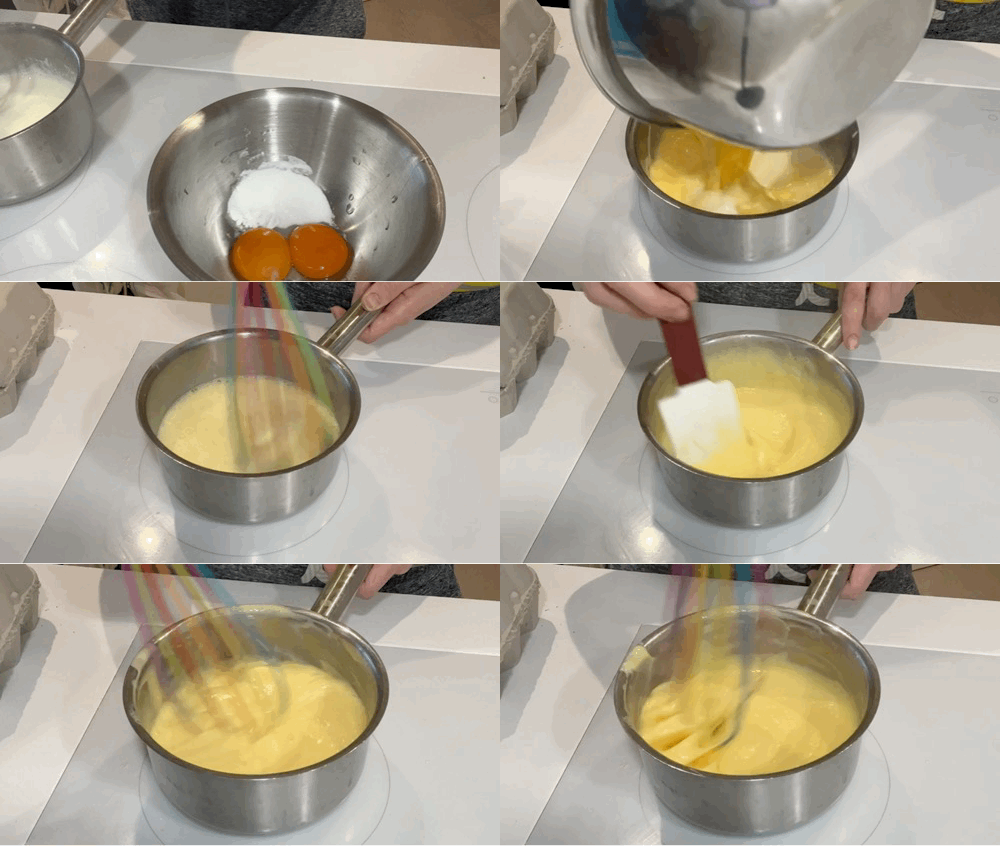
Heat cream and milk with half of the sugar until simmering
Whisk egg yolks with the cornflour and rest of the sugar
Temper the eggs - pour half of the simmering milk over the egg yolks, whisking all the time
Pour back into the saucepan and whisk until thickened and bubble for about 1 minute
Pour into a clean container and cover to prevent a skin from forming
You can make this 3-4 days in advance and re-warm when you’re ready to use
Pie dough - method
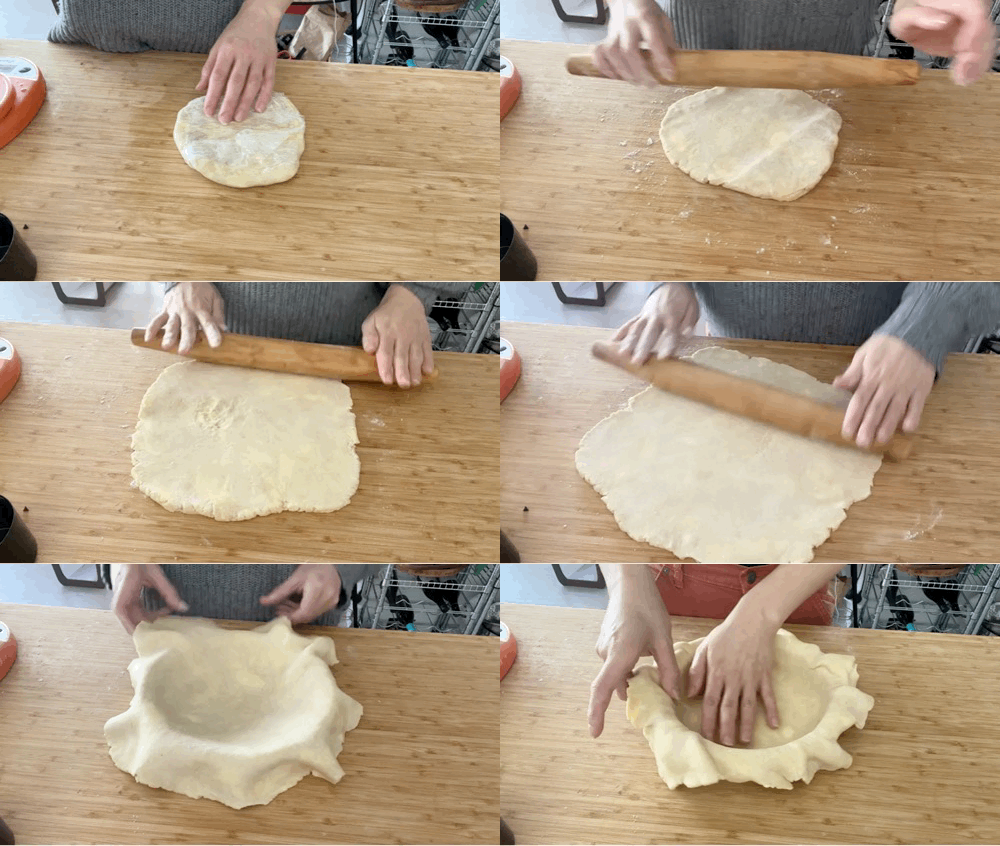
Roll out the pastry using firm strokes of the rolling pin, turning it a quarter turn between each roll to keep it in an even shape. Roll it to about 3-4mm. I know this seems thin but it has lots of layers in and won’t cook otherwise! You want it to be rolled out enough for there to be a few cm of overhang so we can make a nice crust
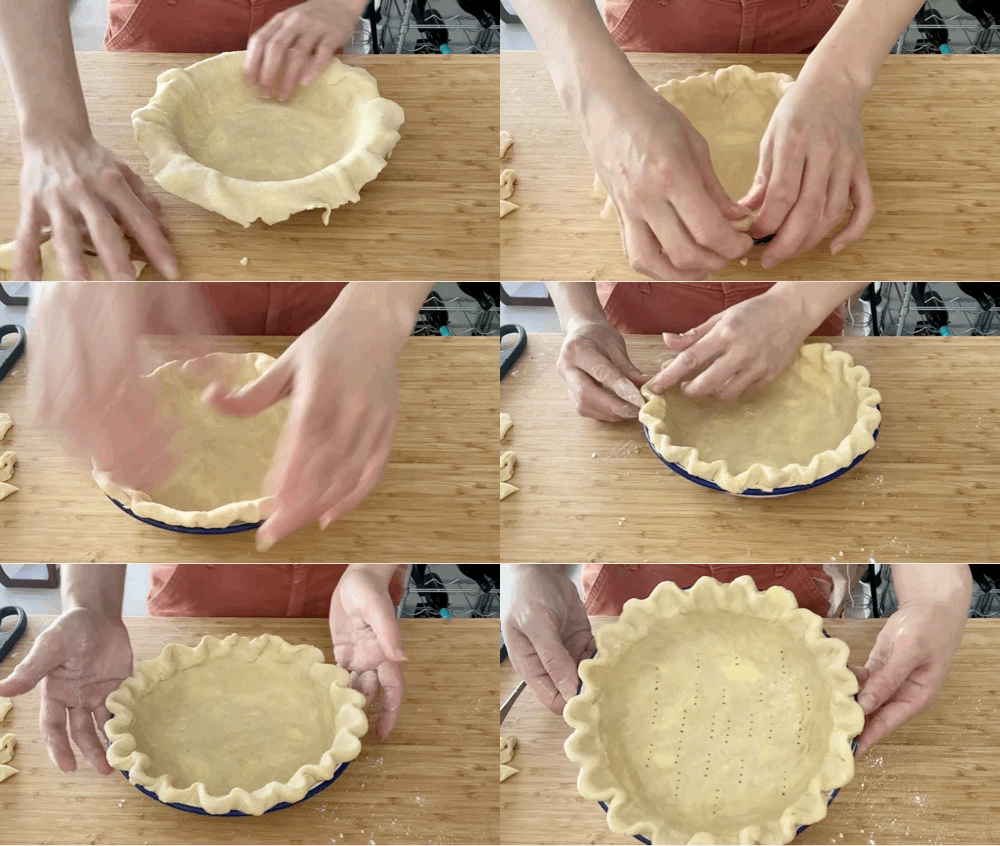
Line your pastry case. Roll the pastry up onto the rolling pin and drape over the case. Tuck carefully into the corners and press into the sides. Go over it several times with floured fingers if you need - it’s got to be super tight to the tin. You can trim the overhang with scissors so it only has 3cm
Tuck the pastry under itself then crimp. There are lots of way to do this but my favourite is simply using a finger and fore thumb - make a V with your left hand then using a finger on your right hand, press inwards whilst holding your fingers in place.
Dock with a fork all over - sides and all
Chill in the freezer whilst the oven pre-heats
Pre-heat oven to 180c fan
Press foil (as it gets into the edges best) or paper into the tart, ensuring it is tight to the edges. Fill with rice, or your chosen baking bean
Bake case for 30 mins it is golden on the edge
Remove the beans then bake for another 8-10 mins until it looks dry and pale golden
The case is now ready to use
Rhubarb filling
Pre-heat oven to 180c fan
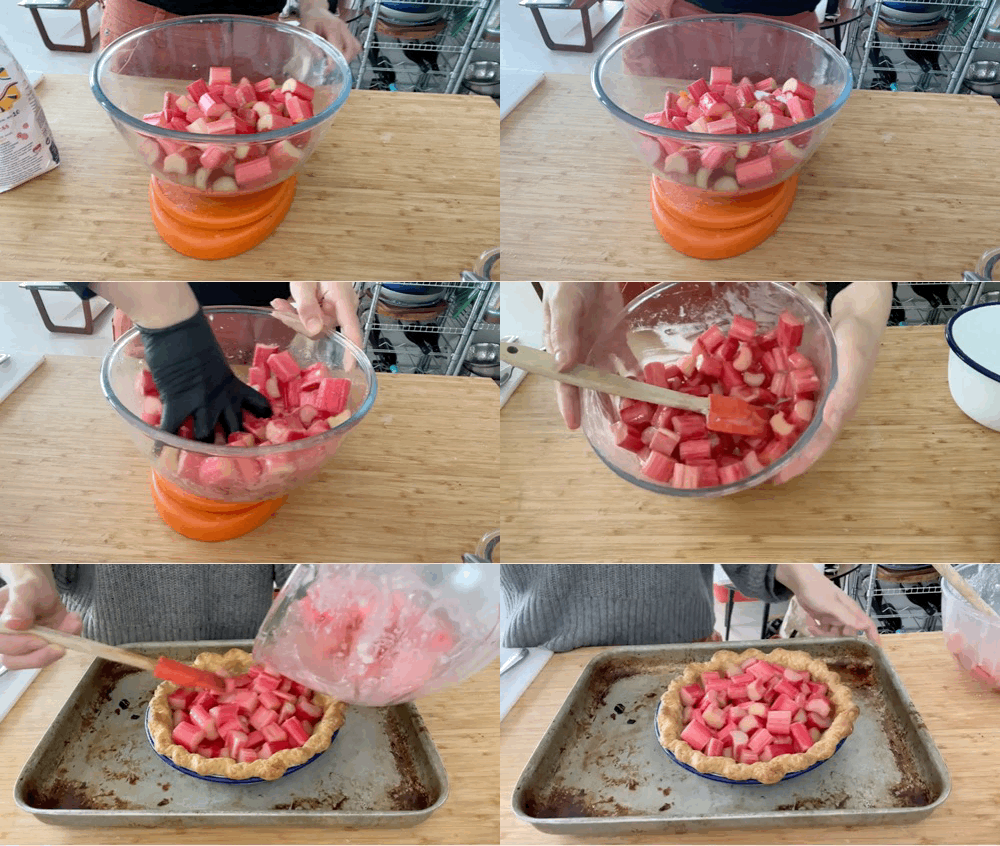
Cut rhubarb into 1inch pieces
Toss with sugar and orange juice. Leave for 10 minutes until a bit of the juice has come out
Now mix in the flour
Pour into blind-baked case. If the edges of your pie case are already quite dark from blind baking, cover with foil to shield the crust
Bake for around 1 hour - the rhubarb should be soft and bubbling; if it isn’t, keep going! The fruit needs to bubble so we know that enough liquid has evaporated and the flour has thickened
Cornflake topping
First brown the butter - Melt butter in a saucepan. It will be noisy whilst all the water evaporates
Once it gets quiet, it will be foamy and the butter will be browning quite fast at this stage. Use a spoon or spatula to scrape the milk solids as they will want to stick to the bottom of the pan
Do your best to clear the foam and check the colour of your brown butter. I like to go for a deep amber
As soon as it is the right colour, take it off the heat and pour into a heatsafe container
Leave to cool a little before whisking in the sugar, golden syrup and salt
Finally stir in the cornflakes and stir to coat. It might be lumpy. That’s okay. Just do your best!
Final bake and assembly
Reduce oven to 160c fan
Sprinkle cornflake topping over the cooked rhubarb filling
Bake for 10-12 mins until golden and toasty
Leave pie to cool for 1-2 hours so the filling sets
Re-warm slightly if desired and serve with hot custard
Pie keeps for 4-5 days in the fridge






Wondering, what fruits can be substituted for the rhubarb? Not available here in Albert quite yet.
I’ve just eaten this (sliced and froze so just heated up the slice). I used a mix of rhubarb and apple and it was absolutely divine. Can’t believe it tastes so good. Another wonderful recipe thank you!