
Kitchen Project #160: Fastelavnsboller (Chocolate-Covered Custard Buns)
THE Danish lenten treat with Chef Nichole Accettola

Hello, and welcome to today’s edition of Kitchen Projects.
You know how sometimes it’s hard to imagine a time BEFORE something came into your life? That’s how I feel about Fastelavnsboller, the Danish lenten bun. I am thrilled that Nichole Accettola, author of Scandinavian from Scratch and chef/owner of Kantine, is here to teach us all about it.
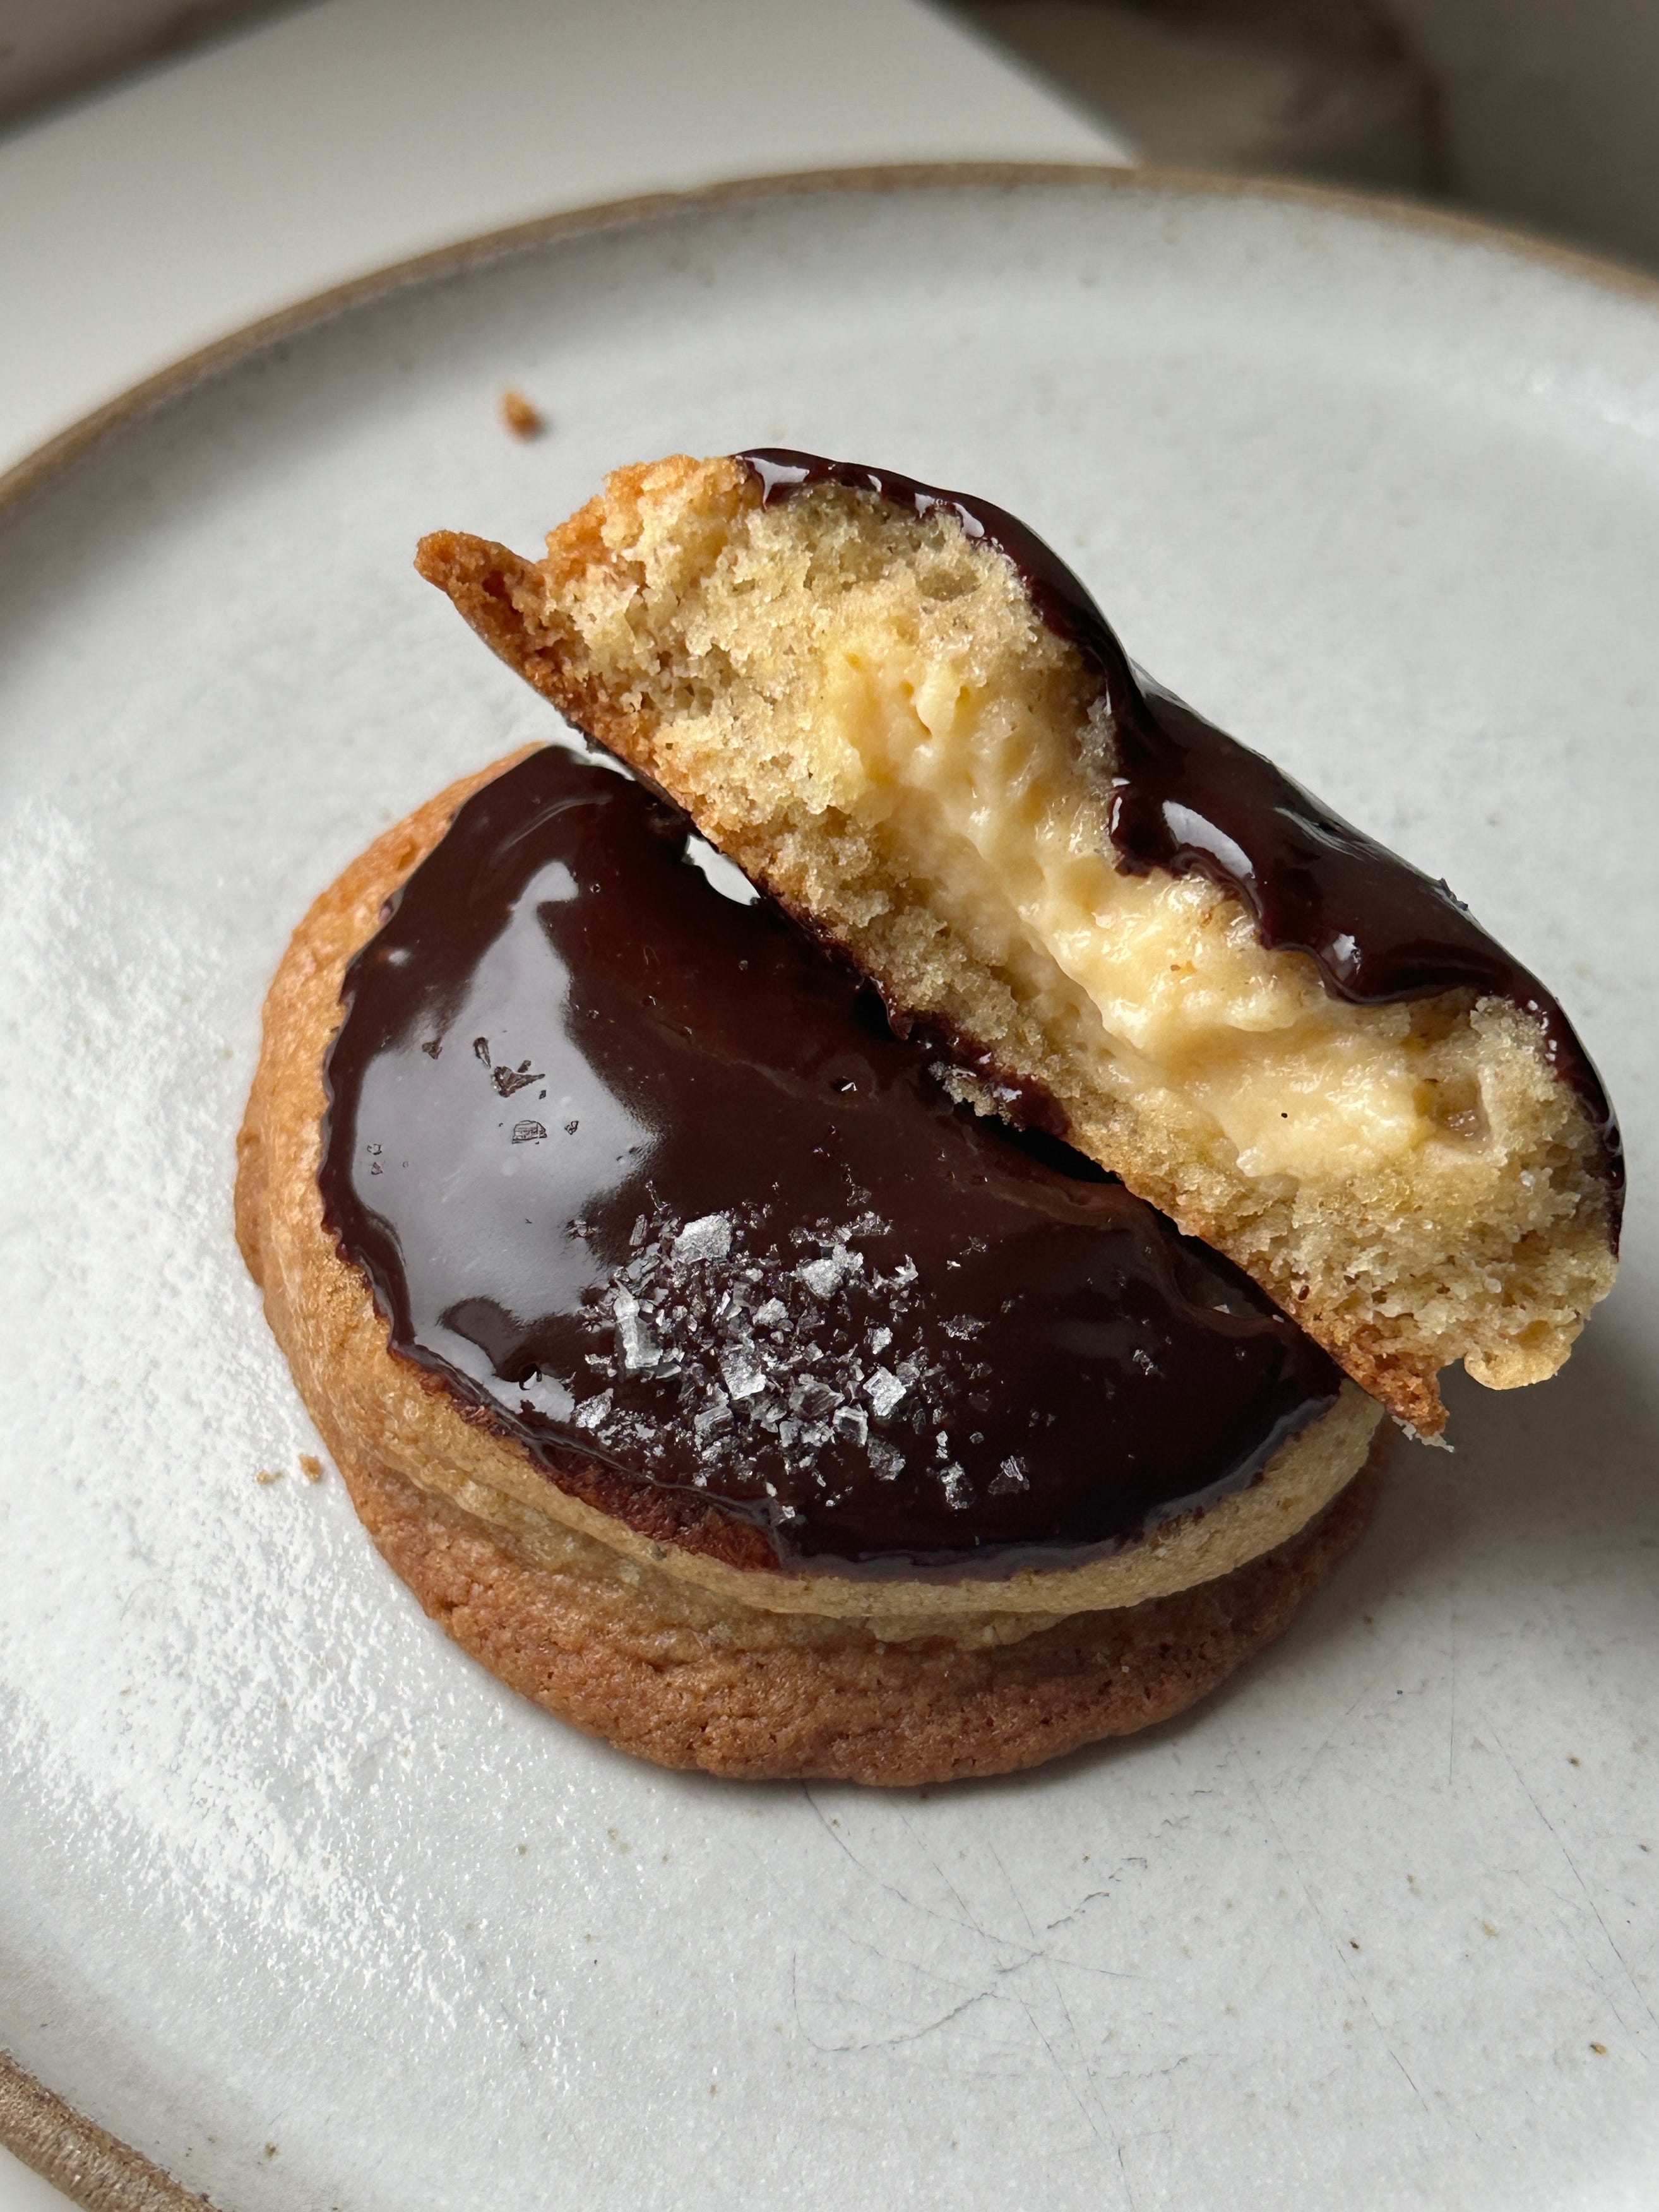
Over on KP+, meet my fastelavnsboller tribute act in cookie form: A custard-stuffed vanilla-rye cookie with a shiny chocolate glaze. I have fallen HARD for these and I know you will, too. I’ll also be giving away a copy of Scandinavian From Scratch to a KP+ subscriber so head on over there! Click here for the recipe.
What’s KP+? Well, it’s the level-up version of this newsletter. By joining KP+, you will support the writing and research that goes into the newsletter (including the commissioning - and fair payment - of all the writers), join a growing community, access extra content (inc., the entire archive) and more. Subscribing is easy and only costs £6 per month or £50 for the whole year. Why not give it a go? Come and join the gang!
Love,
Nicola
SIFT: Back on Tour!

I’m very excited to say I have officially booked flights to return to the US and Canada for a mini tour. I will have my big red puffa coat at the ready and be ready to brave the weather. I hope to see you there!
Toronto
Sunday, February 23rd: Book Talk & Bakes with Camilla Wynne, 4 p.m. at The Good Egg. It is currently sold out, but there is a waitlist if you email the store! There will also be a signing line, so even if you can’t come to the talk and you want to get your book signed, come along, and I promise to save you a treat or two. I’m looking into the possibility of another event, so I’ll let you know as soon as possible if that happens!
Chicago
Tuesday, February 25th: BBook Talk & Treats with Tim Mazurek at 6pm at Floriole. Tickets, which are limited, will be released this week - will share on instagram as soon as I have the link! I can't wait to see you there!
A Very Festive Bun
For all the shortcomings of human beings, you can’t deny we are very good at coming up with occasions to eat cake and pastries. January brings flaky crowns in galette des rois, March has Pancake Day, April has all the delights of Easter, and so on. But February? Oh, February is where we can start to get very serious about buns. Soft, squishy, creamy, filled, there’s a whole family of yeasted treats that we welcome in. Leading the charge of the late-winter (or is it early Spring? I always get this mixed up) goods are Scandinavia, whose bun game is already legendary. And though you can never put cinnamon or cardamom buns in the corner, I must say I am a big fan of their perennial offerings. Like buds of daffodils pushing up through the frozen ground, the Fastelavnsboller, the Danish Shrovetide bun, is a sight to behold.
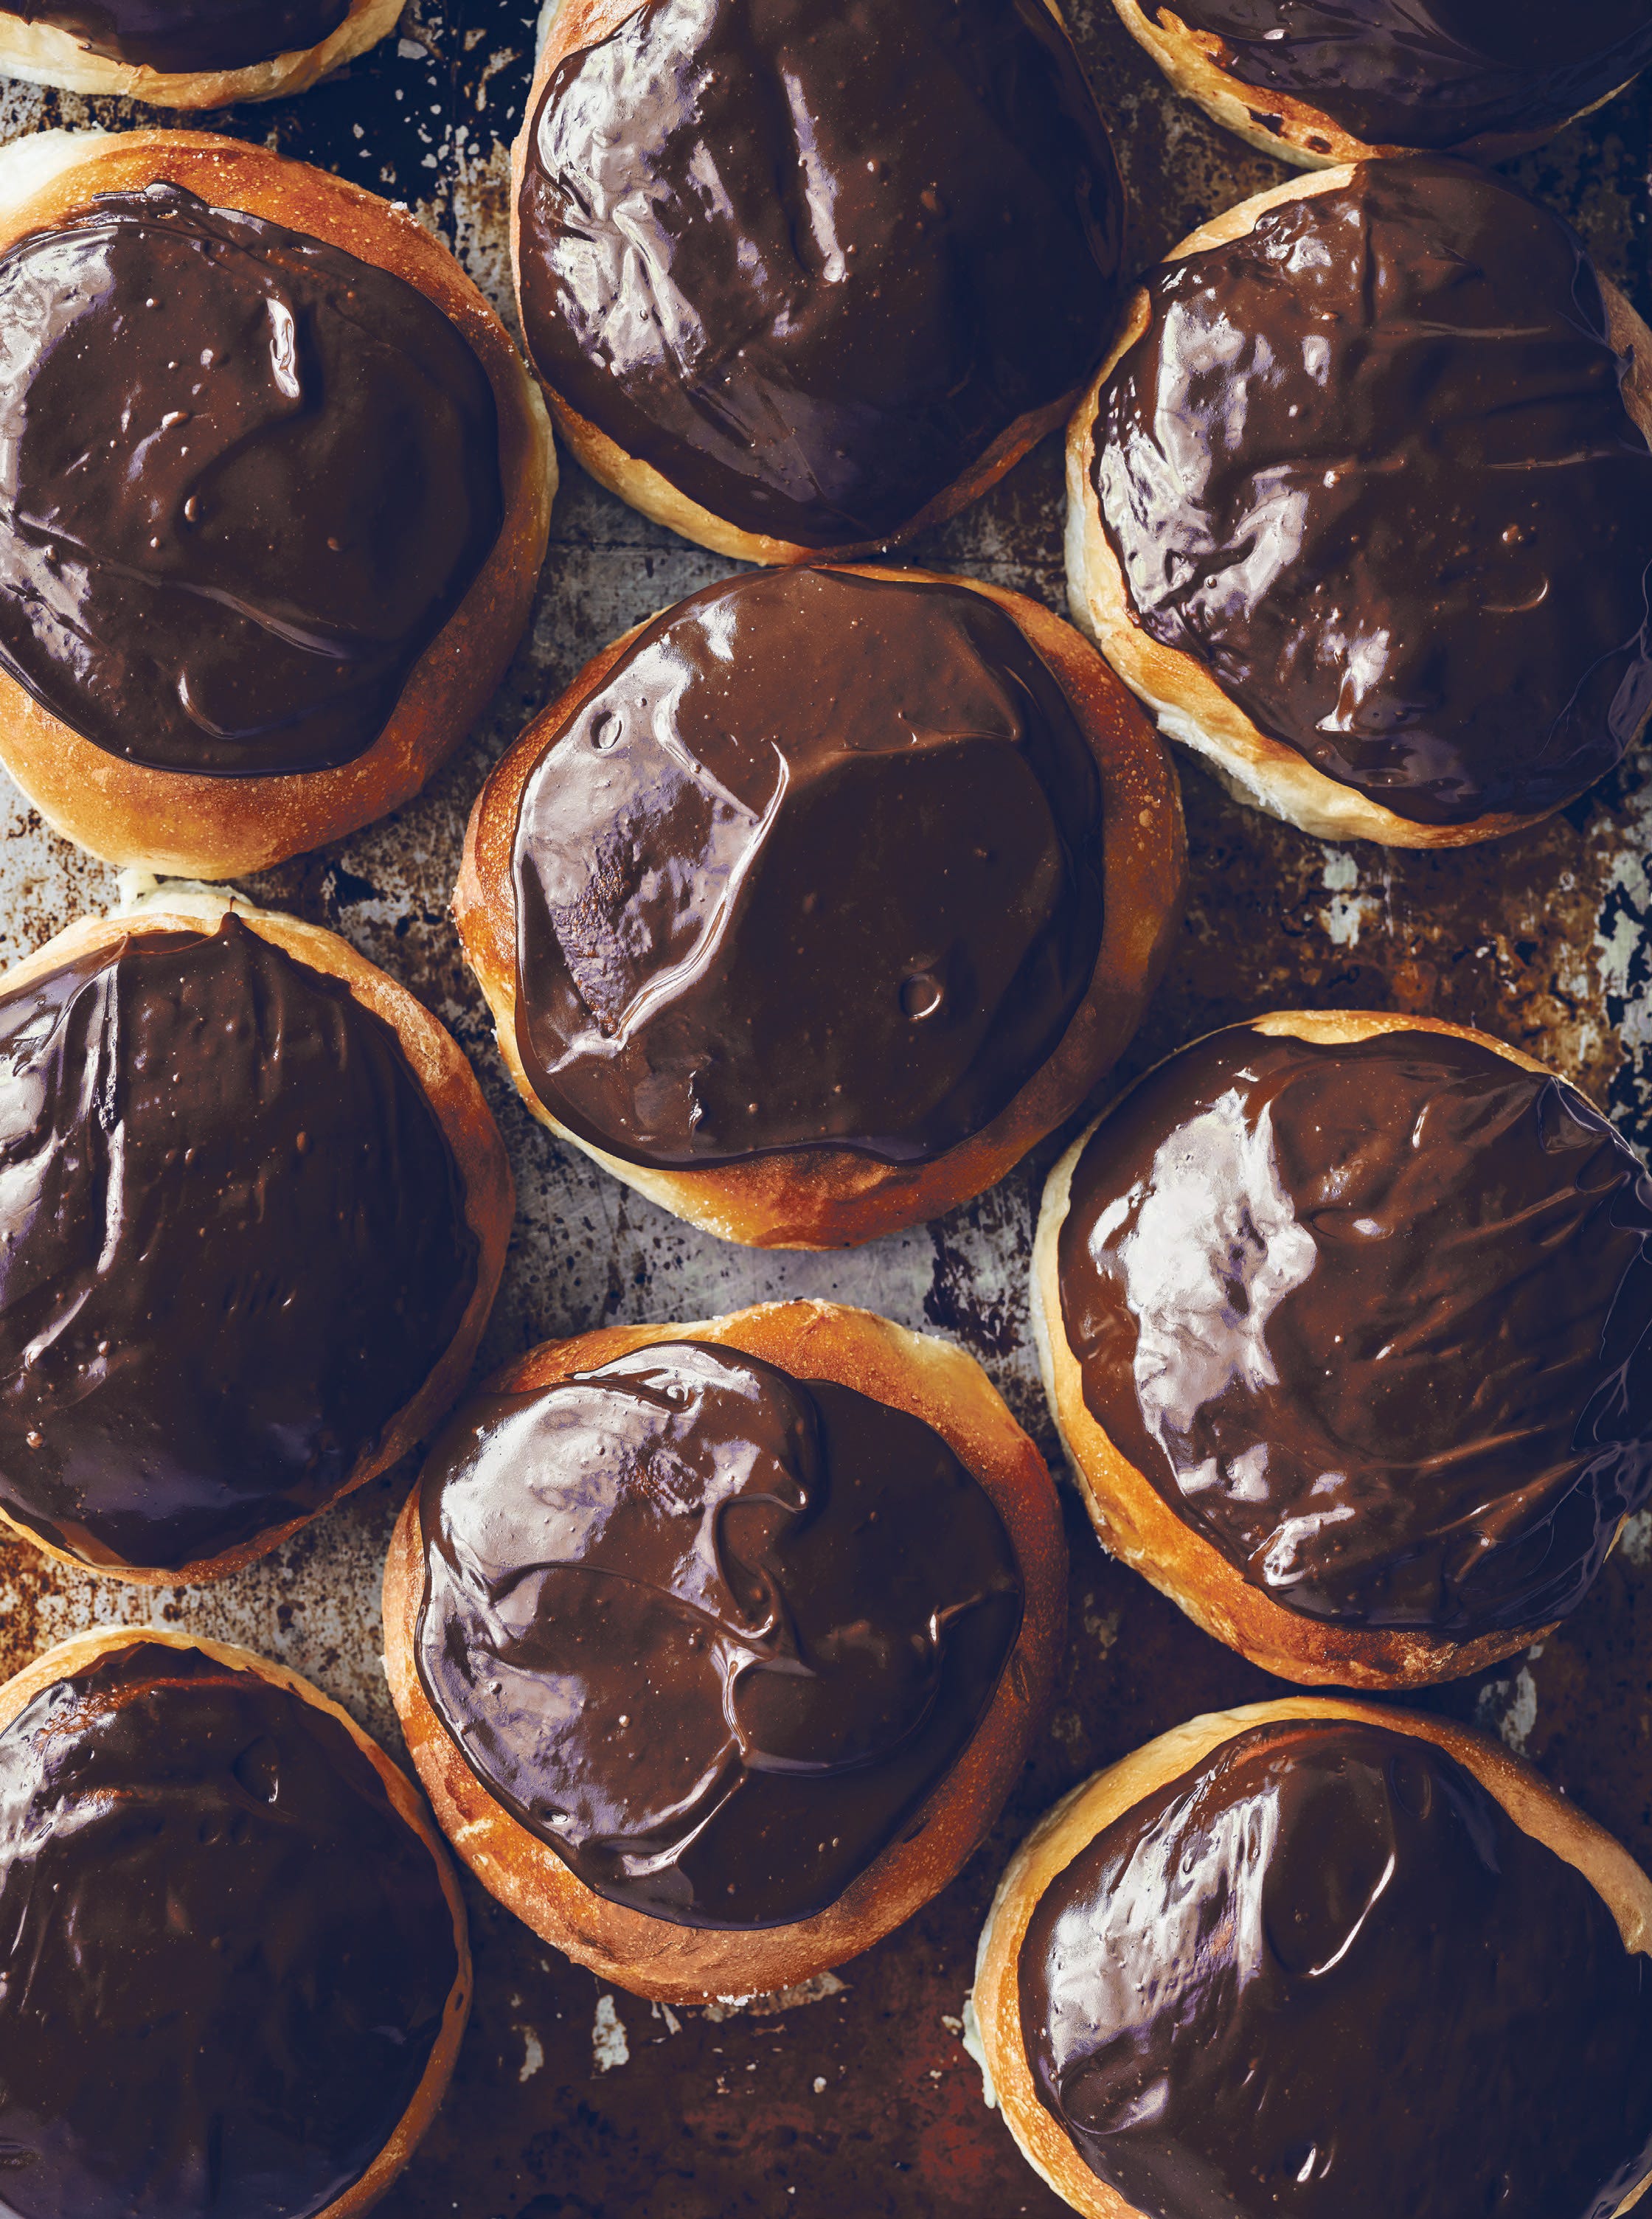
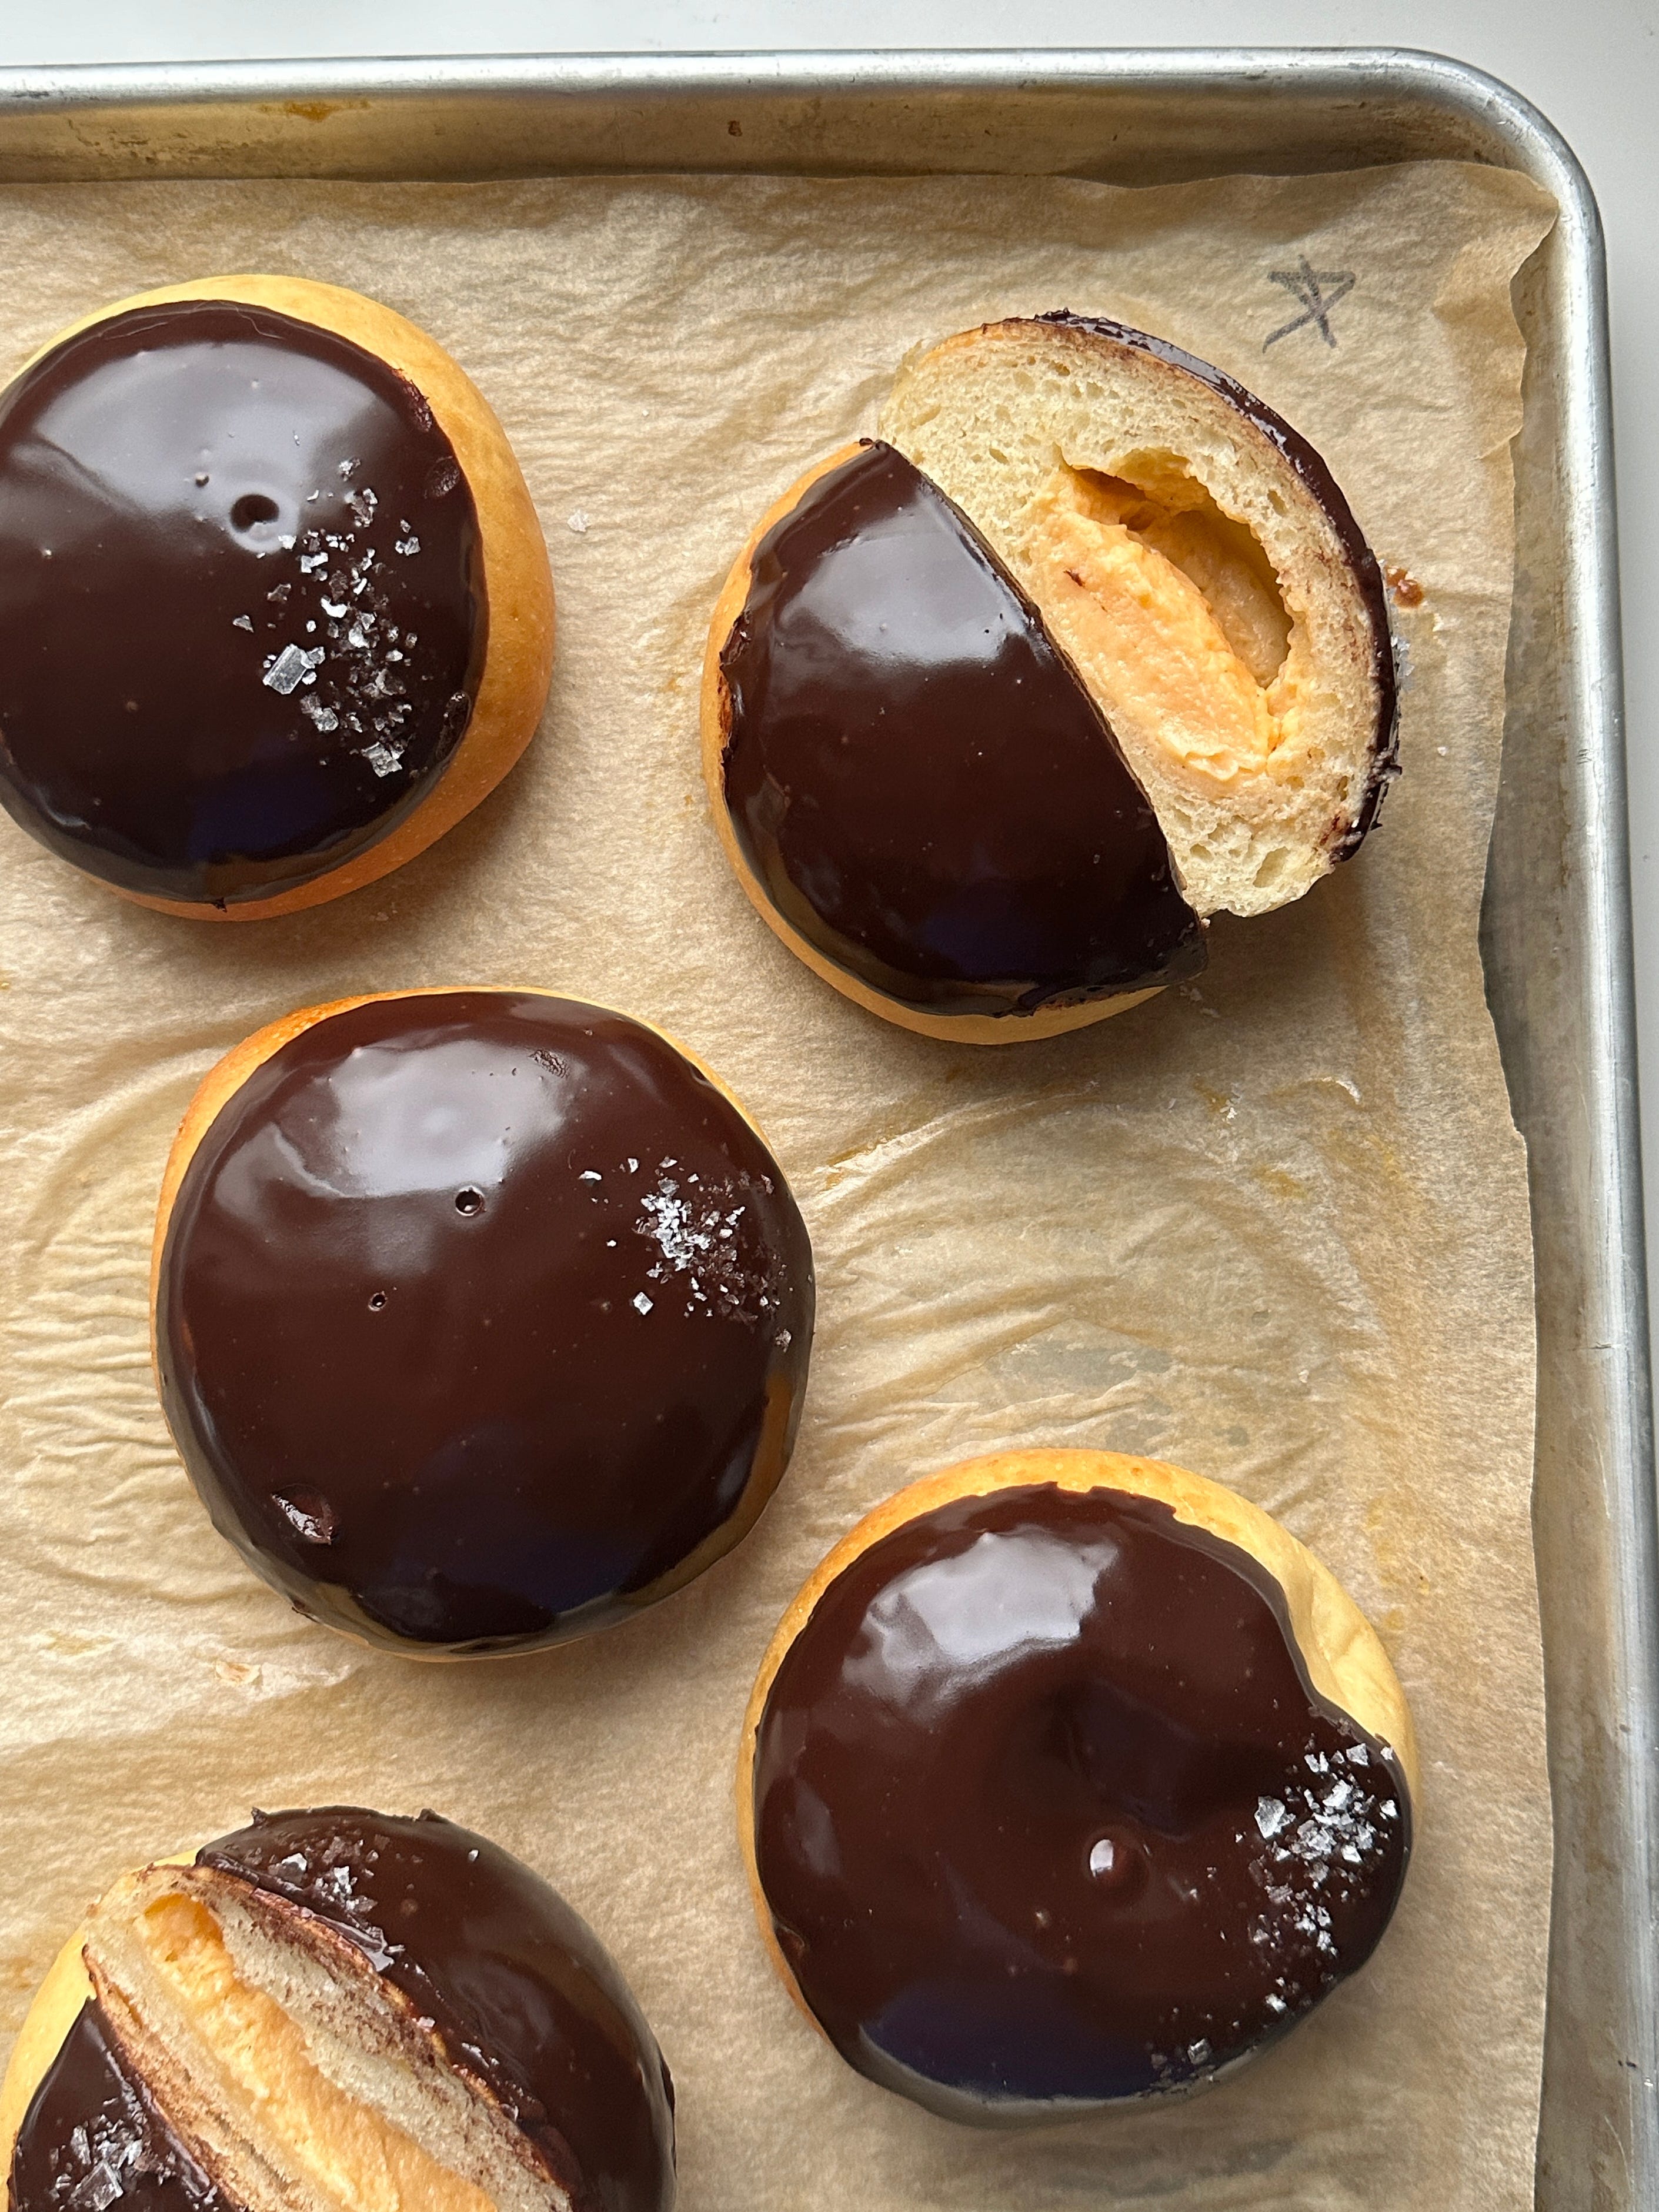
Soft, brioche-adjacent bun dough baked with custard inside and finished with a chocolate glaze. The custard, which steams as it bakes, creates a beautifully airy pocket in the centre of the bun, making these surprisingly light. The bun is tender, the custard is creamy, and the chocolate is rich. It’s a heavenly trifecta with an overall sense of creaminess; it’s deeply comforting.
Much like its Swedish cousin, the semla, the Fastelavnsboller is eaten in the run-up to Lent. Though these special buns begin appearing from the beginning of the year, they are most prevalent between February and up until Fastelavn itself, which falls on the Sunday before Lent. Much like Fettisgaden (Fat Tuesday) in Sweden, Fastelavn is a day of eating, celebrating and clearing out the pantry. As well as traditions like hitting sweets out of a pinata-like structure to become the "Kattedronning" (Cat Queen) or "Kattekonge" (Cat King), the day is marked by feasting on buns, and lots of them.
In today’s newsletter, we’ll go through all the steps to success for making your own Fastelavnsboller, guided by Chef Nichole Accelotta, who you’ll meet in just a sec. To be honest, my kitchen has never smelt more delicious. You really can’t beat a bun - and I can’t wait for you to make them.
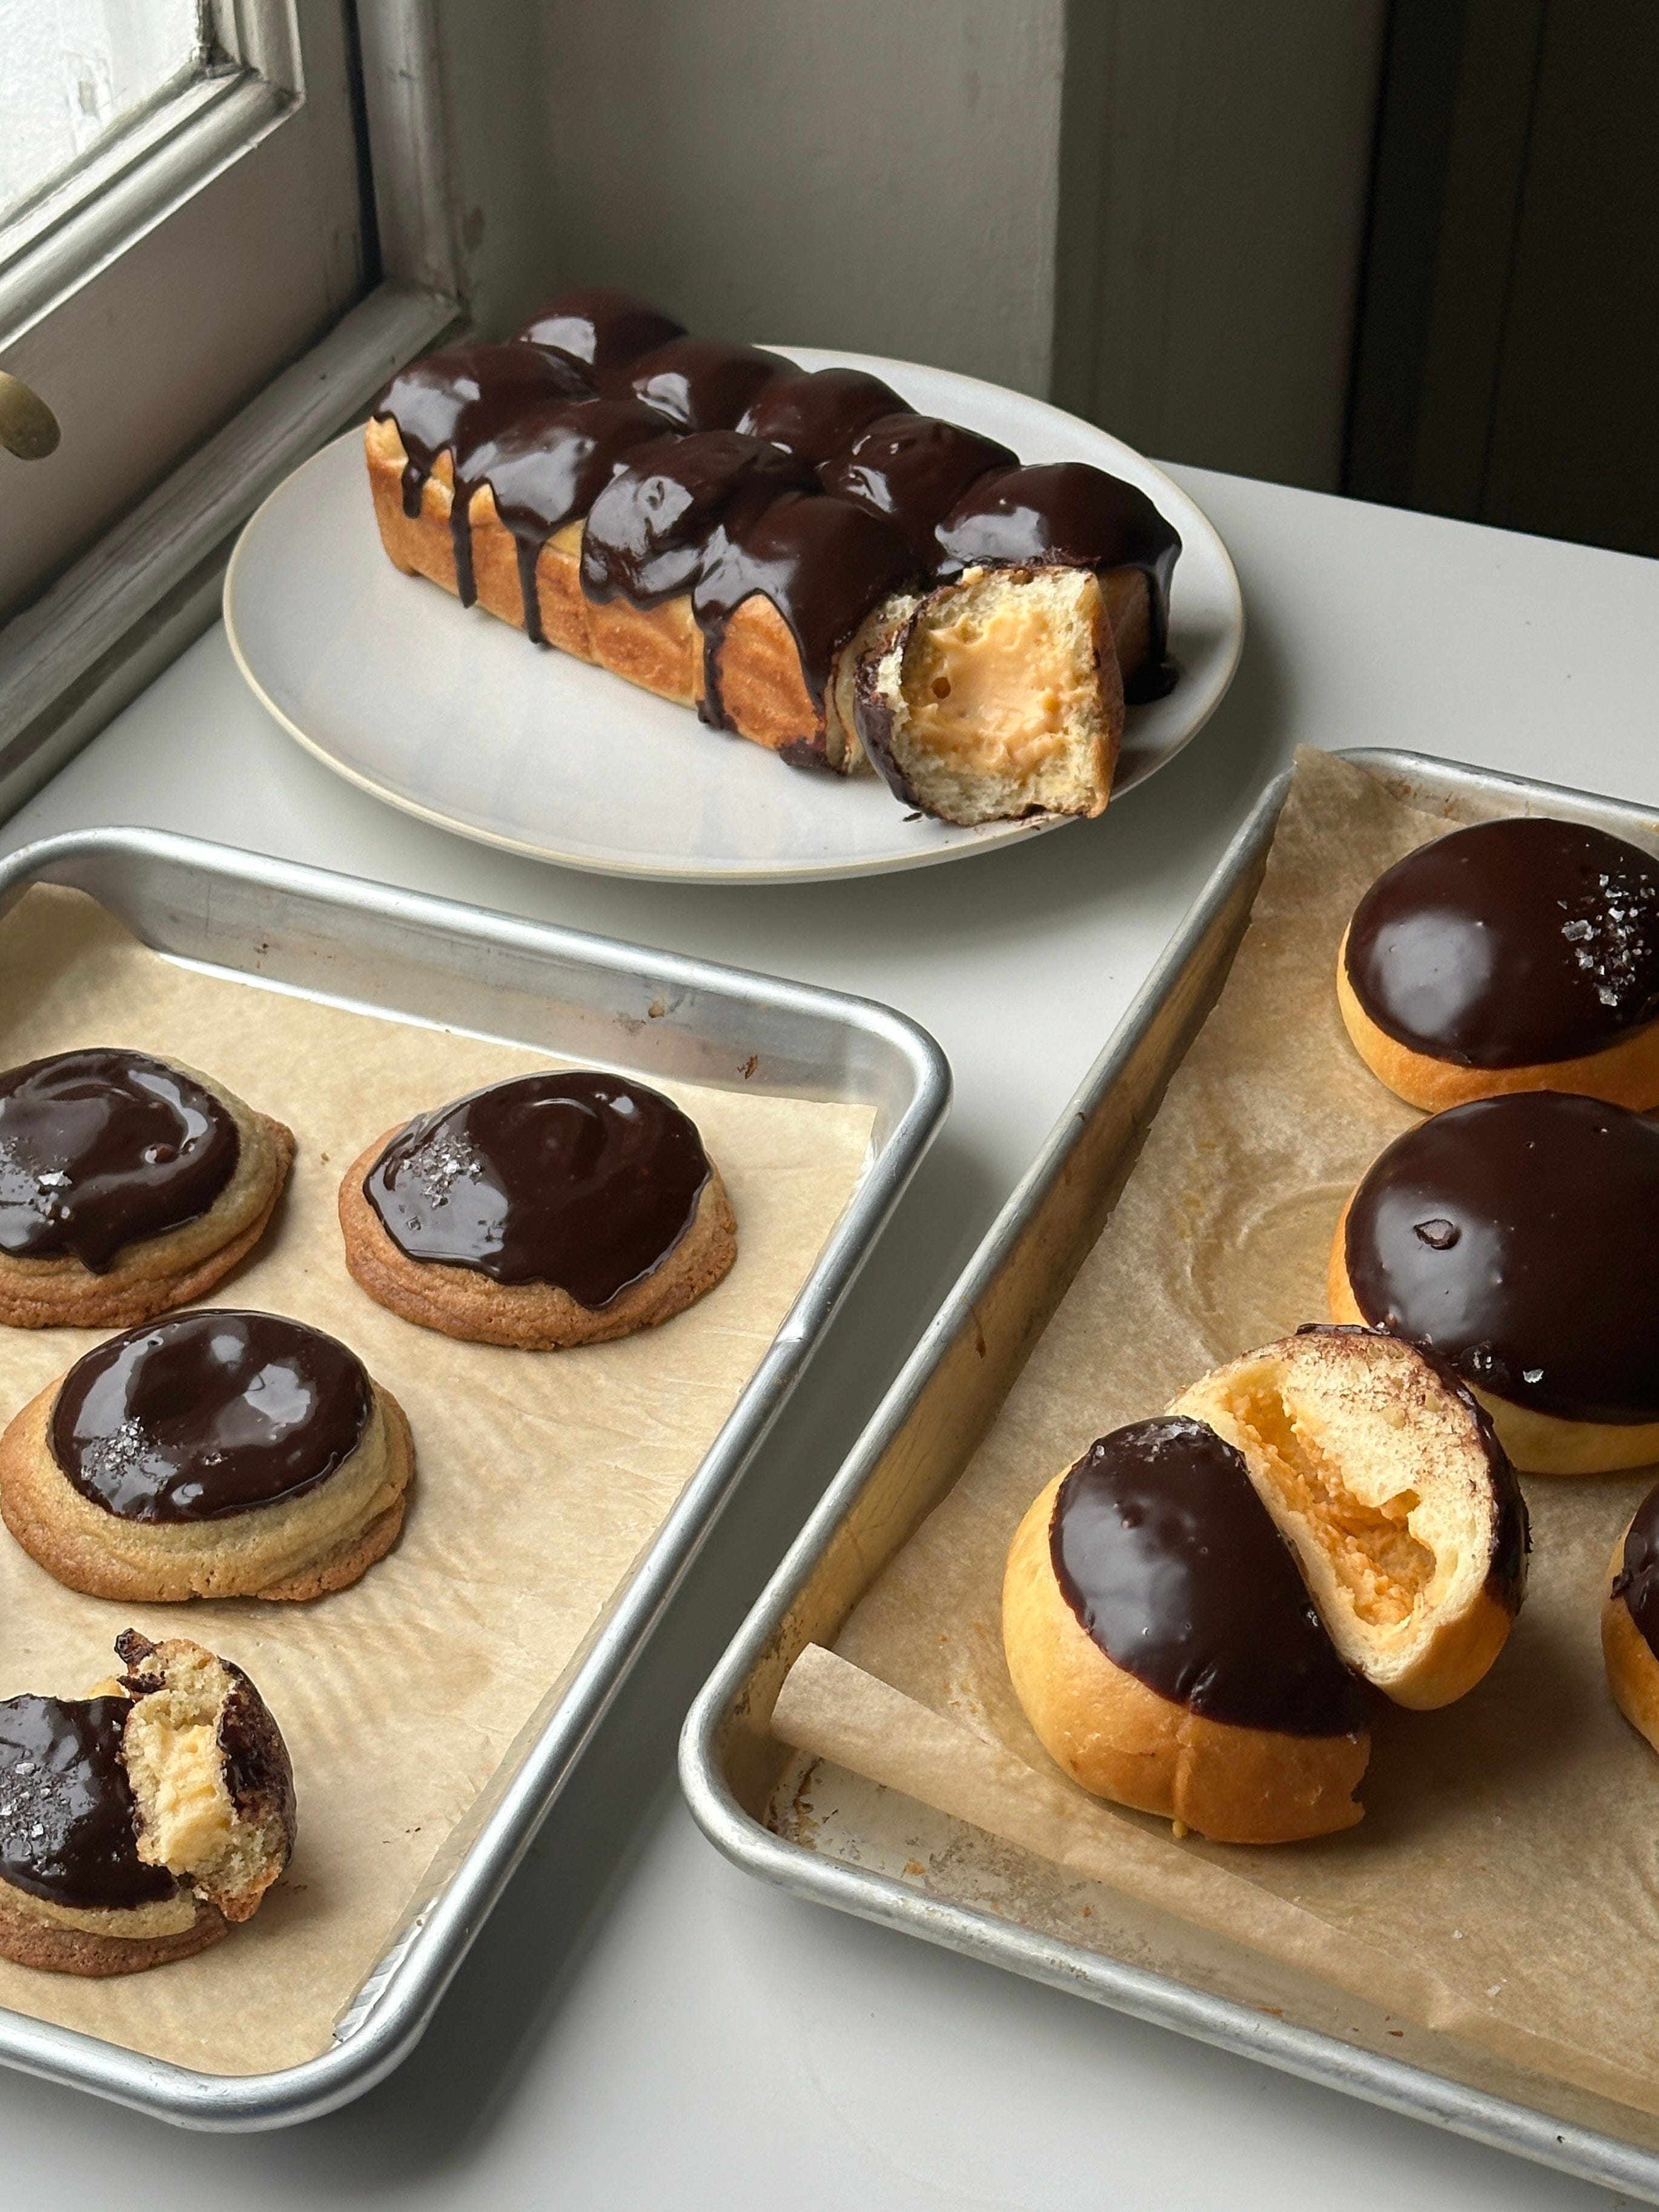
For those less keen on yeast, I’ve turned these buns into a cookie over on KP+: Please meet this custard-stuffed vanilla-rye cookie with a shiny chocolate glaze. I have fallen HARD for these, and I know you will, too. I’ll also be giving away a copy of Scandinavian From Scratch to a KP+ subscriber so head on over there! Click here for the recipe.
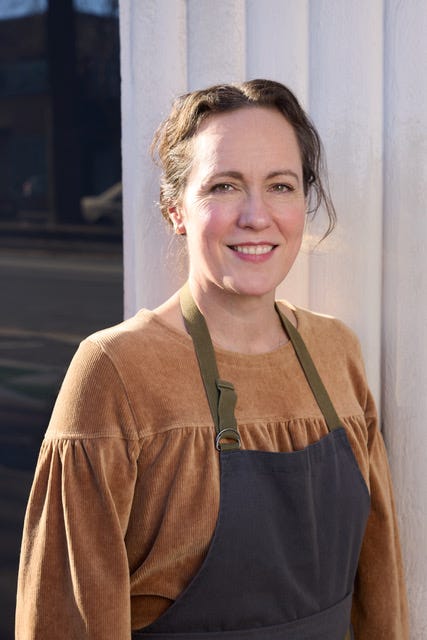
Meet Nichole: Our lenten bun spirit guide

I learned about Fastelavnsboller from Chef Nichole Accettola, author of Scandinavian from Scratch and owner of Kantine in San Francisco. Our paths crossed late last year during my US book tour for SIFT - Nichole kindly interviewed me at Omnivore Books, and I had the delight of visiting Kantine, her all-day Scandinavian-inspired kitchen with the flakiest cinnamon buns and resplendent smørrebrøds. Catching up after the event, I asked if she had any suggestions for a Scandinavian bake for the newsletter, and there was one clear candidate.
“Fastelavnsboller are the Danish version of lenten buns,” says Accettola. “Nowadays, there are two main types: the traditional one, which is a soft bun filled with custard and covered in chocolate, and there are more modern versions, made with flaky Danish dough and all sorts of fillings - creams, jams, everything. Bakeries get really creative” Which are her favourites? I ask. “I always gravitate towards the classic custard-filled, chocolate-covered version.”
Custard-filled brioche? It’s an easy sell to me - but I had to ask what made them special. “It’s got that perfect balance” she explains. “Pillowy soft dough, a rich custard filling, and a glossy chocolate coating. It reminds me a lot of Boston Cream Pie, which was my go-to birthday cake. I have a deep love for soft textures and creamy fillings.”
Given Nichole’s deep understanding, respect and love for Scandinavian culture and baking, I was surprised to learn she grew up some 2000 miles away in Ohio. During high school, Nichole made friends with a Danish exchange student (who is still a close friend today) and, though I’m sure she’d never have guessed it, the fates had aligned. Visiting her friend in Denmark for the summer, she fell in love with Scandinavian culture, and after completing her culinary education at the CIA and training in kitchens in the US, she moved to Denmark permanently.


At the time, Copenhagen wasn’t the vibrant culinary destination it is today, though she has fond memories of grilling outdoors, eating herring, cycling for ice cream and plenty of open-faced sandwiches. Fifteen years, several chef roles, one husband and three children later, Nichole and her family left Denmark and arrived in California.
Here, she put down roots in the brick-and-mortar cafe Kantine on Market Street, San Francisco. During her time in Copenhagen, she had a front-row seat to the culinary explosion of New Nordic cuisine, watching Noma rise to prominence and watching bakery culture expand exponentially. With Kantine, Nichole wanted to share the culture of her beloved second home. A few years later, she wrote and published the beautiful ‘Scandinavian From Scratch’ filled with all of her favourites from her cafe and her time in Denmark.
From St Lucia Day Saffron Buns (Lussekatter), Citrus salad with Tarragon sugar, Poppyseed and Apple pastries, and of course, Fastlavenboller and Cardamom buns, it’s filled with wholesome, delicious baking projects that will transport you to the region. The photography is beautiful, and Nichole’s charming voice gives you clear, well-thought-out instructions throughout.
The flour
In Scandinavian by Scratch, Nichole’s recipe for soft bun dough calls for All Purpose Flour. Though this might seem most similar to plain flour in the UK, in the US, King Arthur flour is actually 11.7% protein. In the UK, plain flour is usually between 9-11% protein. When it comes to baking, it’s always important to check the protein content of your flour. If it’s not clearly stated anywhere on the bag, head to the nutrition table on the back. Scan the table and find the figure, per 100g, for protein and bingo, you’ve got your answer.
When it comes to dough, there are two properties that are not opposites yet not quite equals: Elasticity and extensibility. Elasticity means your dough will go back to its shape/can hold a shape. In contrast, extensibility refers to the ability to stretch the dough without consideration of it returning to form. You can also think of this as strength vs stretch. Plain flour, despite its lower protein, can form a very extensible dough that stretches impressively, but it may not be elastic enough to capture air, or hold its shape after proofing and baking.
Though most recipes for bread and buns ask for strong flour, plain flour will offer a softer, cakier and more tender texture. Because it cannot absorb as much water as strong flour, it will be stickier and more challenging to work with. Strong flour can sometimes produce an overly tough dough with too much chew. So, what to do?
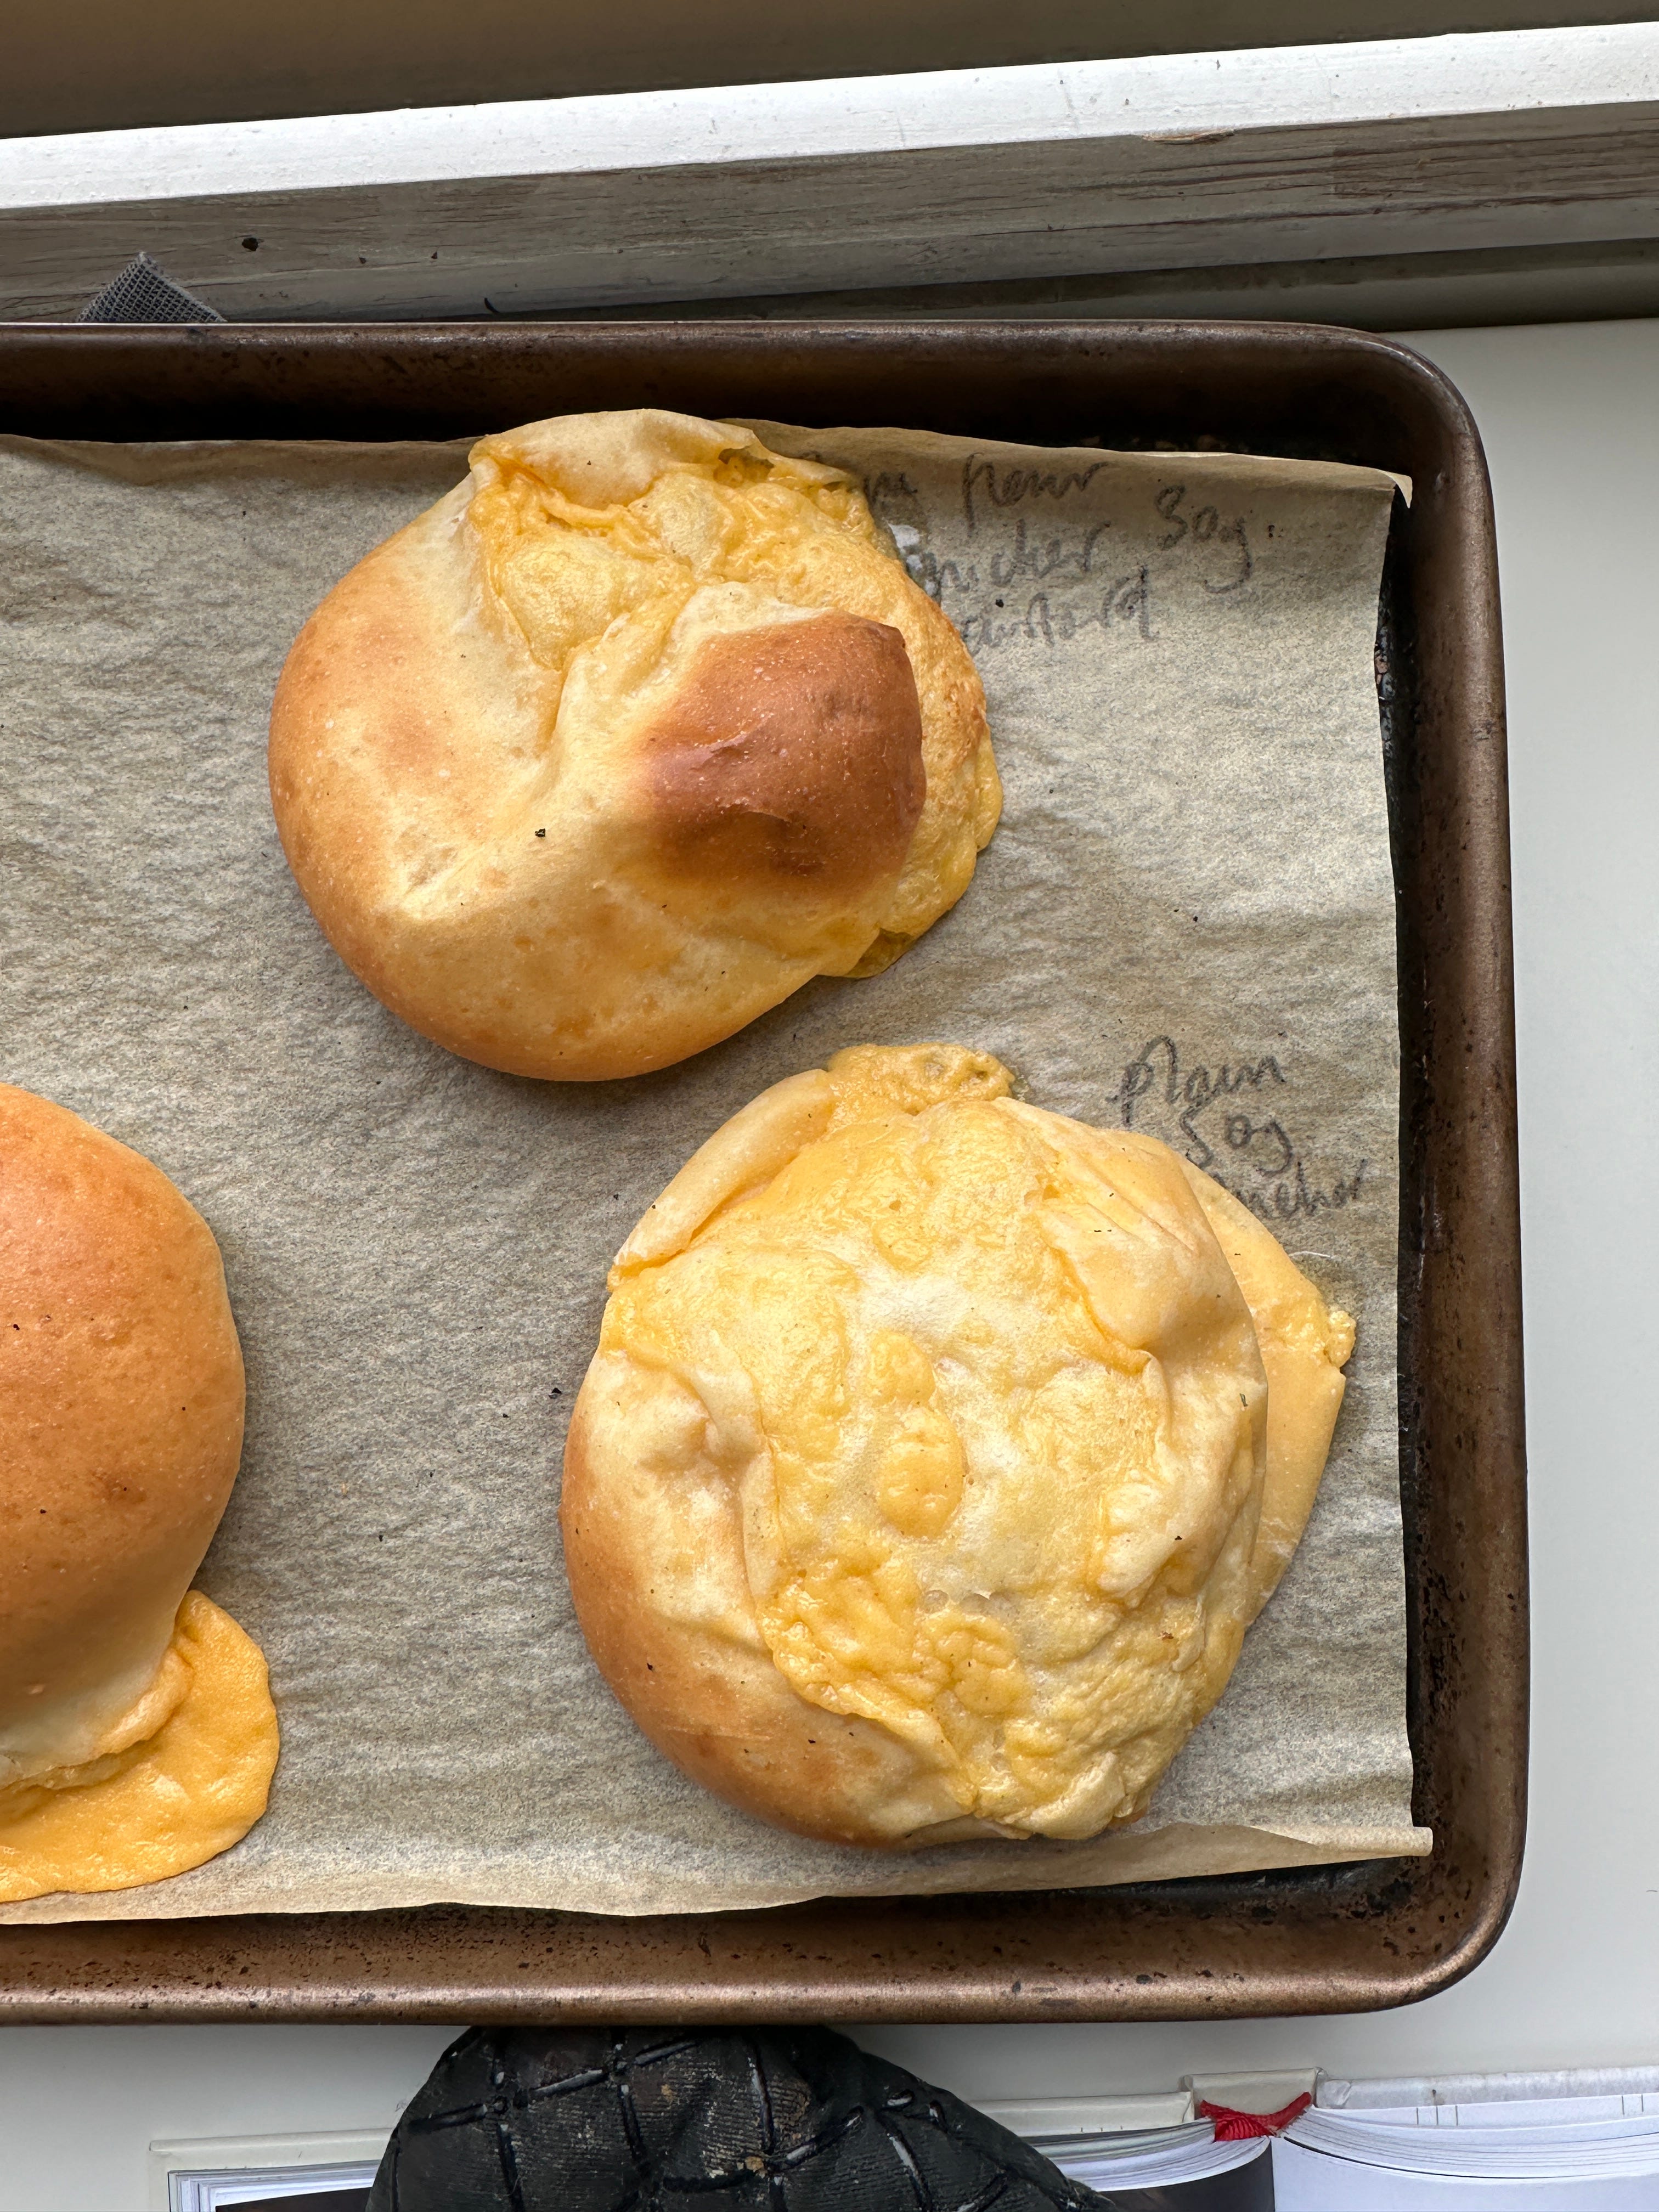
I mixed up a few samples and tried them out; One with plain, one with strong and one with a mix.

Since the plain flour I have at home comes in just under 10%, while it did form a dough, it took a long time and was very difficult to work with, even after a long chill in the fridge. The strong bread flour formed a dough easily, but produced a bun with a firmer, closer texture and a thicker crust. The half and half? Well, the goldilocks approach does work. It resulted in a dough that was easy enough to work with and had the right balance between pillowy softness and chew.
Of course, check the protein on the back of your flour - if you have access to the 12% all-purpose, no mixing and matching is required.
The dough
To achieve ultimate pillowy-ness, Nichole’s bun recipe features a tangzhong. This is when a portion of the flour’s recipe is pre-cooked with water or milk before it is added to the recipe. When heated, the mixture thickens, undergoing starch gelatinisation. While it is not “traditional” in Danish baking (what is traditional anymore, anyway!), Nichole explains, she finds the addition makes the buns “irresistible and pliable” and has “enhanced our buns.” I think we can all agree there’s nothing worse than dry bread, and Nichole swears by the technique. “It keeps our buns pillowy and pudding-y inside” she adds.
The tangzhong method was pioneered by Yvonne Chen in the 1990s in her book ‘The 65-degree Bread Doctor’. Here, she found that by using this technique, you could introduce a higher proportion of hydration into bakes. By pre-cooking the flour, we are essentially ‘trapping’ hydration by keeping moisture busy with starch, effectively binding the water. This means we can add more hydration whilst keeping the bread stable, as well as having the effect of improving oven spring and texture.
I’ve explored the use of tangzhong in a number of recipes, including my Spring Onion Babka, Shokupan and Japanese Curry bread, and I wholeheartedly agree with Nichole’s approach. Tangzhong is a must!
The size
The Fastelavnsboller comes in all shapes and sizes. The most important thing is the ratio of dough to custard. Once you have this nailed, you can scale it up or down. Nichole’s buns are between 100g-120g, but if you prefer a smaller bun you could go closer to 70g. Either way, using about 25% of the dough’s weight in custard is about right.
The Filling
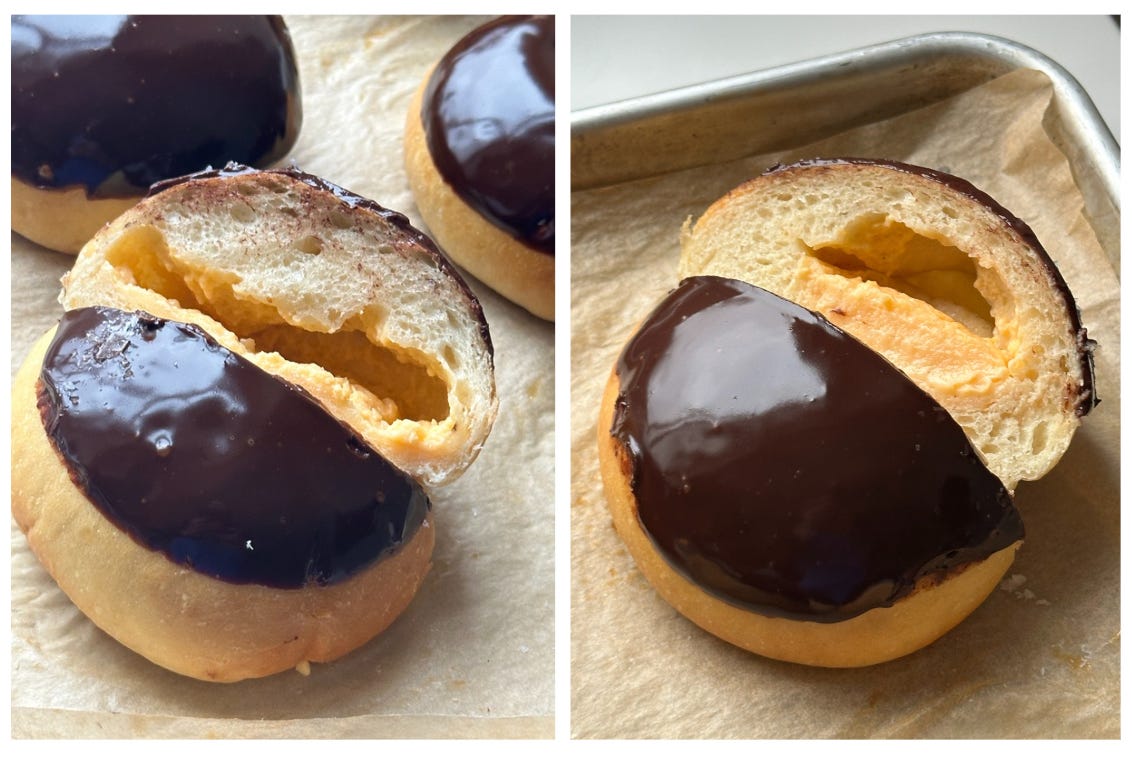
One of the most charming characteristics of the Fastelavnsboller is the custard filling. Pastry cream is sealed in the dough before proofing and baking, which Nichole explains “creates a bit of a pocket as the steam is released.” During the bake, the custard “pushes up the pastry and you get an openness in the middle”. I will admit I was apprehensive at first - I am so used to images of donuts stuffed to the absolute maximum, but it is gorgeous. The airy pocket gives the Fastelavnsboller a sense of lightness, like a gigantic, soft, puffy choux bun.
This way of filling the buns isn’t without its challenges. And I will tell you now, there’s definitely a learning curve when it comes to tidily filling them. Nichole has plenty of her own custard battle scars. “I had a large order where I thought that I'd filled and closed the buns really well, but as soon as they got into the oven I could just see that they were just like, squirting out everywhere.” Of course, the chocolate glaze did a lot to cover the leaking buns, but it inspired Nichole to look closer at her recipe. “At first I thought maybe I have too much gluten that is constricting the space and causing them to explode” she tells me. But, after testing, she realised that adding low-gluten pastry flour made the problem worse. Though she had thought gluten was her enemy, she realised it was her friend. Ensuring her dough had enough structure from well-developed gluten strands meant it could withstand the internal steam pressure from the custard.
While you could fill these buns after baking, I suggest you EMBRACE THE SPACE. I exercised free will in making a nanterre-style Fastelavnsboller, a shareable pull-apart version filled with custard post-baking. And though I have embraced space with the original, I have to say, this version is very lux:


To make it, shape the buns into 10x30g balls, nestle into a 8x4inch loaf tin, proof til puffy then pipe this custard into it when cooled. Spoon over the glaze, and let this be the most beautiful centrepiece of all time!
The custard
Fastelavnsboller are filled with pastry cream. As we’ve learned in recent newsletters, the amount of starch in a pastry cream matters. In Nichole’s book, her pastry cream is beautifully light, using just 1 tbsp of cornflour per 240ml of milk, around 4% starch to liquid weight. It is thickened but relatively light and doesn’t form a strong gel when cool. This means it doesn’t require beating-til-smooth-before-using, which I’ve become so used to. I decided to make a batch of my classic pastry cream closer to 7% starch to see how the two compared.
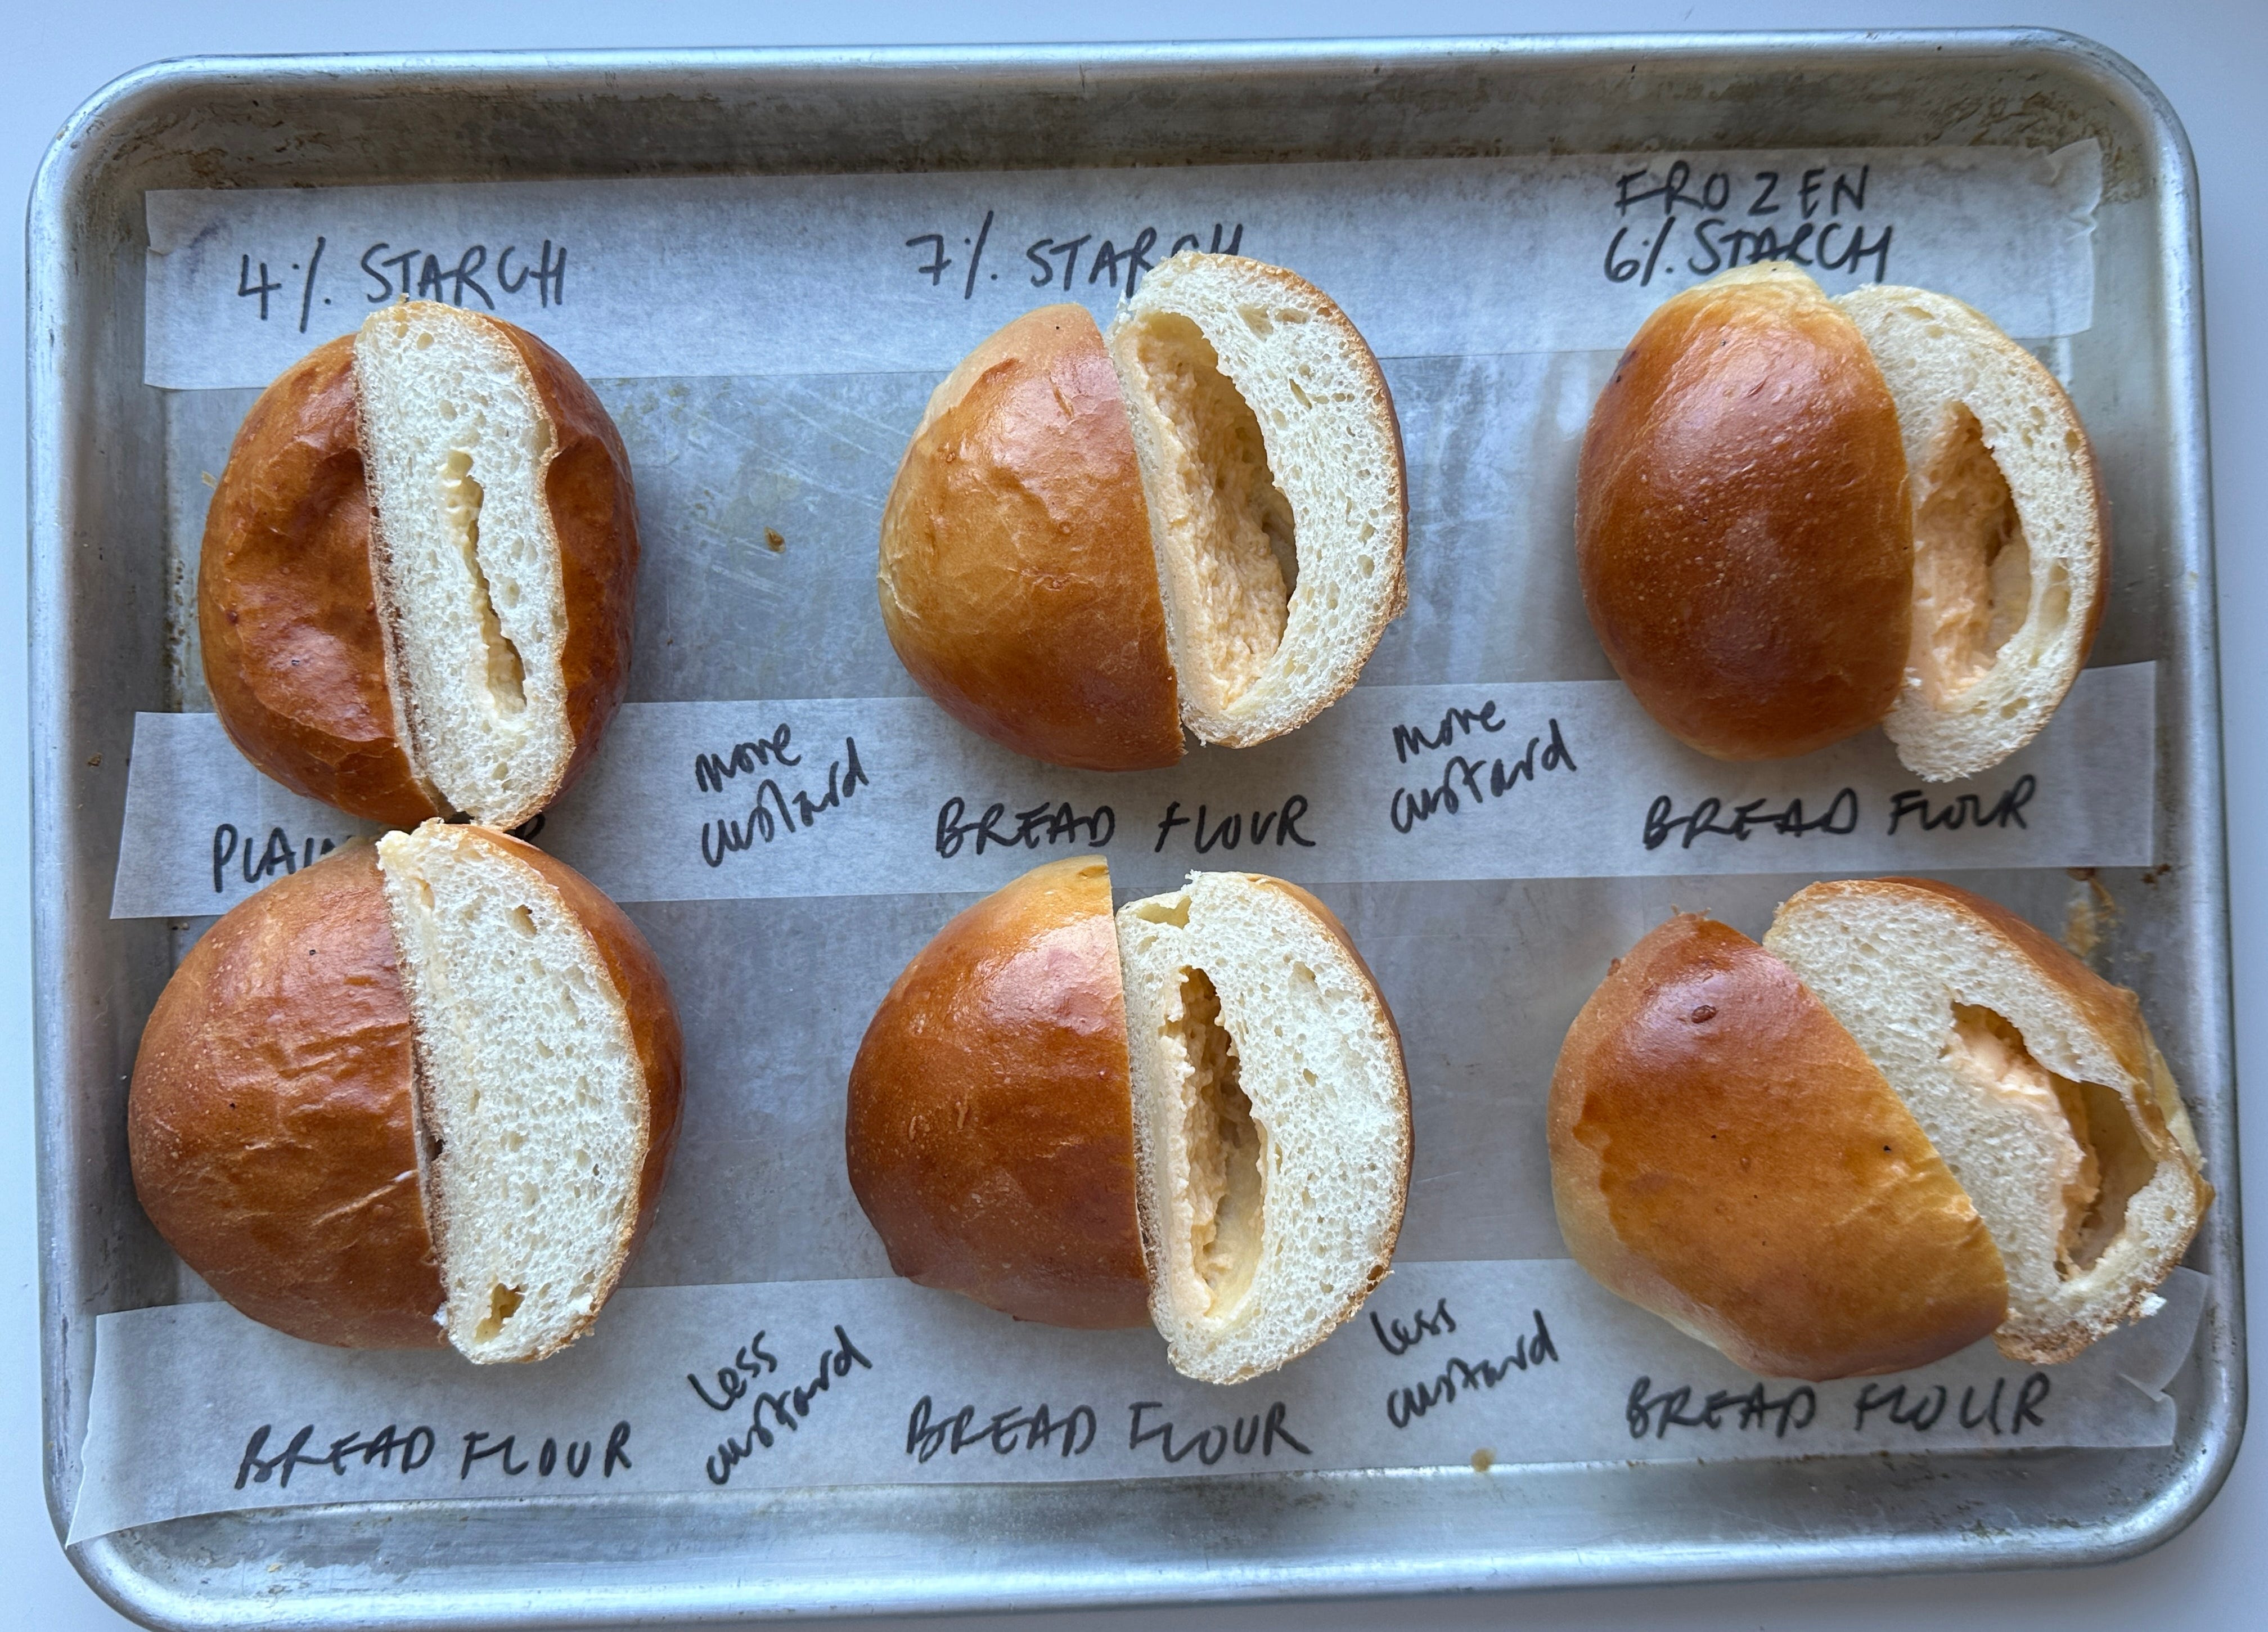
While I loved the lightness of Nichole’s pastry cream, I think I lacked the dexterity and skills to seal it neatly inside the soft dough. The thicker pastry cream was more forgiving of my shaping blunders. Ultimately, both tasted great. However, I did have one thought…
To freeze or not to freeze
As a general rule, pastry cream should never be frozen. When frozen, the water in the milk forms ice crystals, which destroys the careful emulsion and structure. As it defrosts, excess water leaks from the cream, making it appear split and separated. Though it is possible to rescue it in an emergency by re-emulsifying it with warm liquid, it should be avoided.
BUT… and there is a but… what if the relatively small amount of custard was defrosted by cooking, and any excess water turned to steam or was absorbed into the surrounding bun/dough? Would it still be such a crime against pastry? Plus, wouldn’t this make it miles and miles easier to shape?
The results are mixed. Though a rock-hard custard may seem easier to wrap on the surface, its rock-hardness actually makes it a bit treacherous. For the best results in this bun, the custard should be relatively centred during the wrapping—any overly thin areas of dough are at risk of splitting during baking. Because the frozen custard is so hard, it presses too firmly against the soft dough during shaping, which can put too much pressure on the layers.
My verdict? If you are having trouble or getting really frustrated during the shaping process, pipe custard onto a tray and freeze until solid. This is a good way to learn how to handle the dough without the constant stress of splurging. Just remember that the custard is much firmer than the dough and can act like a wrecking ball if you aren’t gentle.
The amount of custard matters, too. If you use too much (I tried up to half the dough’s weight), it will explode, and not enough just feels mean. About 25% to 30% of the dough’s weight is a good place to start. And, btw, if you get a little bit of custard splurging - don’t worry. Chocolate will cover almost all errors, and they will still be delicious.
The glaze
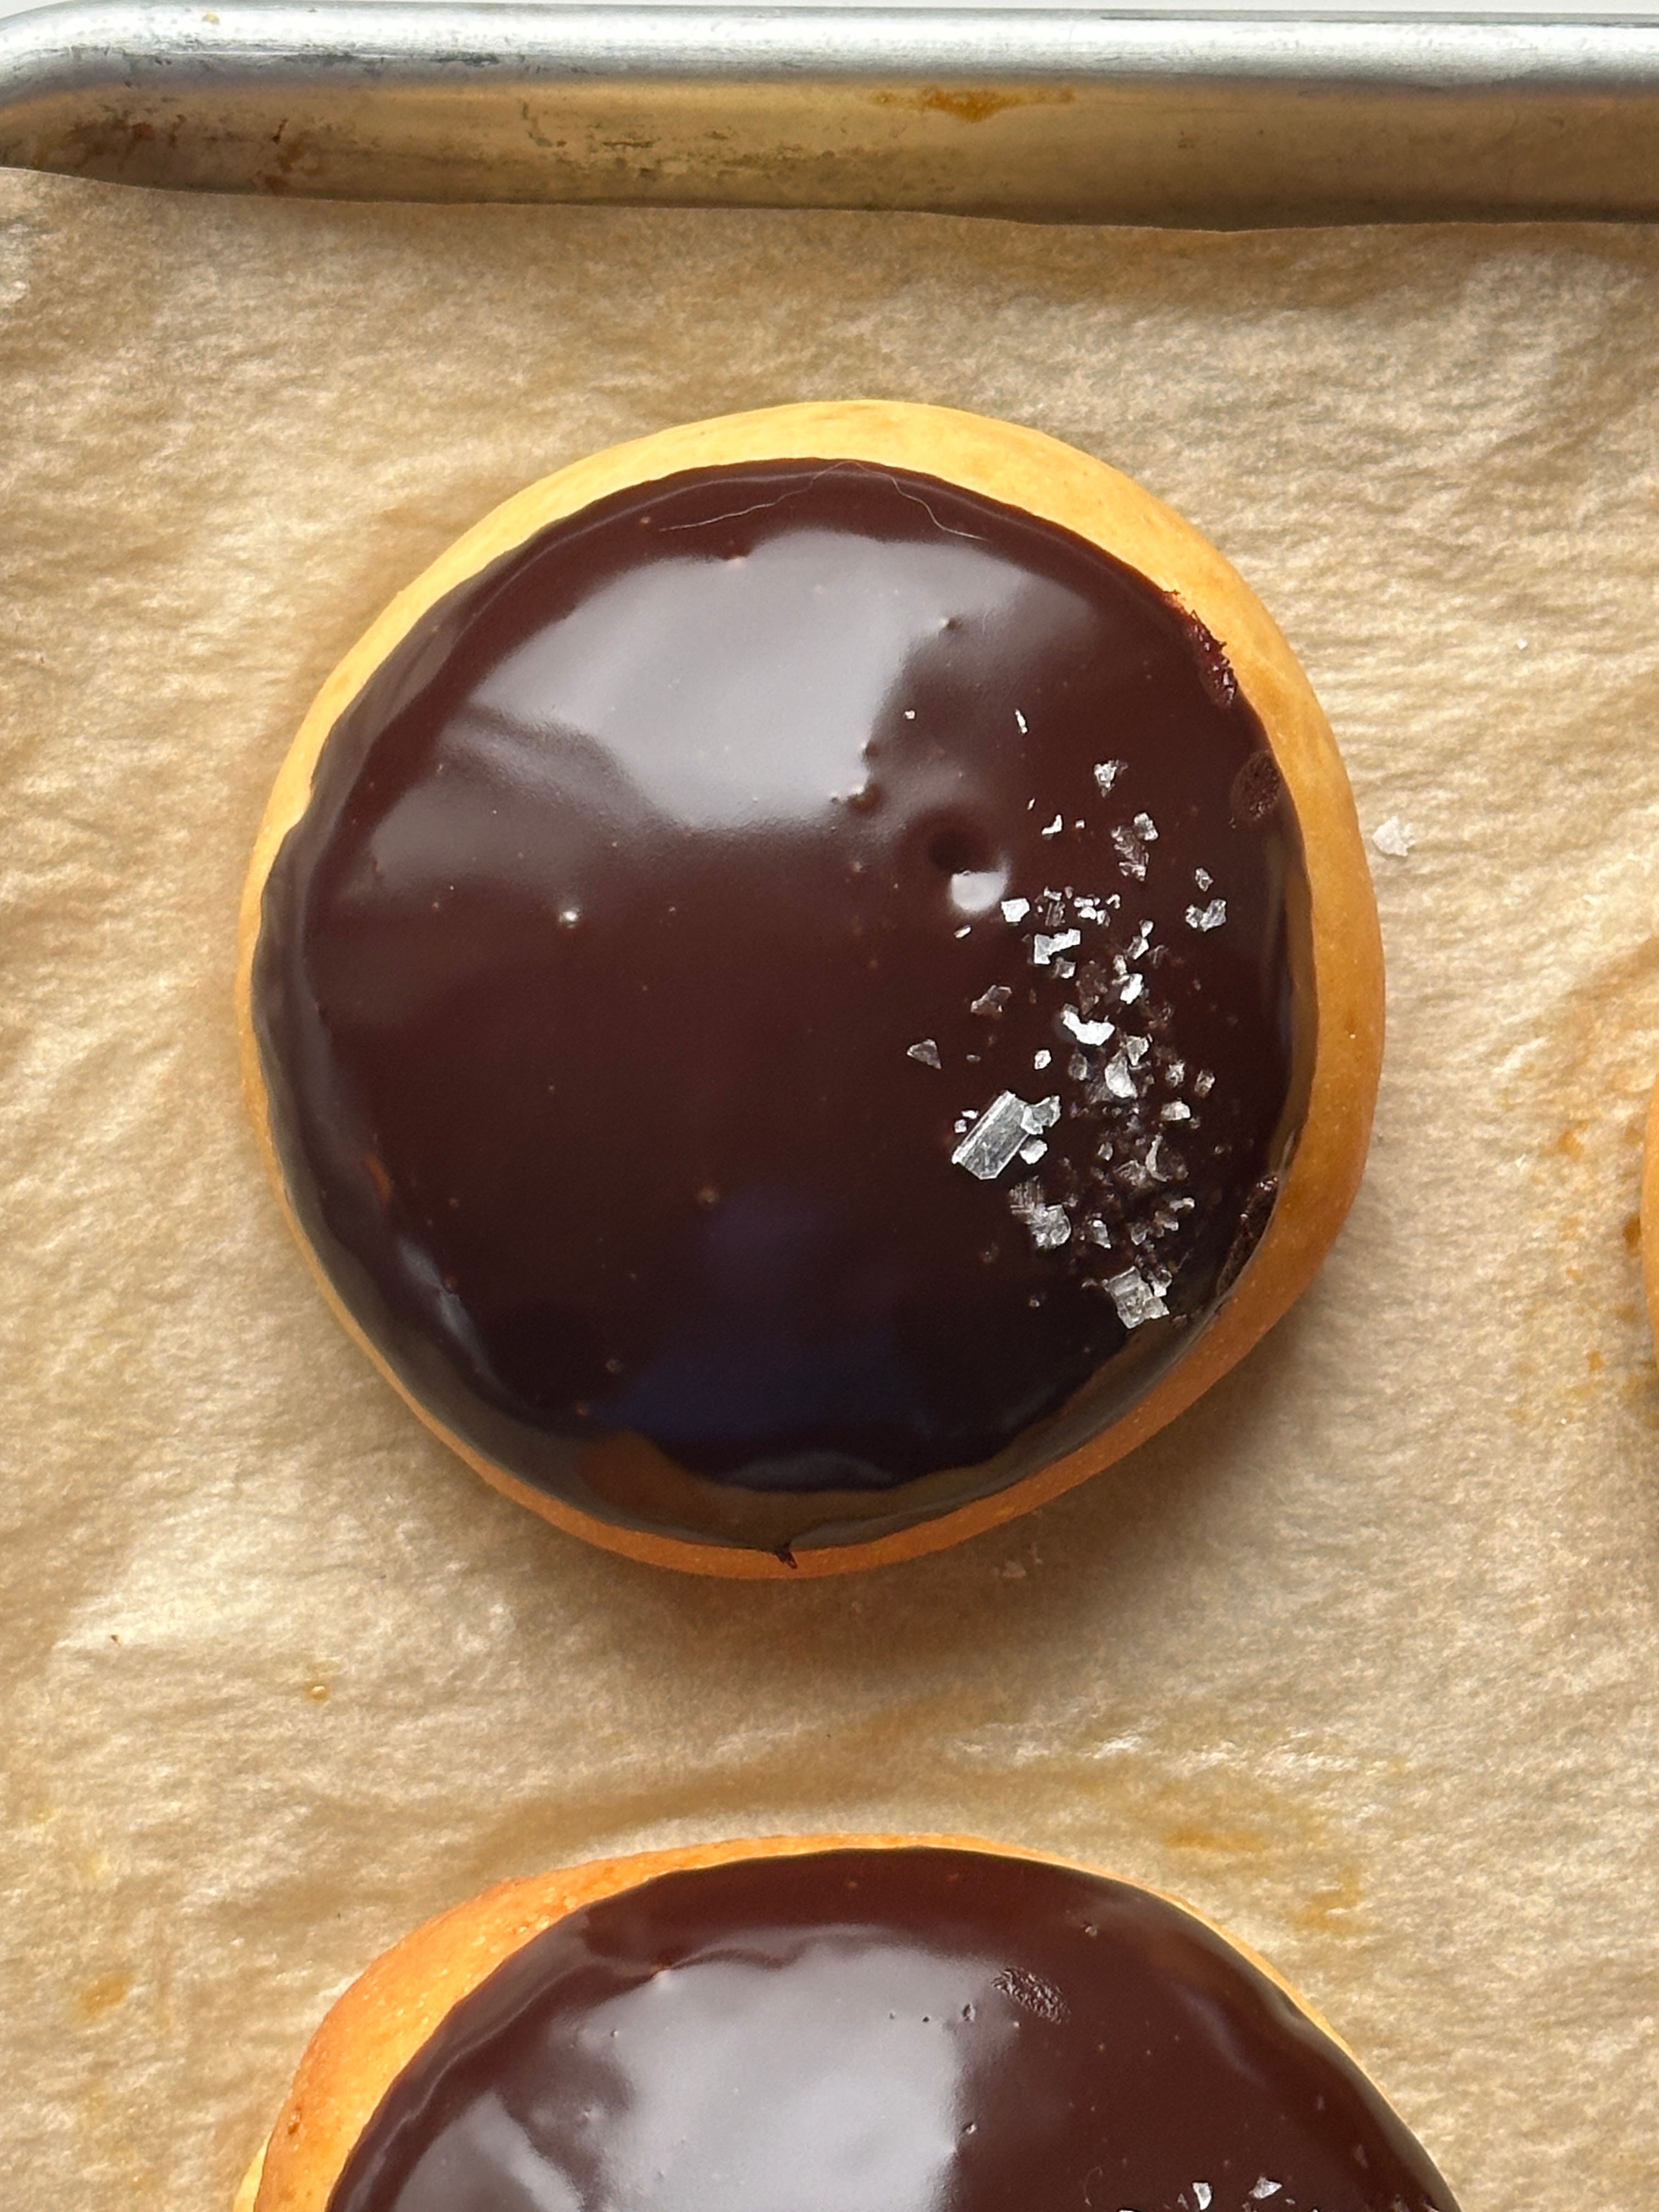
The final flourish of these buns is the ultra-shiny chocolate glaze. Nichole’s recipe calls for equal parts of chocolate and cream, which are melted and stirred together to make a shiny ganache. Since the cream in the UK is very high in fat compared to heavy cream in the US, I’ve shared an alternative ratio, which uses warm water to even out the ratio. The technique is gloriously simple - upturn your freshly baked bun, dip it into the ganache (it should be relatively viscous and not runny), and leave it to set. Because I love salt, adding a sprinkle is a perfect decorative flourish for me.
Alright, on to the recipe! This is kindly reprinted from Scandinavian from Scratch, which you should totally get a copy of. However, any notes or tips from me will be in italics as editor’s notes.
RECIPE: FASTELAVNSBOLLER
Reprinted from Scandinavian from Scratch. Published by Ten Speed Press. Text copyright © 2023 by Nichole Accettola. Photographs copyright © 2023 by Anders Schønnemann.
Makes 12-14 buns
Soft Bun Dough (BLØDE BOLLER)
[Editor’s Note: Nichole strongly recommends making this dough the night before so it has a chance to firm up. You can also halve this recipe easily if you want to make less buns.]
Tangzhong
3 tablespoons all-purpose flour [Editor’s Note: Use Plain flour]
½ cup (120 g) whole milk
Dough
½ cup (113 g) unsalted butter, cut into 1- inch (2.5 cm) pieces, at room temperature, plus more for greasing
1½ cups (360 g) whole milk
4½ cups (576 g) all-purpose flour [Editors Note: Check the protein content if your flour. If you have access to 11.5-12% protein all purpose, use that! But if not, use half/half plain flour and bread flour]
2½ teaspoons kosher salt
1 egg
1 tablespoon active dry yeast
1/3 cup (66 g) sugar
Pastry Cream
[Editor’s note: This makes a soft pastry cream - for a thicker pastry cream, check this recipe]
1 cup (240 g) whole milk
1 vanilla bean, split lengthwise
2 egg yolks
3 tablespoons granulated sugar
1 tablespoon cornstarch
Chocolate glaze
½ cup (113 g) heavy cream [Editors Note: If you are in the UK, use 90g cream and 25g water]
4 ounces (113 g) 63% (or higher) bittersweet chocolate, broken or chopped into small pieces
Method
MAKE THE TANGZHONG: In a small saucepan, whisk the flour and milk so that there are no lumps. Cook over medium heat, whisking constantly, until the mixture becomes elastic, like the consistency of thick glue, about 1 minute. Transfer the mixture to the bowl of a stand mixer and let it cool completely, about 10 minutes.
MAKE THE DOUGH: Butter a medium bowl. To the mixer bowl holding the cooled tangzhong, add the milk, flour, salt, egg, and yeast. With the dough hook attachment, mix on low until all the ingredients are combined, pausing to scrape the sides and bottom of the bowl with a rubber spatula. Increase the speed to medium and mix for 4 minutes more. Decrease the speed to low and sprinkle in the sugar, 1 tablespoon at a time. Gradually add the butter, one or two pieces at a time, waiting between each addition for them to be incorporated into the dough, then mix for 4 minutes more. The butter should be completely absorbed into a glossy and stretchy dough that is beginning to come off the sides of the bowl.
Transfer the dough to the prepared bowl. Cover it with a kitchen towel or plastic wrap and chill it overnight (up to 12 hours) in the refrigerator or let it rest and rise at room temperature for 2 hours, until you are ready to shape it.
MAKE THE PASTRY CREAM: Add the milk to a small saucepan. Scrape the seeds from the vanilla bean into the milk, then add the scraped pod. Bring the mixture to a simmer over low heat, turning the heat off as soon as you see bubbles forming at the edge of the pan. Fish out and discard the vanilla pod.
In a small bowl, whisk the egg yolks, granulated sugar, and cornstarch to a smooth and uniform paste. Add about ½ (120 g) cup of the scalded milk to the egg mixture and whisk together, then add this back to the pan with the rest of the milk. Bring to a gentle simmer over medium-low heat and cook, whisking continuously, for 2 to 3 minutes, until a thick pasty cream forms. Transfer the custard to a small bowl. Place a piece of plastic wrap directly onto the surface of the pastry cream and chill it for at least 30 minutes in the refrigerator.
MAKE THE BUNS: Line two 13 by 18-inch (33 by 46 cm) baking trays with parchment paper. Lightly dust a work surface with flour. Roll the dough into a 13 by 17-inch (33 by 43 cm) rectangle, gently pinching and pulling at the corners to square them off as much as possible. Using a ruler and a chef’s knife or pizza cutter, cut the dough into a 3 by 4-inch (7.5 by 10 cm) grid (for twelve rectangles total). [Editors note: At this point you can cut the dough into the desired size. 70g still makes good sized buns, but 110g is more traditional. You may also find it easier to divide the dough, roll into balls then flatten in into thin discs with a rolling pin. I tried both methods of shaping, so it’s worth figuring out what is easiest for you]
In the center of each rectangle, place 1 heaping tablespoon of the pastry cream. [Editors note: You want the custard to be at least 25% of the weight of the dough]

Gather the corners of the dough together, pinching them so that you seal the custard inside the dough, almost as if you were making a dumpling. You can pick it up and cradle it in the palm of your hand as you seal it. Place the bun seam side down on one of the prepared baking trays. Repeat with the remaining rectangles of dough. You should have six buns per tray, spaced 2 to 3 inches (5 to 7.5 cm) apart.
PROOF THE BUNS: Cover the buns with a kitchen towel and set them in a warm and draft-free area until they are noticeably puffier, slightly dry looking, and the impression of a fingerprint is slow to fill in, 1 to 2 hours, depending on the temperature of your kitchen.
When the buns are sufficiently proofed, preheat the oven to 350°F (175°C/ 160°C fan).
Bake for about 20 minutes, rotating the baking trays halfway through from top to bottom and front to back, until pale brown. Transfer the buns to a rack to cool.
WHILE THE BUNS ARE COOLING, MAKE THE GLAZE: In a small saucepan over medium heat, bring the cream to a gentle simmer, turning the heat off as soon as you see bubbles forming at the edge of the pan. Whisk the chocolate into the cream, continuing to stir as it melts and forms a silky glaze. (If needed, you can turn the stove back on for 1 to 2 minutes, but turn it off again as soon as the chocolate is almost entirely melted.)
Dip the top of each cooled bun into the glaze and allow them to set before serving. [Editor’s Note: and sprinkle with Flaky salt if desired!]. These buns are best enjoyed on the day they are baked.


Thank you very much for the recipe 🥰
These look amazing and remind me a little of Hing Kong Pineapple buns with a chocolate top