Hello,
Welcome to today’s edition of Kitchen Projects. Thank you so much for being here.
Today we’re taking on an absolute classic - The bûche de Noël aka the yule l*g (I’ve got an aversion to this combination of words) ft. a very exciting and quite odd technique for the final fudgy sponge and a whipped custard filling. It’s a fun one.
Over on KP+, I’m sharing a level-up bûche de Noël. Part way between an opera cake and a fancy patisserie bûche, it boasts layers of salty maple chestnut cream, blackcurrant jam and whipped custard. It’s finished with a coating of fudgy salty coffee crumb chocolate. Click here to make it.
What’s KP+? Well, it’s the level-up version of this newsletter. By joining KP+, you will support the writing and research that goes into the newsletter (including the commissioning - and fair payment - of all the writers), join a growing community, access extra content (inc., the entire archive) and more. Subscribing is easy and only costs £5 per month. Why not give it a go? Come and join the gang!
Love,
Nicola
PSST… I’ve written a book!
SIFT: The Elements of Great Baking is out next May and is available to pre-order now. Across 350 pages, I'll guide you through the fundamentals of baking and pastry through in-depth reference sections and well over 100 tried & tested recipes with stunning photography and incredible design. SIFT is the book I wish I'd had when I first started baking and I can’t wait to show you more.
Yule be home for Christmas (and have the cake of your dreams)
I've always found the Yule log a bit of a head-scratching tradition. Unlike Christmas biscuits or a Christmas pudding, it's not clear to me when exactly a yule log is supposed to grace our table during the festive season. At least not here in the UK. And I gotta say it - it's kind of a clunky cake. Rolling up a sponge and painstakingly decorating it to look like a foraged log, complete with mushrooms and other woodland detritus - the commitment to the aesthetic is admirable, a rough-around-the-edges predecessor to the 'real or fake' cake videos of our modern times.
So what IS this dessert? I mean, I've made, seen, eaten and enjoyed a fair few slices in my life, but this year is the first time I've really stopped and asked: Why on EARTH do we make these?! Like all traditions, there is a method to madness - it might seem abstract, there's a deep folkloric thread that connects us with our (very peculiar) ancestors.
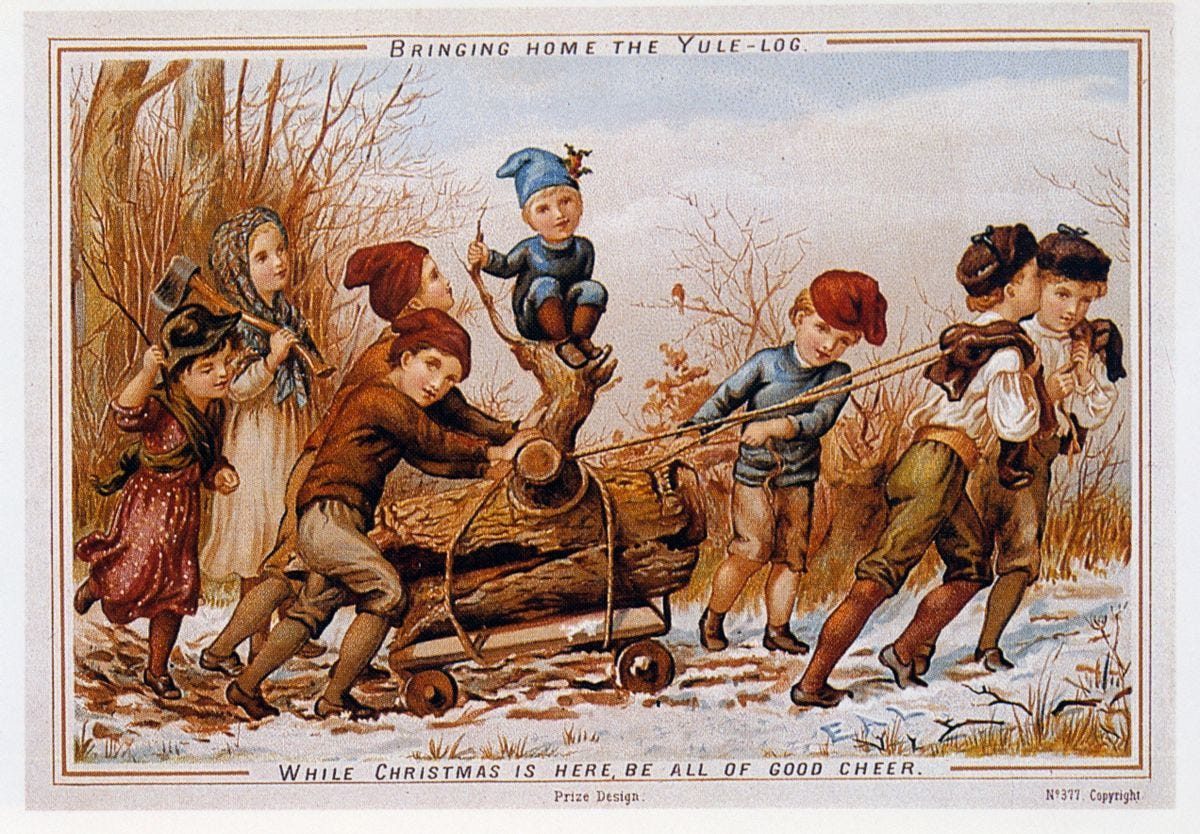
The origins can be traced to Celts in 600BC, who burned a log at the Winter Solstice 'Yule Festival' to ensure the sun would return in Spring. Since then, the tradition has transformed - in the Middle Ages, it was customary in England to send out a group on Christmas Eve to find a giant log to drag back and, consequently, burn in the fireplace. The log, which - strictly - could not be purchased for fear of bad luck for the following year, had to burn for 12 hours, requiring a near-constant tending. Even lighting it was fraught - if the Yule Log did not light on the first attempt, it was a sure sign that a tragic fate would soon befall the family.
How they managed to get a - probably - soaking wet, gigantic log that had been dragged through all the cold and wetness that European winters offer to light at all, I’ve no idea. Considering one of the superstitious functions of a successful burning of the yule log was to protect the home from future fires, it all seems a bit precarious. And from everything I’ve read, the Yule log was incredibly hard work that came with so many fussy conditions that seemed more likely to curse than bless you.
We’re all friends, so we can be honest here - I’m sure you agree that the word ‘log’ really doesn’t get your appetite going, though credit must be given to the previous generations who picked the best out of a bad bunch - in England, it was also known as the ‘Yule Clog’, the ‘Yule Block’ and there was also the similar ‘Ashen Faggott’ tradition which, unsurprisingly, was never made into a cake.
I suppose we have the French to thank for putting an end to the madness with the arrival of the ‘Bûche de Noël’. Sometime in the 19th century, someone (who we don’t know who) thought - why do hard labour when we could have a cake instead? Unsurprisingly, this new way to usher in the tradition is one that has remained on our tables to this day.
Though the bûche de Noël is still a bit of a head-scratcher, it does present the perfect opportunity for me to investigate a subject I’ve long desired to deep dive into What makes a sponge flexible? Can ANY cake be rolled (so long as it's warm)? And how do we achieve that blend of richness and softness?
I don’t exactly believe in Christmas miracles, but this week of testing was packed with exciting discoveries that do feel tinged with Christmas magic. From reversing freeze-dried fruit (see KP+) to an unlikely cake technique that is somewhere between choux pastry and a tangzhong, as well as a super fancy multilayered version over on KP+ ft. maple chestnut mousse, it’s been a (sleigh) ride. Let’s get into it!
Cake flexibility
To understand what allows a cake to bend, we actually need to understand what makes it solid. The main ingredients of cake rarely deviate, blending flour, sugar, eggs and fat in various ratios with various techniques.
We can divide these four pillars into two categories: 'Tougheners' and 'Tenderisers', which basically means Things that go hard after heat is applied and things that retain/or remain soft. It's the interplay of tougheners and tenderisers that create everything that is good - or bad, depending on the recipe you're using, about the texture of our cake. Sure, the baking plays a role (even a perfect formula can't outrun a too-long stint in the oven), but it's these essential structure builders that we need to balance.
Flour is a toughener, providing structure through gluten and starch. Though gluten, the protein responsible for chewy baguettes and lofty loaves which forms in the presence of water, often gets all the credit for being the scaffold of our bakes, we really owe a lot to starch gelatinisation. This is when flour absorbs water and swells, creating body and texture. When baked, the starch structure and proteins (gluten) are set in place. Eggs are on the same team - when heated, eggs transform from gloopy to firm in a process called coagulation. The hardening of both eggs and flour is irreversible and happens when our cake goes into the oven.
Sugar and fat are both tenderisers, somewhat returning to their original state after baking. This is why high-sugar bakes, like cookies, pasties de nata and brownies, can stay gooey long after cooling. This is also why baked goods made with liquid fats, like oils, appear softer and more tender - the fluidity of the fat makes a difference. Though butter is our chart-topper when it comes to flavour, its firm texture, once cooled, does not always win points in the texture department.
Beyond these inherent states, both sugar and fat have other roles in keeping things soft - sugar is highly hygroscopic, which means it attracts water. By attracting and holding the water, it can help limit gluten development as well as essentially retaining moisture. Something similar happens with fat - we can strategically force fat and flour to interact, the fat coating the flour and preventing gluten from forming. Acting as a physical blockade, the fat 'shortens' the gluten chains (and that, my friends, is why fat is sometimes called shortening.)
For cakes, the ratio of tougheners and tenderisers is usually 50:50, but it's the way these ingredients are blended together that can affect the structure of the cake.
What even is a sponge cake?
In general, recipes for rolled cakes tend to be based on airy sponge cakes, like genoise or chiffon. These are a type of cake that rises solely from the expansion of air, carefully whipped into the eggs and folded into the rest of the ingredients. I did a deep investigation of these cakes earlier this year (click here to read) if you want to get any deeper, but here are the main points:
A ‘sponge’ refers to cakes leavened solely by the expansion of air trapped by whisking eggs, known as ‘foams’. This name reflected the similarity between a cake and a natural sea sponge in appearance and texture. These air bubbles, trapped in our cake batters (thanks to eggs!), expand when heated. The cake batter, which is at first flexible, will expand with it, causing the cake to rise. As the cake continues to cook, the egg proteins coagulate and starches set in place, setting the final form of the cake.
Eggs are the best vehicle for getting air into your cakes, expanding 5x in volume when whipped. Egg whites are even better - expanding 6-8x in volume. When agitated with a whisk, the proteins in eggs begin to unfurl and bond. As these bonds form, air bubbles are trapped within, and the volume increases. This foam can be stabilised with sugar. Depending on the cake, you might whip the whole eggs with sugar (like in a genoise) or separate them and make a meringue (like in a chiffon), but either way, we need to get air into the cake and a lot of it.
So, what makes the best rolled cakes? Can you just take any old cake recipe from the internet or from your archives, spread it thinly and roll it up? Let’s get into it.
Working with Warm Cake / the deal with thickness.
Most roll cake recipes ask you to immediately roll up your cake as it leaves the oven, an insurance policy to the pesky (and tragic) cracking that can occur. The hope here is that the curled shape is imprinted onto the sponge. Even as it cools, it should remain somewhat flexible. To show you that literally *any* cake can be rolled up whilst warm, I made a Victoria sponge, spread it thinly (less than 1cm) and baked it - look, it rolled up happily. Unrolling it? Let's just say it wasn’t such a happy story:
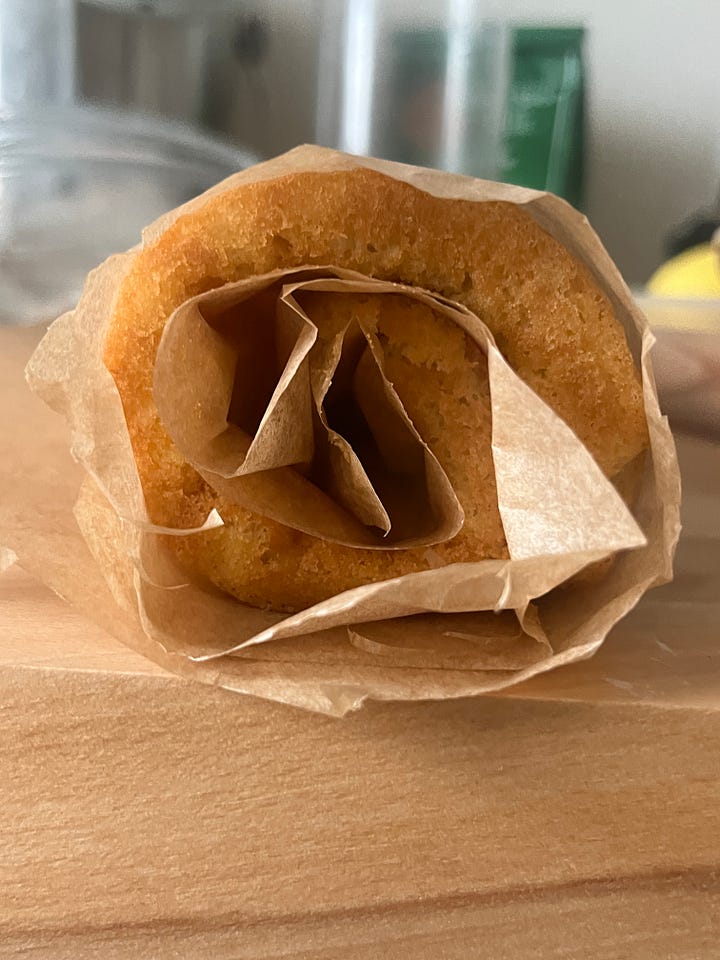
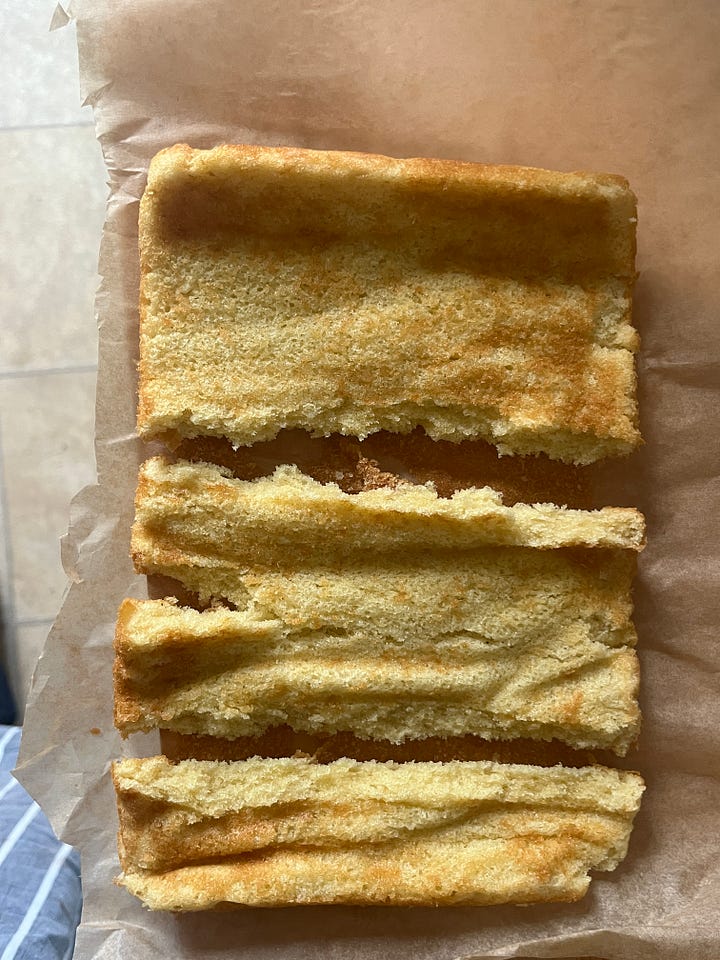
Even though fragile chiffon has 50/50 tougheners and tenderisers, the same as a Victoria Sponge, the amount of air whipped into the cake and set into the structure makes it flexible. That’s where the recipes strongly deviate.
There is one thing that no amount of recipe tweaking or egg foam fiddling can game - thickness. A thin sponge is much more flexible than a thicker one. This is because the stress is lower for the same bending angle. The thicker something is, the more you have to stretch or put pressure on it to achieve the same angle. The pressure is especially extreme on the outside. This is why, if your cake does crack while rolling, it will likely do so on the outside of the cake, as this is the part that has to stretch the most to rotate and has the most force applied to it. This means it’s much harder to get a thick, fuzzy cake roll than a thin one.
What about cocoa?
Cocoa powder is a common baking ingredient whose alchemy you’ve probably underestimated. To adapt any recipe to a cocoa flavour, recipes tend to swap around part of the flour weight for cocoa powder. Adjusting within this range will change the flavour of the bake, but also the texture. You see, cocoa powder is about 25% fat, so it cannot be treated like any other starch, and it absorbs more water than flour, so we need to increase the liquid in a recipe to compansate for this.
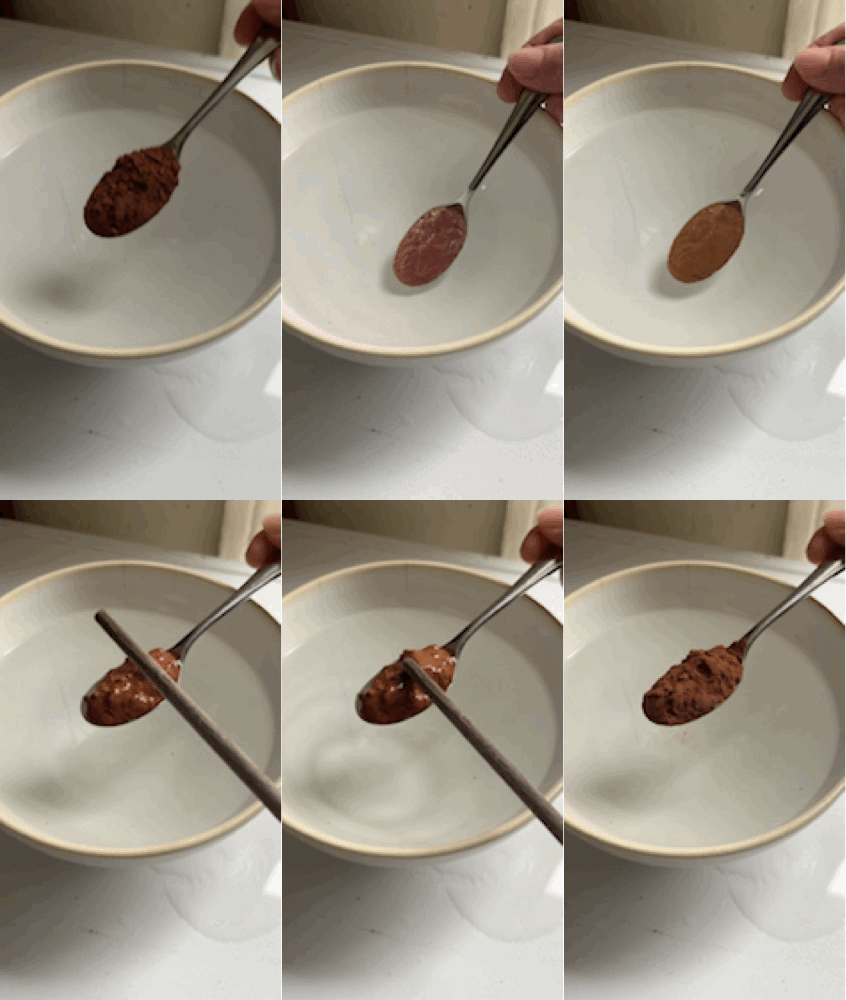
Let me encourage you to get a spoonful of cocoa powder and a glass of water. Dip the spoon into the water, bring it out and gently tap the cocoa powder. The water flings off, and the cocoa remains dry. Though this little (not actually magic) magic trick is a bit of fun to look at, it’s an important clue on how cocoa behaves in bakes.
You see, cocoa powder contains a lot of tiny, evenly dispersed fat particles, which gives it hydrophobic qualities - it repels water. This is because water and fat don’t mix. Cocoa also has a tiny particle size - this, combined with that hydrophobic nature, makes it very clumpy when it meets liquids. Each tiny particle of cocoa powder individually repels the water, making it hard to combine without a lot of effort. But if you keep working at it, it turns into a gloriously thick creamy paste, not dissimilar to the sudden change of yolks and oil to mayo. But it’s not an emulsion - that’s between two liquids - it’s a suspension.
This very week, Andrew Janjigian, baker extraordinaire and author of Word Loaf and all-around bread encyclopaedia, and I were discussing cocoa powder. Andrew is writing his book ‘Breaducation’ at the moment and wanted to come up with a basic rule of thumb to adjust the hydration of doughs that use 10% cocoa powder in place of flour - he conducted some tests, and I’m thrilled to share that he landed on “for every 1% flour you replace with cocoa, increase the hydration by 1.2%”. This tracks with the experiments I conducted this week - mixing water with cocoa powder and water with flour; I needed about 15-20% more water to make the cocoa clump together in a similar fashion to the comparable amount of flour.
In addition to this, cocoa powder is often ‘bloomed’ before being used - this means letting it breathe in a warm liquid to help open up the flavour. It is worth doing if your recipe has a liquid that allows for it - the cocoa flavour is certainly better distributed, at the very least.
The tests
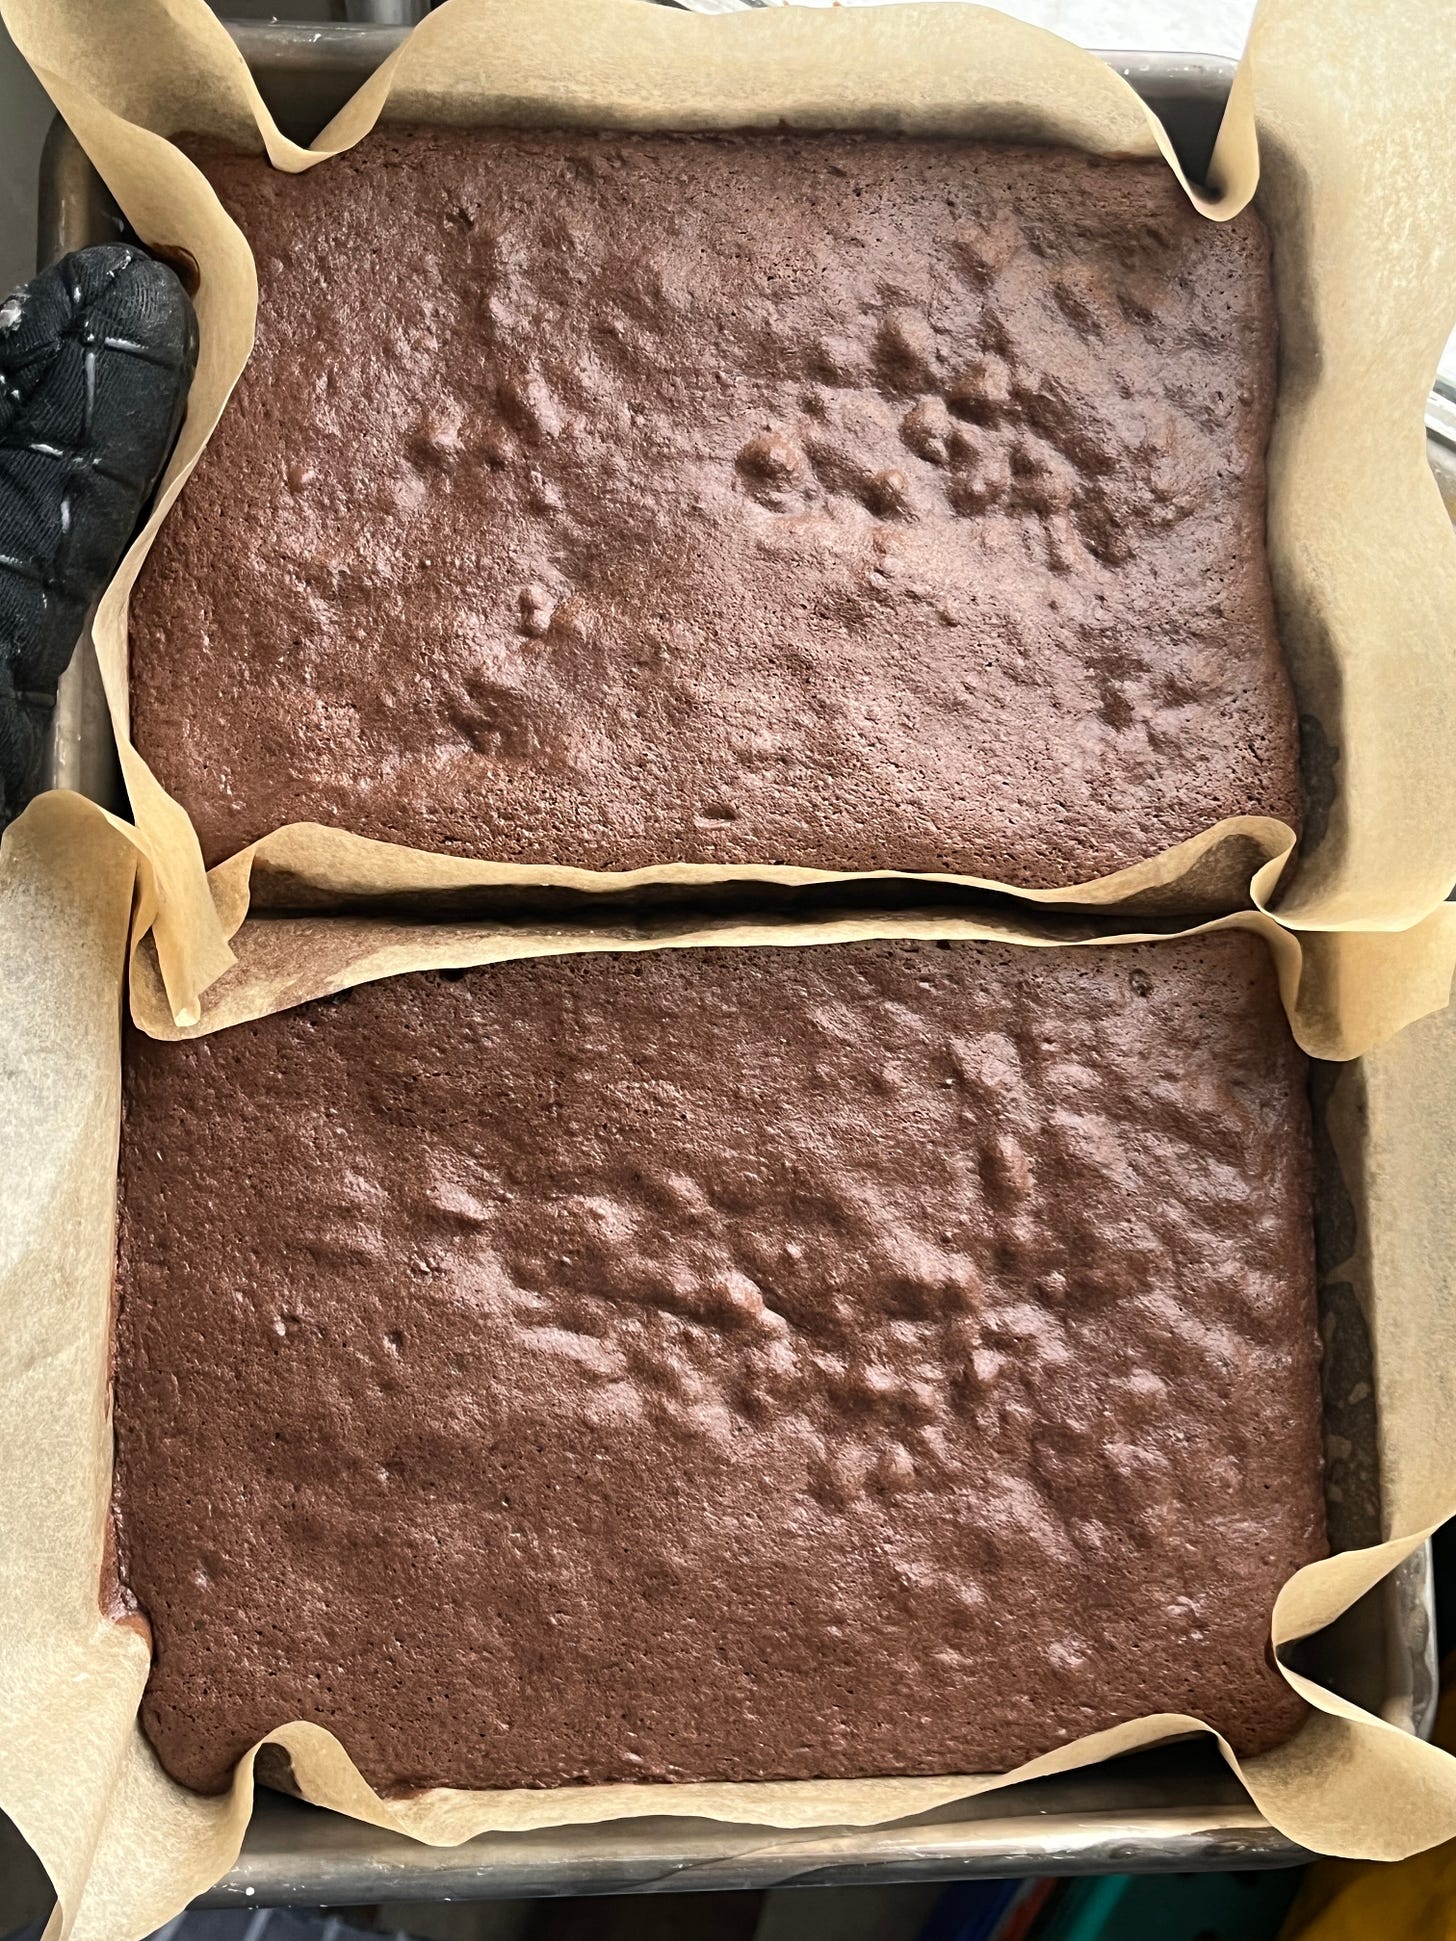
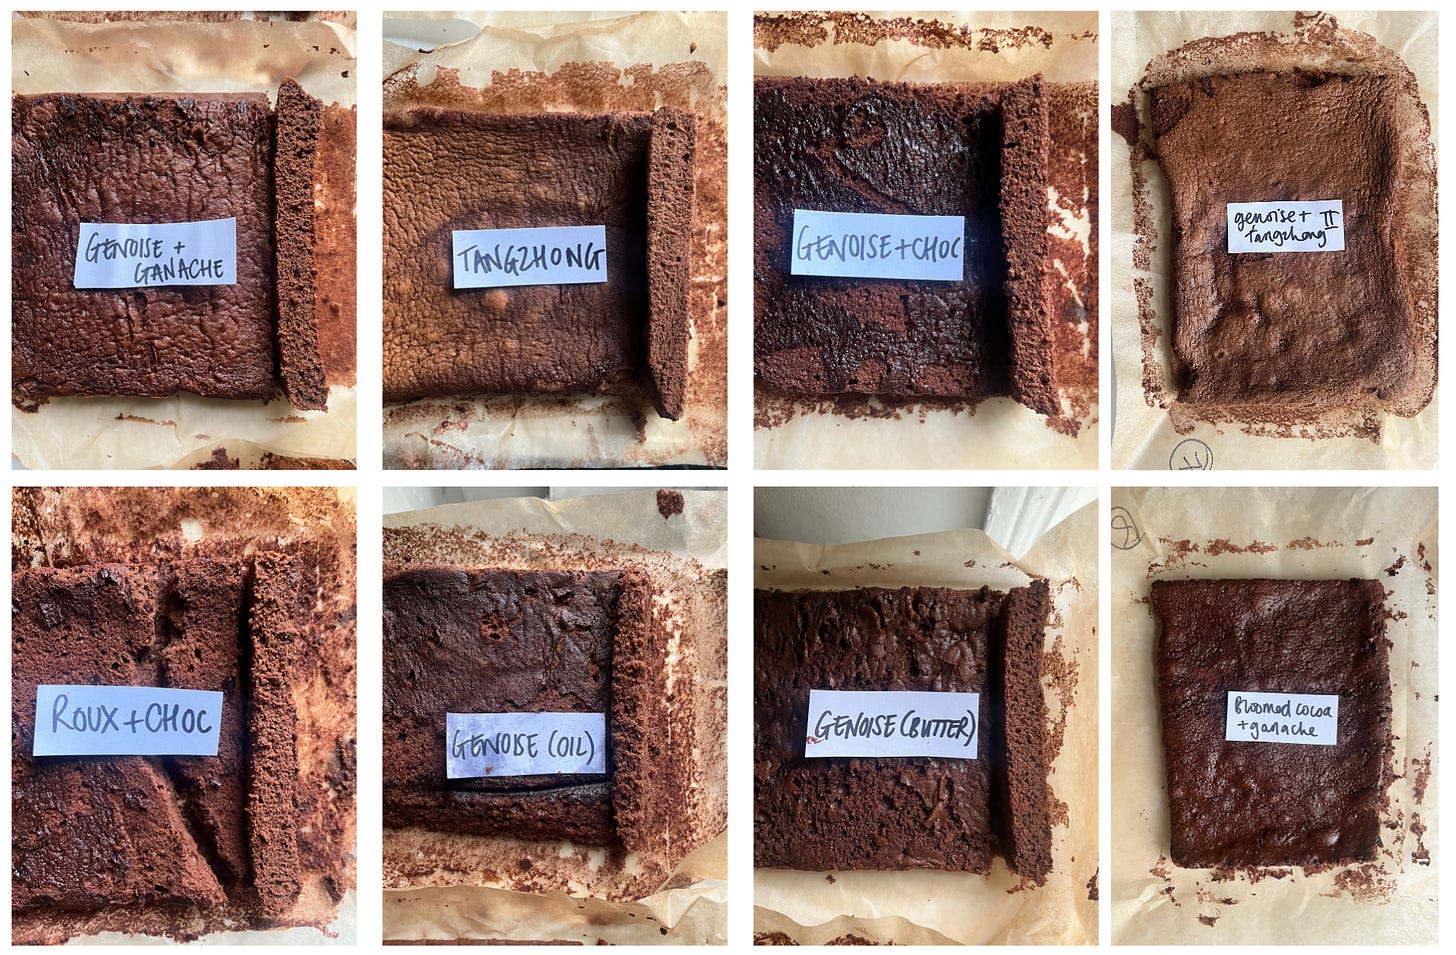
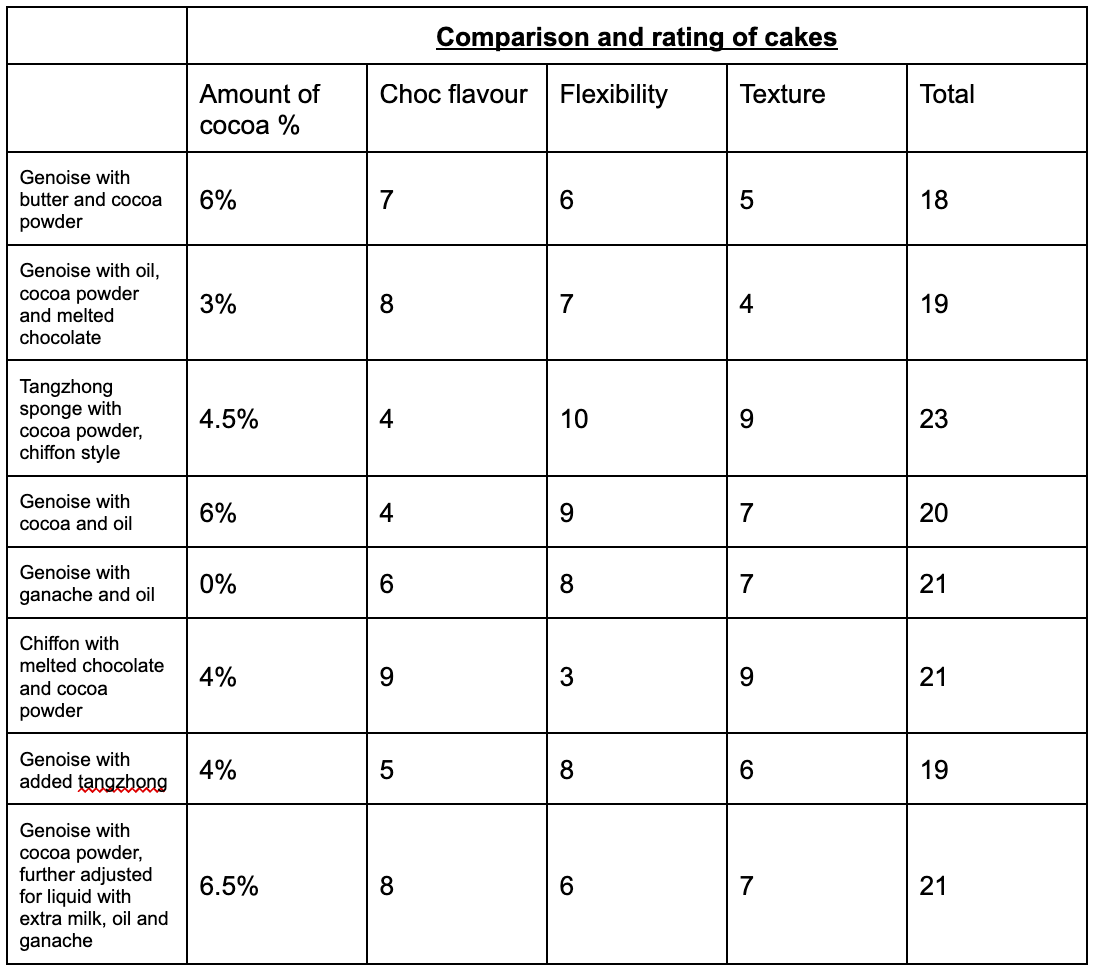
This week, I put eight sponges head to head. From my classic genoise and chiffon recipes, I adjusted to use cocoa powder, then additionally adjusted for liquid (as above). I also wanted to look into the best way to incorporate chocolate and cocoa flavour - from adding melted chocolate into the crumb, blooming the cocoa, to whipping in ganache as a fat source and testing the effects of oil rather than butter. I made all the batters and baked them in a small sheet pan, subdivided with paper. To test the flexibility, I rolled one cake as soon as it came out of the oven and left the other to cool completely before attempting to roll it up. In my tests, when I call it a ‘genoise’, this is when I’ve whisked whole eggs, while ‘chiffon’ refers to eggs and yolks treated separately.
This week, as I was making my way through the airy cakes, I thought: What would a tangzhong do in a cake? I’ve long loved the effects of the tangzhong in bread, the technique of pre-cooking some of the flour so it gelatinises. It allows you to introduce a higher proportion of hydration into bakes, improving oven spring and texture. But in a cake? What happens then? Would this help with the issue of cocoa powder being so drying and difficult to incorporate? I didn’t have much hope, but let me tell you: It’s fantastic. The cakes using a bit of pre-cooked cocoa and flour were so incredibly cottony, like a set mousse, and so gloriously puffy.
The results
In the end, most cakes could be rolled when warm - it’s the unrolling that is the issue. And the lasting power and texture were not created equal between them. Sure, you could make a great cake using my genoise sponge spiked with cocoa, but it won’t be optimally tender, plus blooming the cocoa in liquid gets you the deeprest flavour. While using melted chocolate in the sponge made a very rich, fine crumb, it hardens too much when the cake cools, making it inappropriate for a rolled sponge (though I’ll certainly be using my rich recipe for something else in the future…). Utilising ganache had a decent result, but not good enough to make the extra steps to make it and cool it worthwhile.
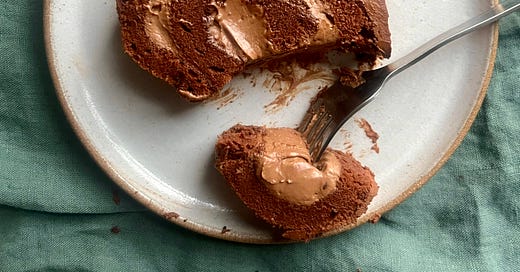
The clear winner was the cake made with the tangzhong. Though the chocolate flavour was comparatively lacking, the cake gets so much richness from the filling/coating that the primary responsibility of the sponge is to be soft, soft, soft! I looked a bit further into the subject, and this technique is similar to ‘tang mian’, where the fat is melted and flour added to it, like a roux you’d make for bechamel sauce. This cooked flour is then let down with the liquid. The result is a super squishy cake - it tracks! In the recipe I’m sharing below, we cook the cocoa powder with the liquid and fat and just a little of the flour until thick.
It looks quite like choux pastry, oddly, but the effect is an expansive cake with incredible softness, flavour, chew and flexibility. The gelatinised cocoa and flour create a solid, sturdy base for the eggs to inflate and expand. Another bonus with this technique is producing a comparably thick and flexible sponge with just four eggs in my 10 x 15inch pan, compared to the six eggs I used in this recipe. You’ll be overjoyed watching it puff up in the oven. To really lean into the mousseyness, I’ve reduced the baking temperature to just 140c -150c fan to help the cake rise gently and evenly - it helps it set beautifully.
The filling and finishing
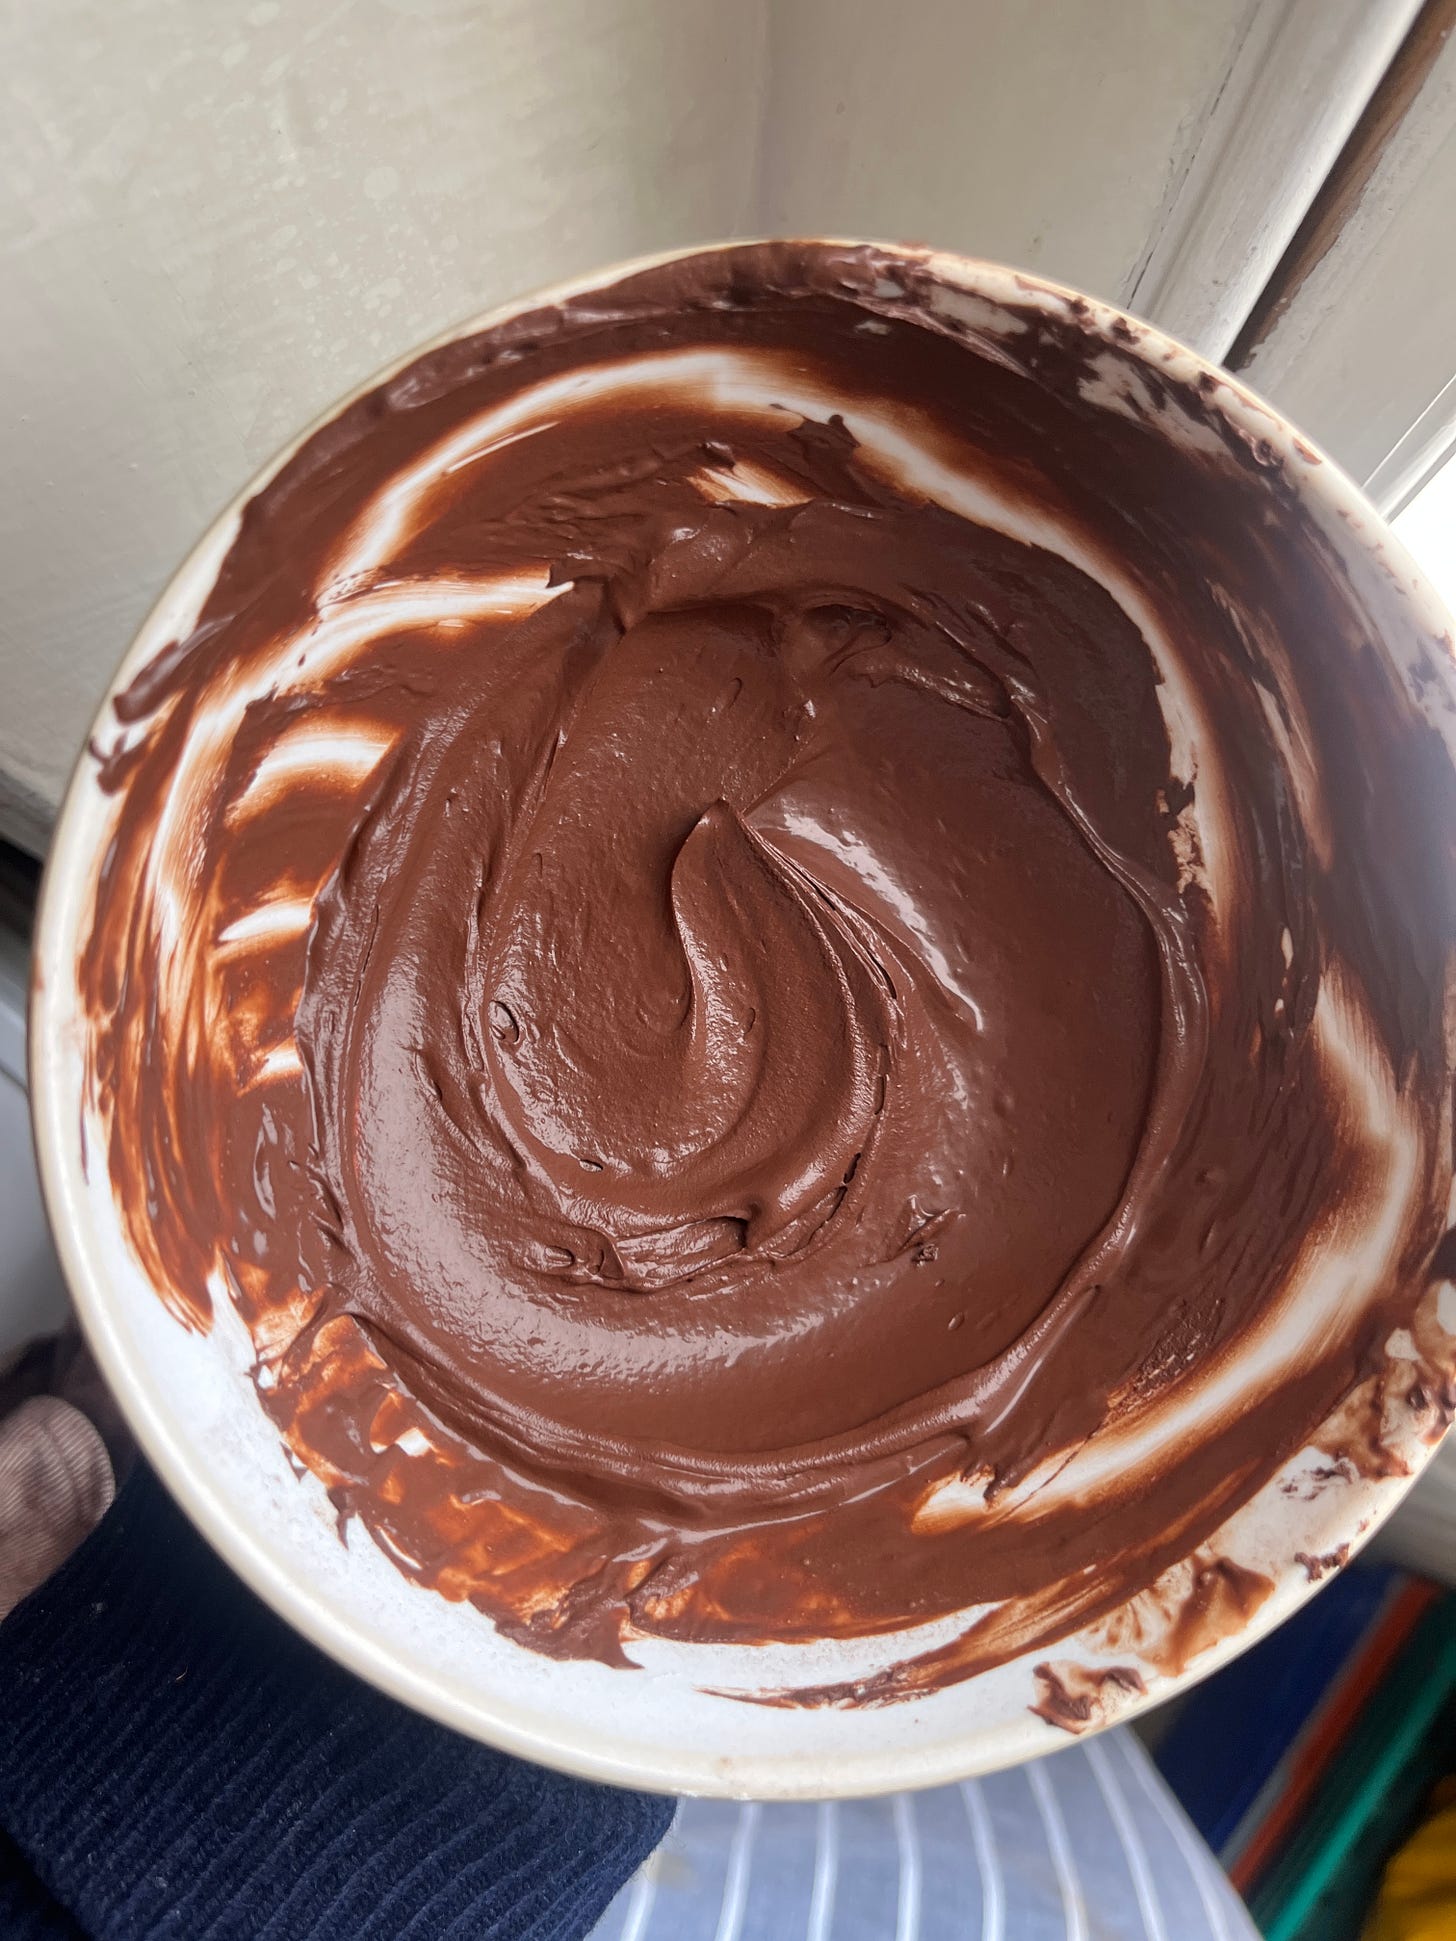
I’m pretty excited about today’s filling. A blend between a cremeux (a ganache made with custard) and a whipped ganache, it’s a whipped custard that is all at once light and rich. It has a relative fat content of about 35%, making it similar to whipping cream, so it isn’t as fatty and dense as a lot of whipped ganaches, which are often closer to double cream, 50% fat.
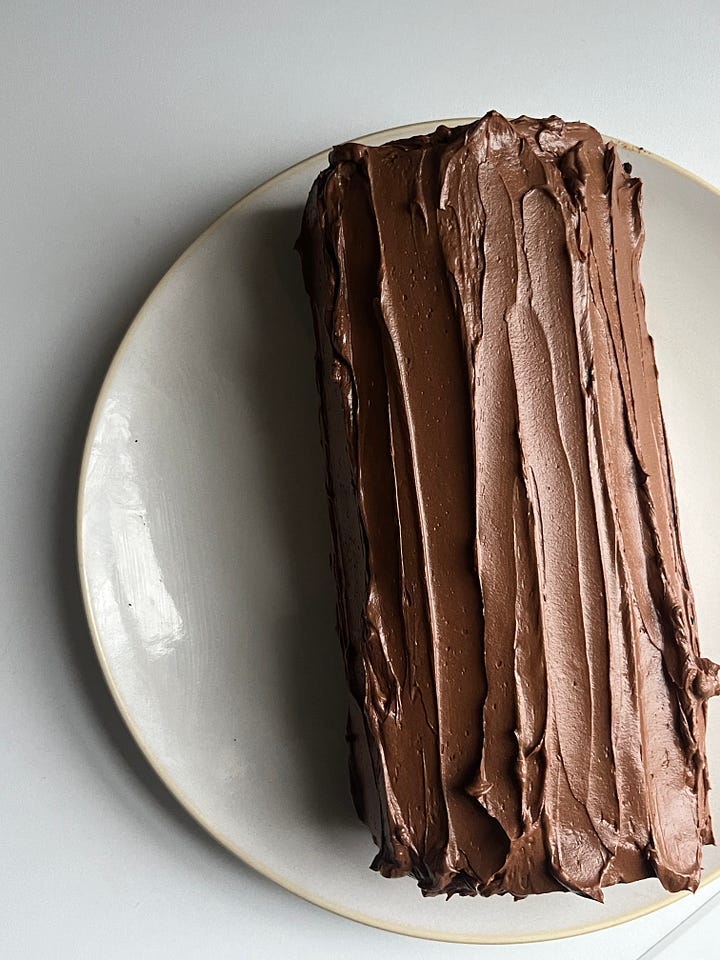
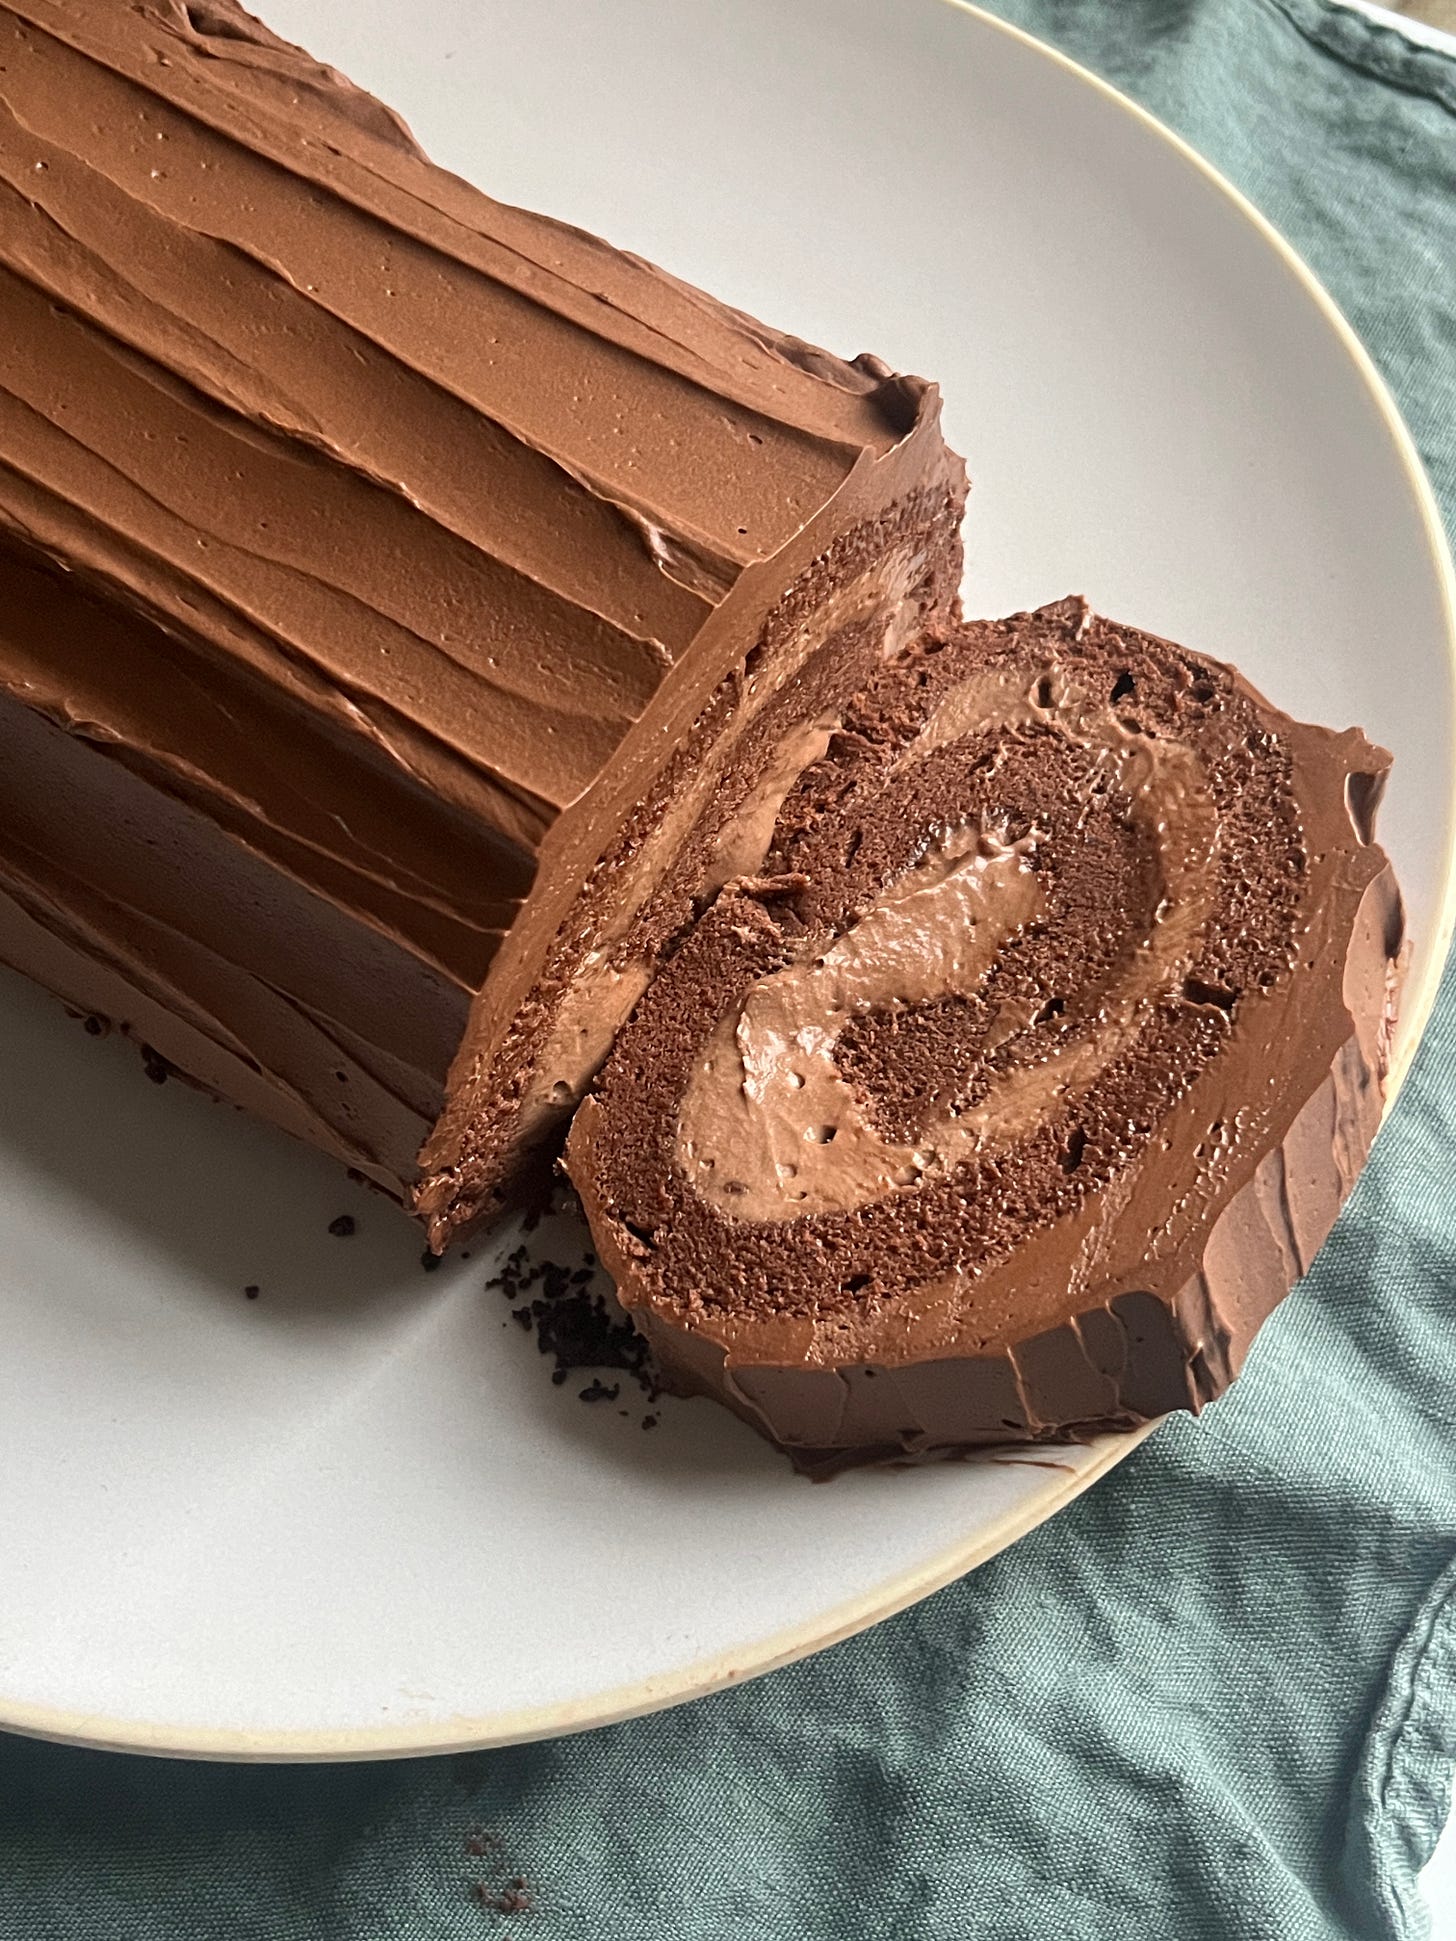
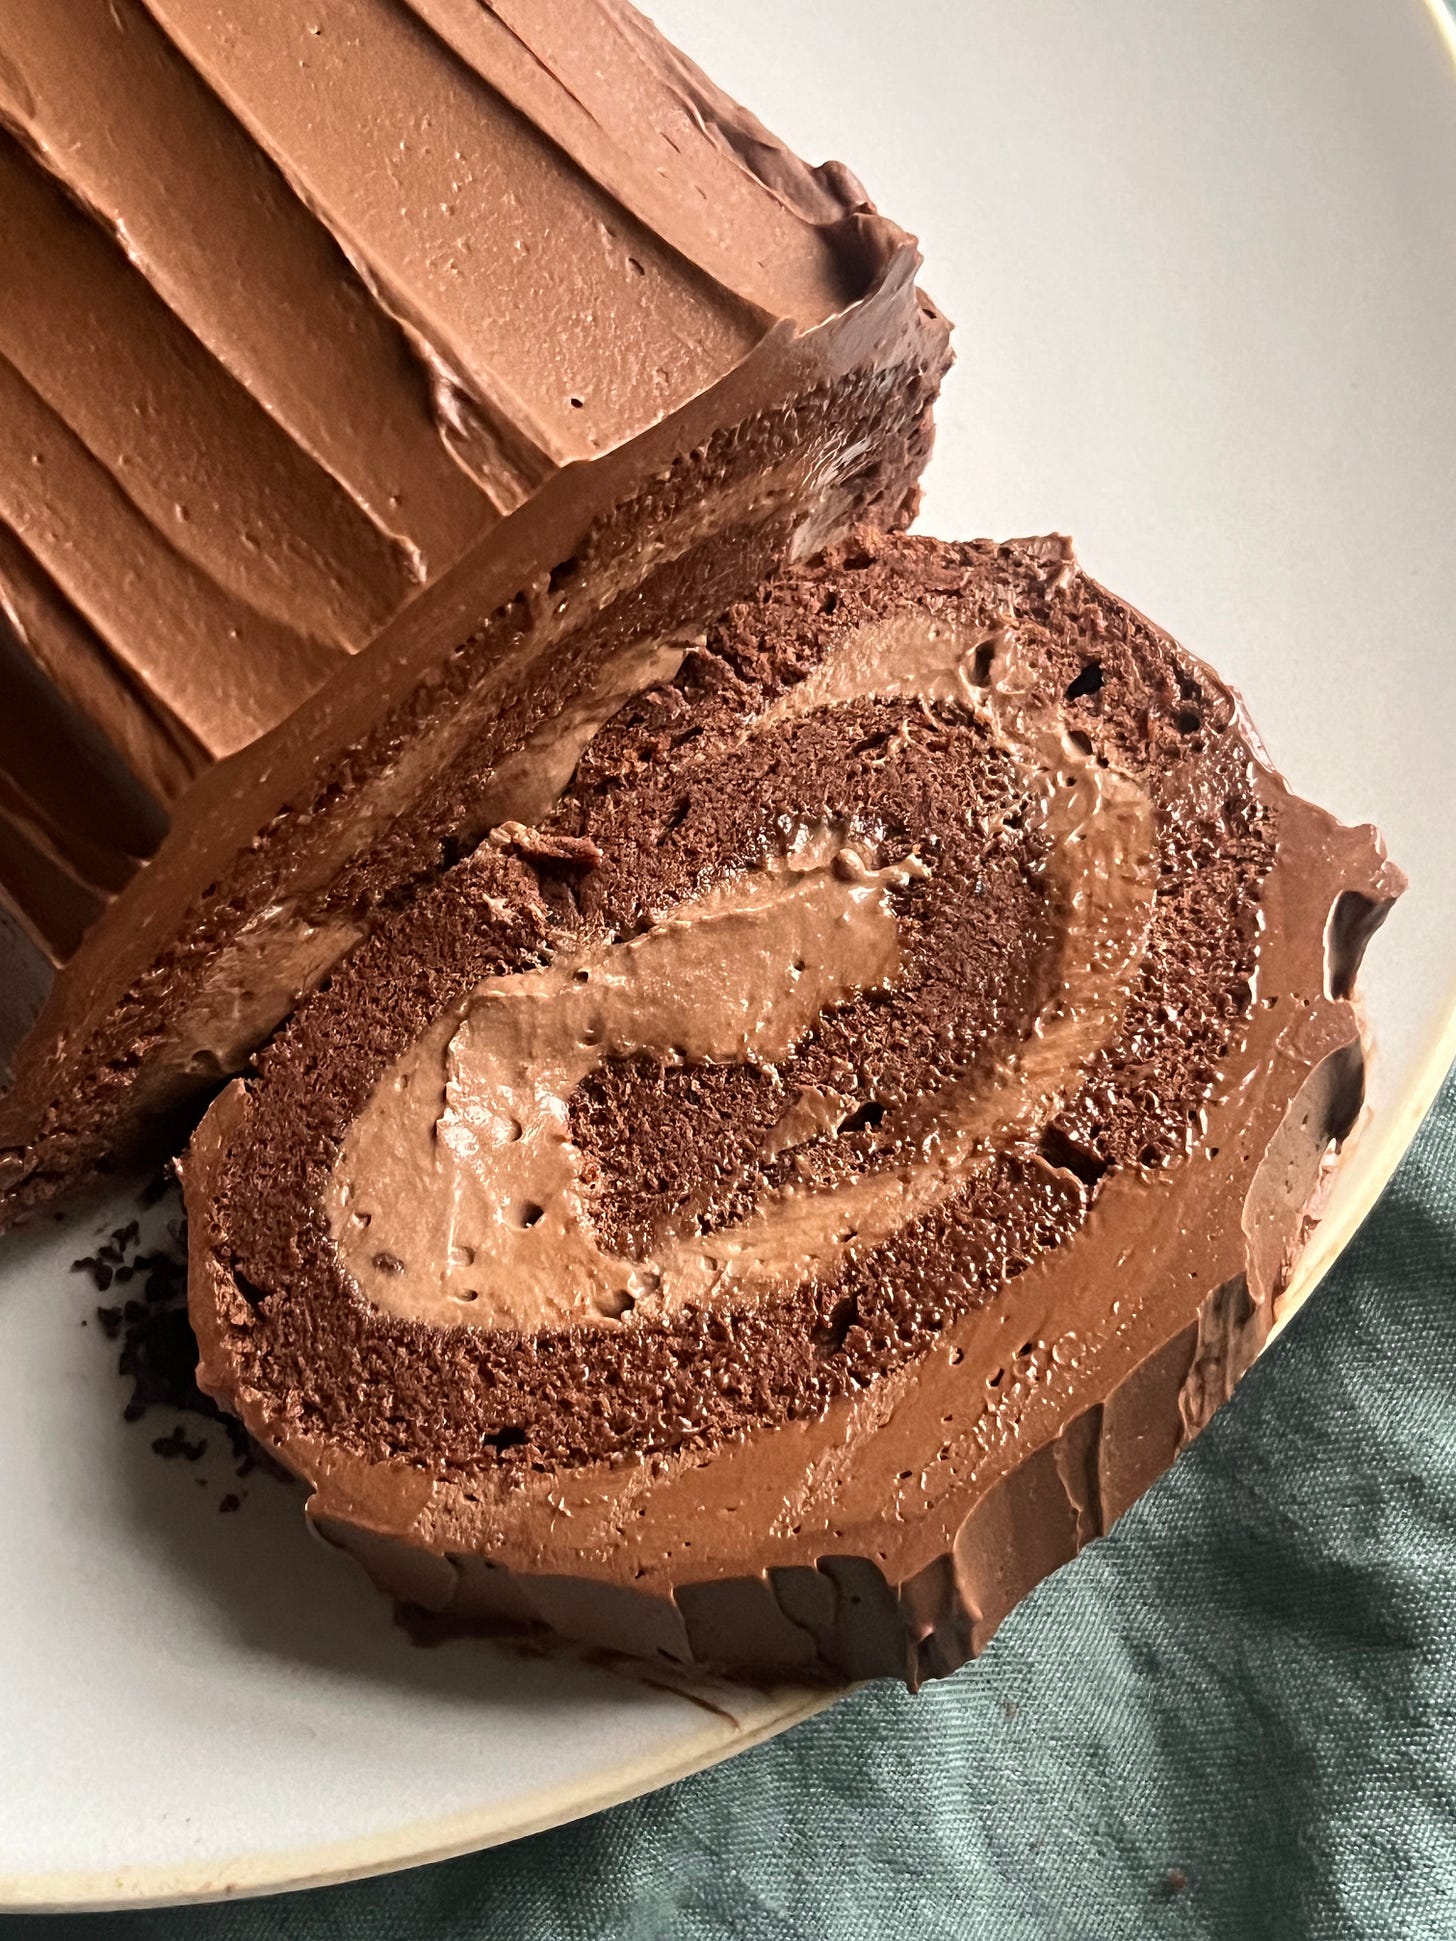
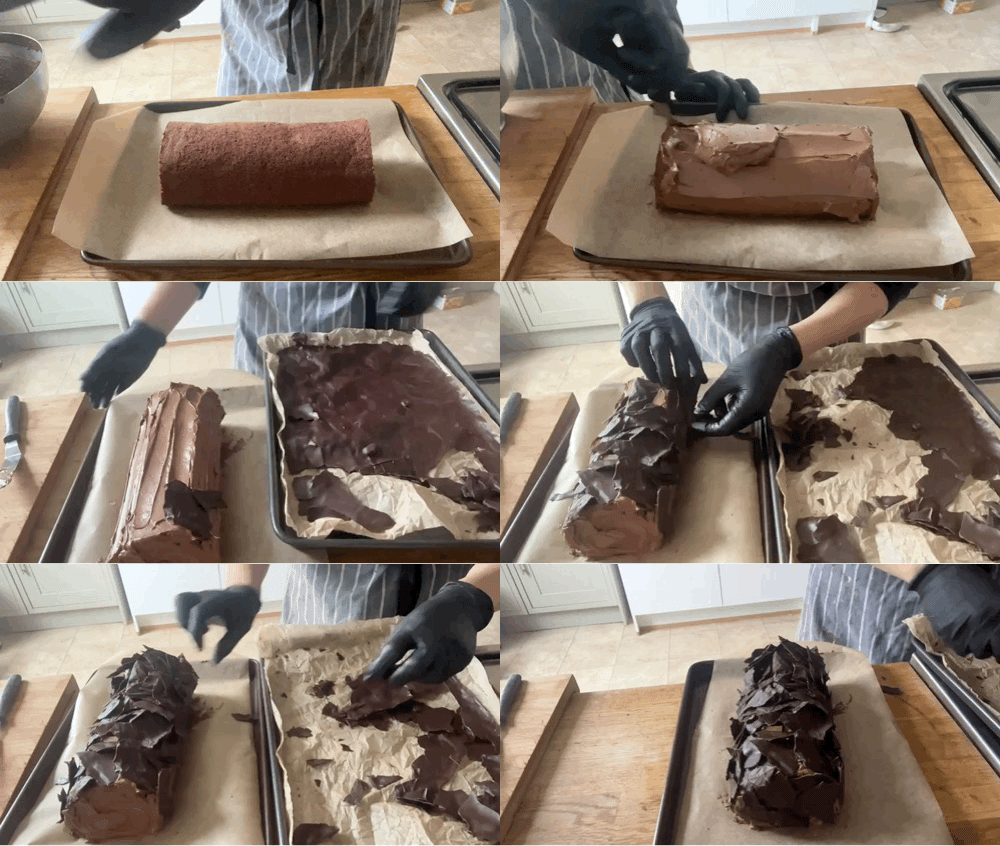
It makes a dense, spreadable mixture which is perfect for coating the outside - for the middle, I combine it with more whipped cream for something really airy and light. To finish the cake, you have a few options. I personally just love a simple, lush coating of the whipped ganache with a few artful strokes of a mini offset spatula, really allowing the texture of the cream to shine. But you could also make chocolate bark:
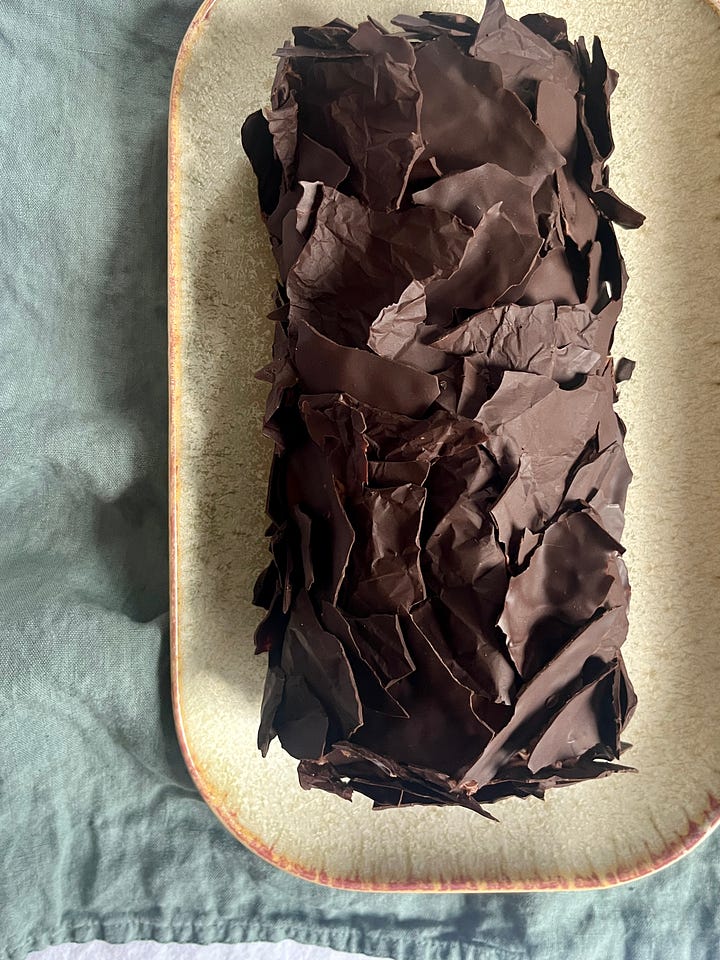
By spreading tempered chocolate thinly on scrunched-up sheets of parchment, you get a gorgeous natural-looking textured chocolate to break and decorate your cake with. It is hard/impossible to cut, but this is pretty extraordinary if you’re going for looks.There are plenty of places online where you can learn to make lovely meringue mushrooms - a quick Google will lead you to all the info.
The deal with sheet pan sizes
I’m shocked at the range of sheet pan and baking tray sizes out there. I know I’m so lucky to have readers all over the world, so over on KP+, I’ve adapted this recipe to various baking tray sizes. Click here to read it.
Recipe: Double chocolate Bûche de Noël
Equipment: 1 x 10 x 15inch baking tray / Jelly Roll pan
Serves 8-10
Cake Ingredients
4 eggs, separated
80g Vegetable oil
80g Whole milk
25g Cocoa powder (I use Valrhona)
65g Plain flour
130g Caster sugar
¼ tsp flaky salt
Whipped Chocolate Custard Ganache
Please note that I am working with Double cream which is 45-50% fat. If you have less fat cream, adjust the ratio of milk to cream to be more cream. :)
250g Double cream
120g Whole Milk
45g Egg Yolks
30g Caster Sugar
150g Dark Chocolate, chopped finely.
¼ tsp flaky salt
Airy filling for middle
150g chocolate custard from above
200g Double cream
Optional: Chocolate bark
200g dark chocolate
Method
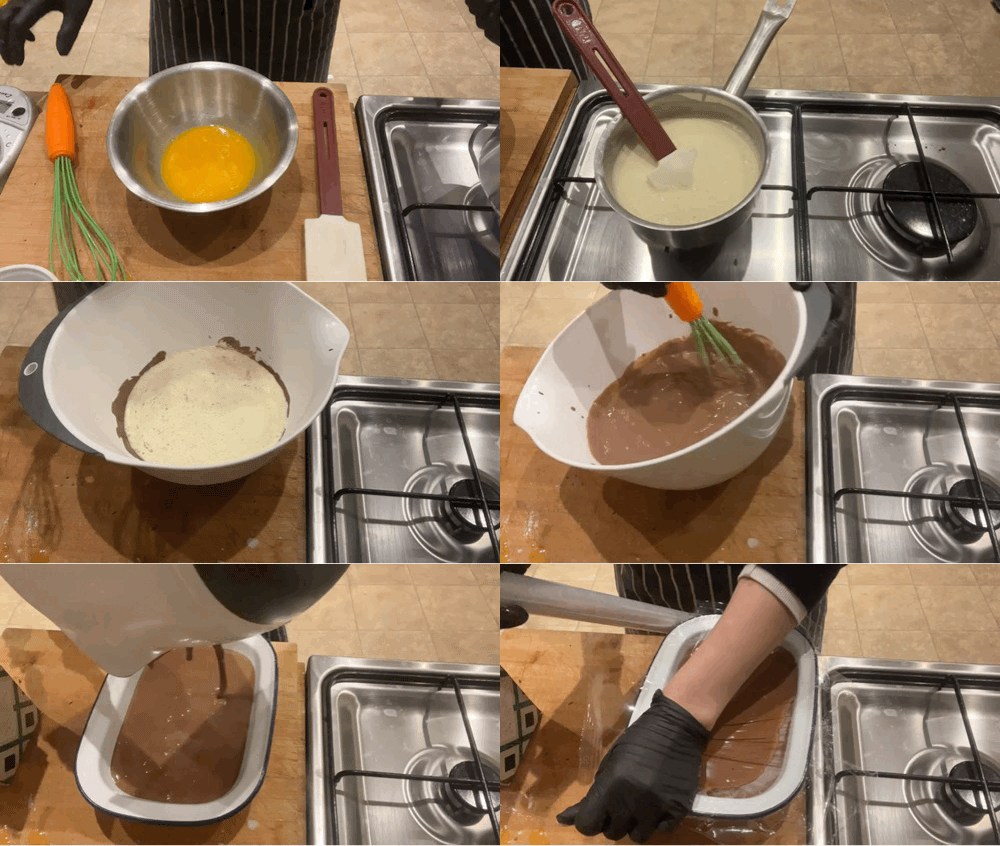
For the Whipped Chocolate Custard, start by making a custard: Heat the cream and milk in a small saucepan on medium heat until simmering. Whisk the egg yolks and sugar in a small bowl until combined. Pour a little of the hot cream onto the yolks/sugar, whisking well to combine and temper the mixture. Pour back into the saucepan and turn the heat to low. Stir or whisk constantly until the mixture thickens enough to coat the back of a spoon or reaches 82c.
Pass the custard through a fine sieve onto the finely chopped chocolate, along with the salt. Leave for 1 minute, then whisk slowly until a thick chocolate custard ganache forms. Leave it to cool completely, then transfer it to the fridge until firm, at least 2 hours.
For the Chocolate bark, temper the chocolate according to these instructions. Scrunch up a piece of parchment paper, then lay back down on a baking tray. Smooth the tempered chocolate over the paper thinly. Leave to set completely, around 1 hour.
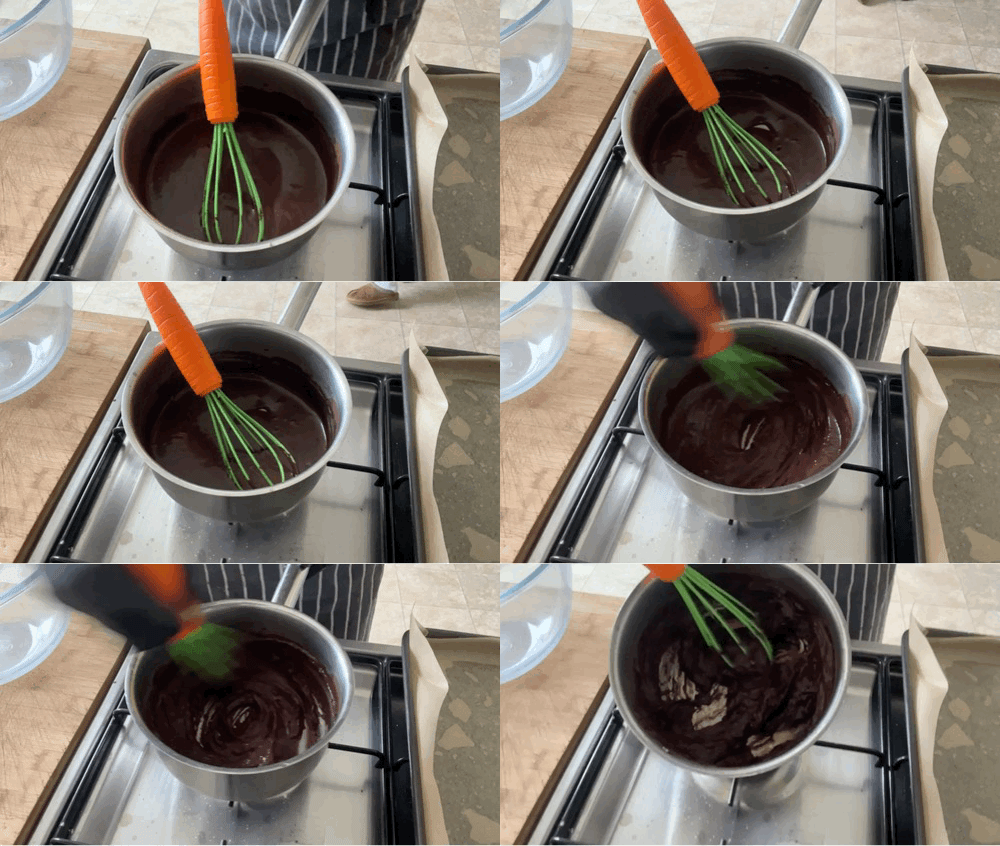
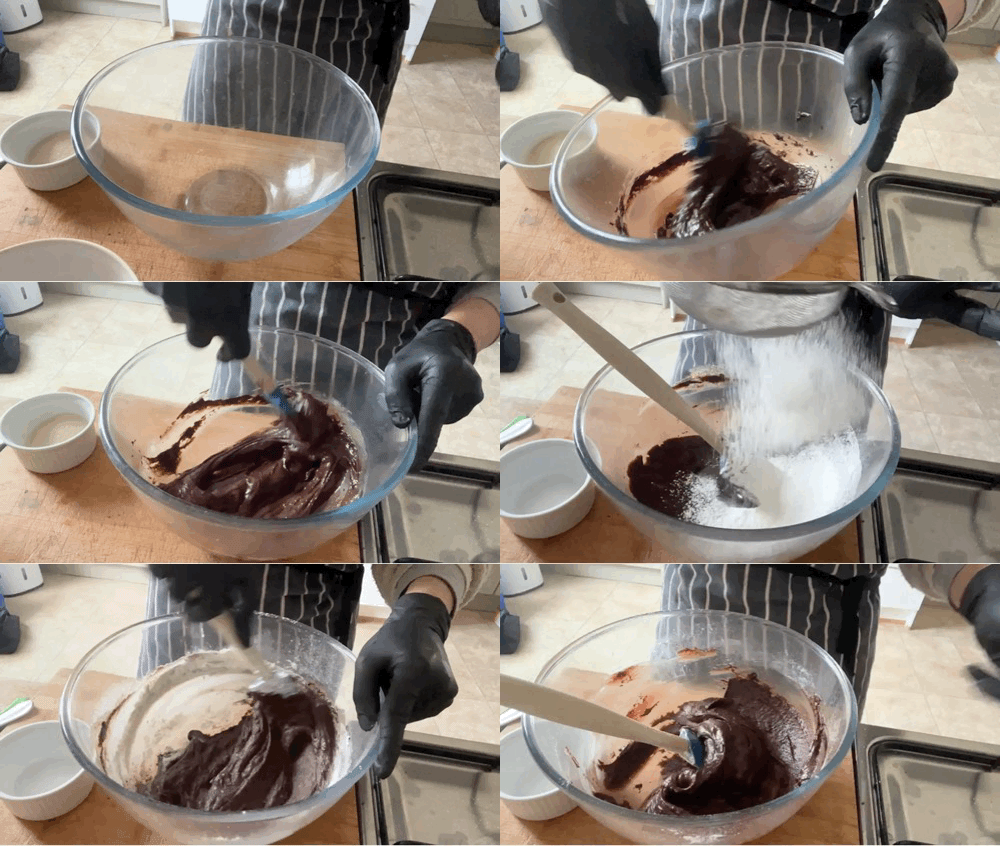
For the Cake, preheat oven to 140c fan. Whisk together vegetable oil, milk, cocoa powder, and 15g of plain flour in a small saucepan. Heat on a low heat, whisking well, until the mixture darkens and thickens. If you get it too hot, the oil will split out. Don’t worry, it will come back together. It will look like thick choux pastry. Remove from the heat, scrape into a bowl, and leave to cool for 1-2 minutes.
Add the egg yolks to your cooked cocoa dough and mix until well combined and the mixture is glossy and smooth. Next, add 20g of caster sugar and mix well - it will be even more glossy. Finally, sift in the rest of your flour, add in the salt, and mix well until combined. It will be smooth and thick.
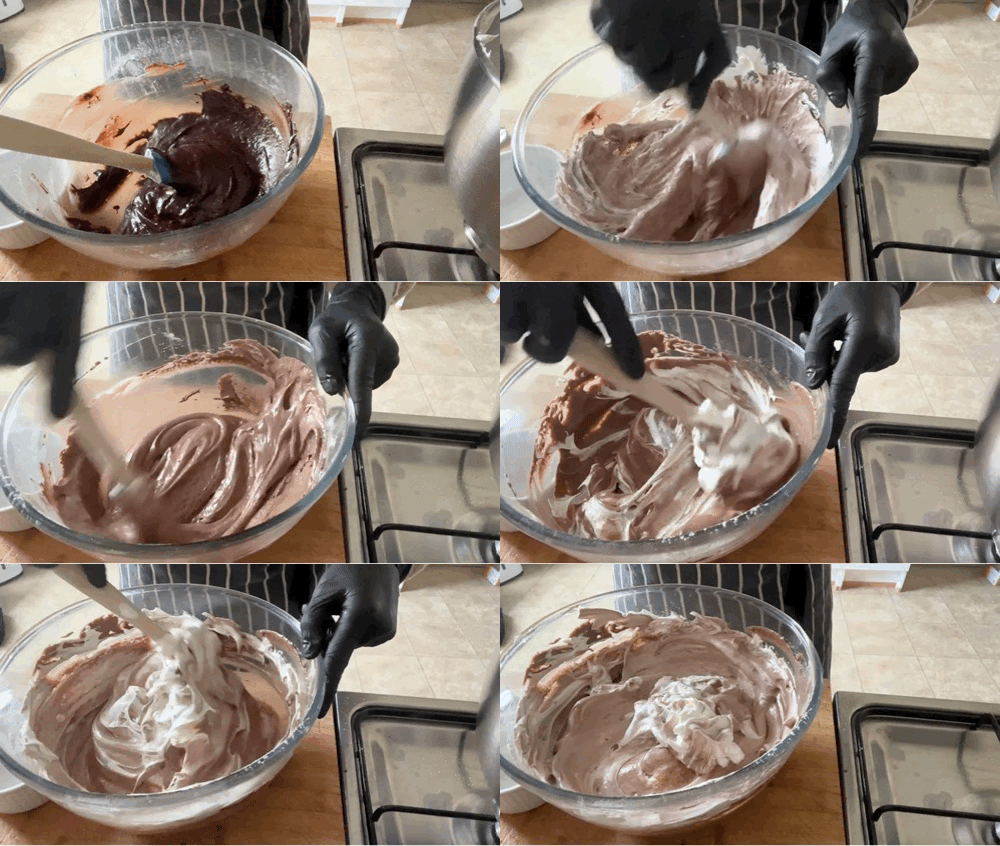
Make the meringue: Add the egg whites into a bowl, then whisk on high speed for 30 seconds. For the next 30 seconds, add the remaining sugar bit by bit. Turn the mixer to medium and whisk for 6-8 minutes until a glossy, dense meringue forms. It should be shiny and thick but not too stiff - when the beaters are lifted, it should gently flop onto itself. All our mixers are different, so keep checking - you want the meringue to be flexible and firm!
In 1-2 goes, add about 75g-100g of the meringue to your firm cocoa dough. Blend with a spatula, taking care to scrape any dry bits from around the edges, until you have an aerated moussey-looking dough. You will have to sacrifice the airiness from the meringue to get the cocoa dough to combine - that’s okay! It feels unnatural, but you’ve got this.
Then, fold in the meringue in three batches. Add the next batch once the meringue is almost completely mixed in. The final batter should be very airy, like a thick mousse, Very puffy and satisfying!
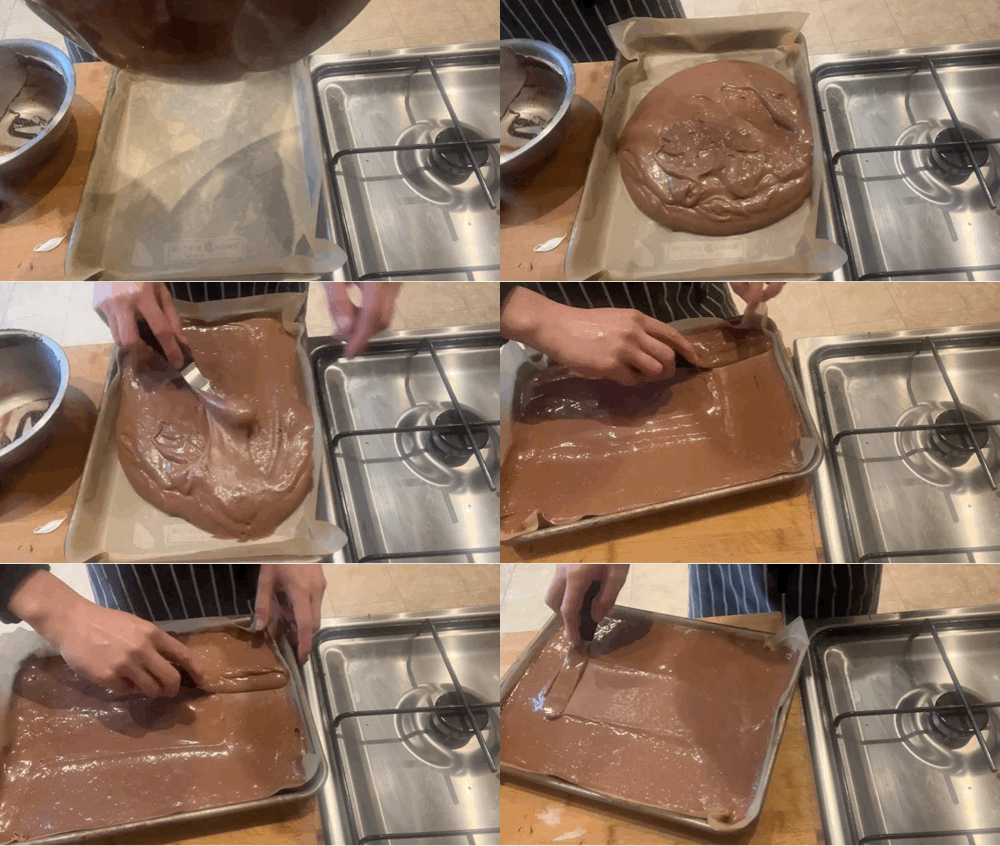
Pour into the lined baking tray and smooth. It will be VERY satisfying and airy. Bake for around 25-28 minutes until risen and dry to the touch - it will feel springy and aerated and moussey.
Remove from the oven and remove from the baking tray onto a cooling rack. Leave for 5 minutes, then place a piece of baking paper on top. Flip it over and remove the paper from the base. Place another piece of paper on top.
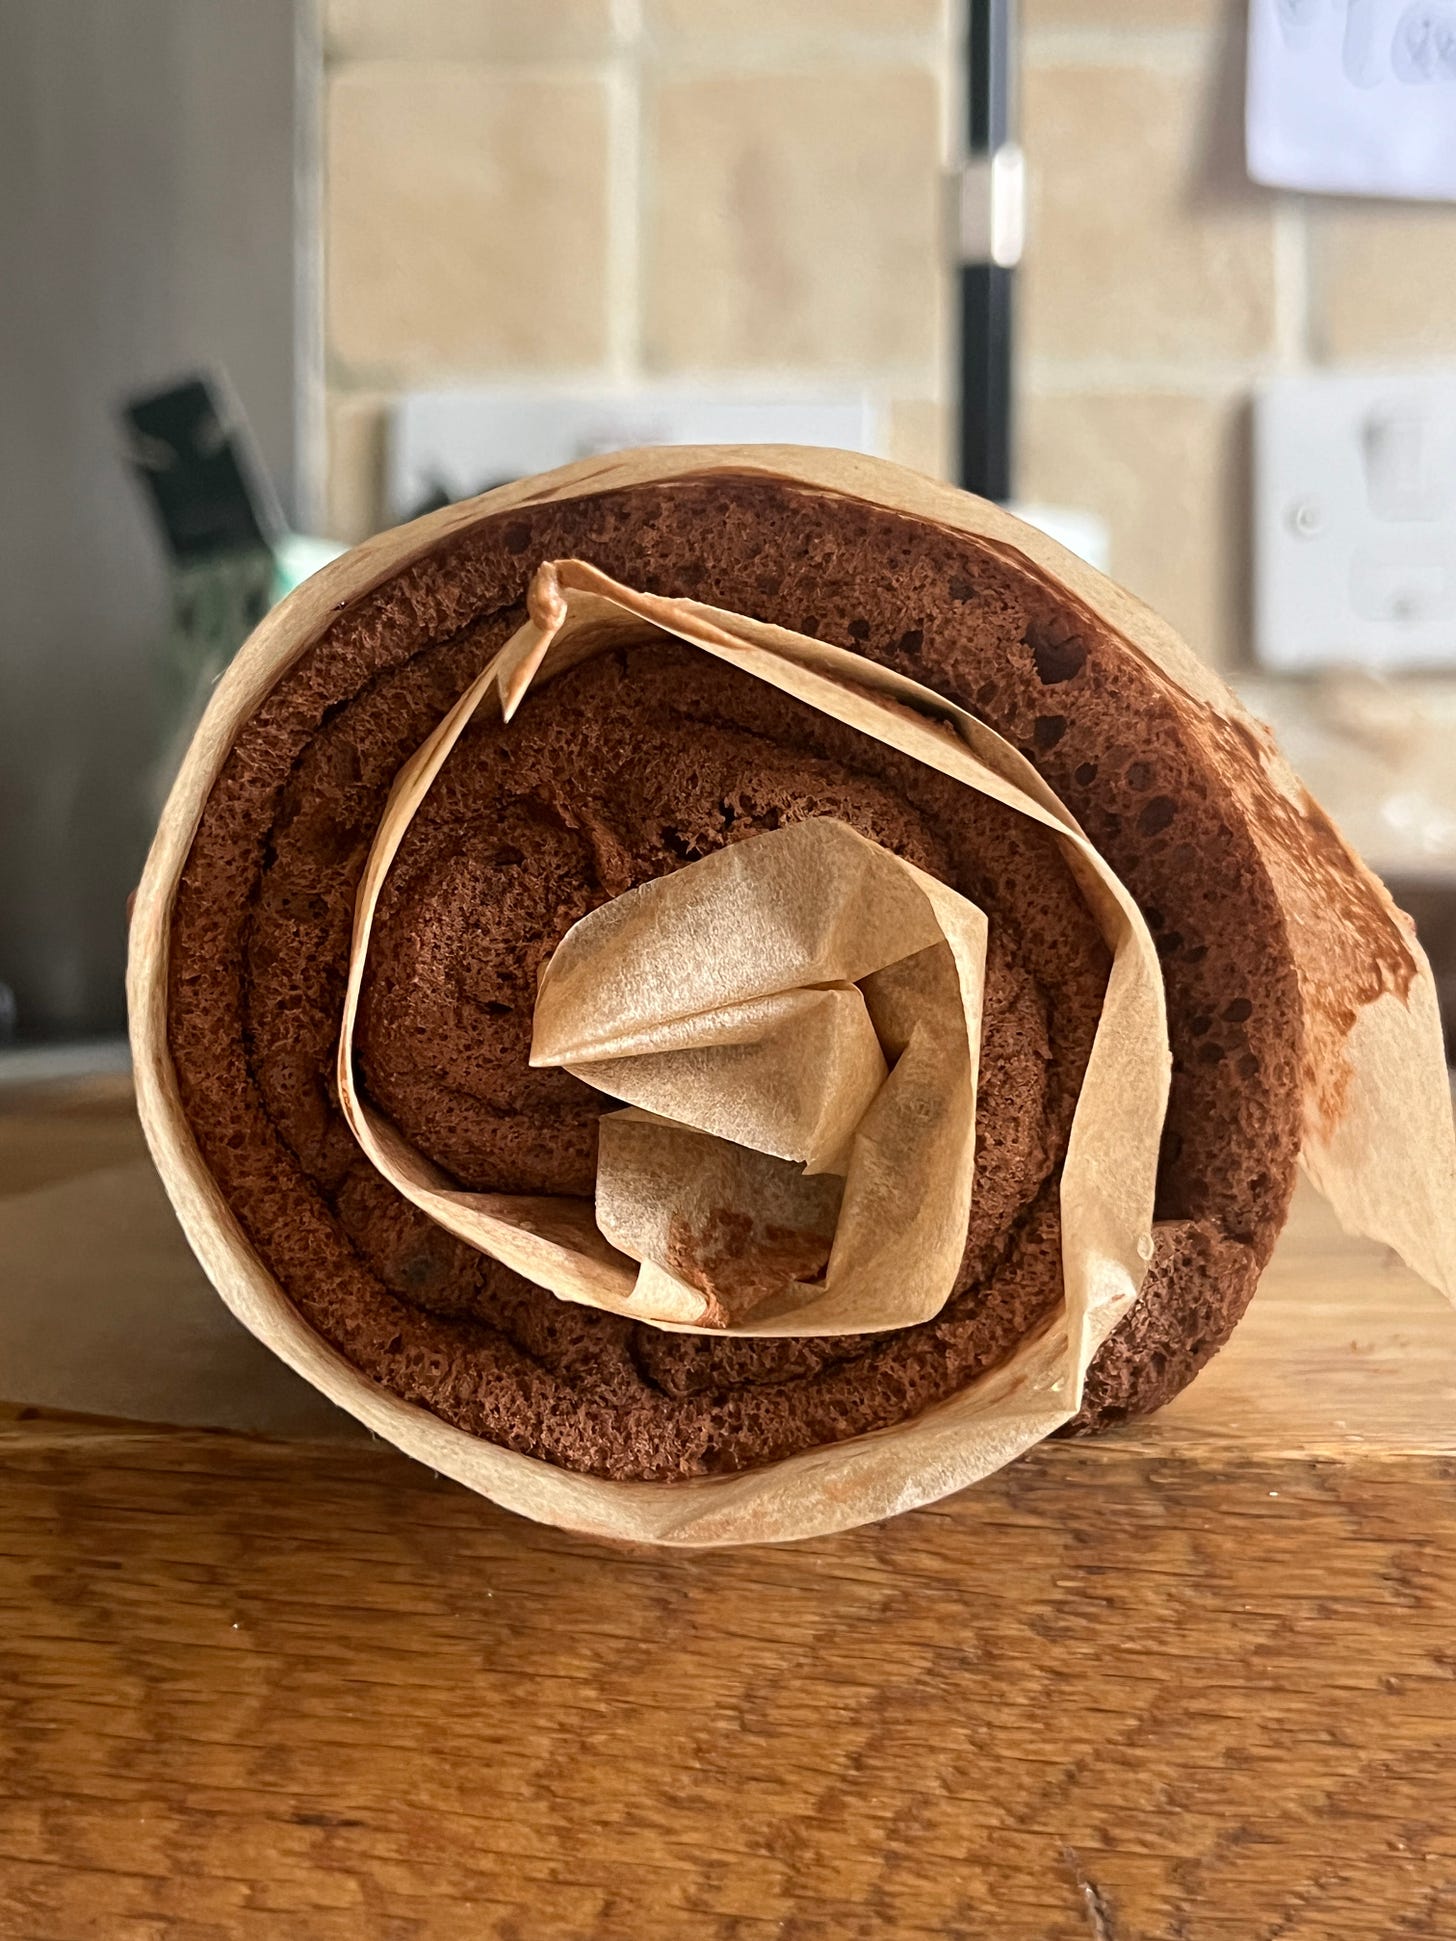
Flip the cake back over (so it's the same way it came out of the oven!), then roll it up gently. This isn’t a completely essential step, as the cake should remain bendy, but it is a good insurance policy. Leave to cool for 45 minutes - 1hour.
For the filling, whip 150g of the firm chocolate custard until smooth and lightened in colour. Whip the double cream to medium peaks, then fold the two together. If you are having trouble combining, try heating the mixture very gently (a few seconds over a bain-marie), as this should help the two combine smoothly.
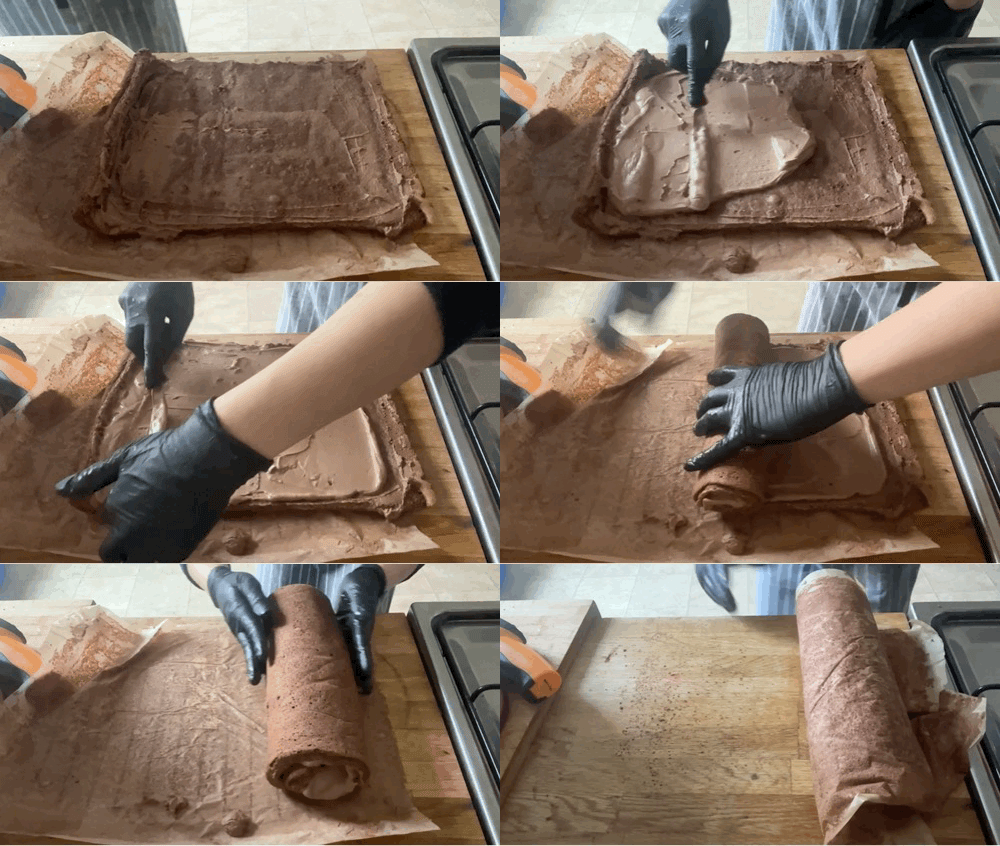
Unroll the cooled cake, then spread the cream on the cake, building up a hump on the right-hand side
Carefully roll up the cake, using the paper to help you. Once it's rolled up, secure the paper (folding the ends helps, or you can place it in a tray and put something next to it, like a baking tin, to hold it in place) and chill for at least 2 hours.
Whip the remaining firm chocolate custard until lightened and use it to decorate the roll cake - start by coating either end to prevent the filling from splurging. If desired, you can cut the top third of the cake at an angle to create the ‘y’ shaped log. See information here.
If desired, decorate with the tempered chocolate bark, breaking it into pieces and placing it all around the cake.
The cake will last in the fridge for 5 days, well-wrapped. Bring to room temp to enjoy.






It should be fine without the double cream, though I might slightly increase the cream to milk ratio - just 40g or so, so reduce milk to 100 and increase whipping cream to 280! 🥰
Brilliant! I’m not in the UK and the highest fat content of our cream is 33%, any thoughts on how to adapt the ganache without double cream?