
KP+: Strawberry Patch Cream Cake
The Ultimate Summer Celebration Cake

Hello and welcome to this week’s edition of KP+, which is coming a day early — I’ve been meaning to send out the recipe for this strawberry cake, complete with GIFs and as much detail as possible, all week! So, here it is; I hope you love it as much as I do. The newsletter will resume, as usual, next Sunday. See you then!
When I sit down to write this recipe, I do feel a little sheepish at first. You see, the recipe that follows is new… but not exactly original. What follows is a patchwork quilt, a combination of recipes that I’ve recently published, reorganised into a new, delicious mosaic.
But then I realised that kinda IS what baking and recipe developing is. In the same way that you might transform a bag of LEGO bricks into towers, houses and all manner of things, recipes (and good base recipes) are the same. Once you get a recipe you love, you can build on it, mix and match it with confidence to create new, delicious things. On the way, you could adjust the flavours, turn up the textures that you love, and avoid the ones that you don’t.
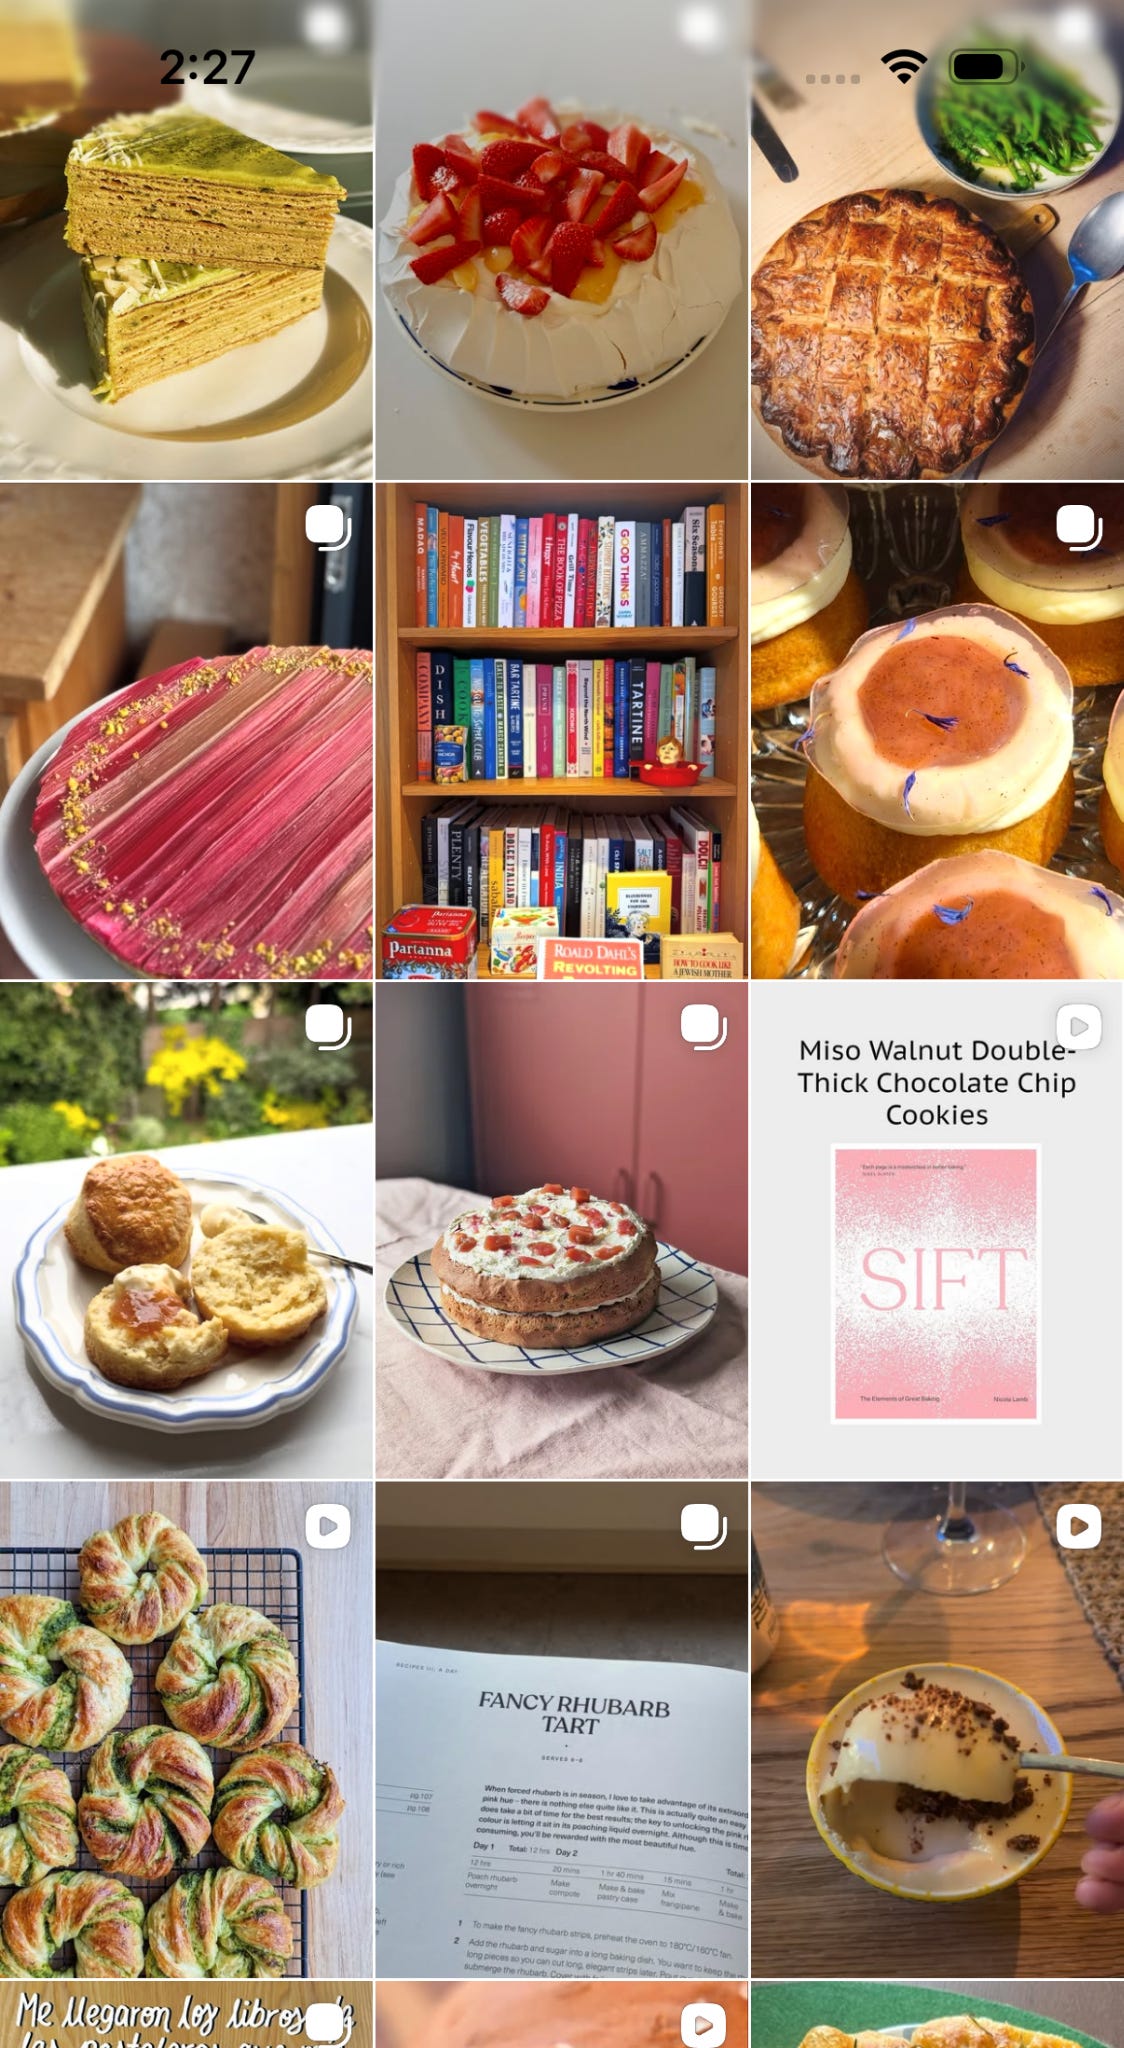
One of my favourite places on the internet is my tagged photos on Instagram. Whilst I recognise quite a few of the recipes I’ve been tagged in (you never forget your children, or indeed my fellow KP columnists’ children, as it turns out, even 200 editions into this newsletter and one book down), there are also dishes that I can’t immediately place. I’ll click into these photos, and the caption often reveals a beautiful mosaic: maybe it’s my sponge or perhaps my buttercream, paired with a topping, a filling or a totally new dessert, sometimes of their own creation and other times from fellow recipe developers and authors. The result is something unique and distinct, and I just love it.
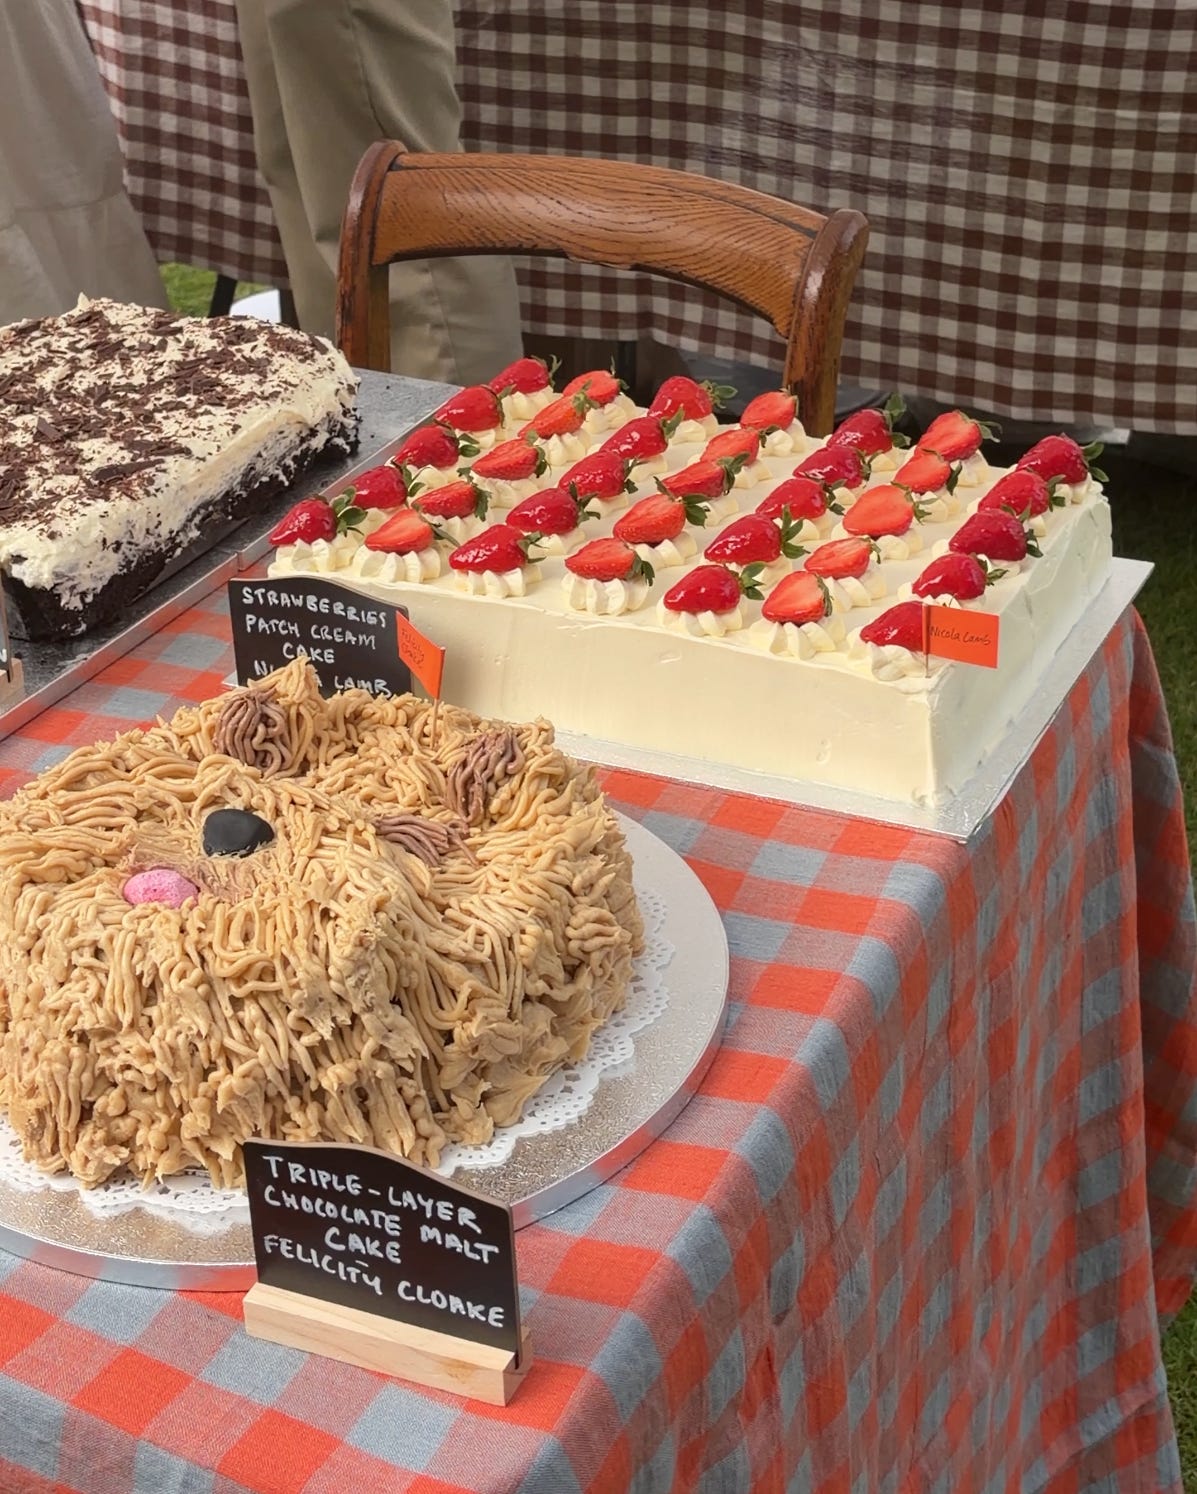
Whenever I write a recipe, of course the intention is for you to make it as-is, but I also hope to arm you with as many ‘bricks’ as possible, a giant pick ‘n’ mix of jams, sponges, creams, crumbs or cookies. So, let’s talk through today’s collage: The Strawberry Patch Cream Cake. I’ve now made this cake THREE times in the last week — once for my sister, the original concept, once to take GIF’s for this newsletter (and share with friends) and also once for the Substack summer party, where it shared a table with Felicity Cloake’s marvellous Wilf cake:
The Sponge
Over the last few years I’ve been perfecting my favourite base sponge, a sponge that has the featheriness of a chiffon, but the reliability of a genoise, or even a sponge cake. I KIND OF have time for cakes that you hang upside down, but I can’t lie, for the most part, I don’t really have that sort of patience, willingness or desire. So, enter the fluffy sponge I’ve come to love so much, which has been peppered into the newsletter in various forms.

I’ve tested it in round cake pans, squares, sheets and more. It is just such a team player. To make this cake, you can either make a large size that feeds a crowd, easily 30+ by baking sheets then stacking, or you can make a slightly more demure size (still feeds 12) by baking in an 8x8-inch tin and cutting in half. I’ll share recipes for both sizes, but the directions remain the same.
The Filling
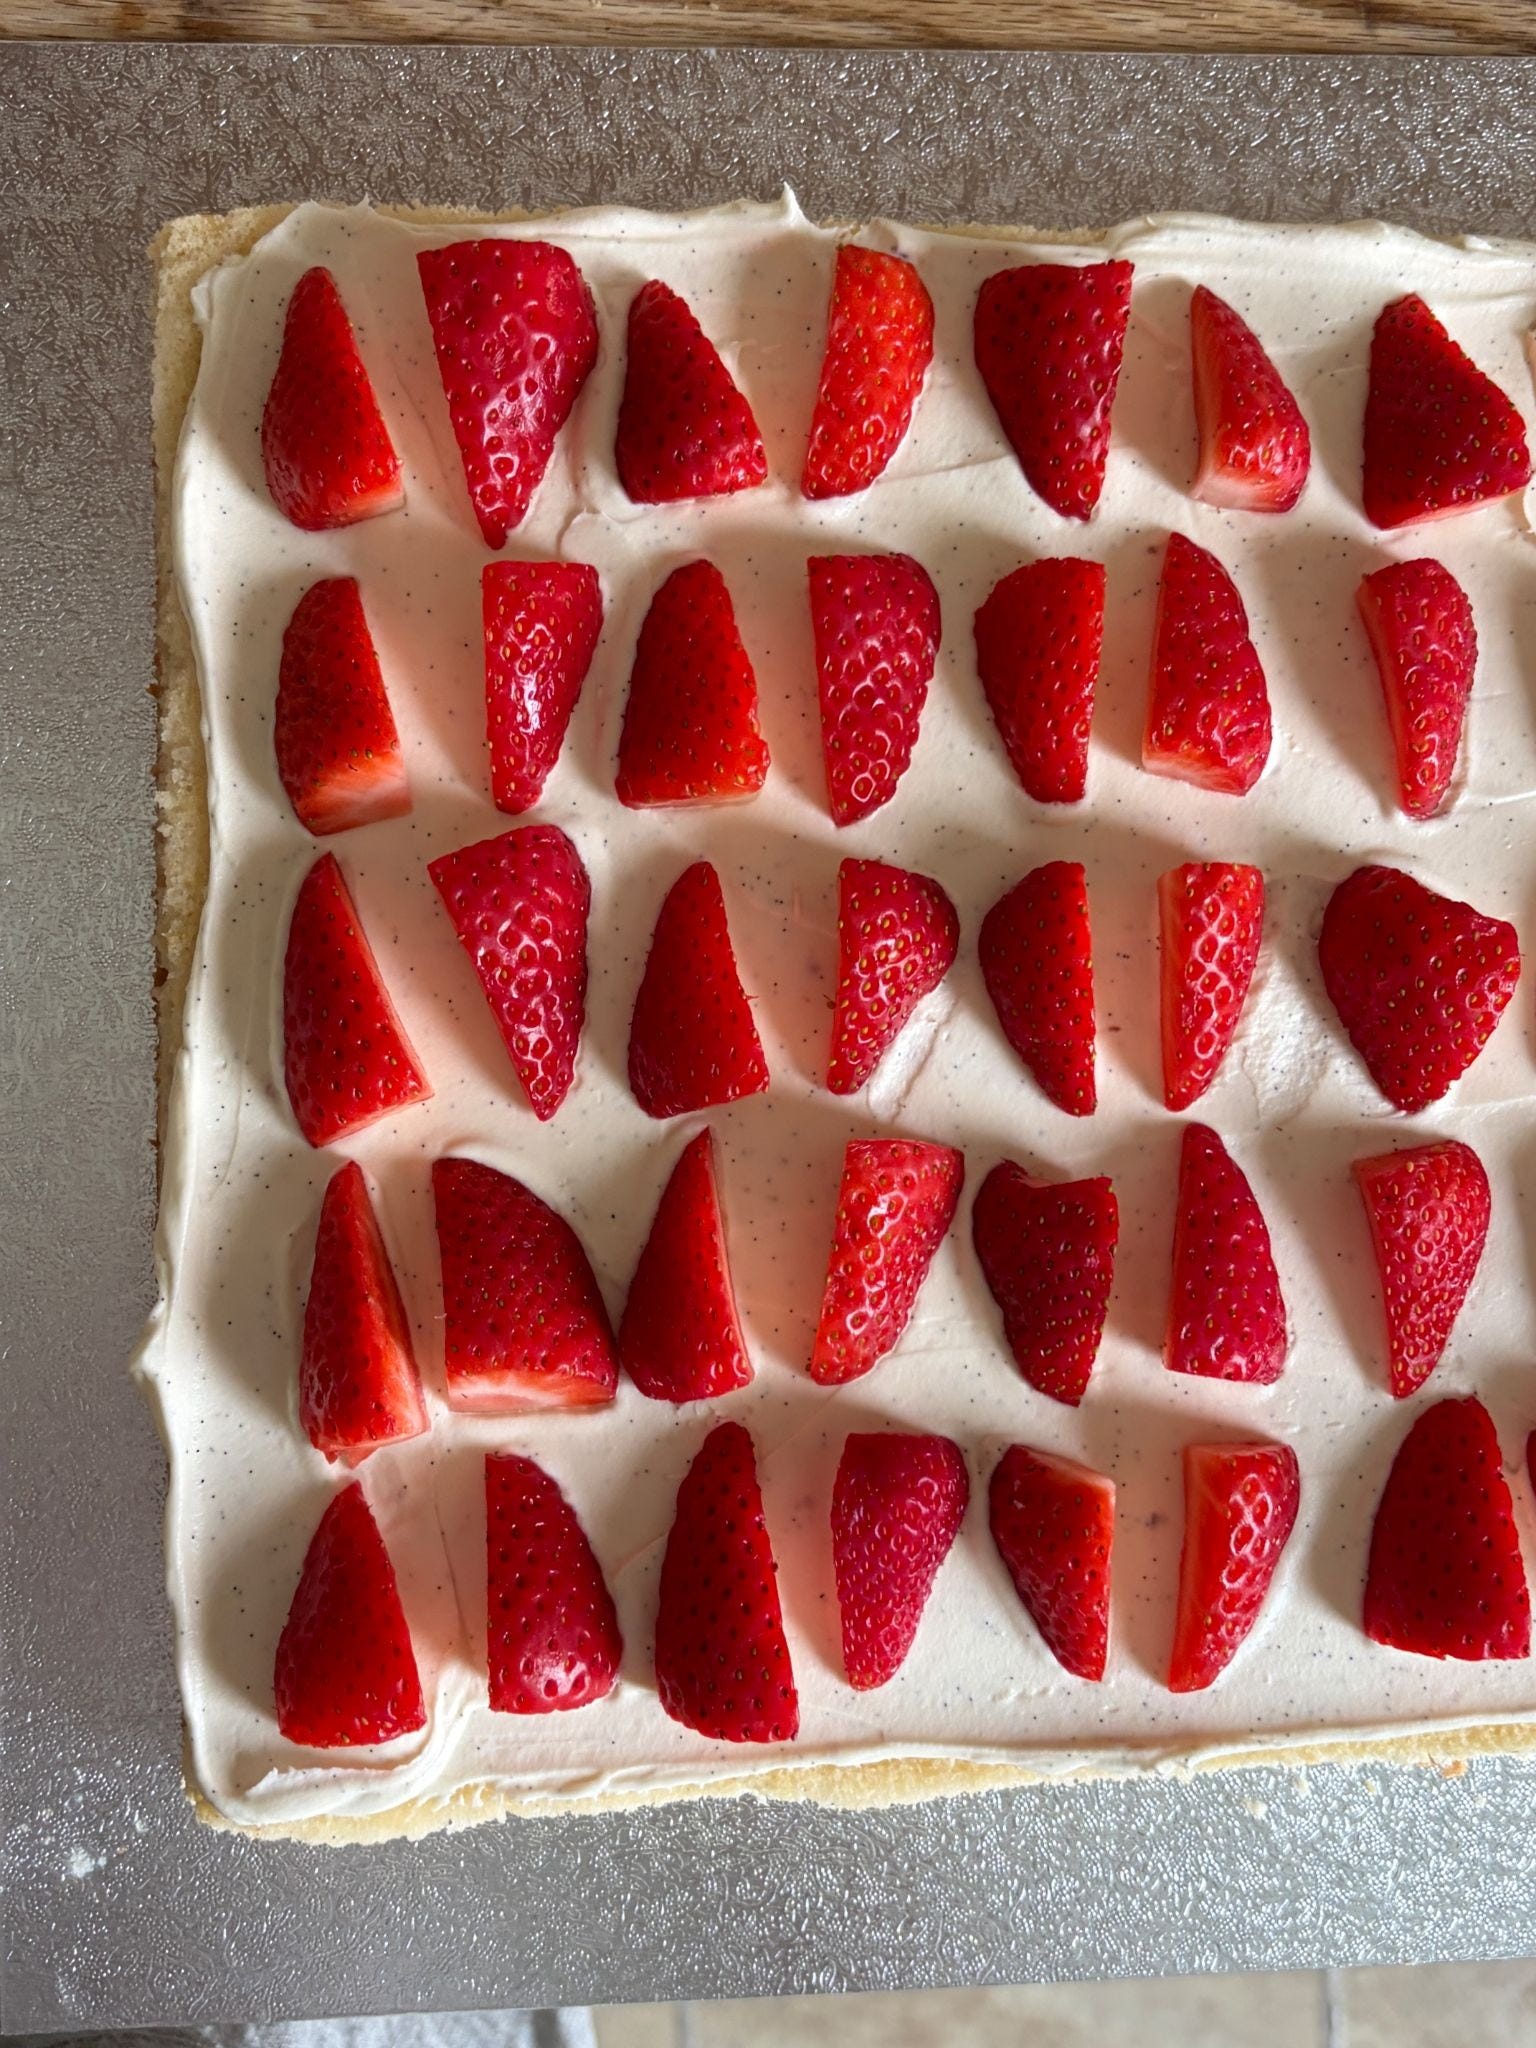
For this cake, I’ve opted for a reliable vanilla whipped ganache, which was my filling of choice for the Cold Elderflower Cream Cake. This gives you a bit more stability for and, as much as I love whipped cream, a little reprieve from the copious quantity on the outside and in the decor. It also nestles round the strawberries marvellously, the other crucial part of the filling. Whilst we have our show strawberries on top, I’ve kept the middle really simple. Depending on the size of the fruit, I either halve or quarter them and, after spreading a thin layer of the whipped ganache, place them evenly on top, then finish with the remaining ganache.
What about jam?
You could DEFINITELY add jam into the mix, but while the strawberries are at their peak, I preferred the simplicity and freshness of fresh fruit. If I were to add jam, I’d add a thin layer after the syrup and before the cream. Which leads us onto…
The Syrup
I’ve made this recipe three times, and the bit that has changed each time? The syrup! For airy/fluffy-type sponges, they can really benefit from a good soaking in syrup, or at least a longer time to mingle with the surrounding cream (or jam, if using) to stay super soft. Syrup is a good way to add complementary flavours into the mix, too. The first time I made this cake, it was with elderflower cordial; the next, I tried vanilla, and finally I landed on a mix of jasmine and vanilla. You could push the cake in a bright direction with a lemon, or lemon verbena syrup, or lean herbal with a bay or basil syrup, floral with orange blossom or chamomile, or go boozy with a sweet wine or vermouth, or subtle spiciness with cardamom. I’ll share my recipe for the jasmine syrup, but know this is a jumping-off point.
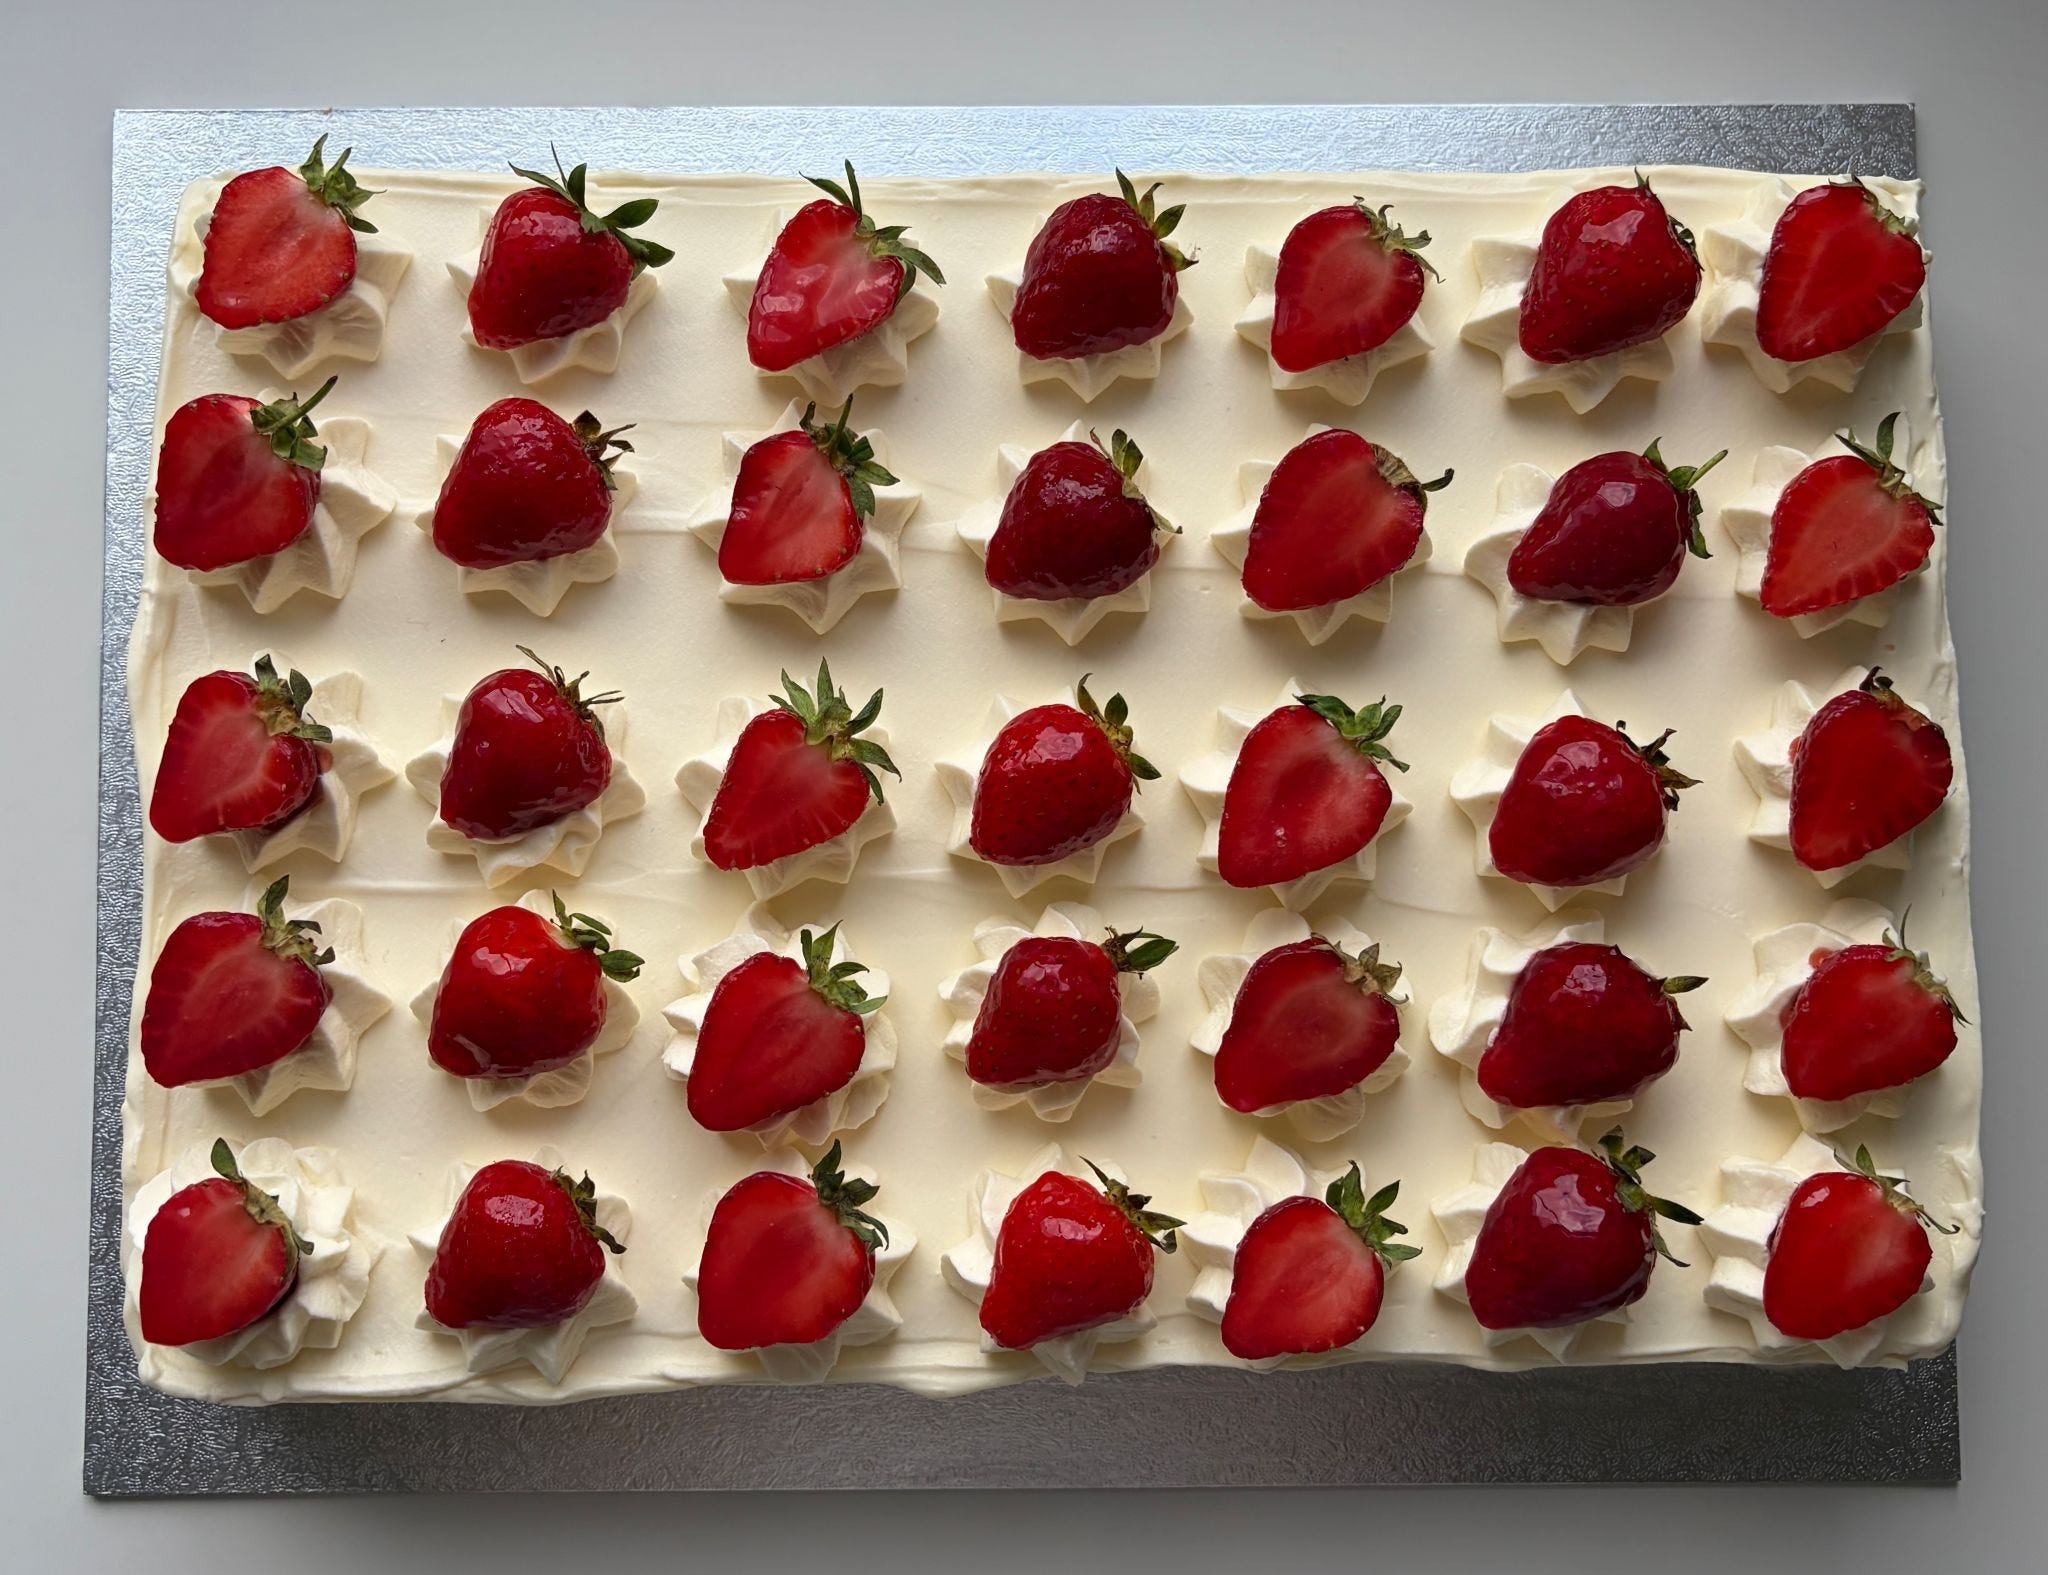
The Decoration
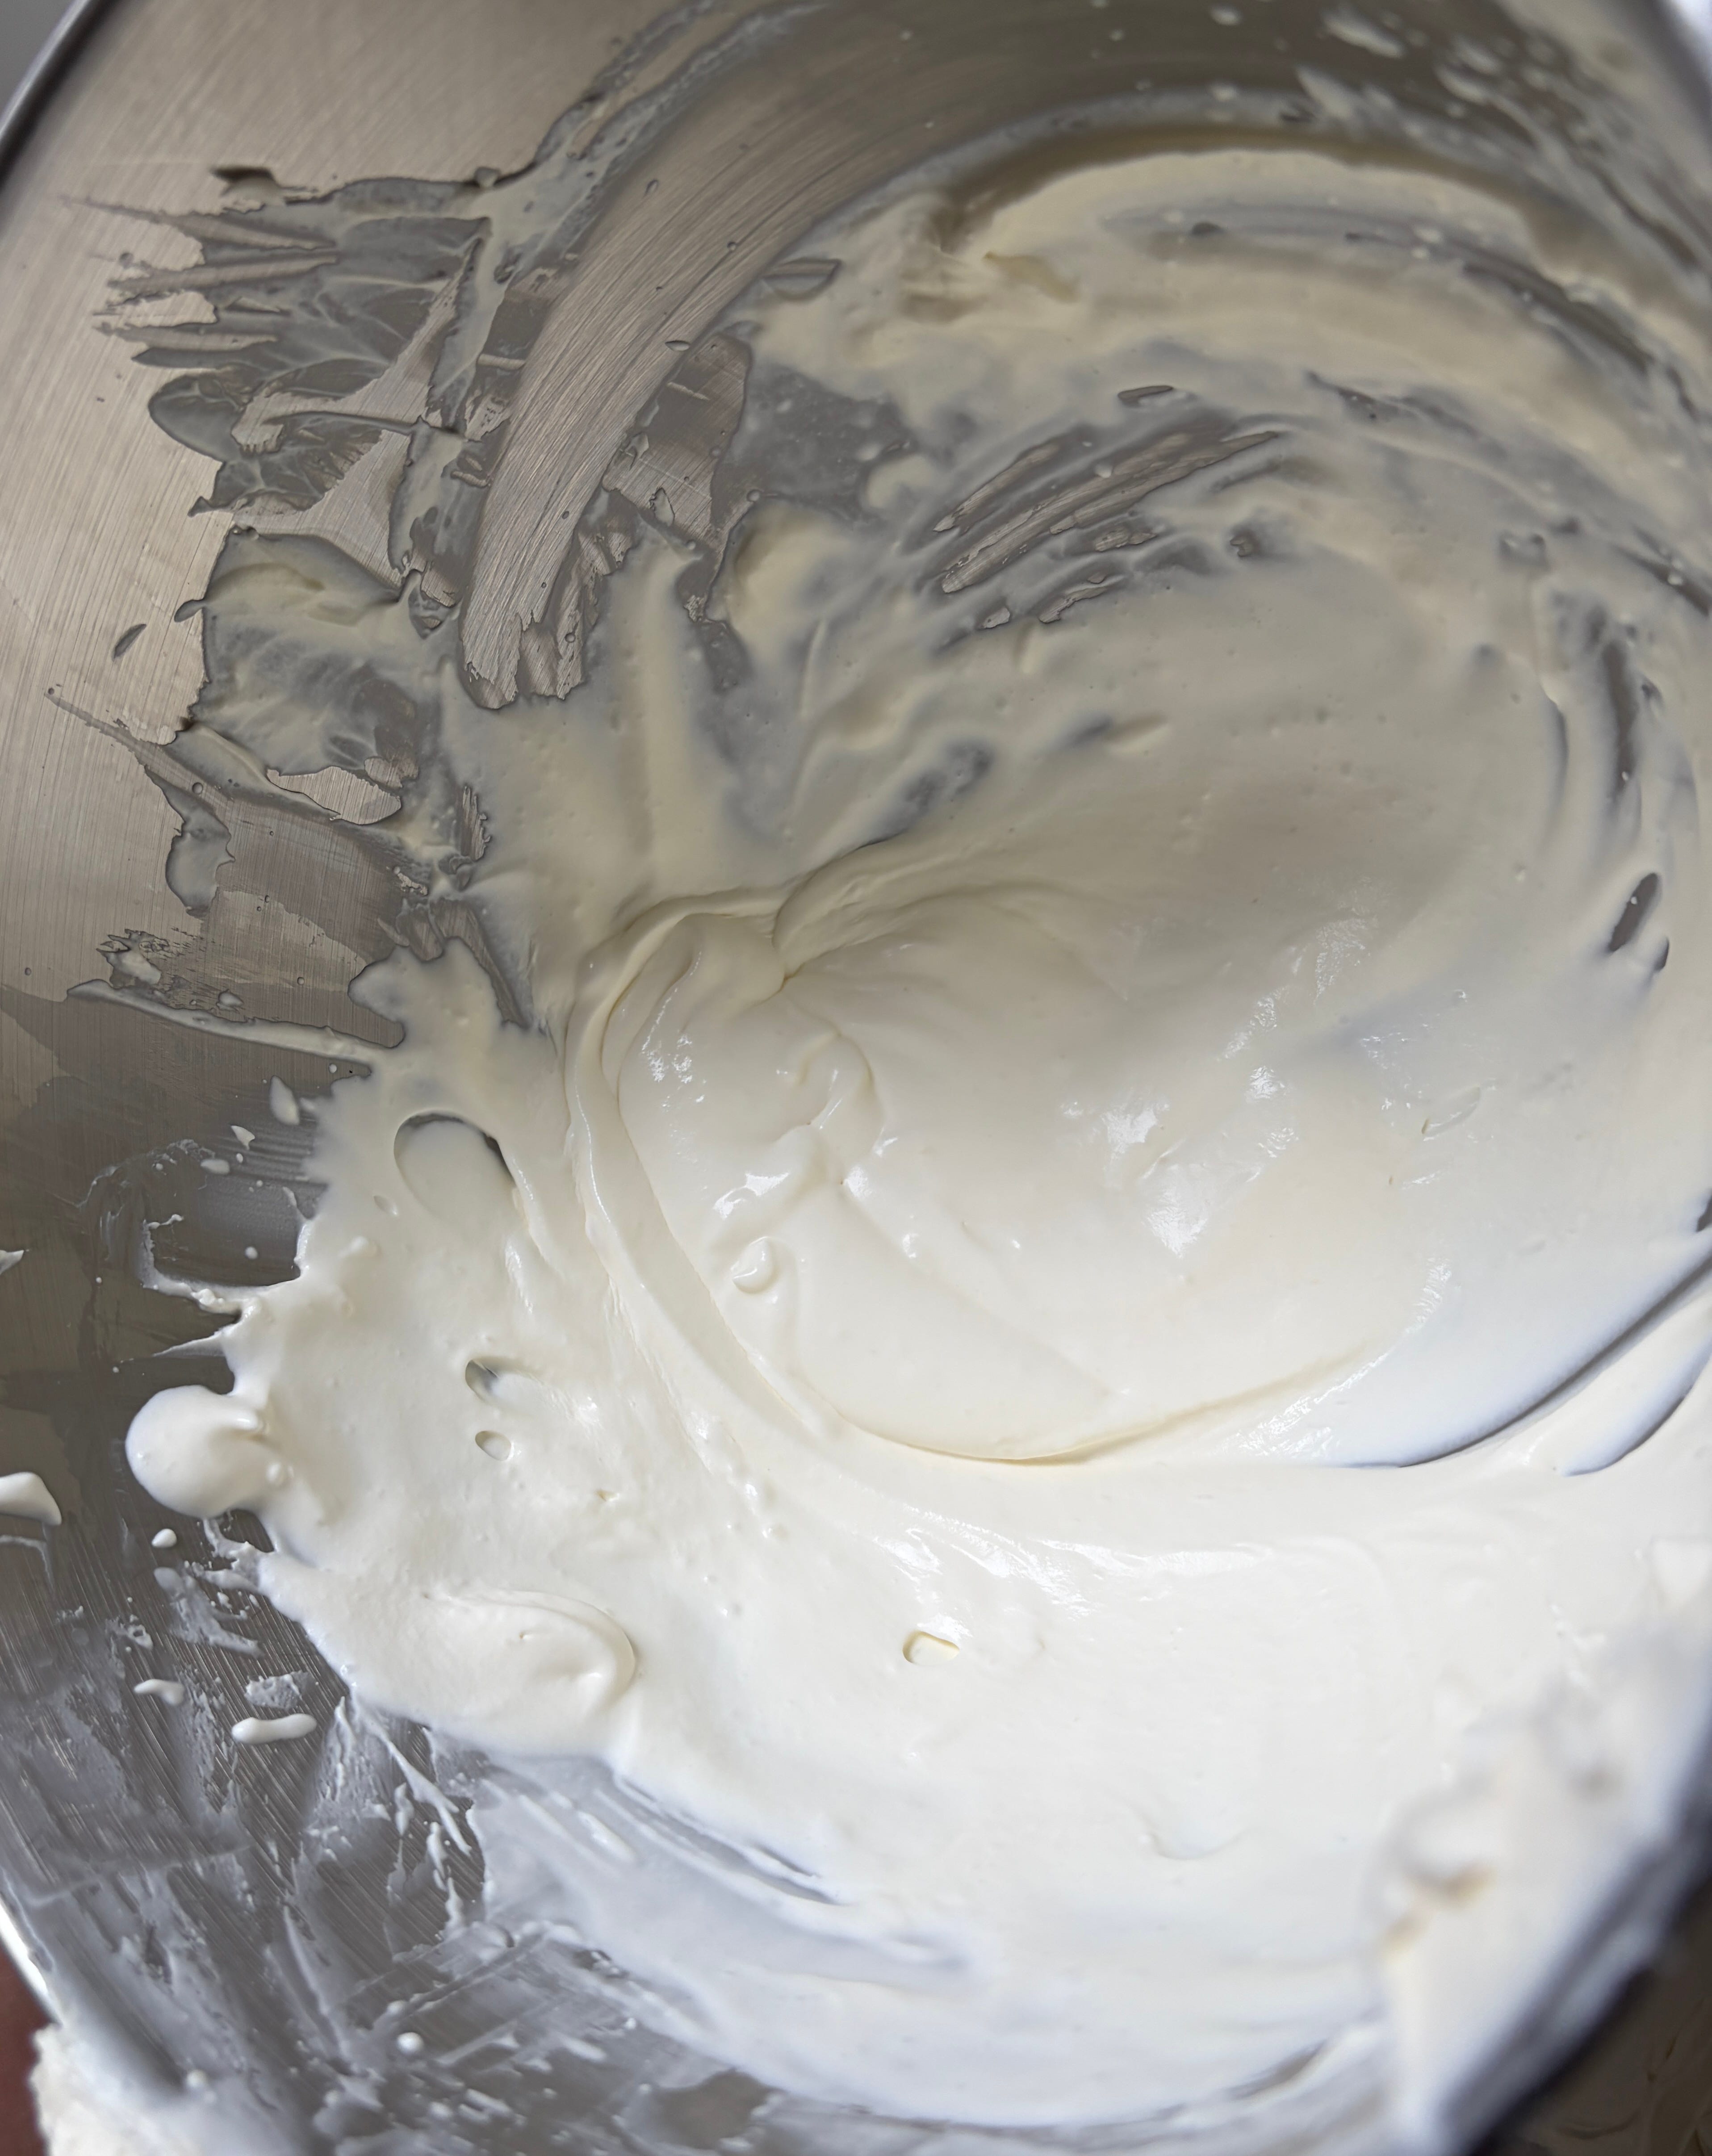
I’m not going to lie. You need a LOT of cream for this cake. More than you think, and for the best results, you have to whip it in several batches. That said, the whipping aligns well with fridge resting times, so it is relatively easy to plan for.
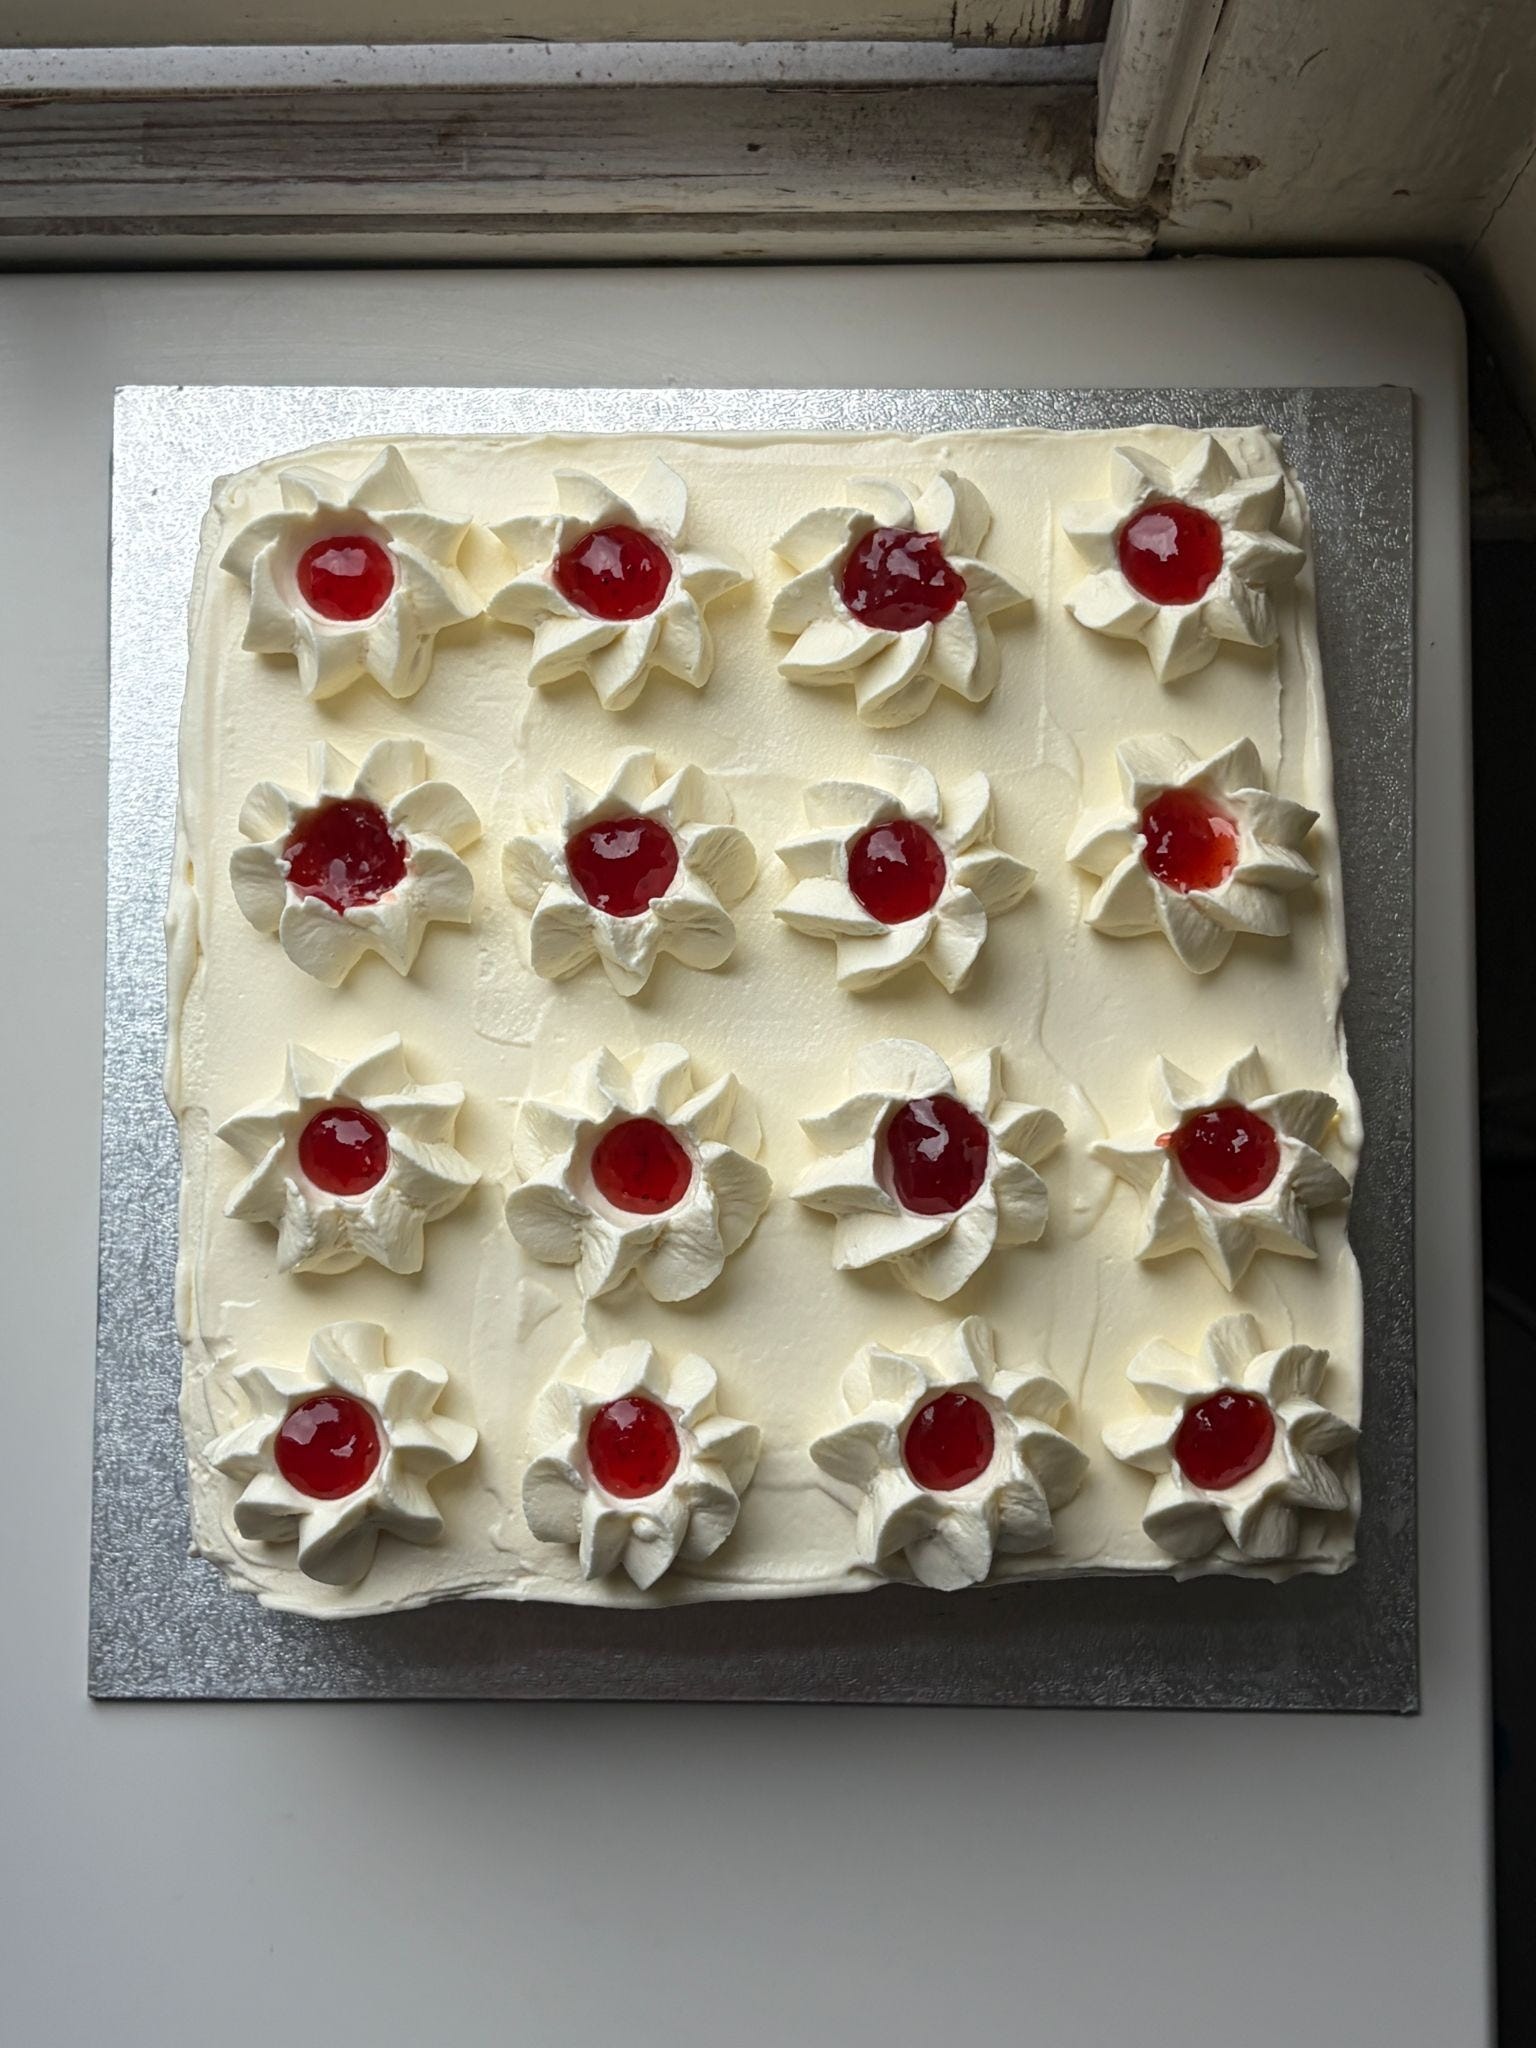
Think of the first layer of cream as more of a crumb coat, and whilst you want it to be smooth, don’t drive yourself mad, as we will go over it again lightly after a rest. I like the flavour and improved stability of lightly sweetened mascarpone whipped cream, but you could go straight-up if you prefer. The key is to work with the cream at soft peaks. It will continue to whip and thicken as you move and spread it. The worst thing that will happen is that it slops off the cake; if it does, you can simply scoop it back into your bowl and whip it a little more. After this first coating, the cake chills and then the final flourish is added: More cream, first spread for that glossy final coating and finally, the cream rosettes.
Inspired by my chocolate hazelnut star biscuits, which comprise a piped rosette of dough which is then indented in the middle and filled with ganache, this cake is topped with cream rosettes that we fill with a little tiny spoon of jam. This jam is optional, but it adds a little wink of cooked strawberry flavour and nostalgic sweetness which could only be a good thing.
Please refer to Brian Levy’s amazing stabilised whipped cream piece for more info on various stabilisation methods, too.
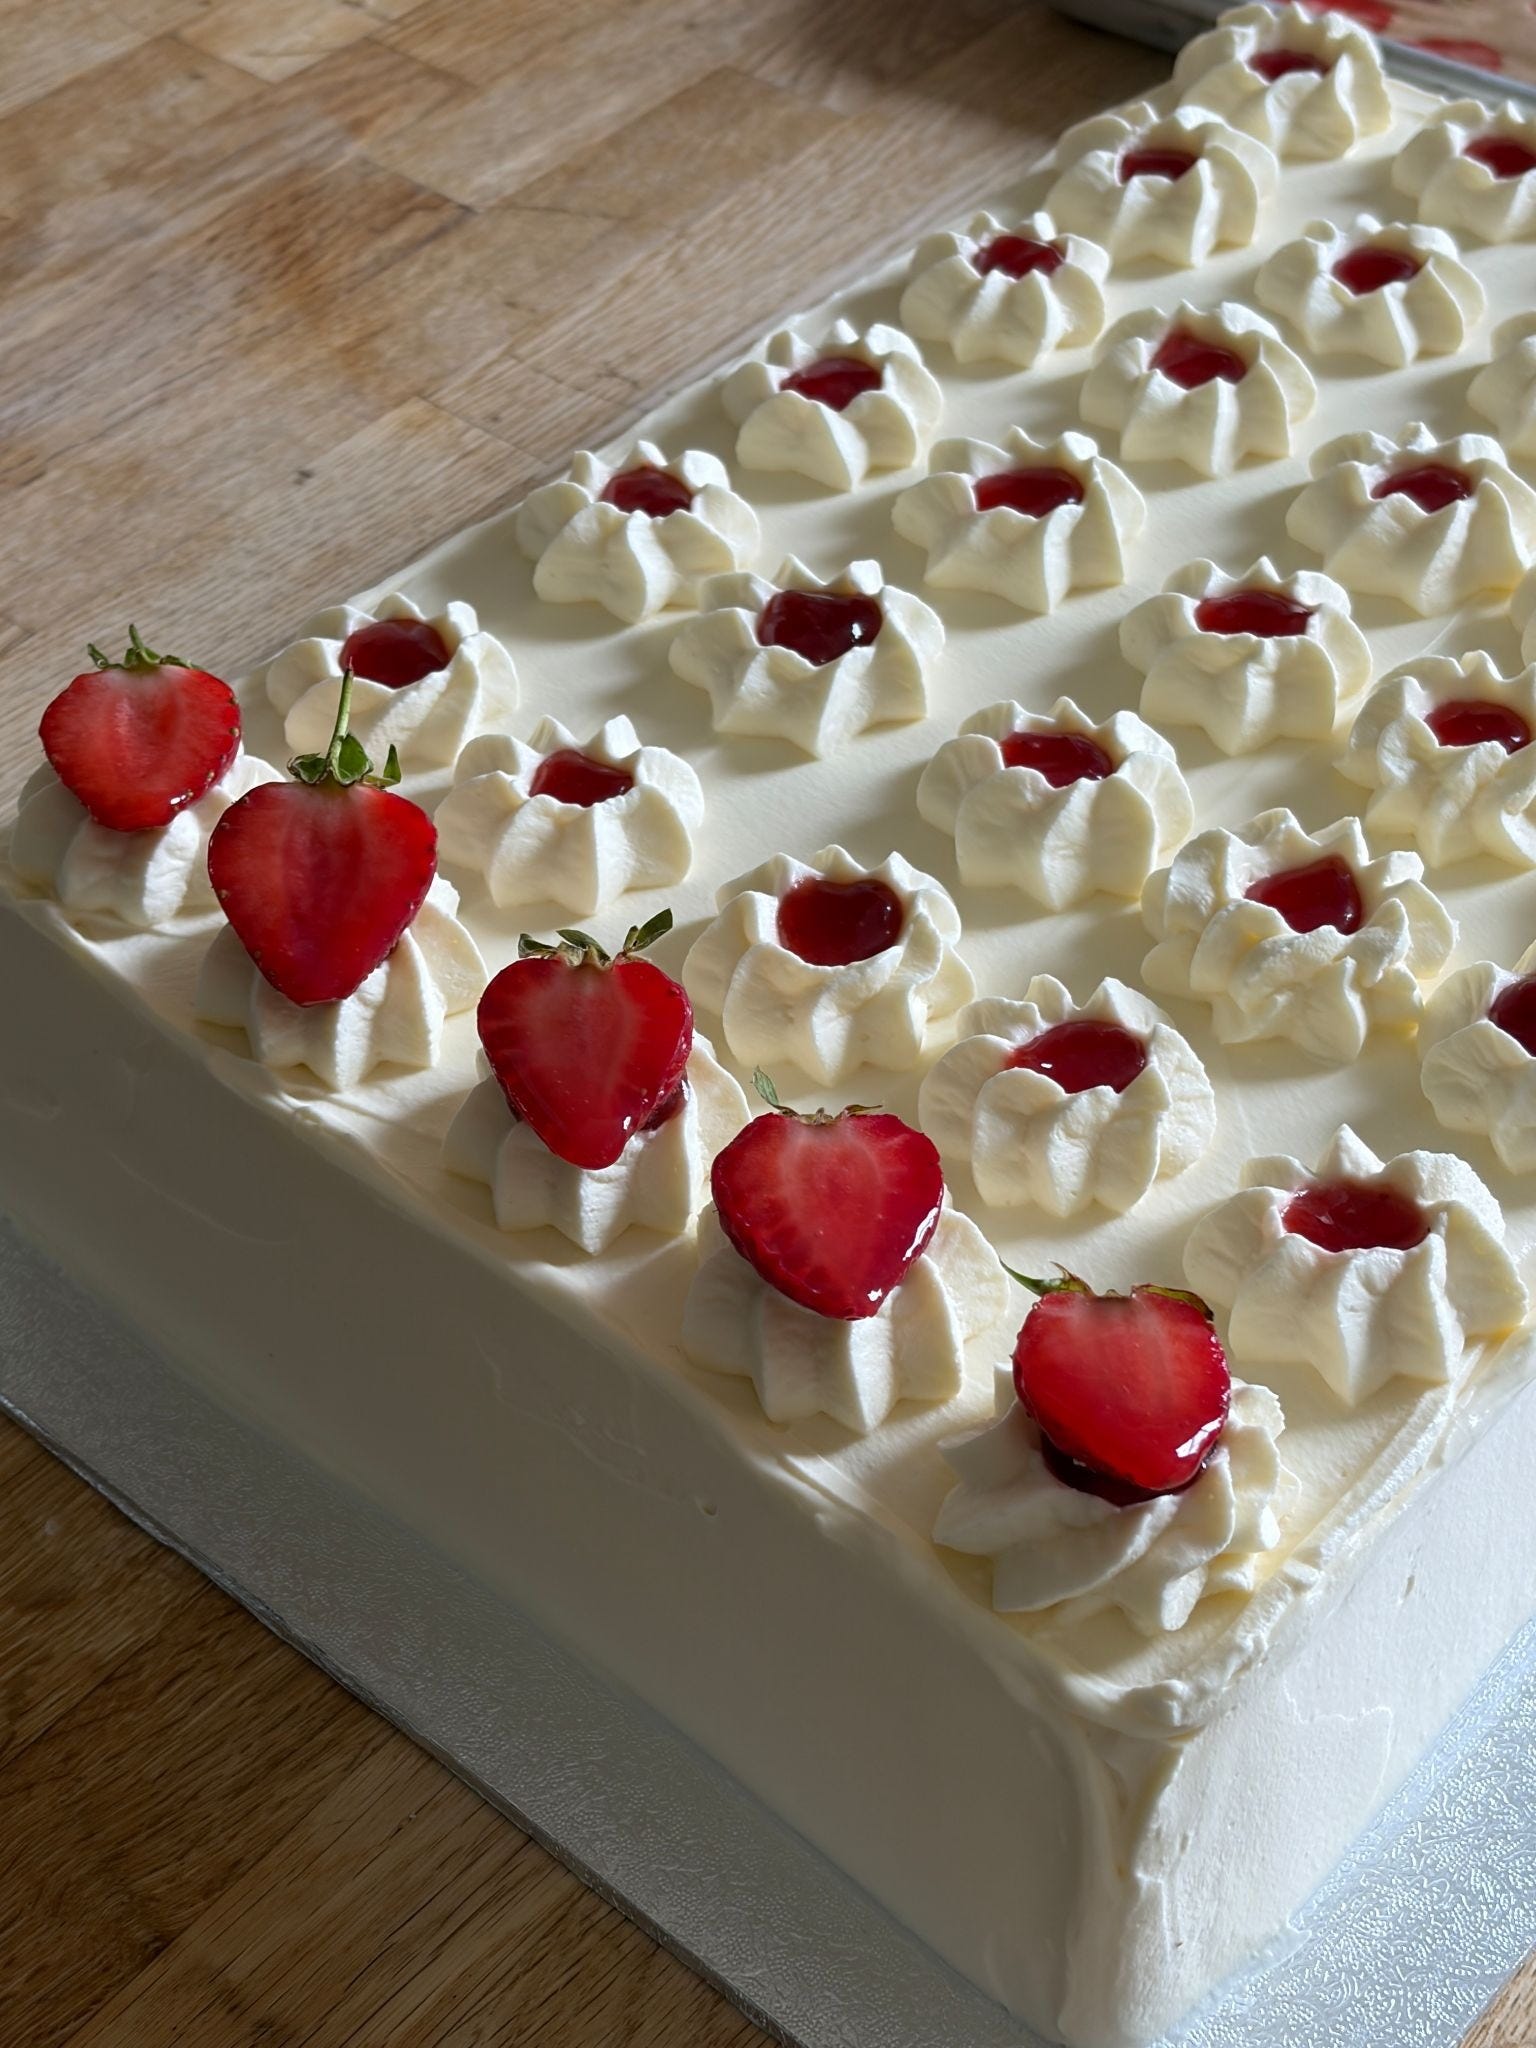
The Fruit
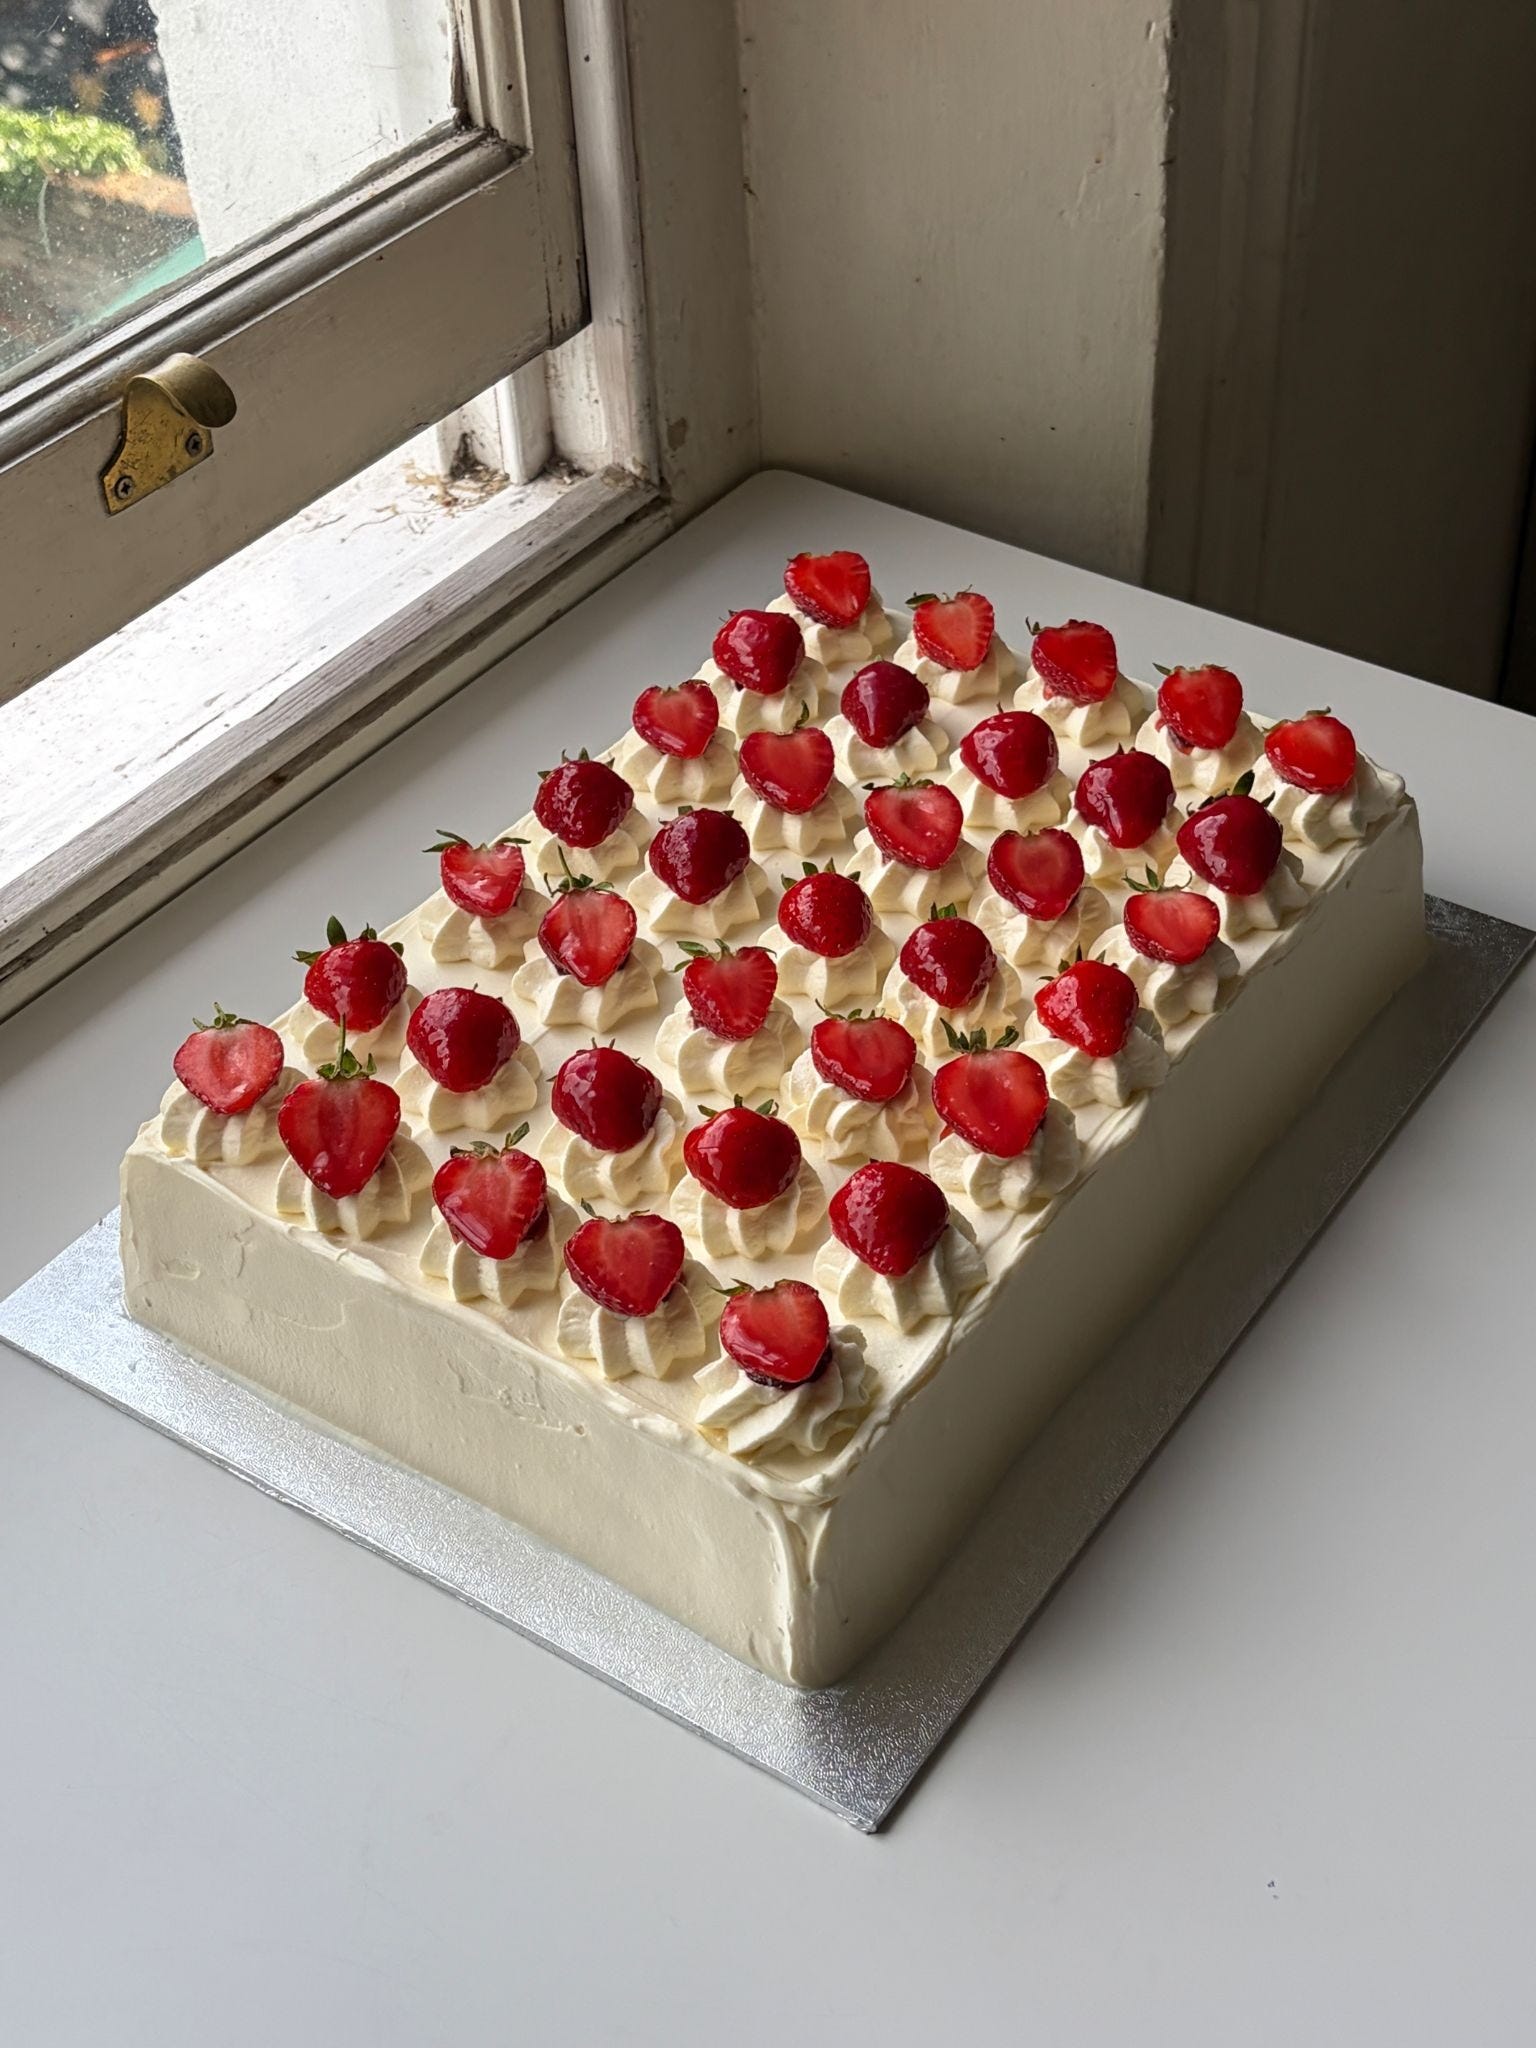
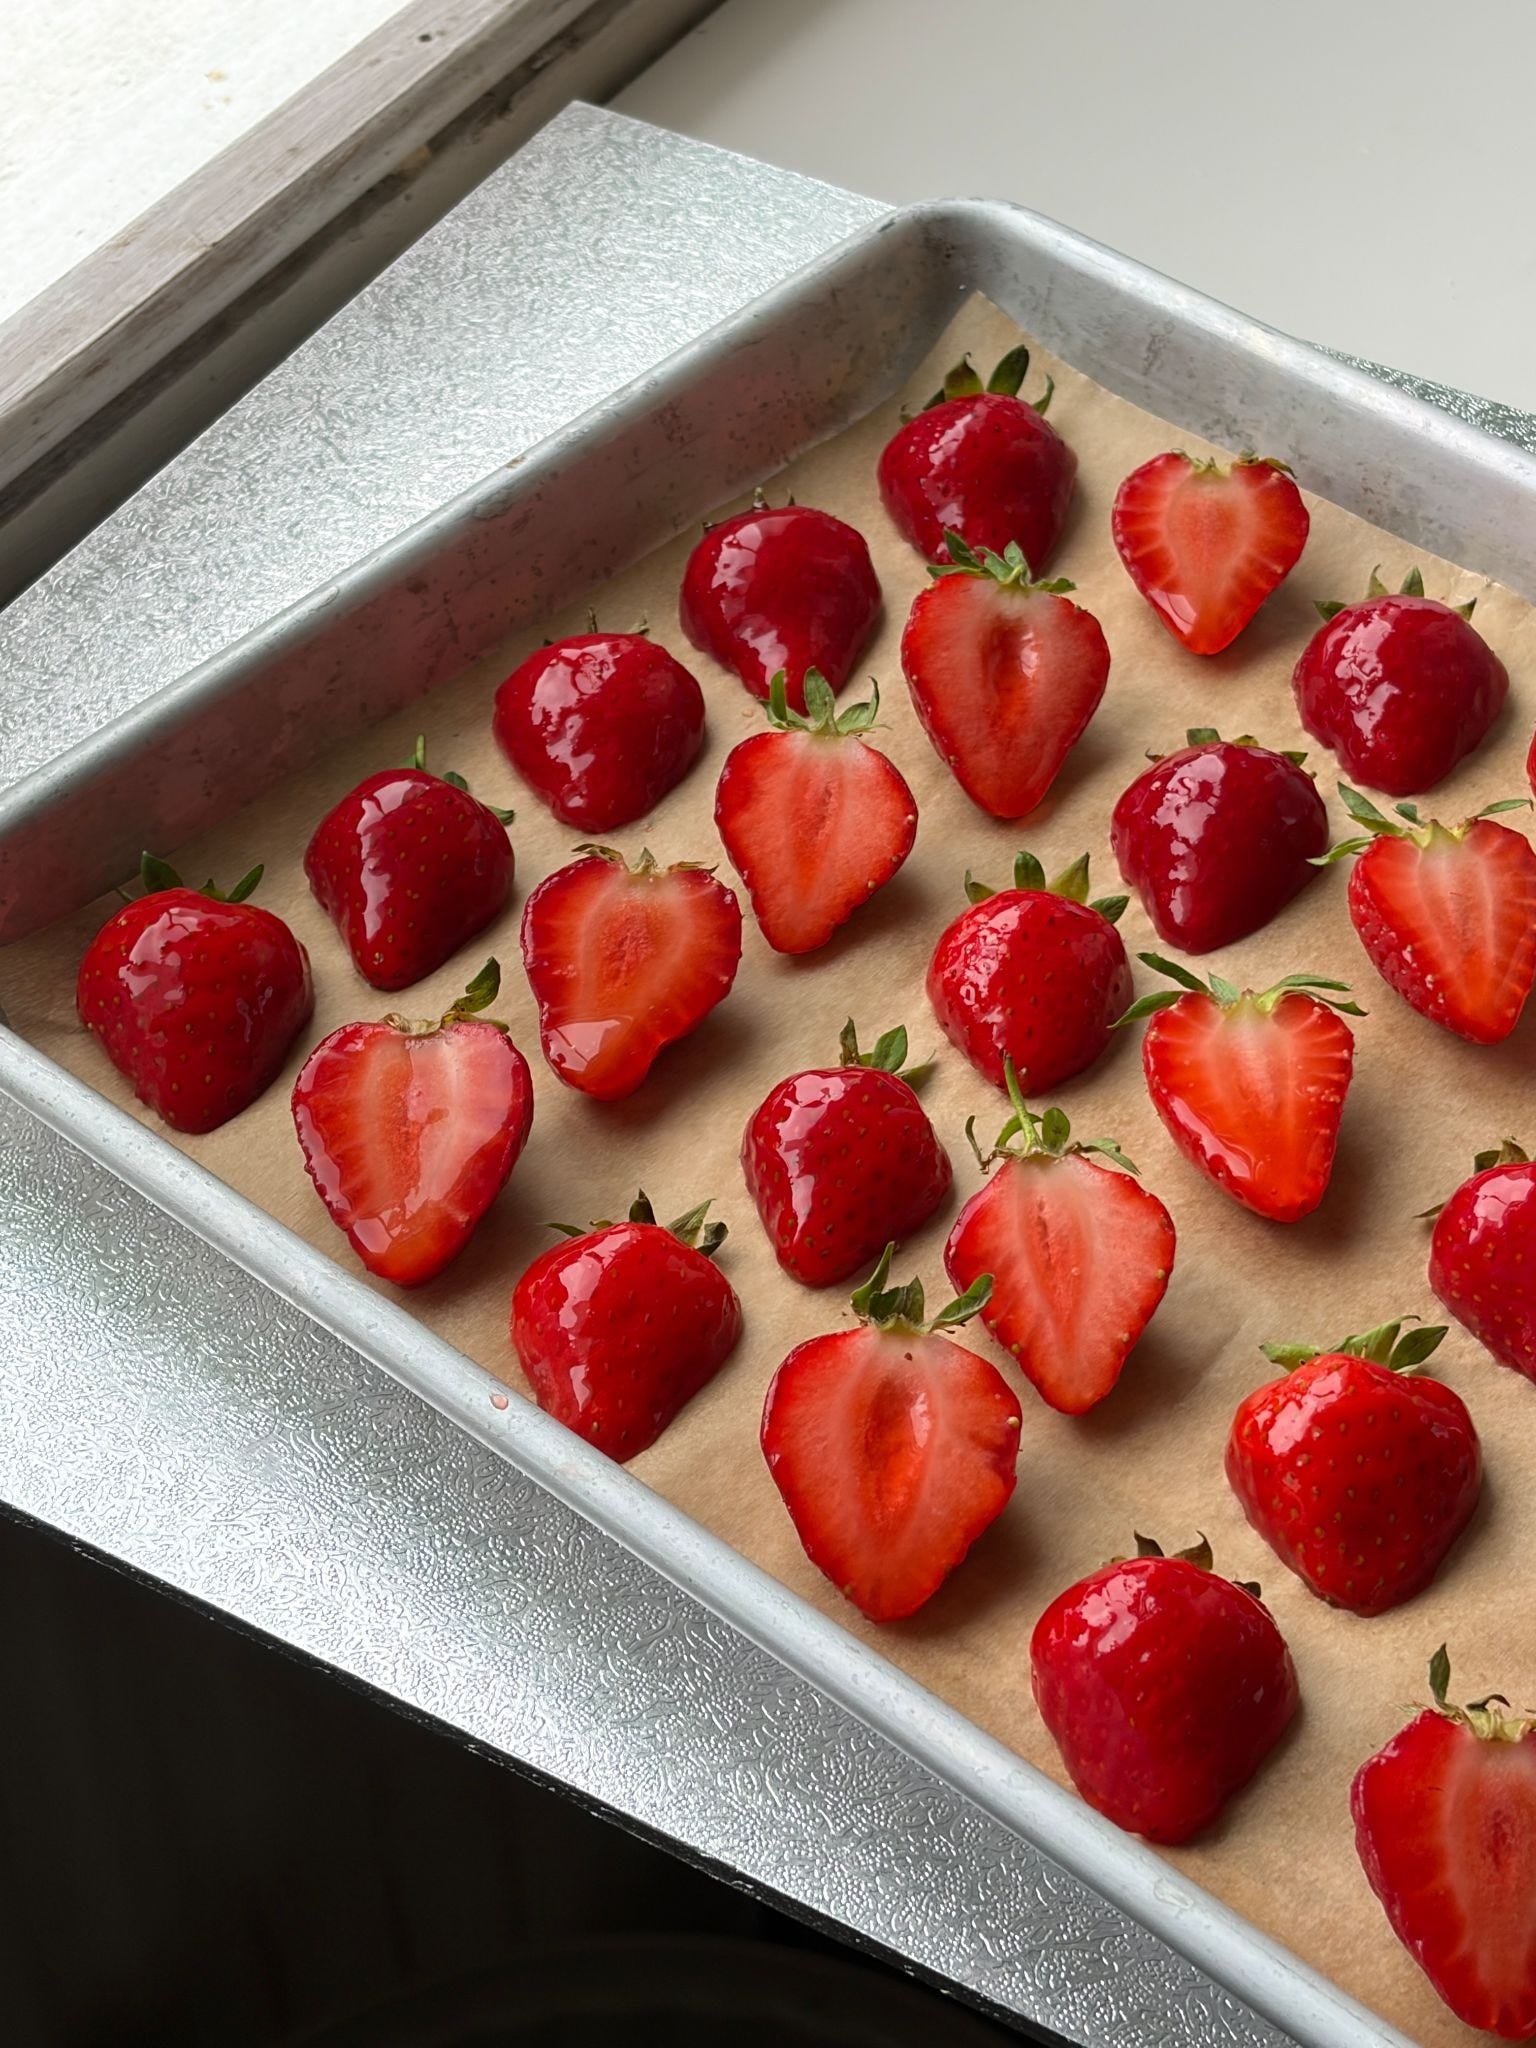
The beauty of this cake is really in the simplicity of the finish and those glossy strawberries (recipe). I can’t pretend, especially for the larger cakes, it doesn’t take picking through several punnets of strawberries to get the most perfect and symmetrical ones, but it is worth it. To ensure a stable glossy strawberry, crucial for lasting power on this cake, I found it most effective to cut the strawberries, then lay cut side down on clean kitchen paper or towel for about 30 minutes to absorb any excess moisture.
After this point, I glossed each strawberry (half cut side, half other side), put them on a clean tray lined with baking paper (or kitchen towel if you REALLY wanna dry those cut sides out), and left them overnight in the fridge. Just before heading out to the event, or sending the cake, I placed the strawberries on the cake. I will say this, though – the cake had really extraordinary staying power and looked almost identical after 24-36 hours in the fridge, so adding the strawberries at the last minute is more of an insurance policy than a must.
Even though this is the Strawberry and Cream patch cake, this design could really lend itself to any number of fruits in the coming months. It would look gorgeous with cherries, with a cherry compote inside, or figs, or peaches. I love how the cream swirls look like little plinths, ready for you to put any fruit you desire on!
Ok let’s make it.