Kitchen Project #136: Brown Sugar Butter Buns
The ultimate recipe remix + praline maple dreams!
Hello,
Welcome to today’s edition of Kitchen Projects. Thank you so much for being here.
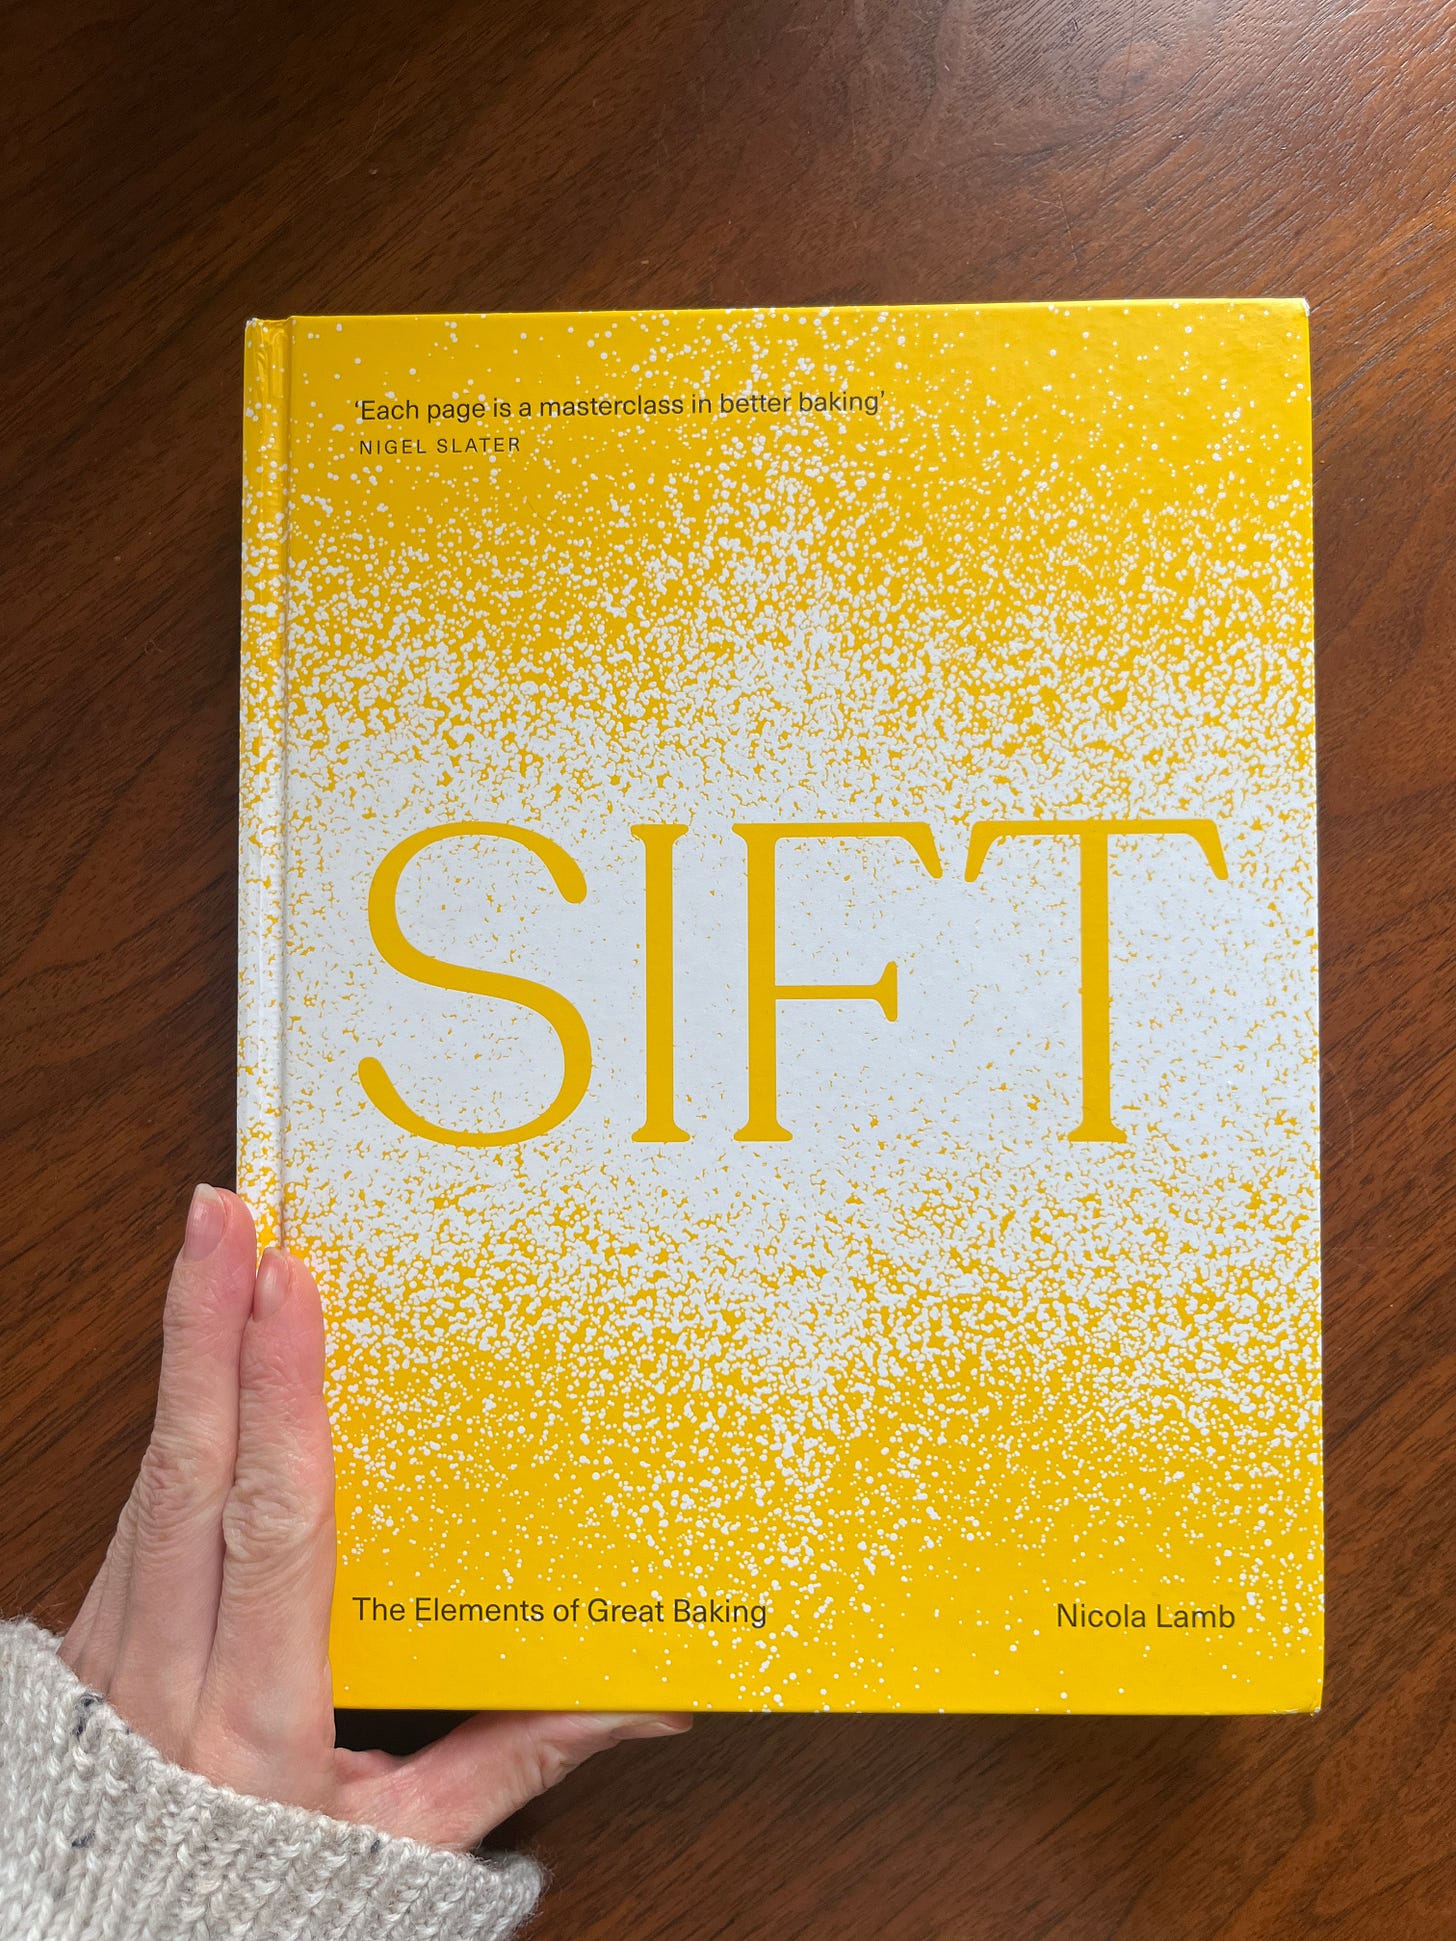
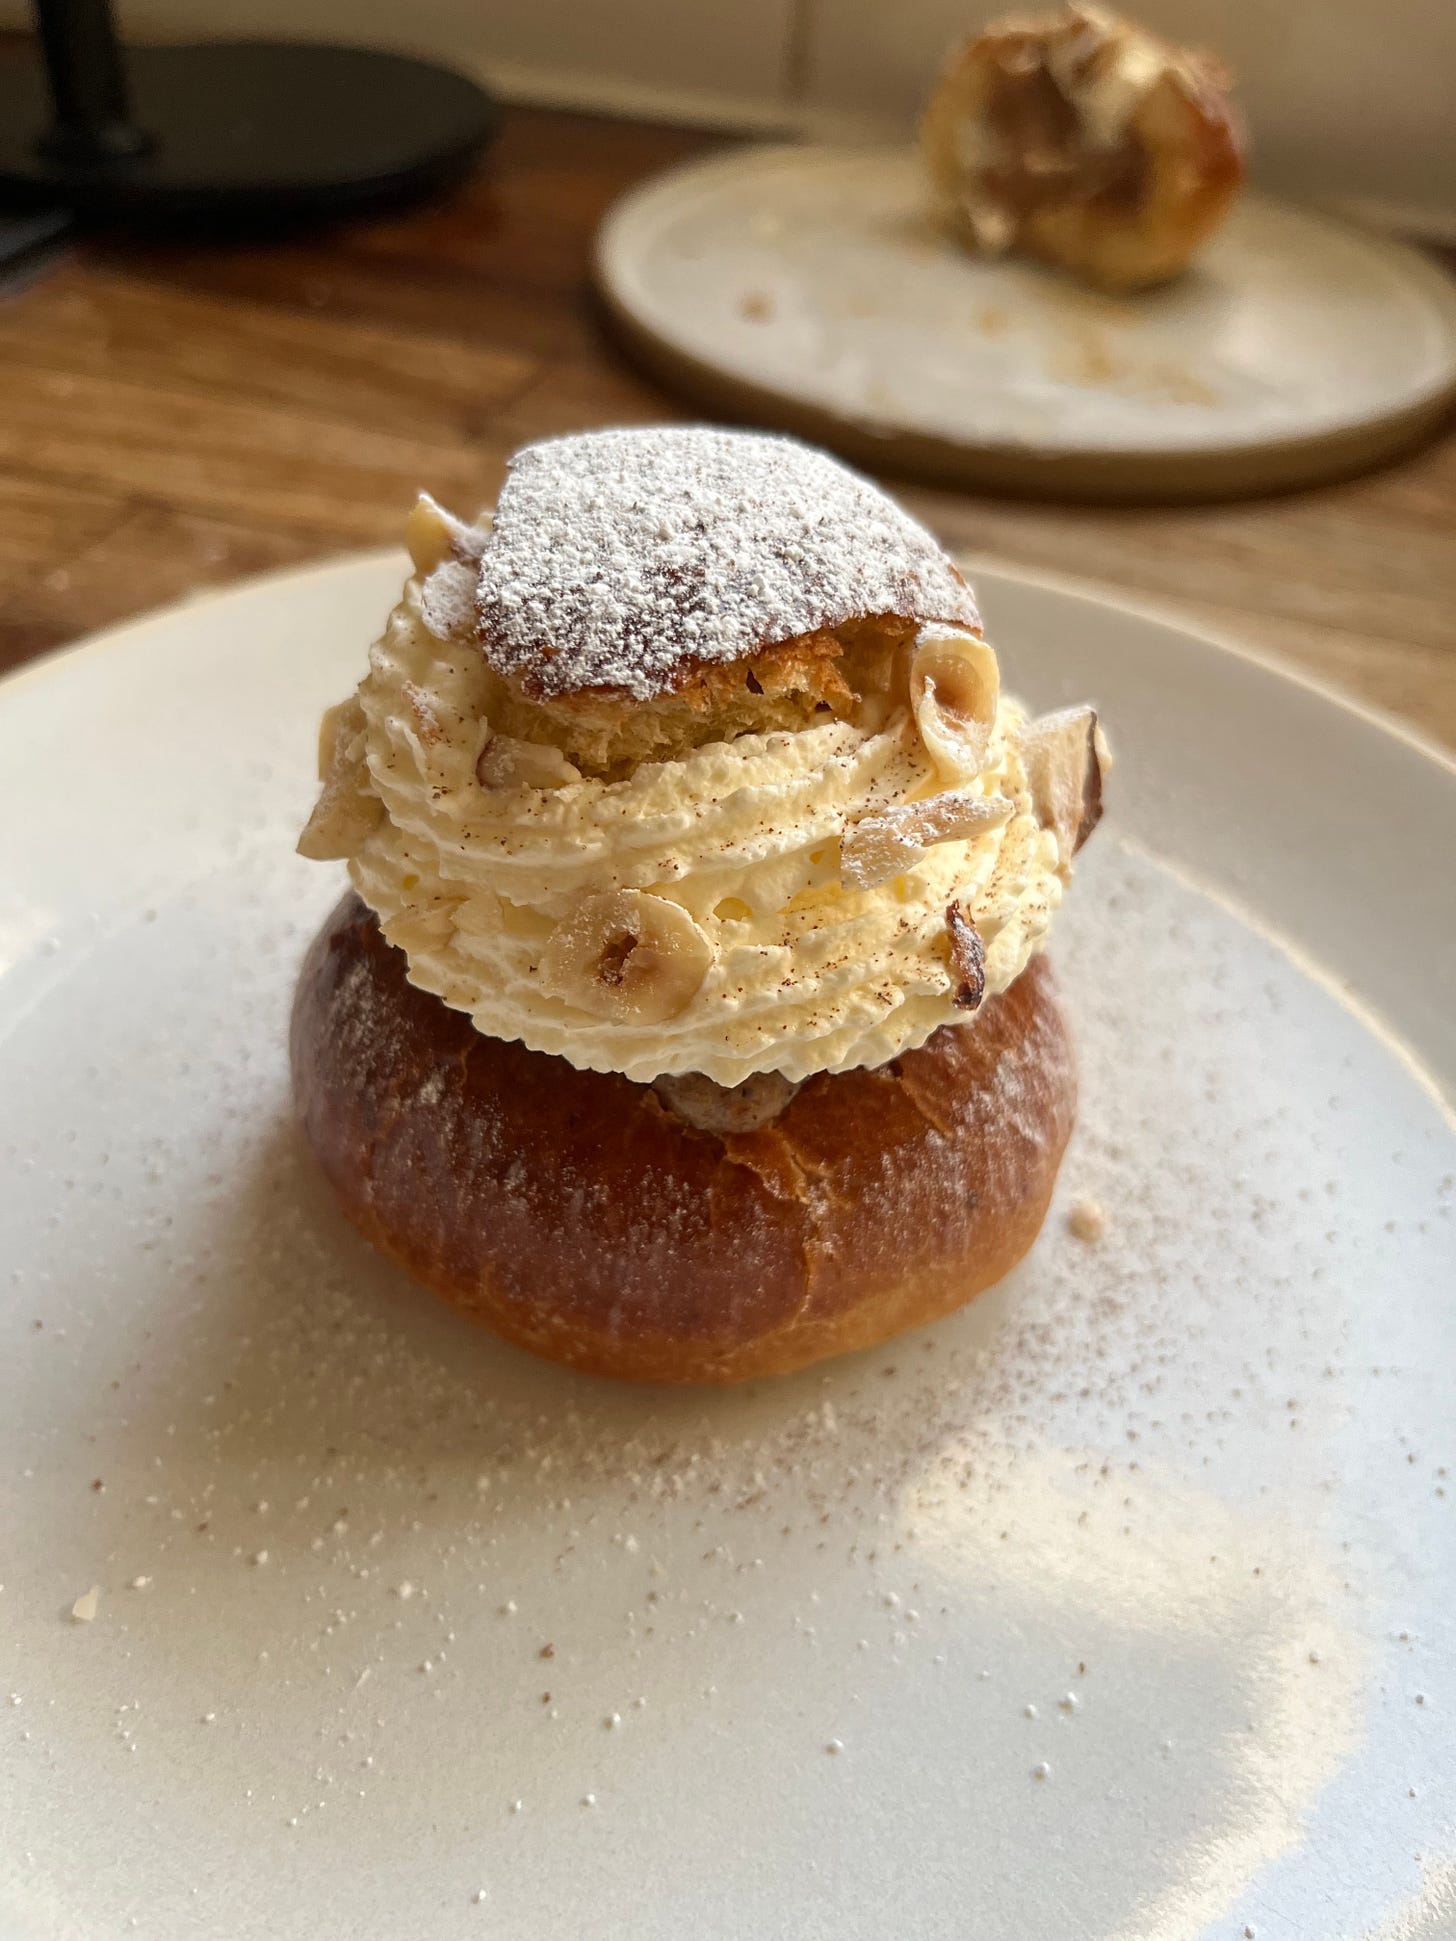
Today its part two of my ode to brown sugar ft. one recipe in two ways: Brown Sugar Butter Buns & Hazelnut Praline Maple Cream buns. The praline buns are a recipe I’d originally created for SIFT, but didn’t make the final book. I reworked the recipe for today’s newsletter - I love showing how to remix recipes to suit you, and I’m SO excited about both versions on the bun.
Over on KP+, I’m sharing original praline bun recipe that started it all, so click here for the recipe.
What's KP+? Well, it's the level-up version of this newsletter. By joining KP+, you will support the writing and research that goes into the newsletter (including the commissioning - and fair payment - of all the writers), join a growing community, access extra content (inc., the entire archive with 300+ recipes) and more. Subscribing is easy and only costs £6 per month or just £50 per year (equivalent to £4.10 per month). Why not give it a go? Come and join the gang!
Love,
Nicola
SIFT POP-UP on WEDNESDAY 1ST MAY
So excited to announce a very SIFT special pop-up on Wednesday 1st May, 5:30-8:00pm, at the gorgeous Toklas Bakery in London. For a one off take over of the Toklas Bakery apero menu, you can try dishes inspired by and baked from SIFT!
It’s the night before the official publication and I can’t think of a better way to send this book into the world.
The menu is coming soon but expect all the delicious things, perfect for an early eve snack or pre dinner stop in, plus LOTS OF CAKE (obviously!). There are no reservations :) I can’t wait to see you there and show you dishes from the book. For anyone not based in London, I’ll have news of a book tour coming next week!
P.S. If you are thinking of getting the book and want it to arrive on publication day - just ELEVEN DAYS AWAY- it is available to pre-order now and there’s currently a great deal on the Waterstones website! You can see a flick through of the book in the video here:
A recipe by any other name would taste as sweet (right?)
Last week’s foray into brown sugar actually started as a small (and then not so small) detour to this week’s recipe. This begs the question… what are recipes but patchwork quilts of things we’ve learned, experienced or tasted?
Sure, you need technique to sew the pieces together, but taking apart and rematching your favourite bits is one of the most joyful things about baking. I love that you can do away with cream cheese icing if you’re not feeling it, and replace it with a vanilla custard. Or leave the cake naked! Who’s going to stop you?! I certainly won’t. I’ll be cheering you on from the metaphorical sidelines - Follow your heart! Leave the frosting!
Putting together the recipes for my debut book, SIFT, which is out almost unbearably soon—less than two weeks *gasps for air*, was surprisingly difficult considering I’m three years into a weekly routine, my best habit, writing this newsletter. Of course, it all began with a spreadsheet. And then the questions started rolling in…
Which recipes would fit into the ‘day’ category? Which could I reasonably squeeze into ‘An afternoon’? Which recipes did I want to memorialise in gorgeous print (and much more accomplished photography than I’m capable of)? And which fruits should I prioritise?! How much chocolate is too much chocolate? Is that a stupid question?
I fretted for months, doing more fretting than cooking at some points. I mean, if there were to be 100 recipes that summed me up, that might become birthday gifts, commiseration packages, drop-offs to celebrate the birth of a child or a new home, I wanted them to be just perfect. But even more important than being perfect, I wanted the recipes to be flexible.
Even though all recipes have the ultimate goal of being ‘greater than the sum of its parts’, the parts must also be complete and flawless. As much as I want to see you make my recipes as is, I also want you to be able to remix the recipes easily, stitching your very own patchwork quilts. Today I’ll show you how.
One recipe, two ways.
Next week, in the newsletter, the last one before the BIG DAY (AHHH), I’ll share some exclusive recipe excerpts from the book. This week, I’m getting to share a recipe from that original spreadsheet that slipped through the gaps. It’s one that got away!
And so I give to you, this week, two recipes made from pretty much the same component parts, twins in different outfits: Hazelnut Praline Cream Buns (inspired by Semla) and Brown Sugar Butter Buns.
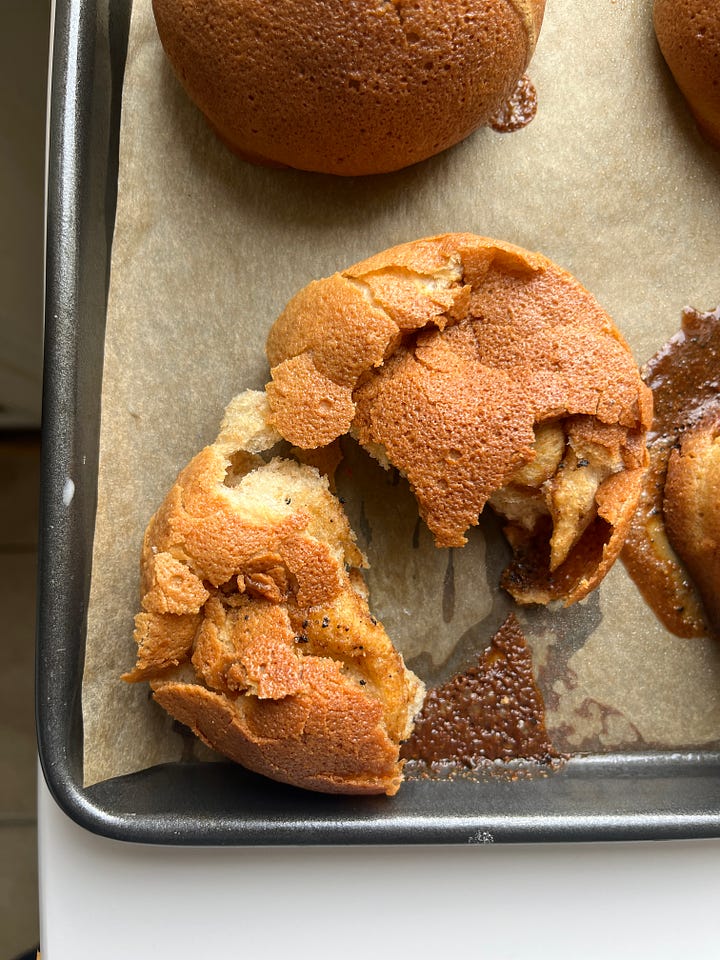
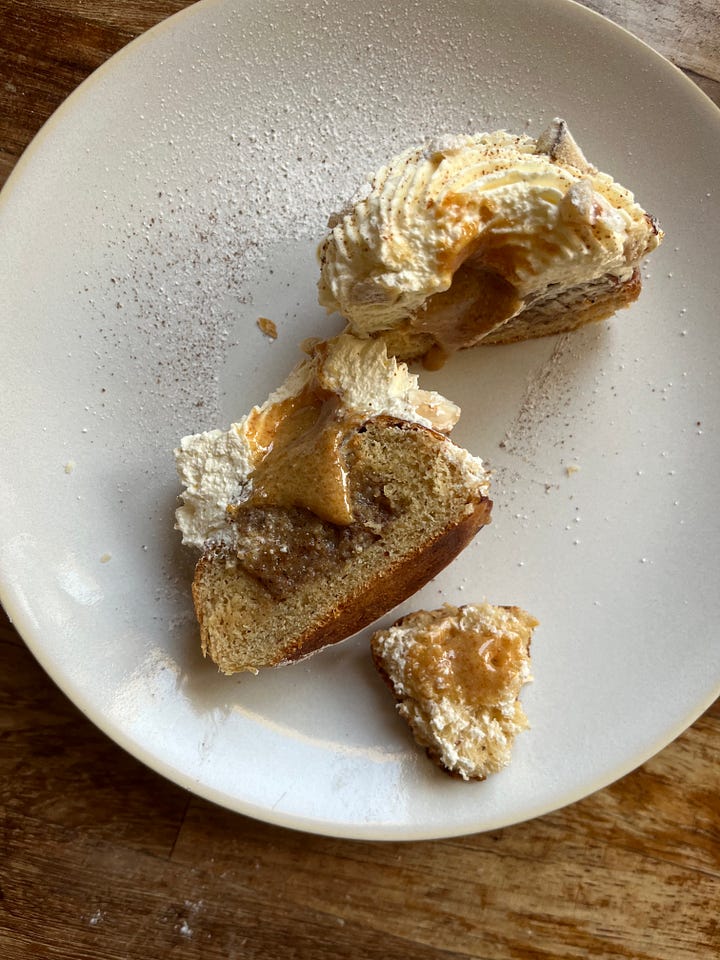
With a few little twists, a semla inspired cream bun becomes a crisp shelled bun inspired by kopi roti aka Singaporean coffee buns. Both use the same gorgeously airy, wholemeal enriched base dough, but are expressed differently with a few different ‘accessories’. I’d originally conceived the praline buns for SIFT, but it got left on the cutting room floor - it did break my heart a bit. It was so fun to revisit and rework this recipe to share with you today.
I’ll share the praline buns inspired by Semla, with its enriched maple cream & gorgeous praline paste, on KP+ and the brown sugar butter buns below.
Ok, what ARE these two buns?
Traditional Semla (which I wrote about here) are usually eaten around lent. It’s a soft cardamom-scented bun filled with almond paste, topped with cream and dusted with icing sugar. It’s hard to find Semla in Sweden anytime other than January - April. I’m all too aware that we are strictly out of the semla season, BUT the story of these buns - and the flavour - is too good not to share & I wouldn’t be mad at eating these any time of the year.
Kopi Roti aka Coffee Buns are a popular baked good in Singapore. Created by RotiBoy, they are also known as Mexican Coffee Buns (though, as far as I can tell, they have very little to do with Mexico? Someone please let me know if I’ve got that wrong), and though they are Roti by name, they have very little in common with Indian Roti.
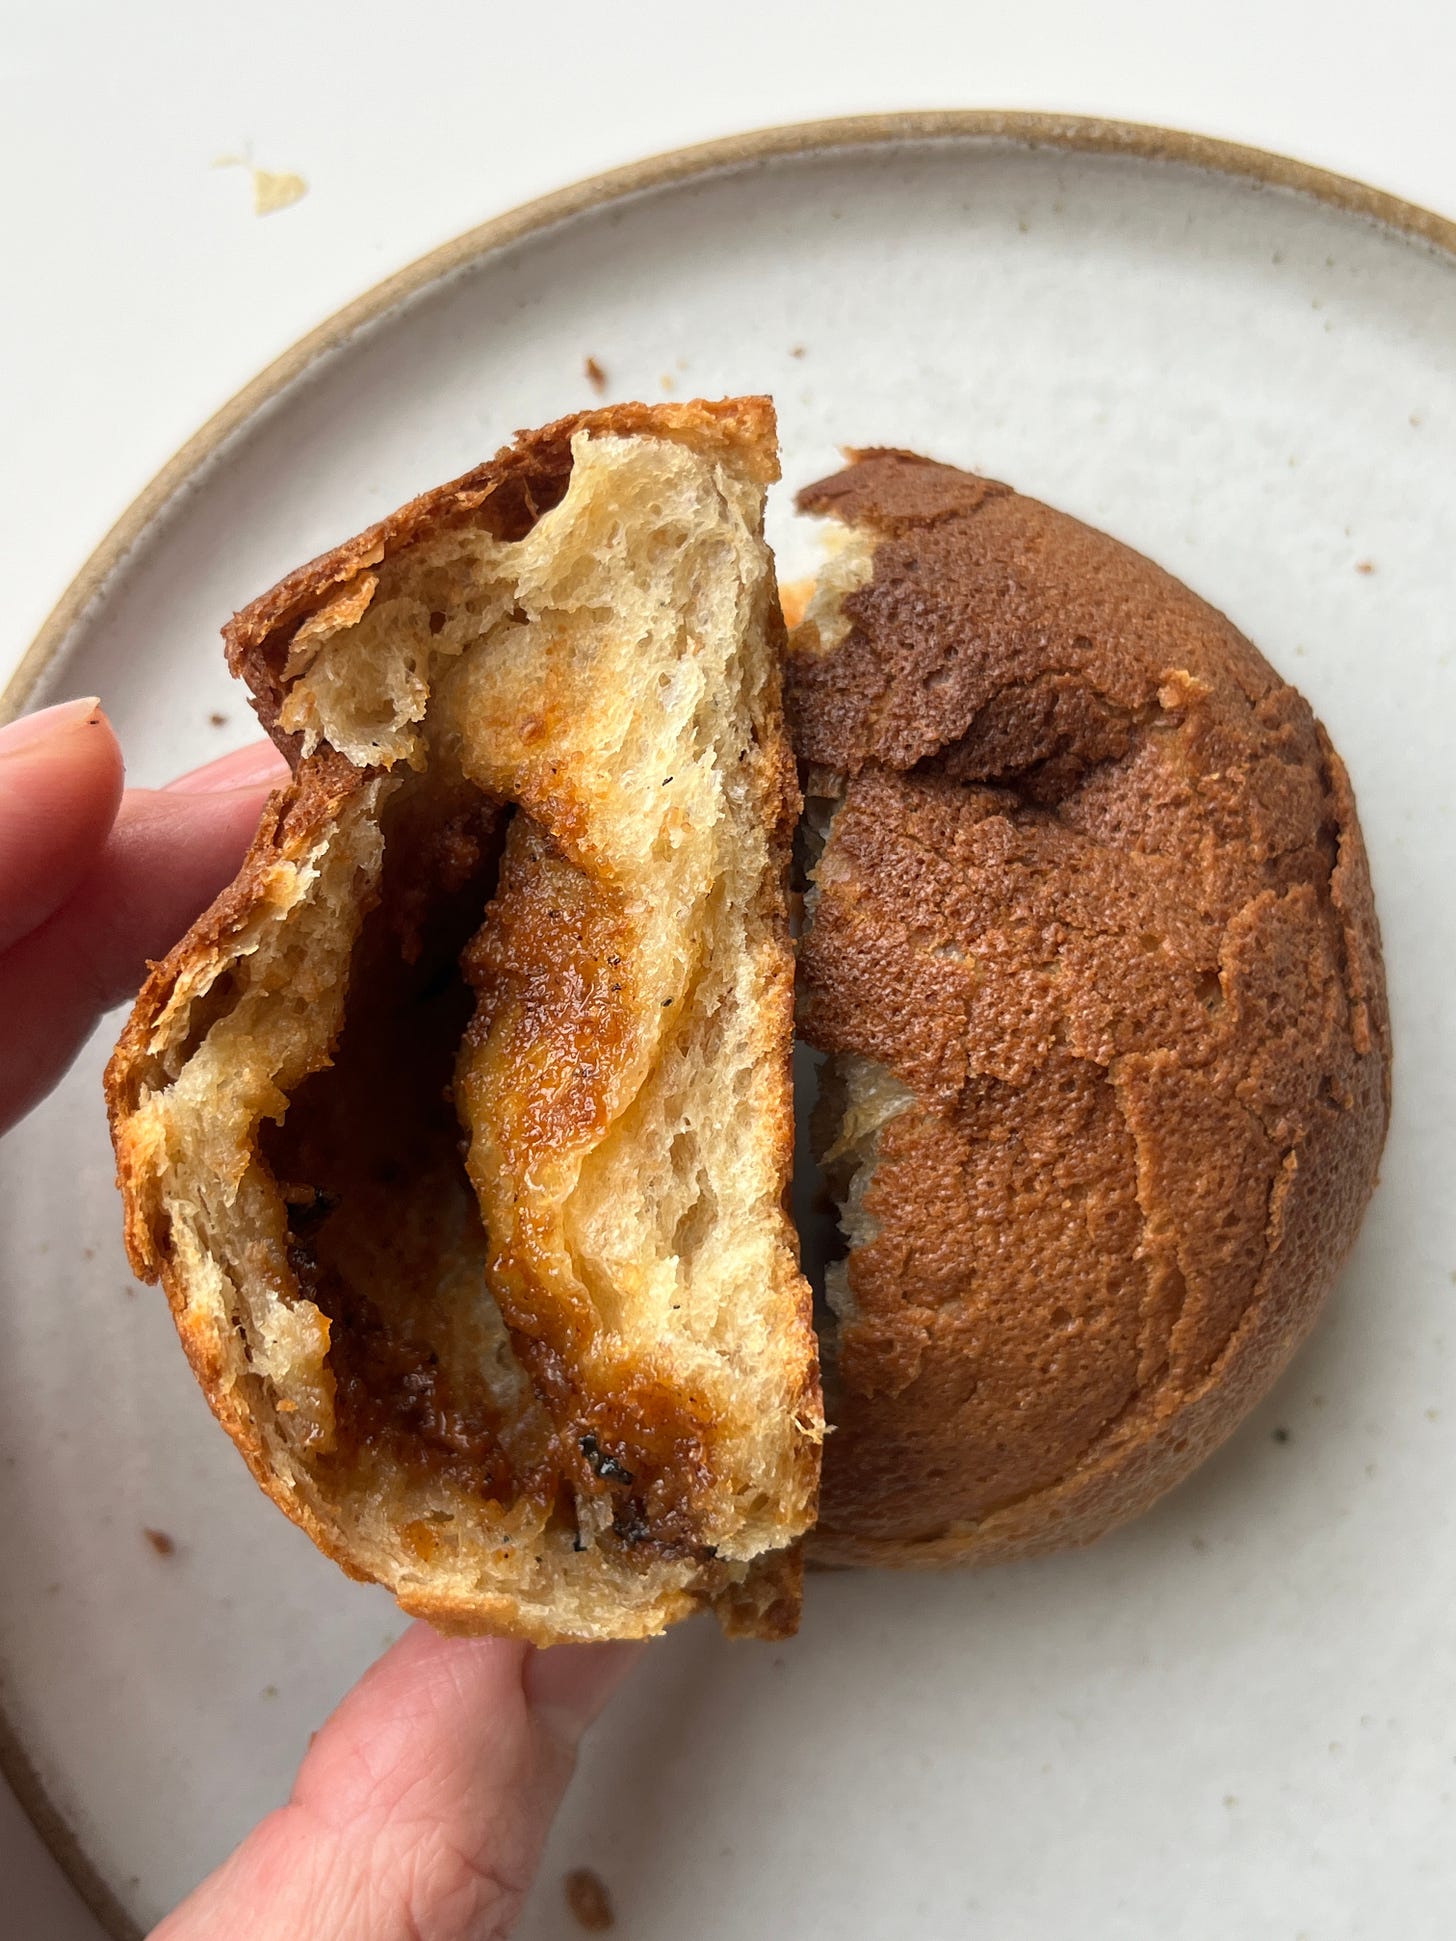
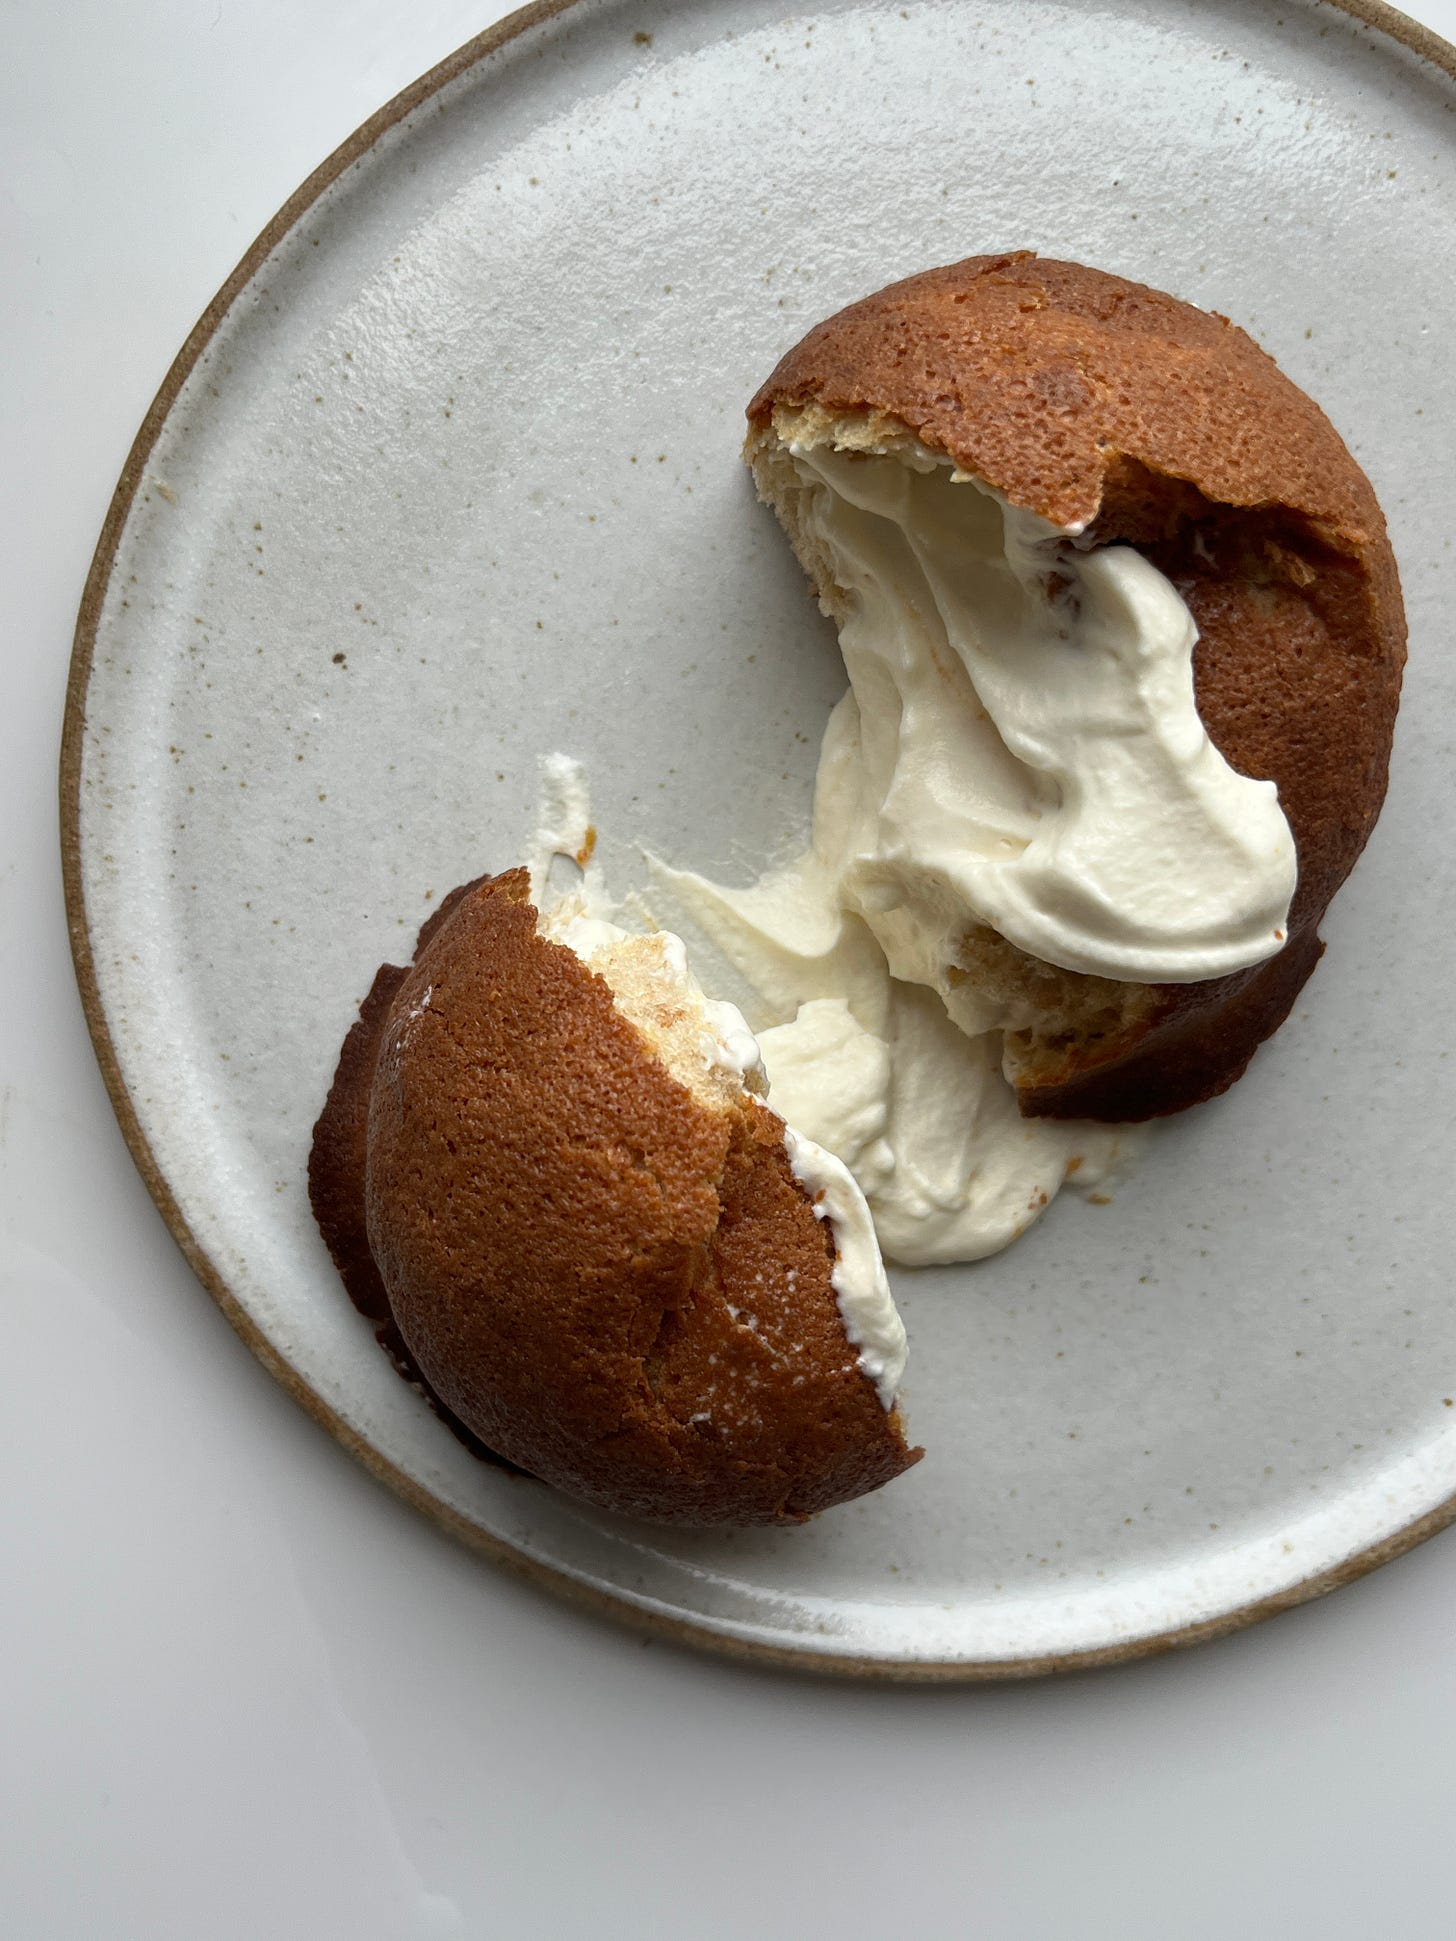
They consist of a buttery bun baked with a square of butter inside, leaving an enriched steamy pocket in the centre, finished with a crisp, crackly coating. I’ve never tried the buns myself, but the number of YouTube videos and times I’ve googled it over the years must be in the thousands. I’ve been meaning to make this recipe for the longest time, and when I wanted to rework the semla, I KNEW IT WAS FINALLY TIME!
In today’s expressions of the flavours, we use the gorgeous flavours of caramelised hazelnuts, aka praline, nutty wholemeal flour, brown butter, brown sugar and maple to bring it all together cohesively.
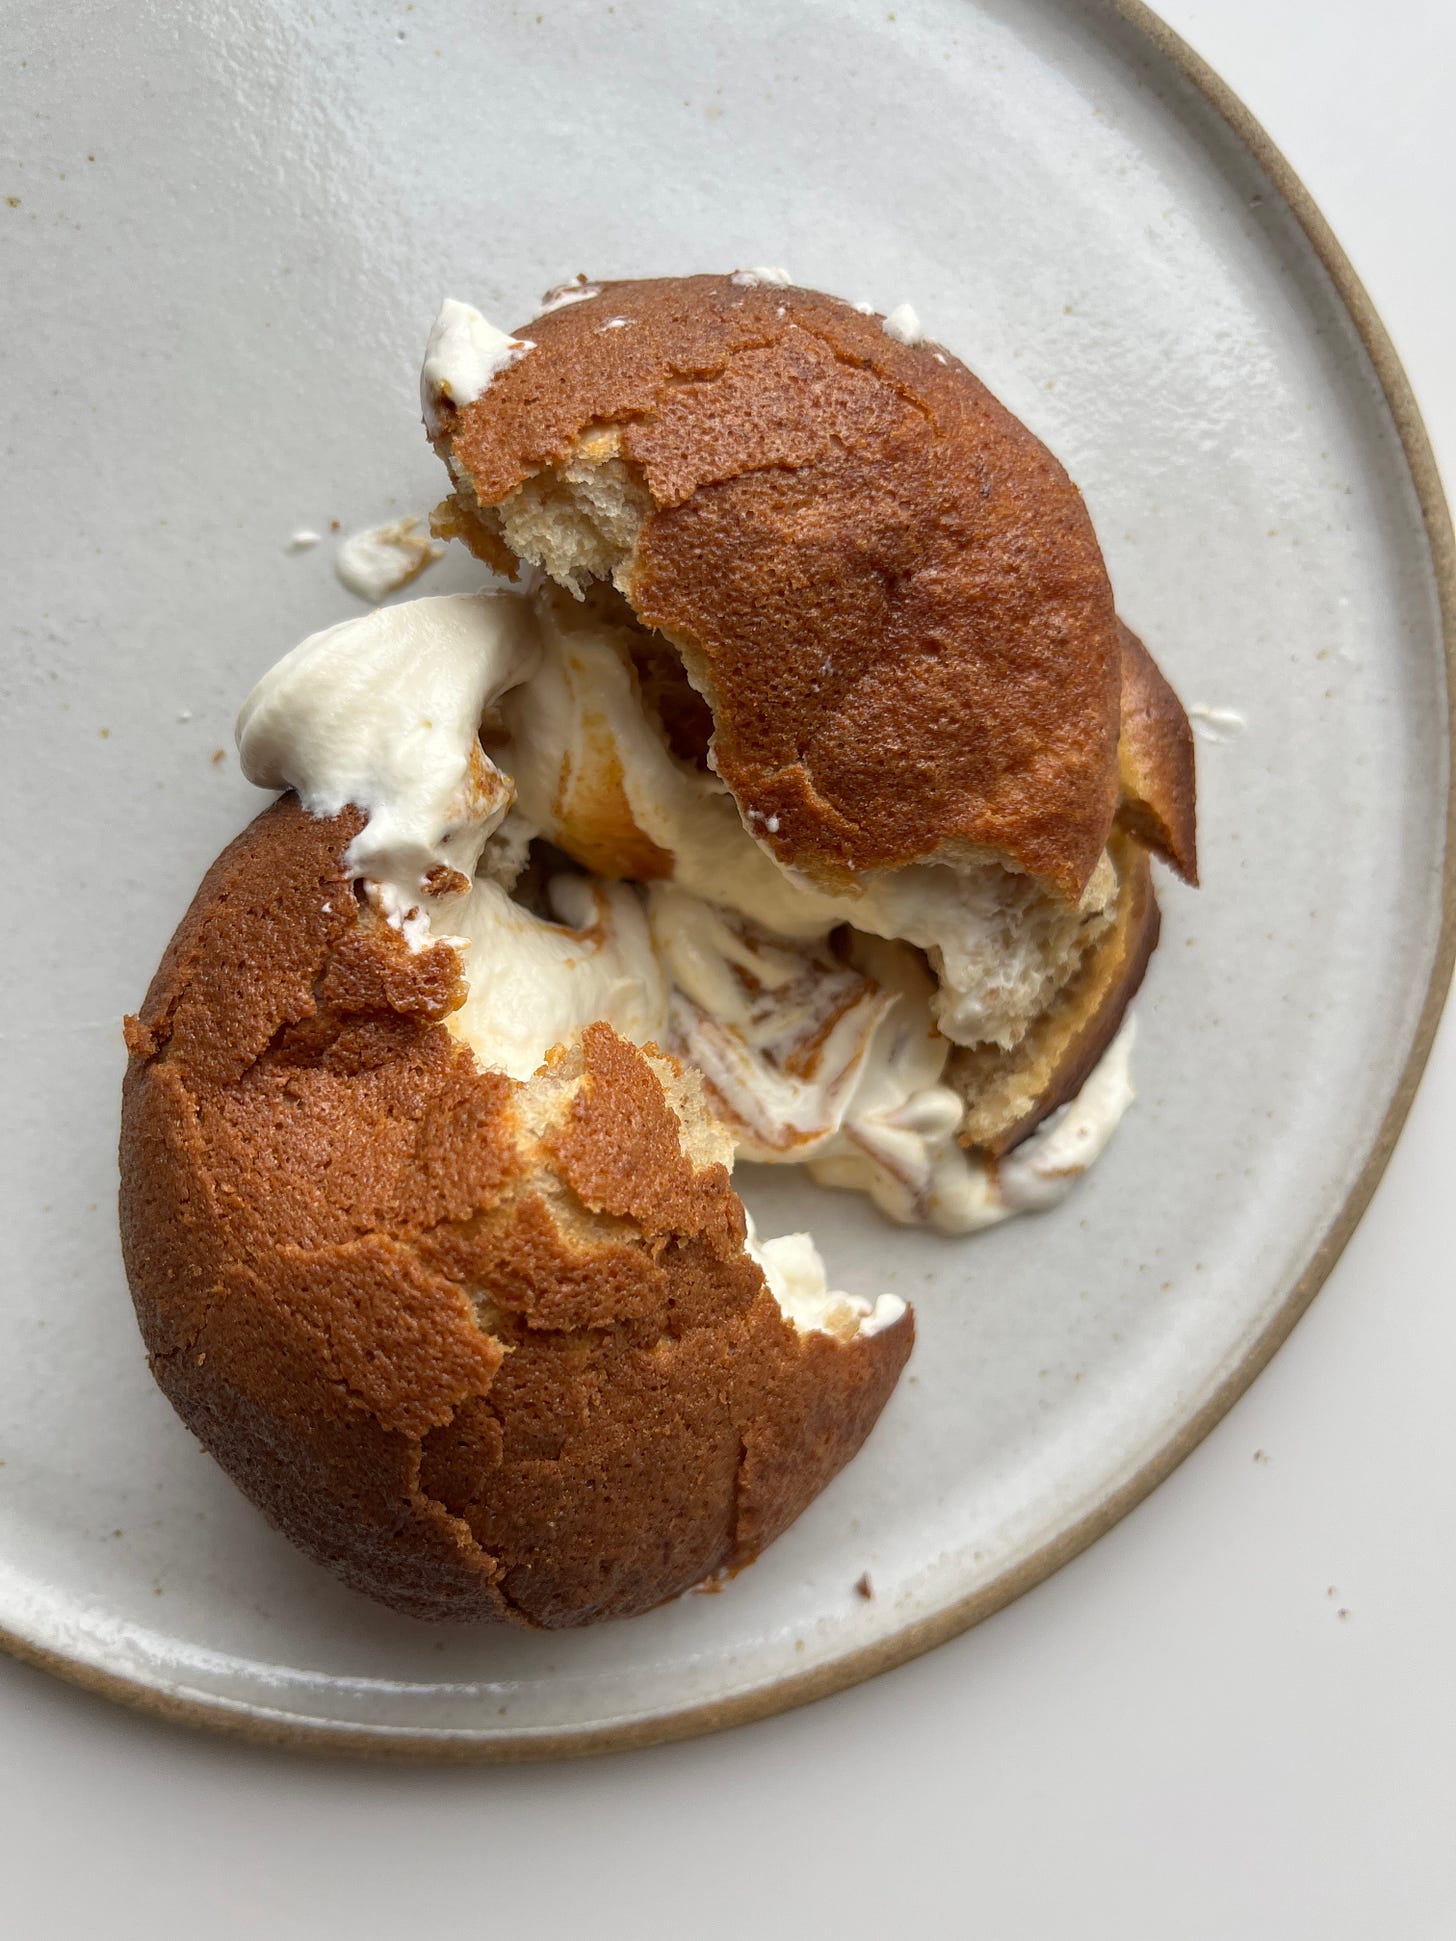
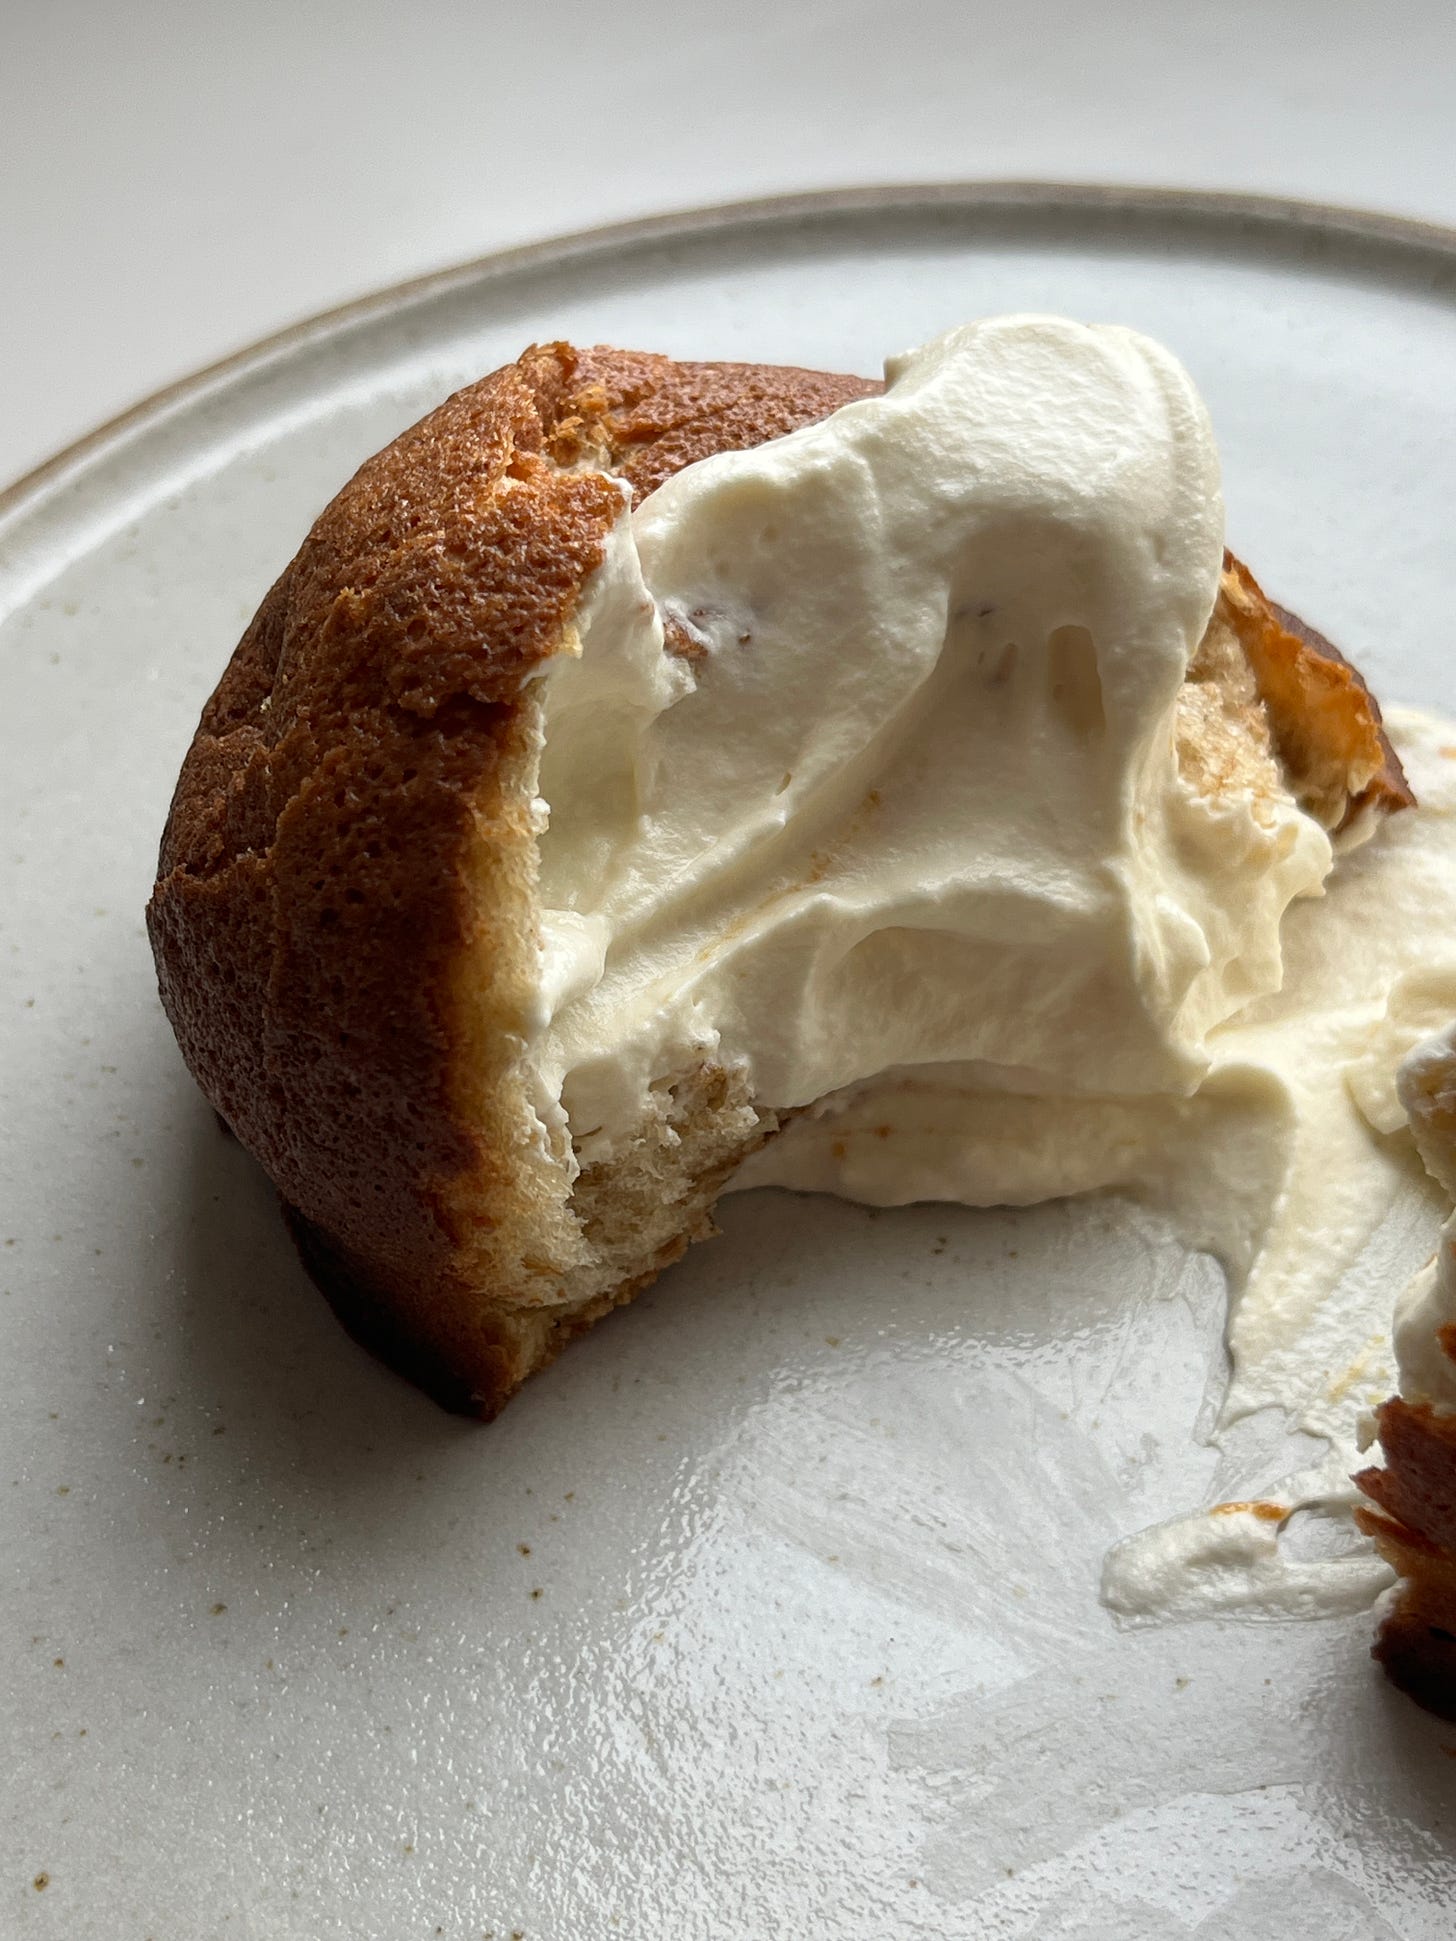
In the original recipe the buns are baked and then stuffed with hazelnut paste, topped with luscious maple cream, doused with praline paste, and topped with a little sugared dough hat. In the reworked version, the buns are stuffed with brown butter then baked with a crispy brown sugar coating. There is, of course, the option to fill it with praline paste and maple cream (I highly recommend this.)
The dough
The heart of these two recipes is the airy wholemeal dough. I KNOW, AIRY? WHOLEMEAL? Can we even use these two words in a sentence together?
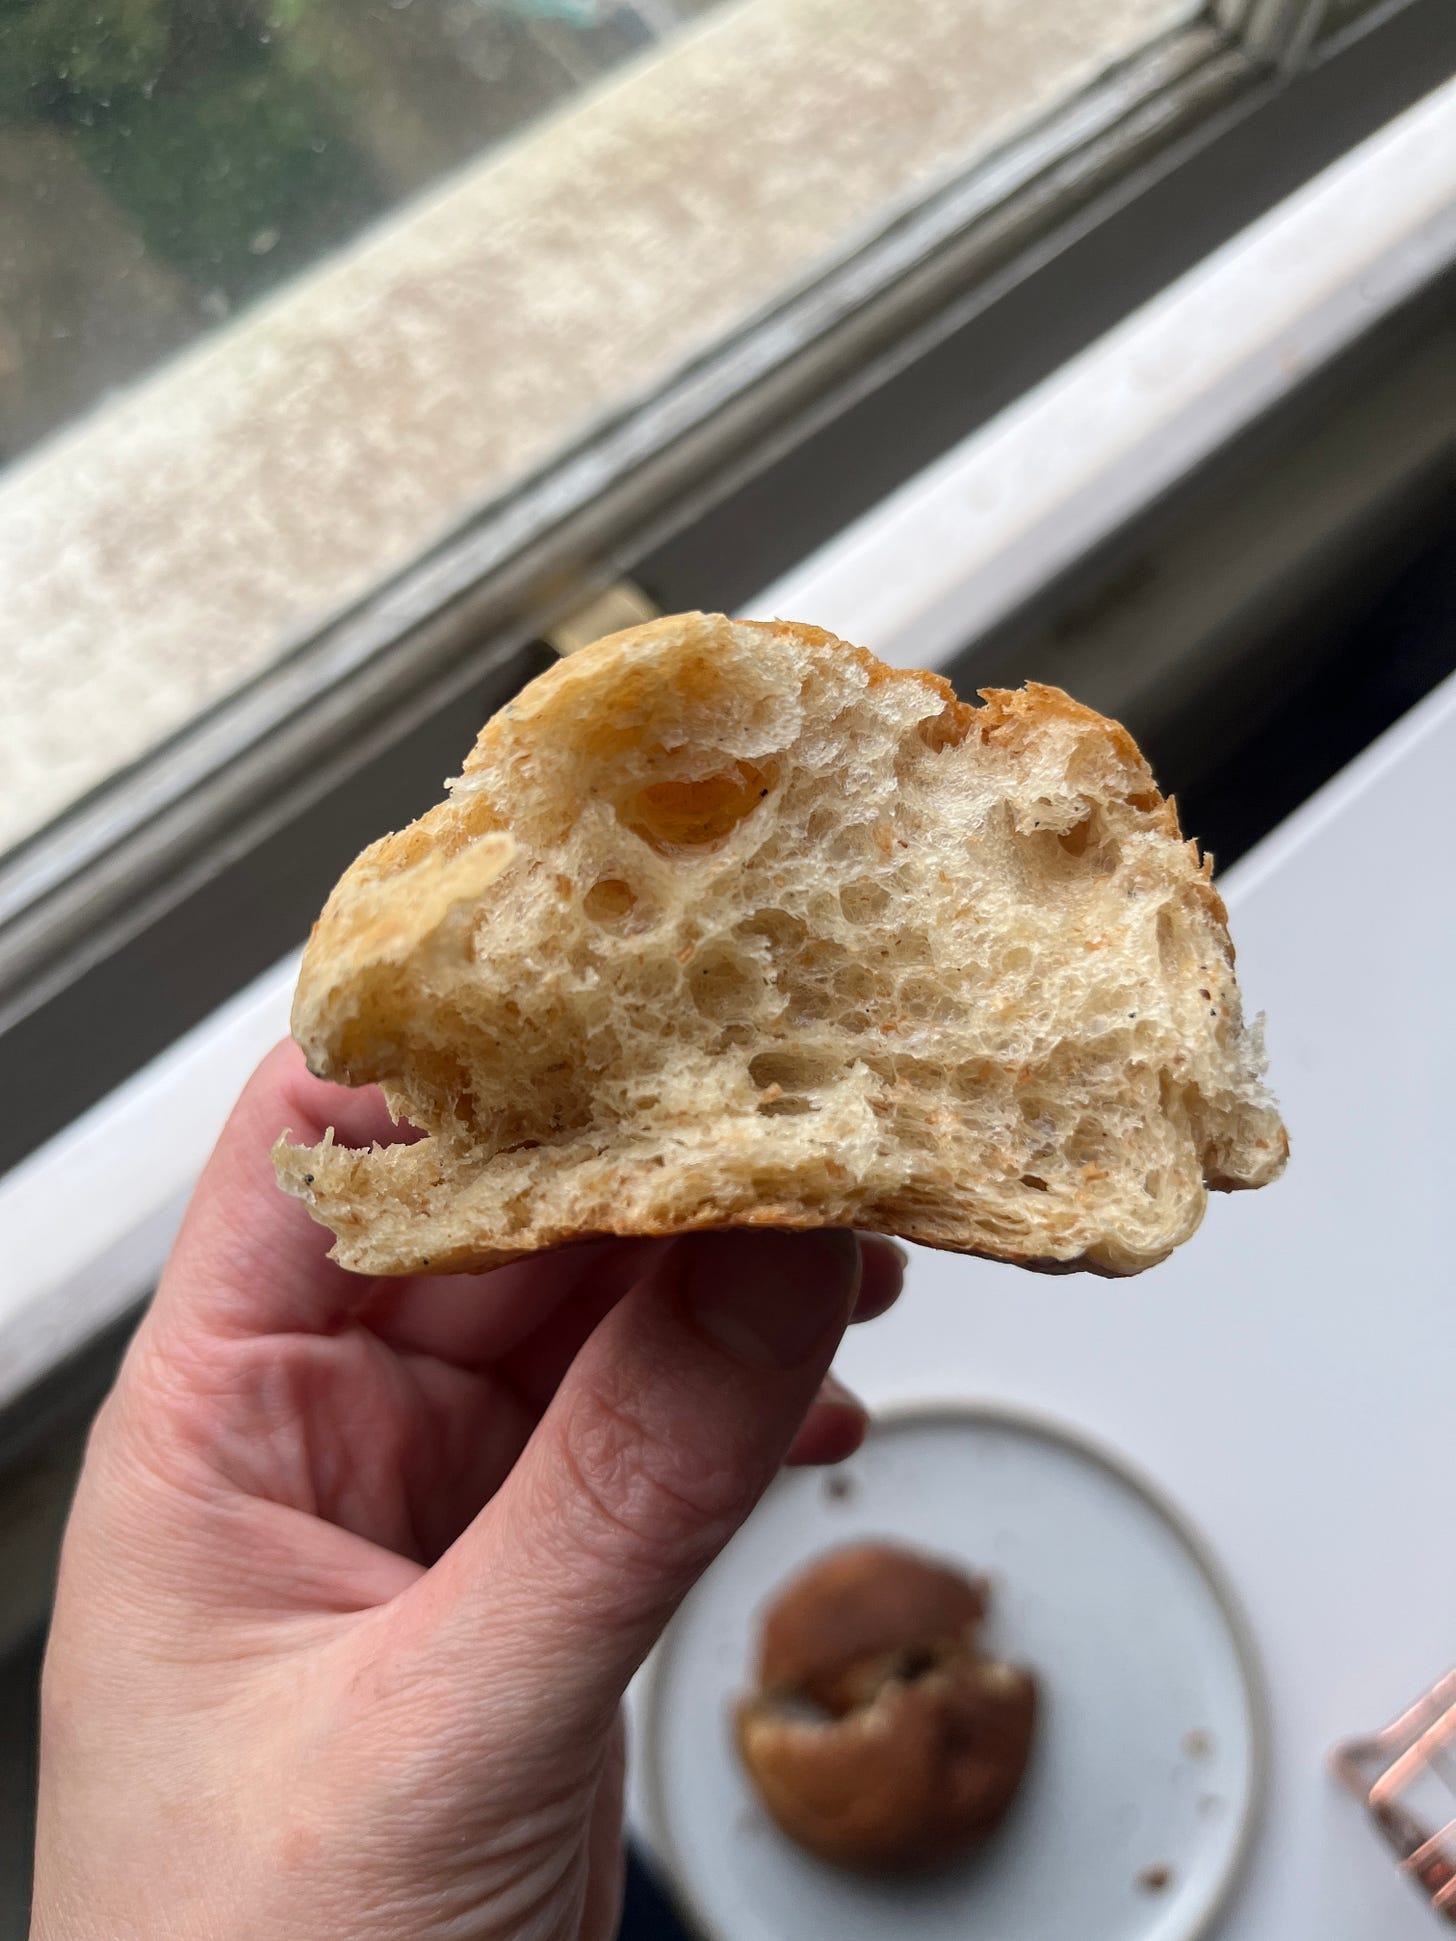
I love the nuttiness that wholemeal flour brings to a dough. But if you’ve worked with wholemeal flour before, you know that the bran and germ are more absorbent, meaning you need to increase the hydration in the recipe. But the amount of wholemeal you use also matters - to introduce wholemeal without too much fuss, you can use about 30% of your flour weight. This will impart the lovely nutty flavours without causing dramatic structure changes. A rule of thumb is up to 40%; add around 1% extra liquid for each 10% wholemeal added. So, if you’re adding 10% wholemeal, increase your liquid by 1% and so on and so forth.
I wanted to push the nutty flavour to the max for this dough, so I have upped the wholemeal to 40% of the entire flour weight. To counteract any heaviness, I’ve used a few techniques:
Tangzhong: To keep the buns soft and tender, and to help keep the wholemeal flour at bay, I’m using a tangzhong aka pre-cooking some of the recipe’s wholemeal flour.
Separating the bran: Wholemeal flour can be difficult to work with because all those pesky/stabby bits of brain and germ interfere with the gluten development. These bits of wholegrain act like little knives, cutting through the dough. So, a way around this is to separate out the bran and add it back later. This means you can adequately develop the dough and reintroduce the bran later. This way, you get all the benefits of flavour and nutrition from the bran without any headaches or concerns about proper development.
As this dough is based on a brioche, it does include sugar (brown!) and fat (browned!) which adds a glorious richness to the sometimes overly wholesome bran flavour profile. (There’s something about wholemeal bread that makes me desperate to see my long-departed Grandma and eat a ham sandwich in the back of her car when she’s picking me up from school on a Tuesday). In any case, the double speckles of the bran and the browned milk solids are very pretty indeed.
The fillings/toppings
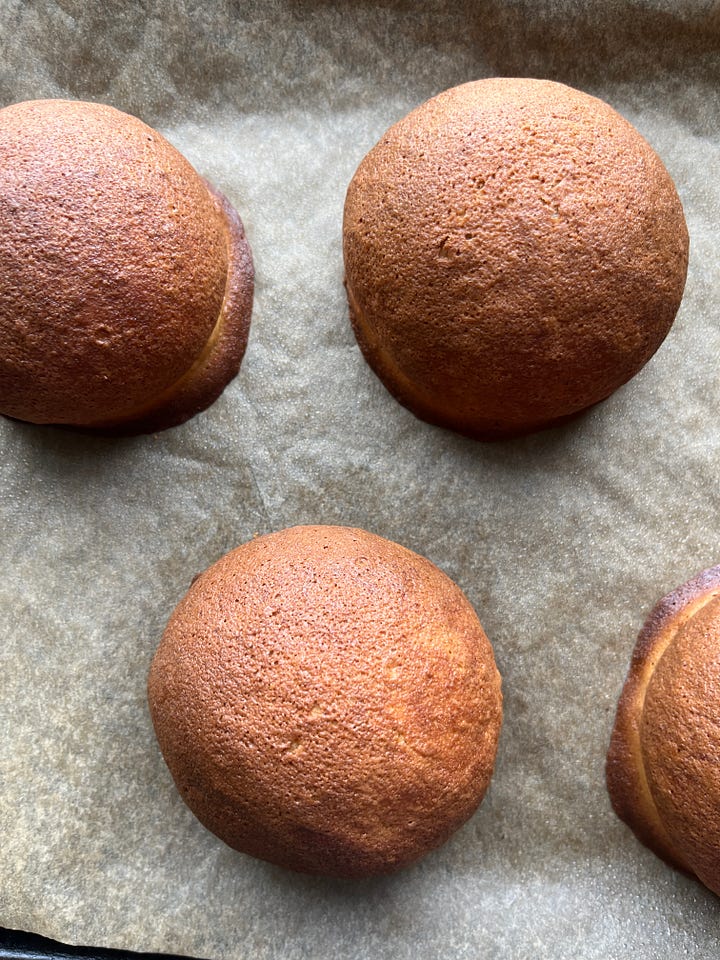
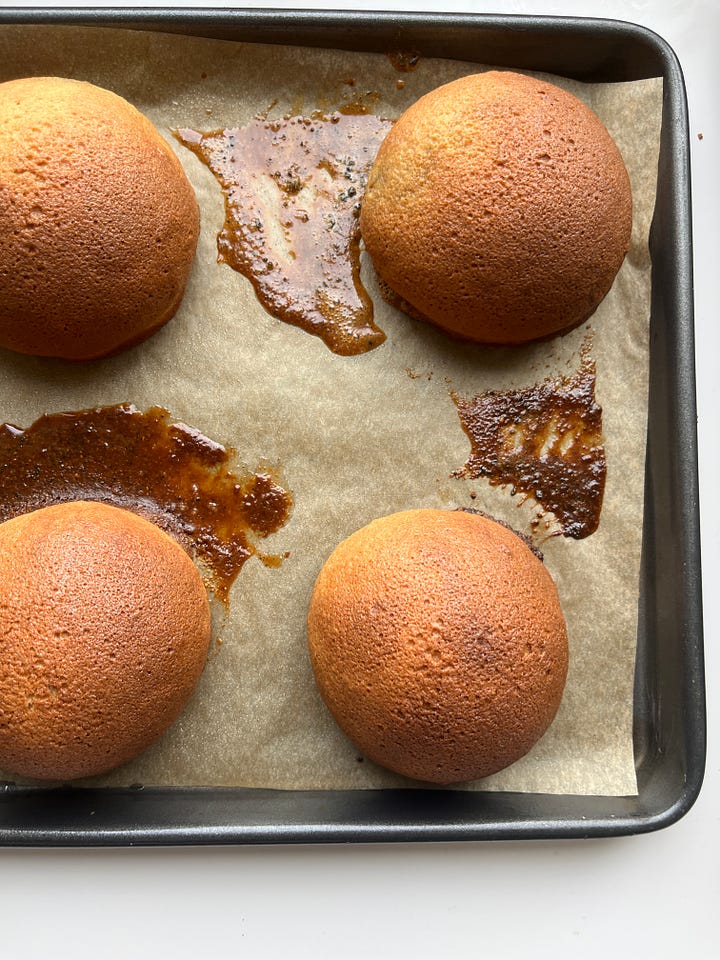
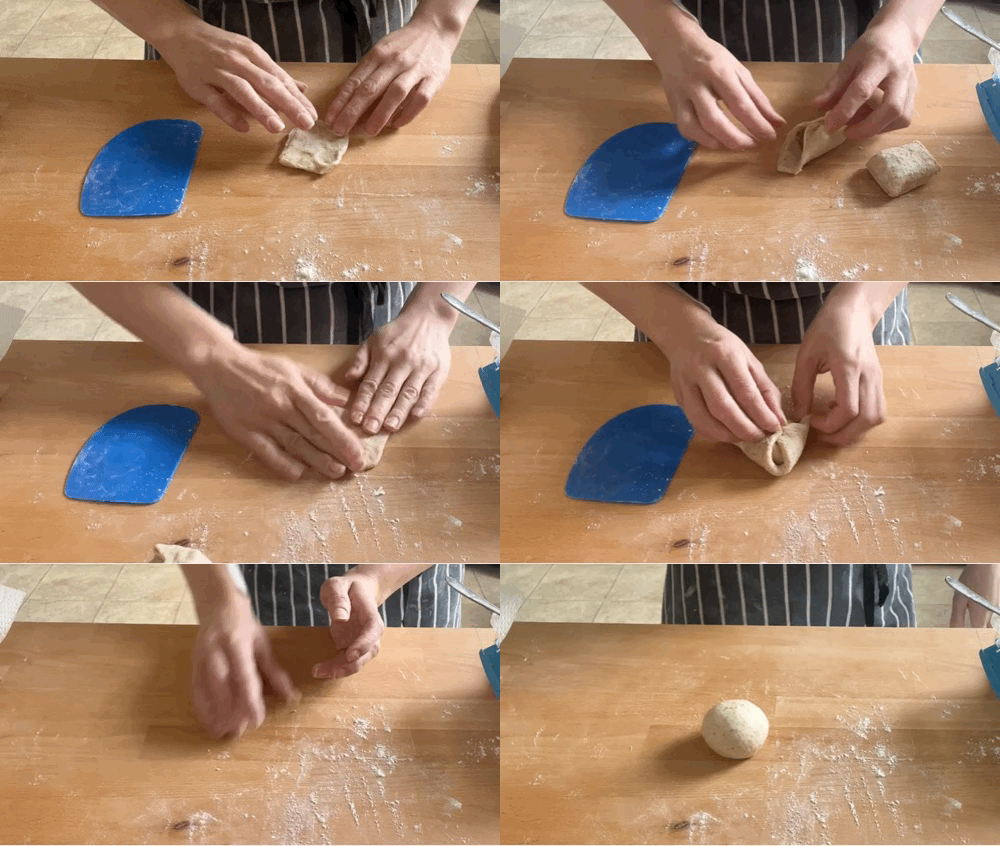
For my Kopi Roti inspired buns, rather than a square of salted butter in the centre, I’m using browned butter. The result is a fluffy bun with a heart of gold (well, gold in fat form, which is 100% browned butter). This gorgeously references the flavour of the bun itself. Forming the dough around the butter was a trial and error process, with the seam often busting open and leaking butter everywhere - thankfully Buttermilk Pantry has solved this issue with a clever shaping technique that did not let me down. But let it be known, if your buns do split / leak, don’t sweat it! You just get a crispy sugar butter skirt, life ain’t so bad.
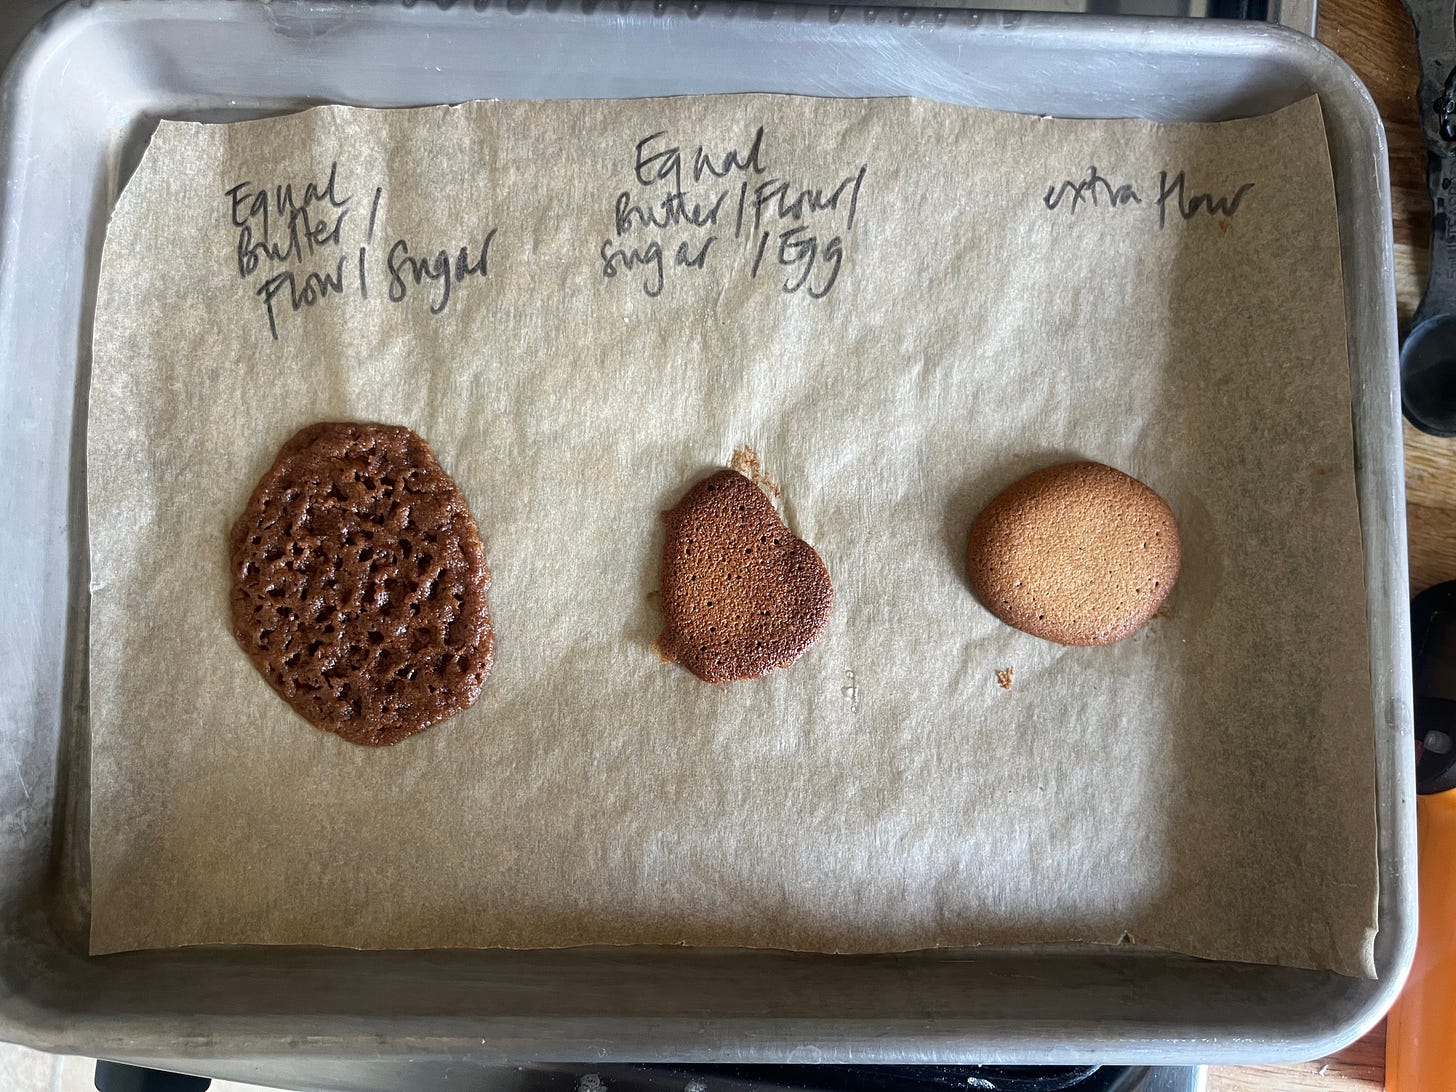
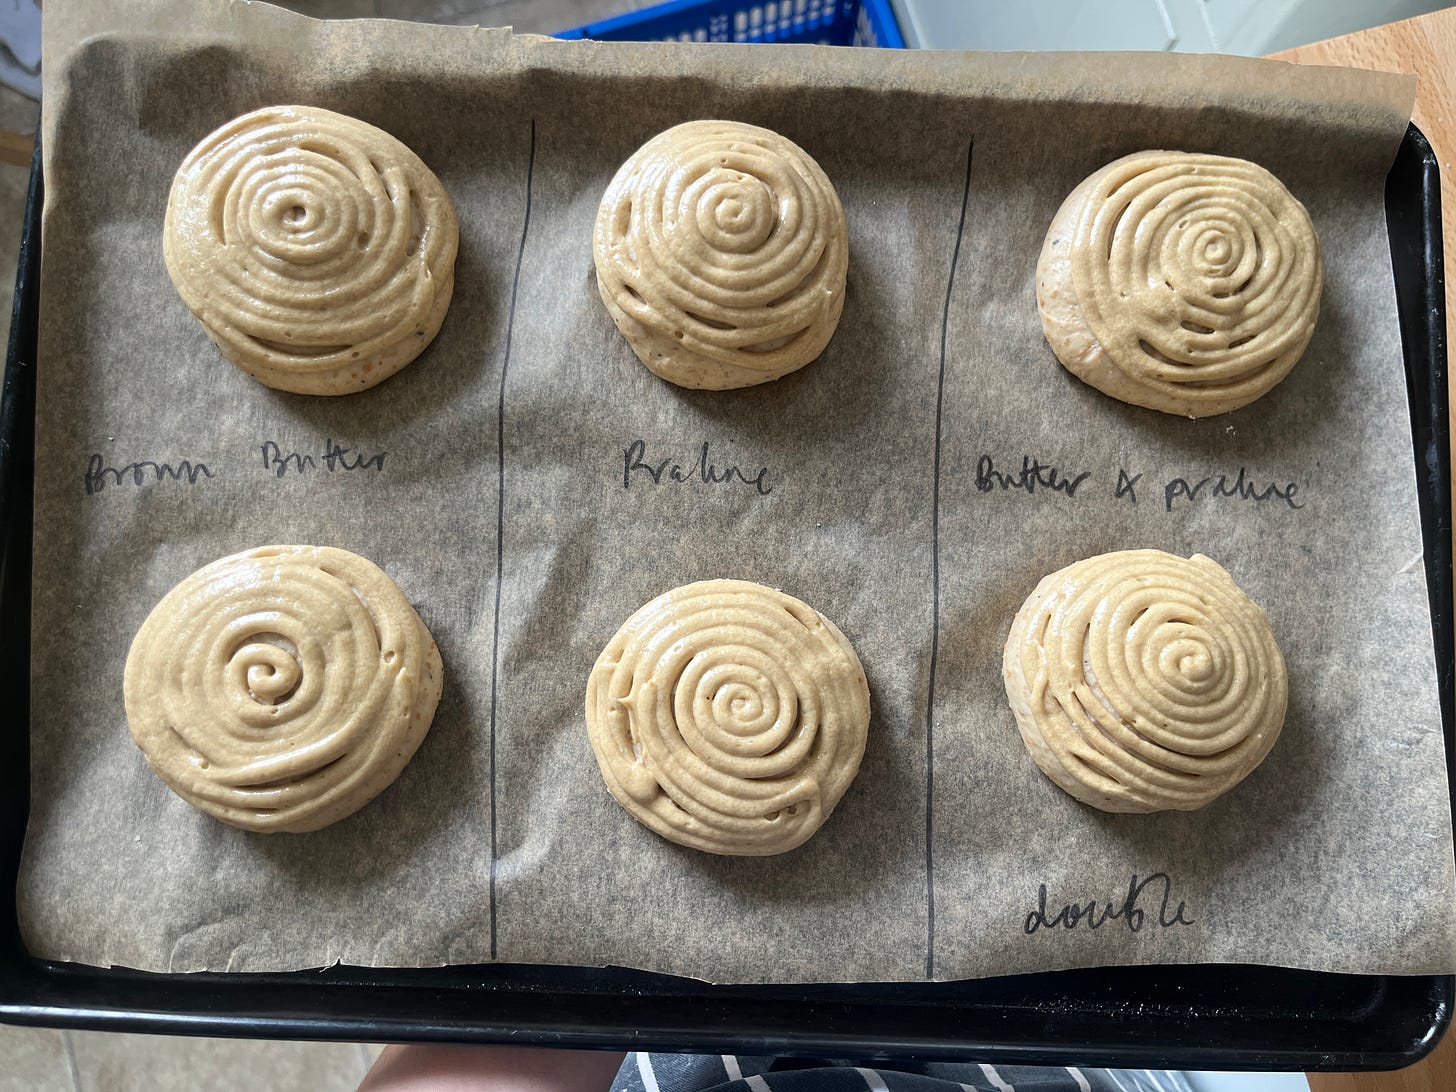
Getting the crusty sugar coating perfect was a bit of a challenge. I’m thankful for Bake Street and Buttermilk Pantry for helping guide me in the right direction. I knew it would be similar to craquelin, the topping we use for choux - equal parts butter, sugar, flour - but more spready, softer. I tried a few iterations to compare.
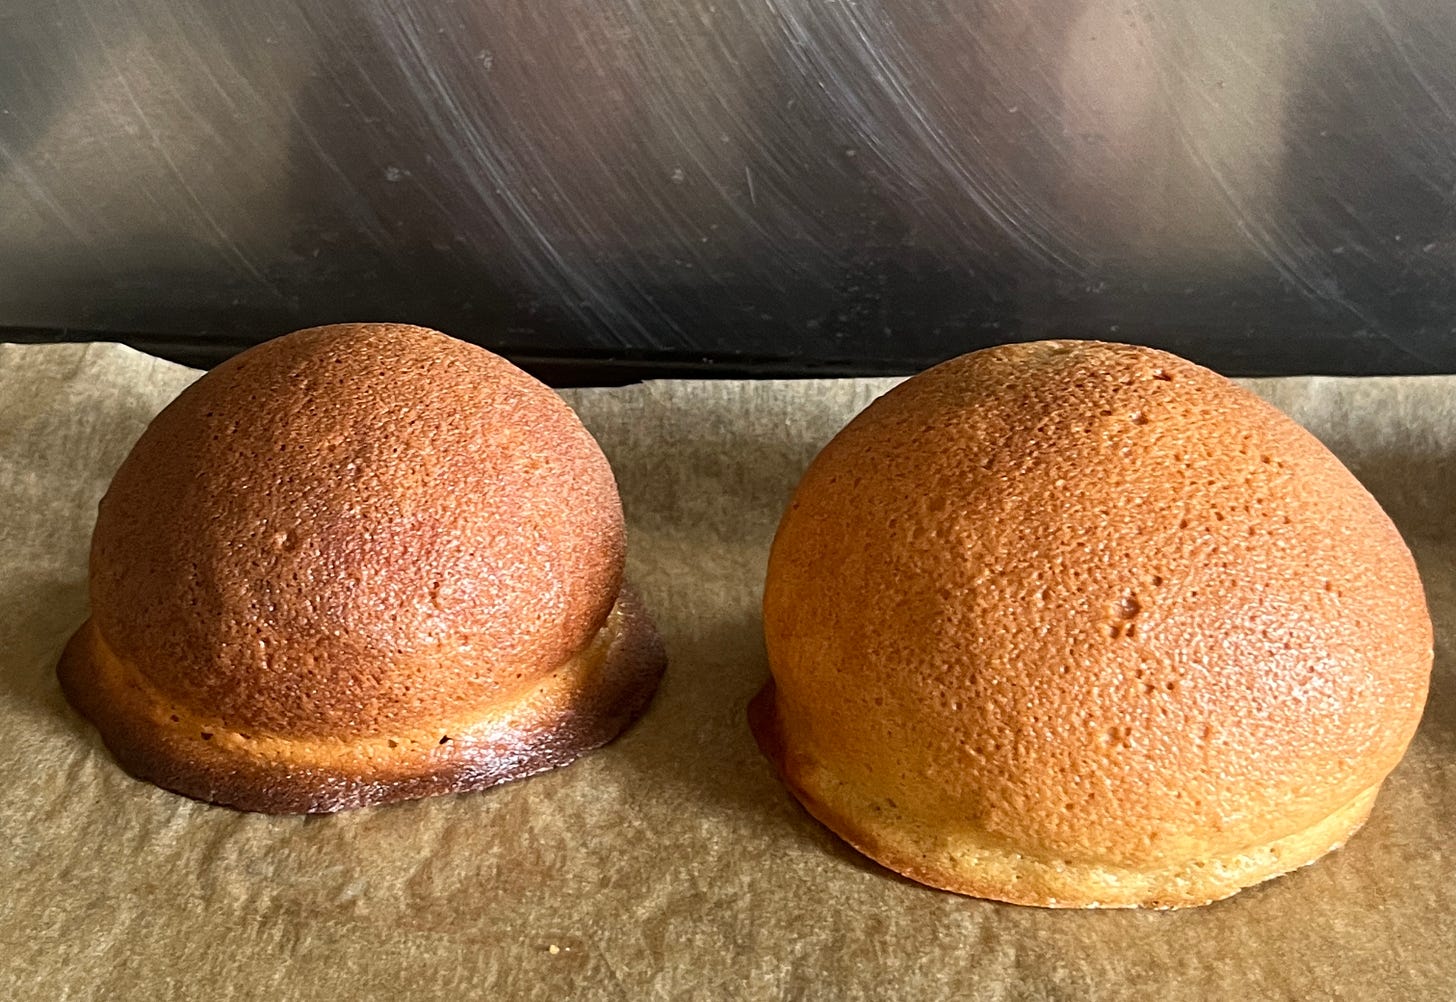
The winner was the recipe with more flour and sugar, which had the best crack overall. If you aren’t fussed about the butter filling, you can absolutely bake these buns without. I’m quite impressed by the size difference! I suppose the butter creates some steamy lift within which is quite exciting to watch.
I also did try an option which also had praline paste in the middle, but I found the butter to be 1) less messy and 2) just as impactful. Adding praline paste is always a good idea, but better to do it after.
The hazelnut cream buns are stuffed with a mandelmassa (almond paste) inspired filling - toasted bread, butter and soaked hazelnuts, a secret gooey praline layer and a lightly sweetened cream. Of course, the brown sugar butter buns welcome some of that maple cream and praline, too! Sharing is caring, afterall.
Other variations
I’m hopeful that showing you these two buns in two forms will inspire you to make your own variations. This dough would make an incredible base for a praline maritozzo, a frangipane stuffed bun, a swirly cinnamon roll, or a caramelised pull-apart loaf. In the same vein of inspiration, you could also use a different dough base - a classic brioche, for example - for any of these. I believe that recipes and books should enable you to explore rather than confine you. And I can't wait to see what you come up with!
Brown Sugar Butter Buns
with optional praline maple cream stuffing, obviously
Yield: 10 buns
Ingredients
Bun dough - tangzhong
30g Wholemeal flour
125g Water
Rest of dough
165g Strong bread flour
70g Wholemeal flour
5g Dry Yeast
40g Light brown sugar
60g Whole milk
50g Egg
70g cooled, solid browned butter - soft, around 16c (see Method here)
5g Fine salt
All of the tangzhong from above
Filling
100g brown butter, fridge cold and solid (see Method here)
Crunchy Topping
50g Butter
70g Brown sugar
50g Egg
80g Plain flour
¼ tsp Fine salt
Method
Sift all of the wholemeal flour for the recipe and keep the bran to one side.
For the tangzhong, whisk the water and 30g of the sifted wholemeal flour together. Heat on a medium temperature, whisking/stirring all the time until it thickens. Take off the heat and add it to the bowl of the stand mixer.
Whisk the cold milk in to cool down the tangzhong, followed by the egg. On top of this, add the sifted wholemeal flour, strong white flour, salt, sugar and yeast, then mix on a medium speed for 5-7 minutes until well combined. Rest for 10 minutes. Mix on a higher speed until medium gluten development stage, 2-3 minutes.
When the gluten reaches medium gluten development - this is when it stretches but tears quite easily, add the bran back in and mix for 1-2 minutes on a medium speed until the bran is distributed throughout the dough. Rest the dough for 5 minutes.
Add in the soft browned butter a teaspoon at a time with the mixer running. Mix until very smooth – another 6-8 mins – and full gluten development is reached. This is when you can pull a thin, almost translucent layer with the dough. If you have not reached it by this stage, rest the dough for 5 minutes, then mix for another 5. Continue until full gluten development is reached.
Remove from the bowl and ‘round’ it a few times on the bench so it has a smooth surface. Leave to rise, covered, for 1 hour or until puffy and almost doubled. At this stage you can deflate the dough and chill in the fridge overnight, or freezer for 1h to make it easier to work with.
Divide dough into 50g-60g portions. Thanks to Buttermilk Pantry for this tip. Divide each portion into two approx ⅓ / ⅔ pieces. Take the smaller piece and roll it out, then place 10g of brown butter into the middle. Pull the pieces of dough around the butter to enclose it completely. Then roll out the second larger piece of dough and place the butter dough seam side down. Wrap the second dough around the butter-enclosed dough and gently shape it into a round bun shape.
Place buns 6 per tray, with a few inches of space in between. Cover lightly with clingfilm and leave to proof until very puffy, around 1-2 hours.
Preheat the oven to 170c fan.
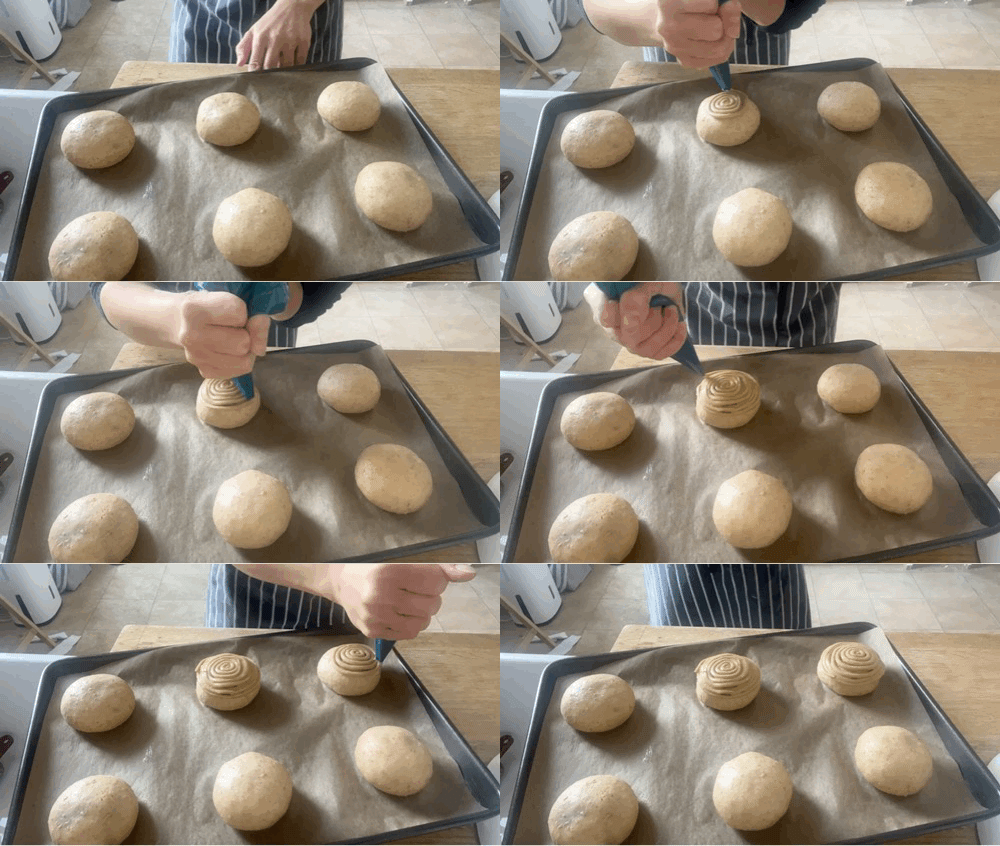
To make the crispy topping, cream the butter and sugar until slightly lightened, then add the egg, flour and salt and mix until combined. It should look like cake batter (because… it is cake batter). Put into a piping bag and snip a small, 4mm hole on the top.
Pipe the crispy topping batter around ⅔ of the proofed bun. Bake for 15 minutes. If the topping hasn’t browned enough, turn the oven up to max and leave the buns in for 2-3 minutes until coloured to your liking.
Leave to cool slightly before enjoying. Rewarm to re-crisp the topping if enjoying after more than few hours, as it will soften.
If you want to stuff with cream and praline paste, get the recipes here. Move into piping bags with bismarck tips and stab a hole in the base of each bun with a chopstick (such a good stabbing tool.) Pipe in praline paste, about 10g, followed by praline cream, about 40g, until the cream tries to escape back out the hole (that’s how you know there’s enough in there)





I’m not fully versed in wholemeal flour being in the US. Do you think these will turn out with just whole wheat flour (no coarse pieces of bran/germ)?
Small typo(?)—it says it yields 10 buns but later you say to put 6 per tray…