Hello,
Welcome to a today’s edition of Kitchen Projects, my recipe development newsletter. Thank you so much for being here.
Today we are celebrating the inter-seasonal joy that is citrus, of all shapes and sizes, as well as testing out the variables for a perfect baked cheesecake. Over on KP+, the citrus fun continues with a not-key-lime lime pie with citrus leaf cream, a ridiculously simple recipe that packs quite a punch.
Kitchen Projects+ aka KP+, is the level-up version of this newsletter. It only costs £5 per month and your support makes this newsletter possible! By becoming a member of KP+, you directly support the writing and research that goes into the weekly newsletter as well as get access to lots of extra content, recipes and giveaways, including access to the entire archive with recipes like my best Hot Cross Buns and go-to brownies. I really hope to see you there:
Alright, let’s do this.
Love
Nicola
Citrus forever
We are covering a lot of ground this week. Though testing wasn’t the easiest - a combination of unseasonably warm weather (Very good!) plus a fridge door that has decided to be in its ‘difficult teenage phase’ and has had trouble staying shut (Very Bad!) was a bit of a hurdle, but I got there in the end.
We are definitely in a bit of an in between seasonal stage - the first sights of peaches and summer fruits still feel painfully far away - where citrus reigns. So this week I knew it had to be all about citrus and today’s combination of ultra smooth cheesecake with a bouncy jelly top, fresh fruit set within, is one I’ll use again and again.
A lot of bakeries have opened in the last year in London but few are as special as Toklas near Somerset House. As well as their incredible range of pastries and bread, Toklas is the sole importer of citrus from the Todolí Citrus Foundation, a botanical farm dedicated to the growing and preservation of rare citrus. It may be the equivalent to the UK’s Brogdale farm except with heaps more sunshine. The Todolí Citrus Foundation is now home to 400 citrus varieties sprawling 40,000 square metres - from kumquats to bergamot, blood oranges to tangors, it captures the rich history of citrus varieties, preserving the incredible kaleidoscope of colours and flavour.
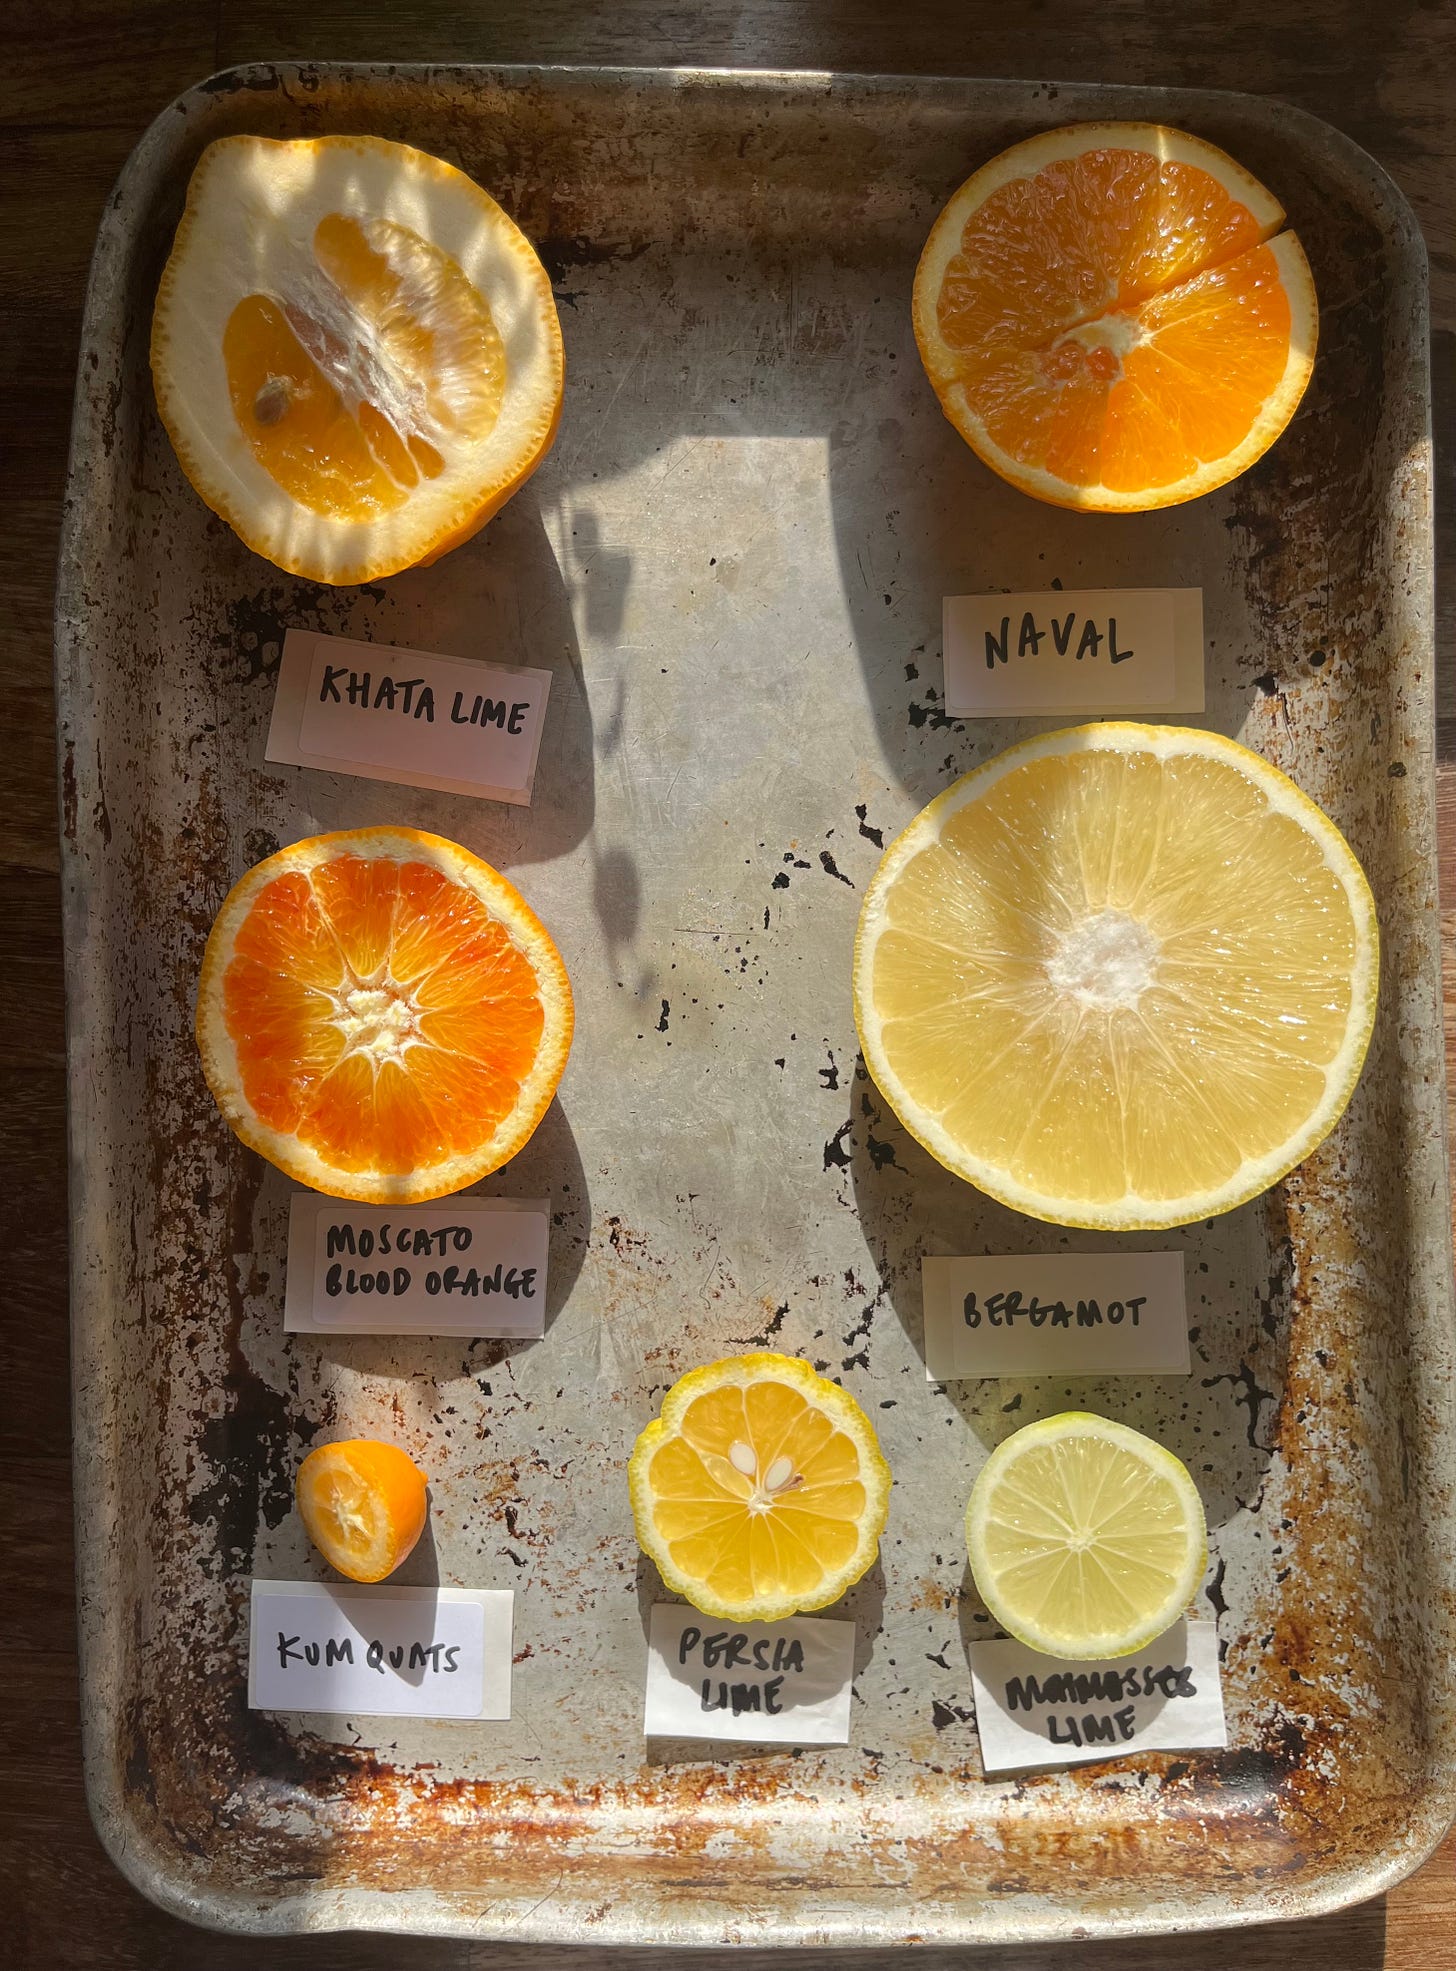
Although I’m definitely going to plan a holiday around visiting the foundation, I was able to get a taste of the beautiful and unusual varieties via Toklas; As well as using the citrus in their pastries (and supplying restaurants around London), they are also selling the almost 20 varieties of citrus in their shop. I was given a little tour of the fridge and picked a few varieties to experiment with this week. Here’s what I got:
The persia lime is a sweet/sour experience, part way between a classic lime and a mandarin. The Khata lime, an extraordinary shape, has a perfect thick pith and skin with tight, acidic flesh. The Naval orange - a classic - was the best I’ve ever tasted. The Moscato Blood Orange, for lack of a better description, is like nature’s orange calippo - sweet and floral. The bergamot is HUGE (I’m used to seeing small bergamots) and so perfumed - the flesh is so intensely flavoured it’s quite overwhelming. The kumquats, perfect oval eggs - and so large - will make perfect candied fruit, whilst the mohtasseb lime was unbelievably bright and acidic, with the palest green flesh.
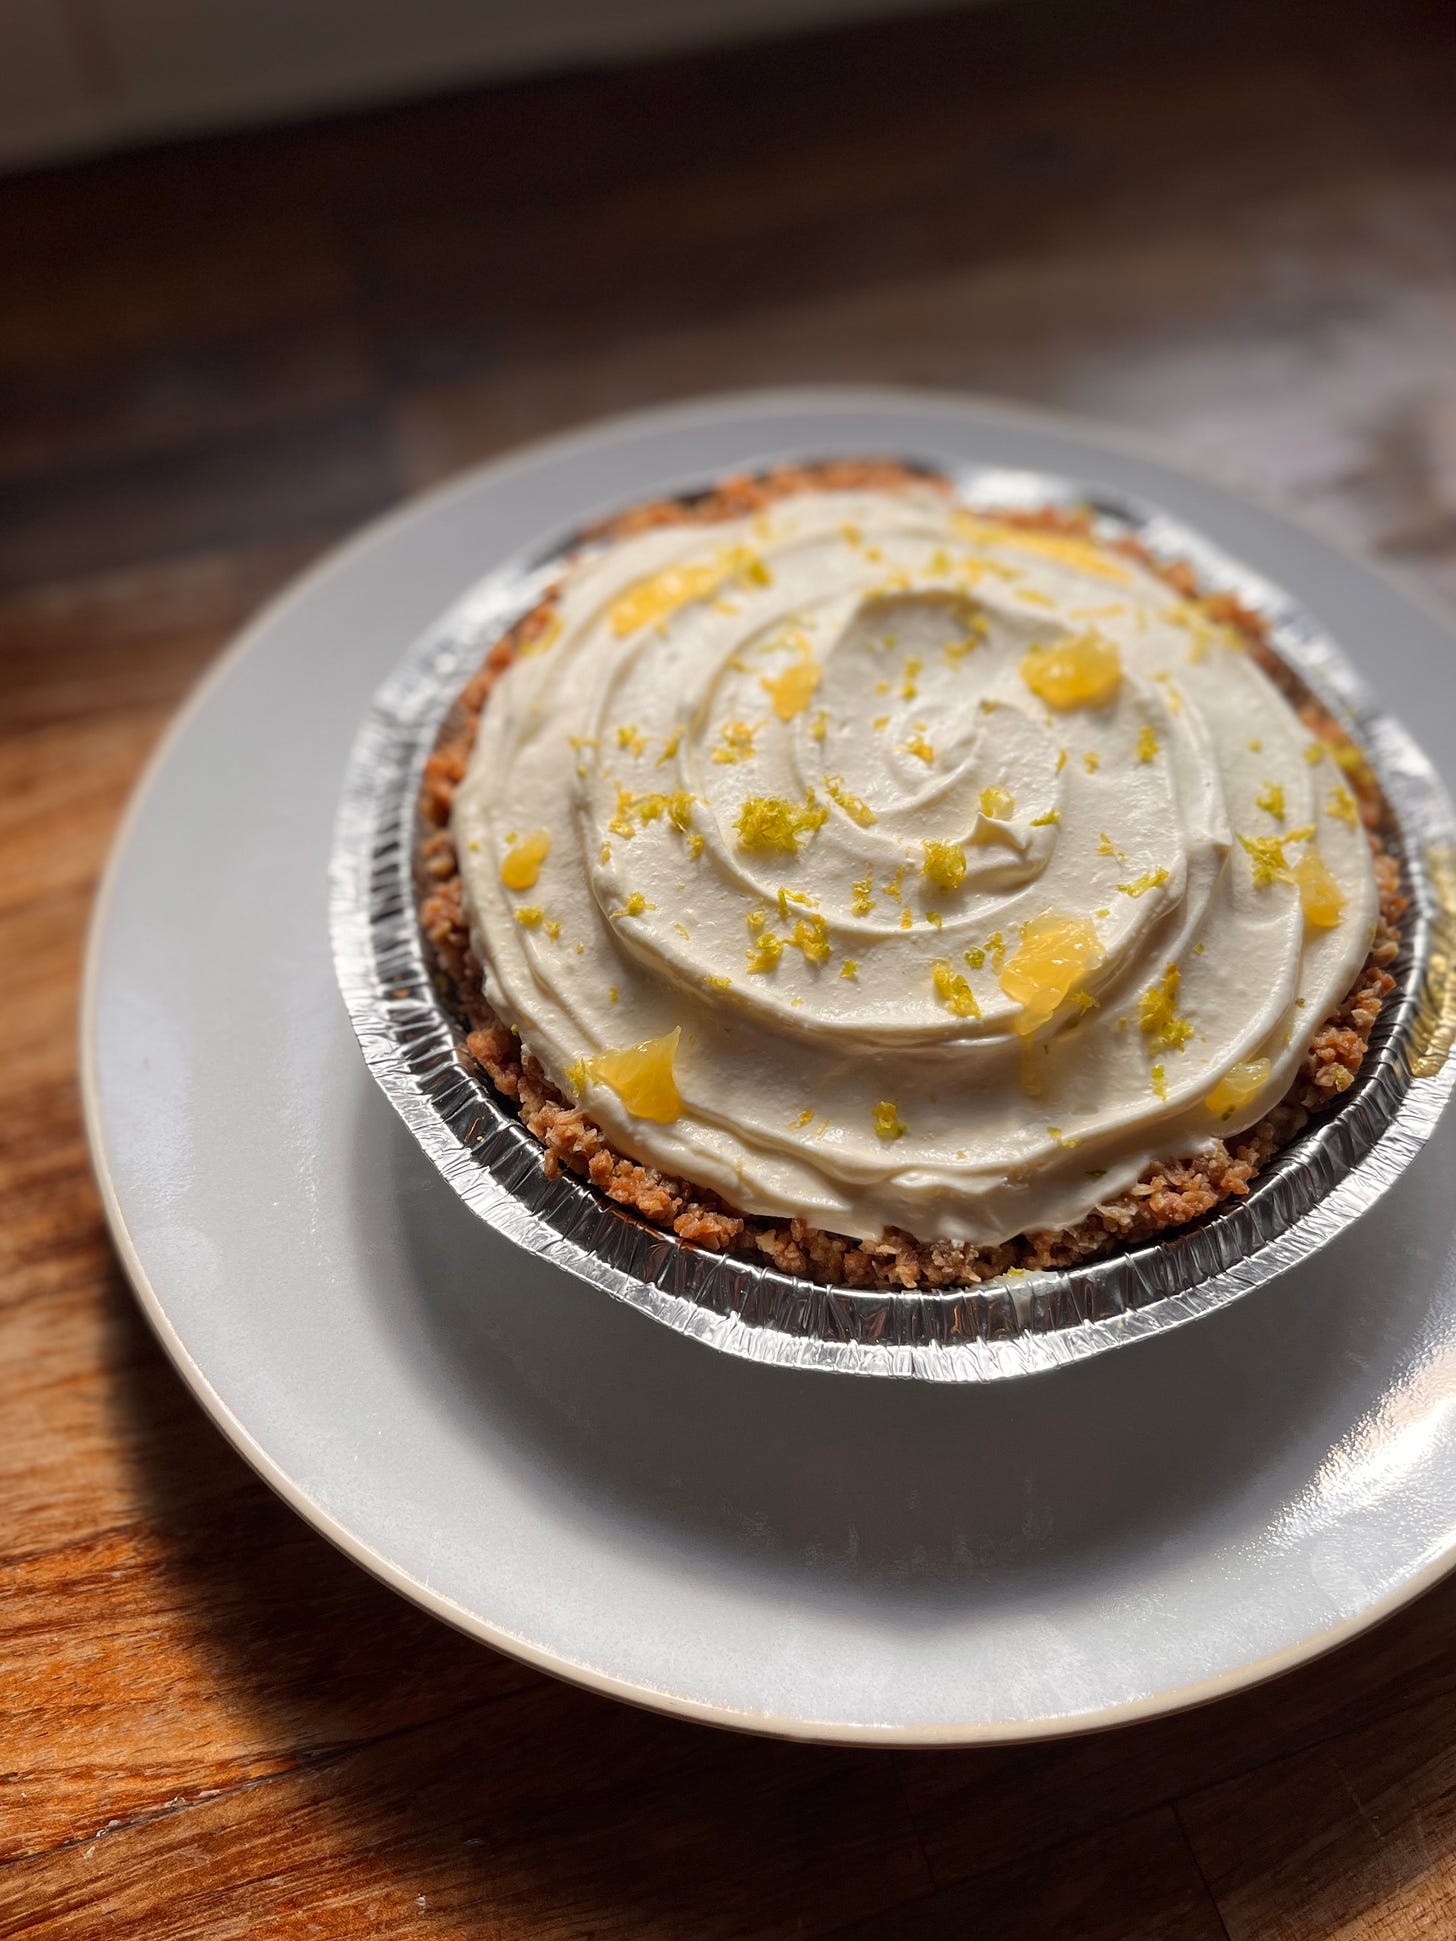
Speaking of lime, I will be using the bergamot, mohtasseb lime and persia limes in a beautiful not-key-lime-lime-pie with citrus infused cream for my KP+ subscribers. I’m obsessed with this one:
Lets talk baked cheesecake
Baked cheesecake? I think we all have different ideas of what is our perfect texture. Though I occasionally aim for density in my desserts, I almost always aim for something lighter and smoother, rich and supple.
The texture of a baked cheesecake is defined by two things: The formulation and the bake time and temp. The latter, I’ve always felt, is more of a preference thing - basically, the jiggle test, so long as there is still a jiggle to jiggle, is subjective. As well as this, I favour a gentle cooking temperature for it’s superior (IMHO) texture a la custard tart/tarte cirtron and save all my caramelised cheesecake desires for basque. But to get the former? I wasn’t sure. So, I decided to test out all the major formulation variables: The dairy.
Cheesecake will, of course, have a majority cream cheese in its base, but what about the *other* dairy? After this week, I now consider the dairy to be the ‘seasoning’ of the cheesecake. I wanted to know, are they interchangeable? And what is the effect on texture, flavour and set?
The major dairy players for this week are sour cream, creme fraiche, double cream, yoghurt and ricotta, as well as the cream cheese itself. Each has distinct characteristics in acidity and fat content - think of acidity as flavour and fat content as texture (also flavour, but fat really is key to mouthfeel):
The only other variable I wanted to test was % of egg in relation to texture. As a starting point, I adapted the cheesecake recipe I know well - Ottolenghis! Ottolenghi is where I first learnt to make cheesecake and the delis always have a wonderful rotating menu of mini baked cheesecakes. So, shout out to Ottolenghi and Helen Goh for my starting point this week.
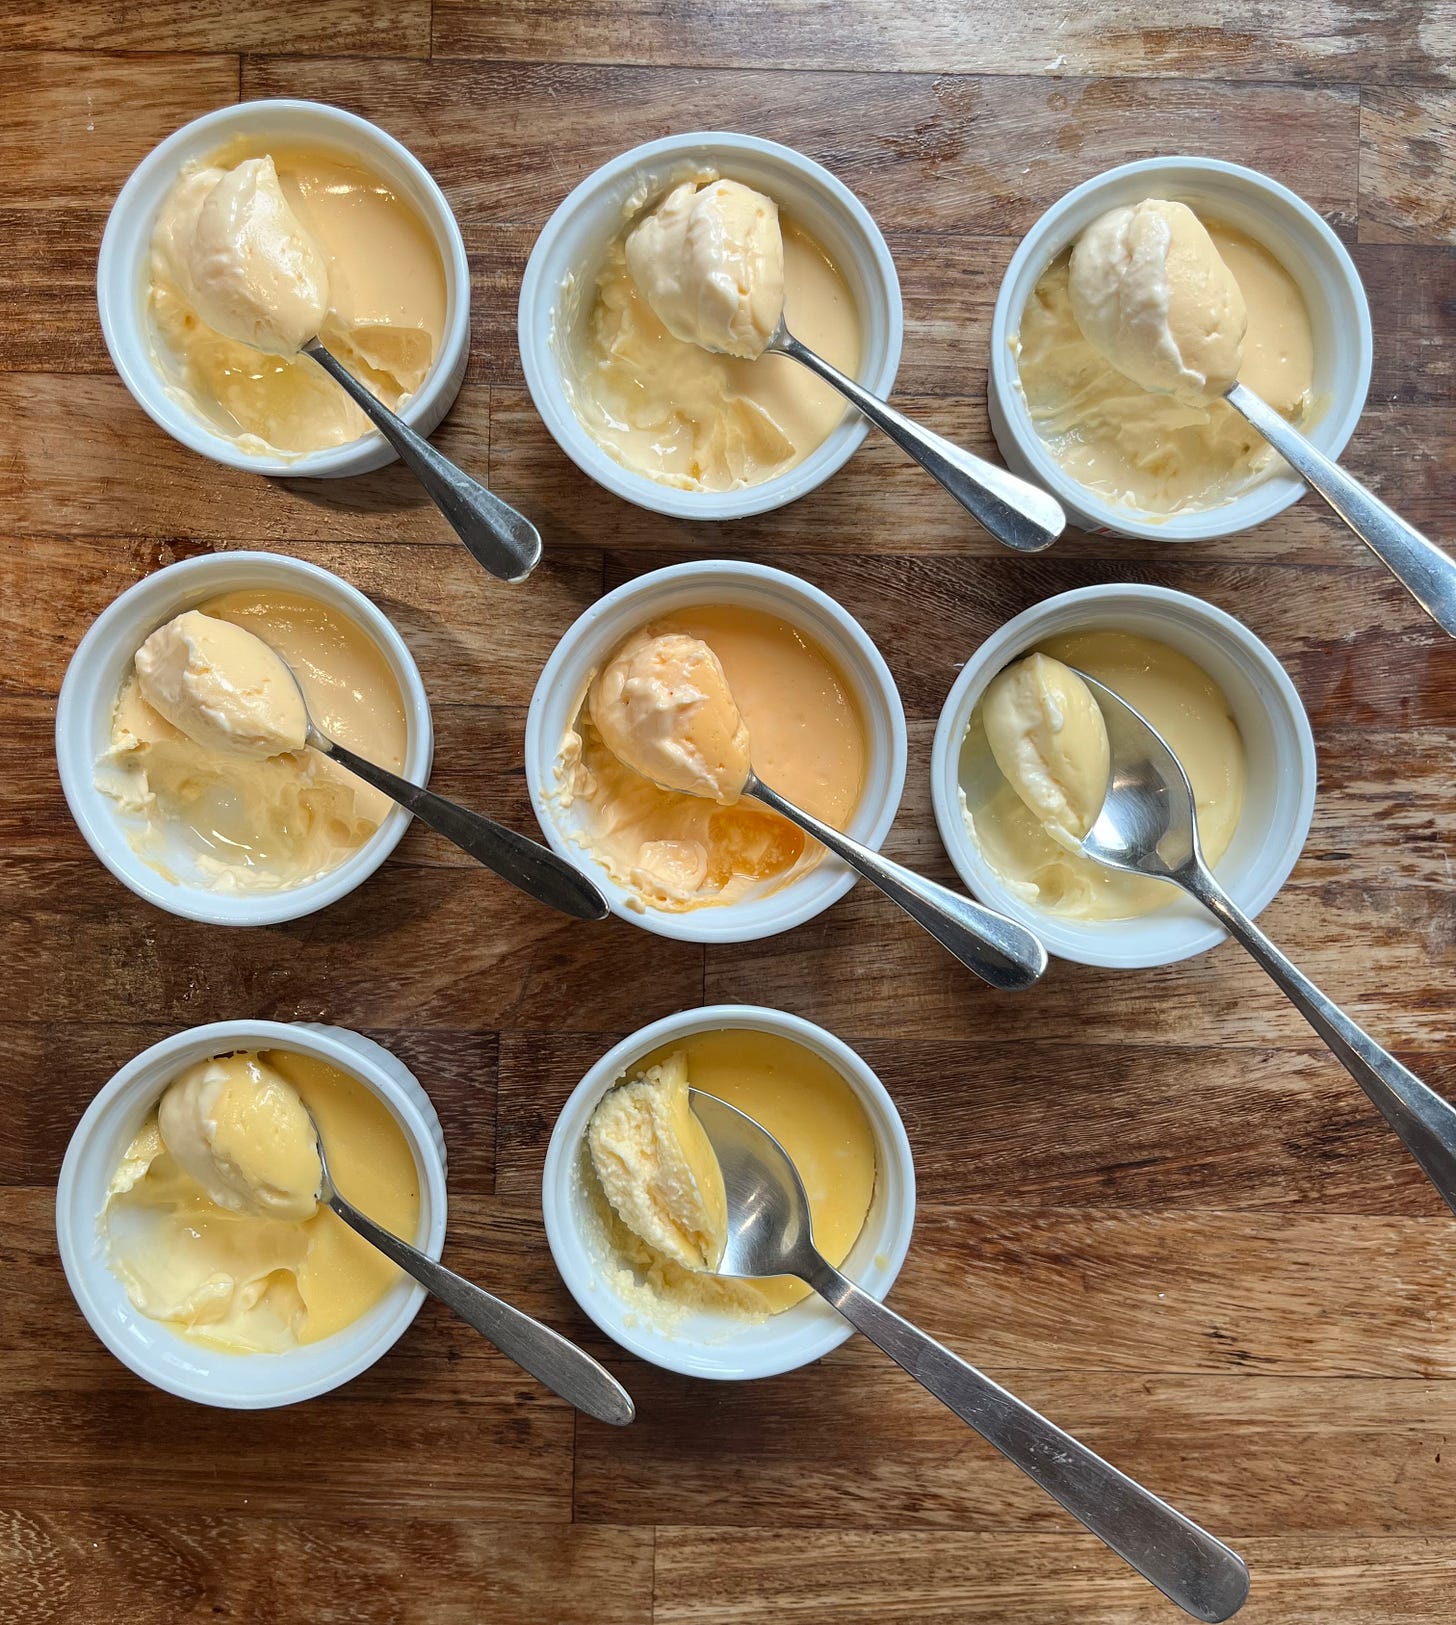
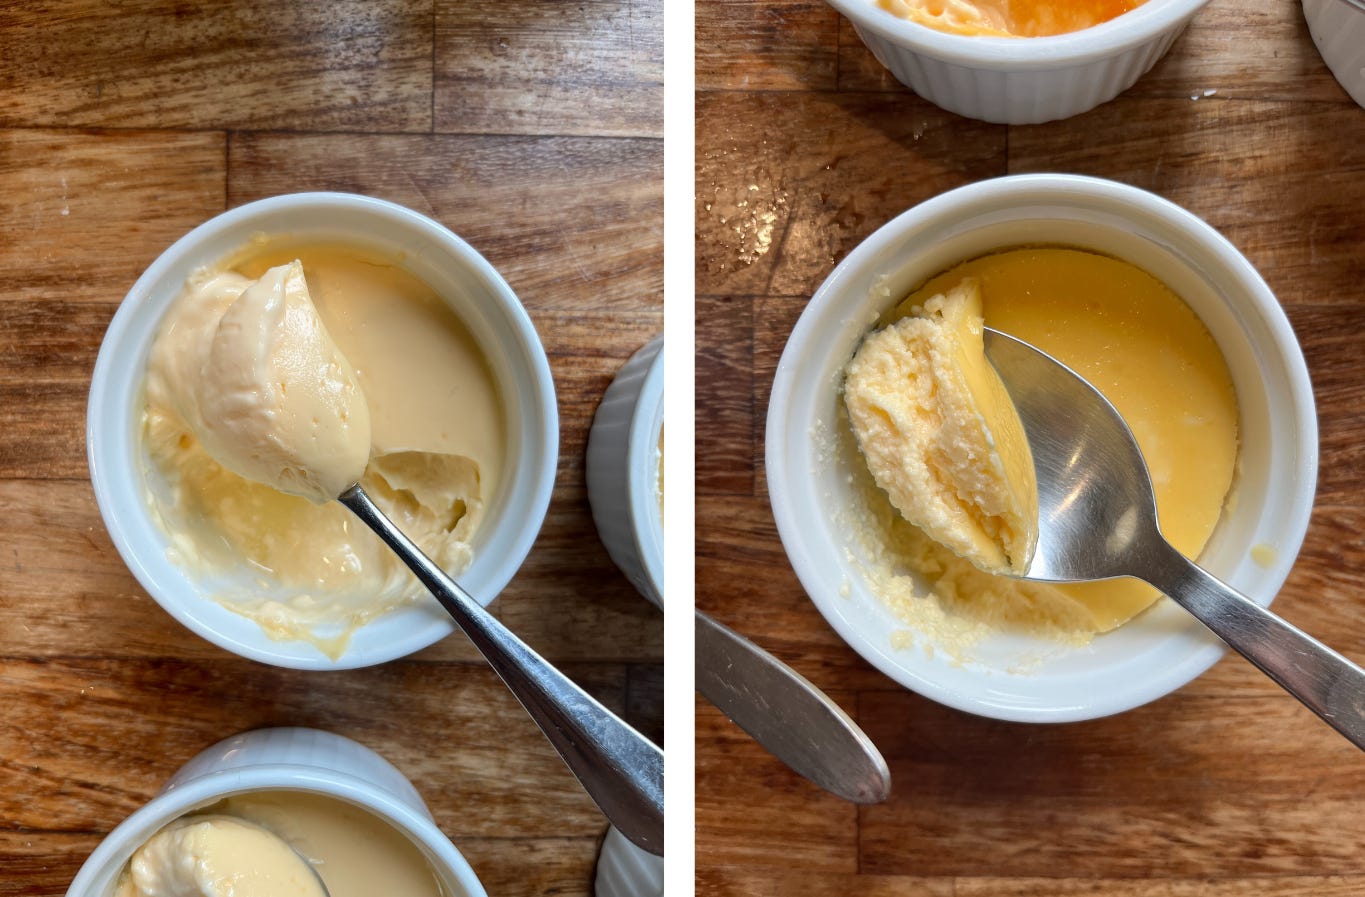
The results are in… and they’re all… pretty great?! Turns out that when it comes to cheesecake, you really can use your dairy as seasoning. Although there were a few textural differences, all of the bases were wonderful in their own way; The creme fraiche and sour cream were almost indiscernible from one another, though the higher fat content creme fraiche had a richer mouthfeel, but the sour cream had slightly more tang. The base made with double cream was so rich but a little flat in flavour. The all-cream cheese was fine but a bit boring and one note. The yoghurt was delicious but - you know, a bit breakfasty, but with a beautiful texture from the thick fage 5% natural yoghurt.
But the winner for me? RICOTTA! I personally loved the milkiness and texture of the base made with ricotta - it had a depth of body and texture that the others simply didnt achieve. However, the flavour was a bit lacking - so I’ve decided to bolster this in my final recipe by adding up to a tablespoon of lemon juice.
Surprisingly, the doubled % of egg wasn’t as significant as I’d thought. I thought that doubling the egg would result in a much firmer set - instead, it just gave me a really rich flavour which I’ll try and emulate by adding an extra yolk, rather than another whole egg. As a result, I put a lot more importance on the bake method (covered next) than I do egg % - it really is hard to make a too solid cheesecake when you use a waterbath, it is SO gentle.
I want this newsletter to be able to set you free when it comes to baking - Yes, baking is exact and science to an extent, but there are areas where you can really explore flavour and this is definitely one of them.
FYI: Is it just me or have modern dairy products become super samey? Not in texture, I mean often modern products made in mass produced settings are not discernable from one another. And it’s a shame! Whenever I go to farm shops, I always pick up the local dairy! Its more interesting and usually different compared to what we get in the supermarkets. Although sour cream and creme fraiche should be distinct products, they seem to be interchangeable in current production methods - the sour cream and creme fraiche, for example, available from my local tesco have pretty much the same flavour and fat content! So, if you are going to go for creme fraiche (which I loved), please try and get one with a higher fat content!
The bake
It would be remiss of me to write a KP about cheesecake without discussing the most common issue (according to Google): Cracking aka do I really need to use a water bath? There is lots of chat online - some say you don’t need to use a water bath, you just need to create a steamy environment. But I don’t think this is true. The water bath is an extremely useful tool because, as well as creating steam (which helps keep the top of the cheesecake supple whilst it still finds its final form), it provides the environment needed for stress-free gentle baking.
Cracking only happens if the eggs have over coagulated aka over cooked aka things have got too hot, either throughout the whole cheesecake or just on the top. Modern ovens are amazing - so powerful - but sometimes that power will not get us where we need to go. I know we’ve discussed this before but let’s run through the science of eggs:
Eggs are about 75% water, but it’s thanks to this property that we can do so much with them.
Eggs have two parts - the white and the yolk. The white is 90% water, with the rest being made up of proteins that float around doing their thing. The yolk is 50% water - the other 50% is a mixture of fat and protein. In their raw state, egg whites stay watery thanks to the bonds between proteins and water repelling each other. Thanks to the fat, which coats the proteins and helps prevent the repelling behaviour of the protein and water, egg yolks are a bit more together, even in the raw state.
Due to these molecular properties, whites and yolks reach a setting point at different temperatures, albeit through the same action: When heat is applied to proteins, the molecules all start to dance around quite quickly. As a result, the proteins unfurl and connect directly with each other, forming strong bonds that begin to edge out the water. Eventually, all the water is squeezed out and you get rubbery eggs or, indeed, cracks. Cracks may also form as the cheesecake is cooling - if there is rapid temperature change, the outside of the cheesecake will cool down much more quickly than the inside and as it settles, the over-coagulated proteins begin to contract, again resulting in fissures. Gah.
This is where a water bath comes in handy. Heat exchange, which is what happens when you put something in the oven, is quite different between water and your cheesecake, vs. air and your cheesecake. The water absorbs some of the heat from the oven, allowing the temperature to be regulated resulting in a more gentle and even bake. As water has a max temperature of 100c, so long as the oven temperature isn’t so high it is turning it all to steam immediately (please don’t do this, this would be a mess!), meaning a symbiotic relationship forms between the water and the cheesecake that is submerged in it: As the cheesecake heats up, some of the heat is transferred to the water, and vice versa, minimising temperature fluctuations. Leaving the cheesecake in the waterbath whilst it cools also helps regulate the temp for extra smoothness.
Custard Tart is never baked with a water bath - instead it is baked in a very low oven - around 110c fan. So would this work for cheesecake? Yes - it would work. But it would be LONG - cheesecake is usually a lot deeper than a custard tart and we are not heating up our filling to give it a head start during the mixing process for cheesecake. It might seem faffy, but a water bath really is the only way to guarantee gentle cooking at a reasonable pace.
I tested two bases - one with and one without a water bath and although there wasn’t significant cracking, the texture of the former was hugely inferior - grainy - and the edges had pulled away from the sides of the ramekin. Not cute and definitely worth avoiding.
A note on the base
I’ve thought about this a lot and my official line on cheesecake base is - lower your expectations. Not in a bad way, but I was getting so frustrated because I wanted to have an ultra crisp cheesecake base and I’ve come to the conclusion that that is just NOT going to happen! In fact, I think we should lean into the quite unique texture of a baked cheesecake base - dense, slightly crumbly, and buttery but not distinctly crisp (well, maybe on the bottom). And that’s fine. More than fine. The best tactic I’ve found is to ensure you have a pretty thick base which means you’ll get a mixture of textures. I used the base for my 3pm oat biscuits but to be honest, plain digestives are bloody good here. I take quite a relaxed approach to my biscuit bases, depending on what biscuits I have on hand, adding salt and sugar and mainly deciding on the texture by checking the visuals, if it clumps together well in my hand.
Jelly trials
I am a huge jelly fan. From panna cotta (come on it is a jelly) to trifles (I pick out the jelly), jelly always makes me smile! But jelly is not always dietary requirement friendly owing to the fact it is usually gelatine based. This week I wanted to test out the three major options: Gelatine leaf, Agar Agar and Carrageenan (known as VegeSet). Each of these have distinct properties with melting point, setting point and final texture. Let’s go through them:
Agar Agar and Carrageenan and both types of seaweed - Agar Agar is derived from red algae whilst Carrageenan is derived from Irish Moss. Although both have potent setting abilities, the final results are quite different.
Sugar plays an important role in gelling - with all setting agents, there is a love triangle going on between water, sugar and the setting agent. Sugar bolsters the network between the liquid and agent by enhancing the stucture and strengthening the hydrophobic bonds, so the more sugar, the firmer your jelly will be! However, I also don’t want my jelly to be overly sweet and for the citrus flavour to shine through.
One thing I knew I had to be aware of was acidity - I’ve always been taught that acidity negatively impacts gelatine so I knew I would probably have to increase the ratio. For the tests, I used the ratio of 1 leaf of gelatin (Dr Oetker) per 100ml liquid. For the seaweeds I used the ratio of 1 gelling agent: 10 sugar : 100 liquid as a starting point. I tested this with freshly squeezed orange juice which is around 4 on the pH scale (below 3 is considered extreme and would radically affect the gelling):
The VegeSet is amazingly potent when you use a lot of it! It sets quickly and firmly. I found it to be most similar to the gelatin in texture, with the gelatin being more fragile owing to its low melting point.
My first gelatine test was way too fragile for what I wanted - so softly set and definitely not sliceable, probably because of the acidity, whilst agar was the outlier and seemed to be quite resistant to the acid - it makes a firm almost chewy jelly that has more bite to it! I am most used to the gelatin jelly texture, but think that vegeset does a good job of replicating this melt in the mouth texture despite having a higher melting temperature. I want the jelly to be quite firm and sliceable and for each of these setting agents - which all do the job brilliantly - it’s a different quantity as below. In the end, I think it’s best to slightly reduce the Agar Agar, stick to the status quo with the Carrageenan and slightly increase the gelatin owing to the acidic liquid. When we get to the recipe, I’ll share all the quantities so you can decide. Below is a table based on 100ml of liquid:
Despite what the instructions say on the back of the packet, I think the most failsafe way to incorporate the Agar/Carrageenan is to mix with sugar and then whisk into the already warm liquid. This always gives me the cleanest, clearest and non clumping set.
I’m afraid I won’t be covering powdered gelatine, though it should have the same effect as the gelatine leaf - I do find it finicky to deal with and I often find it has an off putting smell. So, if I were to use a powder I would prefer to use one of the plant based options.
Equipment
I like to use a springform tin here - unfortunately a solid tin doesn’t suit a jelly topped cheesecake as you can’t flip jelly over safely - so make sure you wrap it several times with cling film before doing the waterbath.
Okay, let’s do it!
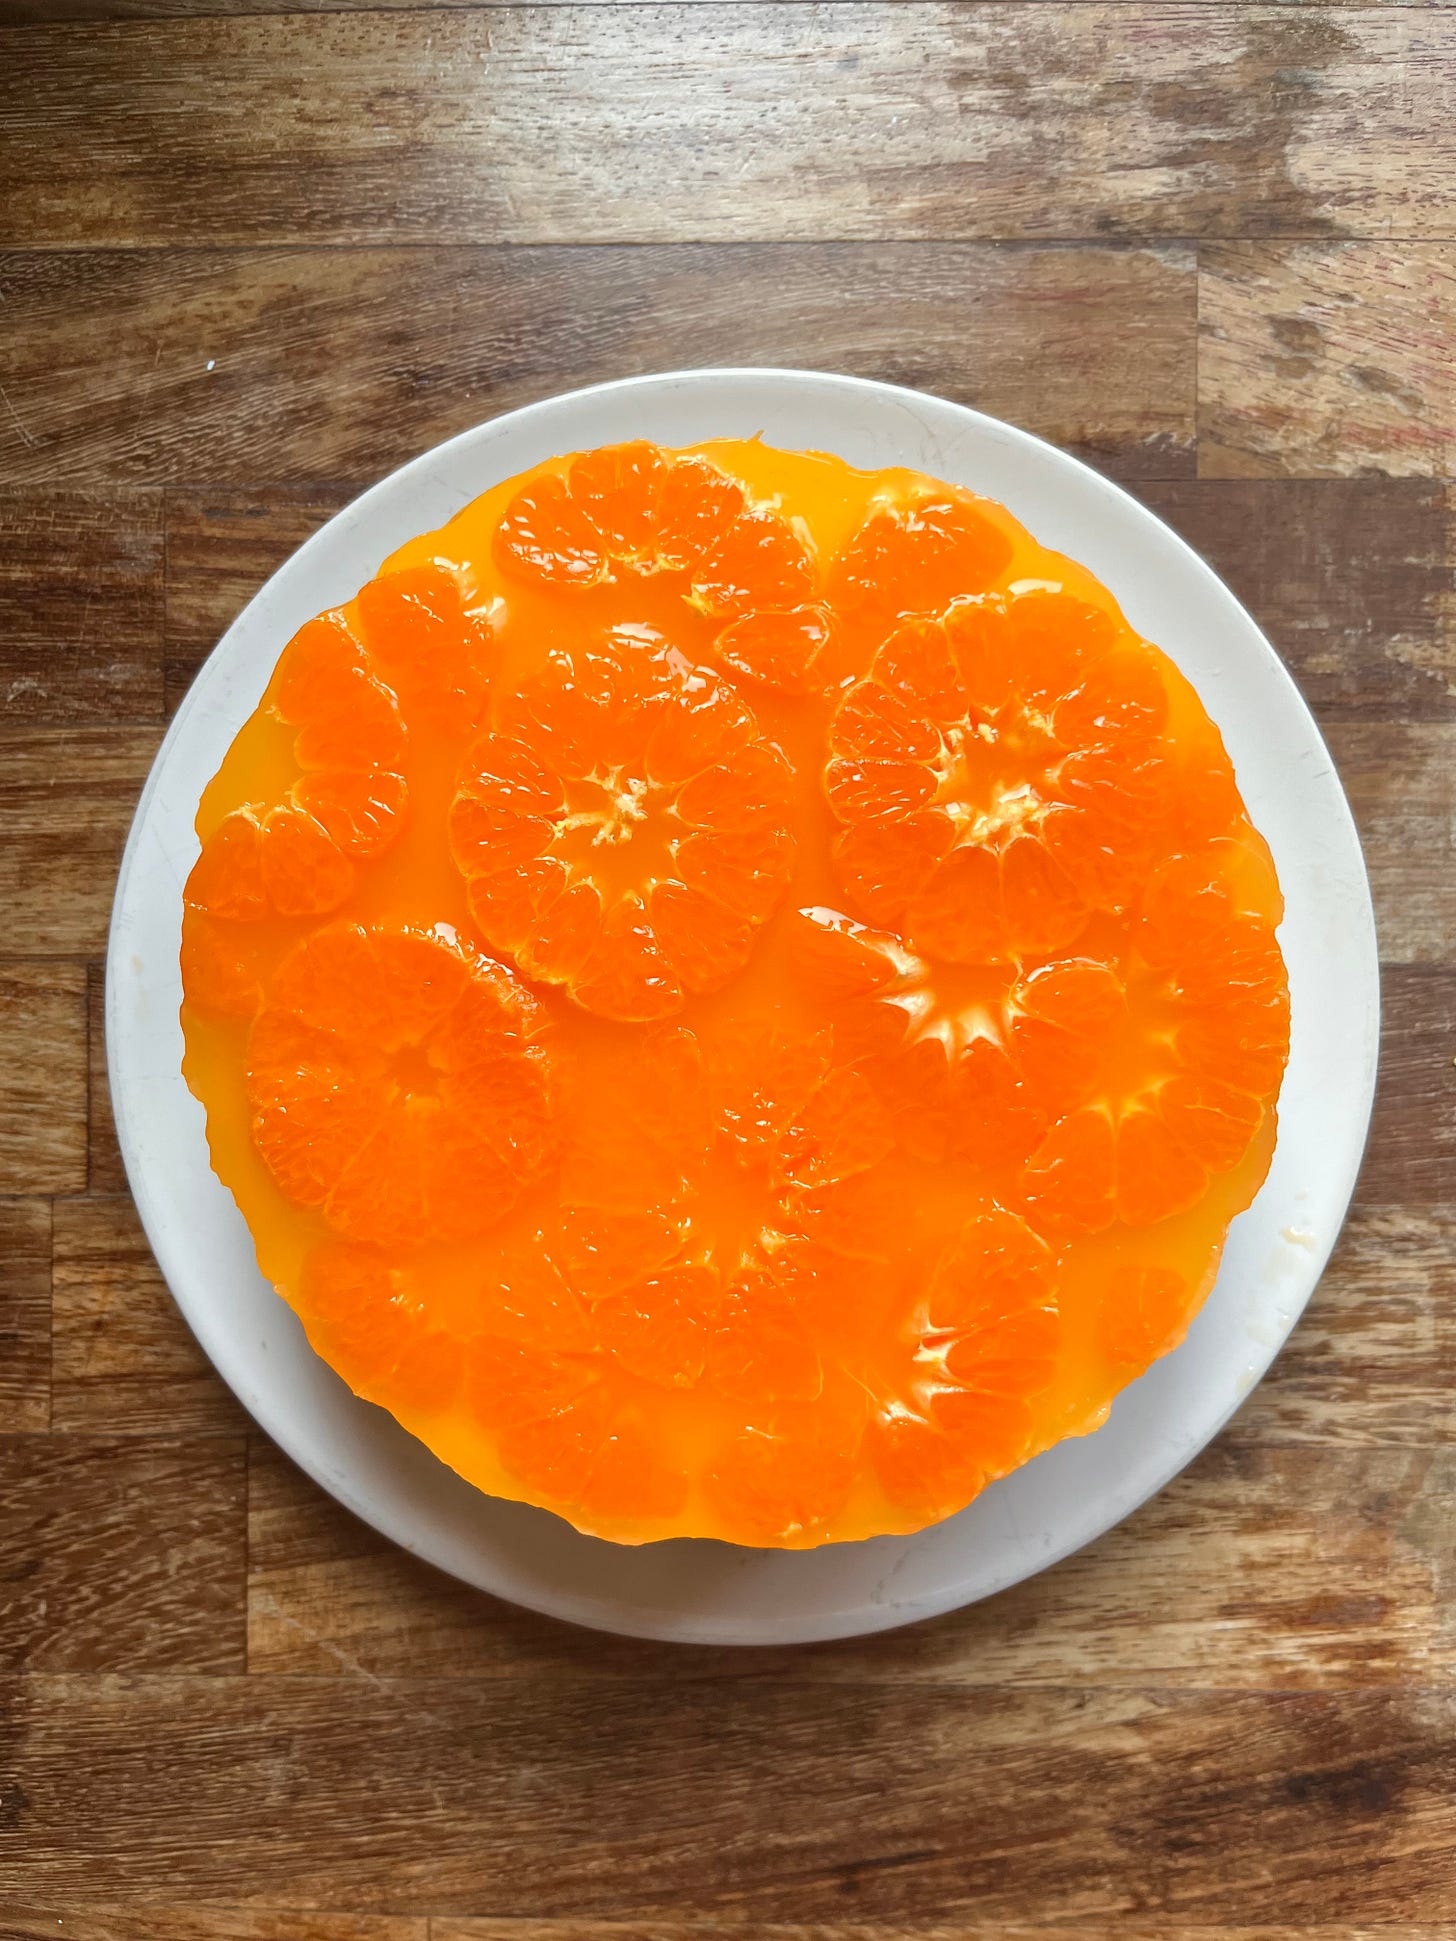
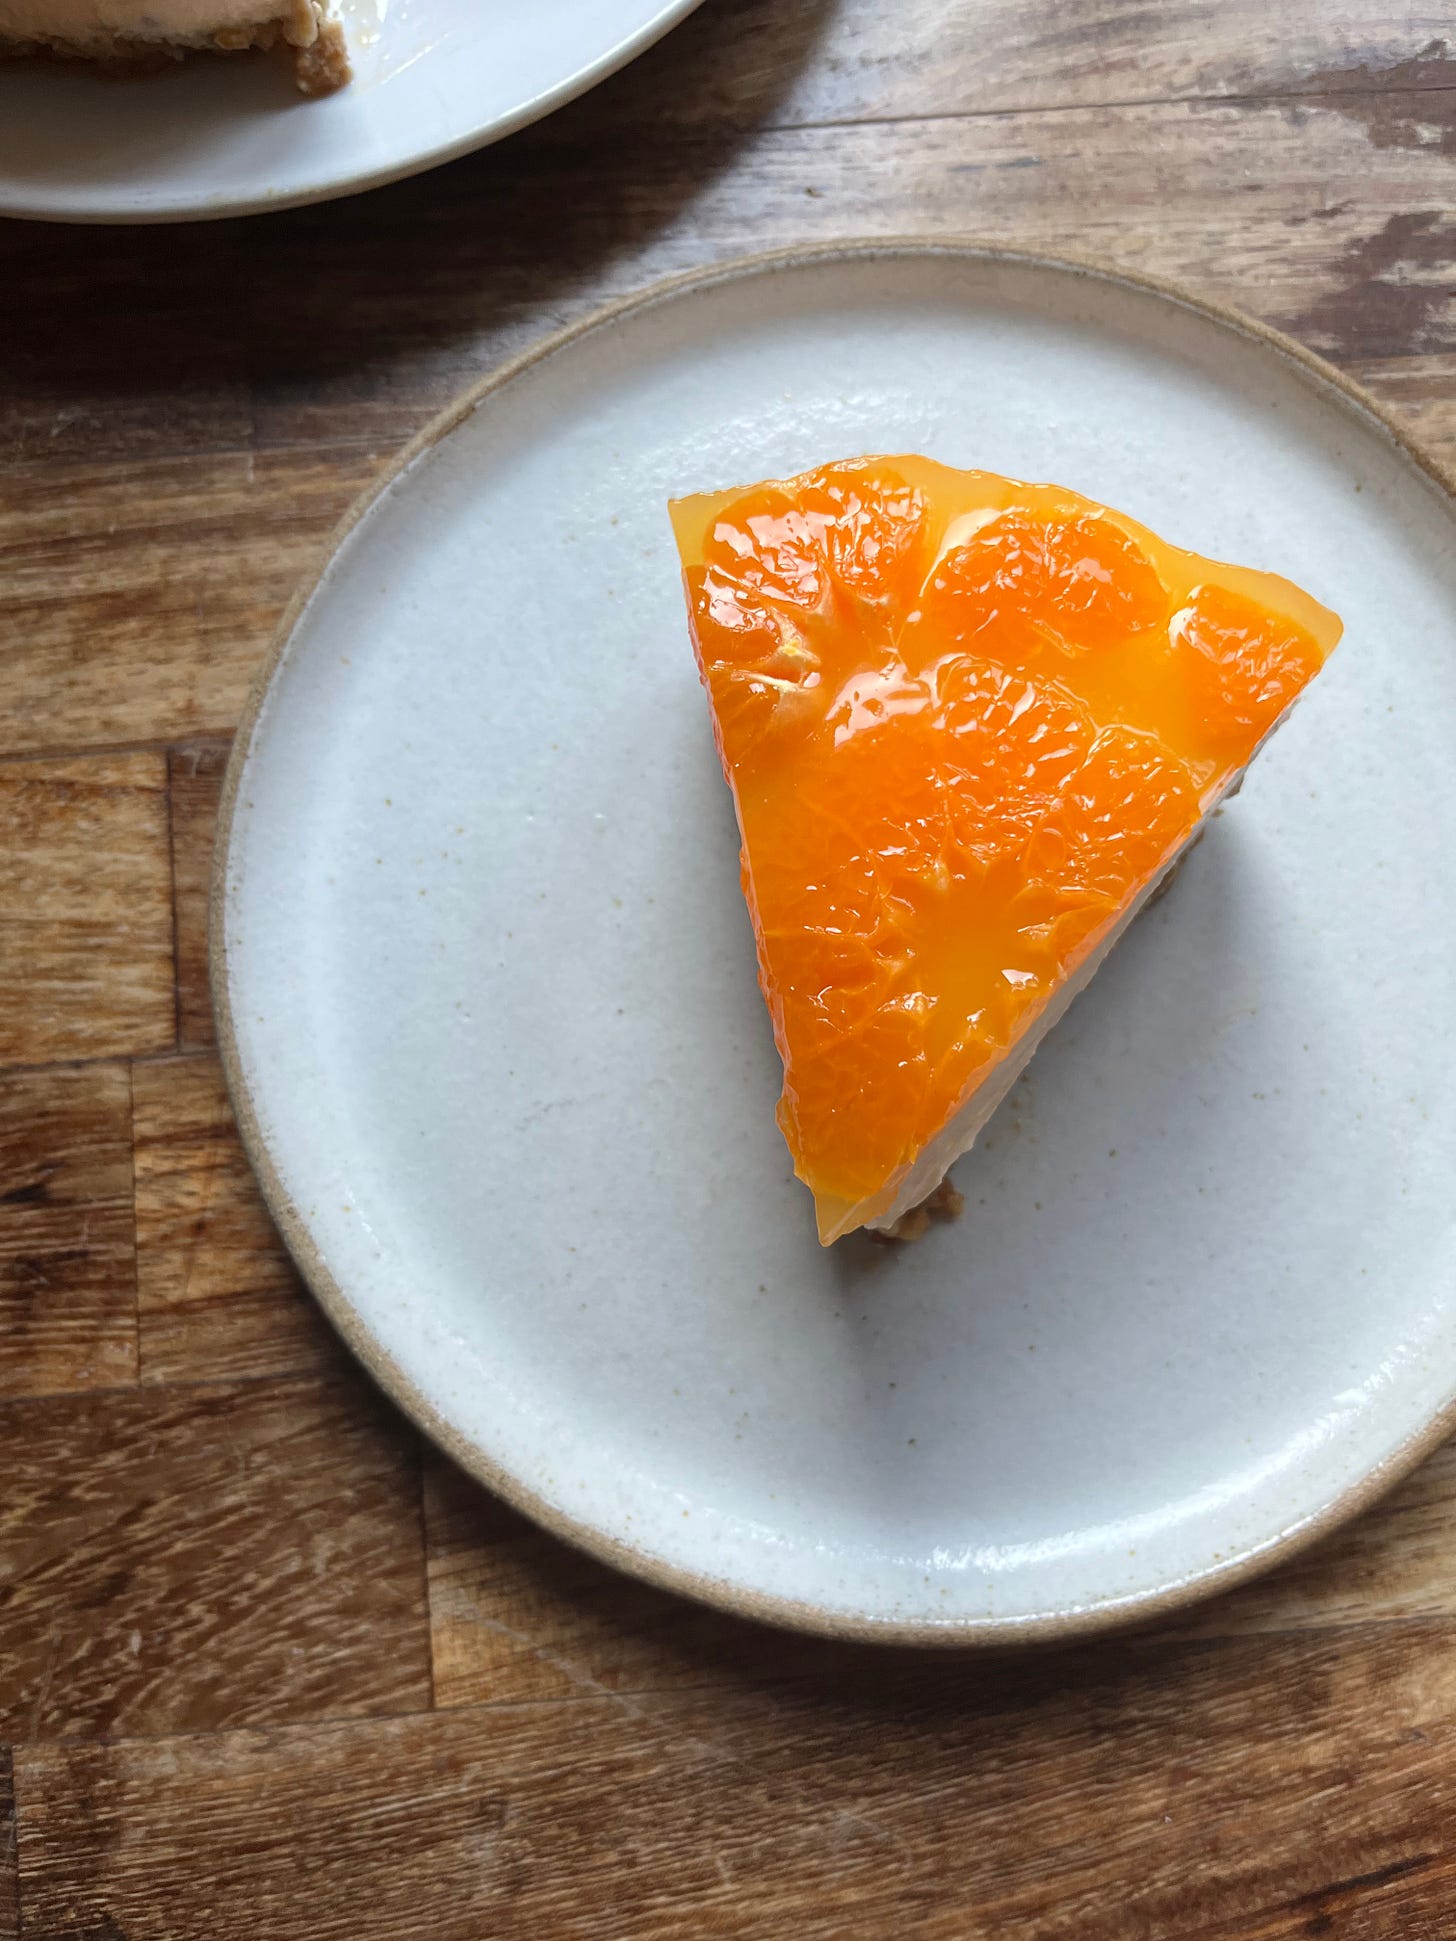
Citrus jelly baked cheesecake
Makes 1 x 6inch cheesecake. To scale up to a deep 9inch, double the mixture
Cheesecake base
150g digestive biscuits (or half recipe of 3pm oat biscuits - bear in mind the latter already have more butter in than digestives so you may not use all the binder below)
50-80g butter, melted (the reason there is a range is because all of our biscuits are different and some will take more/less butter!)
Salt to taste (tasting is the fun bit)
Cheesecake mix (adapted from my time at Ottolenghi)
420g cream cheese
70g caster sugar
150g ricotta, drained (only use the firm bit)*
1 x large egg (60g)
1 x yolk (20g)
½ tsp salt
1 tbsp lemon juice
*Remember, you can play around with this! If you don’t have ricotta, try another dairy but then make sure you taste it before adding the extra acidity via lemon juice!
Orange jelly
3 Mandarins/Tangerines to decorate
150ml orange juice
15g caster sugar
Setting agent of choice
Guys… . It’s a bit tricky to use the powdered seaweeds accurately without a microscale, but I did my best to approximate for you:
Please note the gelatine leaves I have used are the Dr Oetker ones - they are 11.5cm x 7.5cm.
Method
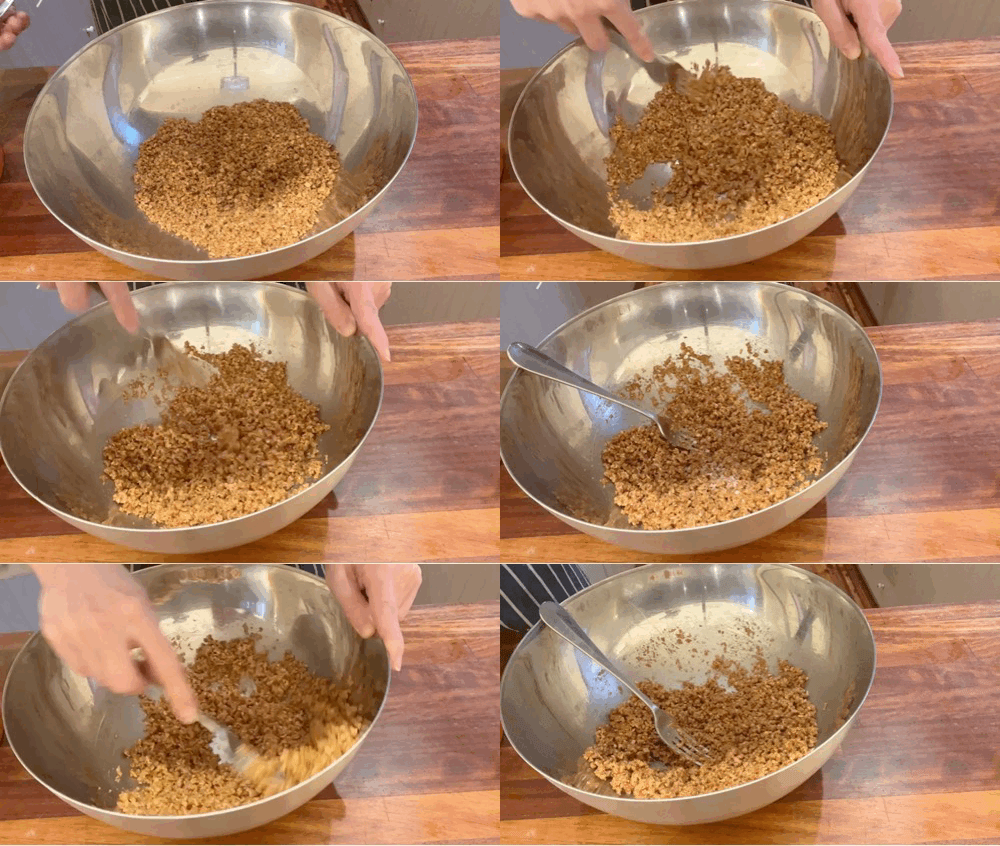
Pre-heat oven to 170c fan. For the base, crush the biscuits and mix with melted butter - it should only just clump together. Add salt to taste::
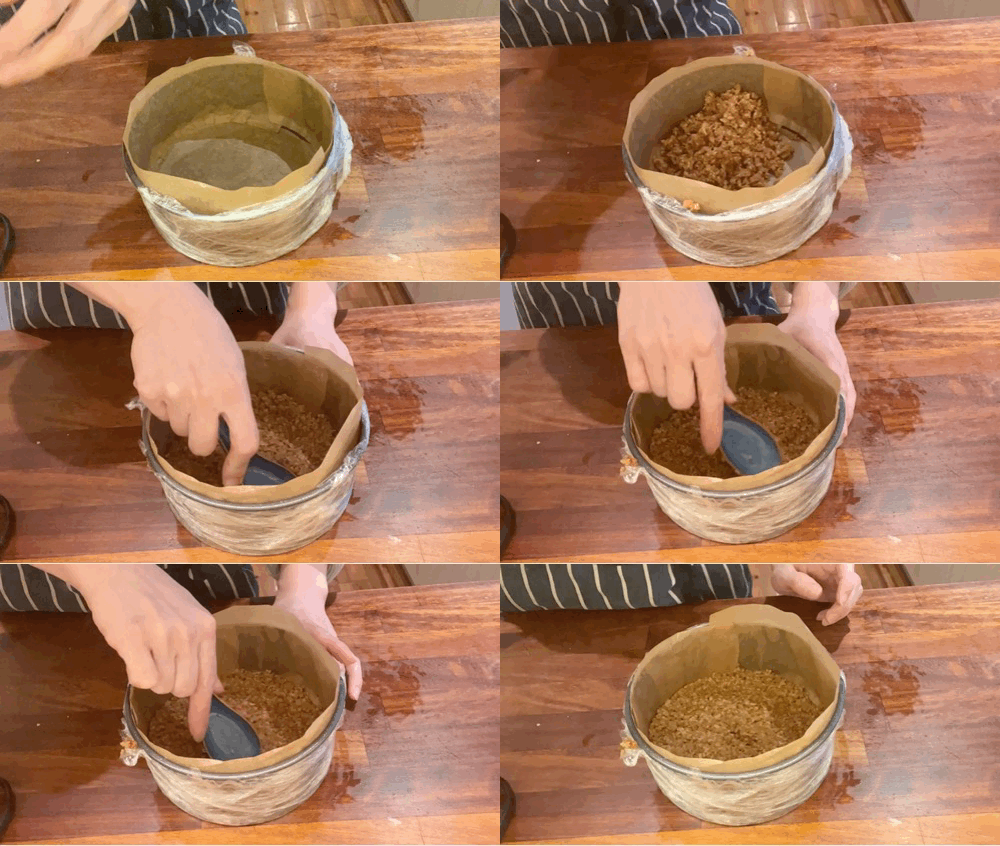
Press into a lined 6 inch cake tin. Bake for 15 mins until extra toasty. Set aside to cool completely
Lower fan oven to 130c fan whilst you mix your cheesecake
Line your cake tin with greaseproof paper and wrap with several layers of cling film/tin foil
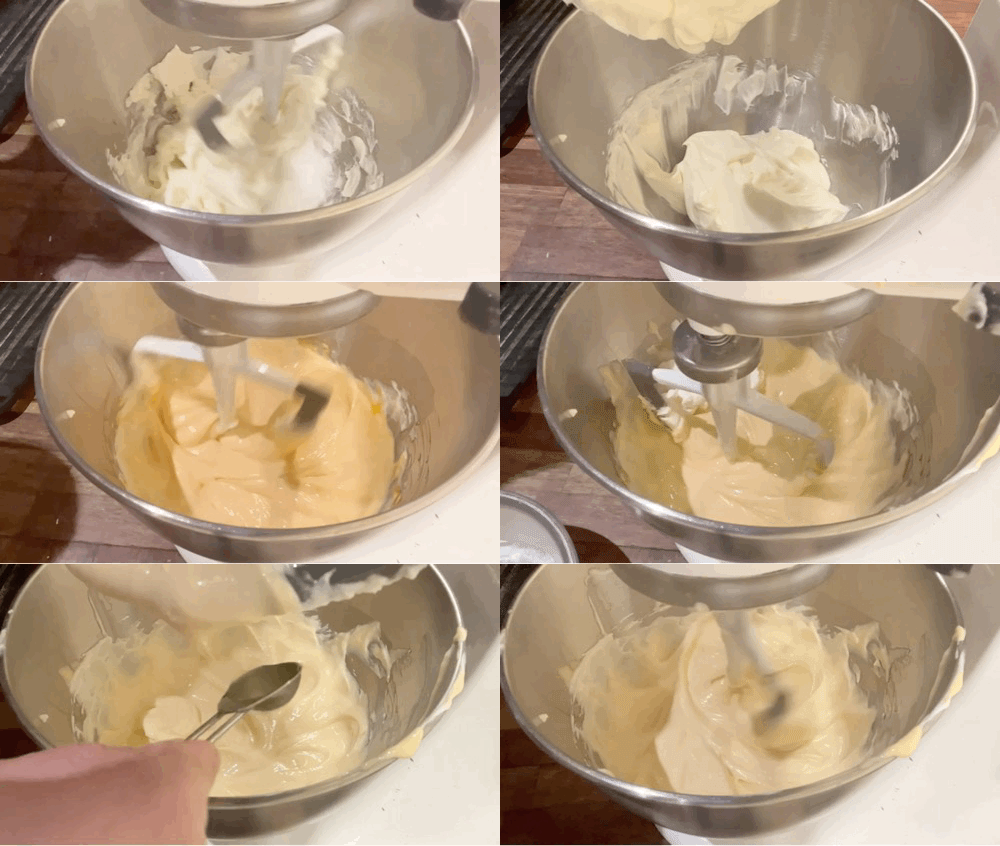
Mix cream cheese, sugar and salt on a low speed - once combined (it will get more liquidy and it should be totally smooth) add the egg and yolk, scraping down the side of the bowl if necessary. You don’t want to aerate, you just want it to be nice and homogenous
Now fold through the ricotta and lemon juice until totally smooth. Check the seasoning! Add a little more lemon juice or salt if needed
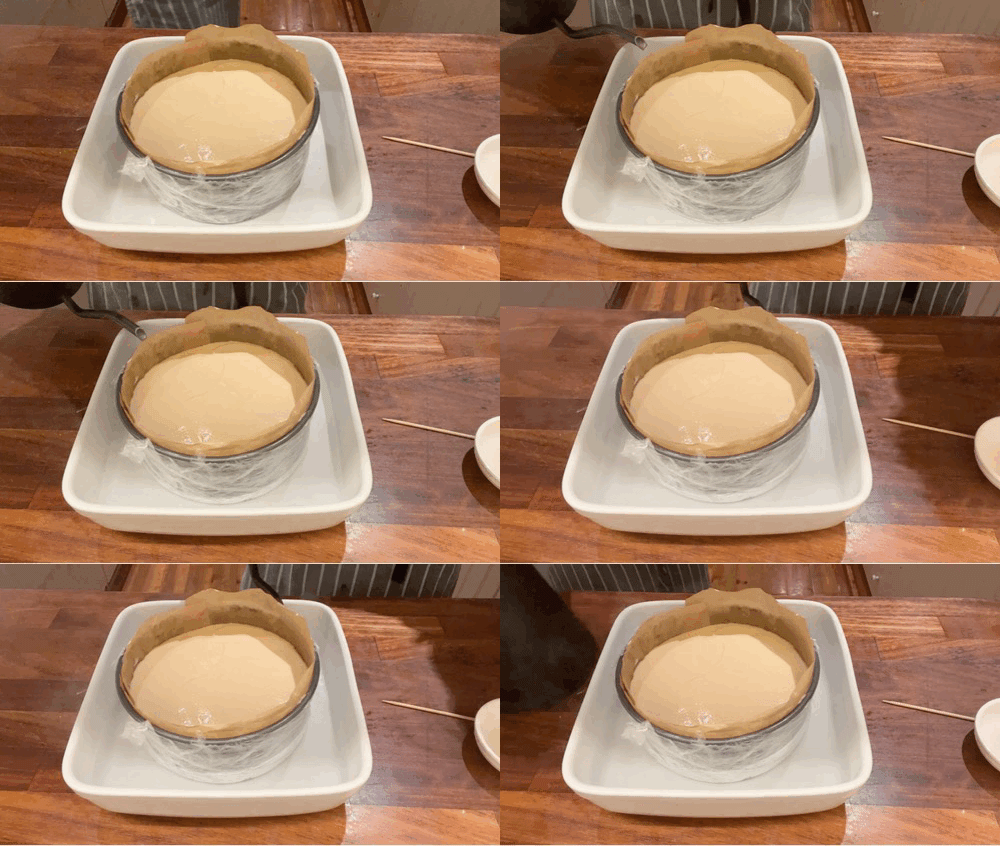
Pour into the lined cake tin and transfer into a ceramic or pyrex dish that is deep enough to fill with water for the water bath
Pour hot water (I use a half boiled kettle, around 70c!) in the dish so it comes around half way up the side of the cheesecake pan
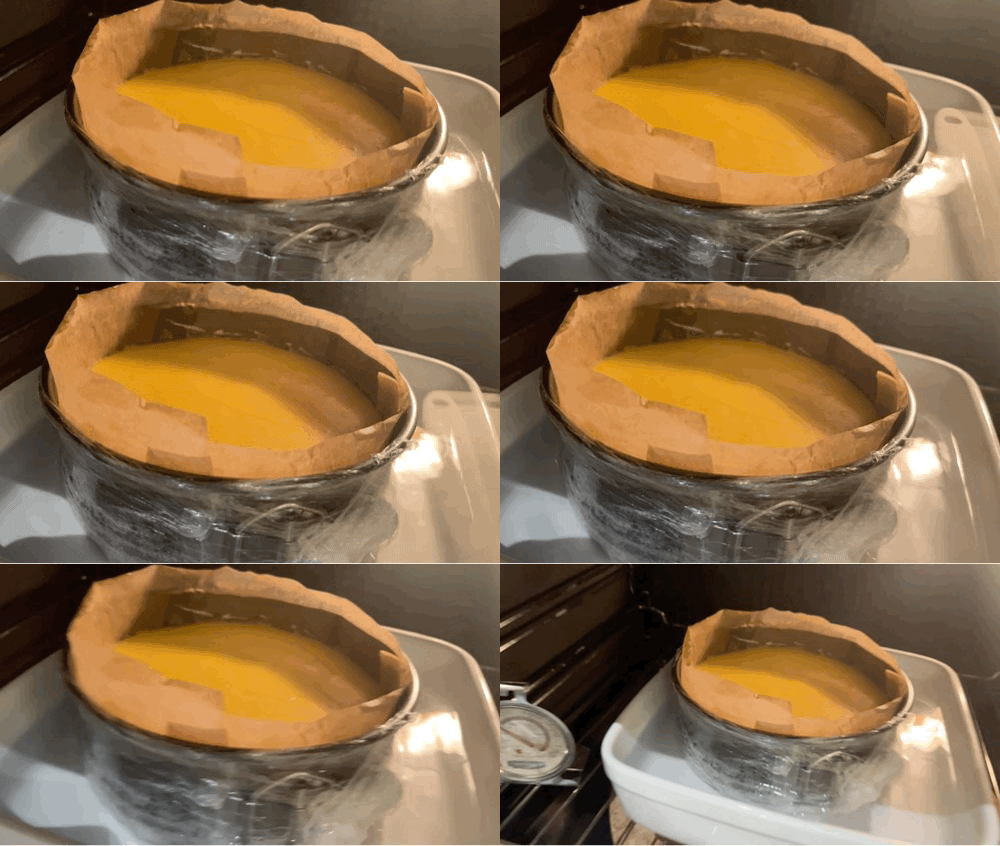
Place into the oven and bake for 1 hour. After 1 hour, check! For a very smooth and moussey cheesecake, remove from the oven when a 3.5 inch circle still jiggles in the middle. For a more densely set cheesecake, remove when the jiggle is only right in the centre, around 20 minutes more. I like tapping it with a spoon!
Remove from the oven and leave to cool to room temperature, around an hour, still in the water
Remove from the foil/cling and place into a plate and pop into the fridge overnight to chill. It really does need to be fully chilled before slicing as it will continue to set-up
Jelly layer
I would wait at least until the cheesecake is fridge-cool to the touch before doing this, around 1-2 hours. You can also wait until its totally cool (safer)
Cut peels off oranges and reserve - make candied mixed peel! Tis the season!!! Juice oranges
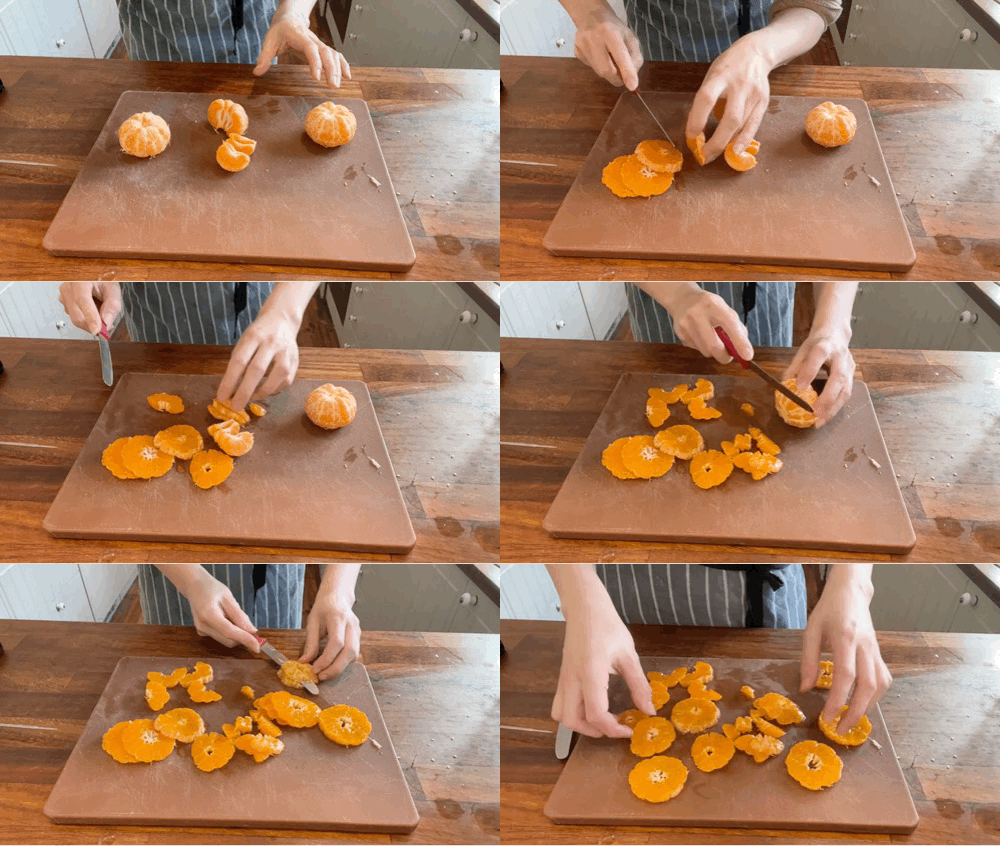
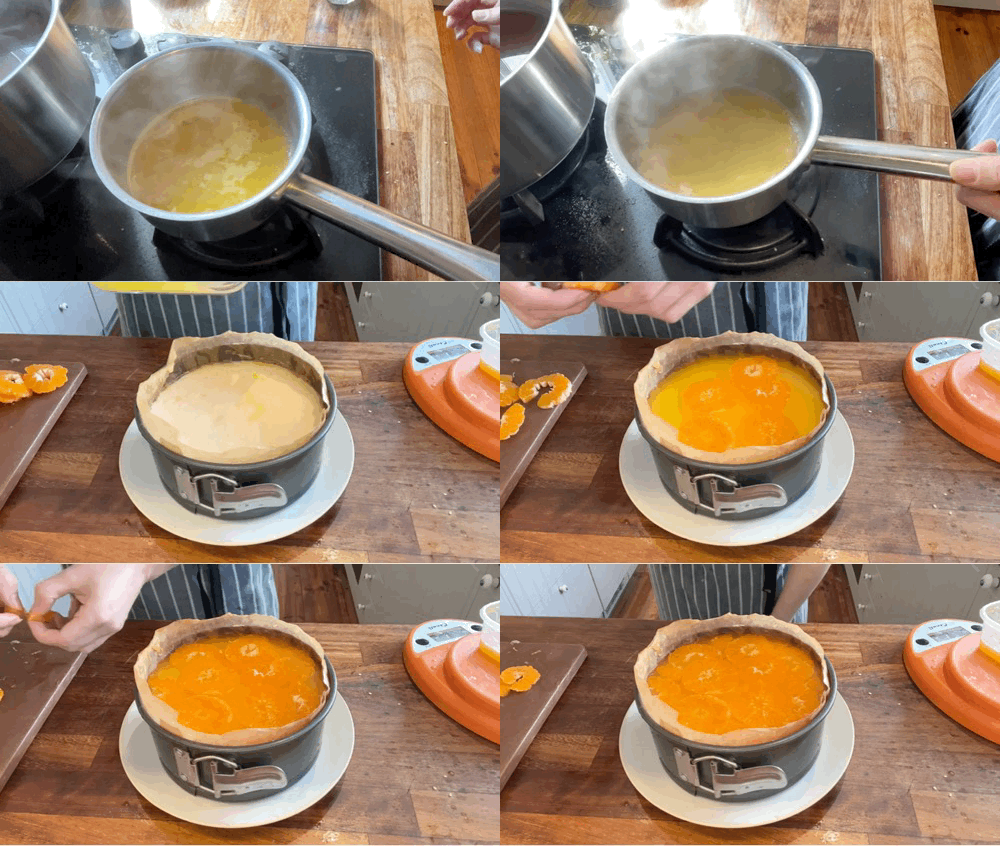
For the decor, prepare the tangerines - peel, leaving the segments whole in tact and then slice horizonally to reveal beautiful flower-like segments. Place tangerine slices throughout the jelly then leave to set completely
If using gelatin, bloom leaves in very cold water and set to one side. Then whisk sugar into orange juice then bring to a simmer. Leave to cool slightly (70c) then whisk in your bloomed gelatin. Leave to cool until around 20c (put it in a shallow wide container to speed it up) then pour on top of the cheesecake
If using agar/carrageenan, heat orange juice to around 50c. Mix the sugar and agar/carrageenan well then whisk into the warm juice then bring temperature up - agar solutions need to boil to activate, but carrageenan just needs to get to around 75c-80c (though won’t be damaged by boiling). Leave Agar to cool to 50c, but carrageenan needs to be poured immediately as it sets rapidly
If the cheesecake was already cold, chill for 2 hours before cutting, ensuring the jelly has set before cutting (and wipe your knife inbetween cuts please!). IF the cheesecake was not totally cold, leave overnight before cutting






This is so beautiful! I can’t wait to try the recipe!
When I’ve made jelly-topped cheesecakes in the past, I’ve found it helpful to place my decorations first and lock them in with a thin layer of jelly which I let set fully before pouring on the rest of the jelly. It doesn’t allow the beautiful cross-section look you have here, but it’s easier to arrange the fruit when it doesn’t float around and the jelly also stays clear because the cheesecake only dissolves into the initial thin layer. Now if I can only figure out how to get clean edges when I unmold it…
Hi Nicola, how tall is this tin? I'm going to purchase a 6" springform to make this, but there are different heights. Thanks!