Kitchen Project #75: Strecci aka Roman-style pizza
Revisiting focaccia - this time it's thin and crispy!
Hello,
Welcome to today’s edition of Kitchen Projects. Thanks so much for being here!
I'm excited to revisit one of my favourite recipes for this week's newsletter: The focaccia. But this time it’s inspired by the brilliant Toklas ‘strecci’, a roman-style pizza inspired dream bread. I’ll take you through how to adapt my 3-day recipe as well as share a dreamy peach and tomato topping for all your summer snacking needs.
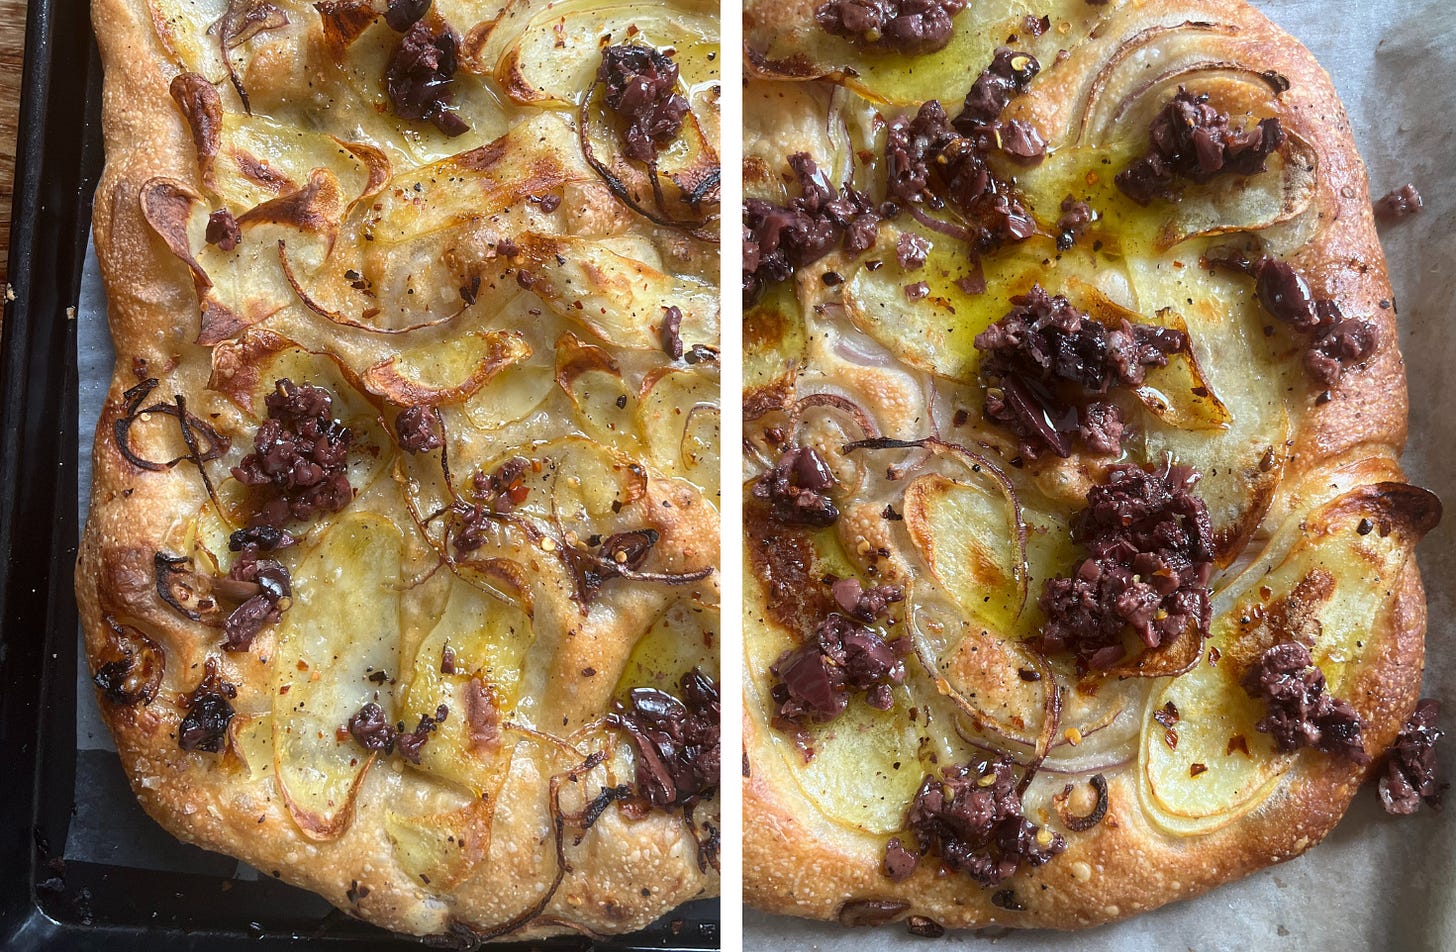
Over on KP+, I’m excited to share the crispy potato & tapenade recipe from the Toklas x lark! pop-up. Click here to read it.
What's KP+? Well, Kitchen Projects+ aka KP+, is the level-up version of this newsletter. It only costs £5 per month, and your support makes this newsletter possible. By becoming a member of KP+, you directly support the writing and research that goes into the weekly newsletter and get access to lots of extra content, recipes and giveaways, including access to the entire archive. I really hope to see you there:
Love,
Nicola
New focaccia, who dis?
The focaccia is a study in bubbles; With a long - patient - fermentation process, we are rewarded with an outrageously voluminous bread, dotted with paper-thin explosions of crispy bread that shatter as you eat it. Focaccia is also the perfect summer bread - happiest in hot temperatures and thriving in these sunny months.
Although there's nothing more delicious than a thicc and bubbly bread that my 3-day method produces, generous witholive oil, focaccia dough is very versatile. As we saw last year with Jordon's recipe for Sfincione, Sicilian pizza, you can rework this base into new and beautiful things.
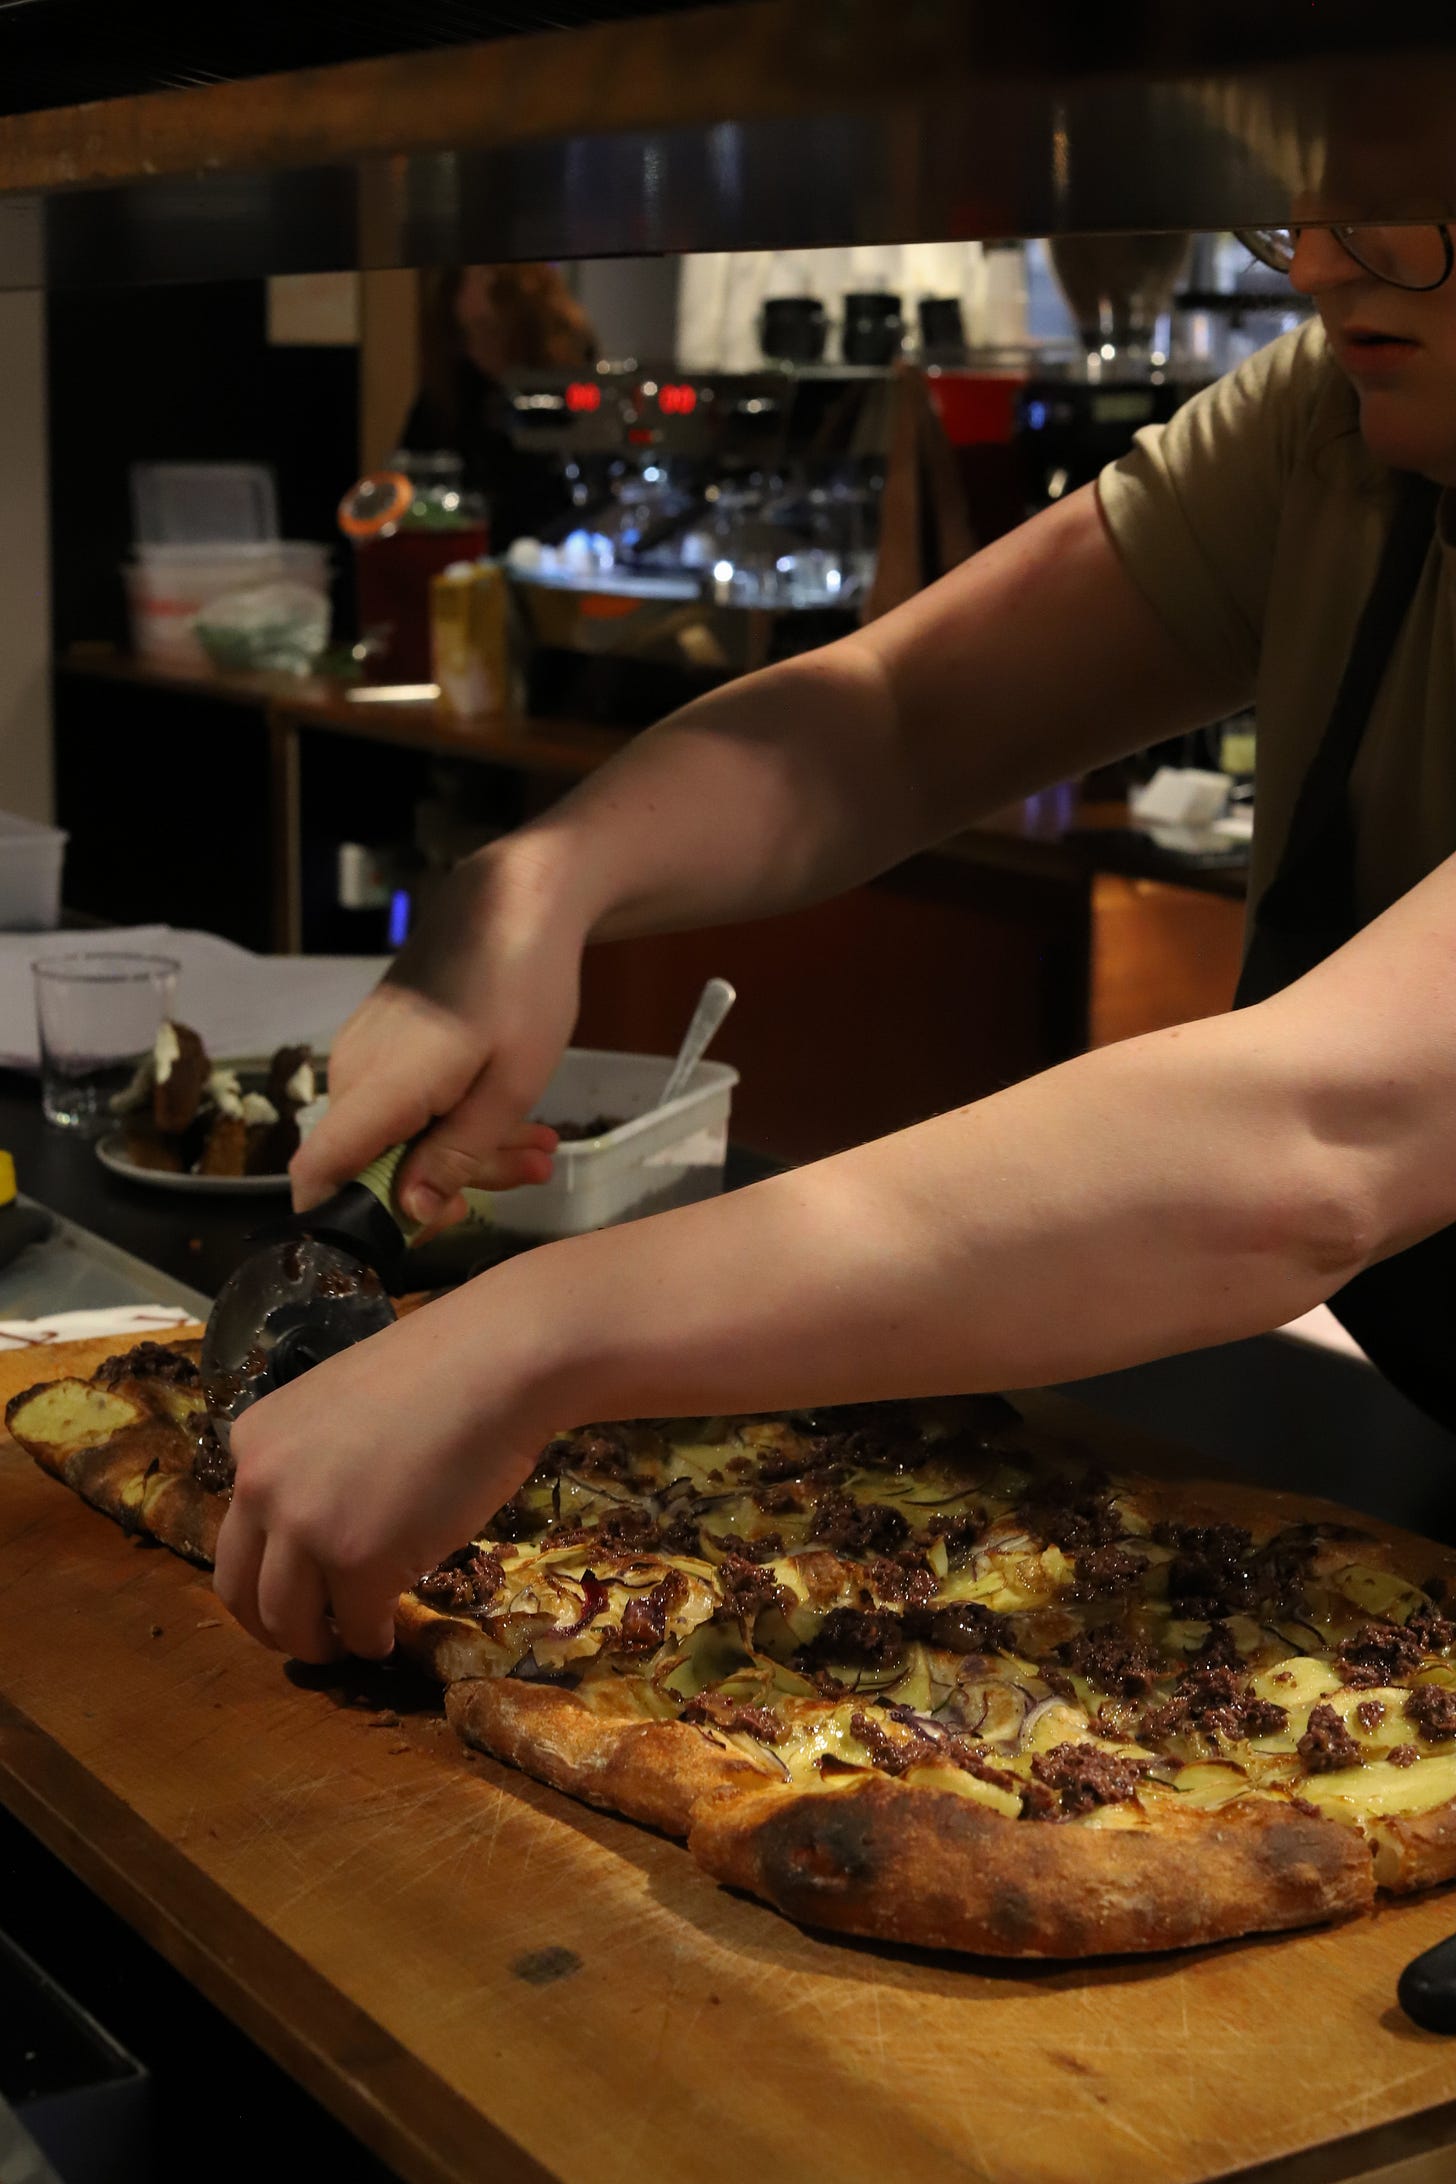
One of those beautiful things is a bubbly bread that I got to know during my lark! Pop-up at Toklas bakery last week. Inspired by thin and crisp Roman-style pizza, the owners of Toklas call this bread 'Strecci' (pronounced 'stretchy') to describe this crispy-oily dream bread. To make it, high hydration dough is stretched thinly, loaded with toppings, and then baked quickly, fast and hot. The result is a highly transportable and very delicious pizza, served by the slice and cut to order.
This strecci is similar to Pizza al taglio, which means pizza by the slice - it's pretty different from its soupy, Neapolitan sibling. If you're still unsure what I'm on about, it's sort of like flat focaccia - still heavy on air and oil, but around 1-2cm thick. Ubiquitous across Rome, it is sometimes sold by weight. These pizzas are not overly saucy or cheesy - they won't win any Instagram points for cheese pulls. But what they lack in cheese pulls, they make up for in flavour and texture.
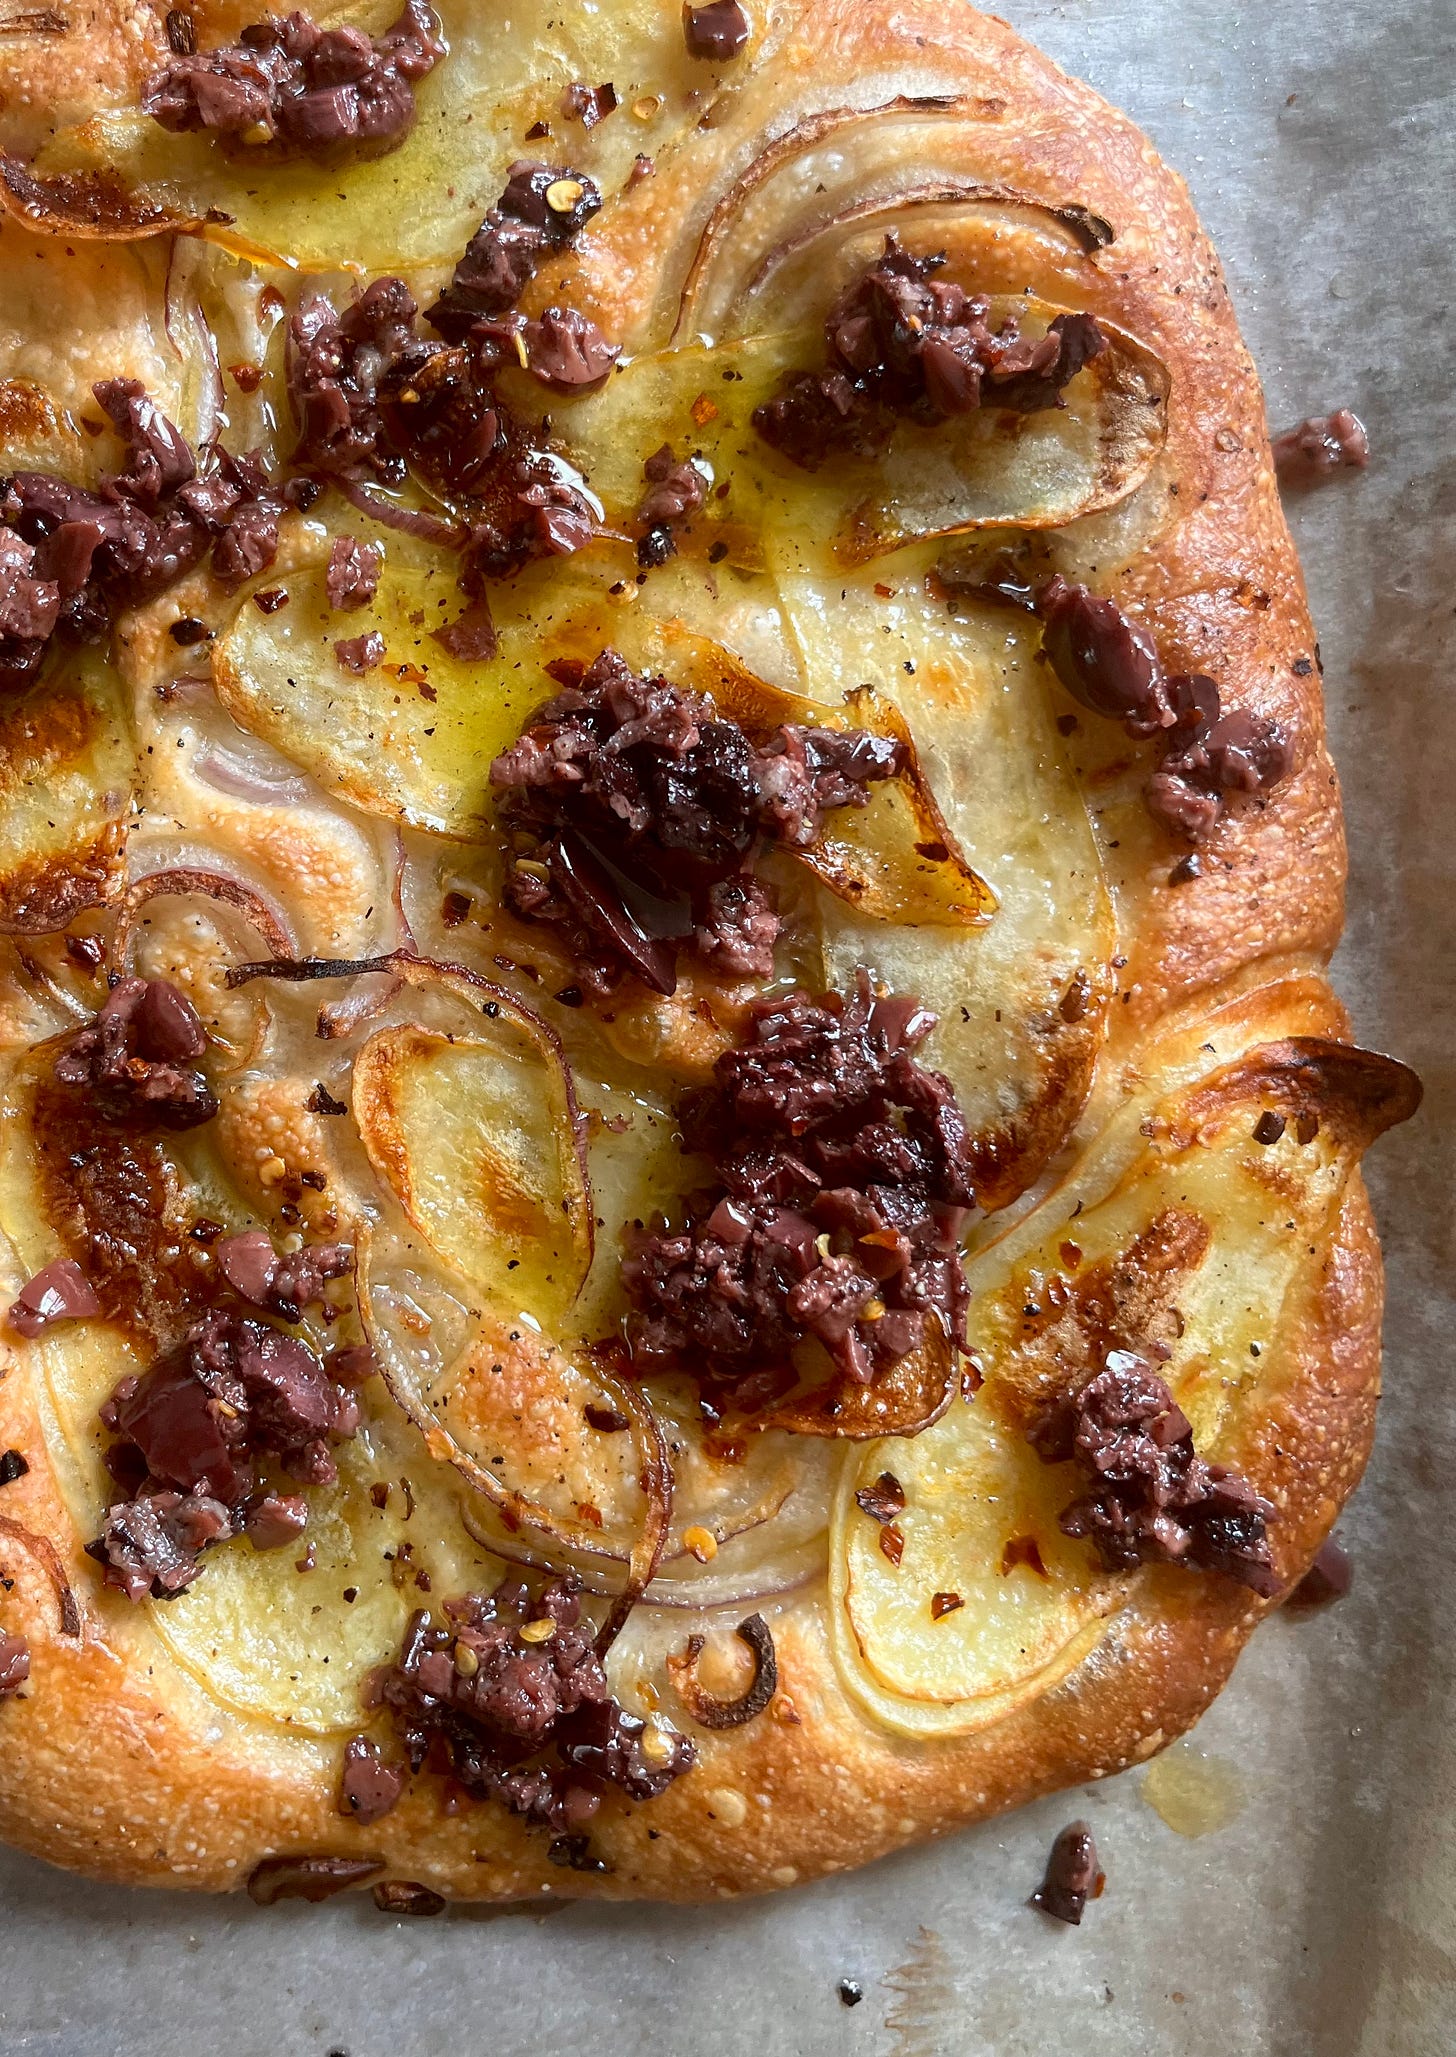
Every week, Toklas bakery has an array of 'strecci' available from around 11am. Of course, we HAD to serve it during the pop-up too! For the lark x Toklas pop-up last week, it was with crispy potatoes and tapenade; I'm excited to share Janine's recipe with you on KP+ plus today. That tapenade is one of the best things I've ever had and will be endlessly handy beyond this recipe.
So, to bring you the joy that is Toklas’ strecci, I decided to see how well my classic focaccia fared! I can’t say that this is an authentic Roman recipe, but it’s definitely my tribute! I’ll just *have* to go to Rome soon and see if it checks out…
Why focaccia works
When it comes to focaccia, I think the 3-day method gives you the best thick bubbly loaf, but how many of those stages are necessary when looking for a thinner final product? To figure that out, we first need to remind ourselves why that original recipe is a multi-day process. Let’s get into it.
Why 3-days?
In my original recipe, I spread the focaccia-making process over three days:
Make poolish, aka your pre-ferment
Mix dough, develop gluten, cold-proof overnight
Proof, dimple and bake
Each of these stages has been tailored to create a flavourful, lofty and bubbly loaf. Let’s have a quick refresher on each stage:
Pre-ferments benefit your dough on multiple levels: You get a head start on fermentation and flavour. Pre-ferments sound fancier than they are - you are simply taking a portion of your water, flour and yeast and letting it get all bubbly. Pre-ferments improve dough texture and extensibility
The mixing stage is important because focaccia is seriously WET! The higher the hydration of your bread, the more airy and fragile the crumb becomes. So, when you think about bread, the most important thing to remember is you are trying to balance gluten development with fermentation.
A note on building strength
To build strength effectively, you have to understand what is happening on a molecular level: Flour contains proteins - Glutenin and Gliadin - that form gluten bonds in the presence of water. Gluten provides structure, shape and stretch to your dough. The presence of gluten allows the dough to be both elastic (holds its shape) and extensible (stretches).
Mechanically kneading the dough can help build strength in the dough and organise the gluten bonds, gluten will form very happily on its own. As soon as the flour is hydrated, it will begin to form gluten bonds and, in a process known as 'autolyse', the enzymes present in flour will begin to break down the proteins, which makes the dough really stretchy. As the yeast processes the sugars, the CO2 expands, which has the effect of very gently 'kneading' and stretching the dough. Cool, right?"
Although mechanical or machine kneading using a machine is a quick route to strength and does have good results, but is also at risk of over fermenting since the machine produces kinetic energy, which converts to heat that may make your dough struggle. To counteract this at Toklas, they mix their strecci dough with a portion of ice! However, at home I am always going to be a fan of the chill folding and stretching method. It feels SO good to get your hands covered in olive oil and gently stretch the dough. While most of the gluten development is happening without our assistance, we support the strength building with a series of gentle movements that are surprisingly effective given how minor they look.
Once the gluten is sufficiently developed, it’s time to cold ferment your dough. Cold fermentation works on two levels. First, let’s discuss flavour: Yeast is a fungus and loves a warm environment and that temperature is really the only real thing that speeds up fermentation. Beneficial as it is, it doesn't favour flavour if you're in a rush to get the bread filled with CO2.
Cold fermentation will slow the yeast activity, which is a good thing, because when the yeast isn't going absolutely nuts digesting sugar and producing CO2, it is really helpful in a flavour-creating process called the… wait for it… Alpha Amylase Reaction.
I know it's not a catchy name. But you don't need to know it by name. You just need to know that it's an action where complex starches are further broken down into sugars, and flavours are made. Although this does happen if you just leave flour and water on their own, yeast - when under control in a cold environment - can provide some useful enzyme action to coax those flavours out and provide new dimensions for your bread.
Beyond flavour, cold fermentation is key in getting the best texture. Although your dough may look extremely hydrated and happy as-is, you'll have to trust me that it goes up a level when it spends time in the fridge. Left for a prolonged period of time, the gluten is fully hydrated through autolysis, creating an even more robust gluten network that provides an even more dramatic and noticeably improved structure to your bread. Since we are shaping focaccia after the cold-proof, we get to benefit from that ultra-strong gluten development and well-aerated structure, aka bubble town.
Putting it all together
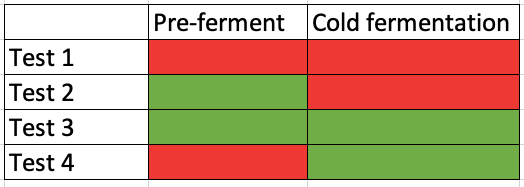
So, how does all of this impact our strecci? What combination of pre-ferment and cold fermentation is the best or, indeed, necessary? I put it to the test.
For test 1, I mixed and baked on the same day, with no pre-ferment. This didn’t work very well - It was hard to stretch the dough sufficiently and I ended up taking it too thin - it was really underwhelming:
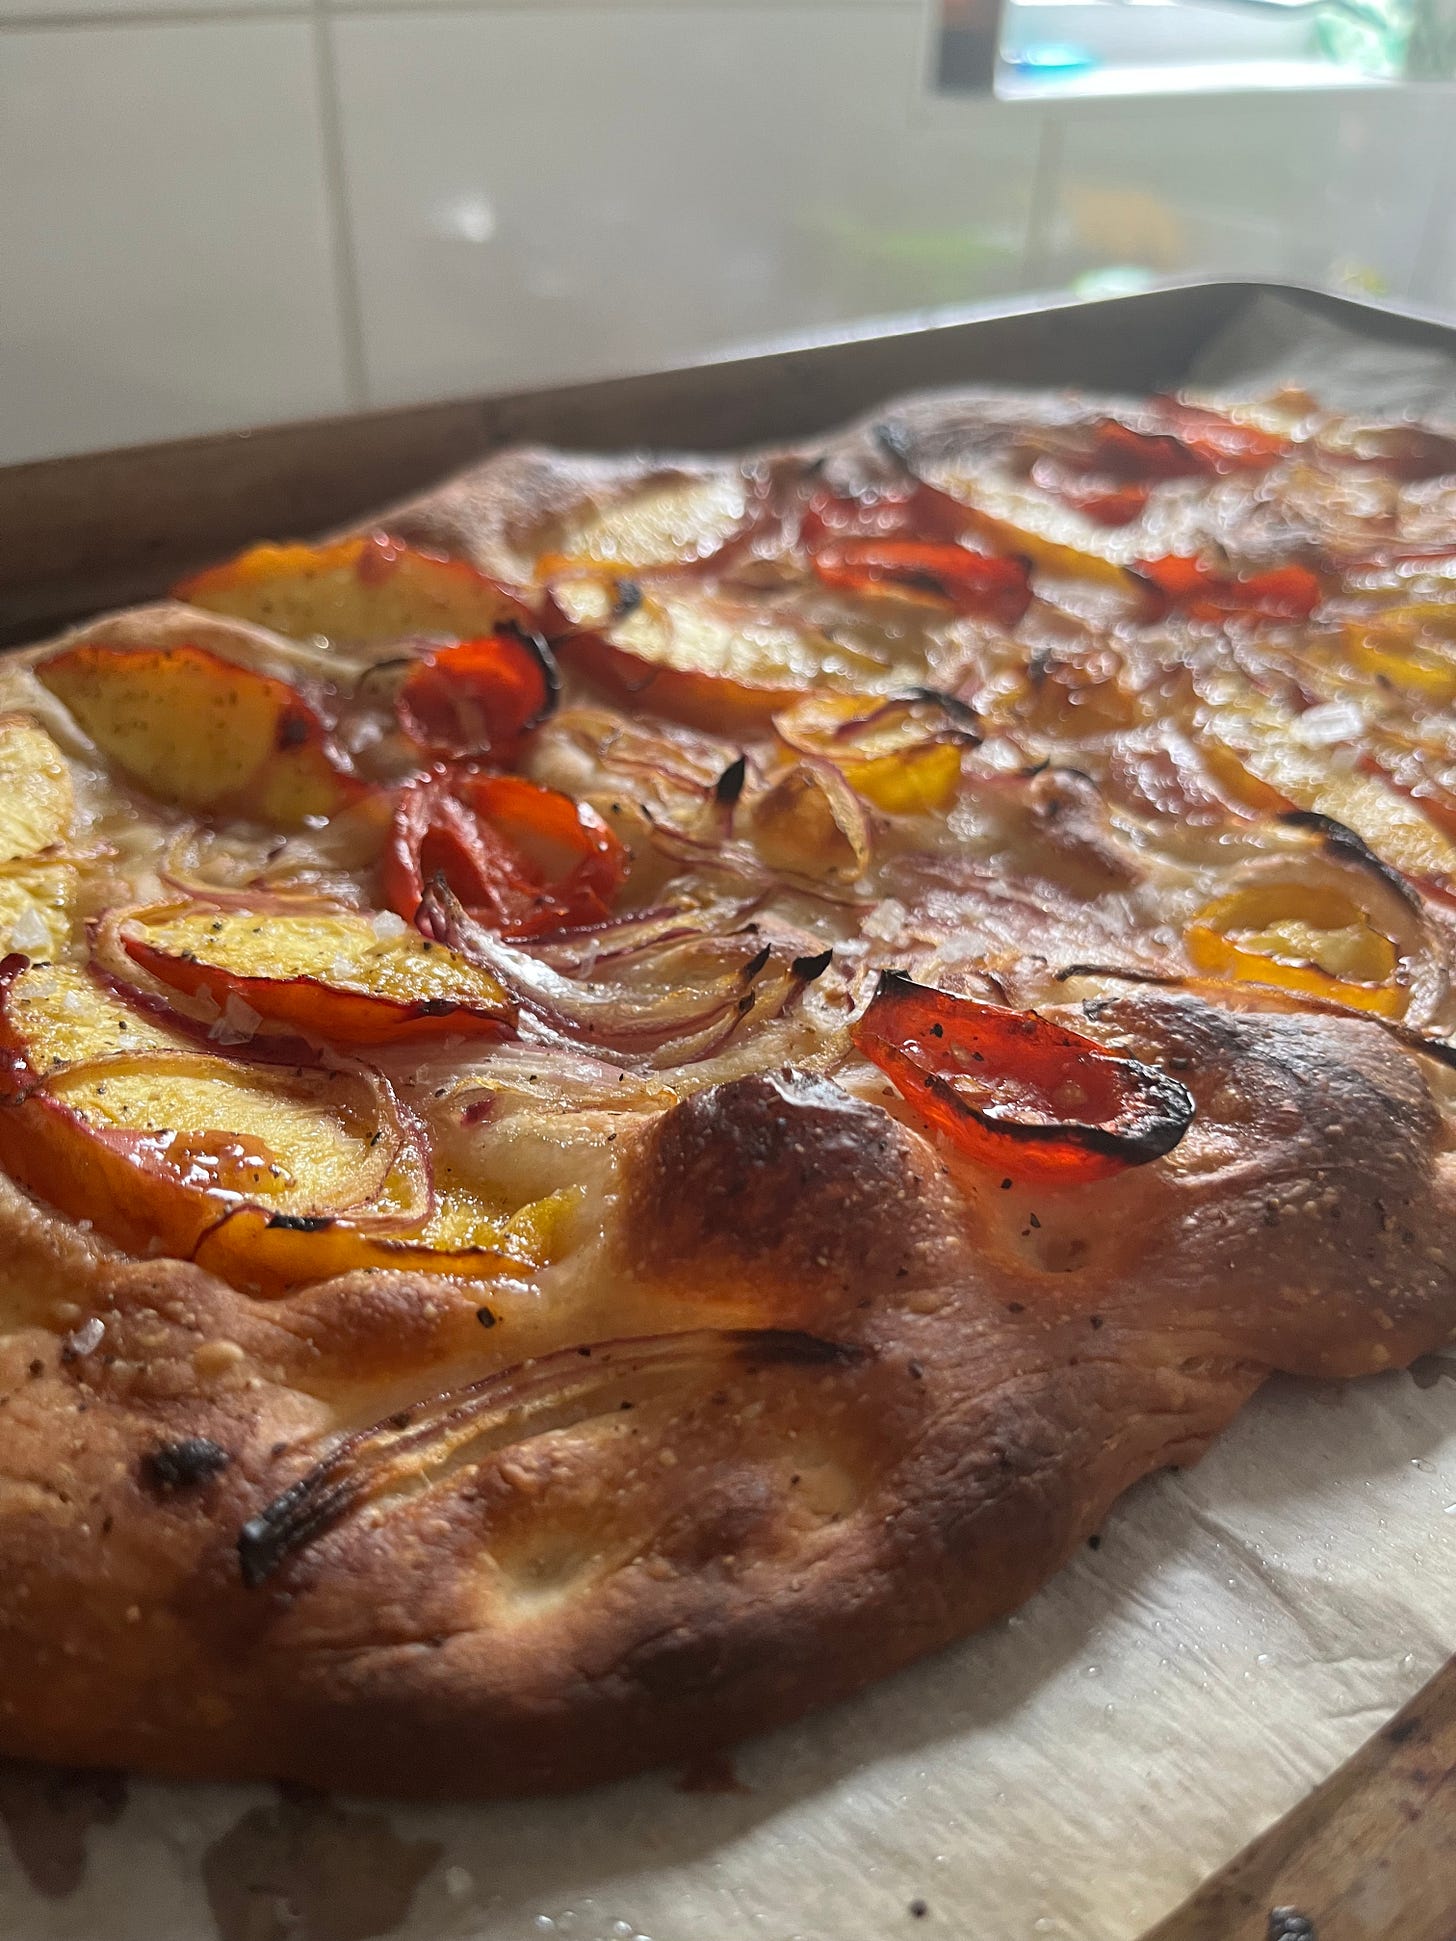
For test 2, I included a pre-ferment but did not cold ferment. You can see that there are bubbles but there is a lack of fermentation signs on the crust - not many small bubbles, indicating lack of flavour.
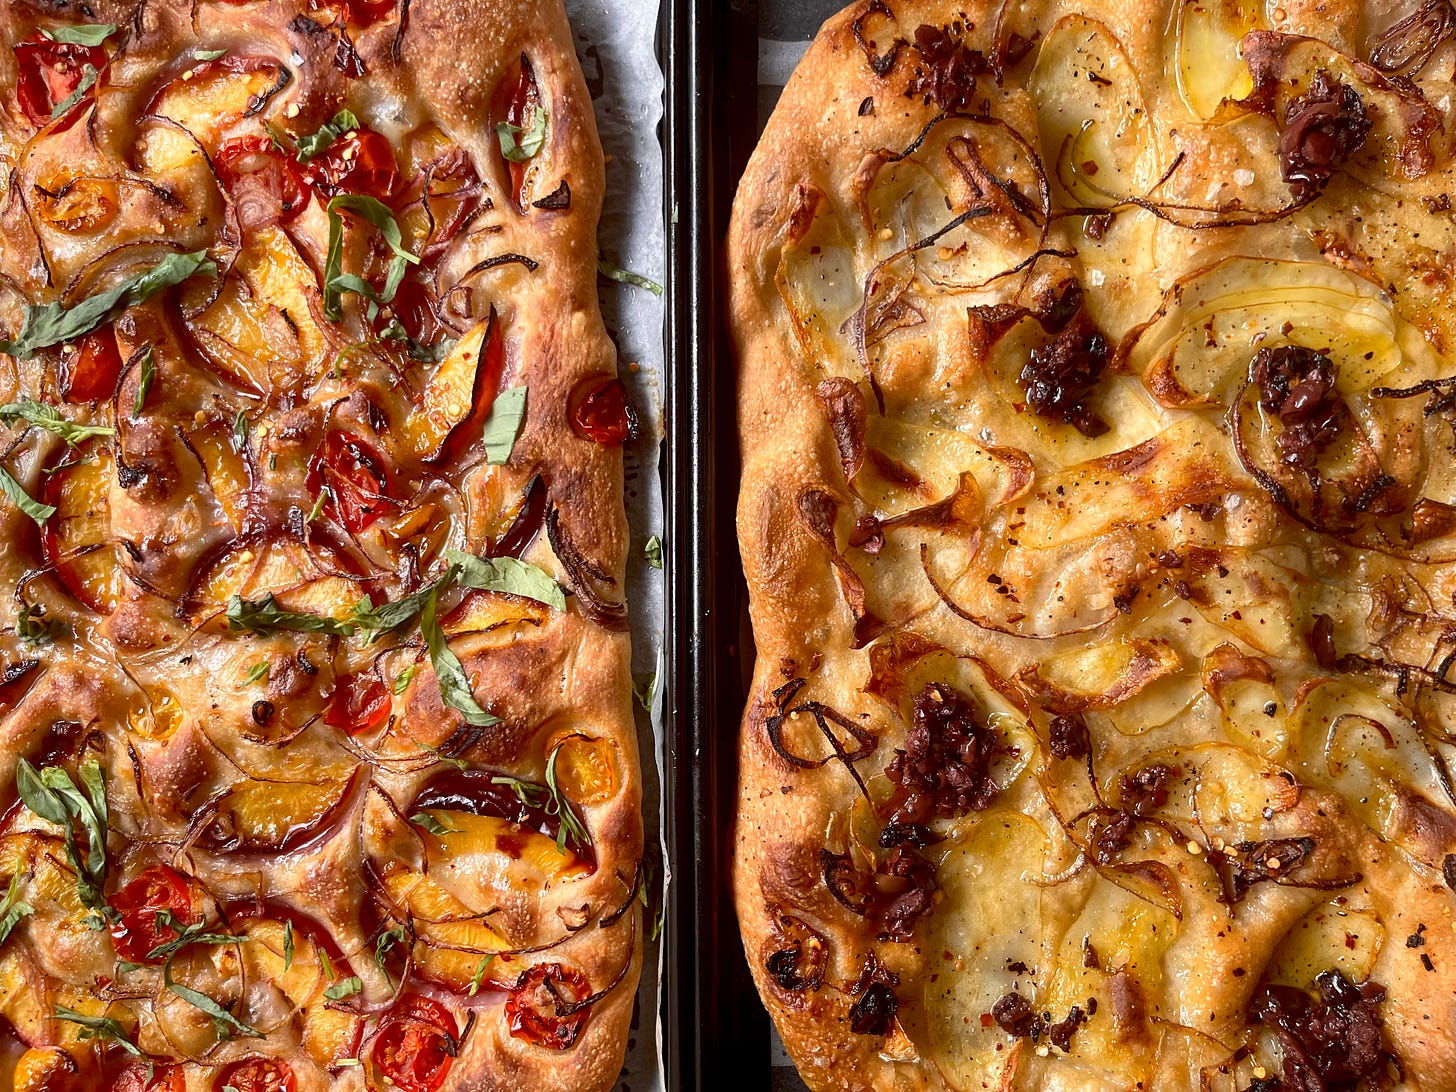
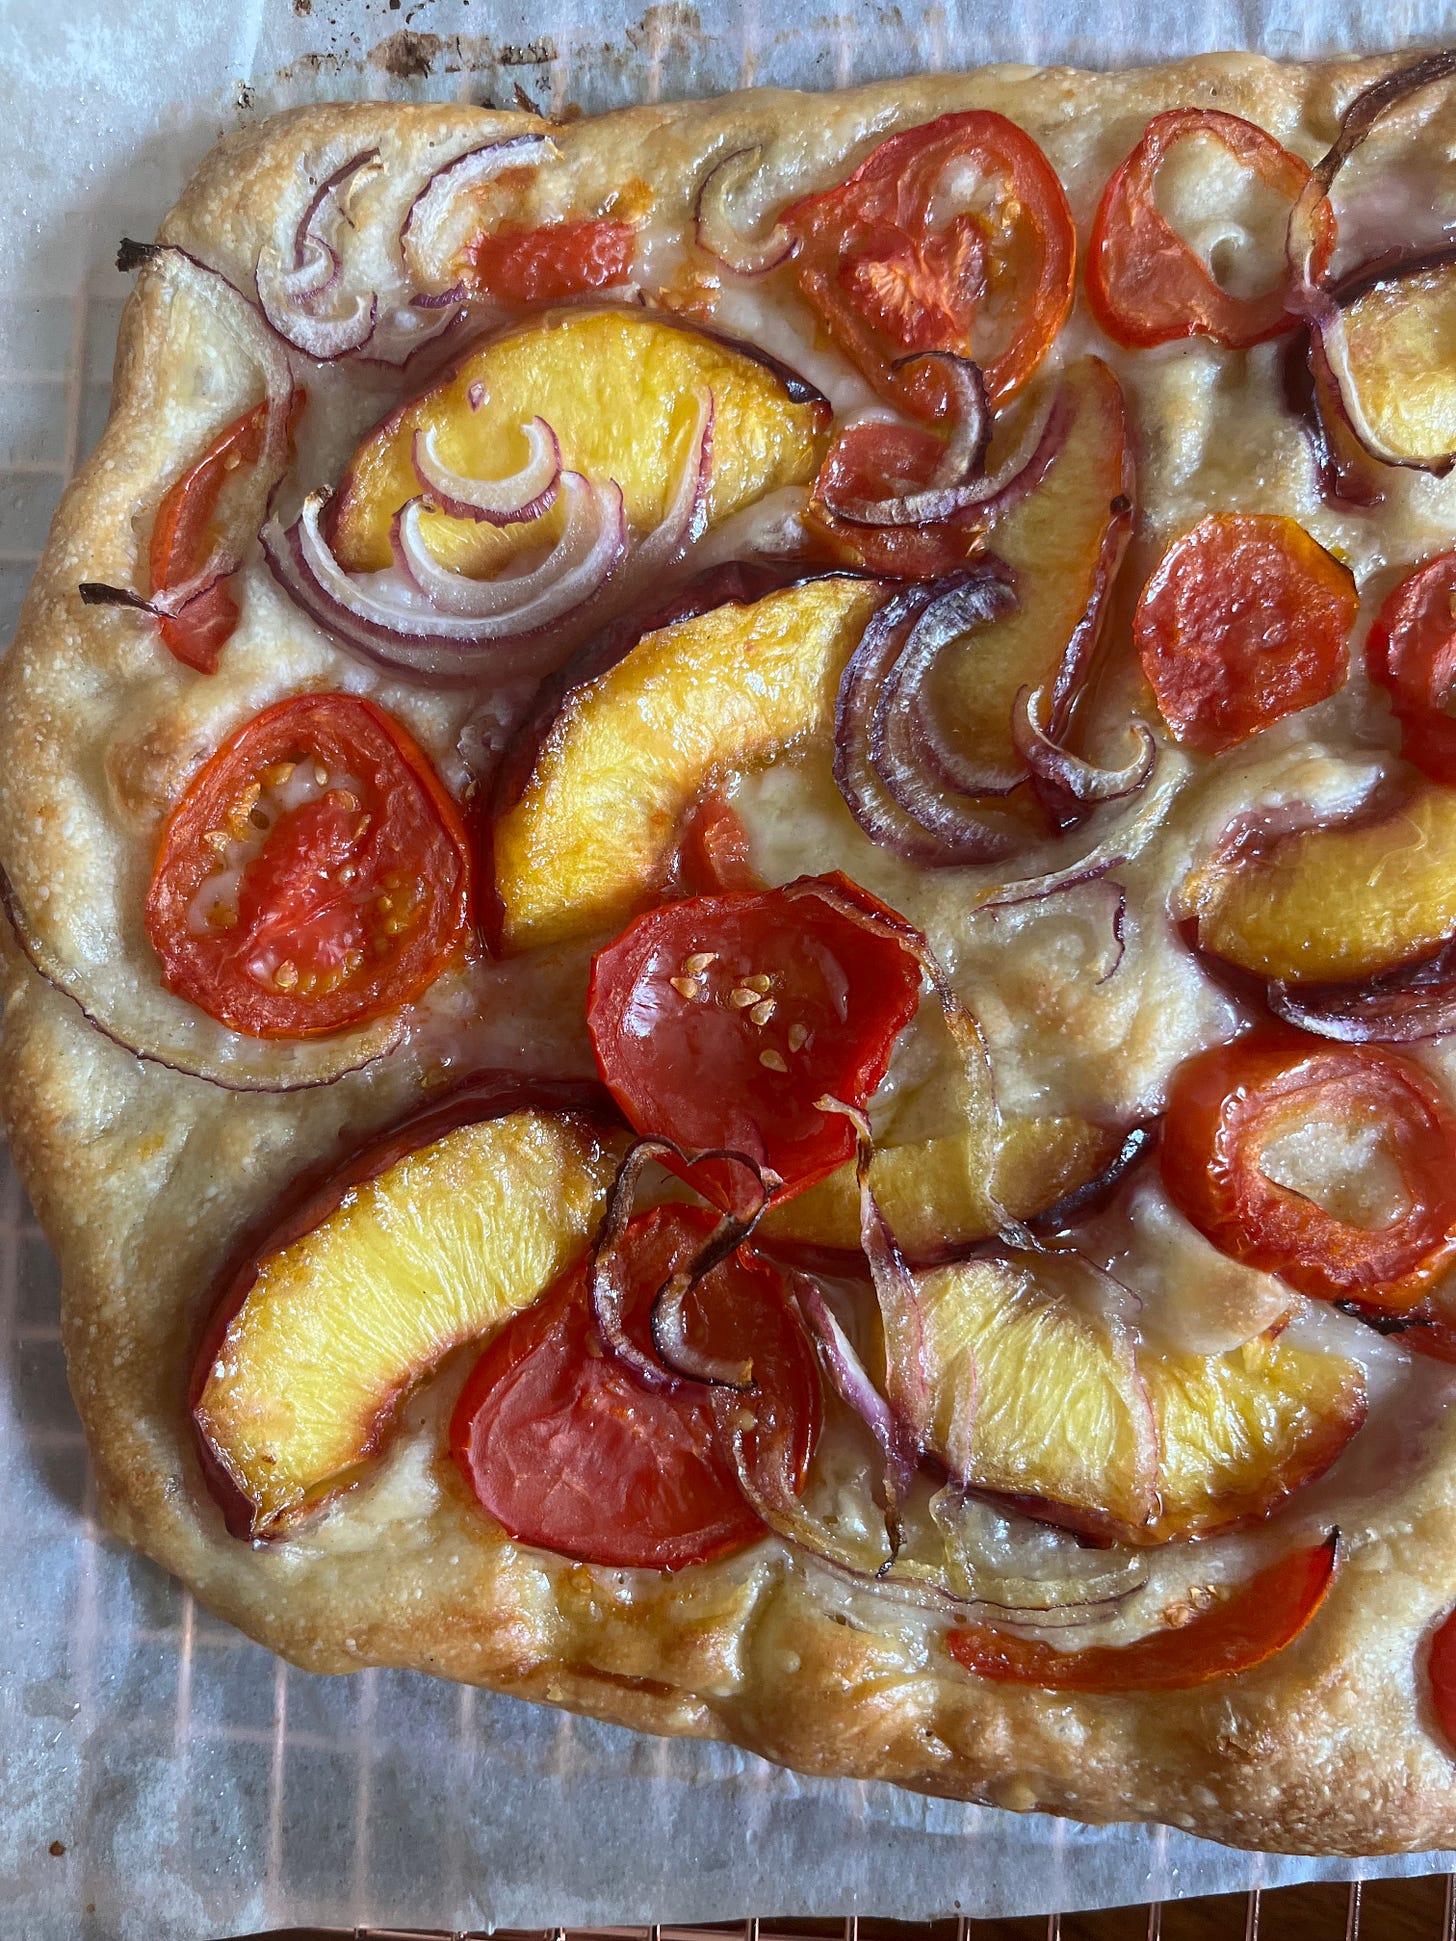
For test 3, I used my classic dough, with both pre-ferment and cold ferment. For test 4, I did not include a pre-ferment but did cold ferment the dough. These doughs looked very similar after baking. As you can see, the rust is well fermented (lots of small bubbles present) and the dough has made a pillowy base for the toppings to nestle into.
Results: For the best at-home, roman-style pizza / strecci , you don't need to include the pre-ferment. It does work beautifully, but if you are looking to skip a step somewhere, this is it! The pre-ferment is really handy for flavour and getting great height and outrageous bubbles, but it's less prominent in the thinly stretched dough. Cold fermentation, however, is essential for texture. So don't skip this part! If you’re really in a rush, you could reduce the cold proof to just a few hours, but you will get a less bubbly and flavorful final product
Stretching the focaccia
You are looking at about 350-400g per tray to get a robust enough pizza to pick up. Much like the 3-day focaccia, the dough needs to warm back up to be stretched - around an hour was enough for it to relax into a wobbly mass. Once stretched, I found it was best to leave it for another 30 minutes and instead of dimpling with my hands to encourage the bubbles to the surface, using the toppings to dimple the dough was really effective.
Baking
The challenge we will always have as home bakers is the lack of utter force. Deck or pizza ovens cook by conduction rather than convection, which means heat travels directly from the hot surface to the product. Whilst this can be approximated by pre-heating a stone in your oven, it's never quite as good! Plus, the amount of time you need to pre-heat (1 hour at least) is horribly energy efficient, especially in summer and these trying times. So, I've come to enjoy the slightly softer base that comes from a home-baked pizza. When Janine, the head baker at Toklas, bakes her 'strecci', it's for 8 minutes! We, unfortunately, don't have that sort of firepower, so the baking time is similar to the original focaccia - near 20 minutes but on a lower temp.
Toppings
You can top your pizza with anything, but I like to think of it as a salad on bread! From herb oils to roasted vegetables to pickled fruits, treat it like a blank canvas! You also want to avoid anything too wet or wait until the end of the baking process to add these. This sort of bread also welcomes piles of ingredients added after - think lemon-dressed thinly sliced fennel or fresh herbs or segments of citrus. By approaching pizza in this way, you add a real freshness to pizza. Today, we'll be doing a mixture of peaches, tomatoes and onions. Depending on your mood, you can add fresh leaves or mozzarella at the end, or even honey and salt.
Tomato and peach strecci
Makes 2 x baking tray size pizzas, around 350g each. Enough to feed four with a few pieces of leftovers!
Dough base
430g strong bread flour
330g water (i)
1.5g dry yeast, ½ tsp
8g salt
25g water (ii)
Around 80ml olive oil
Toppings
240g nectarines or peaches, slightly firm
30g white wine vinegar
20g caster sugar
4g salt
180g cherry tomatoes
10ml olive oil
80g red onion
Optional finishing touches
Honey and Chilli flakes
Mozzarella, basil salad leaves
Day one
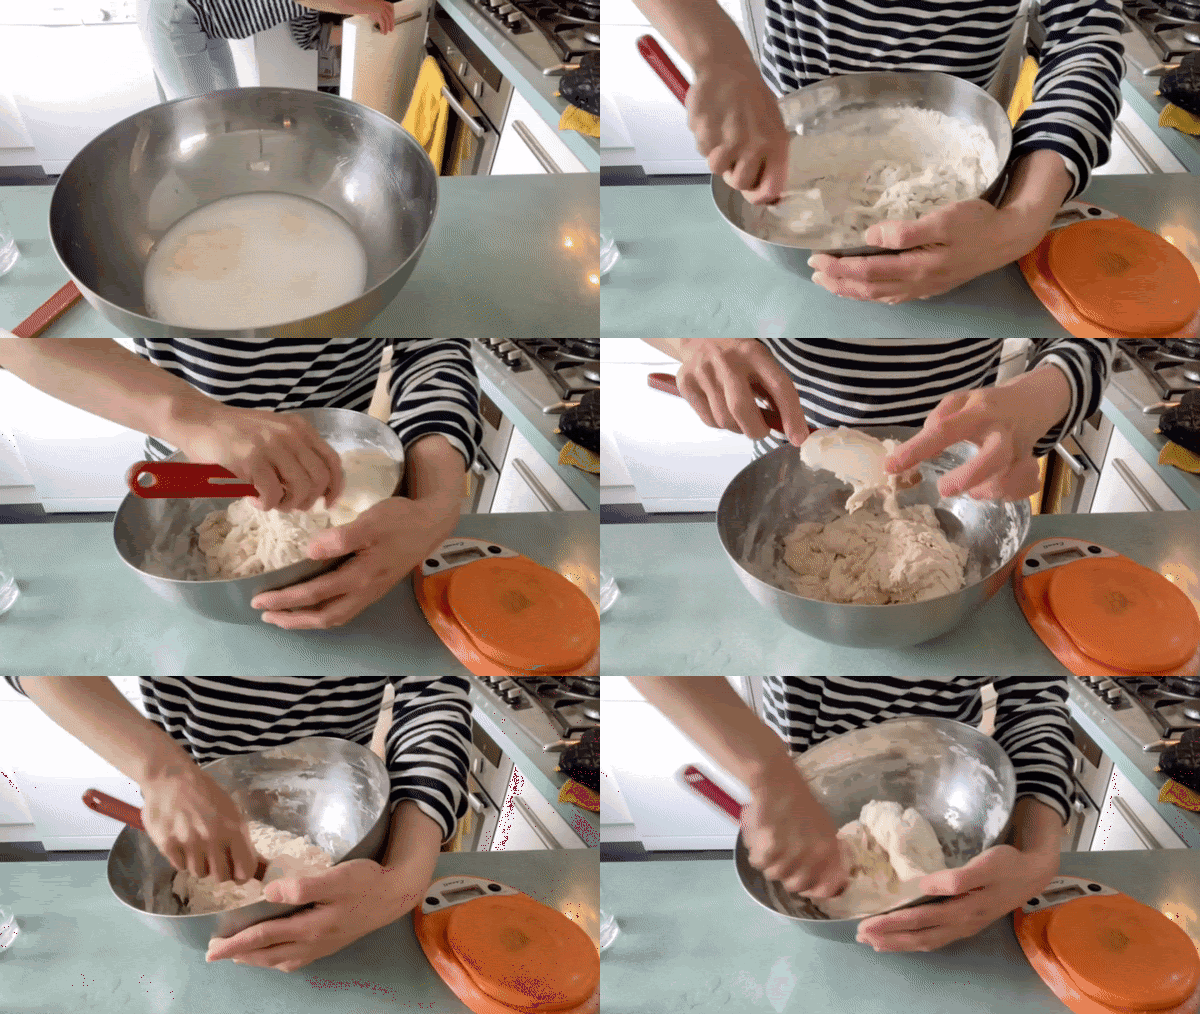
Mix Flour, water (i) and yeast together
Leave to autolyse for 30 mins
Dissolve the salt in the water (ii) and then mix this into the dough - squeeze it with your hands
Rest for 30 mins, keeping it covered
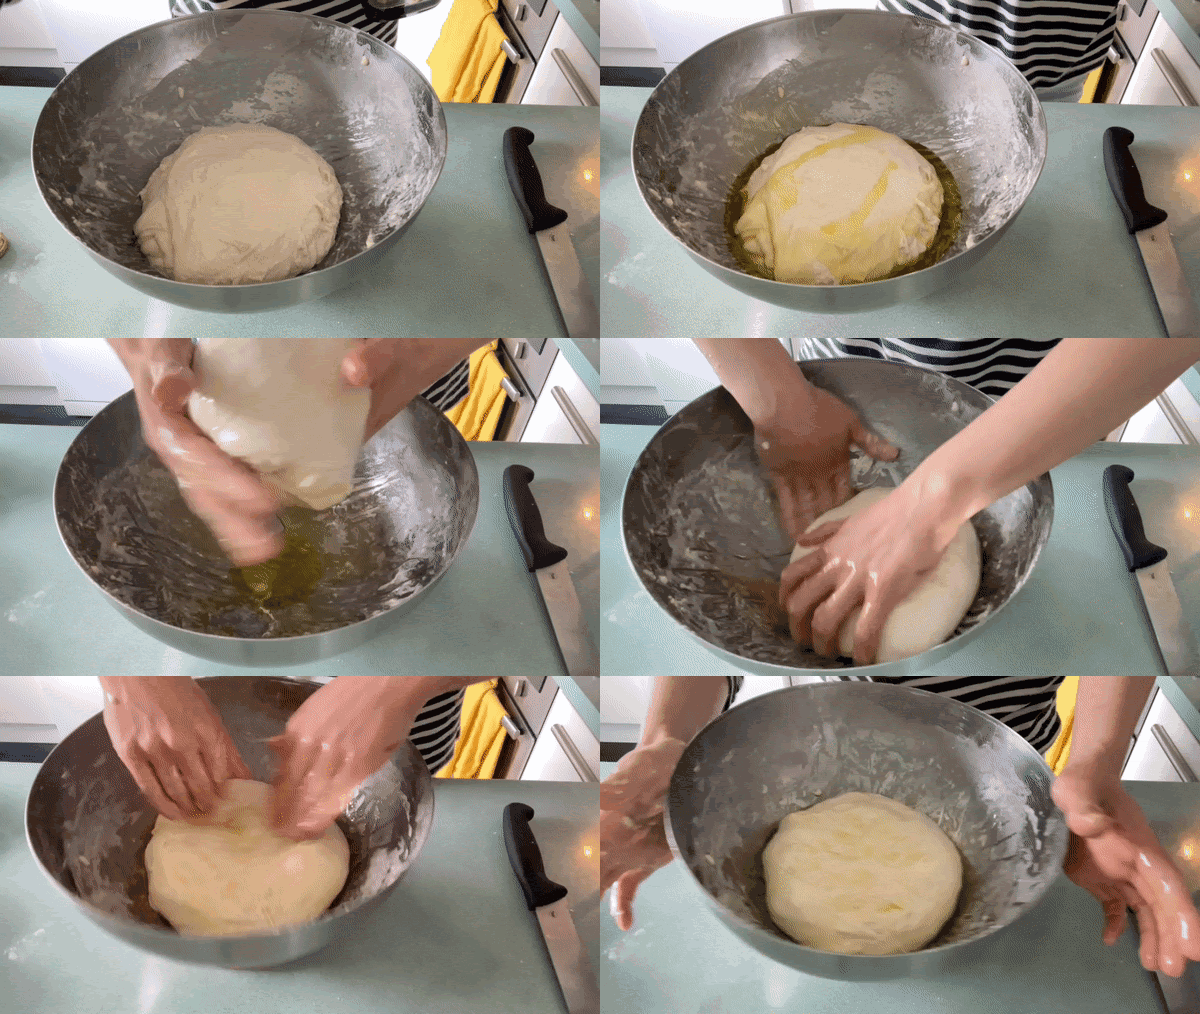
Now add a little olive oil and stretch the dough
Leave for 1 hour
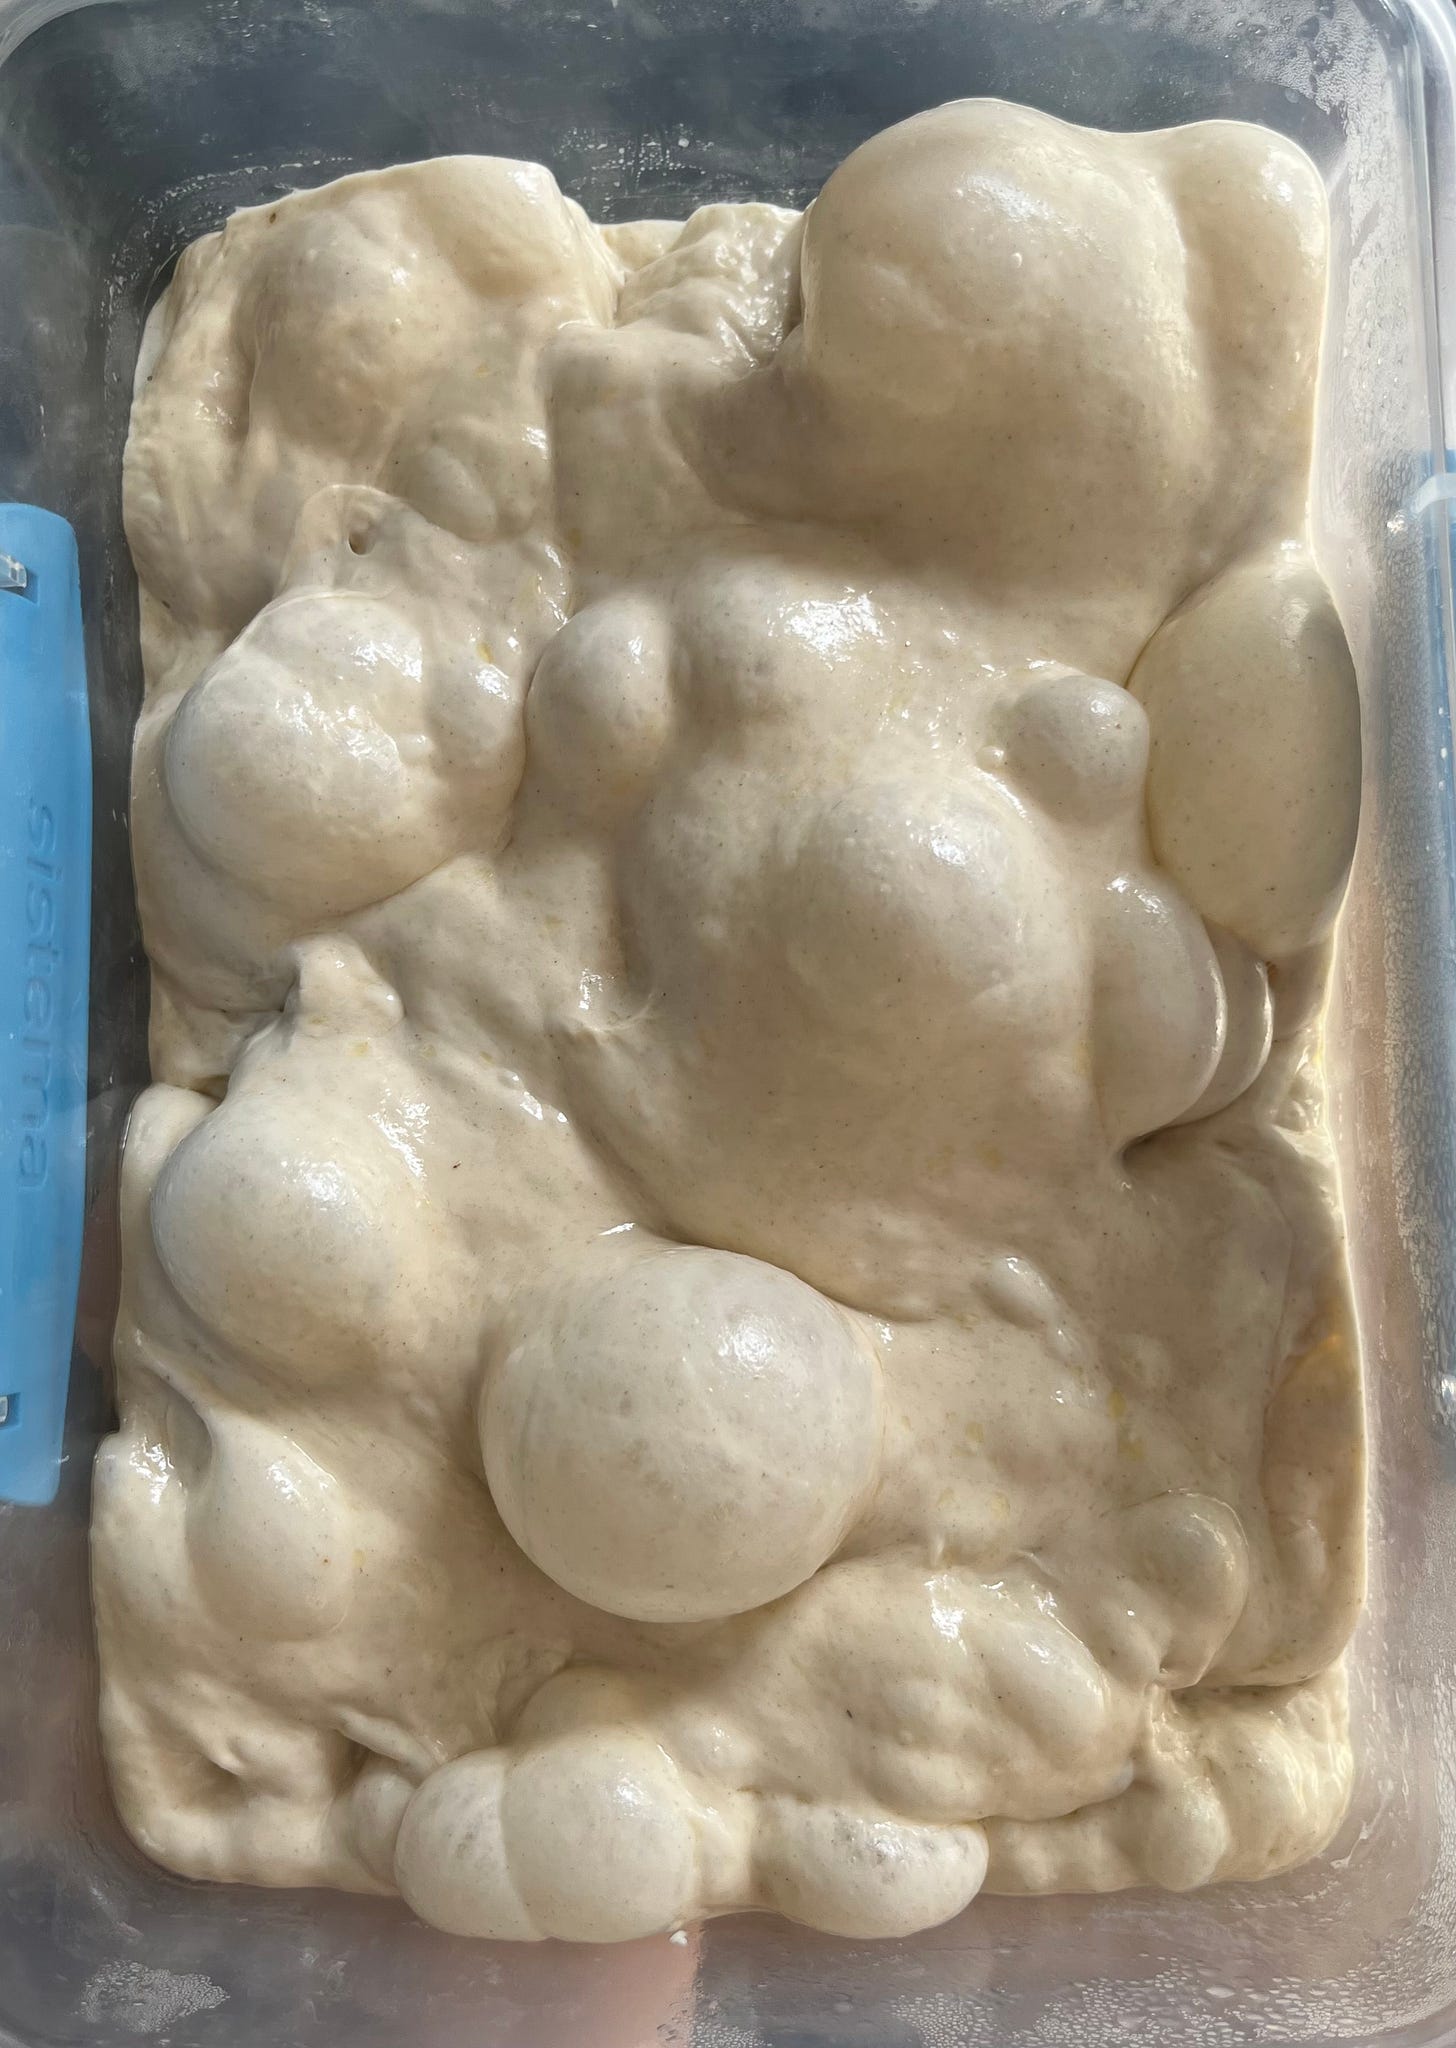
Add more olive oil and stretch the dough - it should be quite puffy at this stage. I call it a puppy's belly!
Leave for 1 hour - it should be getting puffy and big each time you leave it
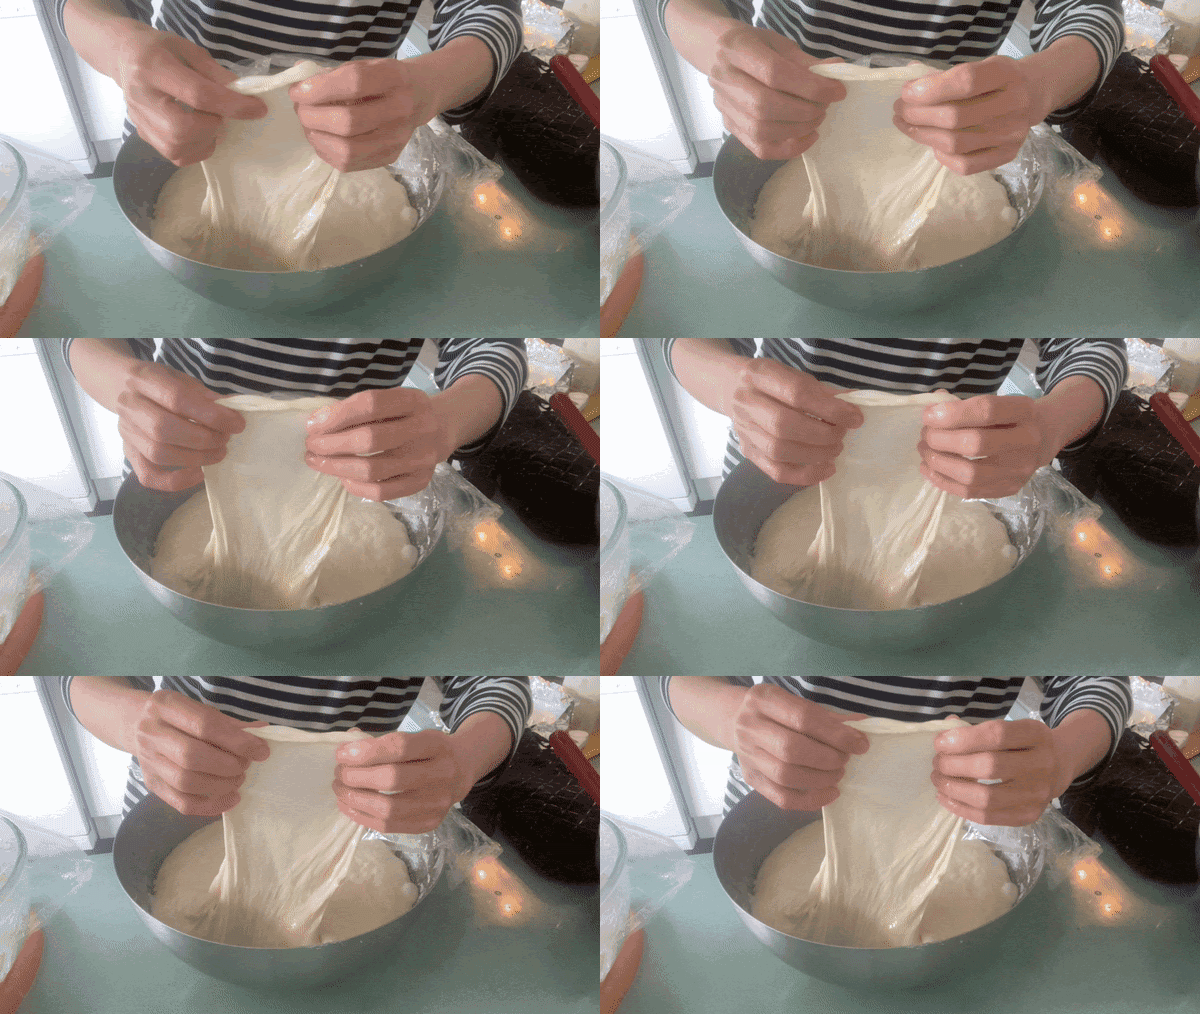
Check gluten development. It should be stronger but may not be fully developed (e.g. the dough tears). If needed, add more olive oil and stretch the dough
After 30 mins, check the gluten development again - you should be able to make a thin stretchy windowpane. If it is well developed, you can move it into an oiled tub and put into the fridge. Keep it covered so it doesn't dry out
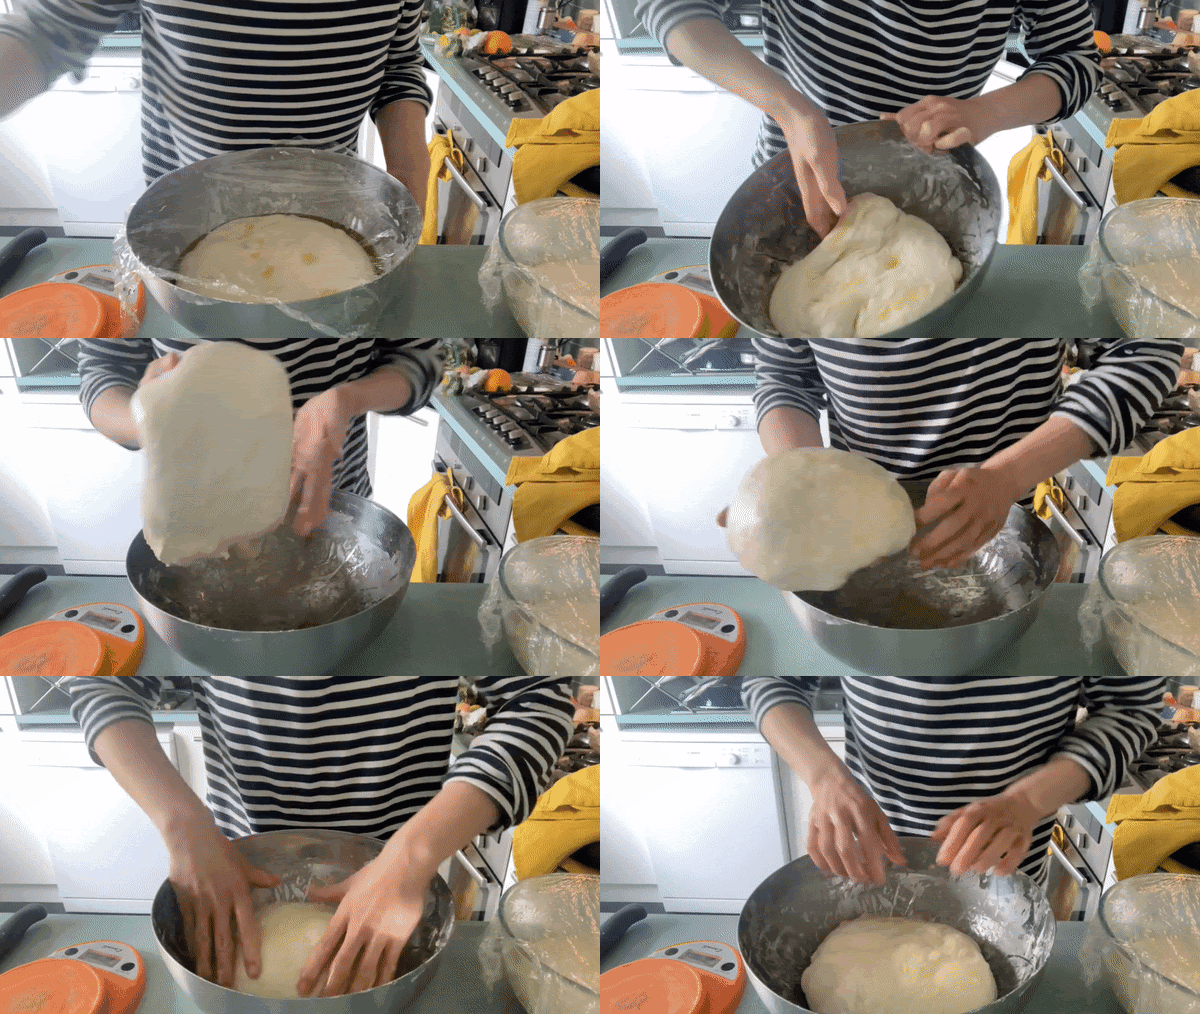
After an hour, check and de-gas the dough by pressing it down like this. If it is bubbling up too much in the fridge (it probably will) and check later to check it isn’t over fermenting
Leave for around 8 hours, or overnight
Day two: Baking the focaccia and prepping the topping
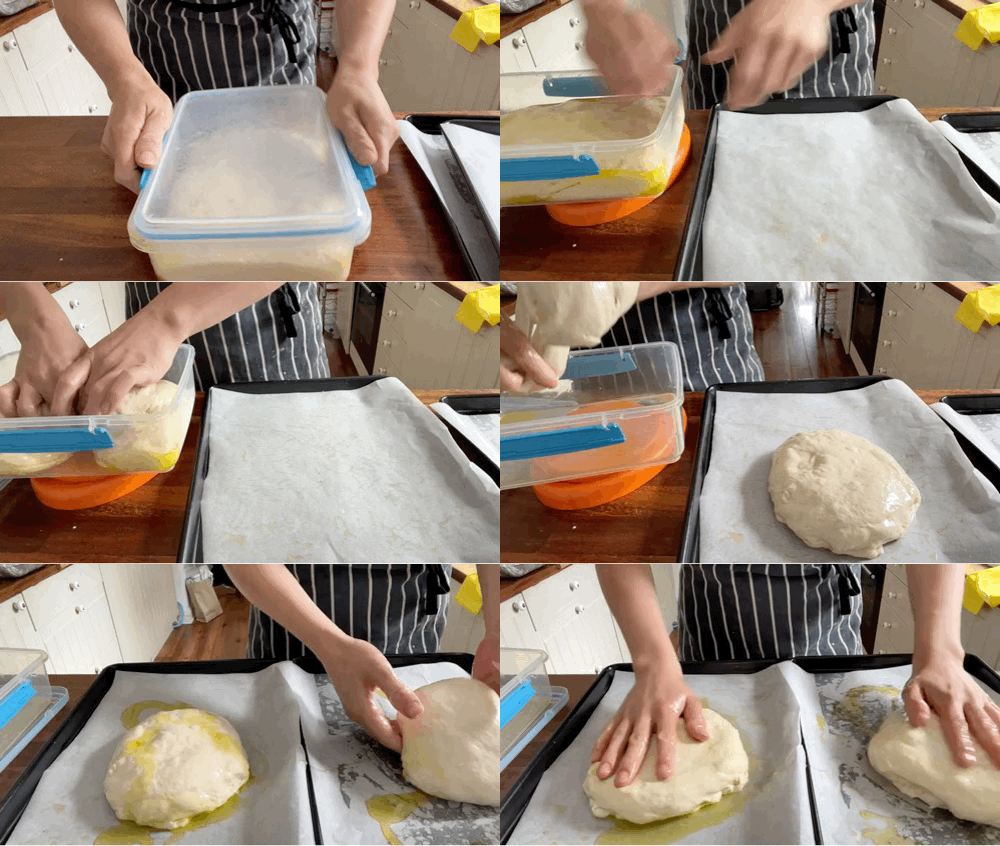
With oiled hands, divide the dough in two, roughly 350-400g and move onto two separate, well-oiled trays. Place it in the middle of your tray, slightly balling it in your hands to help give it a smooth surface. Spread the dough out slightly and cover with olive oil so it doesn't form a crust
Leave for 1 hour until it relaxes
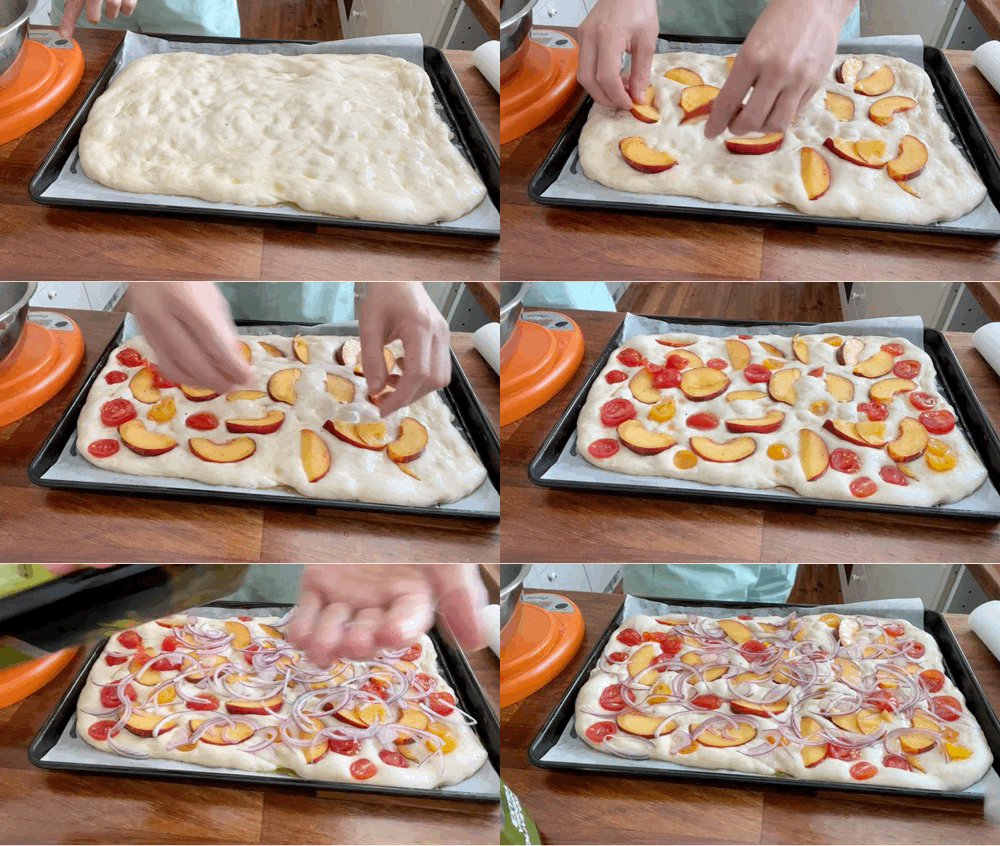
Meanwhile, prep your topping. Slice nectarine/peaches, then toss with vinegar and sugar. Leave for a few minutes to lightly pickle, then add salt to taste. When you are happy with the seasoning, slice the cherry tomatoes in half and add to the stone fruit with olive oil - taste and re-season.
Pre heat oven to 220c fan
It’s time to stretch your dough - press/pull it out gently, trying to leave it slightly thicker at the edges. If it springs back, just walk away for a few minutes and try again. You want it to be around 2cm thick all over, with a few puffy bits
Place toppings on dough with generously oiled hands and press down on the toppings to encourage bubbles to poke through the toppings, but try to be gentle so you don't break the structure too much! No holes, please
Put pizzas into the oven, then reduce temp to 190c fan. Bake for 15 minutes. Check colour and bake - reduce temp to 170c and cook for a further 5-10 minutes if needed.
Enjoy! Best enjoyed fresh out of the oven or cold, but can be reheated for 10 minutes at 150c.
Ready for more? Click here for the crispy potato and tapenade recipe, available on KP+ now!



Awesome. Thanks! Def going to try this. Qq- if I did have a pizza oven and wanted to try and cook it in there, would you just try it as is? Or change hydration of dough? A