Kitchen Project #67: Perfect rice pudding
+ an intro guide and map to mango season
Hello,
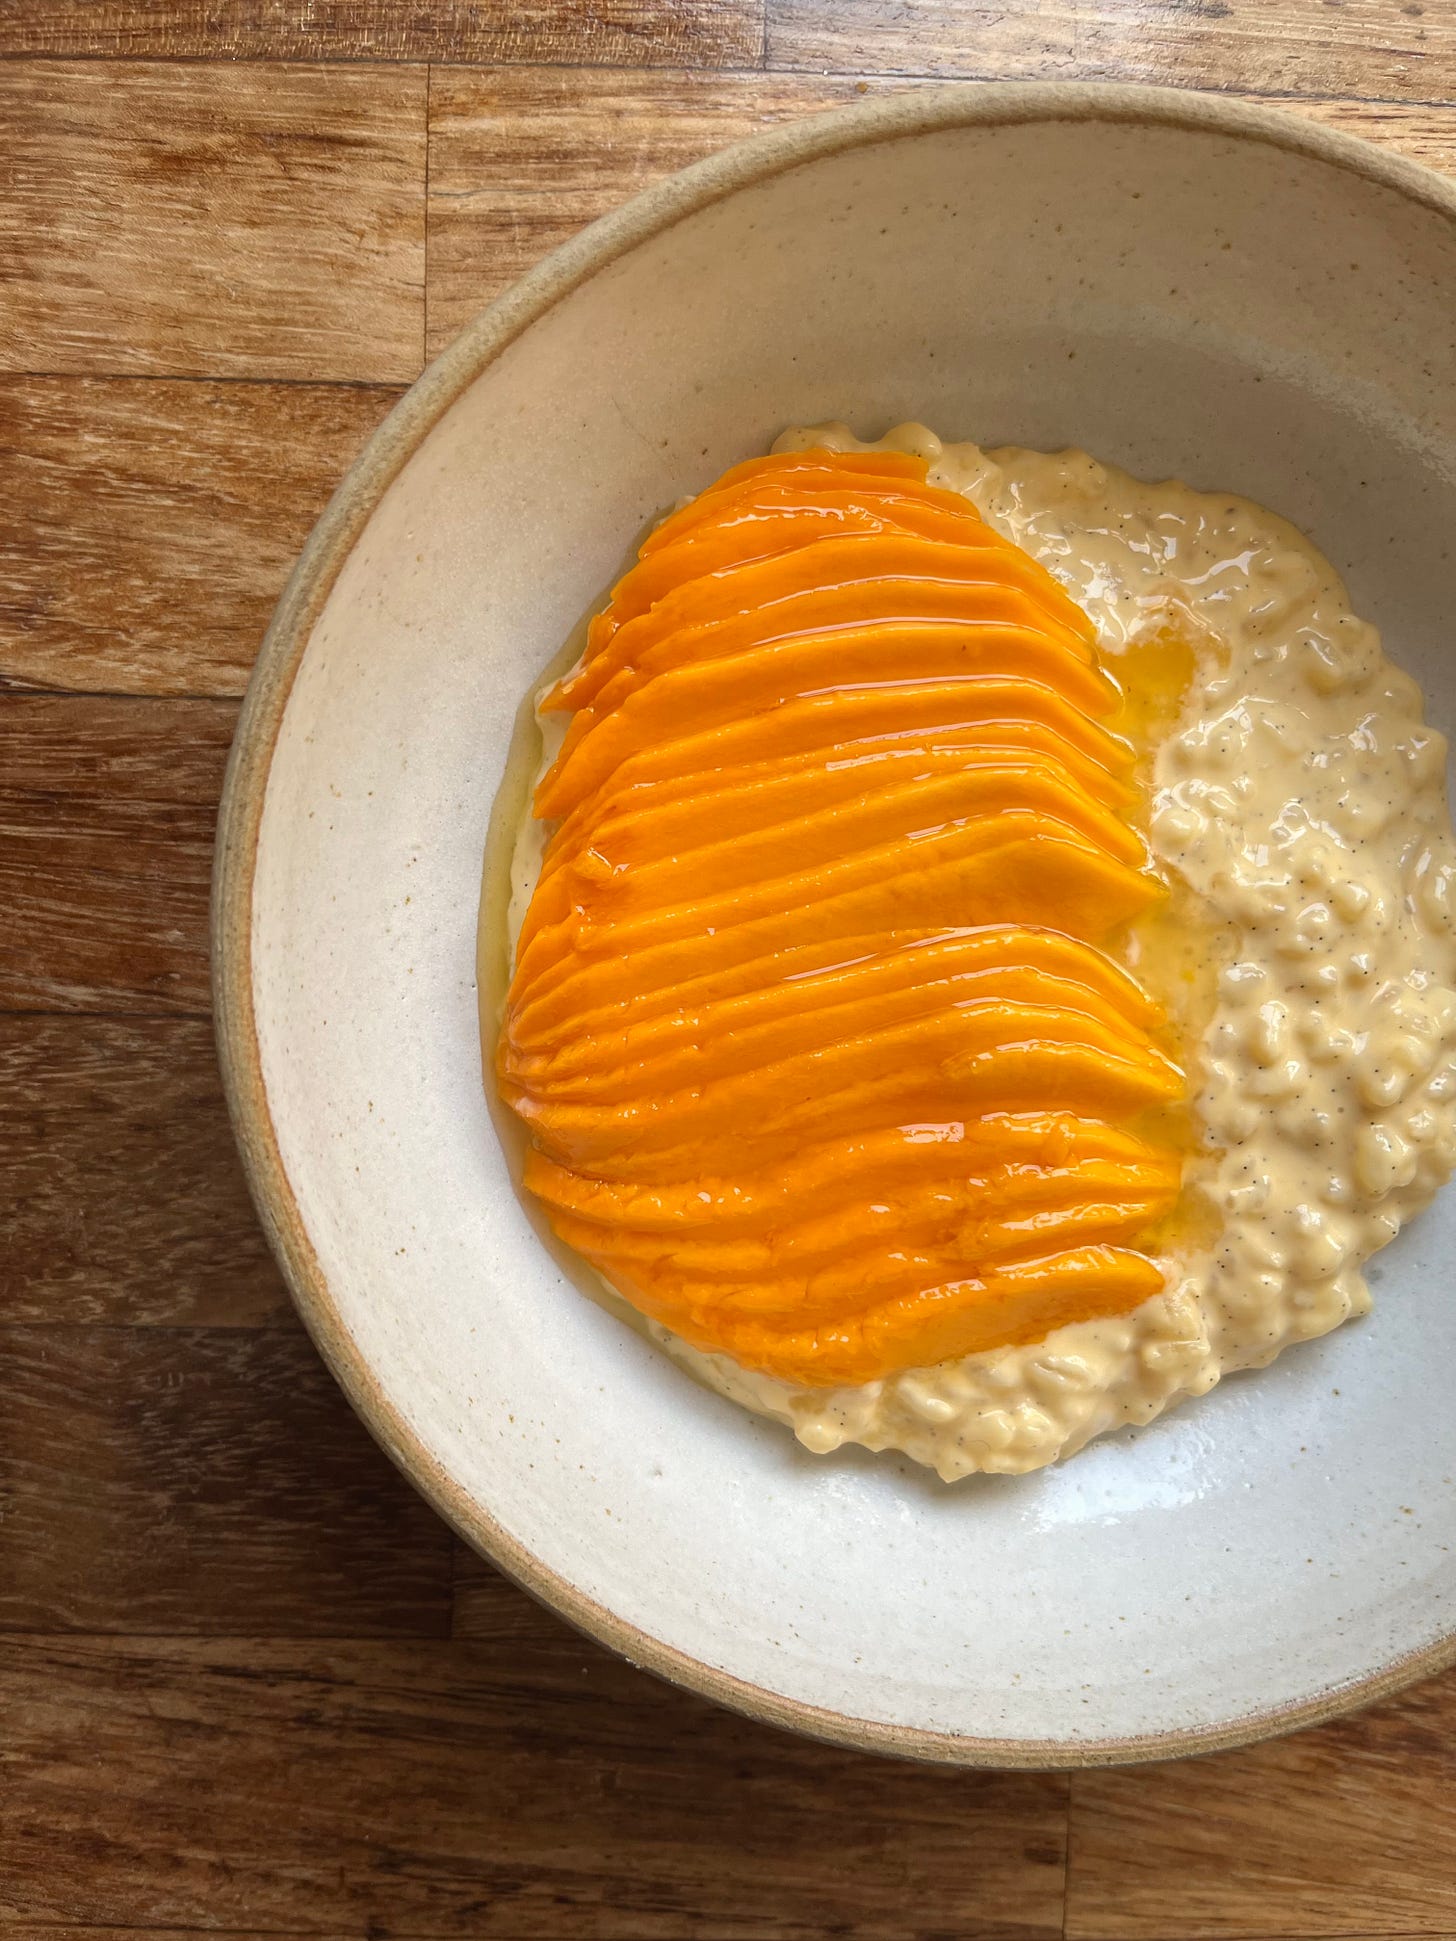
Welcome to today’s edition of Kitchen Projects where we get to celebrate mango season together! I’m so excited to share my adventure into the perfect chilled rice pudding that I think is the ideal backdrop for all of mango season.
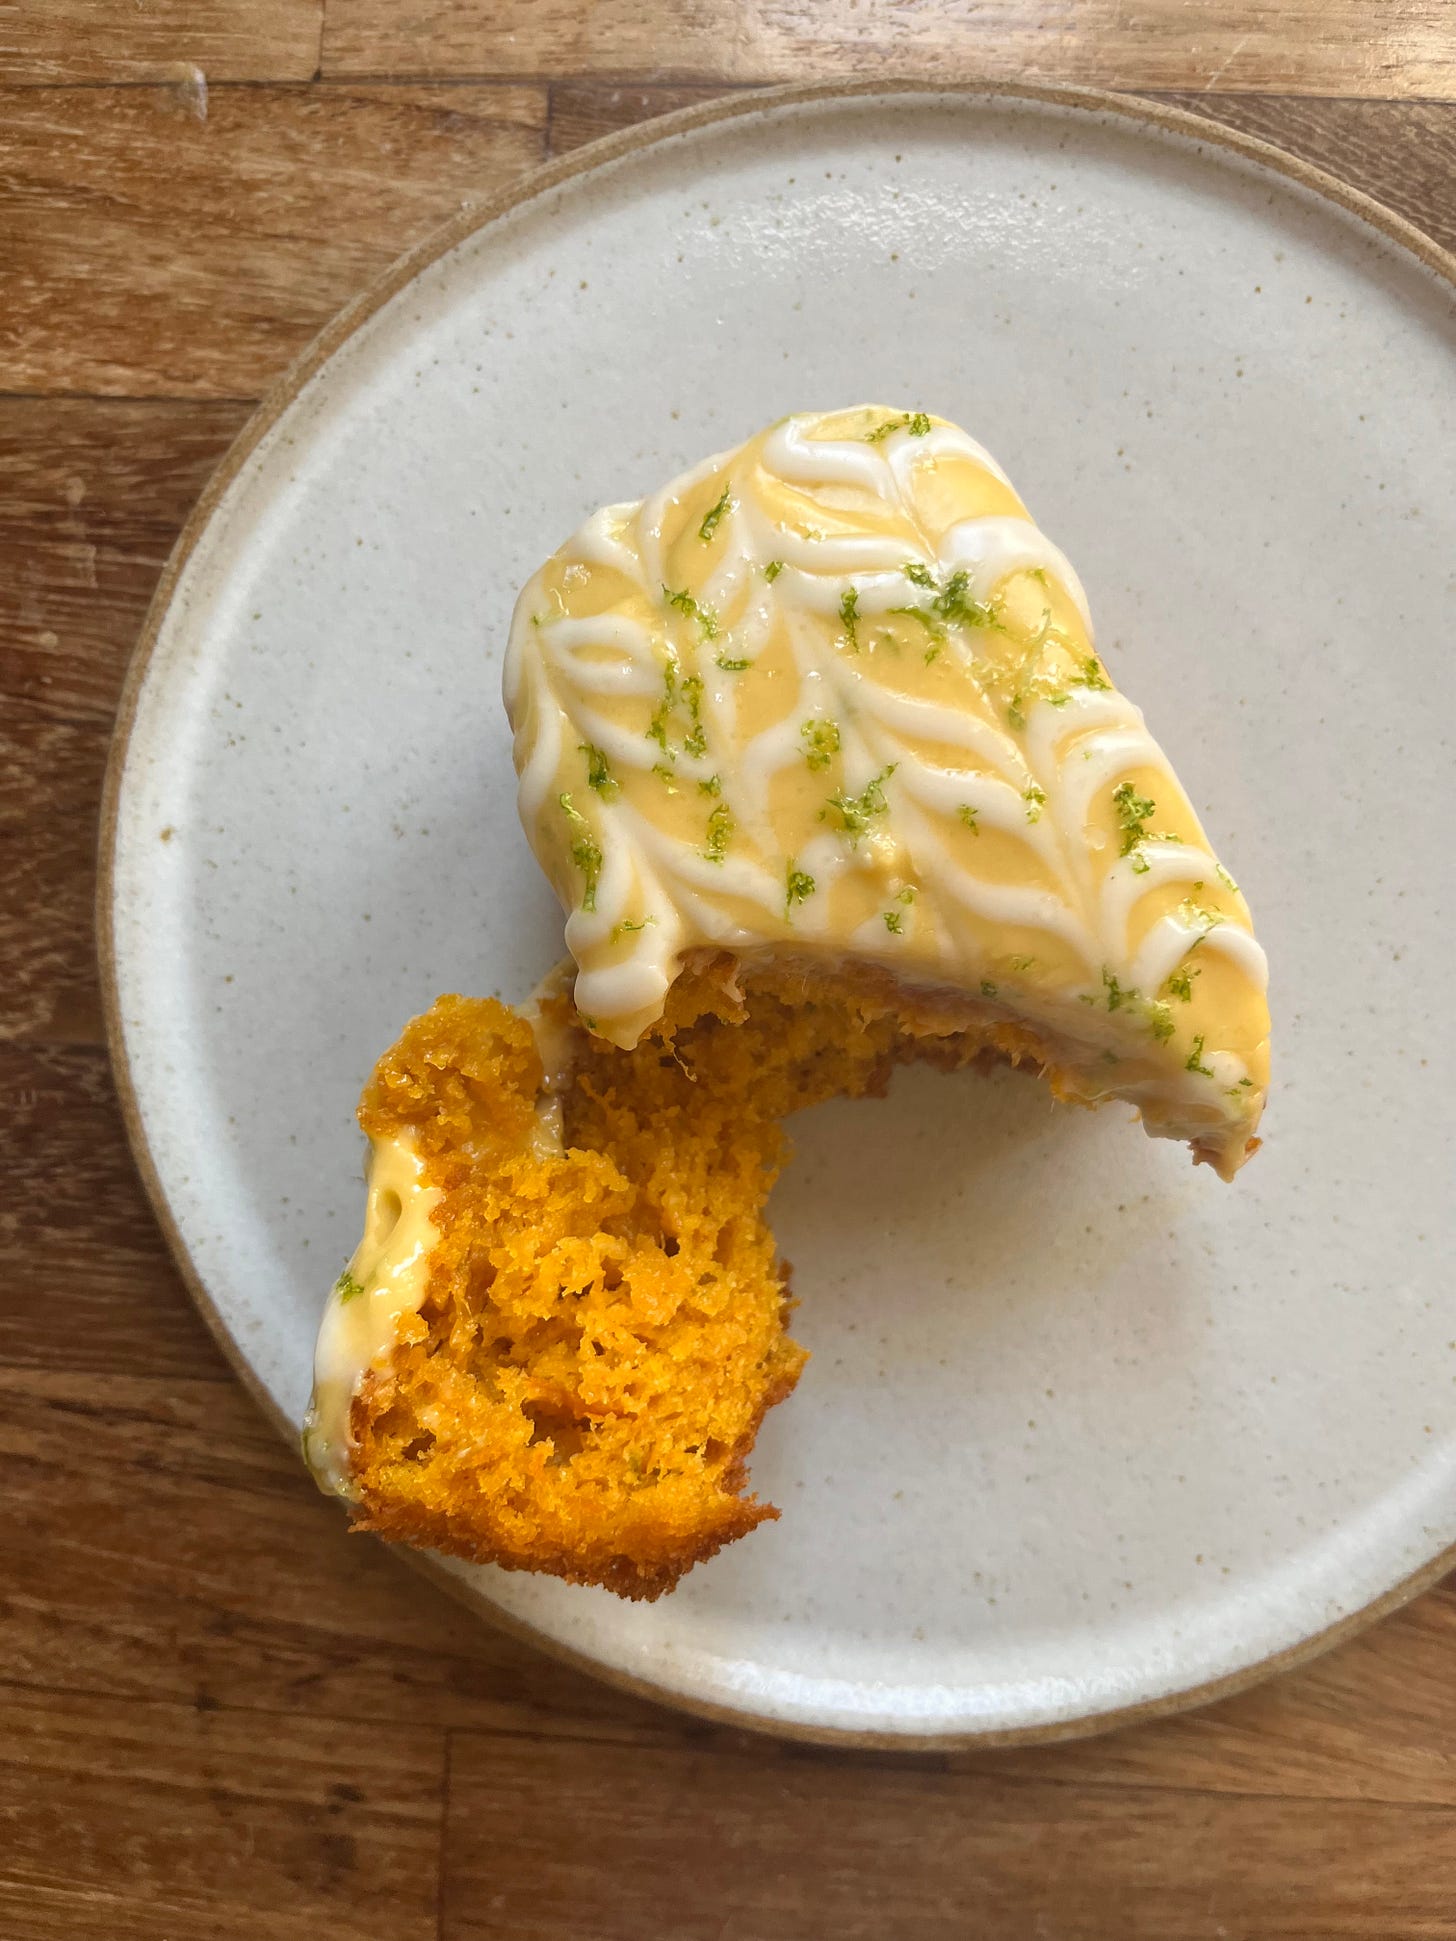
Over on KP+, I’ve got a joyful one for you - the recipe for mango loaf cake, with the dreamiest crumb ever.
What’s KP+? Well, Kitchen Projects+ aka KP+, is the level-up version of this newsletter. It only costs £5 per month and your support makes this newsletter possible. By becoming a member of KP+, you directly support the writing and research that goes into the weekly newsletter as well as get access to lots of extra content, recipes and giveaways, including access to the entire archive. I really hope to see you there:
Love,
Nicola
My first mango season
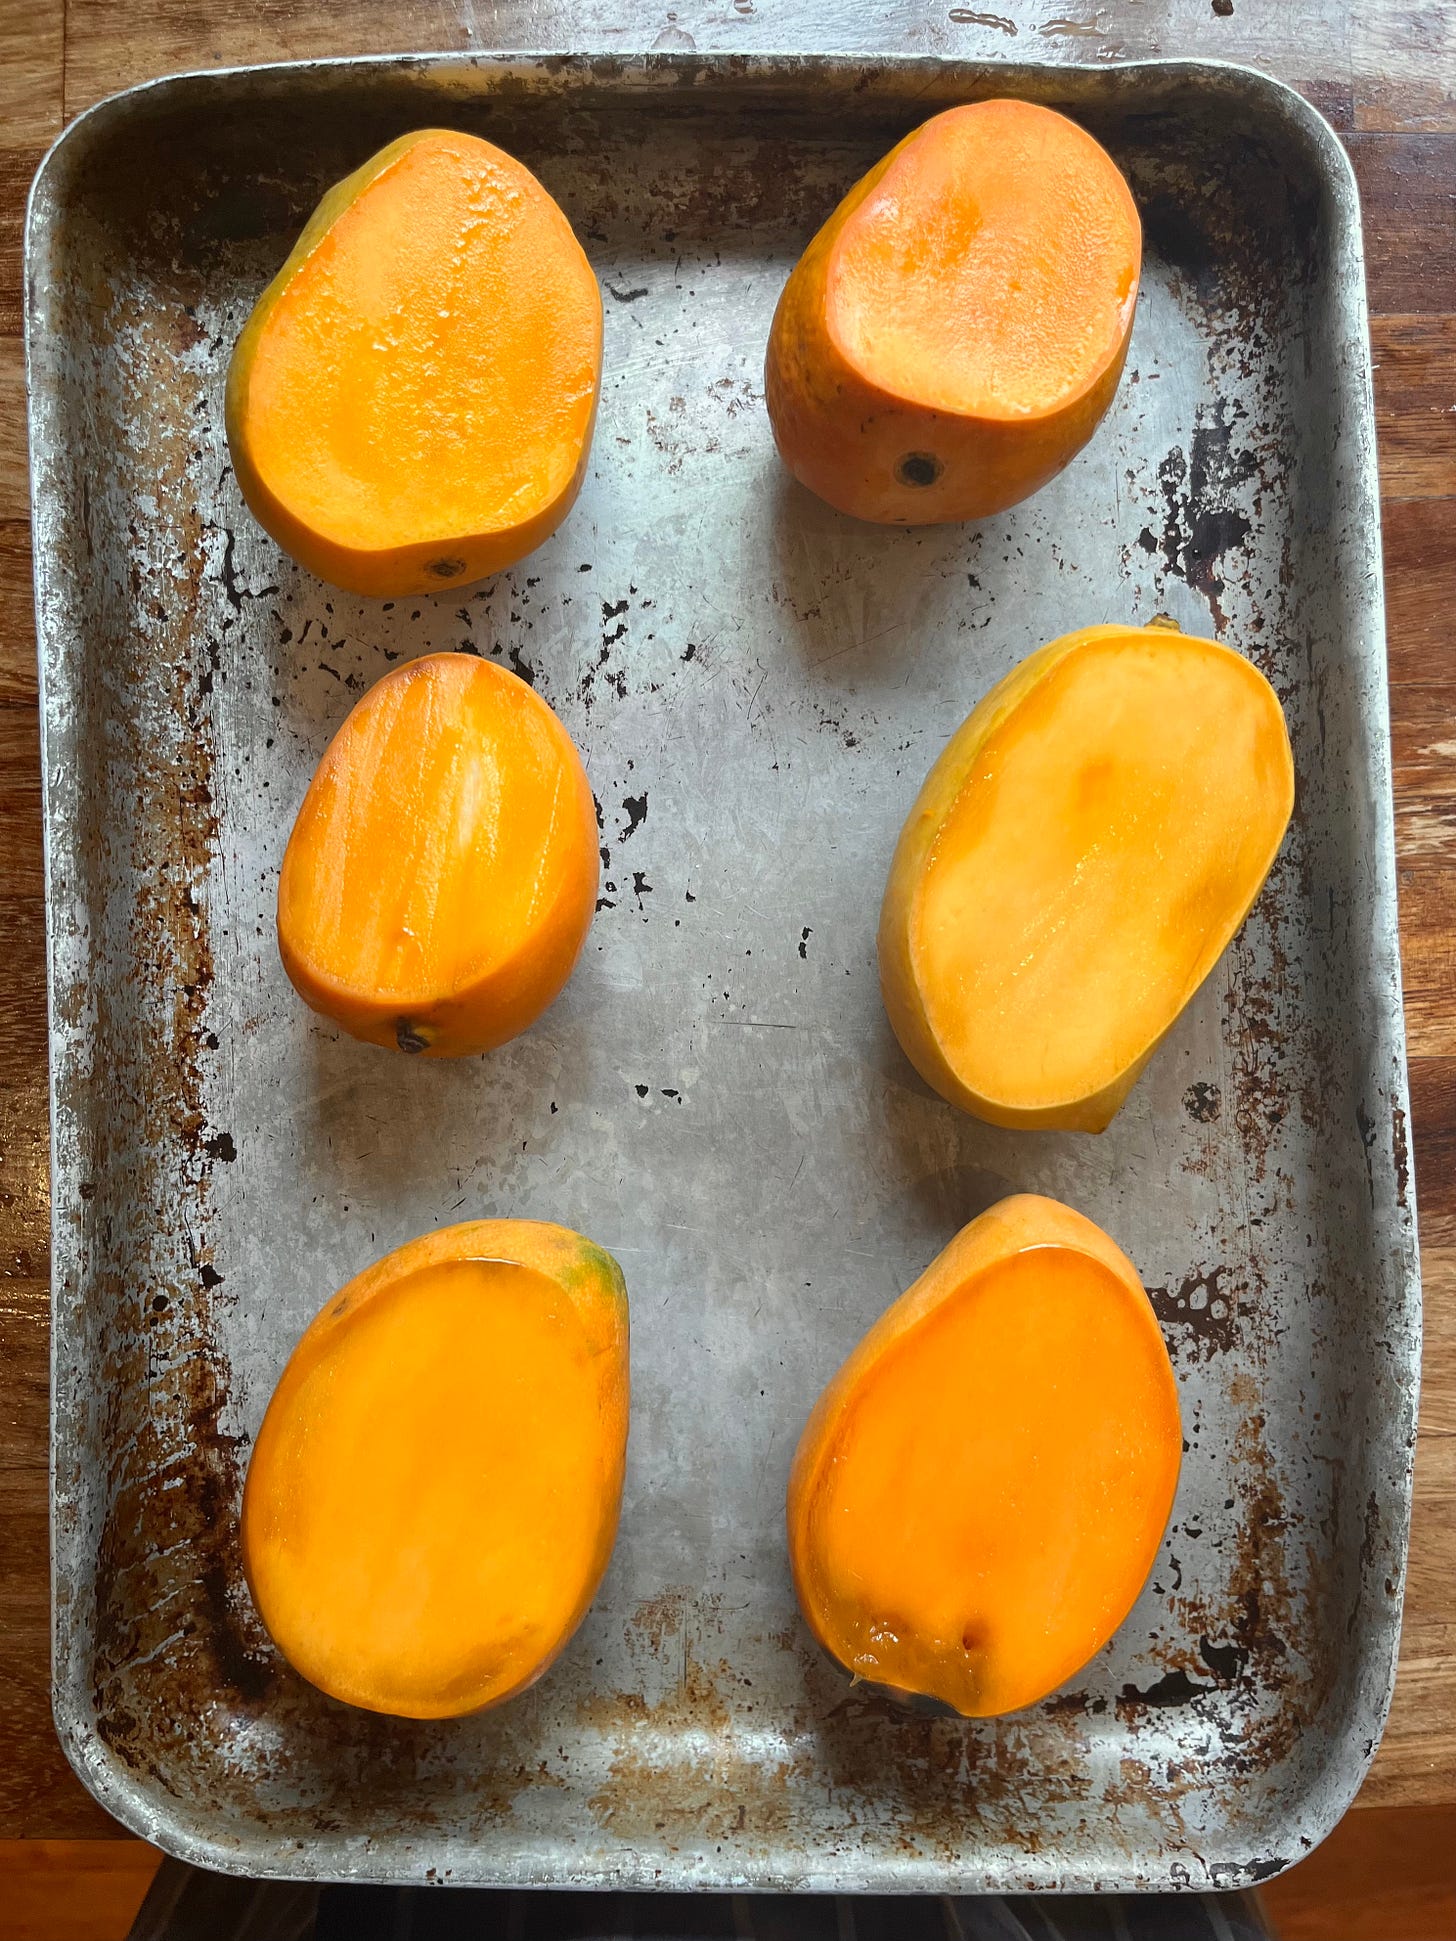
I am slightly ashamed to admit that this is the first year I’ve really paid proper attention to the Indian mango season. I notice them come and go, sure, but I’ve never really spent time seeking out the best ones. This year, it’s different. And I have fallen so in love with mangoes and seeking out the best ones (and learning how to spot them) that I’m already looking forward to how excited I’ll be NEXT year, waiting for its arrival!
Beginning in April and stretching til the summer, the Indian mango season is underway. The two varieties I’ve been seeking this week are the famous alphonso, and slightly less famous (to me, anyway) kesar varieties. Both alphonso and kesar mangoes are yellow mangoes - that means they have yellow skins when ripe - which are native to India. I’ve also been told about Pakistani honey mangoes, which I’m yet to try, but I’ll seek out as they come into season in the next few weeks.
Alphonso mangoes - at their best - are incredibly sweet with a bright firm orange flesh. They are quite small, though you can get jumbo ones - but have been told that jumbo doesn’t always = quality, so beware! Kesar are slightly larger and also boast rich, sweet, fragrant flesh.
Thanks to a lot of incredibly helpful DMs and many long conversations about mangoes, I think I may have begun to crack the code. I was also given an amazing amount of recommendations and suggestions of where to get mangoes during the season. Click here to see the map!. Here’s a few mango buying tips that I’ve gathered from experts:
Alphonso mangoes are available until the end of May, with the best ones starting from this week. Kesar mangoes will be available until end of June
Give them a touch! Of course, ask permission from mango seller first, but you ideally want to go home with a box of firm fruit - ask to swap out fruit if there are super soft ones and ask for a fresh box on the bottom of the pile
And whilst you’re handling them - give them a smell! The best ones I ate had the most amazing fragrant scent, whilst it was a pretty good indication that they weren’t going to be as good if the scent wasn’t there
Don’t be scared off by the green skin - avoid totally underripe green ones, but ones that are semi-green are ok, too, mainly focus on how they feel
Wrap under ripe mangoes in newspaper for a few days
For storage, I had a few different suggestions - some people said that the fridge was okay, but others said to avoid the fridge! Perhaps it depends on how ripe they are, or the variety, but to be honest I’ve been eating them so quickly I haven’t had to worry about it. Someone also suggested keeping in room temperature water for best freshness
Thank you to everyone who wrote to me about mangoes this week. Check out the map here. The tips above are from @mylittlecaketin, @khushikukadia @kiran_vadrevu and @vandankoria. Vandan also shared a link to this brilliant podcast about the Pakistani mango trade in America!
I feel like learning to decode mangoes and pick the right ones is a language I’m not going to learn in one season. But what I do know is this - the very best mangoes should be enjoyed as is, eaten greedily straight from the cutting board. But if you do want to eat them with something else, keeping it simple and creamy is your best bet. Enter: Rice Pudding.
Before we get into that, we need to talk about soft/sad mangoes. Sometimes you’re going to open up a promising mango and it’s going to be stringy, or a bit rotten, let me introduce you to a dessert you can put those less than perfect mangoes into: Mango loaf cake! The texture is unbelievable and it turned my squishy mango sadness into absolute joy PLUS I’ve also shared the recipe for mango pit syrup, waste not want not energy. Check it out on KP+ now:
So, about that rice pudding
I’ve long been obsessed with cold rice pudding. Whilst I do think that Rachel’s is unimproveable, perfecting the ideal cold rice pudding texture has been on my list for sometime. I’ve ventured into it before but looking back at my formulation, I think I may have been approaching it the wrong way (more on that later). As well as this, commercial rice puddings tend to have stabilisers, like additional rice starch, cornflour or added guar gum for that final thick texture which I’d prefer to avoid for something homemade.
If you’ve made rice pudding before, you know how disappointing it is when it turns from perfect and oozing when warm to a solid block when cold. What was once a flowing fountain of ricey joy has become a dense, somewhat grainy block, utterly stiff and in dire need of hydration to get back to its former glory. And one thing that really bugs me about rice pudding recipes? The lack of consistency! I wanted to nail down a formula and method that gives you consistent results.
There are a few tactics to game out the fluidity and final texture. We’ll get into them today - some recipes prefer to use a very low ratio of rice to liquid (5%!) whilst others may have you stir in a significant portion of liquid later on. Either way, there’s always an element of guessing. Shall we dive in?
Rice to liquid ratio
For this week’s recipe the first and most obvious place to begin was the rice to liquid ratio. This is the quantity of rice relative to whatever our chosen dairy is. I looked at a few recipes online and the ratio varied greatly, from 54% all the way down to as low as 7%. The ratio is one of the main ways that recipes try to game the system - the lower the ratio, the more liquid left over at the end… right?
Most rice pudding recipes are broken down into a few distinct cooking stages where dairy might be introduced at different points. Some recipes choose to add all the liquid at the beginning, whilst some may add liquid right at the end, whilst others wait til the pudding cools and then introduce further liquid to loosen. This is where ratios come into play - how much liquid is withheld? And how does this help for getting an ideal cold rice pudding texture that can be served straight from the fridge and doesn’t need to be ‘fixed’ or reheated?
Although the ratio is important, I found the cooking process/differing level of evaporation frustratingly inconsistent. A very gentle simmer, with just a few puttering bubbles, sometimes resulted in a way too wet rice pudding, even with a high ratio of rice to liquid. I also realised this week how I really like a textured rice pudding - I don’t want just a few grains of rice floating in a lot of liquid, it’s just not that satisfying to eat.
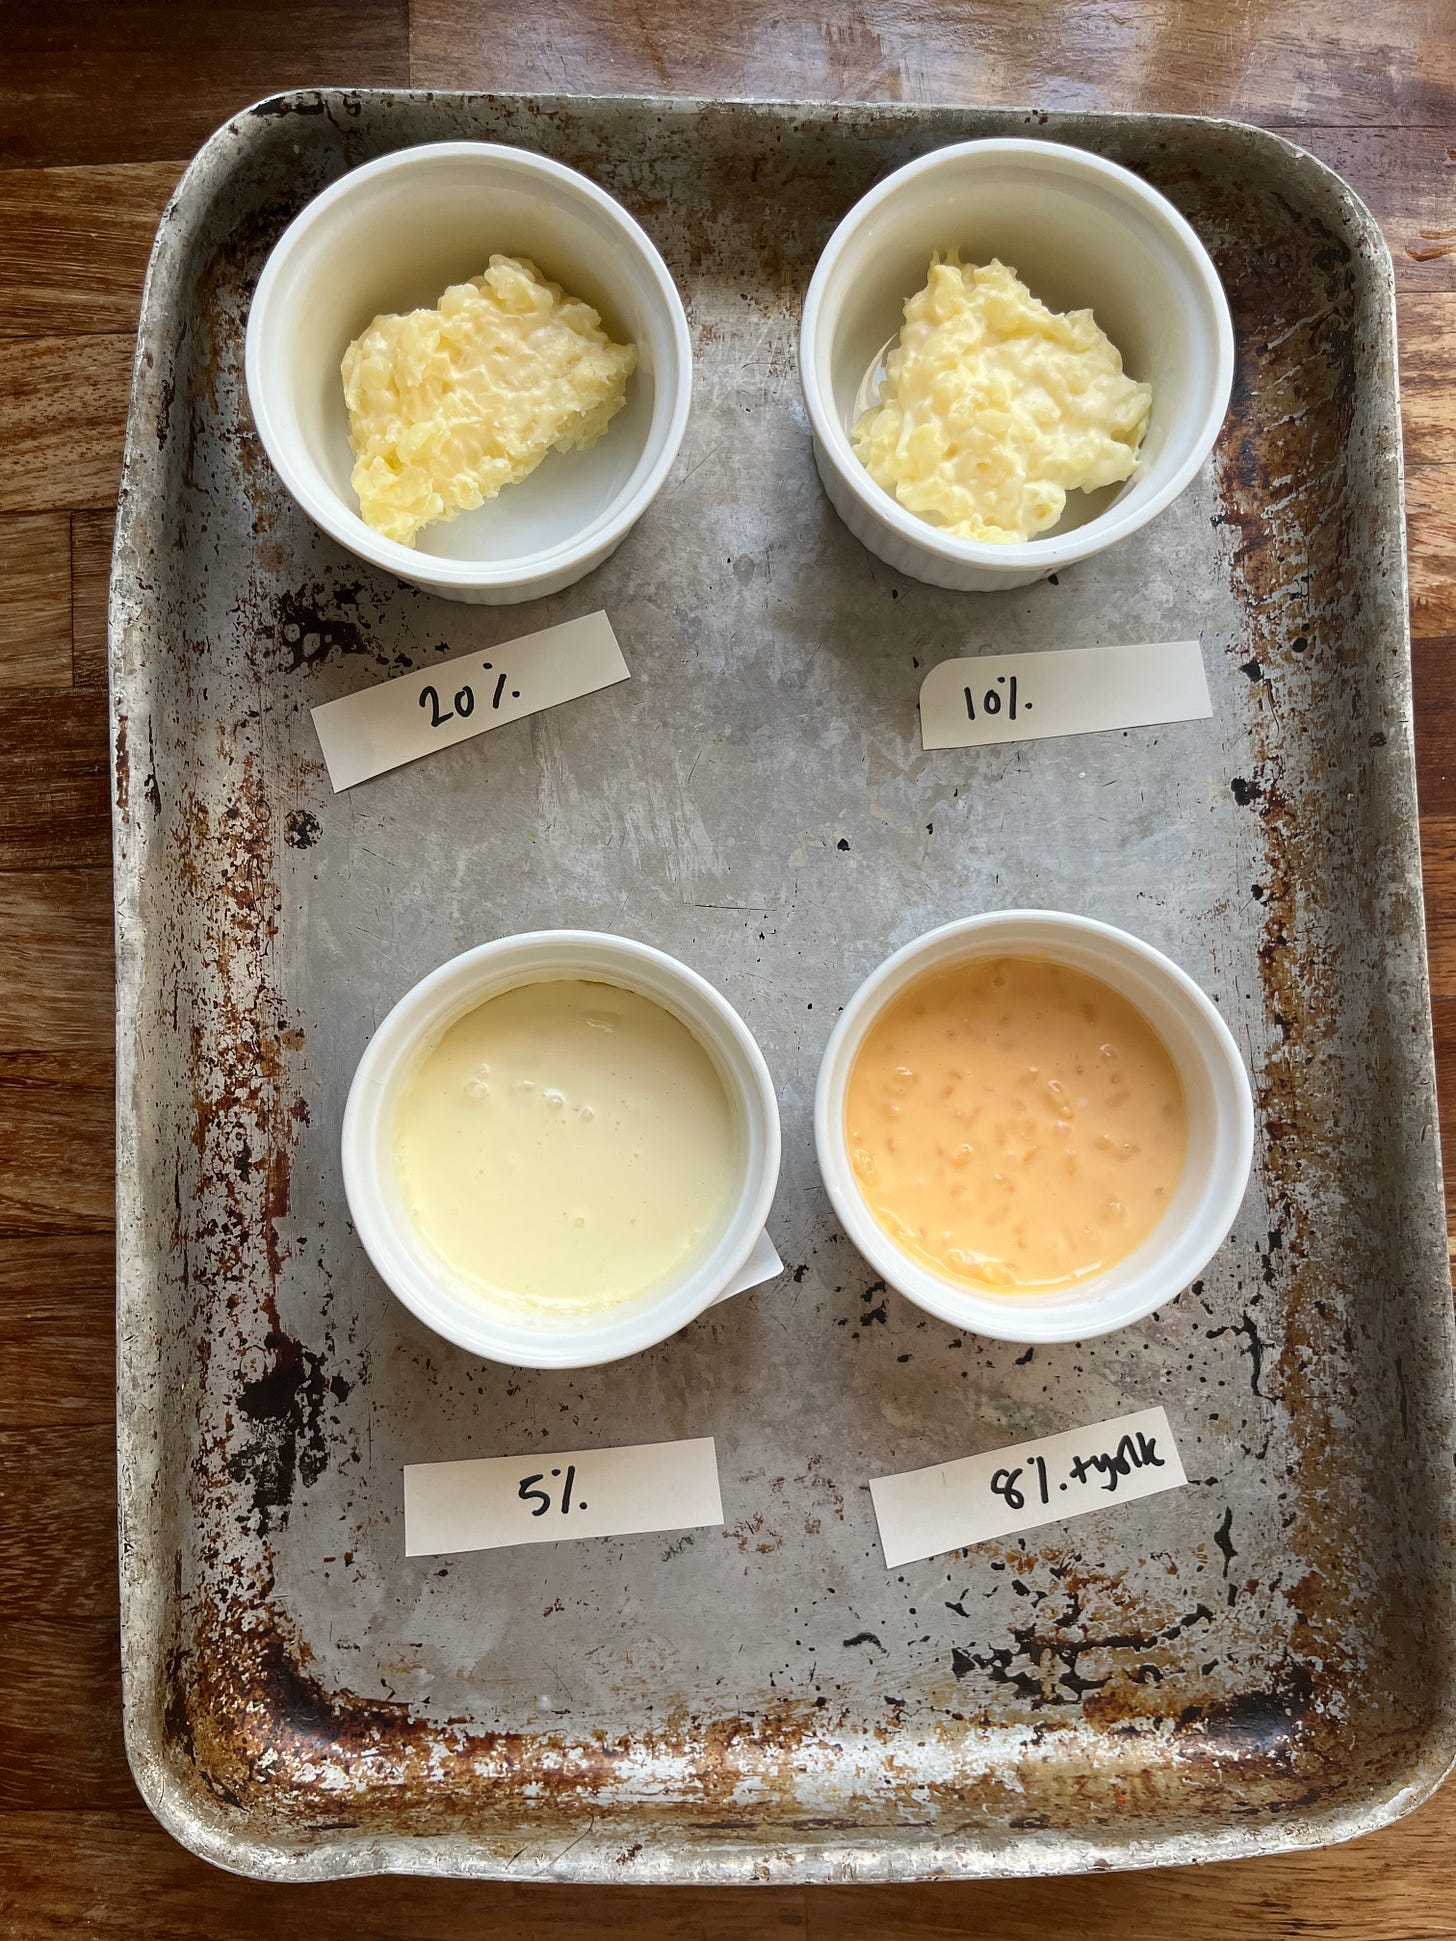
I made a series of rice puddings, with 50/50 cream to milk with various ratios of rice, from 5% upwards. I didn’t add/loosen with additional liquid at the end of cooking and tried to cook them with exactly the same temps each time. On the bottom left is a pudding made with 8% rice, but with added yolks:
This was definitely a goldilocks moment. I went into this process thinking the ratio was everything, but I since realised other variables are equally as important. Despite this, I finally landed on a 15% ratio - but this does require me to parcook my rice to retain fluidity. Let’s discuss that next.
Parcooking the rice
If you’re anything like me, you’ve made rice pudding and thought it was perfect, only to go back to it later and have it be a little more al dente than you’d thought.
Balancing proper rice absorption with evaporation can be a little challenging. As we discussed in the ratio section, some chefs choose to circumvent this issue by radically reducing the proportion of rice to liquid, as an insurance measure to keep things flowing.
But what if we introduced par cooked rice? I noticed a few recipes online that made rice pudding from leftover / fully cooked rice, so I like the idea of giving things a helping hand. By par cooking the rice in rapidly boiling water for a few minutes, we can get the rice well on its way to being tender without worrying about overheating the milk / evaporating too much of the liquid off. Yes, we lose out on a little bit of the starch power (more on that below) but I found this to be a worthwhile exchange to make. Yes, we could potentially start with more milk and begin with a 2 minute rapid boil, but this has a negative effect on the flavour and colour of the rice pudding and possibly lead to splitting - not a deal worth making!
Whilst I would say 2 minutes is an absolute minimum for par boiling, you could increase this to 3 minutes for an even more tender final texture.
The dairy
Don’t get me wrong, coconut sticky rice with mango is, of course, a top tier dessert and I’m not sure I could improve upon any of the amazing recipes already out there (Rasa Malaysia always has great recipes, as does Omnivores Cookbook). But this week I wanted to create a beautiful soft, flowing and creamy backdrop for enjoying peak mangoes, and creating my dream cold rice pudding recipe has been on the hitlist for ages. I’ve also found that many commercially available coconut milks break down a bit with a long, slow cook required of a European style rice pudding, meaning your best bet is to probably stir in a little coconut cream right at the end if you want to introduce that flavour in this style of RP.
The biggest face off we have for dairy is probably milk vs cream and the ratio between the two. The most important thing, I think, to think about when you’re considering your dairy is to consider the way it behaves when heated. Milk is about 87% water, with the rest made up of fat, proteins and sugar which float about happily. When milk boils, the emulsion breaks apart, the proteins denature and the milk can go clumpy. This curdling begins at around 82c.
So what of cream? Double cream is around 48% fat, the rest made up of water, proteins and sugar. Due to the significantly higher fat proportion, it is much much harder to curdle cream without interference from an acid. There is so much fat getting in the way of the proteins, they can’t clump together and thus appear curdled. The more dairy fat there is, the thicker it will be - just compare butter (84%) and milk (4%) and consider how thick clotted cream (58%) is.
I found that the rice pudding made with just milk was a bit grainy once it cooled. I tried 50/50 milk and cream and the result was very luscious, but it was far too thick once it cooled. When the mixture boils, double cream is evaporating water, making the pudding proportionally higher in fat. So, the final result is extremely thick especially once the fat is fully chilled - the effect is a little bit congealed:
For the final pudding, I decided on a 15% cream / 85% milk split - this gives us enough fat to stabilise the mixture but not so much that it is overly dominant in texture or flavour.
The cooking
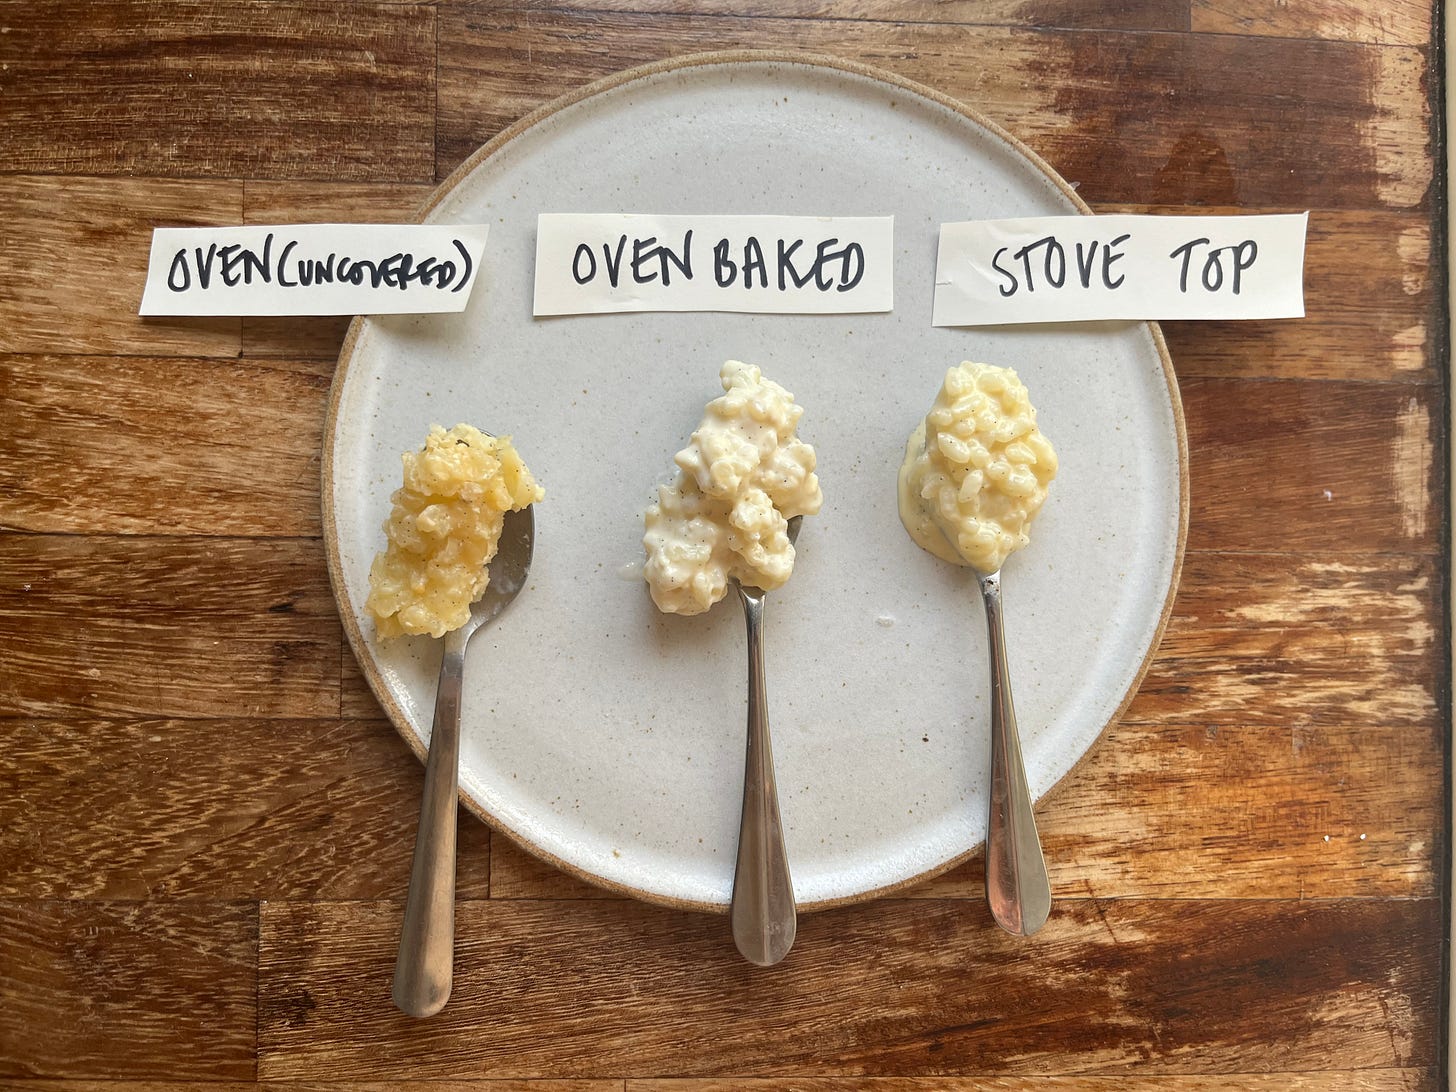
Oh simmering, simmering simmering. Why are you so DIFFICULT to maintain?! I consider simmering to be any temp between 92c-98c, just before boiling. At this point, the liquid is steaming and there might be a gentle putter coming from underneath. If you can hear your mixture purring, it’s probably too hot. Annoyingly, the more your mixture reduces, the less liquid you have and therefore the more likely it is to rise in temperature. Although I loved the texture of the stove top rice pudding, one way to circumvent this, I thought, was by oven baking! Nice, gentle oven baking.
Oven baked rice pudding has a nice caramel flavour to it, akin to evaporated milk, but I don’t think it works well for cold rice pudding as the unagitated dairy from the slow oven bake tends to split a little bit after cooling. Even though I kept it covered and stirred it every 15-20 minutes, the texture was a bit off. If you were to reheat this, like The Square pastry book suggests, with custard or cream, it IS divine, but doesn’t quite work for the cold dessert I’m after today. I do appreciate the famous oven baked rice pudding skin, but it isn’t what I’m after today:
SO, back to stove cooking! I found that by par-cooking the rice, adding to the liquid then bringing the boil before lowering the temp and cooking gently for 30 minutes (keeping it at 93-95c) gave me consistent results. But I wasn’t convinced that was accurate enough. So, the best way, I think, to ensure you have the proper consistency is to track the weight of the mixture! If you measure the weight (so scale the whole thing then minus the pan before and after cooking) this will help you ascertain how much of the liquid has been absorbed/evaporated and will give you a pretty good idea of what the final texture will be (it should be exactly like mine!). This takes the guessing out of ‘done’ nes.
I tested this a few times and found that just over 20% reduction in weight was ideal to have tender rice and a creamy fluid texture. To figure this out, just weigh the mixture and note it down pre cooking. To get the goal final weight, multiply that number by 0.79 - this will give you the weight to aim for after cooking. This isn’t a necessary step but it can help.
Release! The! Starch!
Rice pudding - and risotto - is a marriage between starch and liquid. You’ve probably heard people waxing lyrical about pasta water, but what about rice water?! Rice-y water deserves its moment of recognition too.
To make the dreamiest, creamiest rice pudding imaginable, I took inspiration from risotto. For starters - yes, I tried to make a rice pudding like I would a risotto, toasting the rice and then adding the liquid bit by bit, massaging it lovingly… and it does not work. The milk burns before it gets absorbed. However, there are lessons to be learnt.
Pudding and risotto rice contain a LOT of starch compared to other rice varieties. The starches in question are amylose and amylopectin. Sound familiar? The topic of these two starches came up when we were learning about floury vs. waxy potatoes. Amylopectin is the starch that gets sticky and gels in the presence of water. The starch in risotto and pudding rice is predominantly Amylopectin, so this means that the grains hold shape over long periods of cooking, but we do get fudgy and creamy textures. Shortgrain rice has about 16% amylopectin, whilst long grain rice like basmati has 22% amylose, which is why they behave so differently.
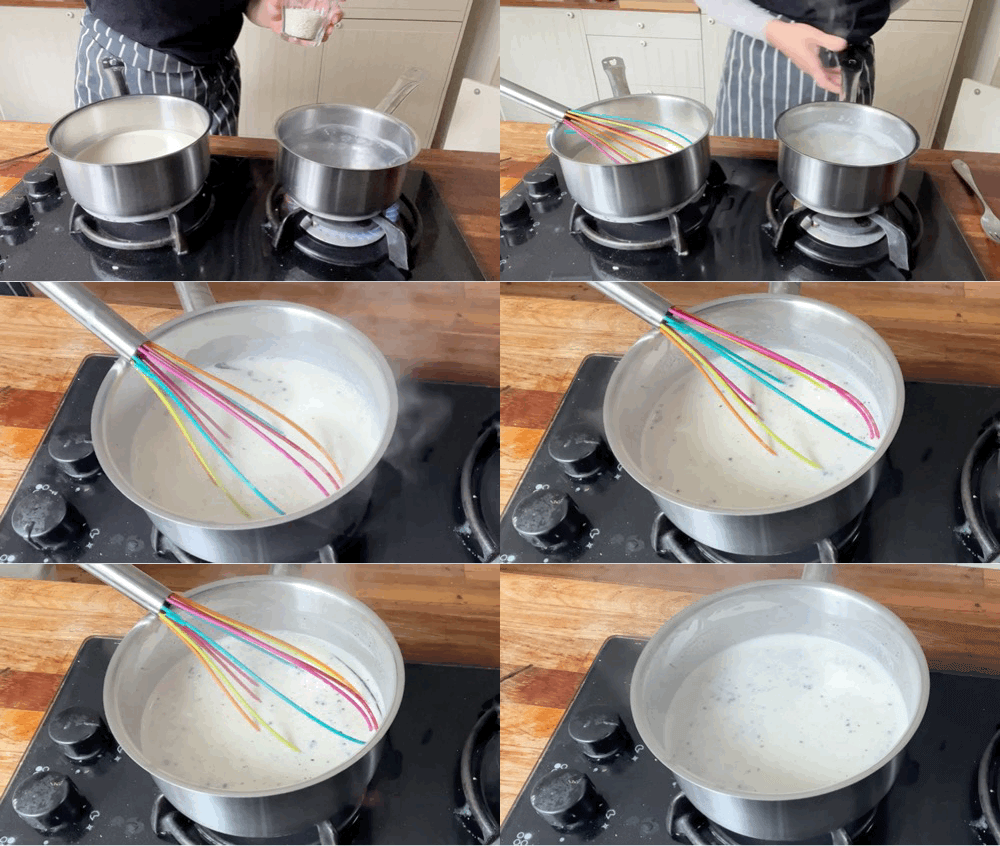
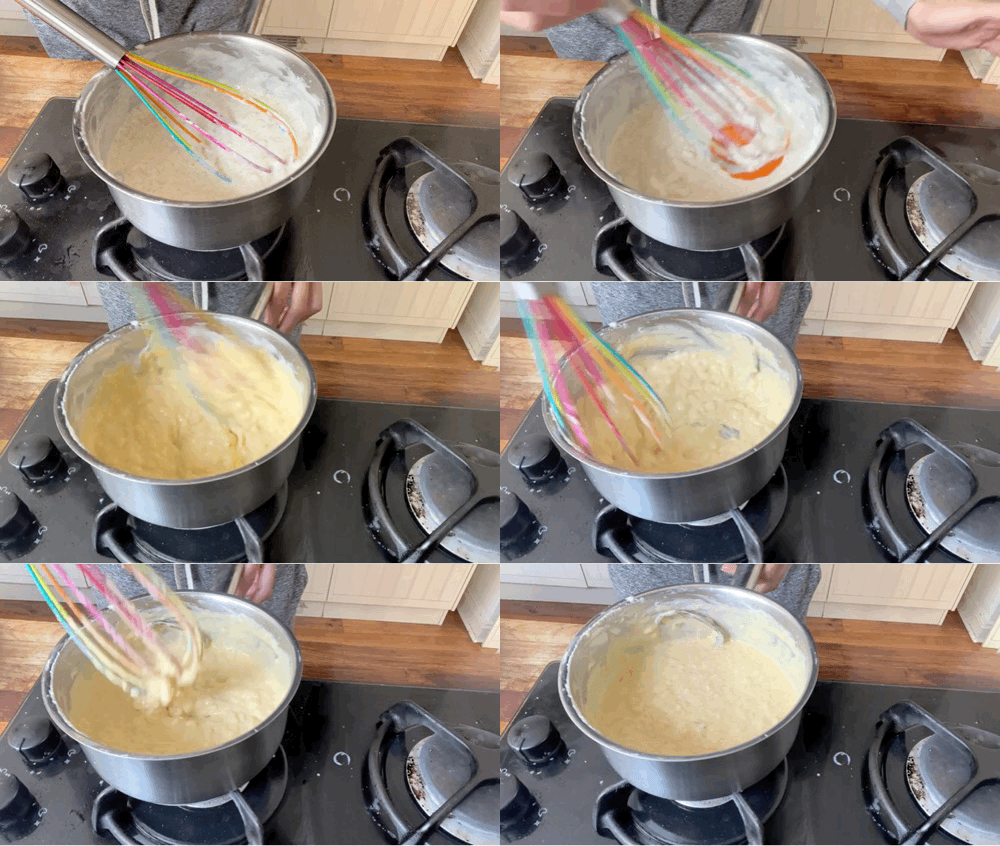
You know how when you make risotto you need to stir it quite a bit? This is because stirring agitates the rice grains and releases starch into the liquid. As a result, the liquid thickens and helps provide that dreamy creamy texture we know and love. So giving the rice pudding a few vigorous whisks during the cooking process gave me the absolute best final texture, as well as helping to cool down the mixture to keep it at simmering temp:
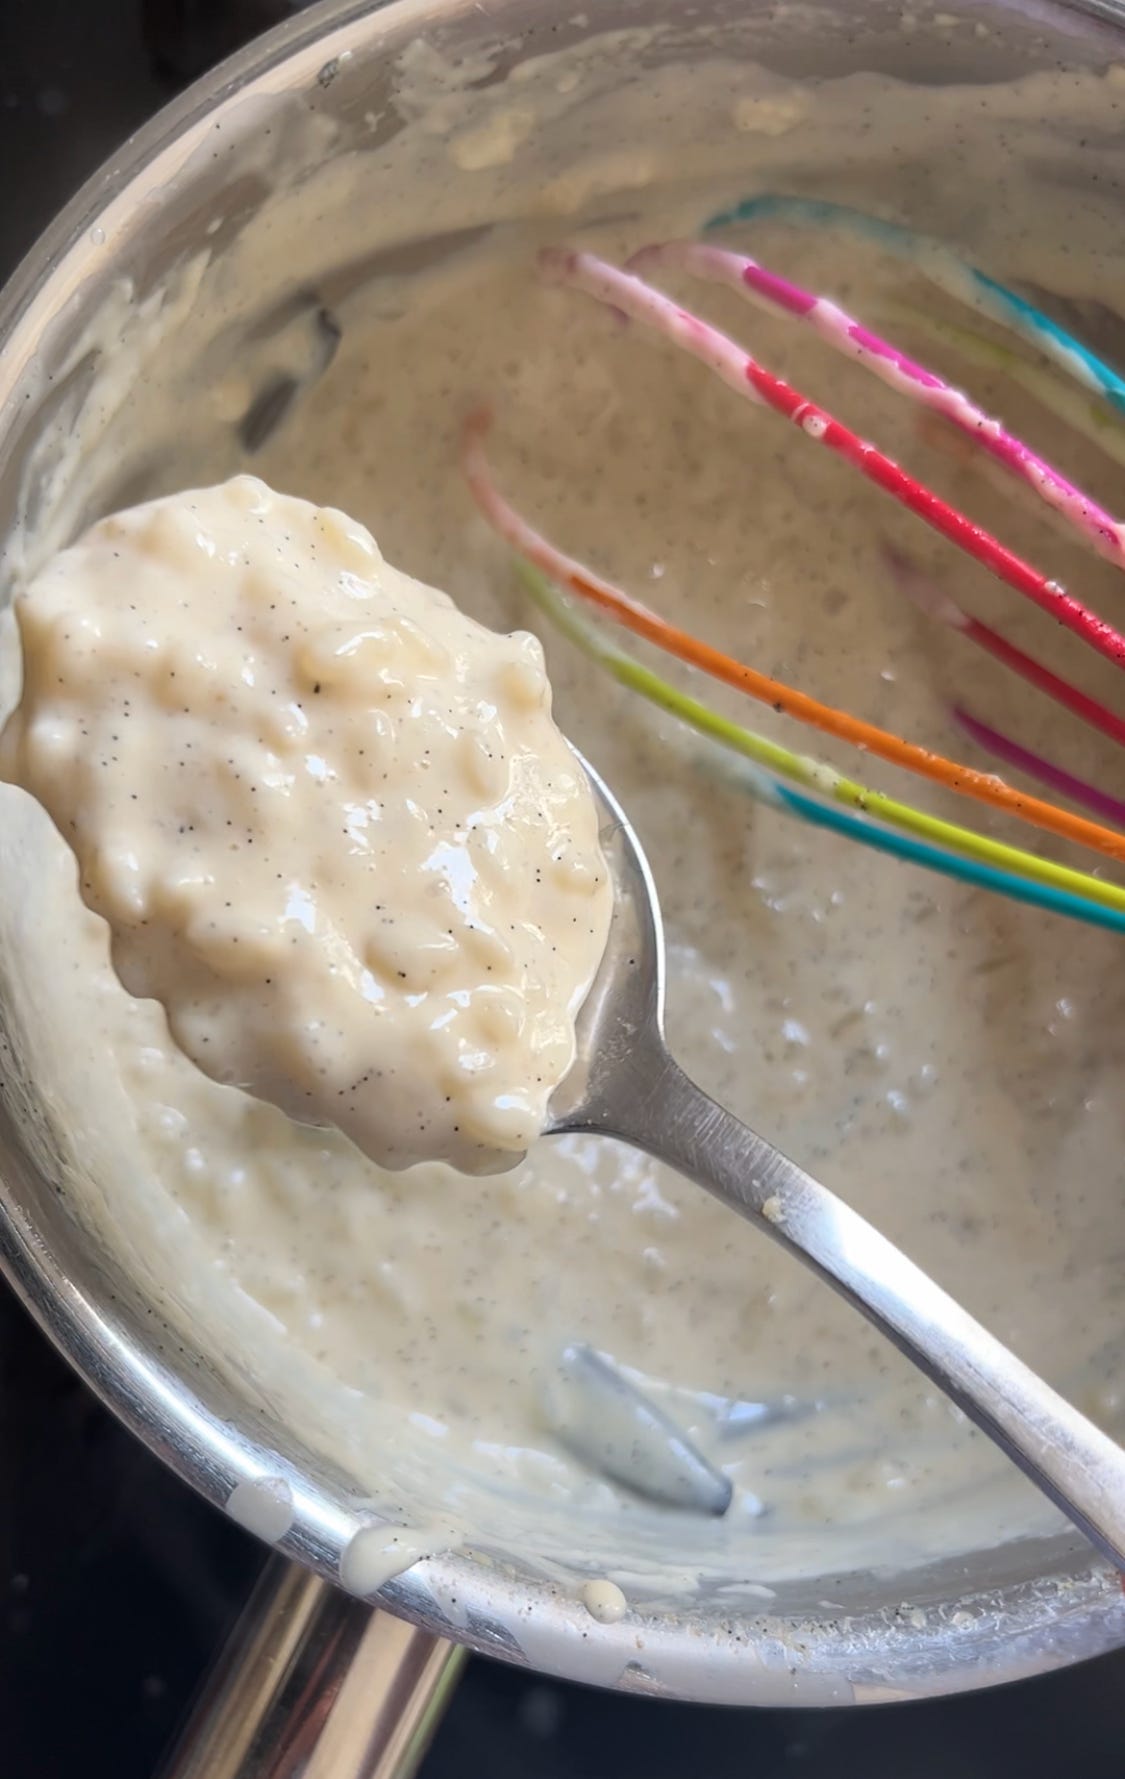
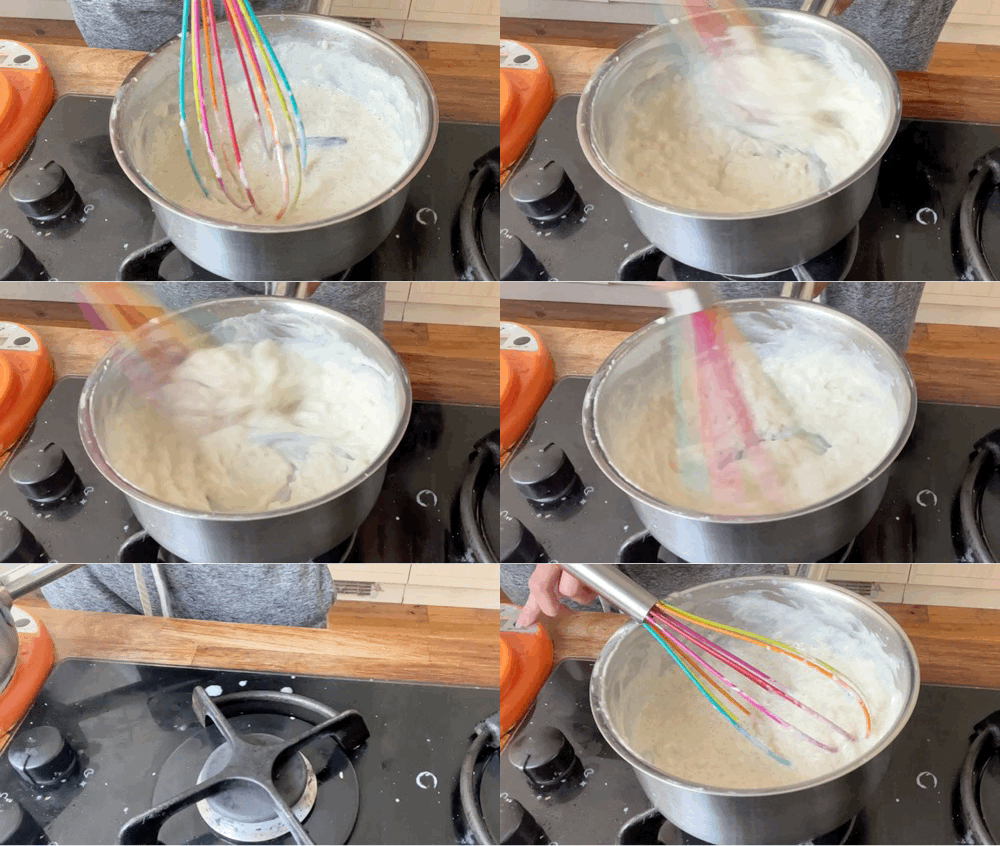
To finish off the rice pudding and encourage a really thick texture, I’ve added a final 1 minute vigorous whisk as a final step - the pudding visibly reduces and thickens and gets really shiny, and makes waves in the pan.
In commercial rice puddings, additional rice starch tends to be an added ingredient to give that ‘unctuous’ mouthfeel, but I don’t think it’s strictly necessary, especially with the next step.
Rice types
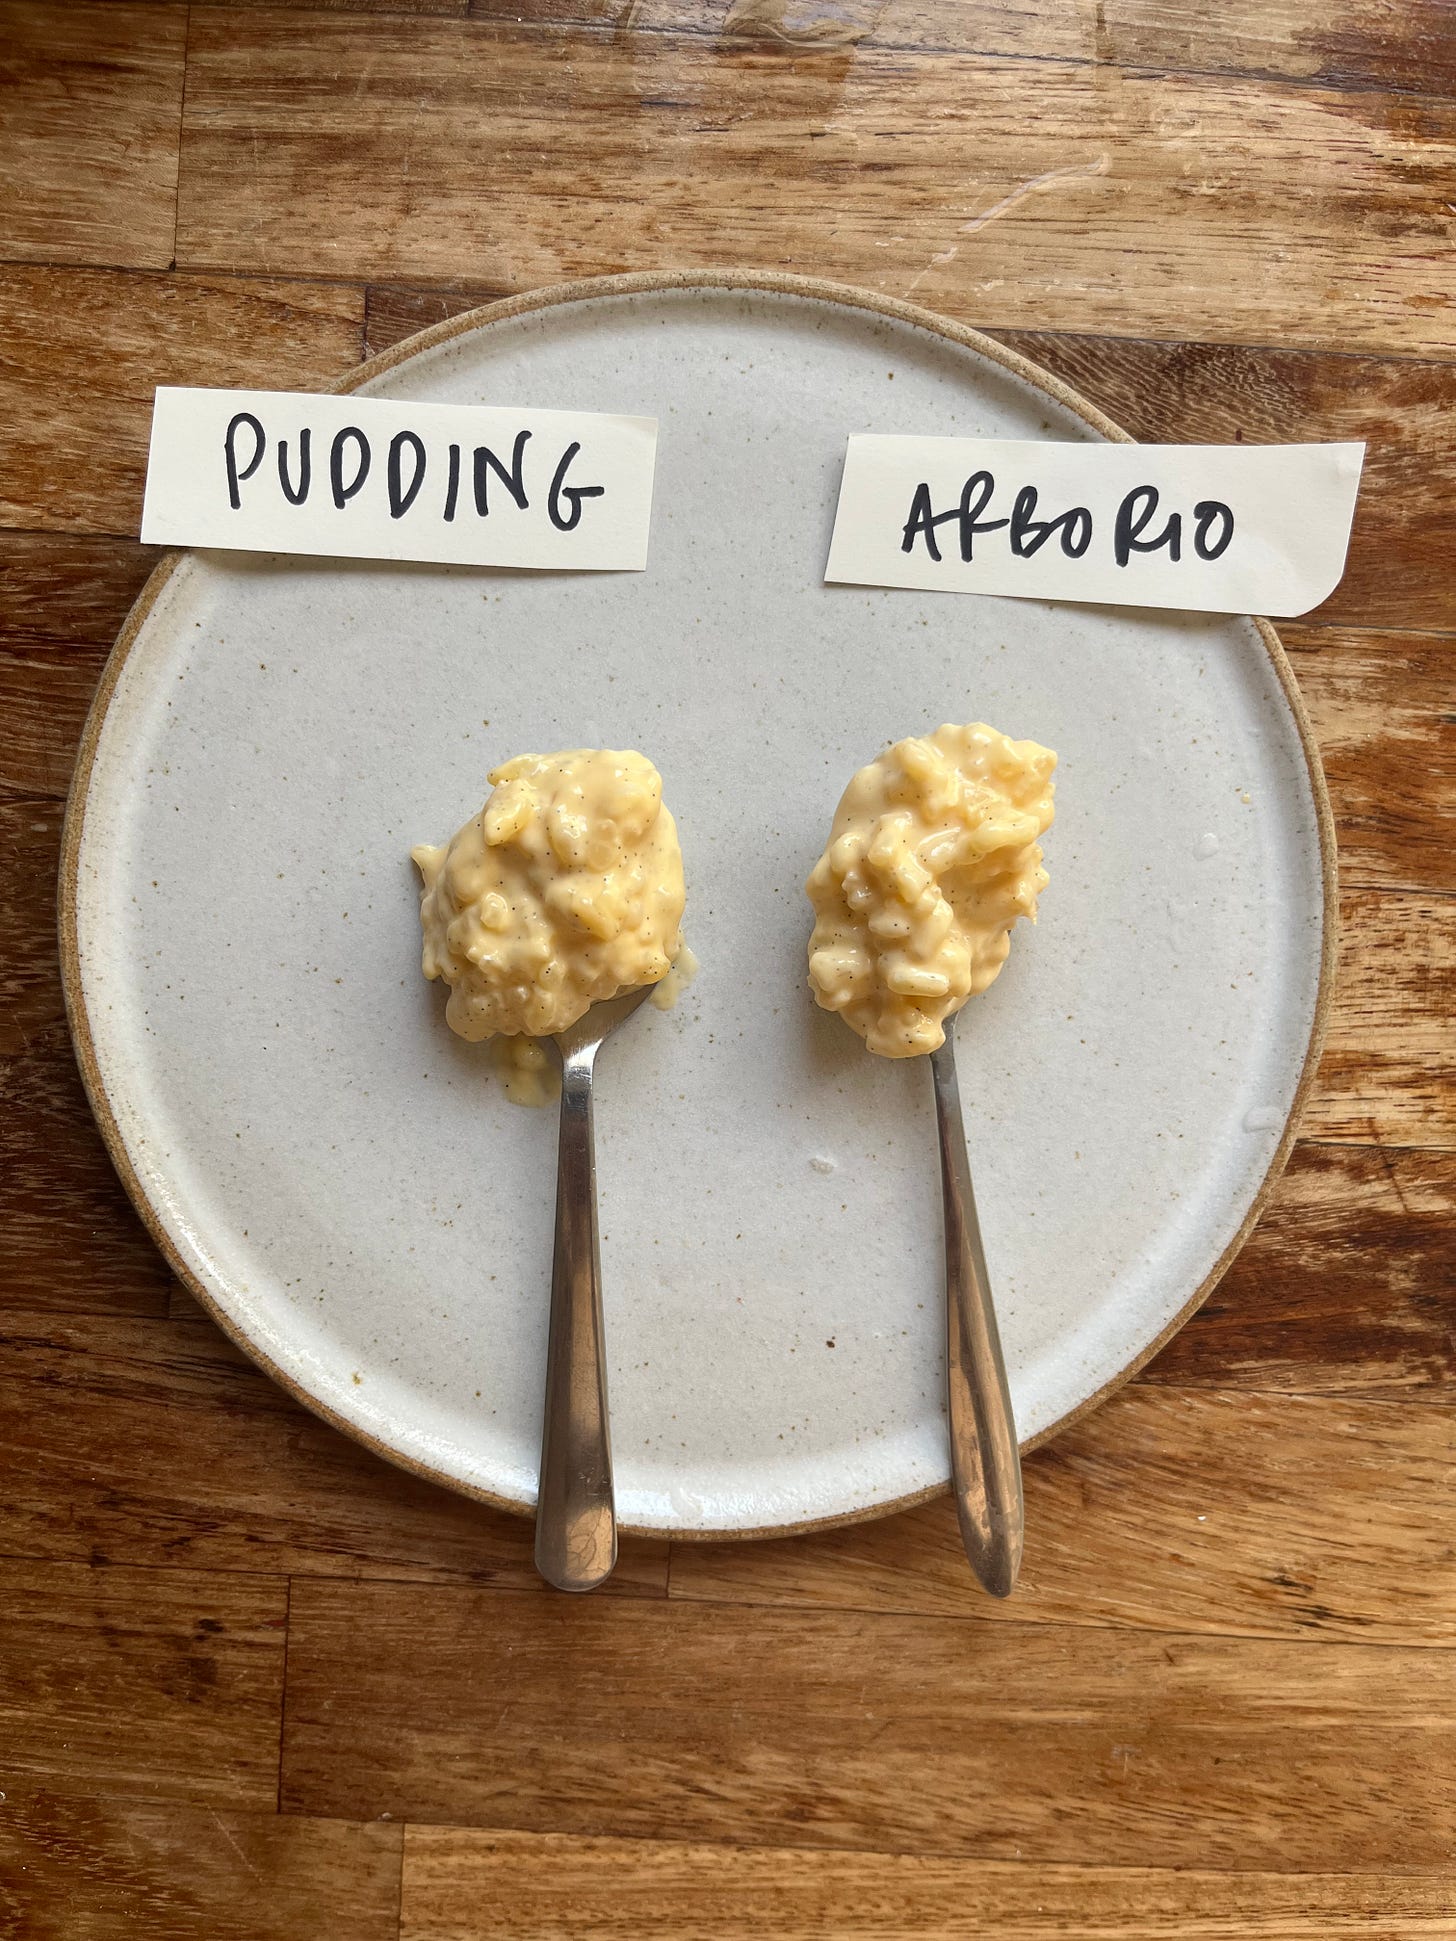
Whilst we’re talking about risottos, I wanted to share the comparison between arborio (risotto) and pudding rice - I found the arborio rice had a more savoury flavour and more of a hefty bite, absorbing slightly more liquid. I preferred the pudding rice, personally, but to be honest either is a good candidate and you don’t need to alter the recipe significantly - arborio might benefit from a touch extra parboiling OR a touch of milk to loosen before eating.
Final add-ins
So, your rice is cooked and it’s looking good, creamy and ready to go… but there’s still a final flourish - the last hurdle is comparing mix-ins. From milk, creme fraiche, butter, cream, mascarpone to egg yolks, this is a great opportunity for you to personalise the rice pudding. I compared a few recipes online and found that some introduced up to 20% of the liquid total AFTER the rice is cooked. Though, be warned - with the ratio I’m sharing below, a little goes a long way as we’ll see below.
In The Square Pastry Book - a legendary plated desserts book - they introduce the technique of rewarming stiff cold rice pudding with creme anglaise just before serving. Now that is lovely for a warm dessert to be shared a la minute, but not very helpful for serving it cold. So, as not to loose out on the custard element, we will follow in the footsteps of other rice pudding pioneers and basically treat our rice pudding process as a deconstructed custard. This means introducing yolks at the end.
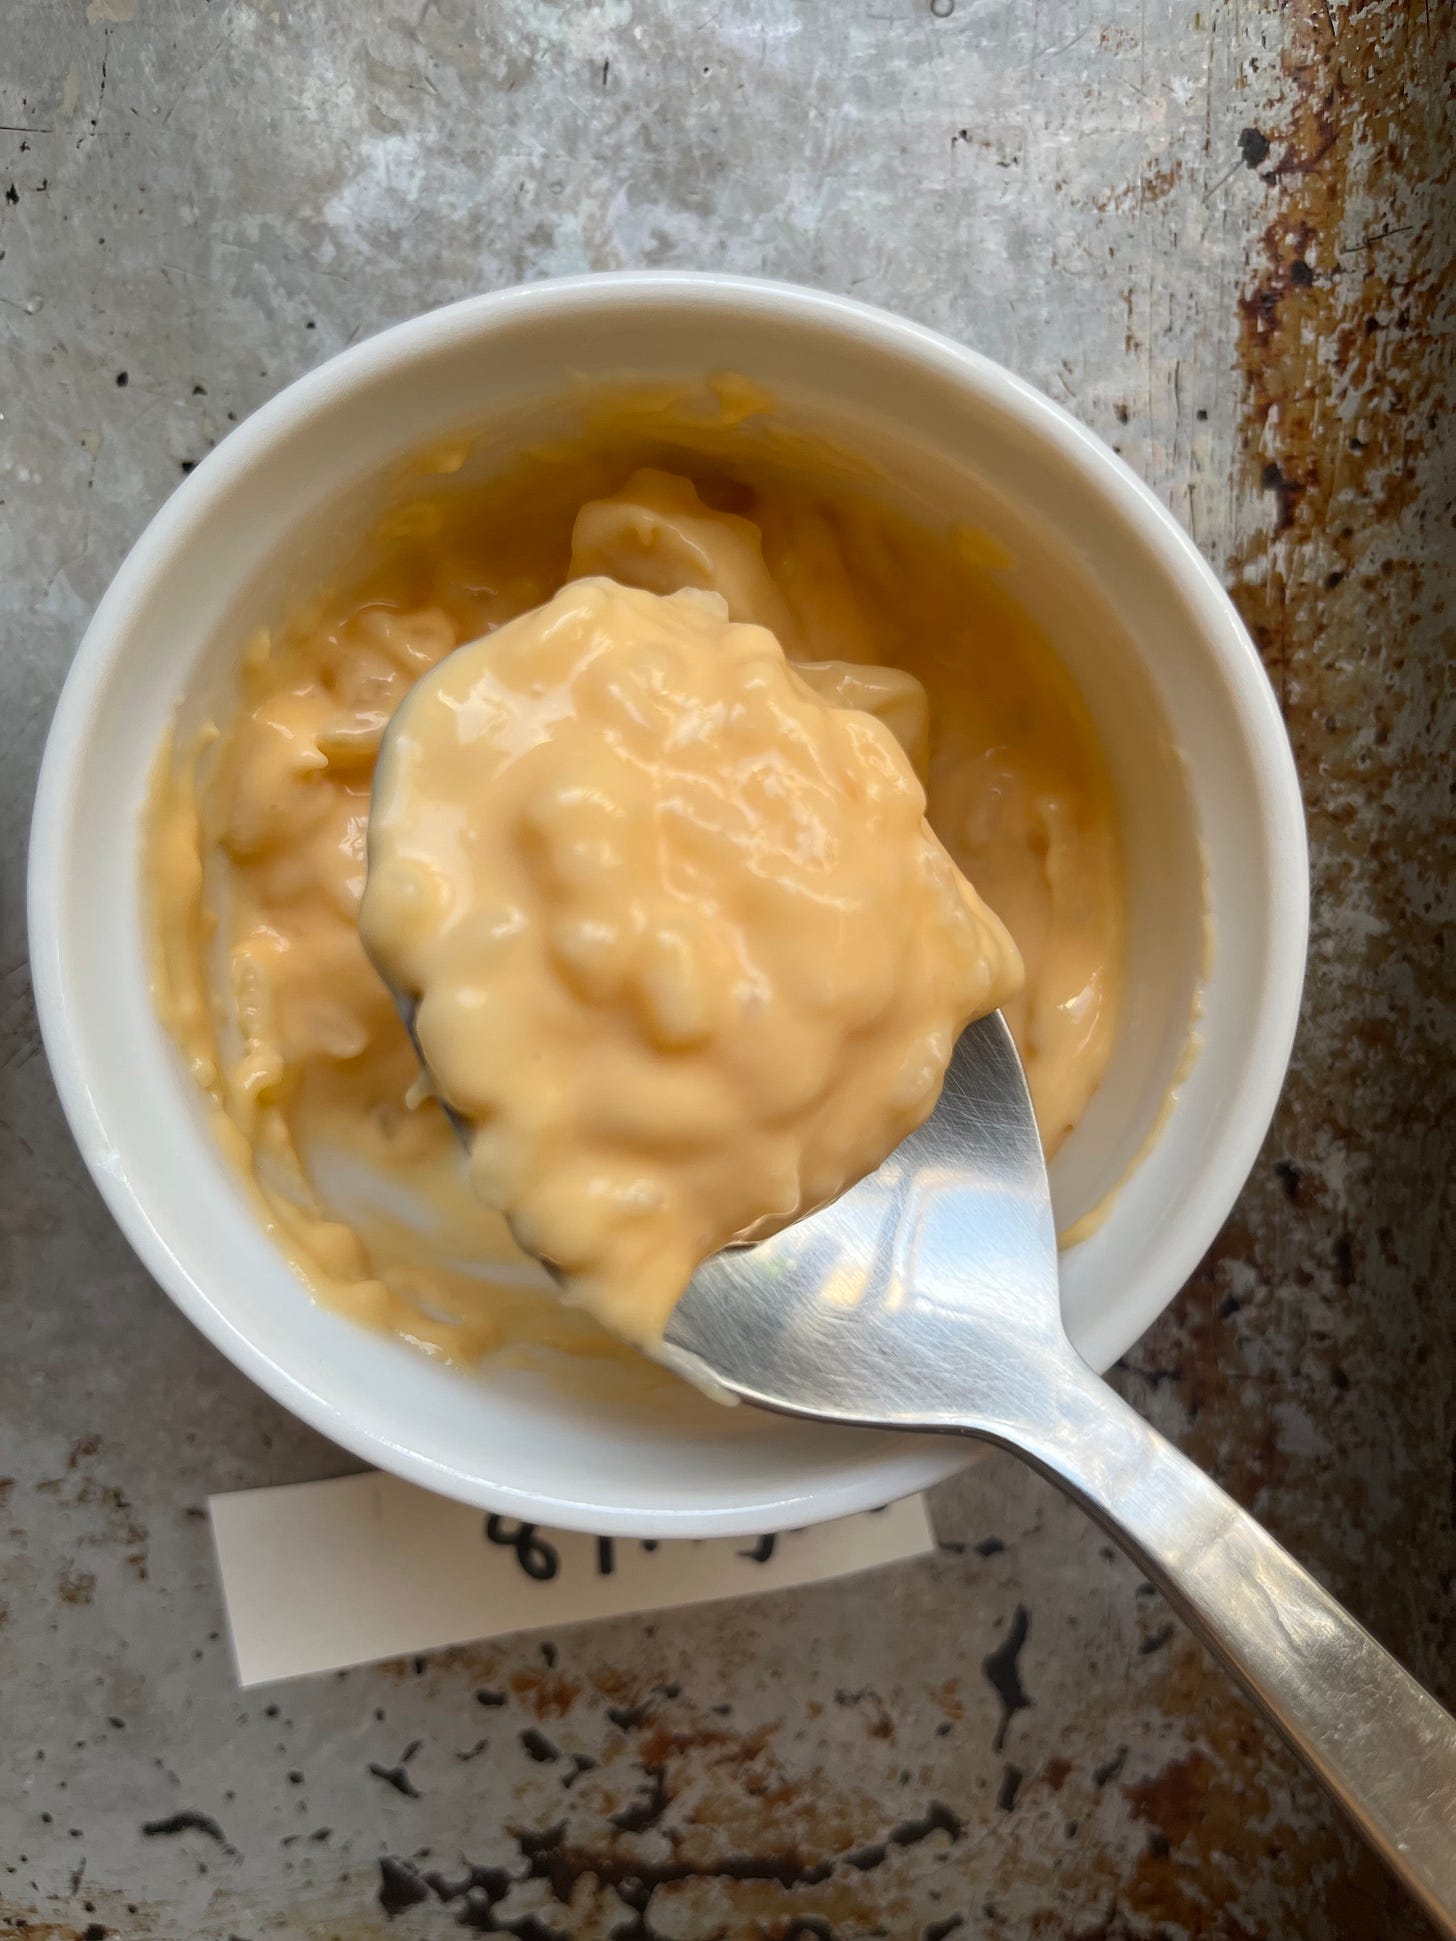
Once your rice is fully tender, we will vigorously whisk the mixture off the heat for a final moment of starch thickening release and to help cool the pudding down. After that, we add the yolks. How many? It’s up to you! I made up a batch with egg yolks proportional to a creme anglaise (8%-10%) and the result was an ultra thick, super luxurious pudding that glowed yellow. Delicious, but not the right partner for mango:
Because this rice pudding is to be a simple backdrop to mangoes this week, I decided to be conservative with the yolks - just 3% - but you could definitely up this depending on the final recipe. Just make sure you add the yolks when the pudding is at 70c and whisk for a minute until the pudding is yellow and slightly thickened. THe residual heat should be enough - remember, eggs begin coagulating at 60c and continue getting thicker until they curdle above 84c.
To finish it off, you can - optionally - add in a little extra dairy. I tried both double cream and butter, which were very unctuous and gave a silky mouthfeel. Please do experiment, but a little goes along way. Since we have taken precautions to keep the pudding fairly loose, introducing more than 10g in the recipe below can make it too fluid!
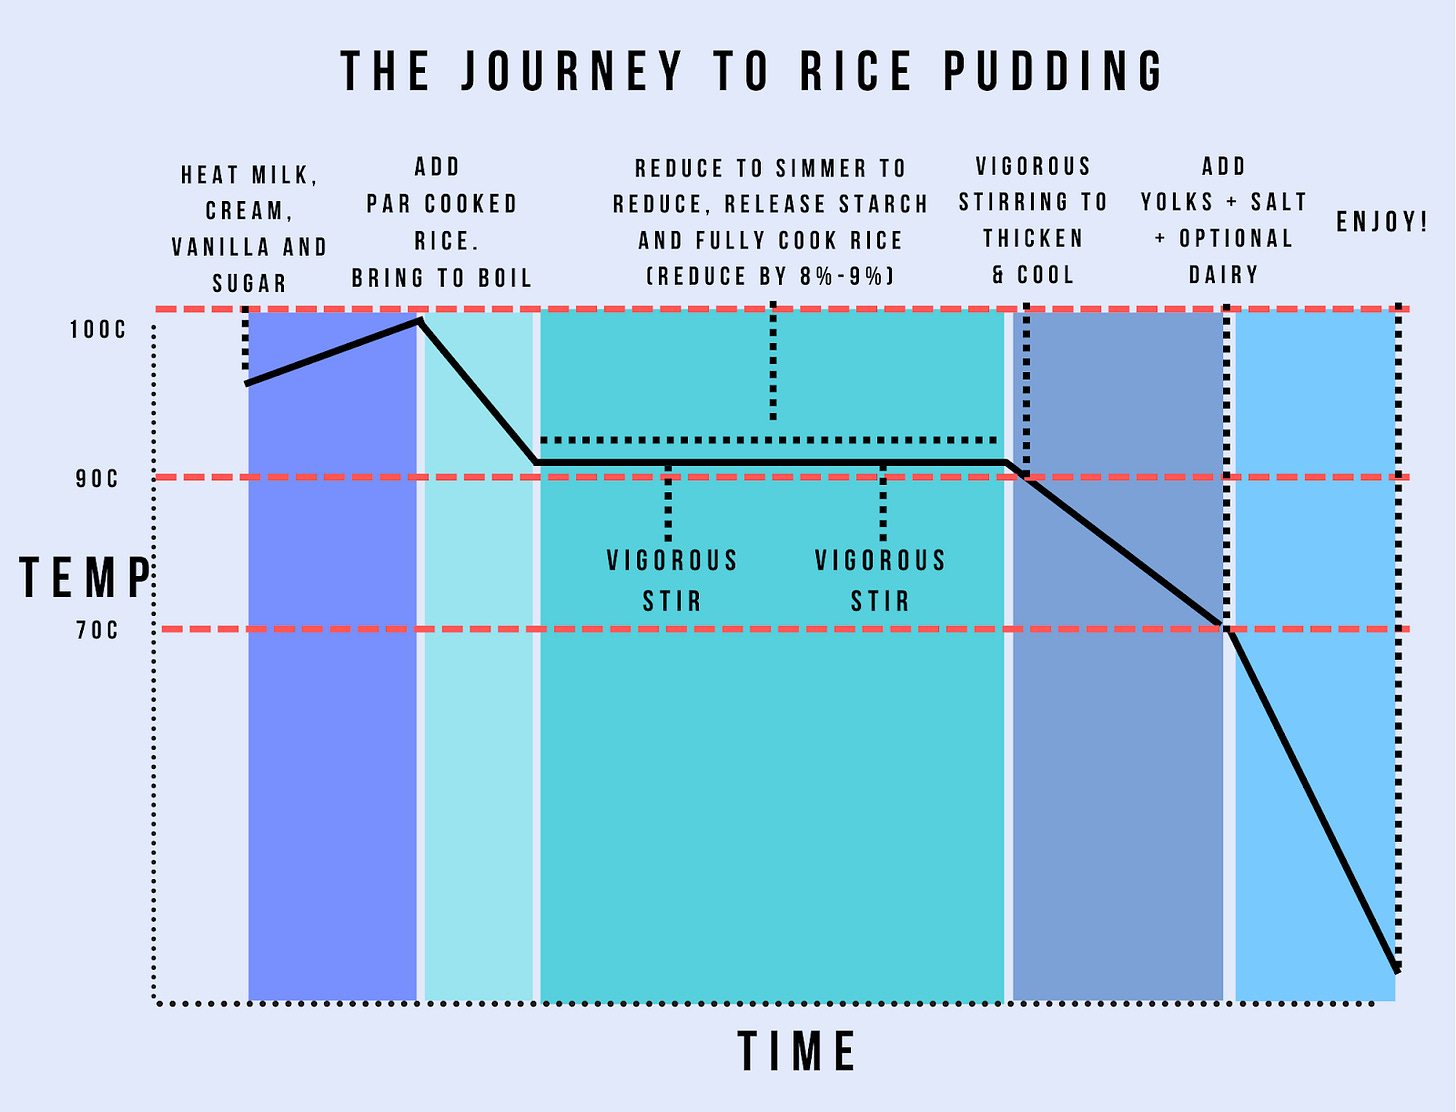
So, here we are! Here’s a handy guide of the cooking process:
Okay, let’s make it
Rice pudding
Serves “2” (i could easily eat this on my own)
60g pudding rice
40g caster sugar
350g whole milk
50g double cream
1 x vanilla pod
1 x egg yolk (about 16-18g)
Optional: 10g of butter or try double cream or anything else creamy
Pinch salt
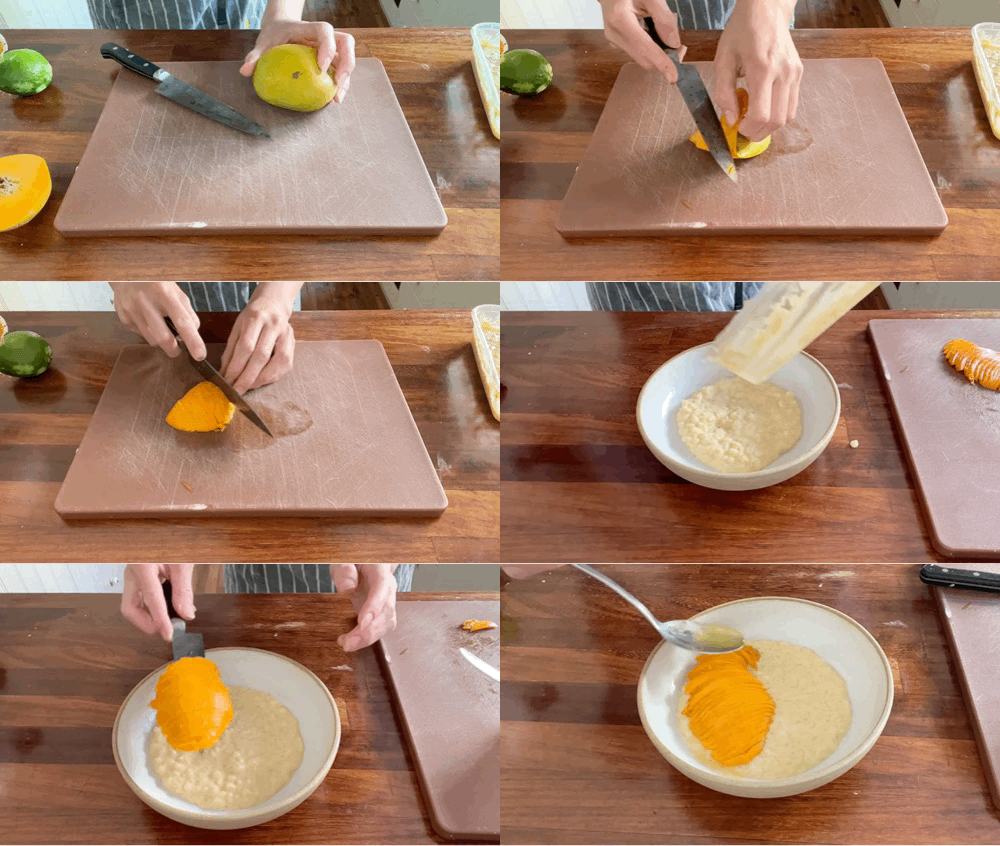
To serve: Sliced mango and mango pit syrup (recipe on KP+)
Method
Heat milk, double cream, sugar and scraped vanilla pod together gently - bring to a gentle simmer to begin infusing
Meanwhile bring a pan of water to boiling. When rapidly boiling, add the rice and cook for 2 minutes (up to 3 minutes for extra tender final pudding), boiling hard
Drain rice and add to simmering milk and stir. Note down weight of mixture if you want to follow the level of reduction - multiply the weight by 0.79 to get the desired final weight
Bring to the boil whilst whisking and then lower to simmering - 93c-94c. Cook for 30 minutes, whisking vigorously every 10 minutes to help it cook evenly and release the starch. Try not to let it boil
After 30 minutes have passed, check how tender the rice is - it should be very tender and perfectly cooked, if not, cook for another few minutes. When you are satisfied with how the rice is cooked, turn off the heat and whisk for about 1 minute to help release the starch:
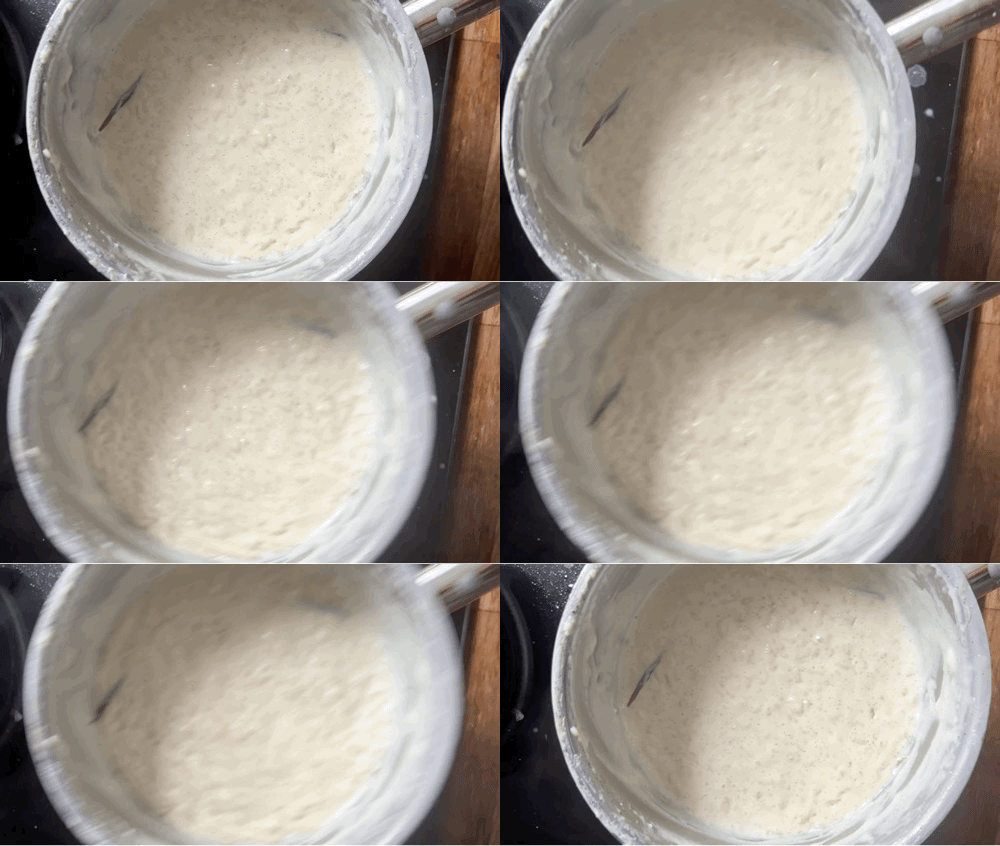
Check the weight of the mixture- it should be about 20% less and match the desired weight you noted down earlier. It should still look quite loose and ‘wave’ when you shake the pan
Check the temp of the rice - it should be about 72-75c after whisking. Add a pinch of salt and the yolk then whisk until totally incorporated and slightly thickened. If desired, add 10g of either butter or double cream for a little extra creaminess. I know 10g doesn’t sound like much, but it really goes a long way!
You can enjoy it now, or transfer into shallow container to cool completely before enjoying with mango, drizzled with a little syrup. Of course, despite our best efforts to get it perfect it one go, you can always loosen your pudding a bit more just before eating when its cold!
Thanks for reading! This newsletter is a reader-supported publication. The best way to support my work is to become a paid subscriber and help keep Sunday’s free for everyone.






This recipe has taken me from 'I guess it exists' to 'I must make this for everyone I love' about rice pudding - so good! I'm in the US and have found arborio rice to work great. Also a cardamom pod works well for flavoring if you don't have a vanilla bean!
This sounds amazing. I’m going to add 10g of coconut cream (or maybe replace some of the double cream with coconut cream?) to give it those sweet Thai sticky rice and mango vibes!!!