Kitchen Project revisited: Summer Neapolitan panna cotta
Roasted Strawbs! Chocolate! Let's do it!
Hello,
Welcome to this week’s Kitchen Projects. Thank you so much for being here!
Today was supposed to be about meringues. But you know what they say about the best laid plans… I had really been hoping to present you with a thorough guide to Pavlovas. However, a lot more tests need to be run for that so I’m pushing it back! Instead, we’re revisiting one of my favourite ever KPs which I’ve updated for summer: The Neapolitan Panna Cotta.
Over on KP+, I’m sharing the recipe for my new fave thing: A super dreamy custard panna cotta with roasted strawberries. Subscribing is easy and only costs £5 per month. So, if you’d like to support the writing, get access to extra content + community chat threads, click below:
Lots of love
Nicola
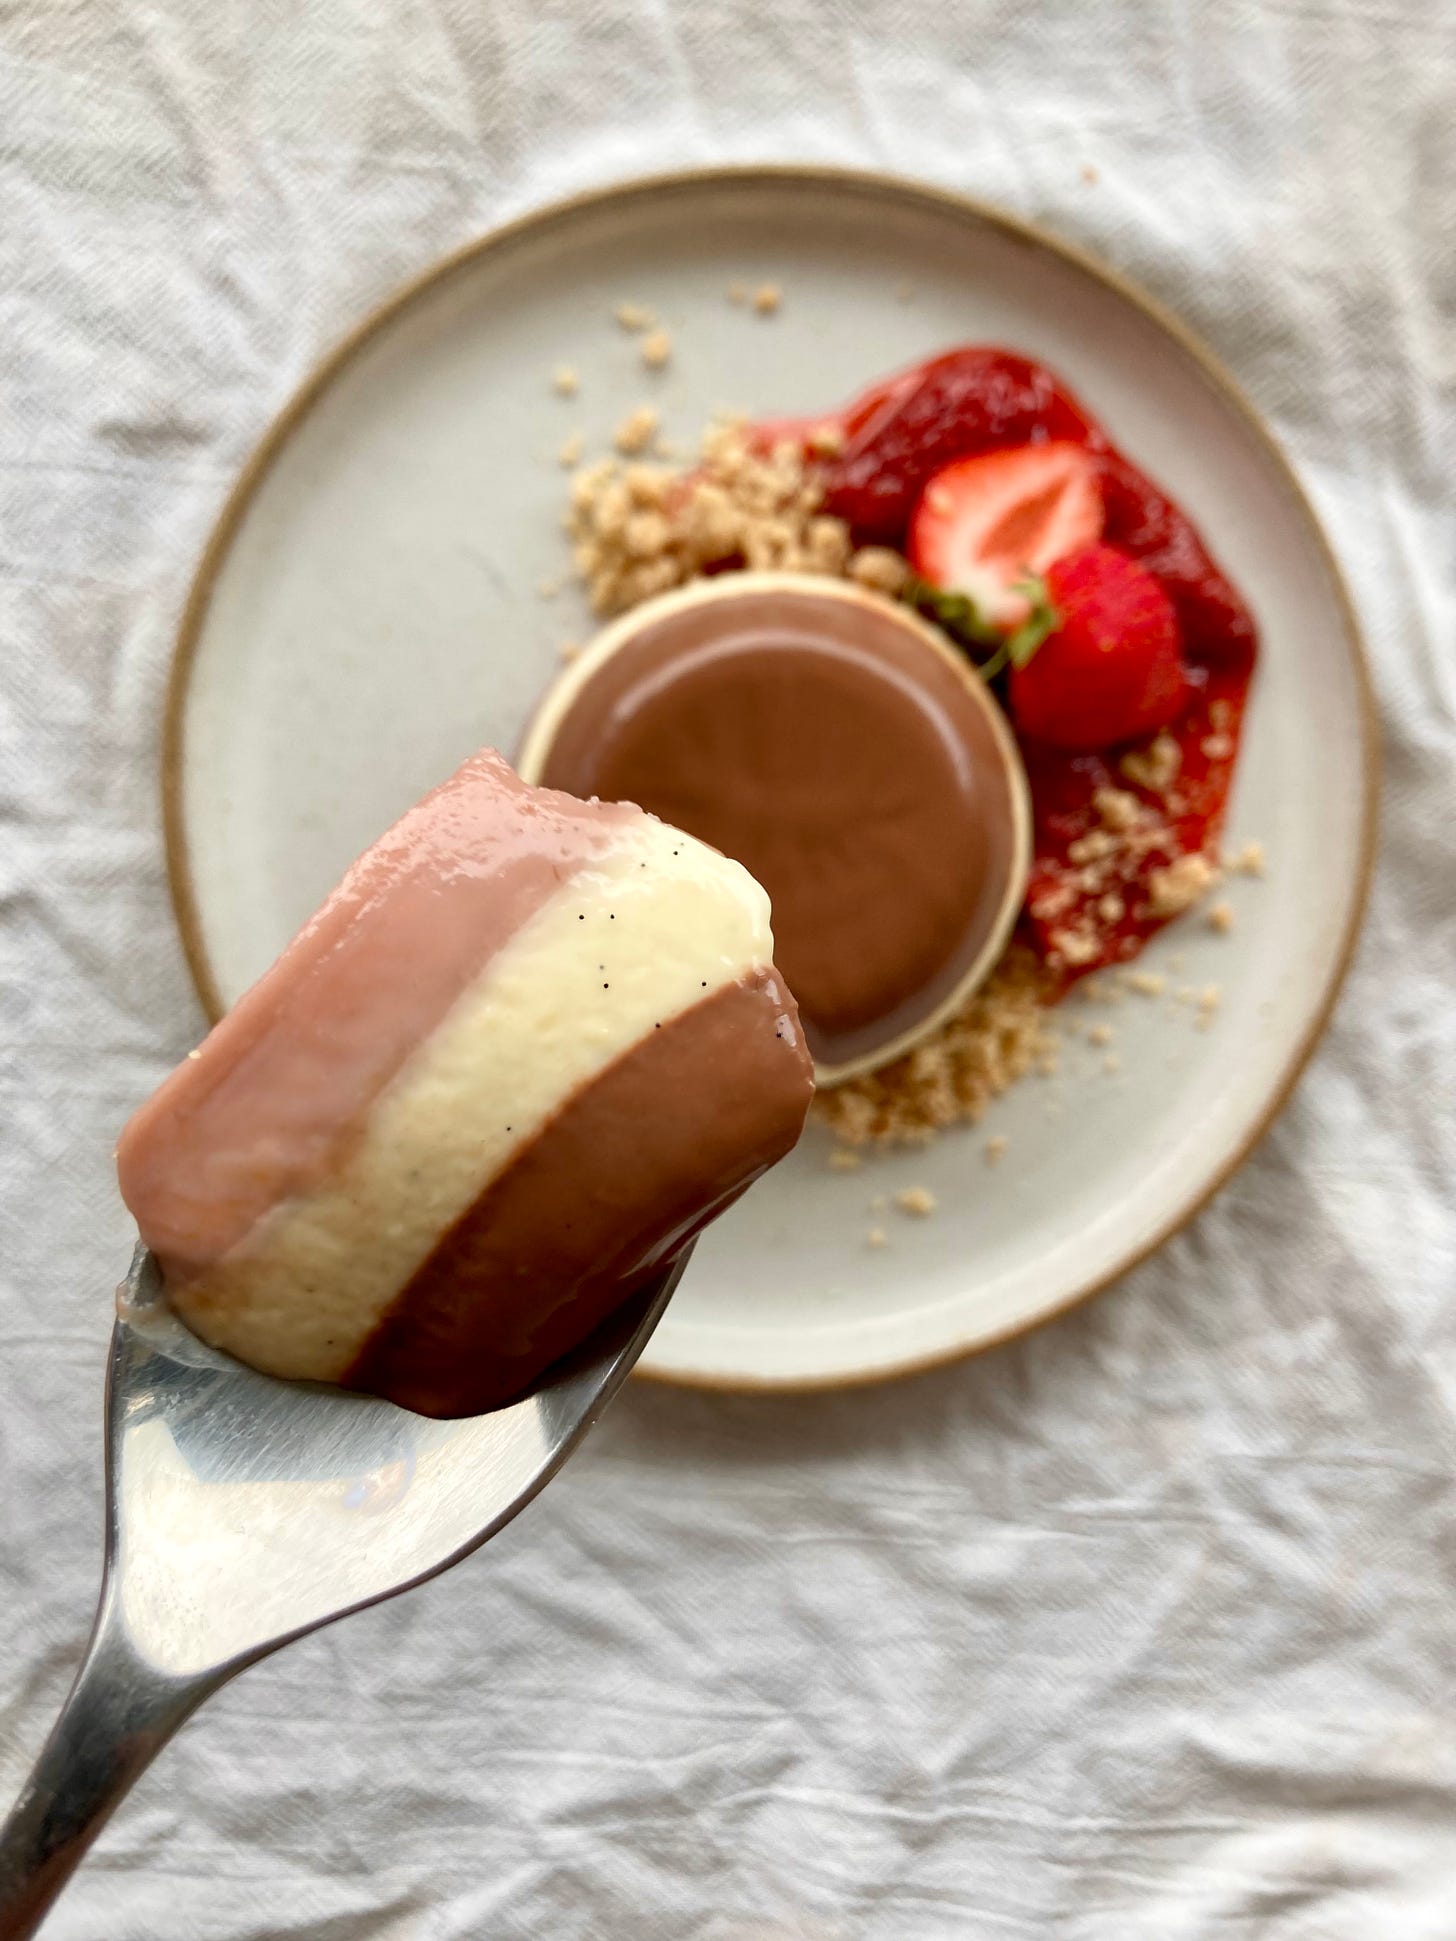
The idea of a Neapolitan panna cotta has lived rent free in my mind for ages. I’d originally conceived the concept in the winter 2020, at a time it would have been totally criminal to even think of using strawberries. Now that we’re here, in August 2021, feeling cute, it’s the perfect time to update the flavours and technique for the classic trio: Strawberry, Chocolate and Vanilla. If you missed it the first time around, here’s your reminder to get involved like, now:
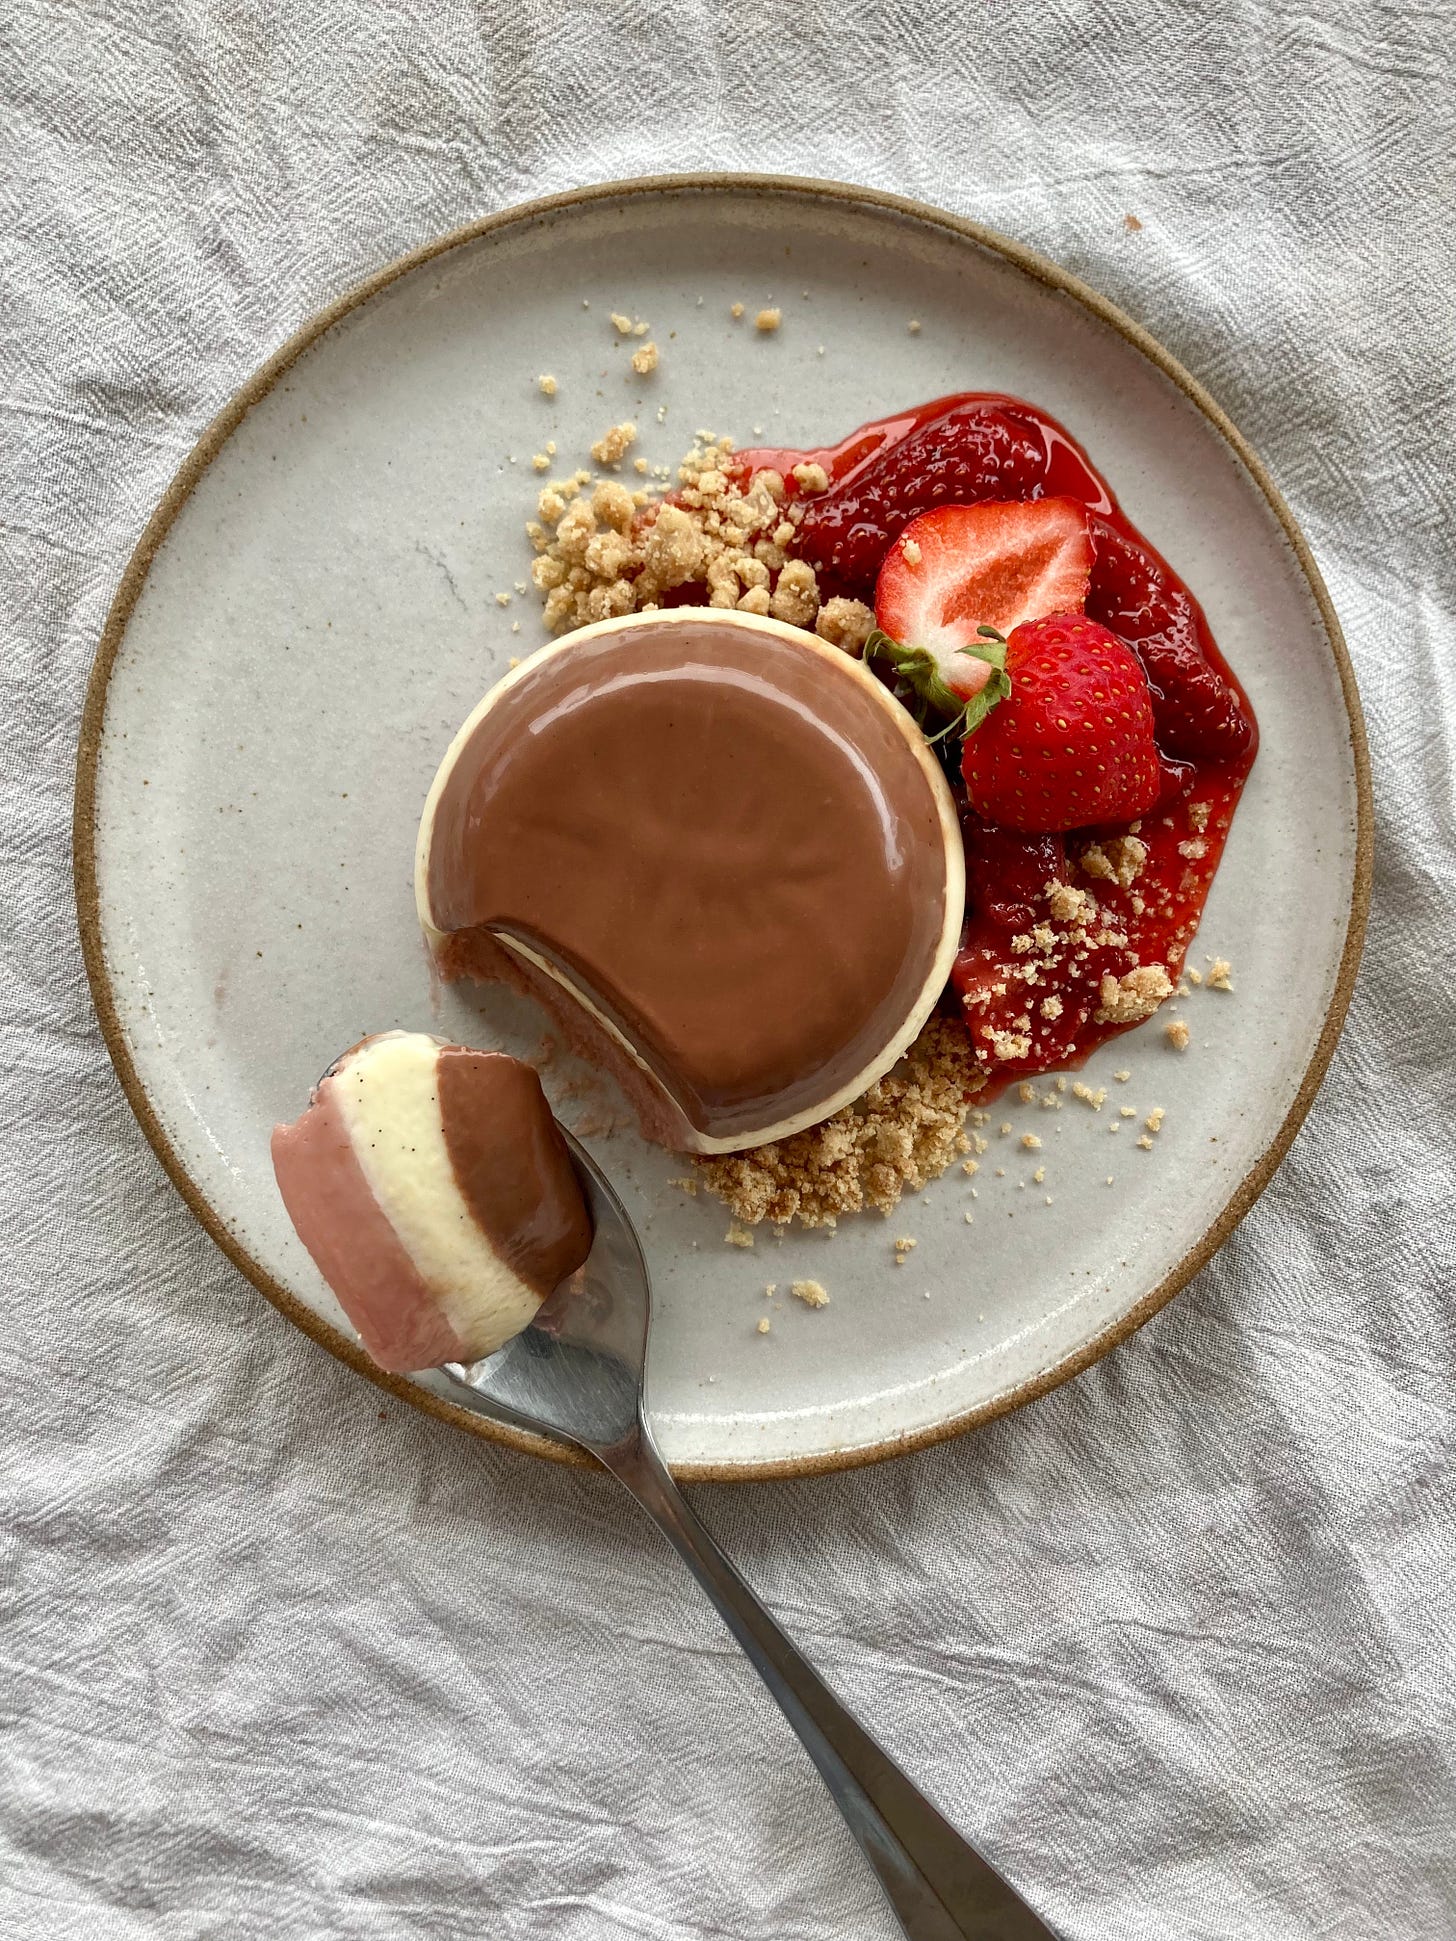
The roasted strawberry layer is intensely fruity and creamy, whilst the chocolate layer is like delicious chocolatey silk. The vanilla layer, as ever, is light and tempers the flavours perfectly.
My crimes against dessert
So... I didn’t expect today’s Kitchen Project to read as a list of criminal charges against dessert, but I’m not exaggerating when I tell you that I failed SO HARD on pretty much every step of the way to developing today’s recipe. Perhaps it was the false sense of security of ‘simply updating’ a recipe I had already spent weeks developing earlier this year, perhaps it was a curse and no, I’ve checked - Mercury is not in retrograde - but whatever it was, it was a total wash out.
Fortunately, things going wrong in the kitchen is actually what this whole newsletter is based on. In the moment, I felt absolutely terrible - like an imposter, a failure, a downright charlatan! - but on reflection I’m actually quite happy to have made so many mistakes. After four failed attempts at LITERALLYMYOWN recipe, I definitely know a lot more about panna cotta than I ever had before.
Before we go any further, you might want to read the OG Neapolitan panna cotta piece. In the original, we cover lots of fun dairy-based-jelly topics, like how to effectively use fruit in pannacottas, how to fuse multi layered panna cottas together, how much gelatine is required for the perfect wobble, how to demould without fear and lots more.
Alright, let’s read the charges. Warning: Ugly pictures of panna cotta lie ahead
Oh, there’s supposed to be gelatine in this?
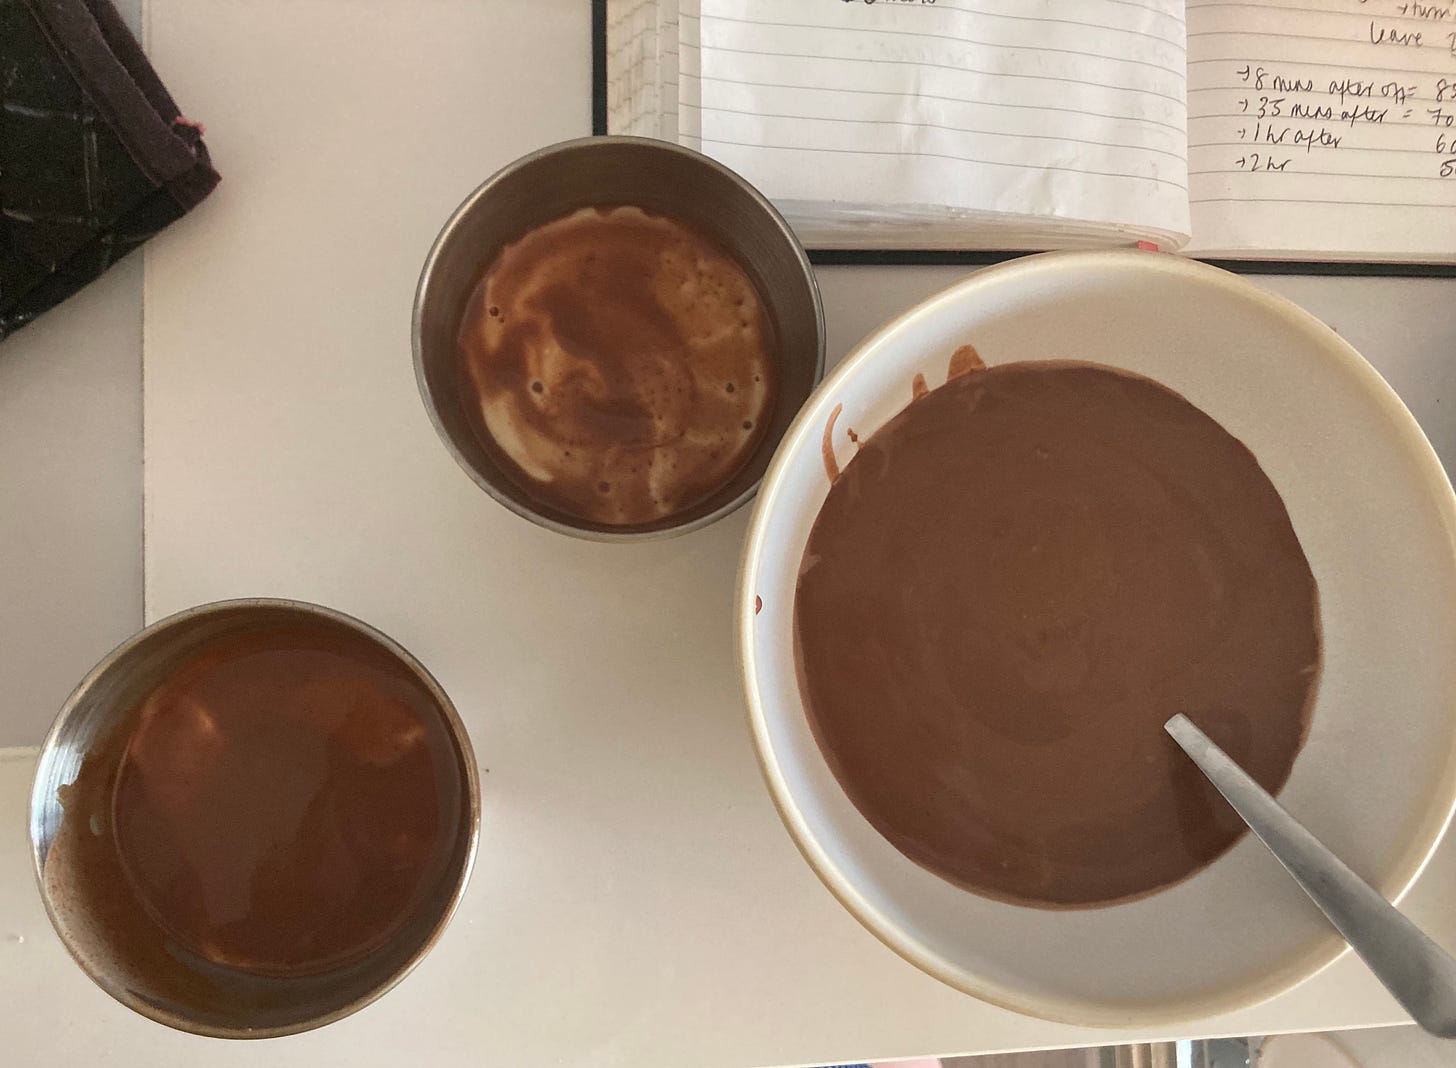
In the first instalment of how-to-mistreat-your-panna-cotta, we begin at… well, the beginning. Which, in this case, actually starts about mid-way through the process. Both the vanilla and strawberry layers went off without a hitch. I mixed up the chocolate layer, cooled it to 35c and poured it on top. To be honest, I was feeling extremely smug. A few hours later, I returned to the fridge to check how the panna cotta was getting on and… oh dear. It was completely liquid.
When putting together my chocolate panna cotta recipe, I overcompensated for the setting power of chocolate. Chocolate, I thought, was firm at room temp! Firm at the fridge! Just think of ganache - that’s bloody firm! And I drastically reduced the gelatine to account for the % of chocolate in the recipe. Big mistake. Although chocolate, with its solid fat and cocoa butter, will contribute to the texture significantly, it won’t work miracles. I looked back at the spreadsheet - christ, I had HALVED the normal amount of gelatine that I would usually use. The liquid panna cotta now made total sense.
Not willing to be put off by this, and wanting to preserve the ‘perfect’ pink and white layers, I painstakingly poured the chocolate layer off, trying not to upset the layers. Knowing that the Neapolitan pannacotta concept really lives and dies on beautiful sharp lines, I dabbed at the moulds for about 30 minutes until they looked pretty decent. Order was restored.
Unfortunately I had to start the mix again. Although in the instance of an unset panna cotta, you can normally just reheat the mix and add a bit more gelatine (fyi, it really does work so dw if this happens to you), I wasn’t prepared to take risks as it couldn’t be totally sure of the proportions. Gelatine maths is a nightmare at the best of times. Anyway, I did drink the mix as chocolate milk though, dw, it wasn’t a total waste.
The fix? Scale your recipe properly!
The dreaded smudge
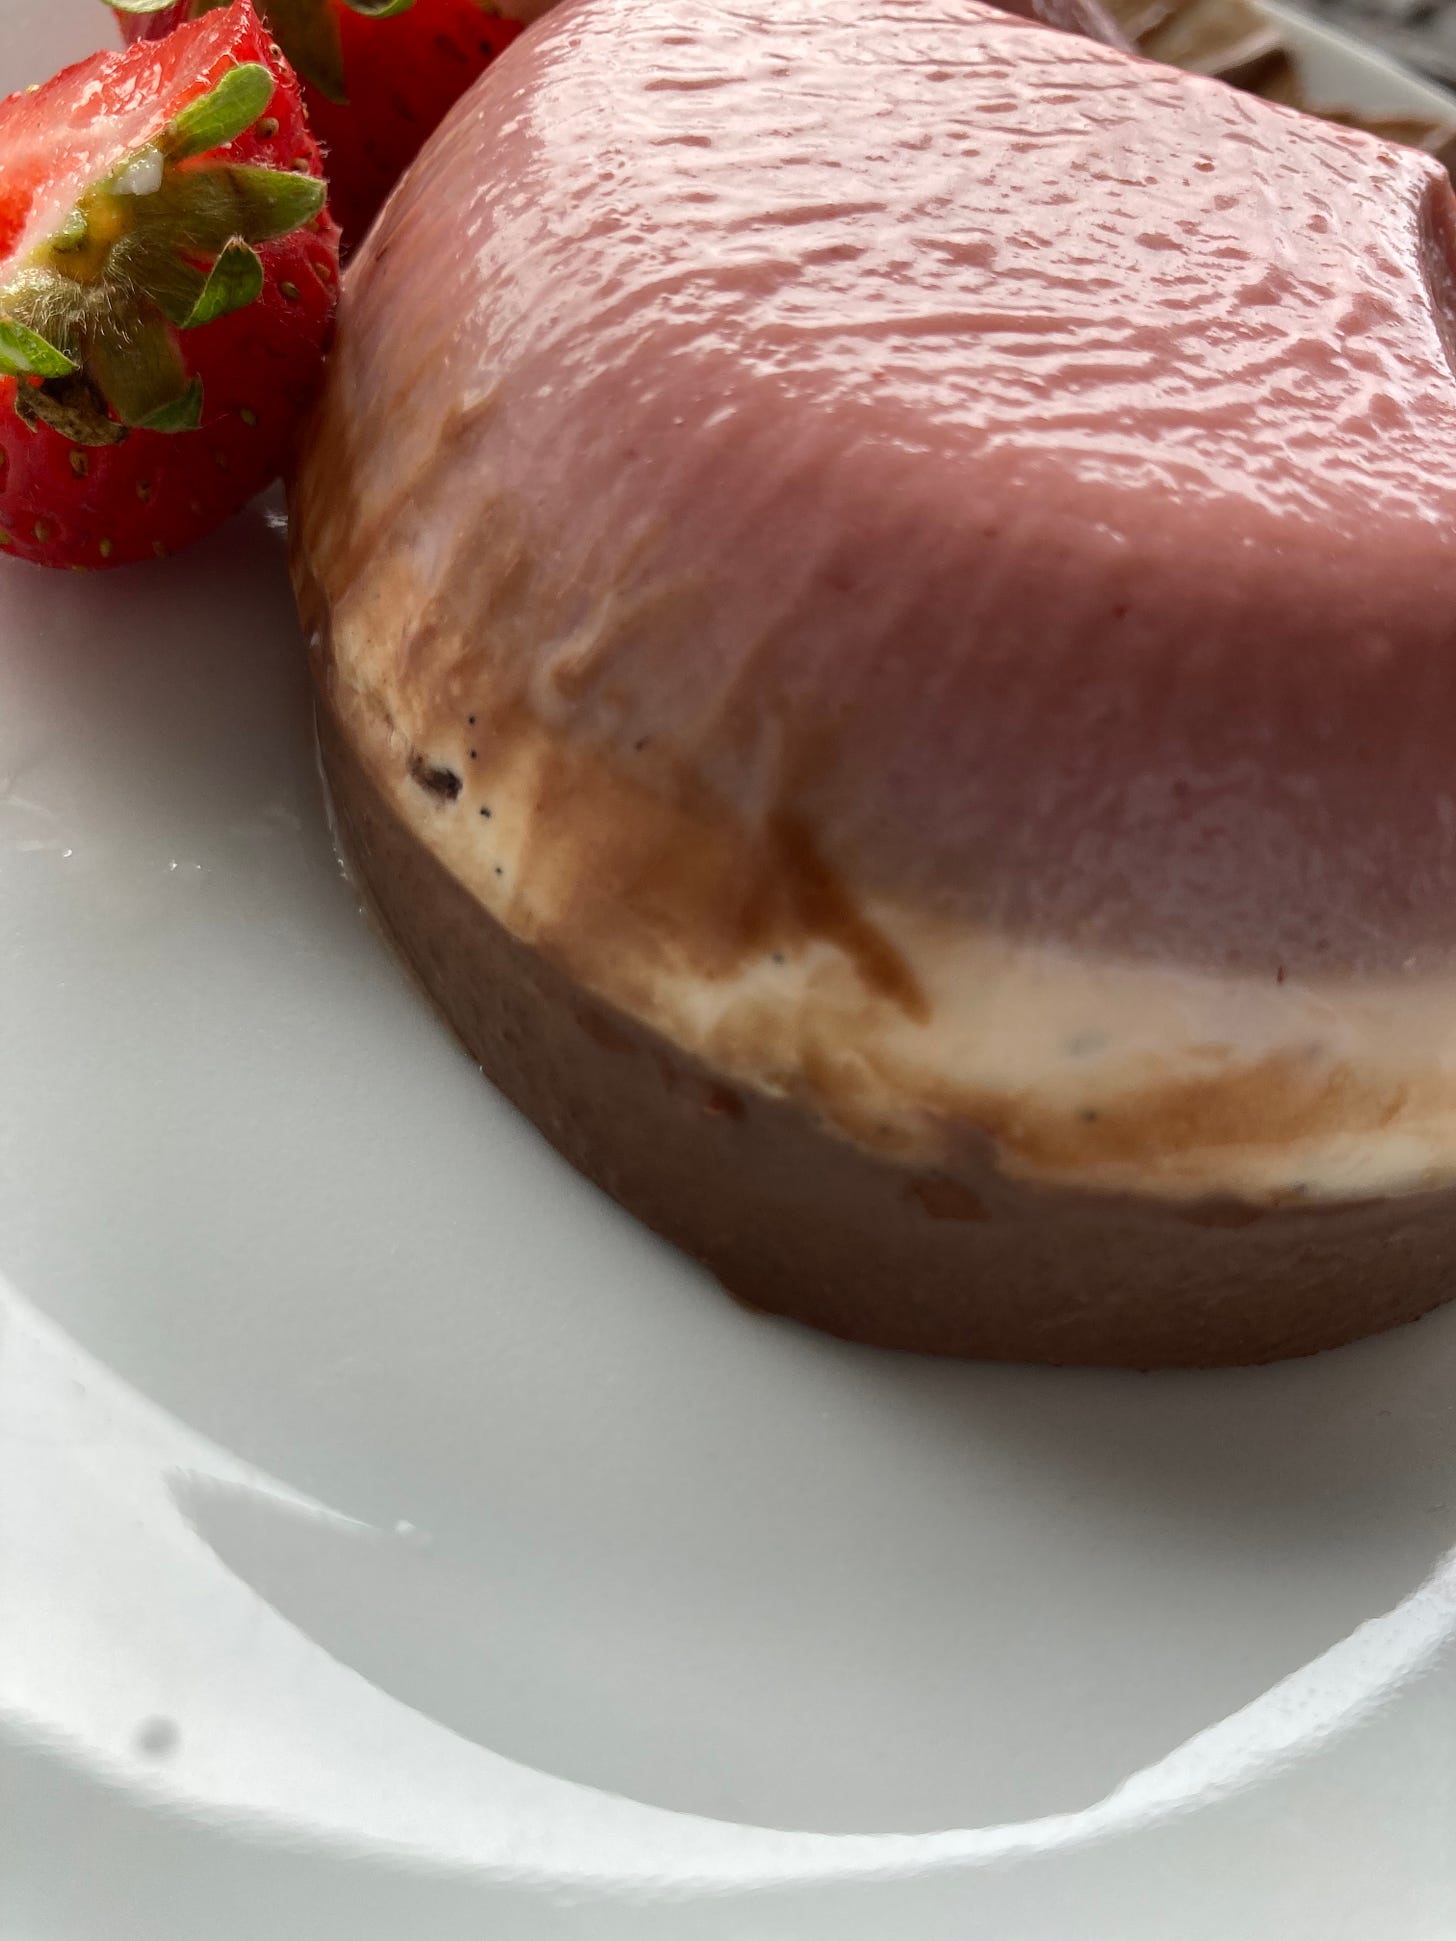
As outlined in my original KP, the dreaded smudge is a result of the demoulding process. After carefully defining layers over many hours, the panna cotta is dipped in hot water to aid the demoulding. Although this allows it to slip out, the slightly melted edges of the panna cotta tend to smear into each other, rendering all the hard work kind of useless. As I stated in the original KP “It was way worse with my original Neapolitan (the chocolate layer left a brown tinge to the whole thing, ugh, will have to revisit this summer…)”, I had fallen into my own trap. I demoulded the panna cotta and it was a smudgy brown all over.
This made me rethink the order of the layers. Having the chocolate layer on the bottom means it is the first to release and therefore leaves a dark brown ring that all the other layers have to slide past on their way out the tin. DRAT! Although I was keen on the order being strawberry, vanilla and then chocolate, this cursed panna cotta was doomed to fail thanks to my aesthetic obsession with a pink top. NEXT!
What do you mean strawberries aren’t meant to be grey?
As I looked upon my slightly brown panna cotta (see above), I noticed another shade that wasn’t supposed to be there: A gun metal grey around the strawberry. Wtf? My initial thought was something to do with oxidation, but only the edges were grey, not the middle. So what is going on?!
Turns out my moulds had reacted with the strawberry layer (perhaps from acidity? The brilliant Holly suggested it might be to do with potassium and Milli also mentioned she had the same issue with a raspberry cheesecake once which was solved by lining the tin with cling film). I really couldn’t catch a break with these creamy little DEVIL POTS. I was definitely cursing at the sky at this point.
Although I considered changing the mix to try and counteract it, my rhubarb layers from the OG had never gone grey, so I decided to blame the moulds and vowed to soak them in hot soapy water and I’ve them a proper deep clean to cleanse them from their sins before attempting again. As well as this, I had left the strawberry panna cotta in contact with the mould for almost 3 days before demoulding (scheduling issues), which could have been a culprit, too. Sigh. Move on.
The fix? Squeaky squeaky clean moulds and only hold panna cottas for 24-48 hours at most. But if you have any ideas on this, please let me know as Ive struggled to find any data online about it!
Grainy Panna cotta
Although I knew I’d have to start again because of the whole grey strawberries and overall weird brown colour thing, I decided to give it a taste anyway. Unfortunately, I really had not nailed it.
First of all, the chocolate layer was way too dominant. It totally destroyed the beautiful vanilla and strawberry flavours. Not only this, it was grainy AF - not lumpy, but more like little bits of sand were distributed throughout. ARGH. The strawberry and vanilla layers were perfect, but the chocolate - my problem child - was acting up real hard.
I thought back to the mixing process - the rushed one, the one to replace the failed liquid version - and I admit I did not pay *the most* attention to it. In fact, I had forgotten to add the sugar whilst heating up the milk/cream and hadn’t whisked it in until the gelatine had been introduced. This is a pretty woman level of error - huge.
I normally stir and whisk my panna cottas to the extreme to ensure that everything is well dissolved. Not this time. The grains were a result of either a) undissolved gelatine or b) undissolved sugar. DOH! Now I’d never had this happen before, not with leaf gelatine, but clearly it can happen if you don’t take care at each step.
Understanding graininess
To understand why undissolved sugar and gelatine play havoc on texture, we must first understand what is happening when gelatine sets a liquid. This is a story of BFFs and also a love triangle between water, sugar and gelatine.
Simply put, gelatine is a protein and is made up of chains of amino acids. The thing about amino acids? They are BFFs - like, they are obsessed with each other. At room temperature they stick together in a strong formation. When you add gelatine into a hot liquid, it warms up the bonds loosen between the amino acids and move away from each other. As the amino acids break apart, they create bonds with other liquids and the proteins are dispersed throughout the liquid. As the liquid is cooled, the BFF amino acids seek each other out again and create a formation. Only this time, there are other things trapped within the mesh - this is what a gel is. If you reheat the gel, it will become liquid again and it can be reset multiple times.
So, when bits of ‘grit’ - undissolved gelatine, pesky sugar granules - get stuck in this mesh, there is nowhere for them to go. If sugar isn’t dissolved properly, or at the right time, it’s too late for it to make a connection with the water. The water, after all, is already busy holding court with the amino acids and what you’re left with is a grainy texture thanks to undissolved particles being suspended in the gel. You see, sugar and gelatine are both competing for the affection of the water/liquid. And THAT is why, my friends, you have got to stir your sugar in ahead of time before you introduce the gelatine. That way, no one gets left out in the cold.
Sugar, as it does in so many situations, bolsters this network making the gel even stronger.
The fix? I will never underestimate the importance of whisking my panna cottas ever again, promise!
Demoulding Issues
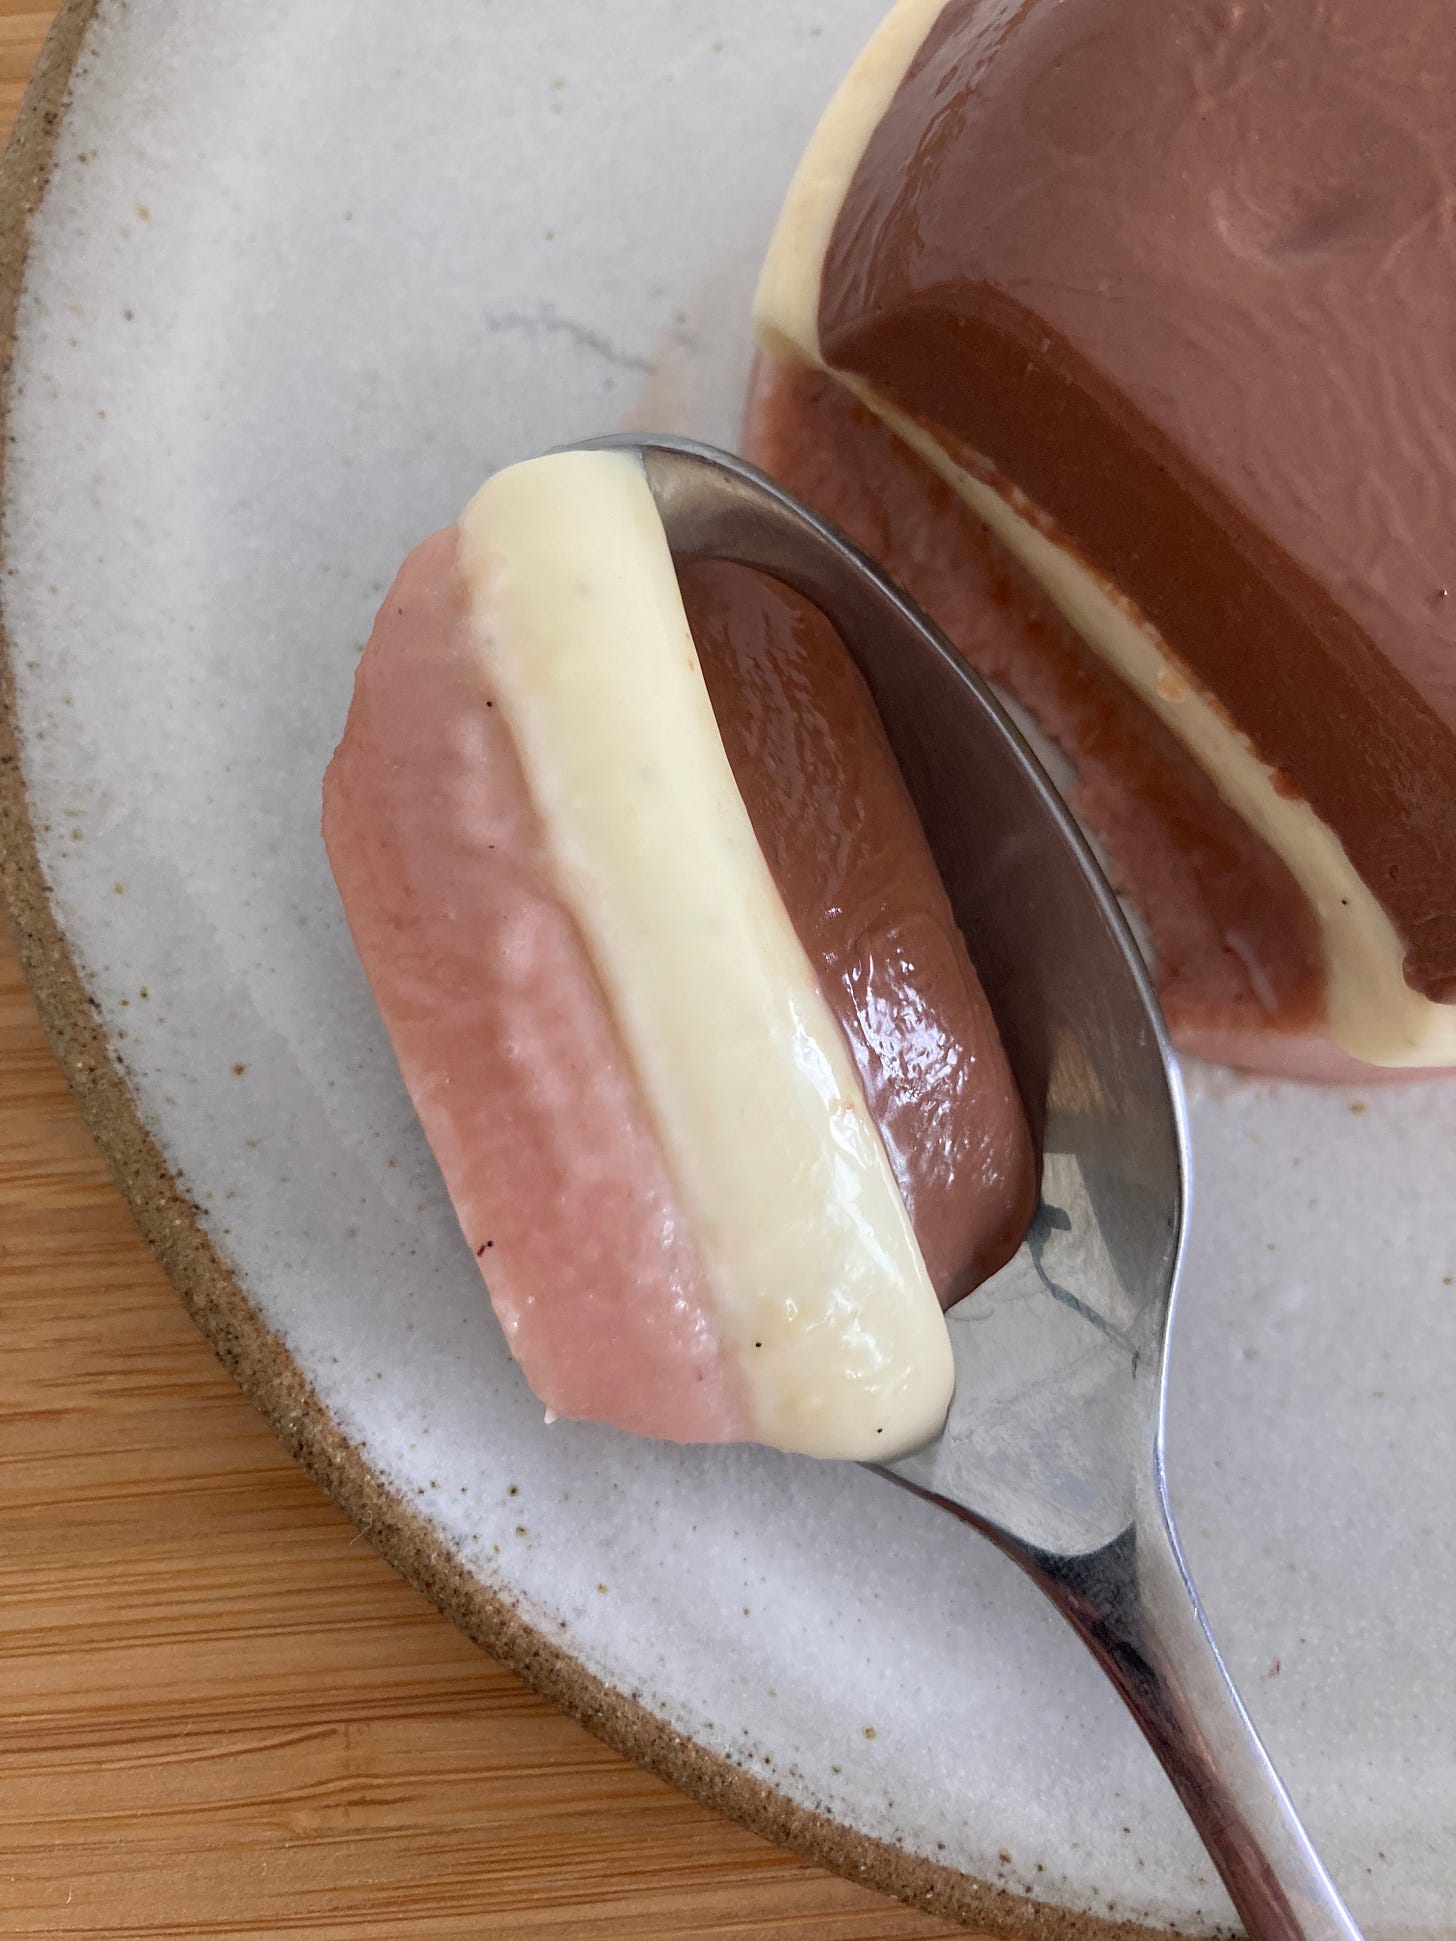
So, I started again from scratch. I fixed all the issues and finally, after all that I thought… I’m safe! I know how to demould a panna cotta. WRONG! I didn’t use hot enough water/hold it in for long enough which meant the top two layers fell out but the base was still firmly stuck in. I peeled the chocolate layer out and put it on top… but it was too late. The damage was done - see how the chocolate layer is way smaller than the two bases? Total connection issues:
The fix? Use water at the RIGHT temp - 60c is ideal. S
So there it is, my charges. My crimes against panna cotta. I have several times said out loud this week ‘this panna cotta is cursed’ but I burnt some sage (metaphorically) and persevered and I have to say I am delighted with the final result:
The magic of roasted strawberries
British summers are all about stuffing as many strawberry moments into your day as possible. It’s pretty compulsive. I’ve never been a fan of cooked strawberries (jams inc.) when fresh is available. As the season draws to an end, I loosen the reigns a bit to draw out the strawberry obsession for as long as possible. Which is why I am thrilled to introduce you to the world of roasted strawberries.
In ‘The Book on Pie’ the brilliant Erin McDowell suggests stuffing an entire pie full of them. She slow roasts hers - around 120c - for a number of hours. For today (and for other dessert applications where you’ll be spooning them on), I prefer a slightly higher temperature for less time. We are effectively macerating the strawberries at speed - the sugar draws out the liquid whilst the heat of the oven keeps things moving at a clip. At the end, you’ll have lost about 30% of the overall mass.
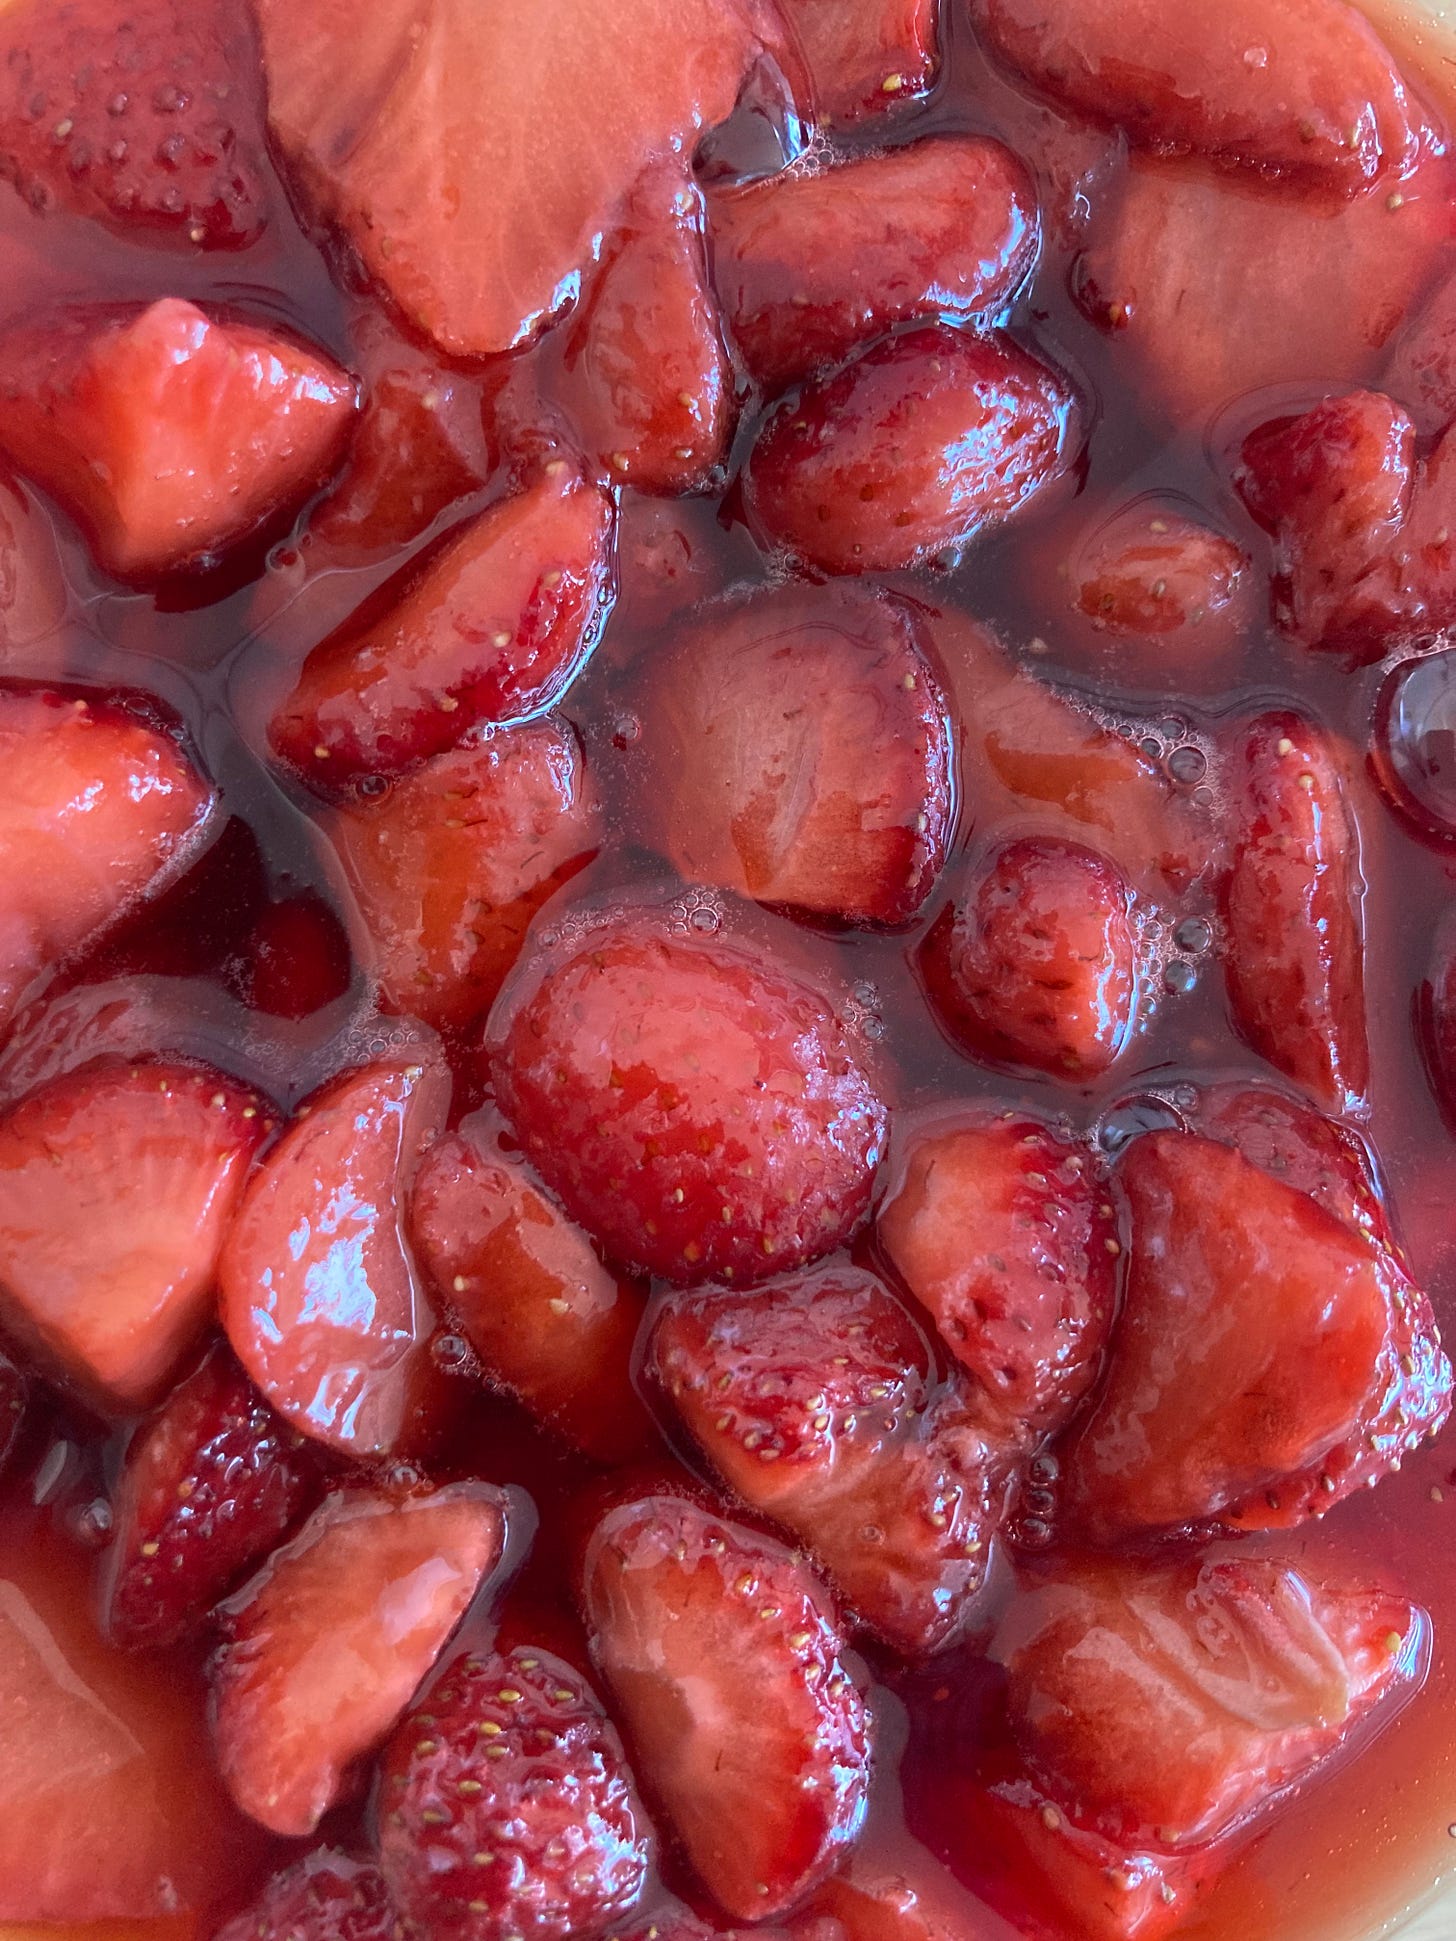
Roasting strawberries, with a little sugar, is a beautiful meeting between fresh fruit and jam, a half way between two magical places. You get the intensified flavours of the fruit as excess water is released, and the texture becomes soft. It is perfect for spooning on rice pudding or anything creamy. The other benefit is the beautiful crimson colour - the strawberries turn a deeper and more carnal sort of red. Oh, and there’s the syrup. The beautiful, beautiful syrup.
Although jam is a wonderful way to preserve fruit in its peak, having strawberry puree on hand (or in the freezer) is a very good thing too.
Commercially available purees, as I had previously thought, are not just made of blended fruit. More often than not, the purees have been cooked or pasteurised in some way, passed for smoothness and have added sugar. The benefit of adding sugar to commercial available purees is consistency. Although I wont go into it now, you may have seen the word ‘brix’ thrown around a bit? Well, brix is the measure of sugar density in fruit purees. It’s really handy if you’re making things like pate de fruit, those fancy fruit jellies. Although some kitchens make their own purees, most don’t bother. In fact, I’ve never worked anywhere that fruit puree didn’t mean a trip to the freezer and back. Whilst this is a bit sad in a way, it’s also understandable.
Fortunately for us producing at home scale, making the strawberry puree is simple enough - take strawberries, 10% of the weight in sugar (this helps with both flavour and texture) and roast in a medium oven for 30-40 minutes. At this point, you are free to use the strawberries as a garnish or as part of a dessert OR you can process it down, pass it through a sieve and voila - puree heaven.
OK, the recipe
Neapolitan Panna Cotta updated for summer
Key points to note from original KP:
The sizes of each pannacotta mix is different to account for the sloping shape of the demouded pannacotta. To make the layers look effectively even the weight needs to be ascending from top to bottom
The vanilla pannacotta needs to be cooled to about 12c - until it starts going a bit viscous - before you pour it on top of the chocolate layer otherwise the pods will just sink
Timing of the panna cotta is important because you want the layers to adhere together. That means you want the chocolate layer to still be a bit sticky when you put the cold vanilla layer on and that you want to add the strawberry layer whilst its still a little bit warm
Alright, let’s make it!
Special equipment
Blender
Pudding moulds - mine are from tala and are 200ml
Blowtorch - if you have a blowtorch, you don’t have to worry about timing of the layers as you can slightly melt the surface of the layer to get better adhesion. If you don’t have one, follow the recipe and timings more closely
Makes 4 x 140g panna cotta
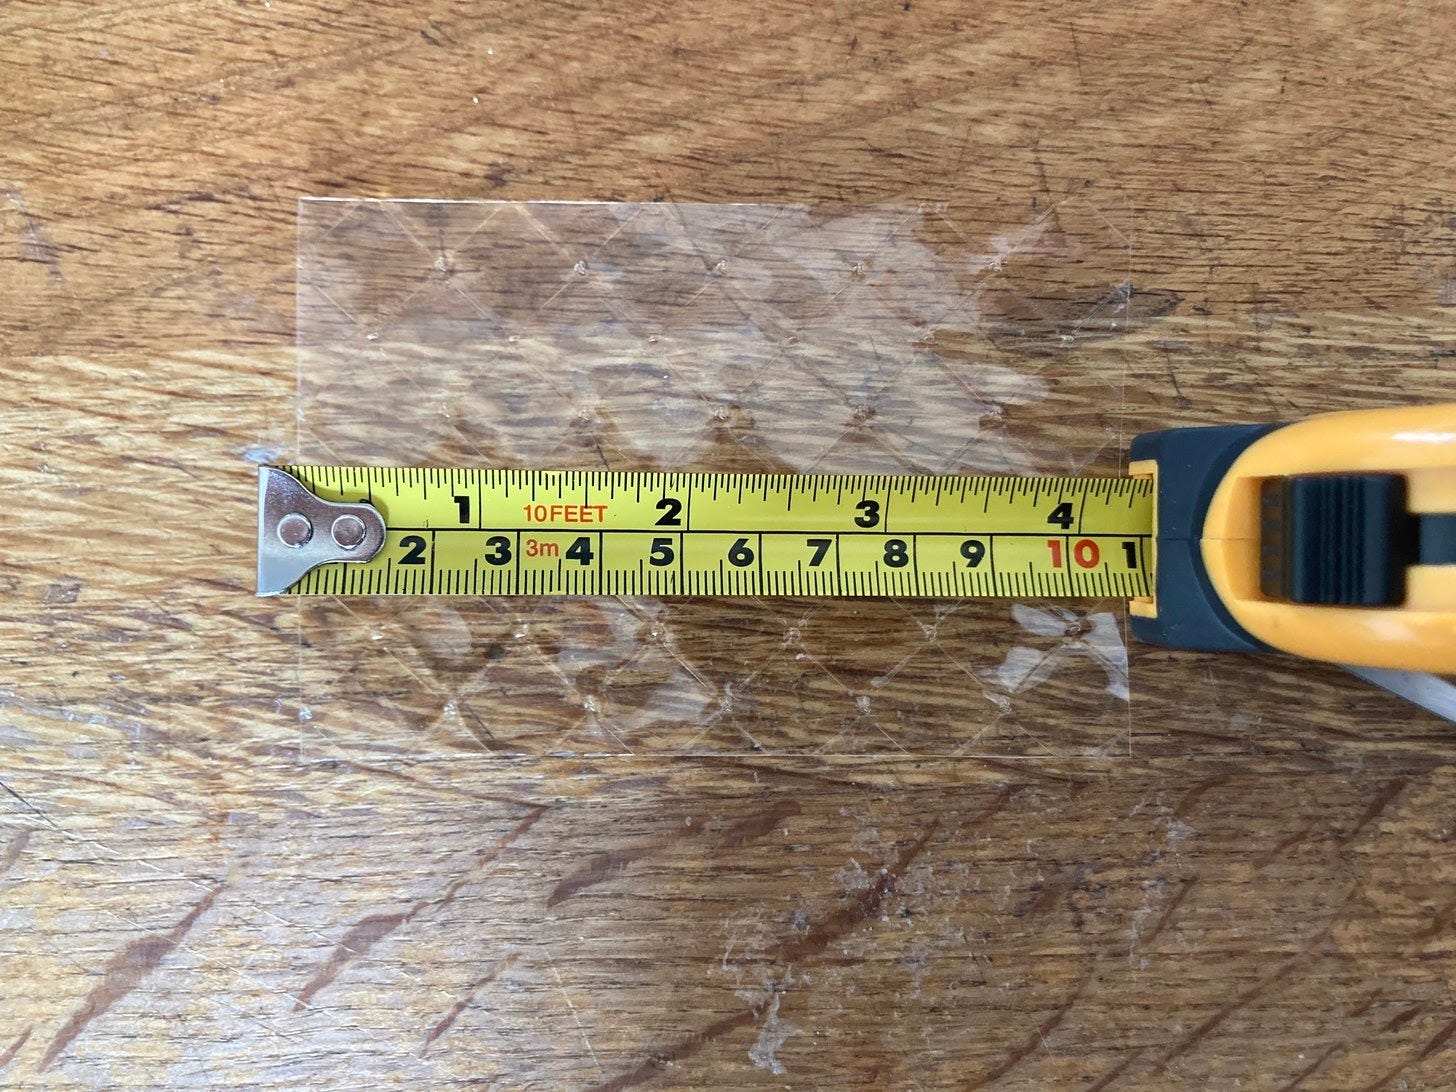
I cut my Dr Oetker platinum gelatine sheets with scissors to try and get it as accurate as possible. Mine are 11cm x 7.5cm, btw!
For the strawberry puree - this makes a larger batch than you need
300g strawberries, halved
30g sugar
For the chocolate layer
60g double cream
60g whole milk
5g sugar (about 1tsp)
30g dark chocolate
½ gelatine leaf
For the vanilla layer
90g double cream
90g milk
½ vanilla pod, seeds scraped
30g caster sugar
¾ sheet of platinum gelatine
For the strawberry layer
130g double cream
130g strawberry puree
40g caster sugar
1 sheet of platinum gelatine
Method
Roasted strawberries / puree
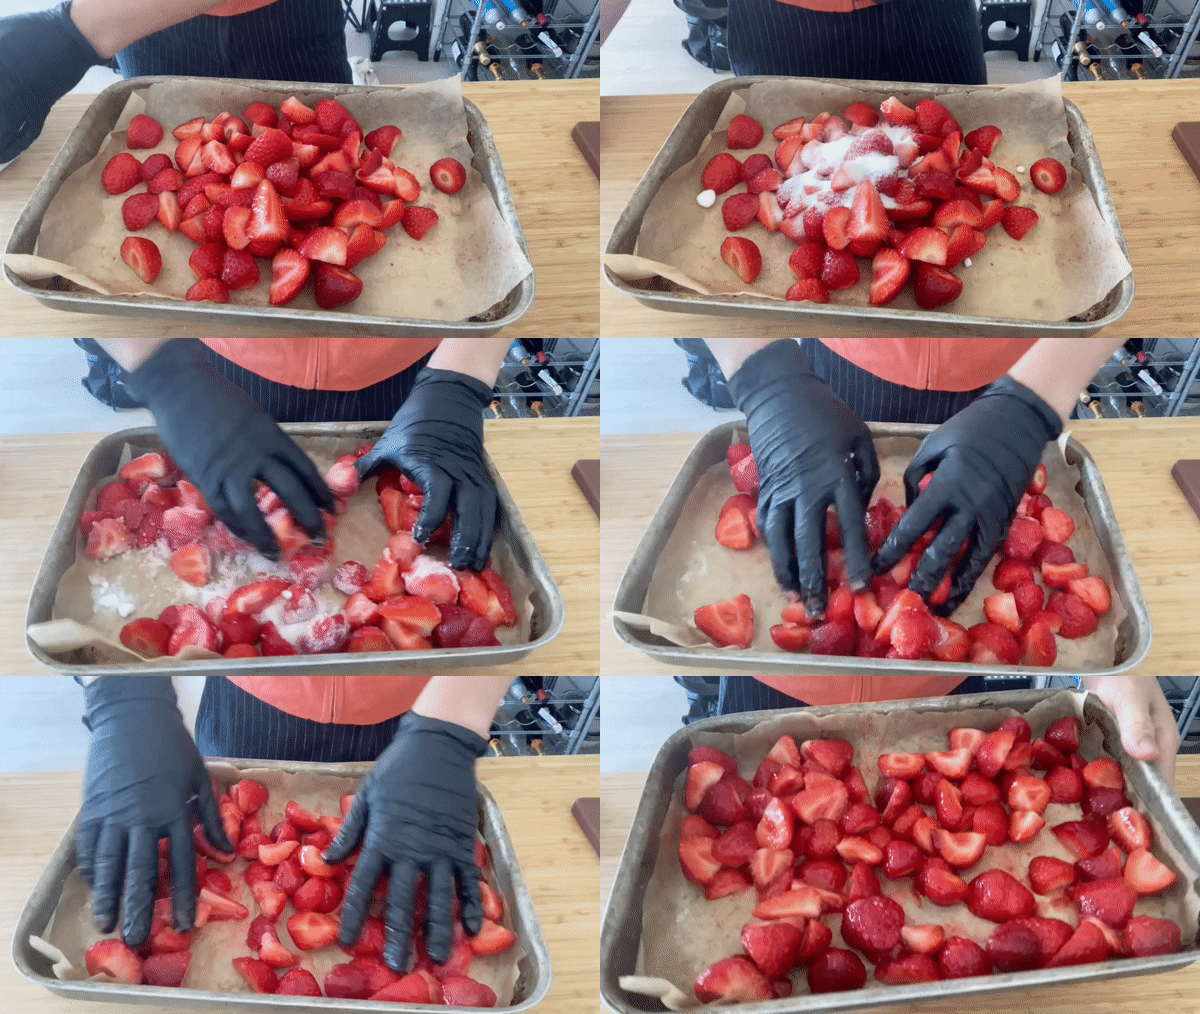
Pre-heat oven to 150c fan
Wash briefly and then cut strawberry in halves. If they’re small, just leave them whole
Toss with sugar on a tray
Roast for 30 - 40 mins until soft and syrupy, and slightly shrunken. The strawberries will have gone a deeper shade of red
Allow to cool slightly before blitzing in a food processor. Keep some aside for final decorating though along with some of the syrup -yYou can store in the fridge for 3-5 days
Pass it through a sieve and set aside
I also like to keep some strawberries aside for serving alongside the panna cotta
Chocolate layer
Bloom your gelatine in cold water until its soft
Heat together the sugar, double cream and milk, whisking well to ensure all sugar is dissolved. Bring it to a simmer then whisk in your bloomed gelatine
Take off the heat and pour over the chopped chocolate, like a ganache. Whisk it really well to make sure it is all dissolved!
Allow to cool to 30c-35c, whisking often to ensure you don’t get a skin. You may need to pass it through a sieve
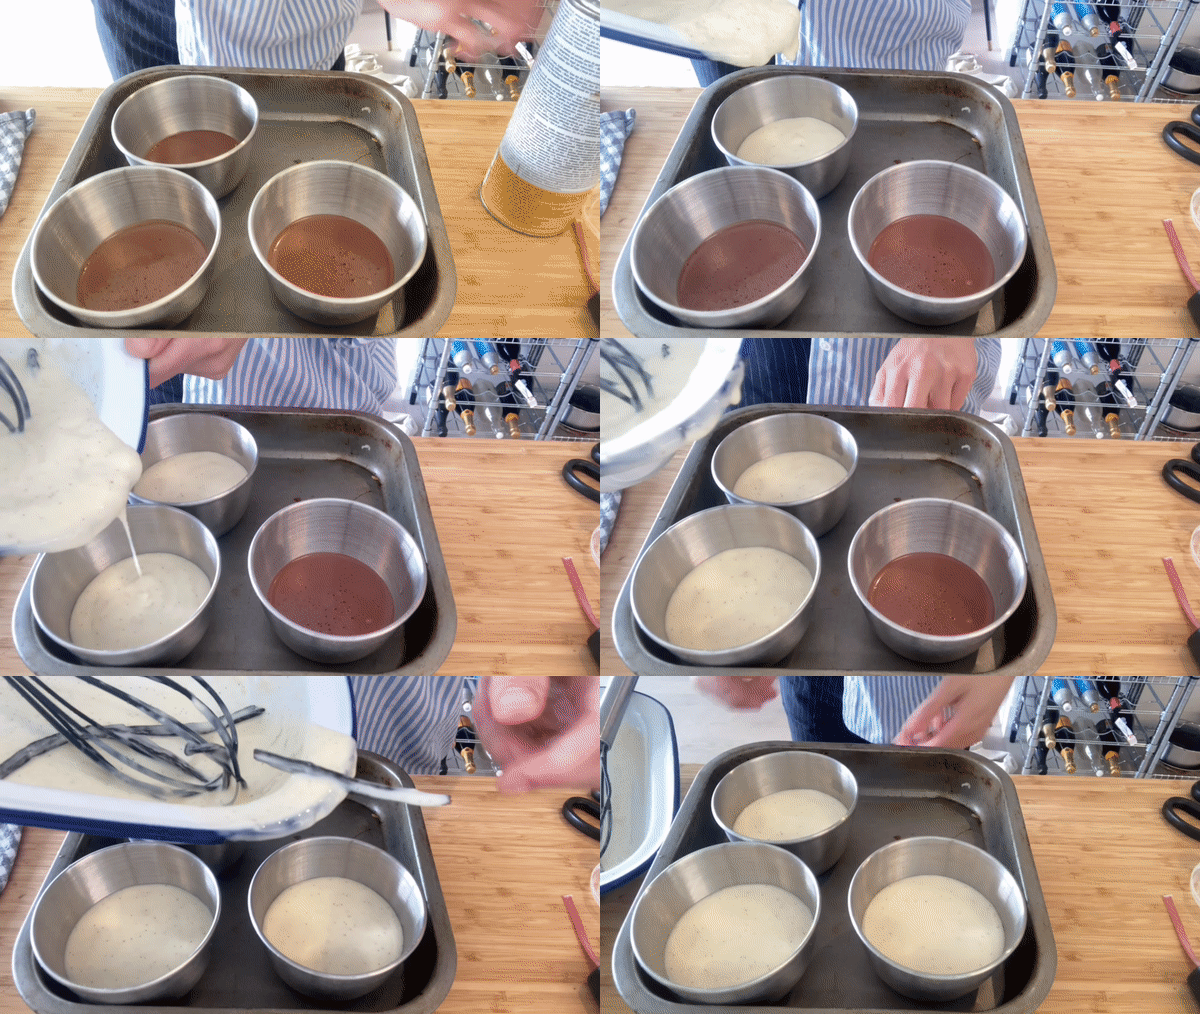
Pour 35g into each mould
To ensure the cold vanilla layer fuses, you want to leave this until its only *just* set, which is about 30 mins. So get started on your vanilla layer right away!
Vanilla layer
Bloom your gelatine in cold water as above
Heat together the sugar, double cream and milk with the seeds and scraped vanilla pod. Whisk it well to ensure all the sugar is dissolved
Once it has reached simmering, whisk in your bloomed gelatine
Move into a clean bowl set over a large bowl with ice (an ice bath!)
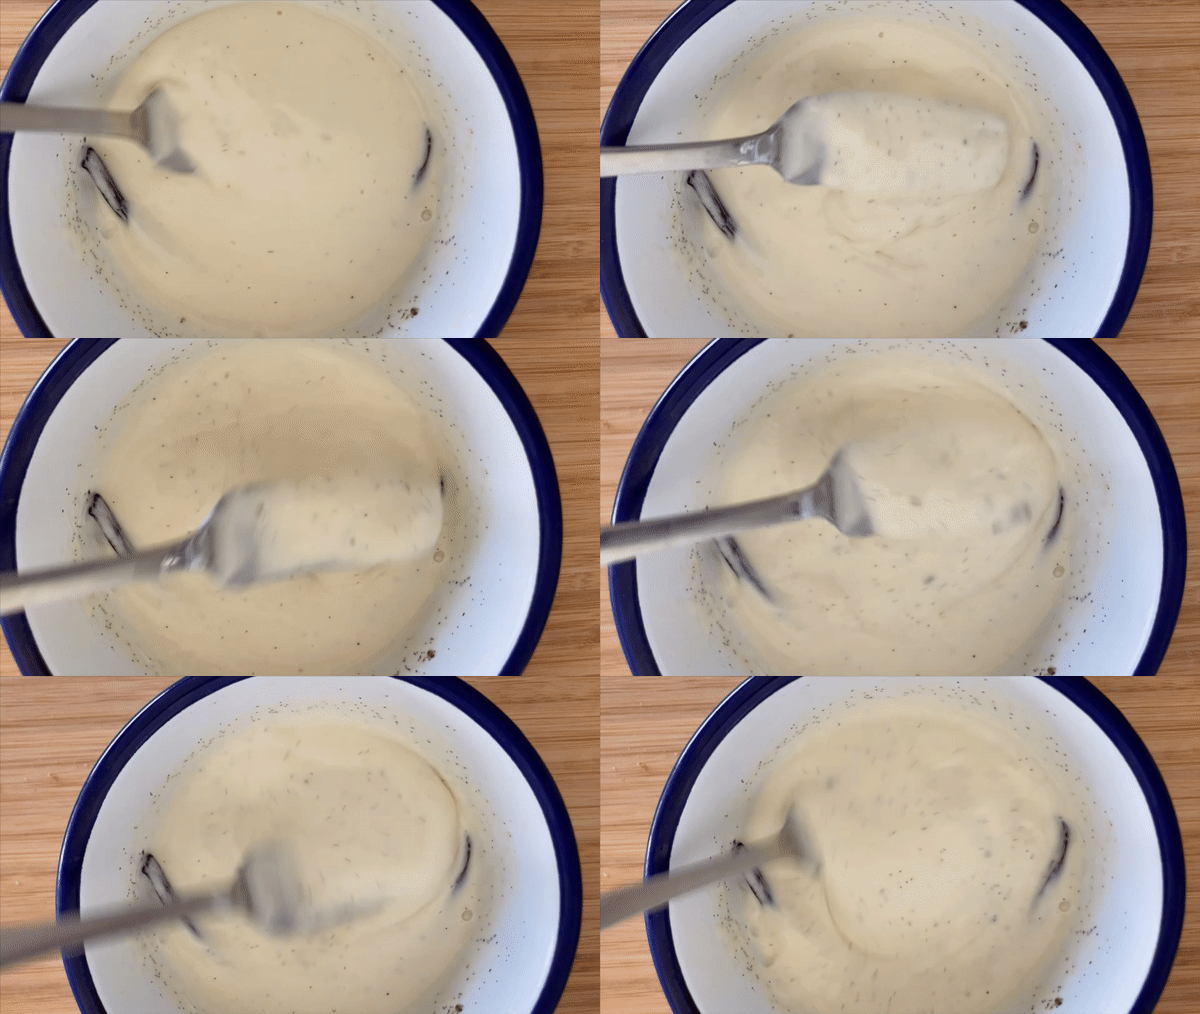
Whisk your pannacotta regularly until it begins to thicken slightly and you can see the vanilla seeds are well suspended throughout. It’ll look like this
Check the chocolate layer - remember, you want it to be sticky still to adhere the cool vanilla layer. My chocolate layer went into the fridge at approx 35c and after 30 mins it was perfectly tacky. If it has set completely, run a blow torch LIGHTLY over the top of the panna cotta or place a bowl on top and add some boiling water to try and melt the top slightly
Pour 45-50g vanilla mix into each mould
Leave to set completely
Strawberry layer
Bloom your gelatine in cold water. Blooming means soaking it until soft - it should take about 5 mins. Make sure it is all-the-way covered
Heat together the sugar, double cream and strawberry puree. Whisk it well to ensure all the sugar is dissolved
Once it has reached simmering, whisk in your bloomed gelatine
Pour hot pannacotta mix through a sieve - you might need to press it through quite a lot to get all the rhubarb fibres through
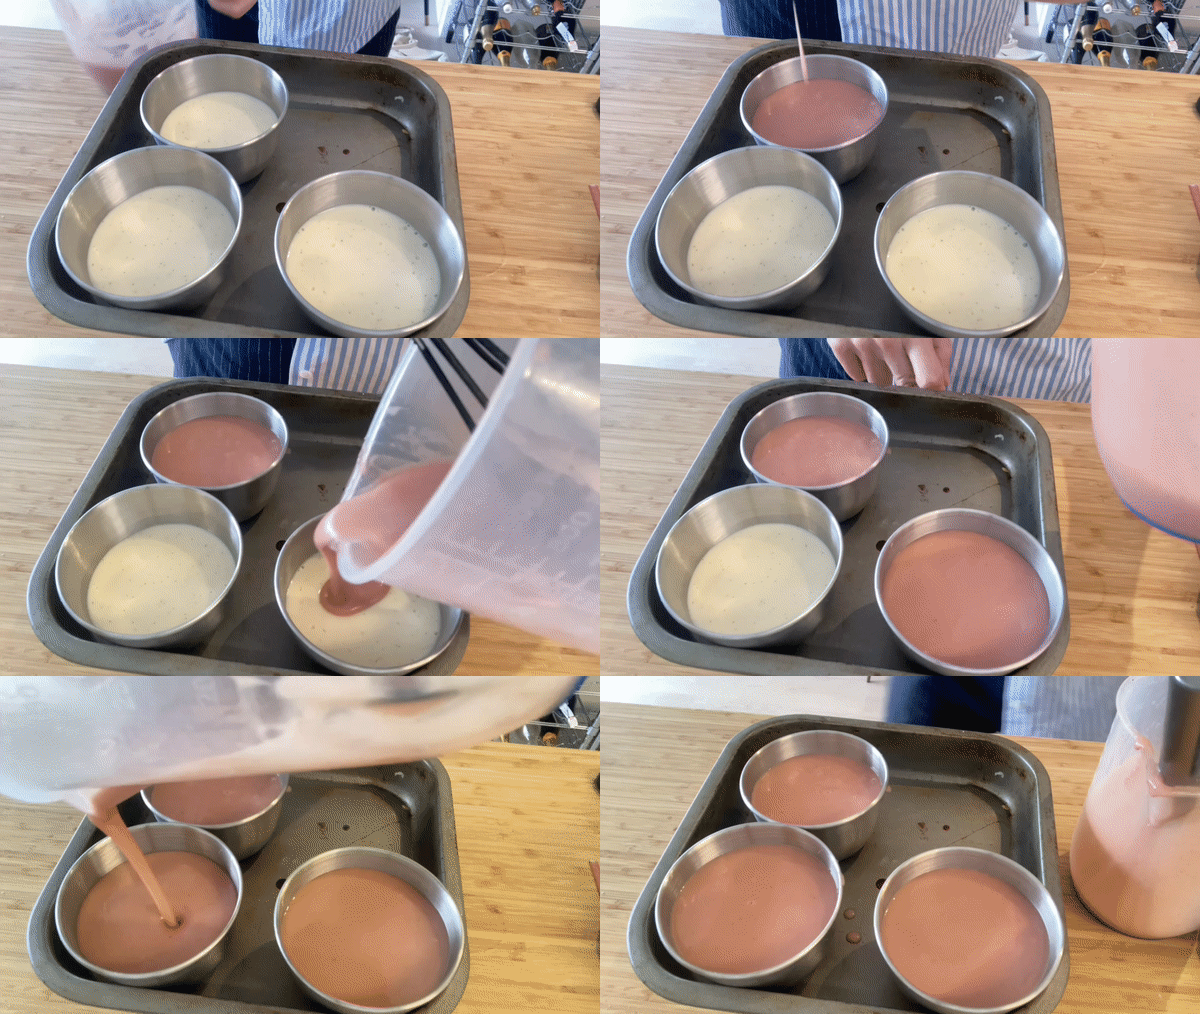
Allow to cool to around 35-40c, stirring regularly to stop a skin from forming, then pour 35g into each mould
Leave to set. It will be completely set within 45 mins so I like to begin my vanilla layer right away
De-moulding and finishing
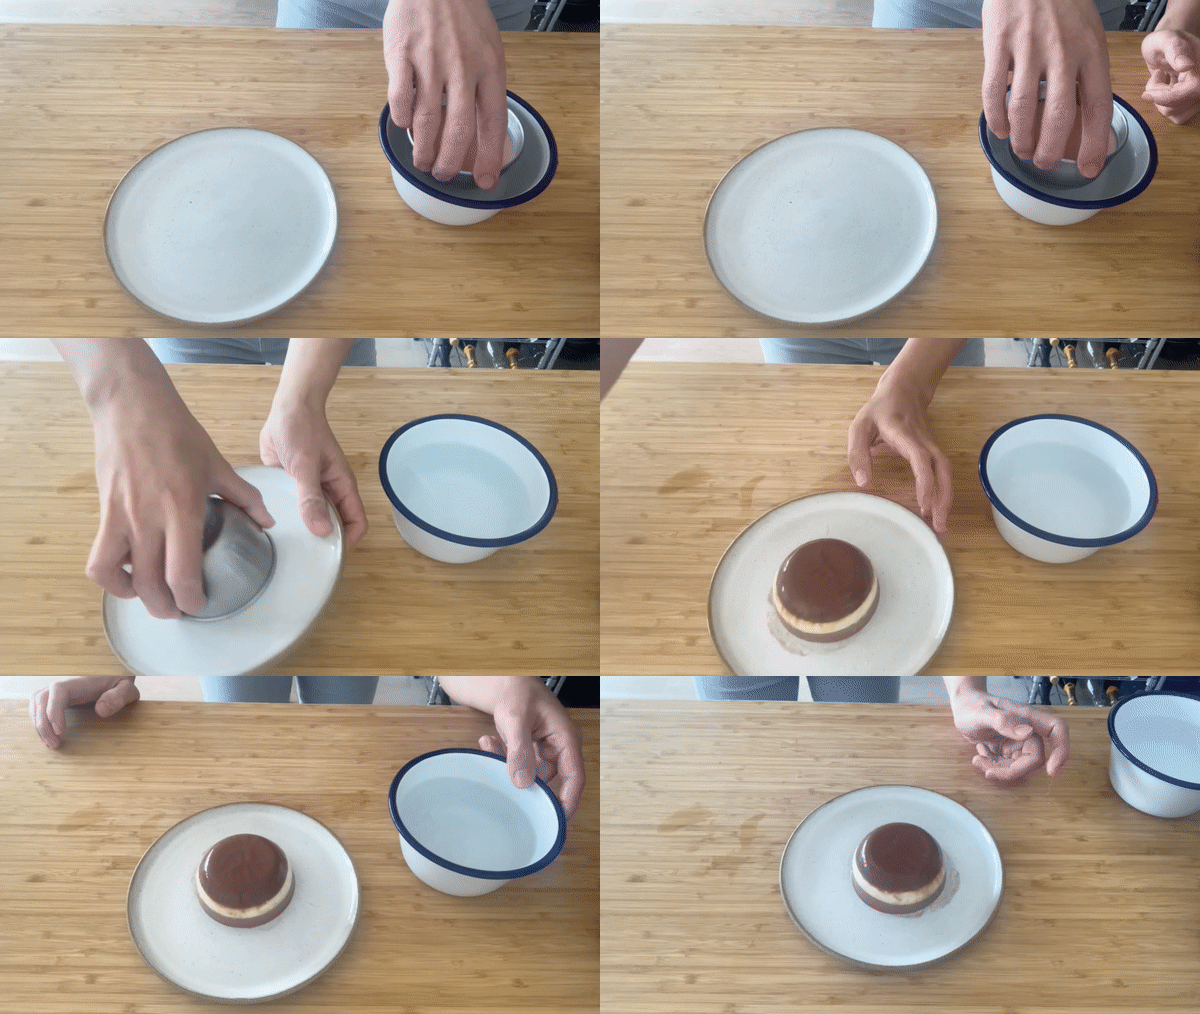
Get a bowl of warm/hot water - 55c - 60c is perfect if you want to temp it! Boiling is neither hand friendly and is way too hot
Gently dip the mould into the water for 3-5 seconds - if you move it from side to side the panna cotta will look like it has ‘come loose’ from the edges
Invert onto a plate
Tap on the base to encourage the panna cotta to slide out
If it doesn’t slide out after the tapping, return to the water and repeat the steps, but this time only hold it in the water for 1 seconds or so… it doesn’t take much, promise!
Eat as is or serve with some artfully crumbled up biscuits (I use the recipe from the rhubarb custard KP) and roasted strawberries







Hello - how many grams is 1 sheet of gelatin? I would like to use powdered gelatin
Bad idea to try this with powdered gelatin? Anyone in the US made this? :) I suppose I could try to source some gelatin leaf too…