Kitchen Project #99: Canelé
Crusty. Custardy. The pastry GOAT!
Hello,
Welcome to today’s edition of Kitchen Projects. It’s so wonderful to have you here.
It’s a big one. Today I’m deep diving one of my favourite ever pastries. It was intimidating to say the least but I’m so excited for you to read it: Welcome to planet CANELÉ, the crispy crunchy custardy pastry of your dreams (even if you don’t know it yet).
Over on KP+, we’ll be taking a left turn - I’m sharing my savoury version ft. parmesan smoked pancetta canelé. It’s a real gem. Click here for the recipe.
What’s KP+? Well, it’s the level up version of this newsletter.By joining KP+, you will support the writing and research that goes into the newsletter and get access to an amazing community, extra content, the full archive, and more. Subscribing is easy and only costs £5 per month. Why not give it a go? Come n join the gang!
Love,
Nicola
Yes we canelé!
If you have never tried a canelé (pronounced: Can-nuh-lay) before, I genuinely envy you…
…Because discovering and (immediately) loving canelé, the fluted Bordelaise pastry that is baked in beeswax coated copper tins, is like being in a secret club, a club that all shares a valuable piece of knowledge: The canelé is the pastry GOAT. To use another modern acronym, it might be the ultimate 'IYKYK' dessert.
Looking at it, you might not think much of it - its unassuming dark shell in that unique fluted shape gives no real clue of what lies ahead when you eat it. But that's part of its charm - that's why it feels like such a secret. Get closer, and you will smell the complex aroma - rich notes of rum, vanilla, burnt milk and sugar. Take a bite, and you'll be greeted with a custardy, tender centre with no hint of bitterness. The result is a perfectly balanced dessert with a textural interplay that creme brulee would envy, if it knew how.
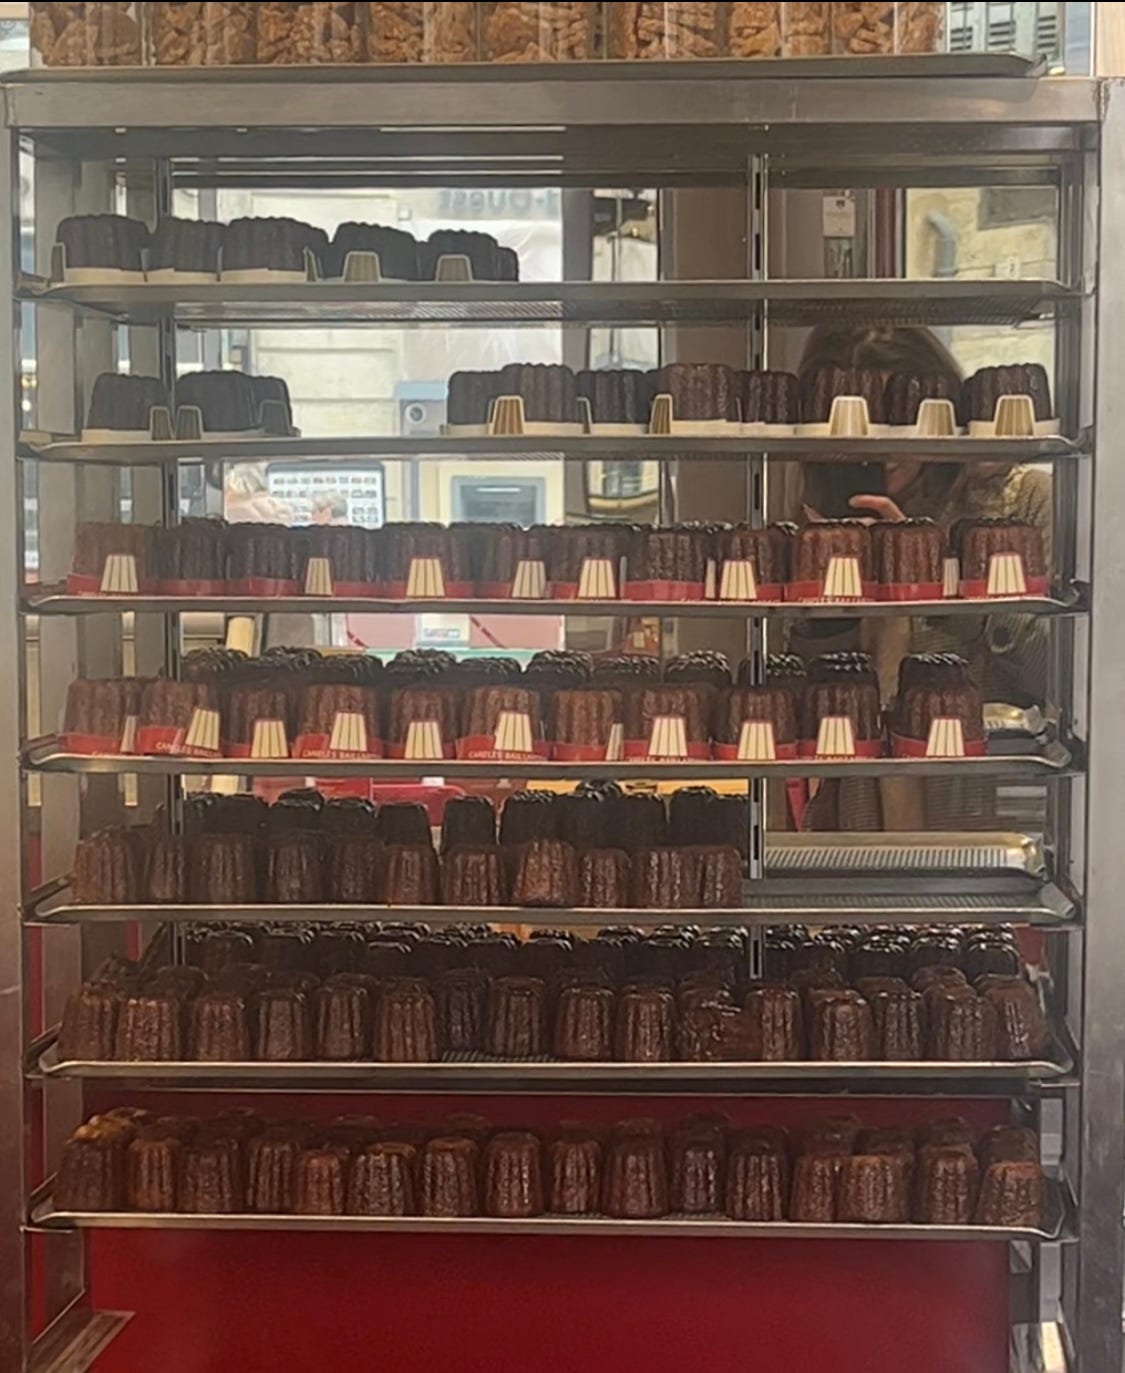
At Dominique Ansel, one of my morning jobs was filling and demolding some 100 canelé, an acrobatic task that tested your agility and bravery (those moulds get HOT). Before joining the team there, I'd never seen canelés, let alone tasted them. And from the first bite, I was done - I would be a fan for life.
Since leaving that job, I haven't really attempted making them except for one poor show in 2018, a batch so terrible (it mushroomed, it ‘cul-blanc'd) that I swore off making them again - I simply couldn't take the disappointment. Now, a trip to Bordeaux with an eating tour around the best shops and stalls (Merci Beaucoup Sophie!) and some 12 pints of milk and a bottle of rum later, I think that canelé has an unfair reputation for being difficult to master. Canelé is not difficult, but it definitely can be unpredictable, even with years of experience.
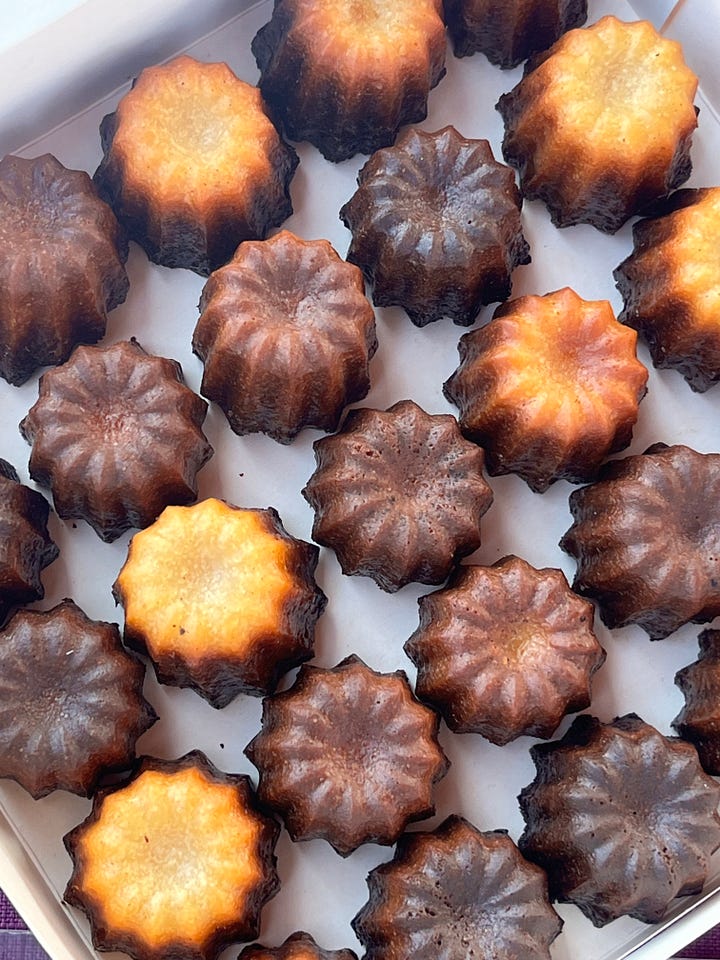
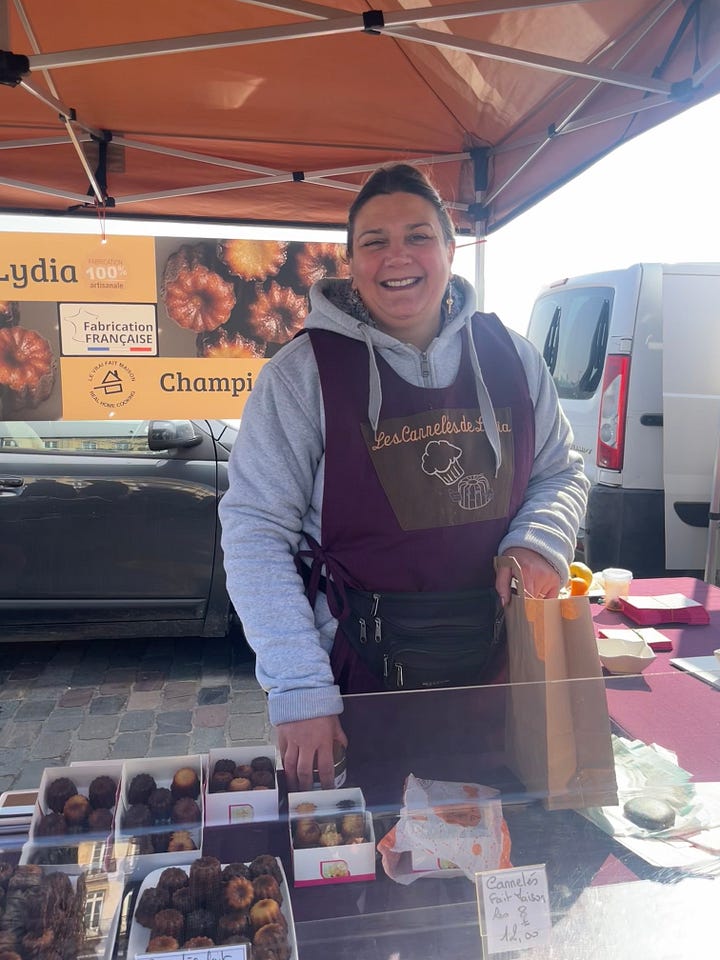
The best canelé I ate in Bordeaux were Lydia’s of ‘Les Cannelé de Lydia’ at the Sunday market. In 2018, she won best canelé and now makes 4000 canelé a week, and even hers still have unevenly browned tops and some that fall in the middle. She just chooses not to see these as failures, showcasing her artisanal product proudly. And I have no doubt that every bakery that makes canelé will have imperfect bakes in every batch. What changes are whether the bakery is prepared to sell or show those products - and our perception is an important part of that.
Not to get too deep, but I like to think we are moving towards a place where imperfection is not seen as a failure. And that can only be a good thing. OK, let's make them!
The history
The canelé's roots can be traced to Bordeaux though exactly where, when and how is questionable. There's plenty of folklore though nothing particularly clear. Egg yolk-rich batters were thought to be more common in wine-making regions since whites were used for the wine clarification process. This meant there was a glut of leftover yolks which were often given to monasteries and convents. And it's here, in a convent in 18th century Bordeaux that canelés are thought to have had their start.
Both ‘canelé’ and ‘cannelé’ are acceptable spellings. The single 'n' spelling was introduced in 1985 to distinguish a canelé made in Bordeaux (one 'n') vs a canelé made elsewhere (two 'n's). So, in theory, today, we are making cannelé, not canelé.
Right, let's get into it! I want to say upfront a huge thanks to superstar Marie Frank, who makes the most incredible canelé, for discussing the process with me throughout the week. And to Natalie Axelsson, who also shared her pearls of knowledge with me! Very grateful.
The batter
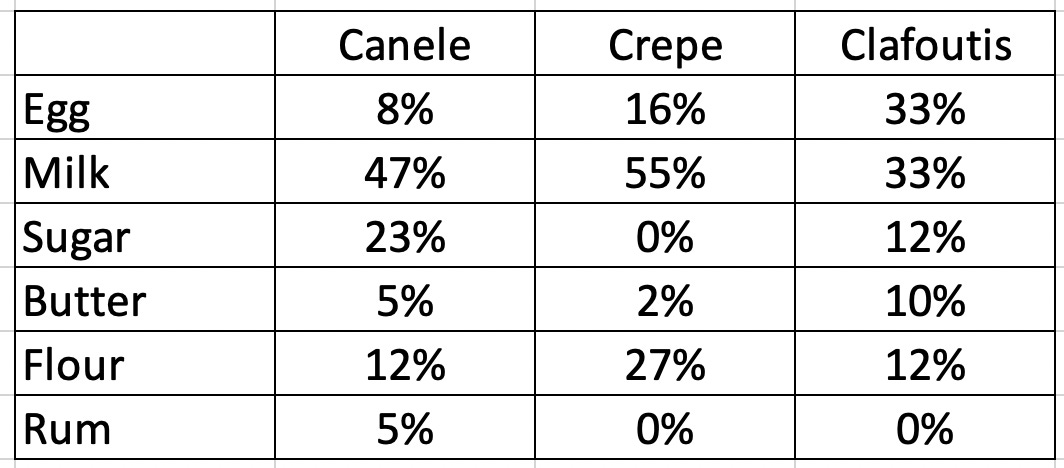
Canelé batter is a simple mixture of milk, eggs, flour, sugar, rum and vanilla, plus a little salt. In ingredients, it is comparable to two much-loved french desserts: Crepes and Clafoutis. However, the ratios of ingredients are different. Compared to crepes, canelé has half as much flour and fewer eggs. Compared to clafoutis, canelé has fewer eggs and more milk.
The custardy, moist interior of the canelé is thanks to this unique ratio: A high proportion of liquid set thanks to a mixture of starch gelatinisation and egg coagulation. The thick, browned crust is thanks to a strong browning reaction from the milk solids. Here's my theory: As the canelés go into the oven, the batter heats up. As it passes 70c, the starches and egg begin to set, but it remains a flexible network due to the high proportion of liquid. As the batter continues to heat, water in the milk and eggs evaporates via steam, resulting in the custardy, holey network we know and love. An undercooked canelé will have a dense texture that falls as it cools.
To understand how to put together my own recipe, I wanted to break down each ingredient:
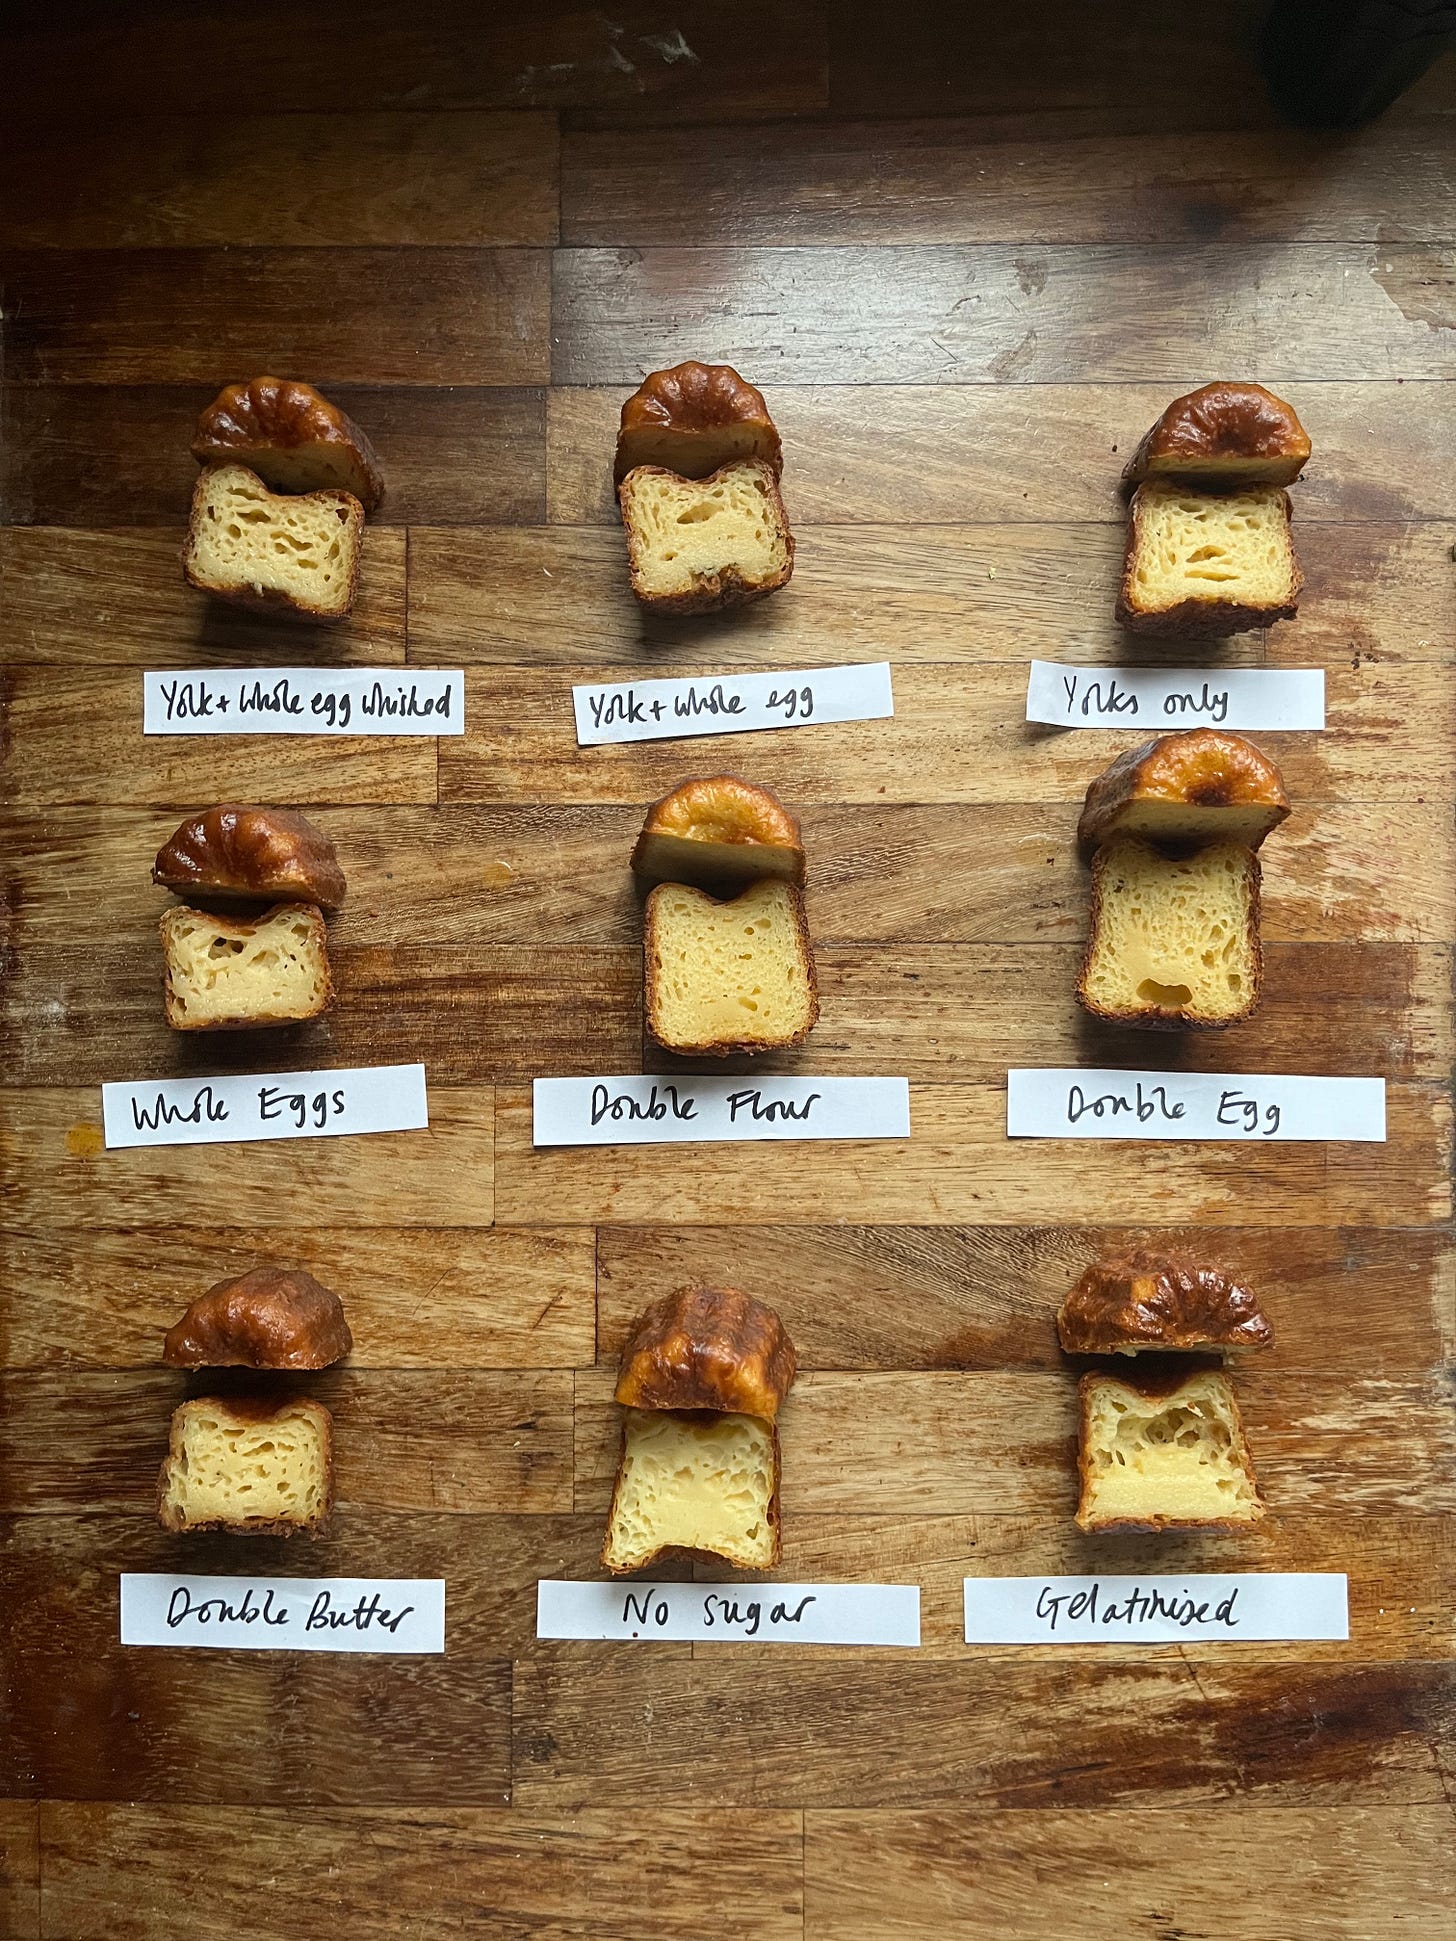
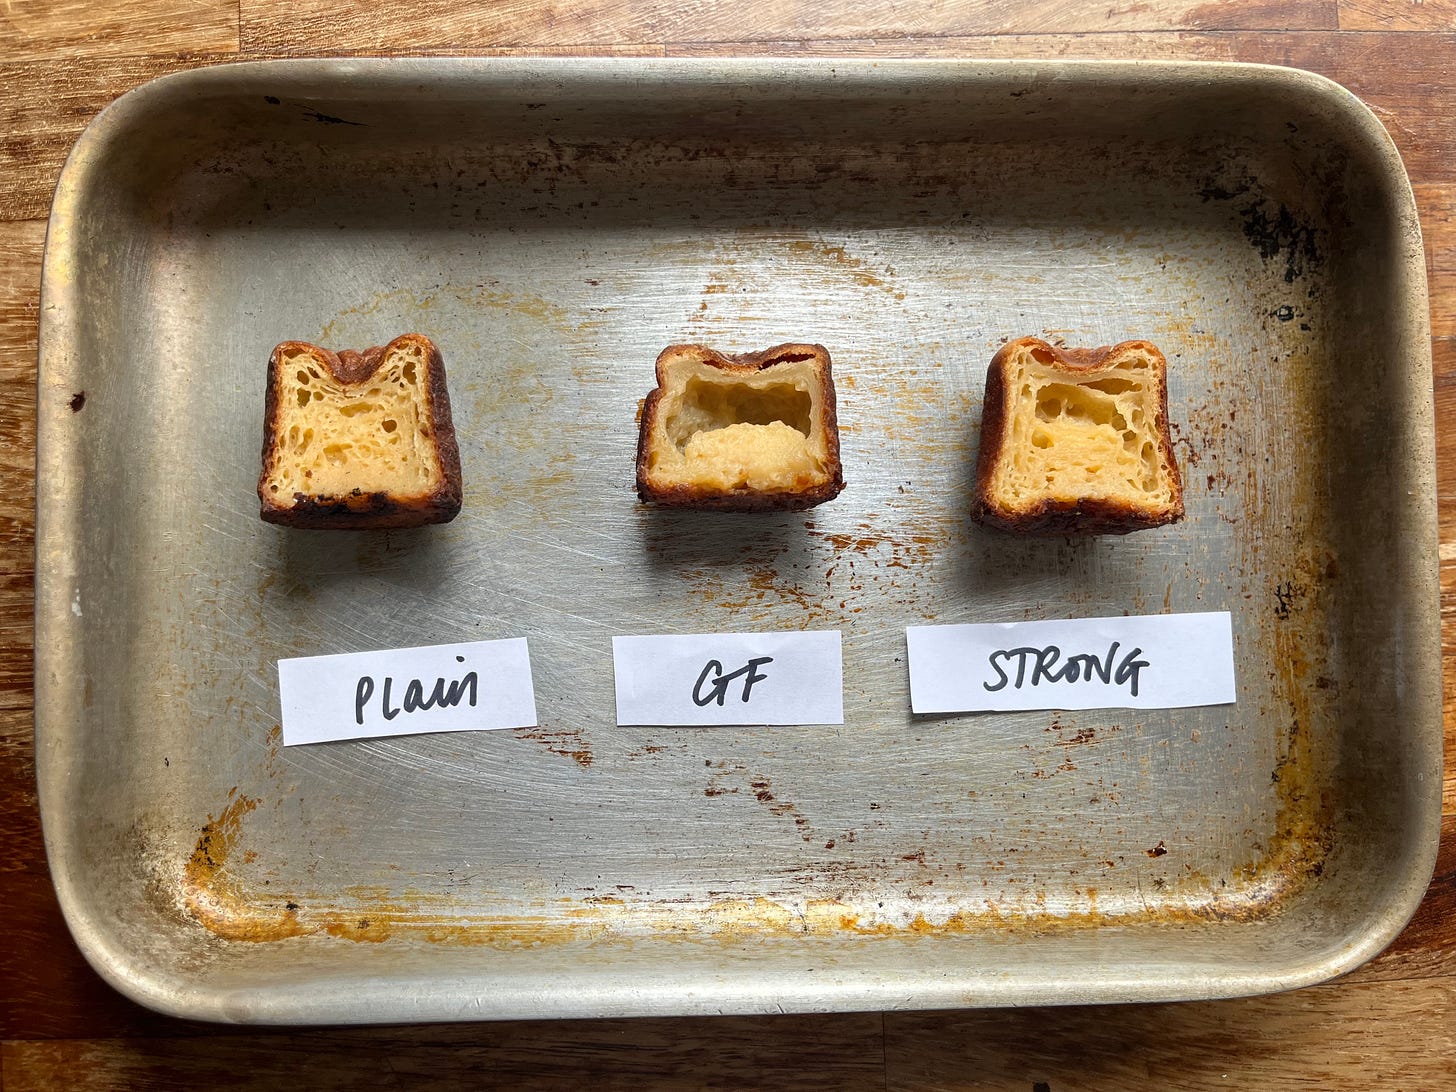
Flour: The flour is responsible for the main structure of the canelé - although gluten does play a role, starch gelatinisation has the more significant role in the final structure. If you need a reminder, gelatinisation occurs starch is mixed with water and heated. Here the granules absorb and swell, creating a mesh network and a thickened consistency. The water is effectively trapped, turning starch from gritty particles to soft ones. If you double the flour, the canelé is more cake like, springy and tall. I attempted to pre-gelatinise the batter to see what would happen. As you can see in the picture, the gelatinised starch stayed in one place, leaving a huge gap where the steam escaped! It behaved similarly to the GF flour (see pic below). Strong flour gives you a slightly more erratic network when baked immediately. When baked after 24h, the difference was minimal. I didn't find there to be any difference in the eating texture.
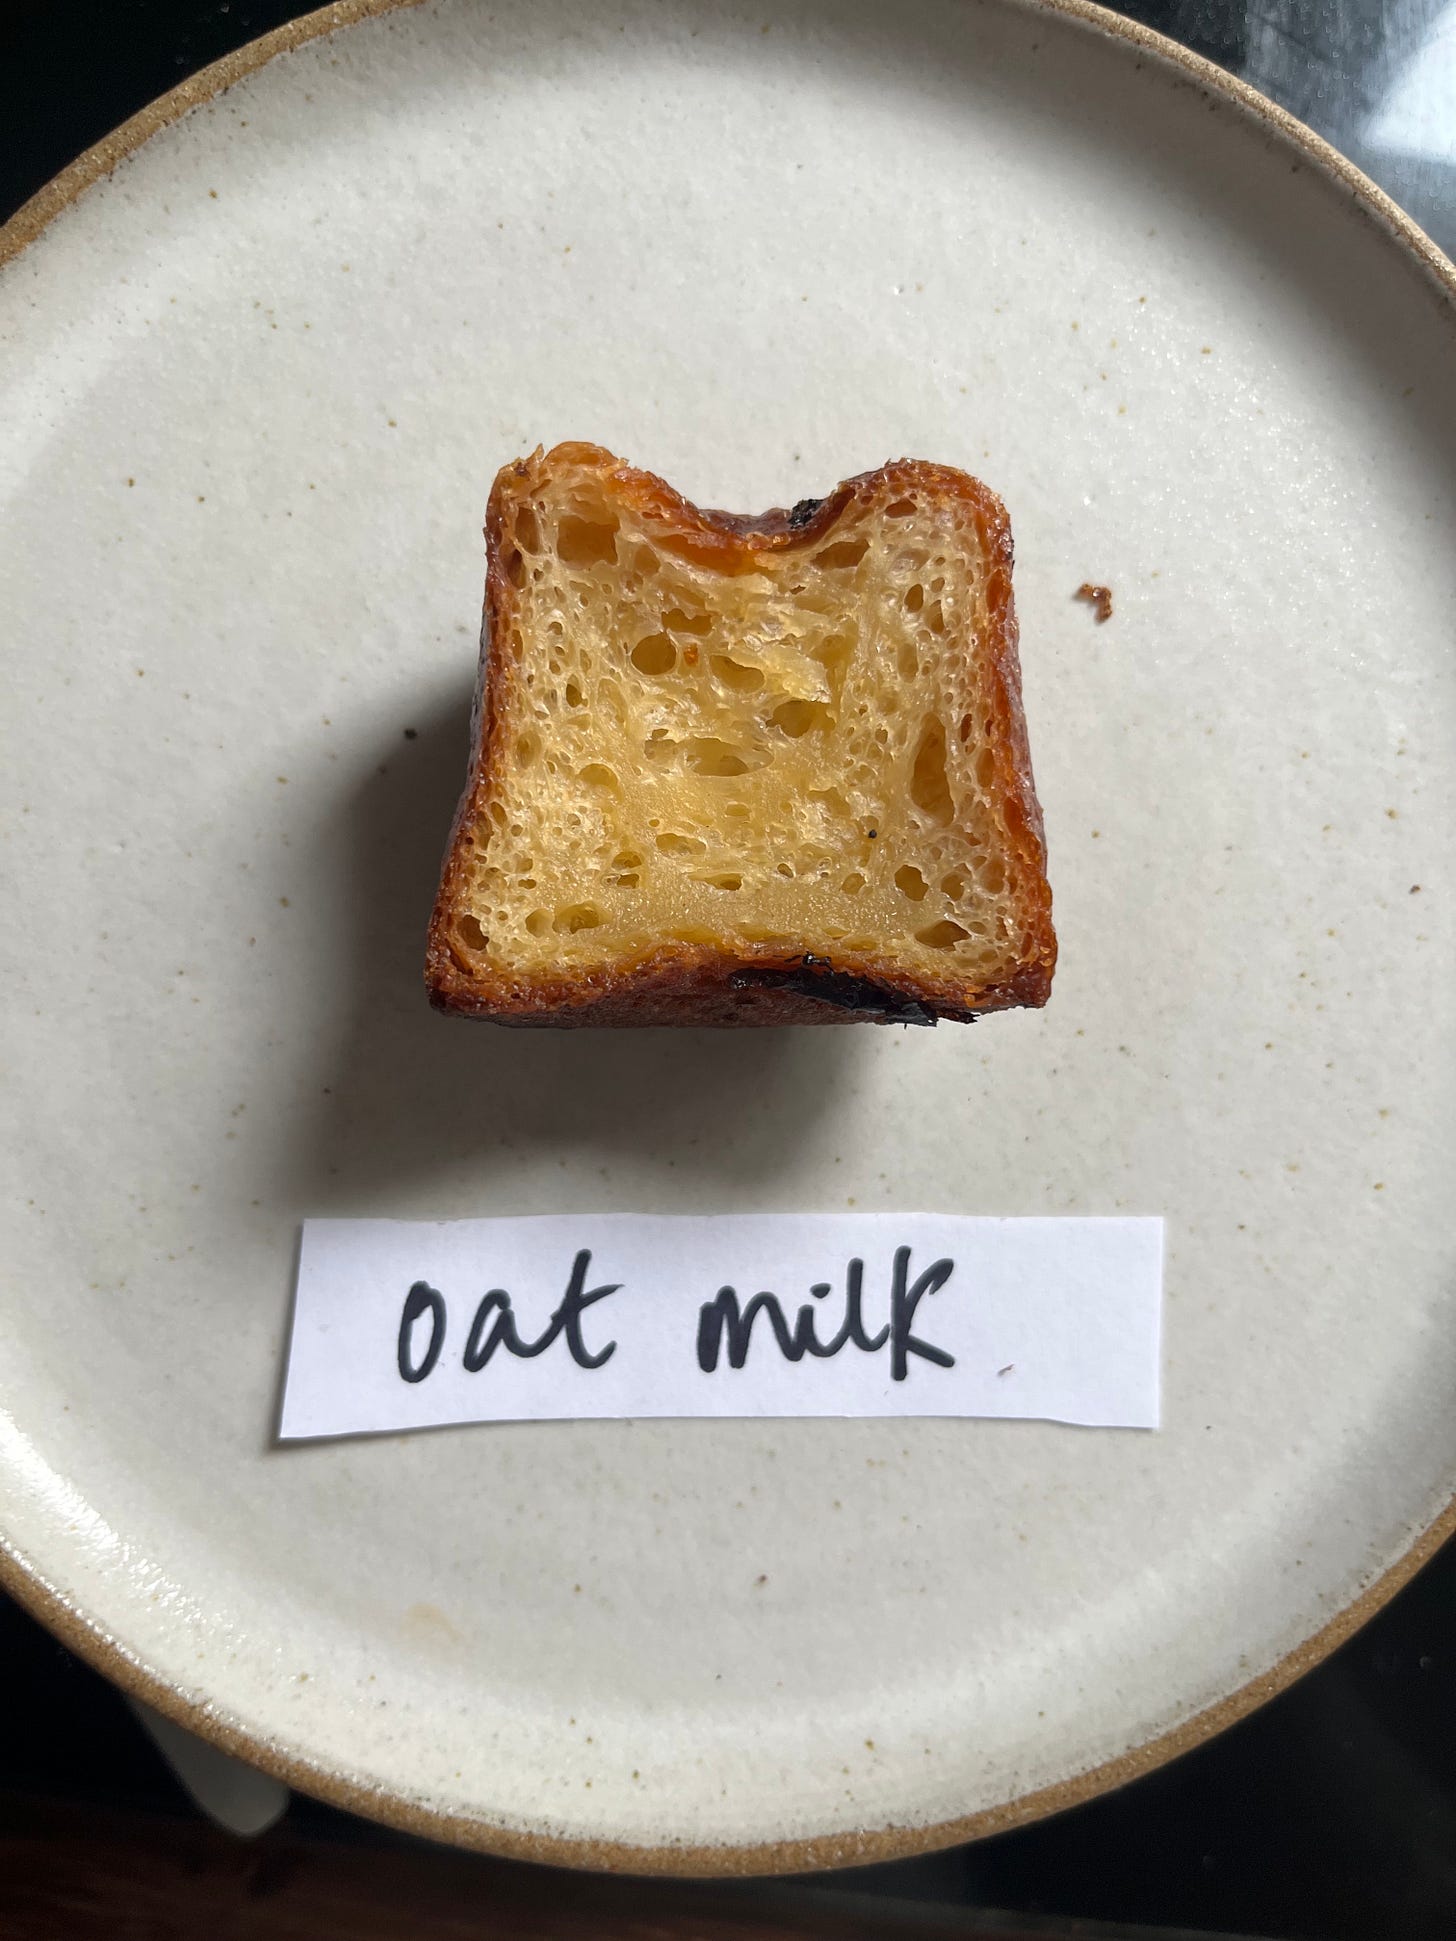
Milk: Making up almost 50% of the batter, milk is responsible for the custardy flavour of canelé and mainly responsible for the browning of the crust. Milk solids are prone to browning through Maillard reaction,, and this flavour - and colour - makes the canelé so irresistible. I also tested whether the canelé works with oat milk - it does!
Sugar: Sugar is highly hygroscopic, which means water-loving. As a result, bakes that are high in sugar will have an incredibly tender texture because it holds on so well to water. When high in sugar bakes cool, some sugar recrystallises, and we get a crunchy texture. Any sugar that is dissolved in liquid will remain gooey. In canelé, sugar is the second highest ingredient proportionally. It is predominantly responsible for the crunch in the crust, and the goo in the middle. canelé baked with no sugar had a much thinner crust, but I'll go into that in more detail on KP+ today with my savoury canelé.
Butter: In baking, fat makes things tender. A little butter in the batter adds flavour and richness. I tested out the role of butter by doubling the amount in the recipe. It resulted in an extra rich canelé that didn't rise quite as much but had a crunchy crust.
Eggs: Eggs add a distinct custard flavour and contribute to the final set and texture. Whilst gelatinised starch gives a thick and dense texture, eggs are more tender when coagulated. It's a mixture of this gelatinisation and coagulation that give the custardy centre. You can use whole eggs, egg yolks only or a mixture to different effects. Whole eggs give a lighter custard, whilst egg yolks give a richer custard. If you double the eggs, the canelé rises quite tall and has a slight bell shape with a springy, tender crumb.
Rum and Vanilla - Rum and vanilla are the two main aromas of the canelé. You can omit or just use one or the other. If you are not using rum, replace it with the same amount of milk.
Salt - Salt improves the flavour of the canelé. Its role here is only to season.
Mixing method
I've read and have always thought that the mixing method made a huge difference. Over the years, I've read that a specific order of incorporating ingredients with specific temperatures can be the make or break. And though this might be the case for some bakers - I just know I'm going to get into some fights after publishing this - I found the mixing method much less significant than I thought.
I tried a few ways out, from whisking the yolks with sugar before incorporating to whisking the yolks with milk before incorporating to only heating half the milk with the butter - all very similar, with all the same results. Some recipes insist on the milk being a specific temp - 63c! 48c! - presumably to mitigate the butter separating (It does make a more homogenous batter after resting, but I didn't find this made a big difference after the bake.)
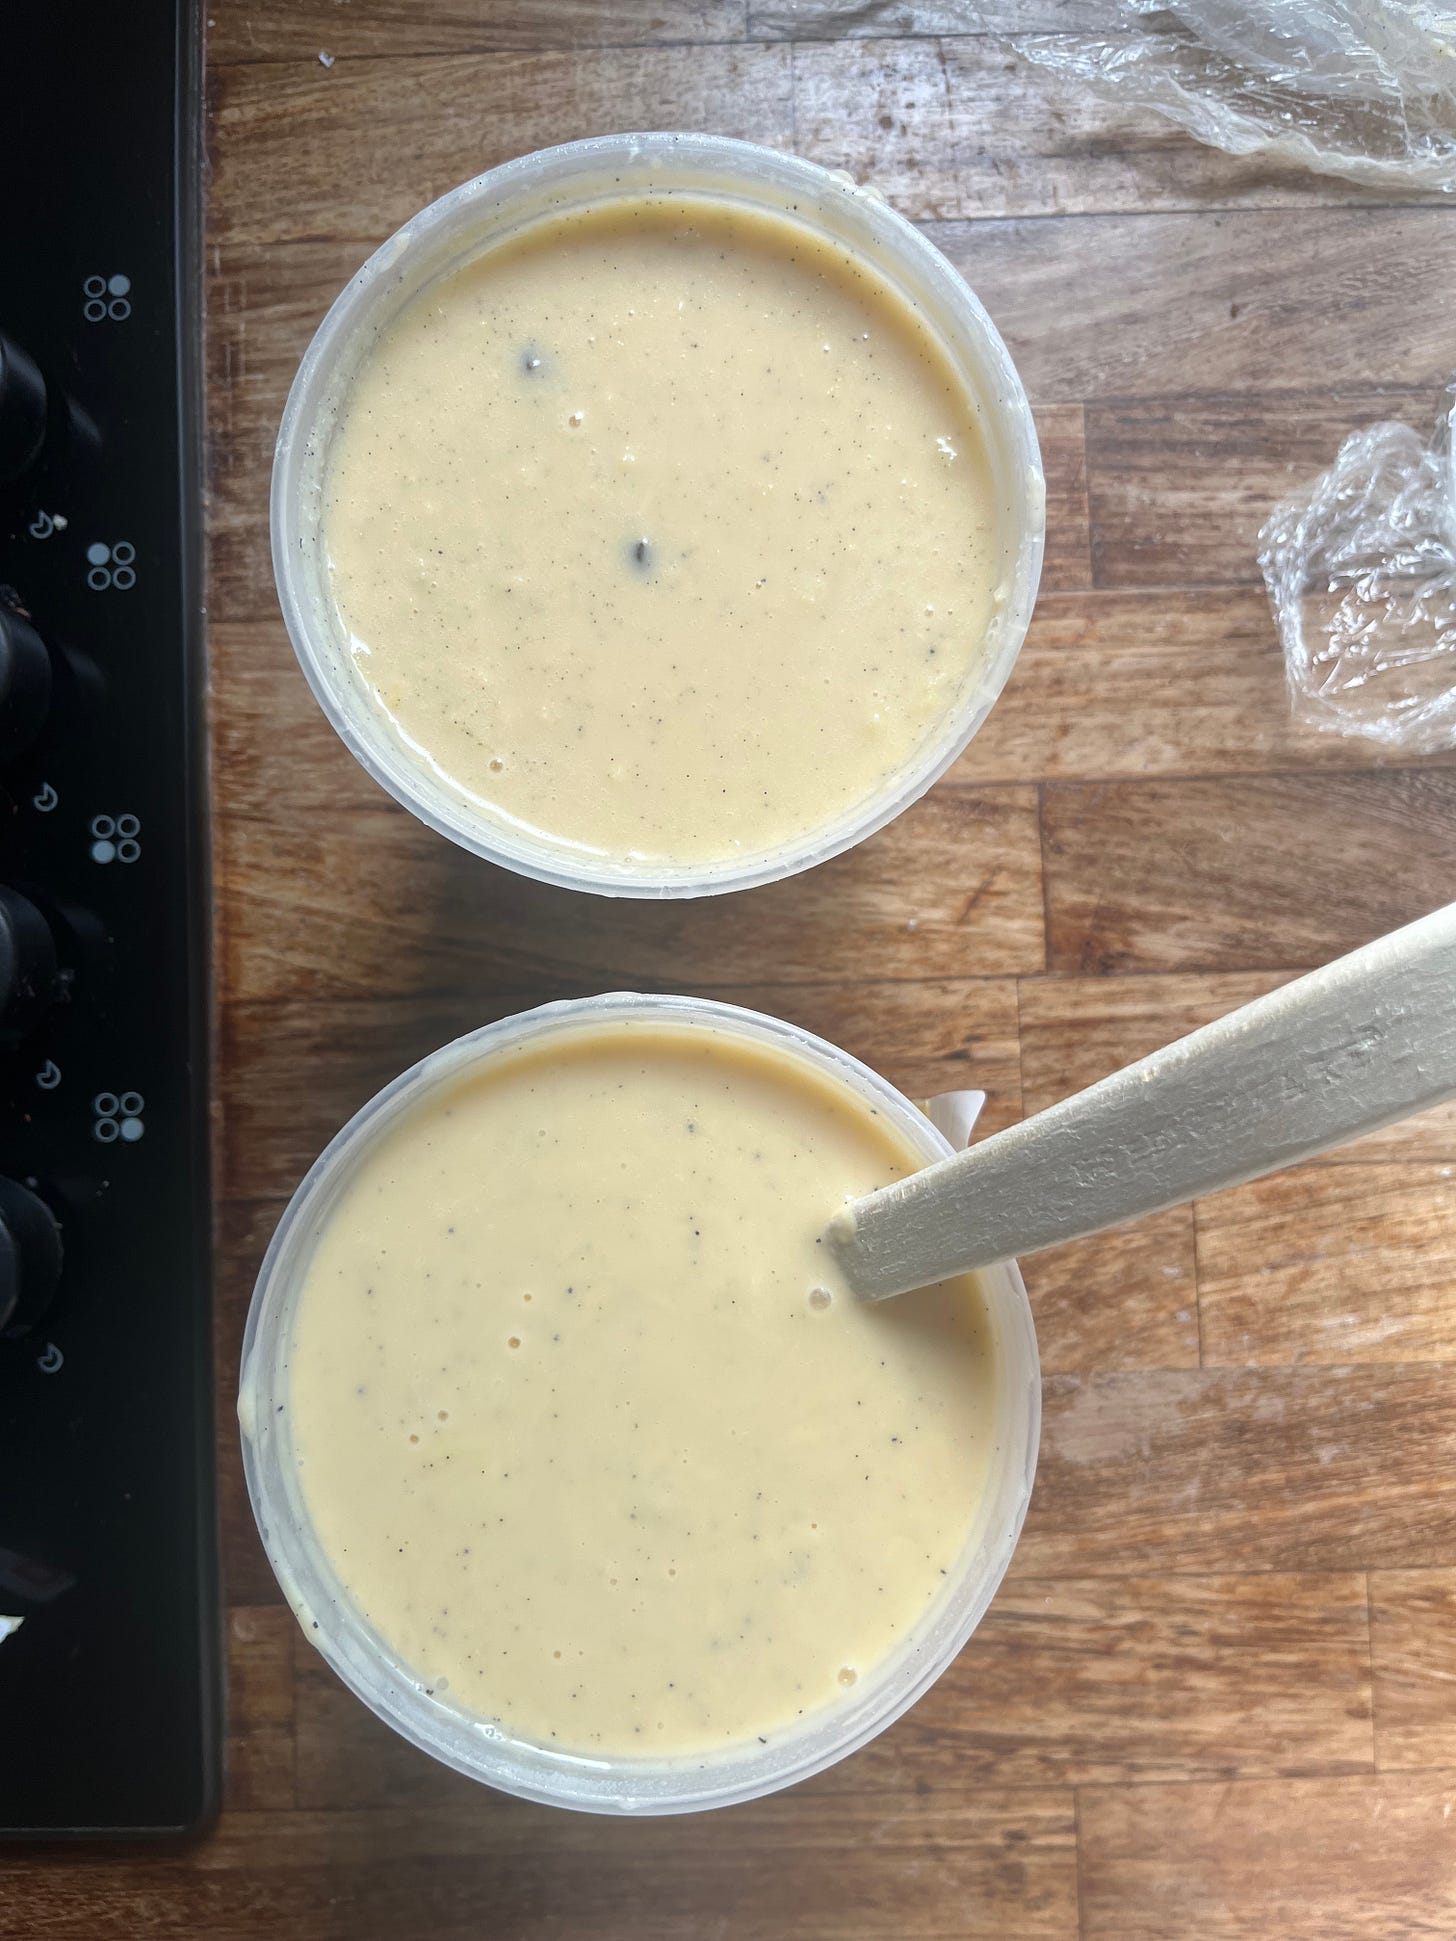
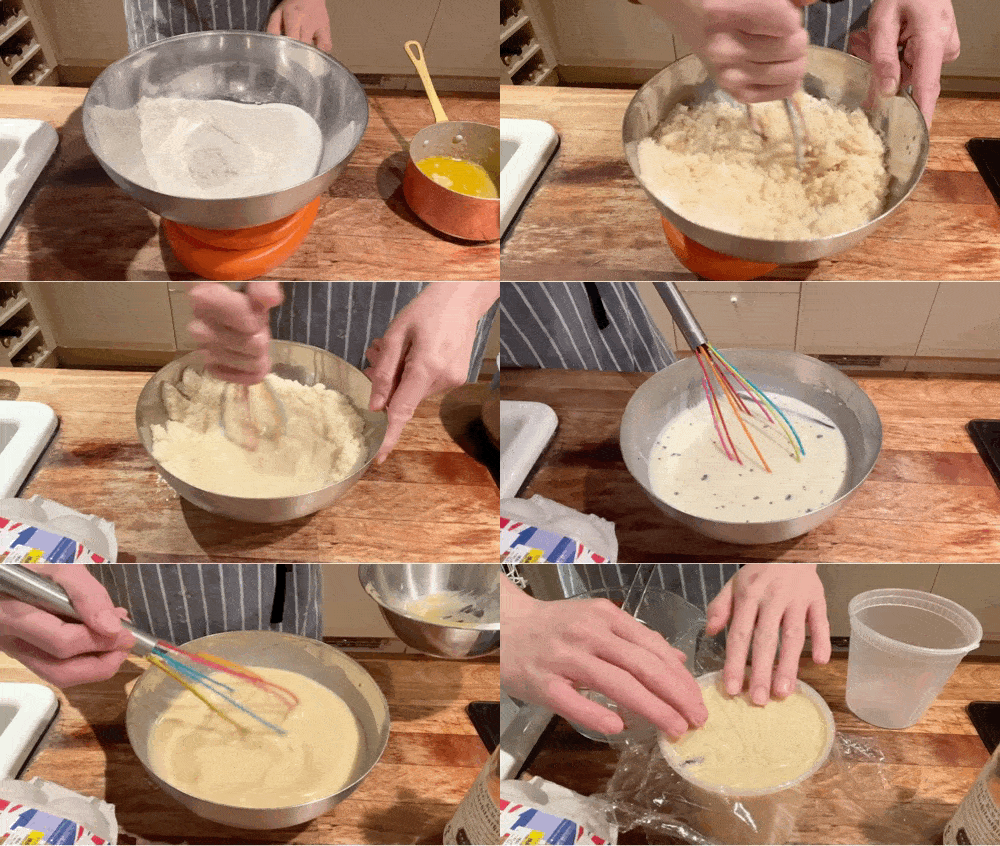
The only outlier method was shared with me by Kelly (thank you, Kelly!), who sent me a link to a video on Faria bakery's Instagram page. In a method which I will now call the 'sable' method, head baker & owner Christopher demonstrates how he first mixes the flour and sugar with melted butter before incorporating the warmed milk and finally adding the eggs. I'd never seen this method before - and Marie confirmed to me that it IS legit! So, of course, I tested it. And, friends… I think it's a great and tidy way to incorporate the ingredients whilst maintaining a consistent temperature. The resultant batter is a lot smoother:
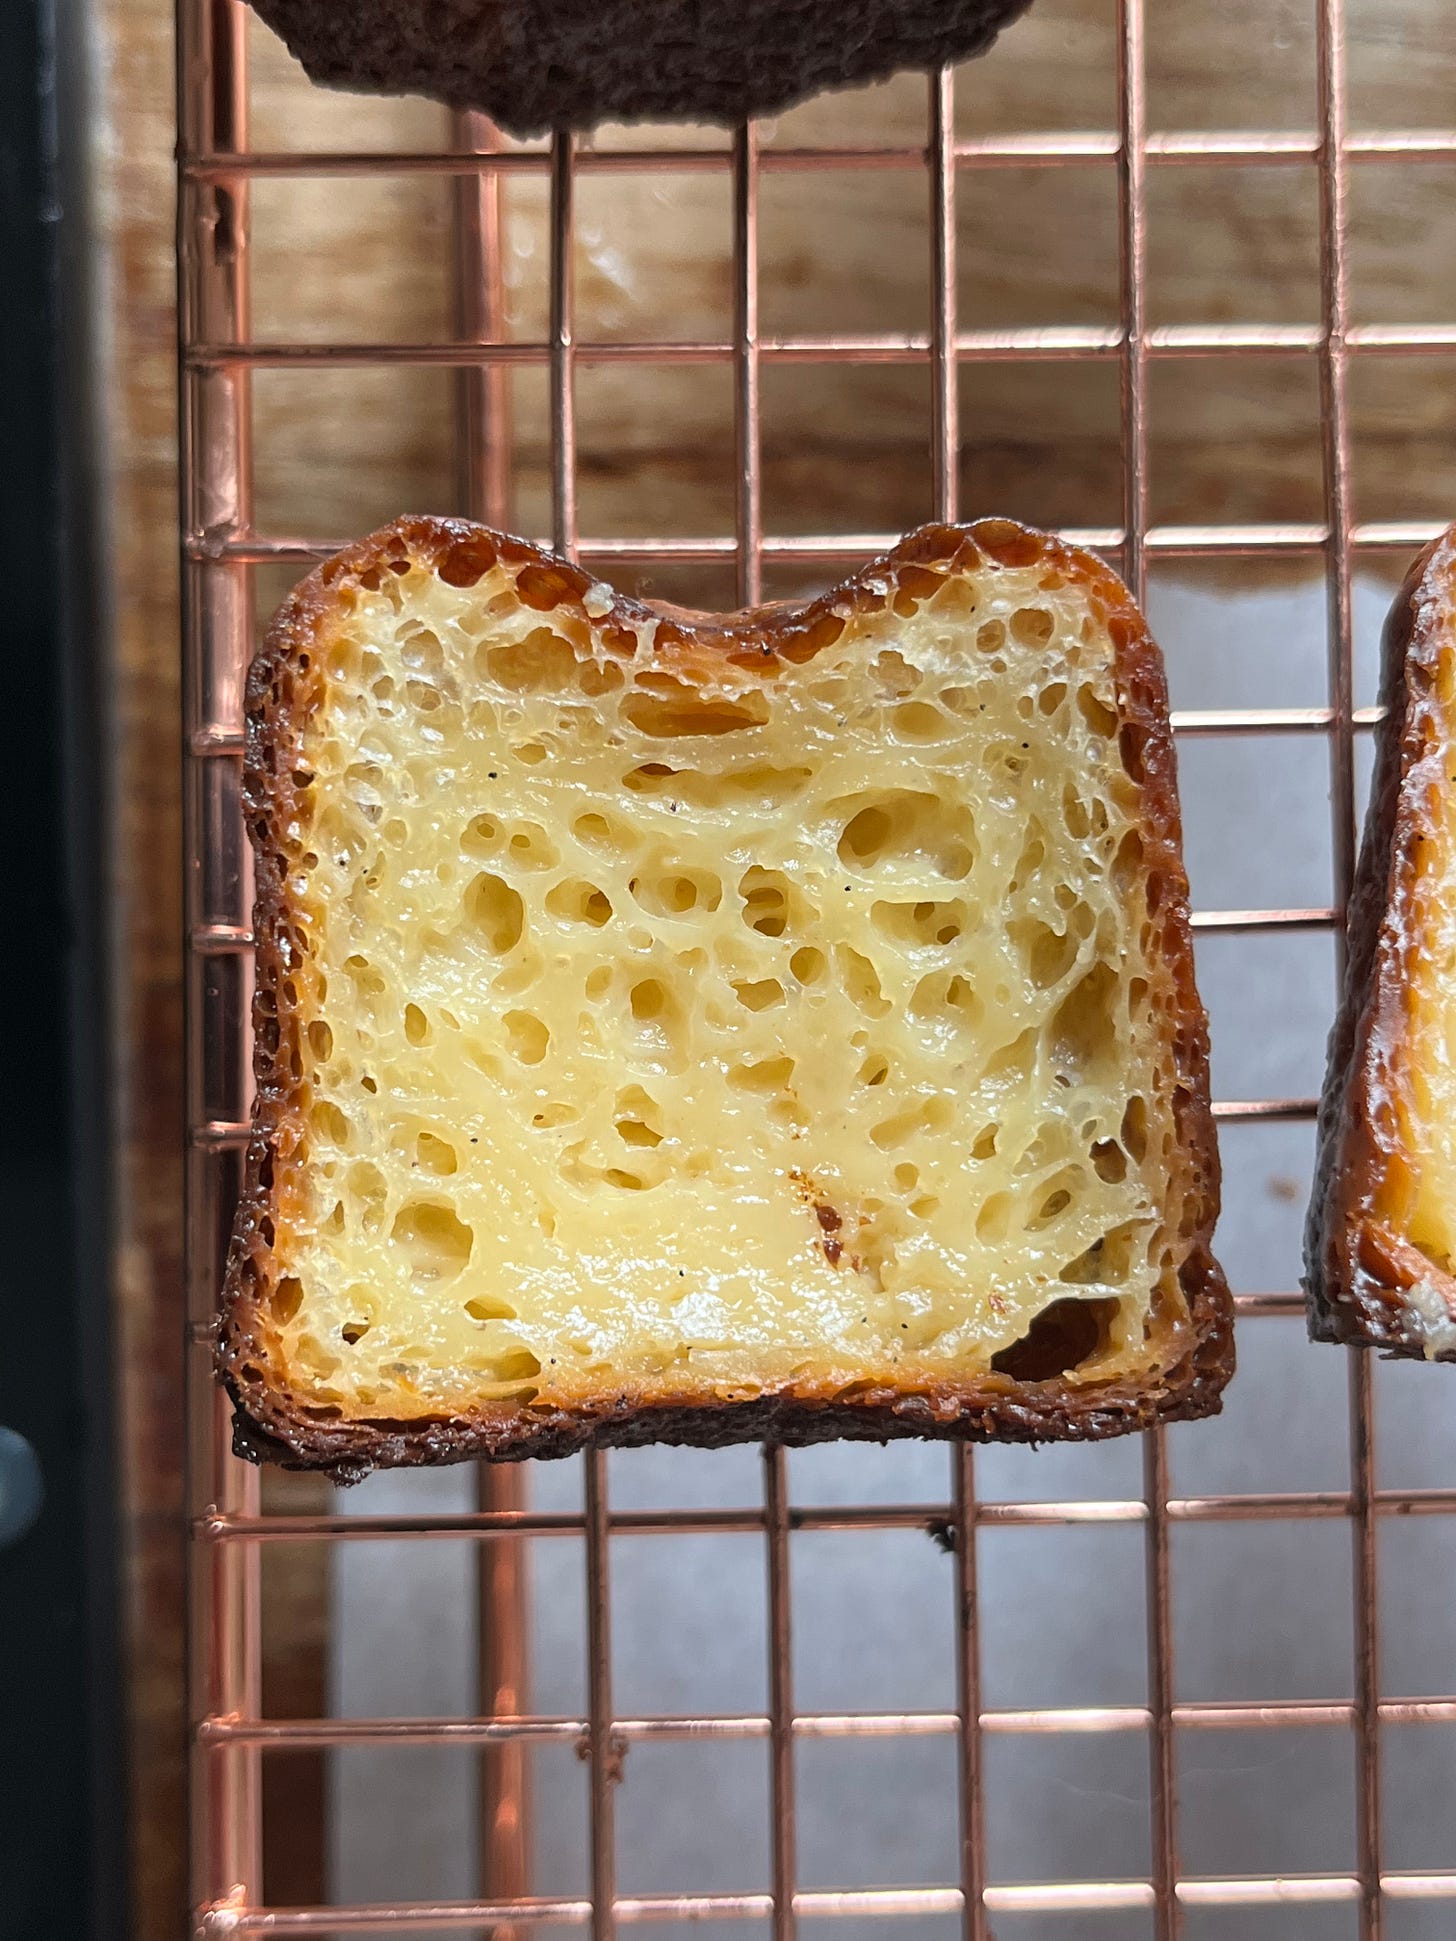
The canelés themselves were, in my opinion, indistinguishable from the ones mixed in the more traditional method. The only difference that I noticed was they didn't rise as much in the oven during the baking. By the end of the bake, there was no difference. Because I like the novel method and how tidy it is with a smooth batter than needs less stirring the next day, I vote Sable! Thanks, Marie and Christopher.
The deal with whisking
The internet warns us that overly aerated batter will cause the canelé to puff up, mushrooming as they bake. Recipes will tell you to avoid whisking completely. But I found this to be a red herring. I made a batch of canelé batter, whisking the eggs with the sugar and incorporating the rest of the ingredients with reckless abandon. "I've totally ruined these", I thought gleefully. "These will make a perfect example of what NOT to do."
But I baked the batch, and… lo and behold, they were fine. They behaved. They were, I daresay, good. What on earth? I thought air was the enemy? Well, the thing is, I think it probably is to some degree - if you whisk your eggs and sugar to a sabayon and then incorporate the rest of the ingredients then yes, this might affect the texture. But a "normal" amount of whisking and incorporating should make very little difference.
I did however run into a batch that mushroomed like crazy. But we'll get to that during the baking section.
Resting
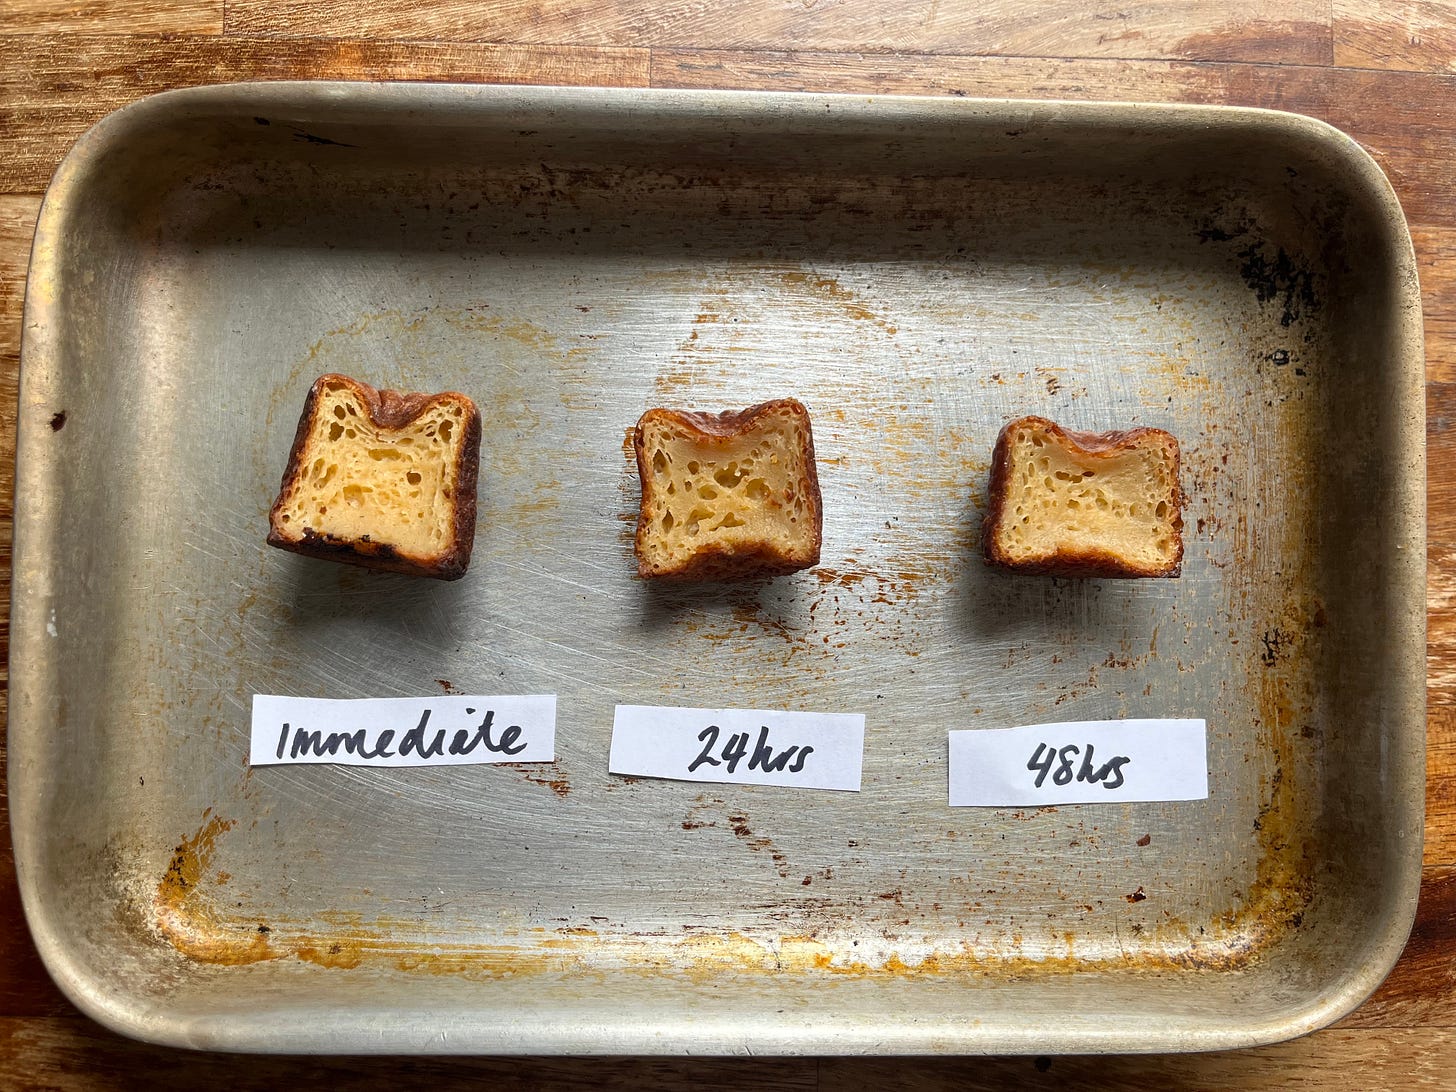
A hotly contested topic is how long to rest for the canelé before baking. As the batter rests, the flour fully hydrates, and the glutenin and gliadin proteins present in the flour absorbs the liquid and form gluten. As it rests, the batter does get thicker and sometimes separates - a floating raft of flour and butter tends to form on top whilst the less dense milk and sugar fall to the bottom. Before baking, this must be reincorporated. According to Harold McGee, there are enzymes present in egg yolks and flour that break down starches and proteins, meaning the batter does develop over time and improves its capacity for browning.
Immediately bake
I found that canelés baked immediately gave me the tallest, airiest canelé. They did have slightly less crust and shine, too. There was a dullness to the crust. This might be due to the fewer sugars present
24 hours
After 24 hours, the canelé batter gave me a thicker, shinier crust. It doesn't rise as tall and has a dense centre. It also weighs less after baking. It is slightly more fragrant from the longer infusion period.
48 hours
After 48 hours, the canelé batter is similar. It is slightly more fragrant from the longer infusion period.
In conclusion: One thing I did notice was that my batters got shorter with each resting period but weighed more per canelé post-baking. I can only assume this is due to the water present in the batter being 'spoken for' during the rest period - it has bonded more strongly with the other ingredients. So, in my opinion, I think a short rest is worthwhile for improving the crust. But a full 24 hours? 48 hours? Not necessary. IN MY OPINION. I think you can bake the batter right away and be happy with the results, though a fridge rest for some 4-12 hours is probably sensible.
Moulds
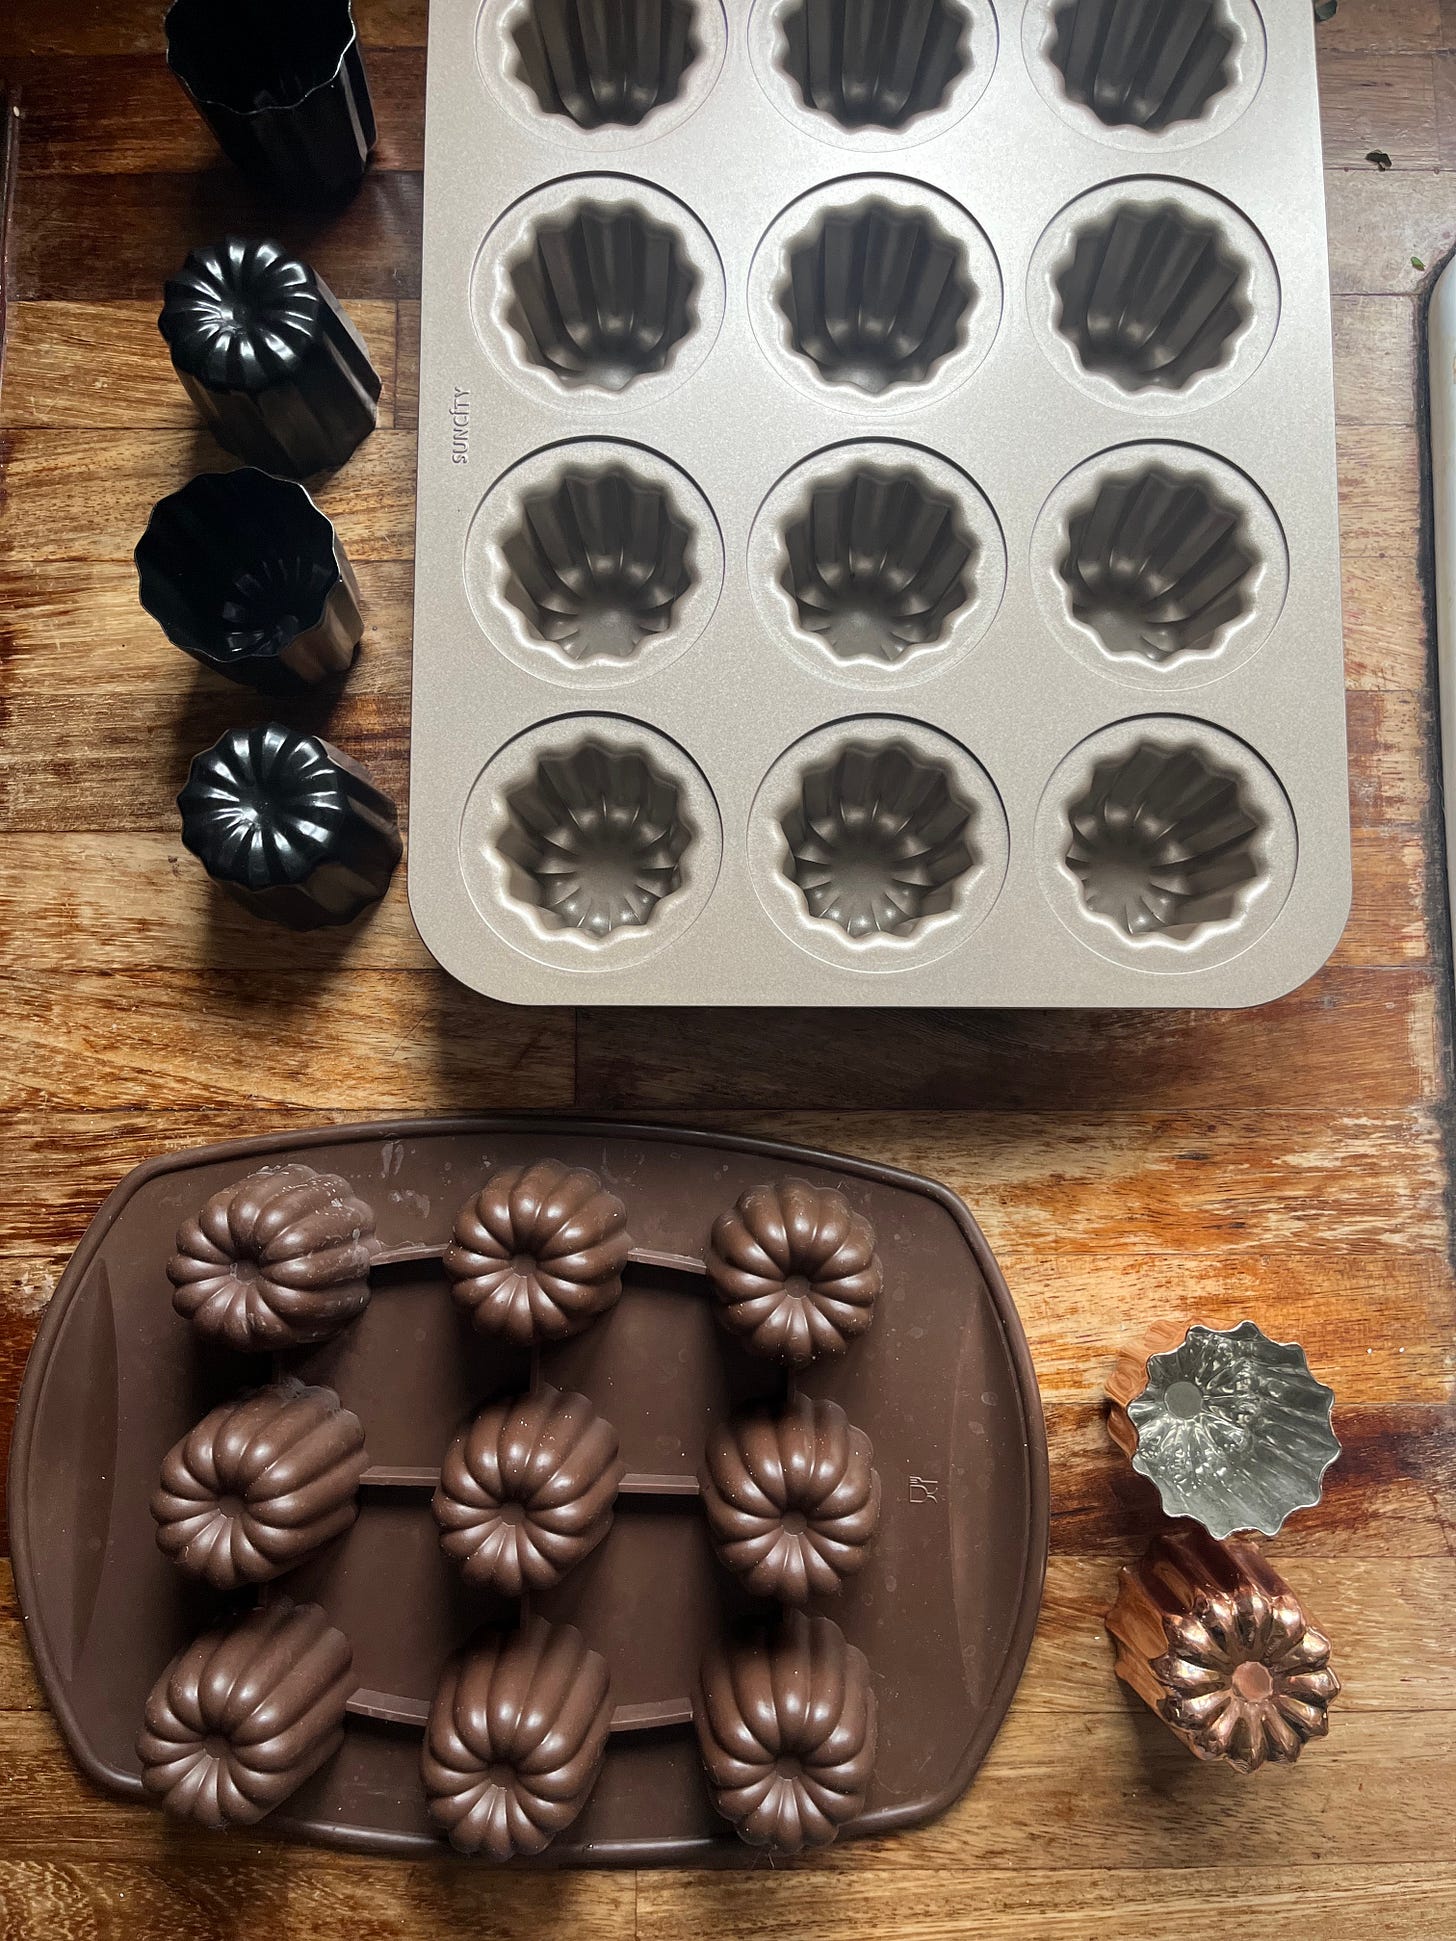
I know that one of the major barriers to entry for making canelé at home is the copper moulds. I'm sure that much canelé enthusiasm has been dashed at the checkout page. Traditional copper moulds will set you back £15 - £20 per piece. Even for the most dedicated canelé fan, that's got to hurt. Copper is desirable in cooking, be it pans or these little moulds, because it both heats and cools quickly. In theory, this susceptibility means that when working with fussy sauces or delicate cuts of fish or meat, you have a higher degree of control. And let's be honest, it looks beautiful.
It's no surprise then that copper is ubiquitous in french cuisine, and France is the biggest producer and purchaser of copper utensils. Copper's history extends far into the past and beyond France - copper utensils and tools dated to 8700 BC were uncovered in Iraq.
The various pros and cons of copper are much disputed especially given the high ticket price. However, when it comes to food, there is something that is truly priceless: Tradition. And the value that you personally assign to that is going to differ from person to person. Can you make great canelé without copper and without beeswax? I personally think so. But I know there are going to be plenty of people (probably most of the Bordelaise population) and bakers that think a canelé without the copper and beeswax is simply not a canelé.
There are, of course, other options (though honestly none of them are that cheap! It’s a bit of a racket!). Let's run through them all.
Copper
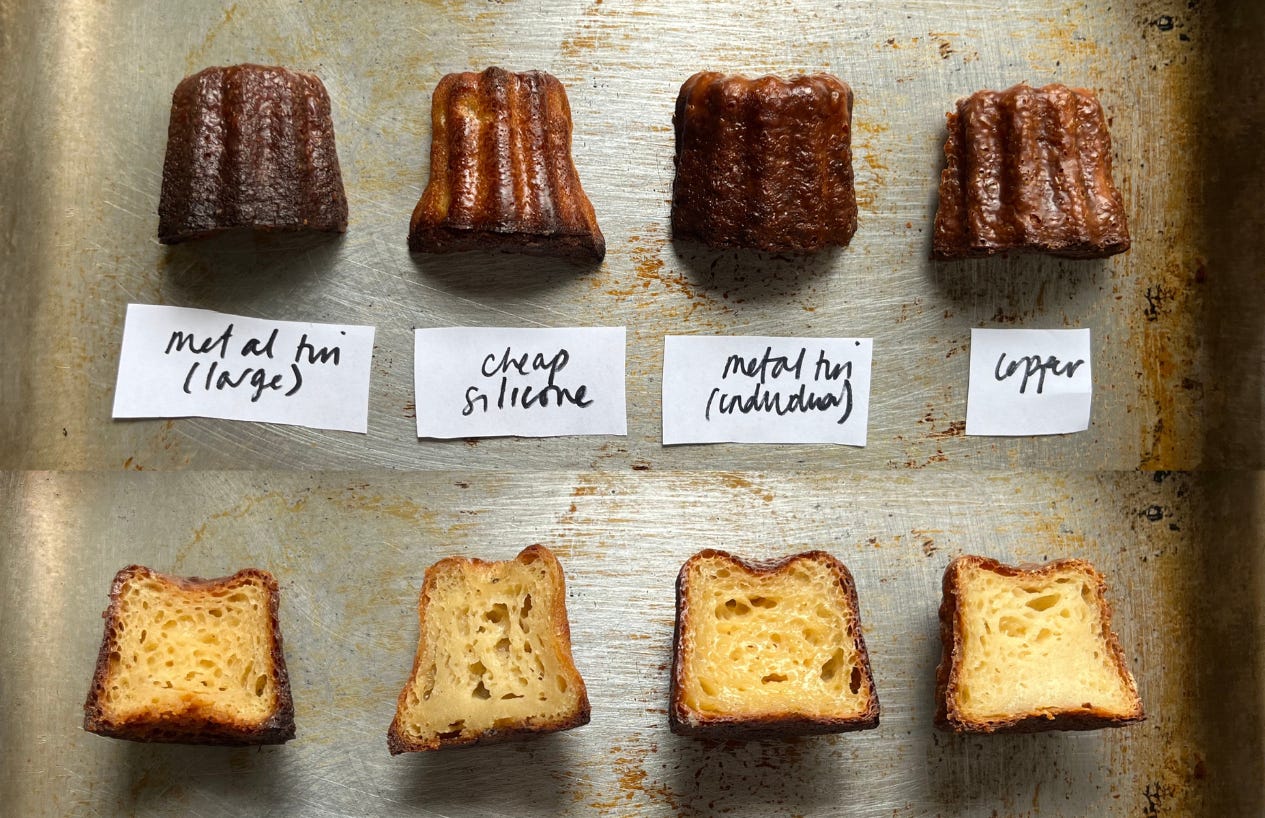
There is no disputing that these are the most beautiful to look at. However, I found baking with them surprisingly inconsistent. The crust was slightly more crackly, and the pattern more defined. I have these ones.
Silicone
I tested both fancy silicone and a cheapy mould. The fancy silicone mould is made with layers of metal powder which improves conduction and gave me good results! The cheap mould gave me quite poor results, it was very flimsy.
Nonstick steel
Individual moulds
Most of my tests were in these moulds. I think they are reliable, give a great shape and bake really well. They still need greasing, but I think they are good value for money for what you get. I warn you though - they are not created equal. I had great results with these ones and not so good results with these ones.
Tray mould
These moulds are slightly smaller in volume than the individual moulds, and with the thick metal, I found they gave a great crust, probably the thickest and most toothsome one out of all the moulds. The heavy metal holds heat extremely well. One of my favourite batches of canelé was baked in this! I would definitely use this again for ease. They still need greasing. I have this one, which makes smaller canelé that I loved, but im sure any similar one will work.
Mini moulds
I have a mini silicone mould. Proceed with caution - mini canelés should be put into a preheated oven with a high temp, then immediately lowered. Otherwise, the crust becomes too thick. I didn't have time to experiment that much with this one. I'll report back!
ANY OLD MOULD
Please don't think that you need to buy special moulds to enjoy canelé. Deep muffin tin? It'll work, but the proportion of crust to the centre might be off. There's a reason that the canelé mould is the shape it is. Try finding something that is tall and deep. Otherwise, you get all crunch and no custard.
Greasing moulds
The greasing or 'seasoning' (which sounds nicer?) of the moulds will depend on which moulds you have. As I found out the hard way, trying to wax a nonstick stainless steel mould ends in tears (and by tears, I mean wax strewn throughout the canelé). I think there are three clear factors to judge the grease situation by: 1. Release factor 2. Favour and 3. Ease (the effort/pay-off ratio)
I'll talk you through the options.
Beeswax
The traditional method is to use beeswax, which, I know, to the uninitiated, might seem totally insane. It is actually fairly easy to source online or in a health food shop. Although I'm sure you can find beeswax with fragrance and aromas, the beeswax I've worked with in the past has been very mild.
Reading up on copper moulds, and from my experience working on the opening team of Dominique Ansel in London, first-time use of copper moulds requires you to season the moulds - this is a process of heating up the copper moulds until very hot (it's quite fun to see - the copper goes technicolour when really hot). One by one, the moulds are filled with melted beeswax, which is then poured out immediately into the next mould and so on and so forth. After each mould is filled, it is turned upside down so the excess wax can drip out. These are then returned to the hot oven for a few minutes. This process can be repeated up to 4 more times, depending on whose directions you are following. Once this is finished, you shouldn't have to repeat this again.
When you're ready to bake, assuming some time has passed since your first season, you need to do a 'lite' version of the seasoning process. Marie Frank, the bonafide canelé queen, told me that she heats her moulds to 85c - much more sensible than the terrifying 170c that most recipes suggest - and pours in the melted beeswax, letting it sit for a brief second and then pours it into the next mould (and so on and so forth, topping up the beeswax if it no longer fills your mould), leaving it upturned on a wire rack with foil underneath. As the mould cools, a thin shell of beeswax should be left behind. Depending on who you speak to, this might be repeated up to 3-4 times.
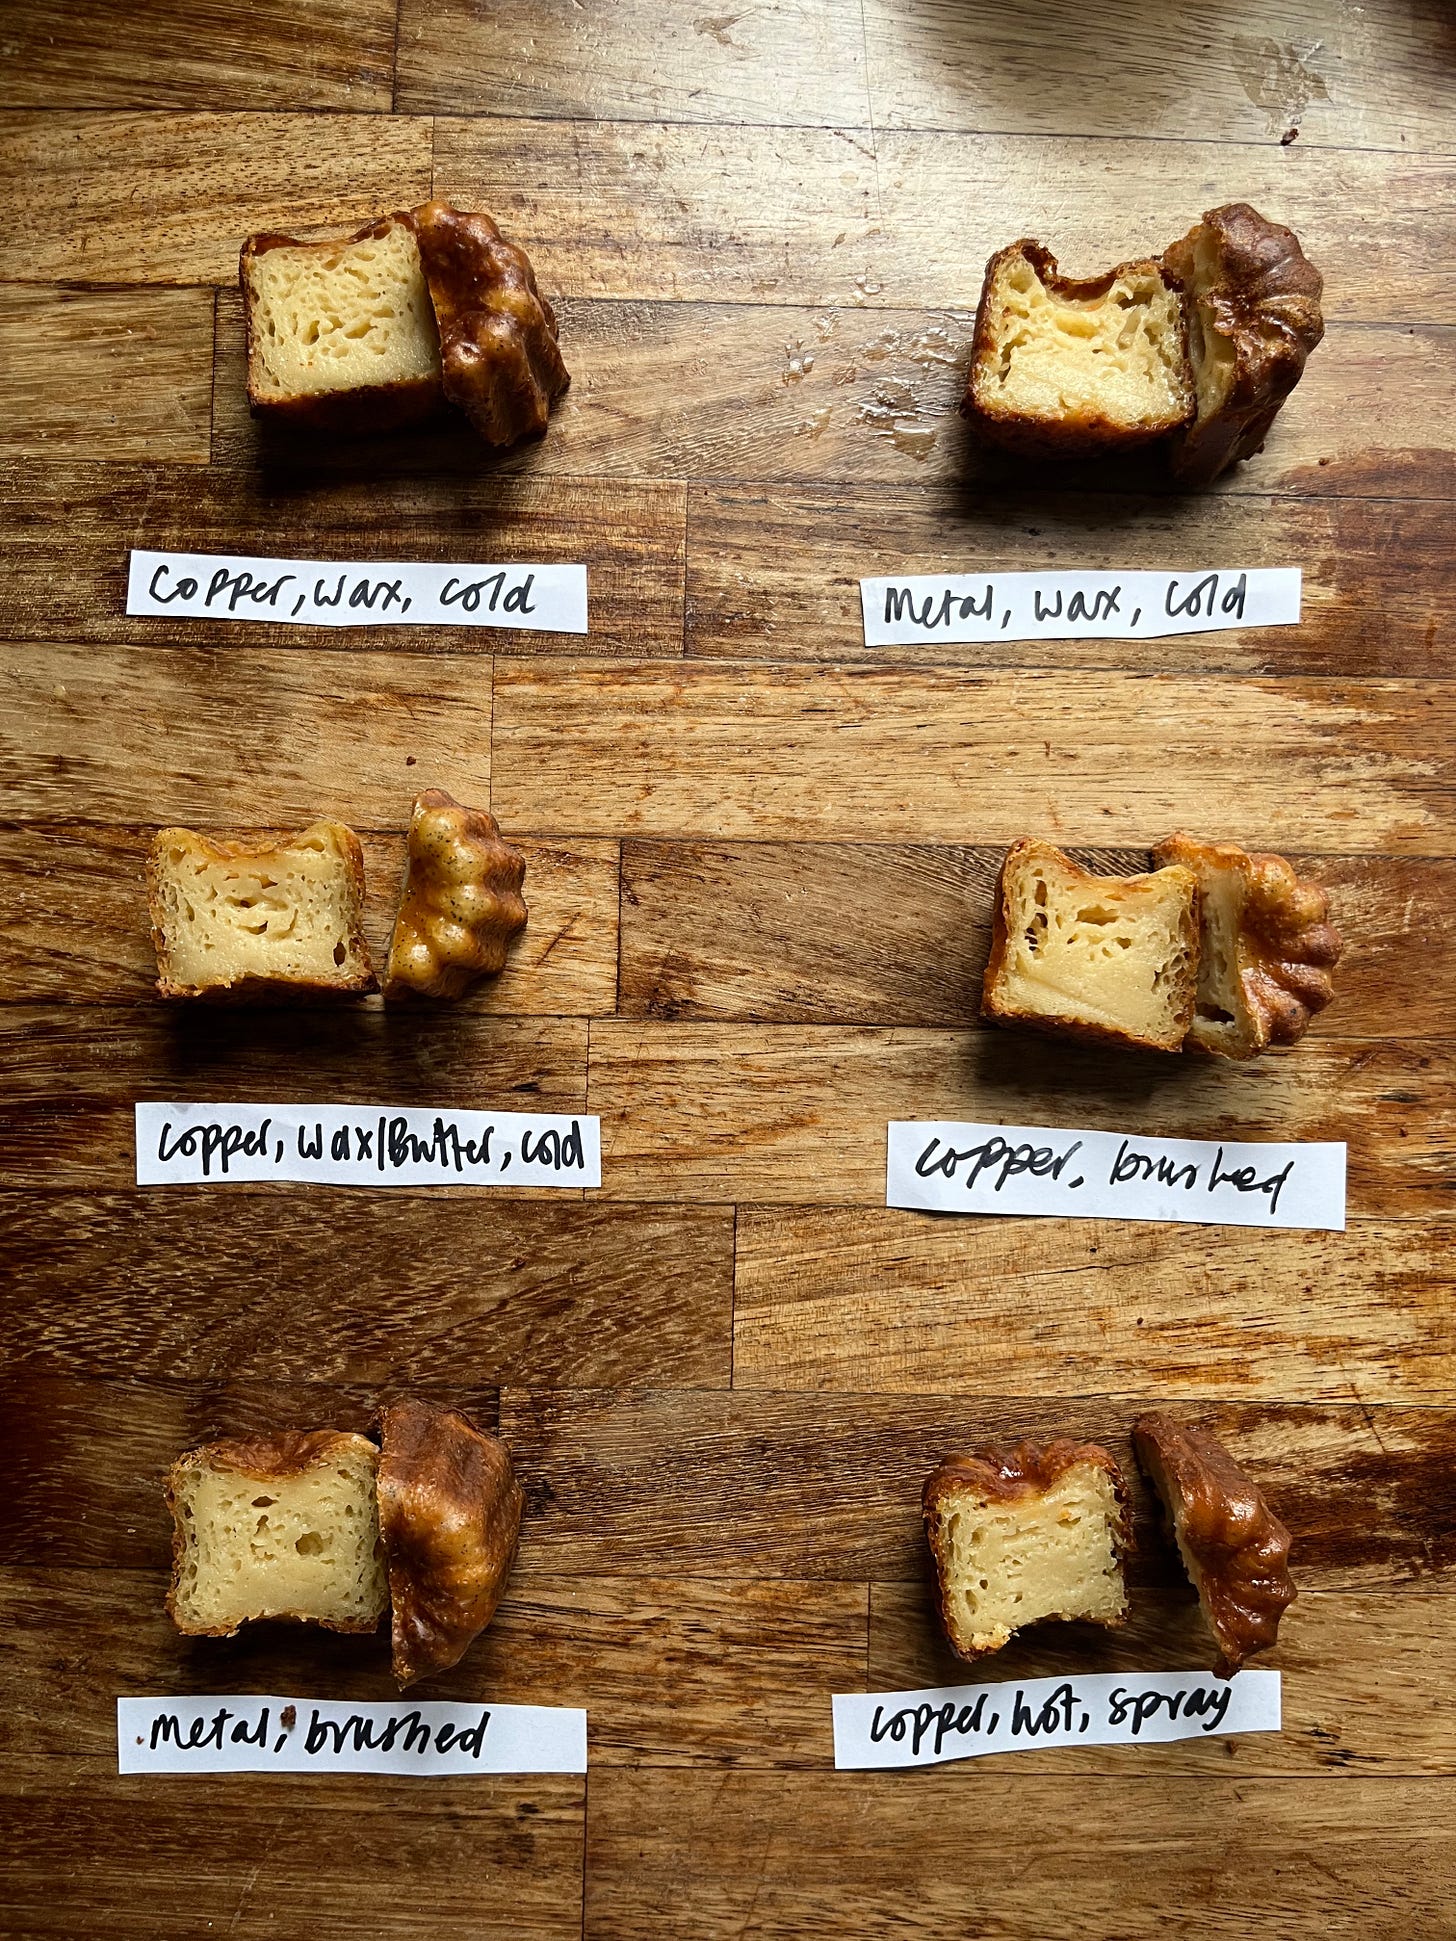
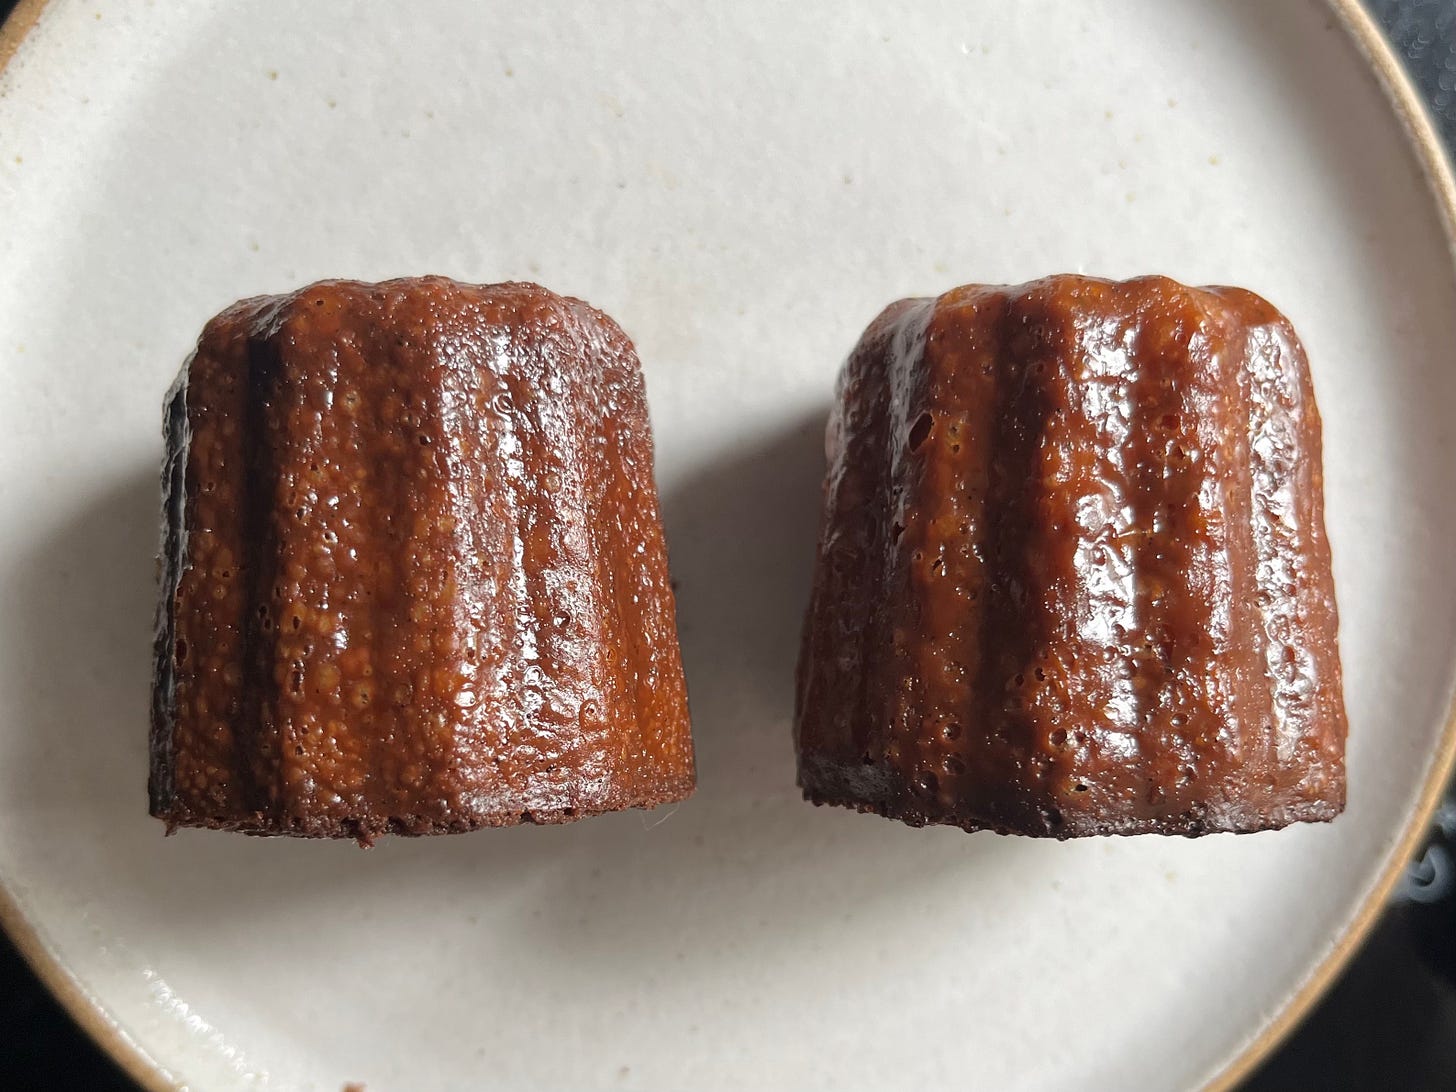
At this stage, some recipes will ask you to freeze your moulds to help maintain the thin beeswax layer to "properly" coat the canelé whilst baking. I'm not sure how necessary this is as I got good results with a room temp wax-coated moulds. Can you tell which one was from the freezer?
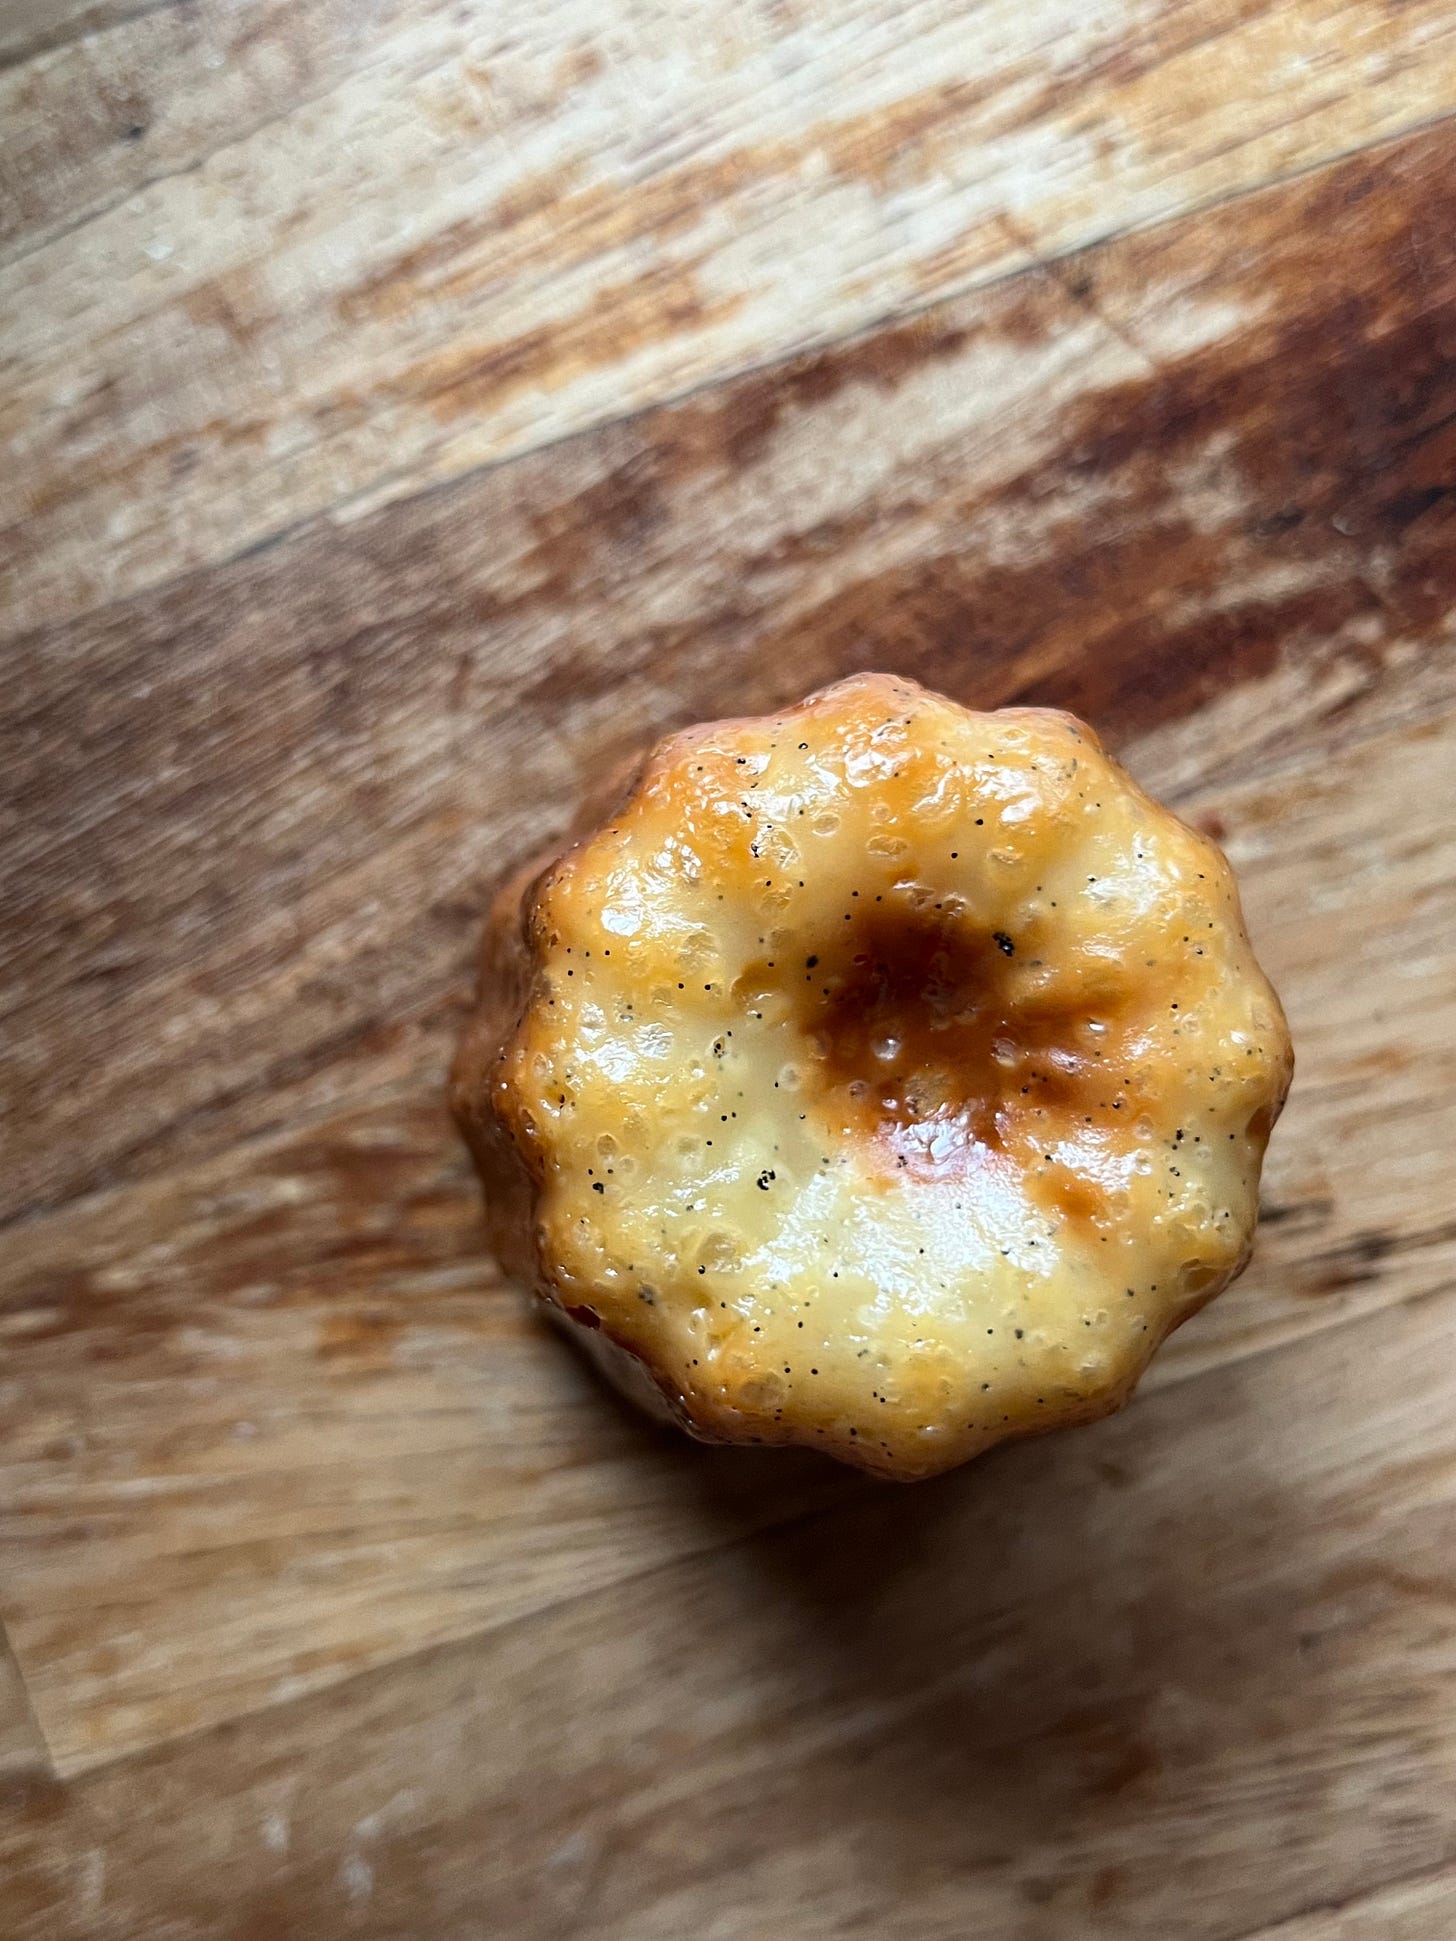
Though I hated, HATED the lining process, I have to admit that when it comes to using copper moulds, ones properly coated in beeswax did give me a fantastic result. There's a reason this finicky method has stood the test of time - the canelé released easily and had a beautiful colour, a thin, crackled shell. There was no significant flavour improvement, in my opinion.
Release factor - 10/10
Flavour - 5/10 (neutral)
Ease (the effort/pay-off ratio) - 5/10
Butter
When using butter, it's sensible to clarify it first. As we know, butter can be browned at high temperatures to great effect. And although we are seeking those browned flavours through the milk, butter tends to scorch the outside of the canelé resulting in uneven colouring. Clarifying butter is the process of melting butter, skimming off the whey protein foam on top, and then pouring the pure fat off to carefully separate it from the milk solids, which sink to the bottom.
Canelé moulds coated in butter only gave me a good result, the canelé
Release factor - 8/10
Flavour - 6/10
Ease (the effort/pay-off ratio) - 5/10
Beeswax/Butter
Another favoured combination is the beeswax/butter combo. This was also effective. I didn't notice much difference in terms of flavour. The results were good. 8/10
Release factor - 8/10
Flavour - 6/10
Ease (the effort/pay-off ratio) - 5/10
Brushing on
Some recipes suggest brushing the moulds with warm beeswax but this is a fool's errand. The beeswax sets more quickly than is possible to brush evenly, even if the moulds are preheated. It's a no from me. 0/10
Release factor -0/10
Flavour - 5/10
Ease (the effort/pay-off ratio) - 0/10
Spray
I have to tell you something: I capital 'L' LOVE grease spray. And I don't care who knows it. Professional 'release' or grease sprays are dearly loved in pastry kitchens and bakeries alike. From lining soda bread tins with oats to ensuring mini bundt cakes come out in one piece, grease spray is really the beating heart of many baking operations. And do you know what one of the ingredients of grease spray is? Wax! Carnauba wax to be exact. It's incredibly reliable, flavourless and gives you great results every time. Although the copper moulds we used at one patisserie were seasoned with beeswax at the beginning, for the daily bake, we used a high-quality wax/oil spray.
Certainly, for the stainless steel tins, most of which have been coated with a release agent (though not enough for you to use no grease, as I found out the sticky/hard way), grease spray is the only option. Neither butter nor beeswax adhered well, but I had every time success with the oil spray every day. If you are like me and hate finicky jobs, then I really recommend investing in a good-quality spray. You won't regret it.
For me, the flavour is not noticeable and I got a great crust with the spray.
Release factor - 10/10
Flavour - 4/10 (neutral)
Ease (the effort/pay-off ratio) - 10/10
In summary: If you have the money and the time, copper and beeswax (or beeswax butter) is a great combination. But the stainless steel (weirdly I found the debuyer ones very poor, but this random brand + the tray mould really good) spray combo is what I’ll turn to!
The final frontier: The bake.
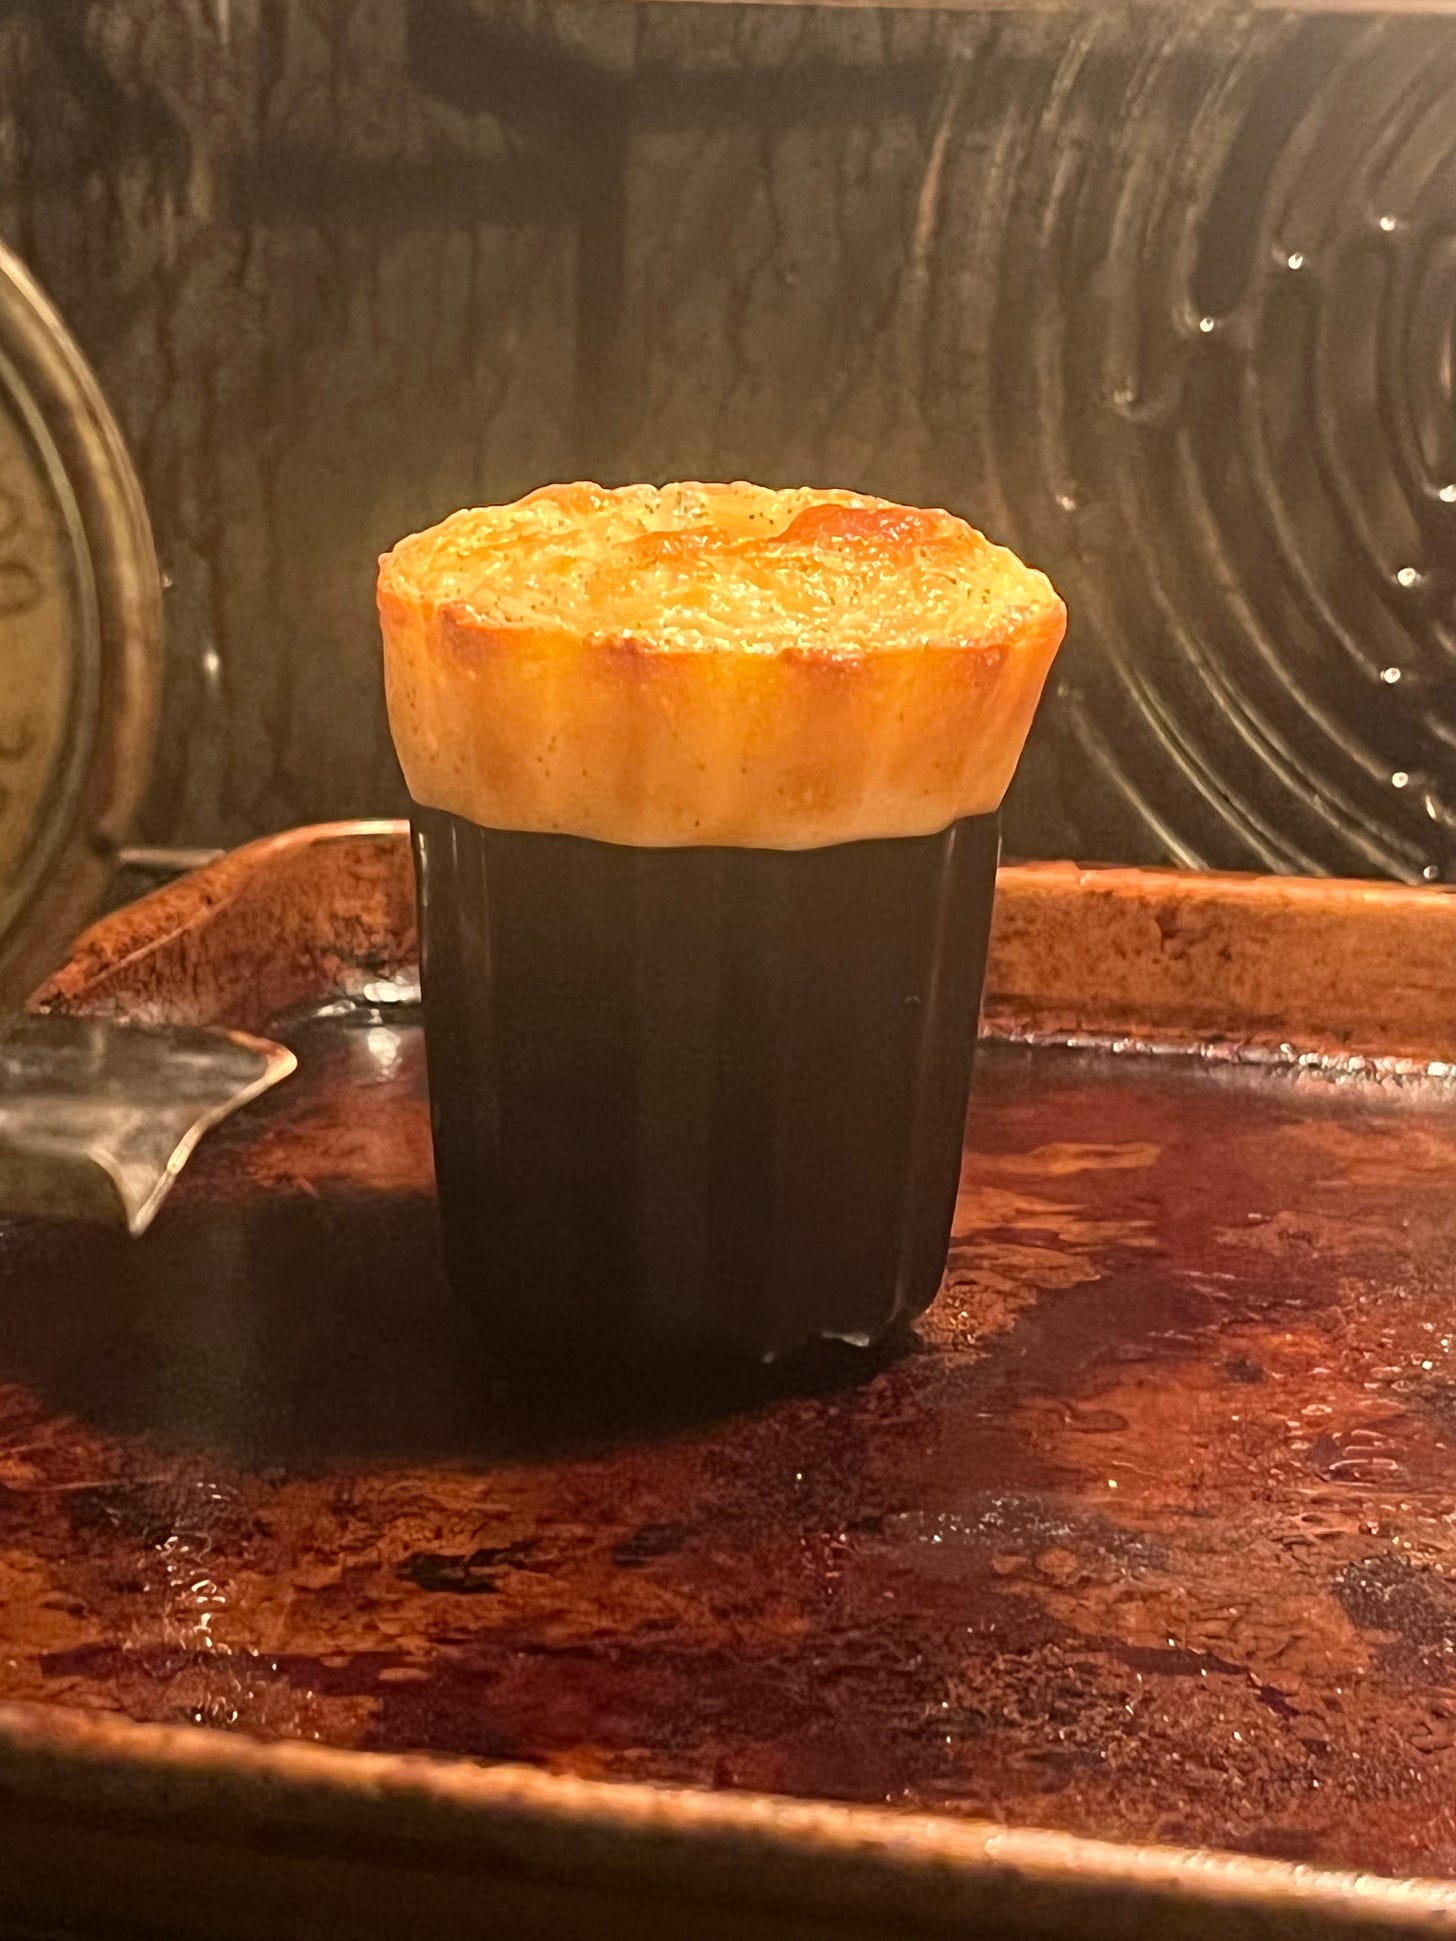
So, you know that whole topic of mushrooming I mentioned earlier? Well, even if you have seemingly everything right, it's during the bake that the canelé batter can bite back. It's only ten minutes into the bake that you'll find out if your canelé has decided to hit the 'eject' button and will attempt to escape. Like this:
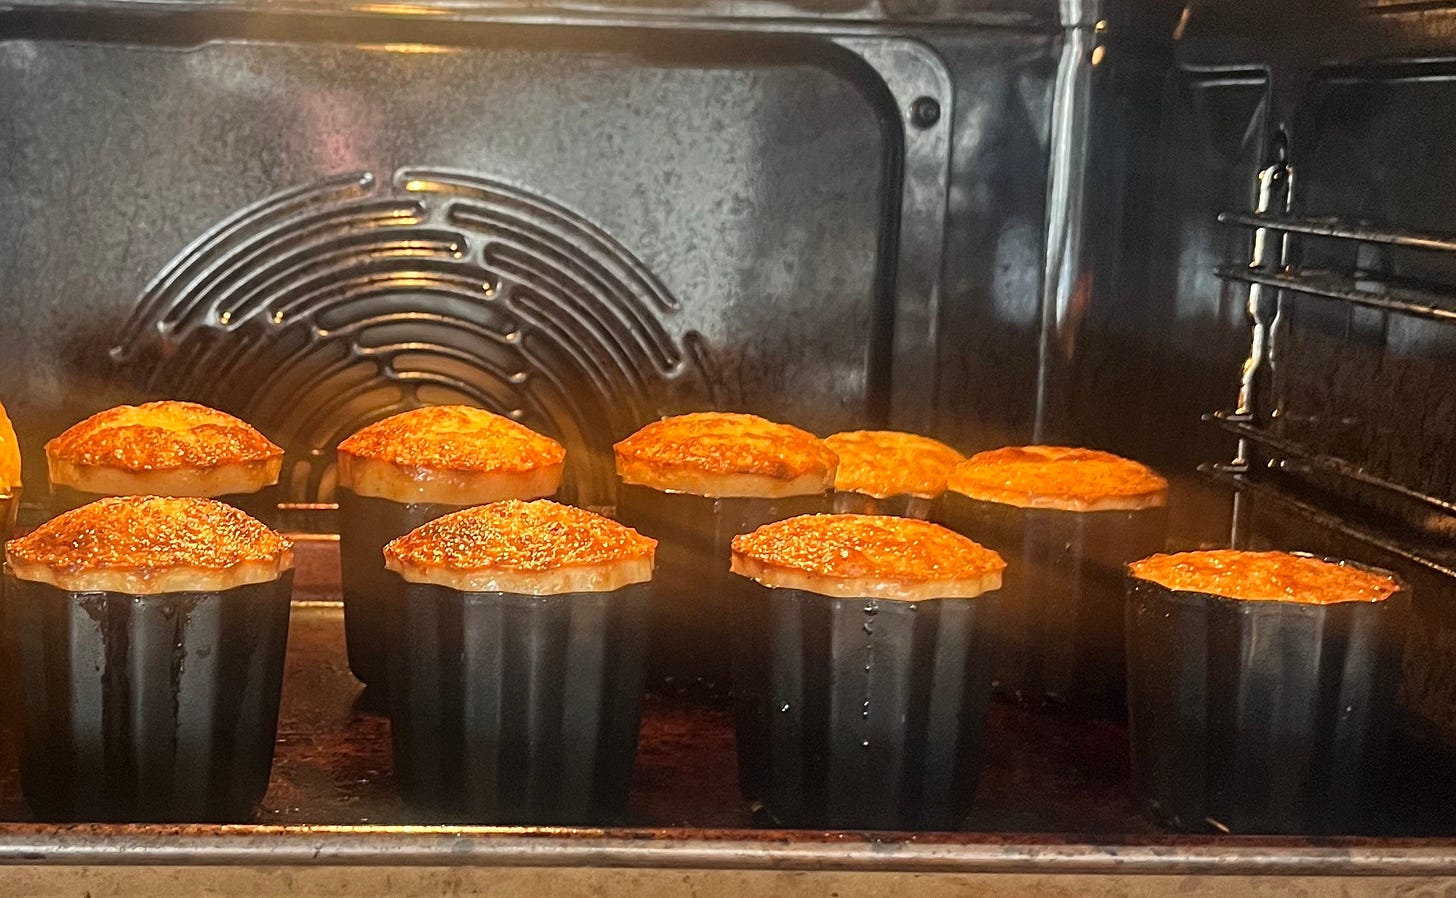
I made about 25 batches of canelé this week, and the mushrooming only happened to ONE batch. A single batch. And it wasn't the mixing method that was the thing that made the difference: My oven was not hot enough when they went in. I was keen to bake another batch because it was getting late, and instead of waiting for the oven to preheat, I threw in the batch, thinking - this would be fine. It was not. And since there was nothing dramatically different about the way it was mixed, I think the best insurance policy is to bake your canelé hot. And I mean hot!
Preheating your oven to a 230c (or even 250c if your moulds allow it!) fan is a good bet. And even better? Preheat your moulds, a little trick I picked up at Dominique Ansel. Now, this is impossible for the beeswax-coated copper moulds since it would cause the beeswax to immediately pool at the base, and pointless for the silicone moulds, but it is really effective for any of the other metal moulds (or copper, if you are not using beeswax). Just spray the metal moulds before you fill them.
The preheated moulds plus the intense oven temp help form an immediate crust. Plus, preheating the moulds should reduce the overall baking time a bit. I also found that my canelé batter at room temp, rather than fridge cold, puffed up less (in a good way). Though by the end of the bake, the difference was indistinguishable. Your canelé may dome or rise a little, but this normally corrects itself by the end of the bake - best thing to do is to not look.
But how long do we bake for? Well, that, my friends, is up to you. After a 15-minute blast, followed by at least 45 minutes at 180c fan, it's time to start checking your canelé. You might be like Pierre Herme and think a canelé needs to be almost black. Or you might prefer a more golden mahogany brown. How long this takes in your oven and how dark you like it is up to you. Once the moulds are emptied, you can wipe them out with a cloth to remove excess oils and bake again.
The 'cul blanc.'
So you've done everything to the letter, and you excitedly unmould your canelé to be greeted with a 'cul blanc' - which, crassly, translates as 'white ass'. I think this is often due to there being too much wax or oil. It can also be due to an over-aerated or poorly formulated mixture lifting up and out of the moulds.
Either way, it's such a ubiquitous issue that it has its own slang term. If you do have a 'cul blanc,' then I think the best solution is to remove the canelé from the mould and bake with the 'white ass' proudly in the air (right way up) to brown. The canelé doesn't brown when the batter doesn't have full contact with the base of the mould.
Ok let’s make it!
Canelé recipe
Makes around 10 canelé
400ml Whole milk
1 x vanilla pod or 1 tbsp good quality vanilla extract
75g Egg yolks (or a mixture of whole eggs and yolks! See pic for the difference)
50g Butter
100g Plain flour
190g Caster sugar
3g salt
50g Dark rum (optional if you don’t drink alcohol)
Method (Thanks to Christopher Beattie of Faria Bakery and Marie Frank for this innovation!)
Heat milk with the scraped vanilla pod and bring to a simmer. Leave to infuse for 30 mins - 1 hour.
Whisk together sugar, salt and flour. Melt butter, then pour into the dries and, using a whisk, or your fingertips, incorporate until you get a breadcrumb-like consistency.
Re-warm milk to about 60c-70c if it has cooled down. Pour 1/3 into your breadcrumby mixture and whisk to melt the butter and incorporate. Pour the rest in, whisking until smooth. Next whisk in the eggs. And, Finally, add the rum.
Pour into a container and press clingfilm to the surface. Rest in the fridge for 4 hours or up to 48 hours. I haven't tested beyond this.
If you are using copper canelé moulds, make sure you season and coat ahead of time. You can read the description in the main body of the newsletter, or you can watch this youtube video (it's in Thai, but it's the best, clearest start-to-finish video of the process!).
Remove canelé batter from the fridge as you preheat your oven - reincorporate the batter as it will have separated.
Preheat oven and tray to 230c fan for 30 minutes (or 250c fan if your pans will allow it!). If you are using stainless steel moulds, you can preheat these at the same time. If you are using copper moulds and want to use oil spray, not beeswax, you can preheat these too. If you are using silicone moulds, you don't need to preheat.
If you are using beeswax, fill up your prepared moulds til 4/5th full and place them on the hot tray. If you are using silicone moulds, place them on the hot tray. If you have metal moulds, they should have been pre-heating with the tray. Either way, give a a good spray. Make sure there is at least a light coating on all surfaces of the moulds. Pour in the canelé batter (it might sizzle) until 4/5th full. In my moulds, this is around 85g.
Place into the oven and bake at 230c for 15 minutes. Turn the oven to 180c, turn the tray around (this also helps reduce the oven temp) and bake for a further 45 minutes. After this time, start checking your canelé. You can remove one from the mould. Do this carefully with oven gloves or a kitchen cloth. If it is coloured to your liking, remove all the others. If not, return to the oven and bake for a further 10 minutes - keep going until you’re satisfied!
Because all of our ovens are different, what works for me may be different for you!
Remove canelé from moulds
Leave canelé on a rack to cool for an hour, allowing the crust to form. Enjoy within a few hours or the crust will go soft. You can reheat and recrisp in a hot oven for 5 minutes.


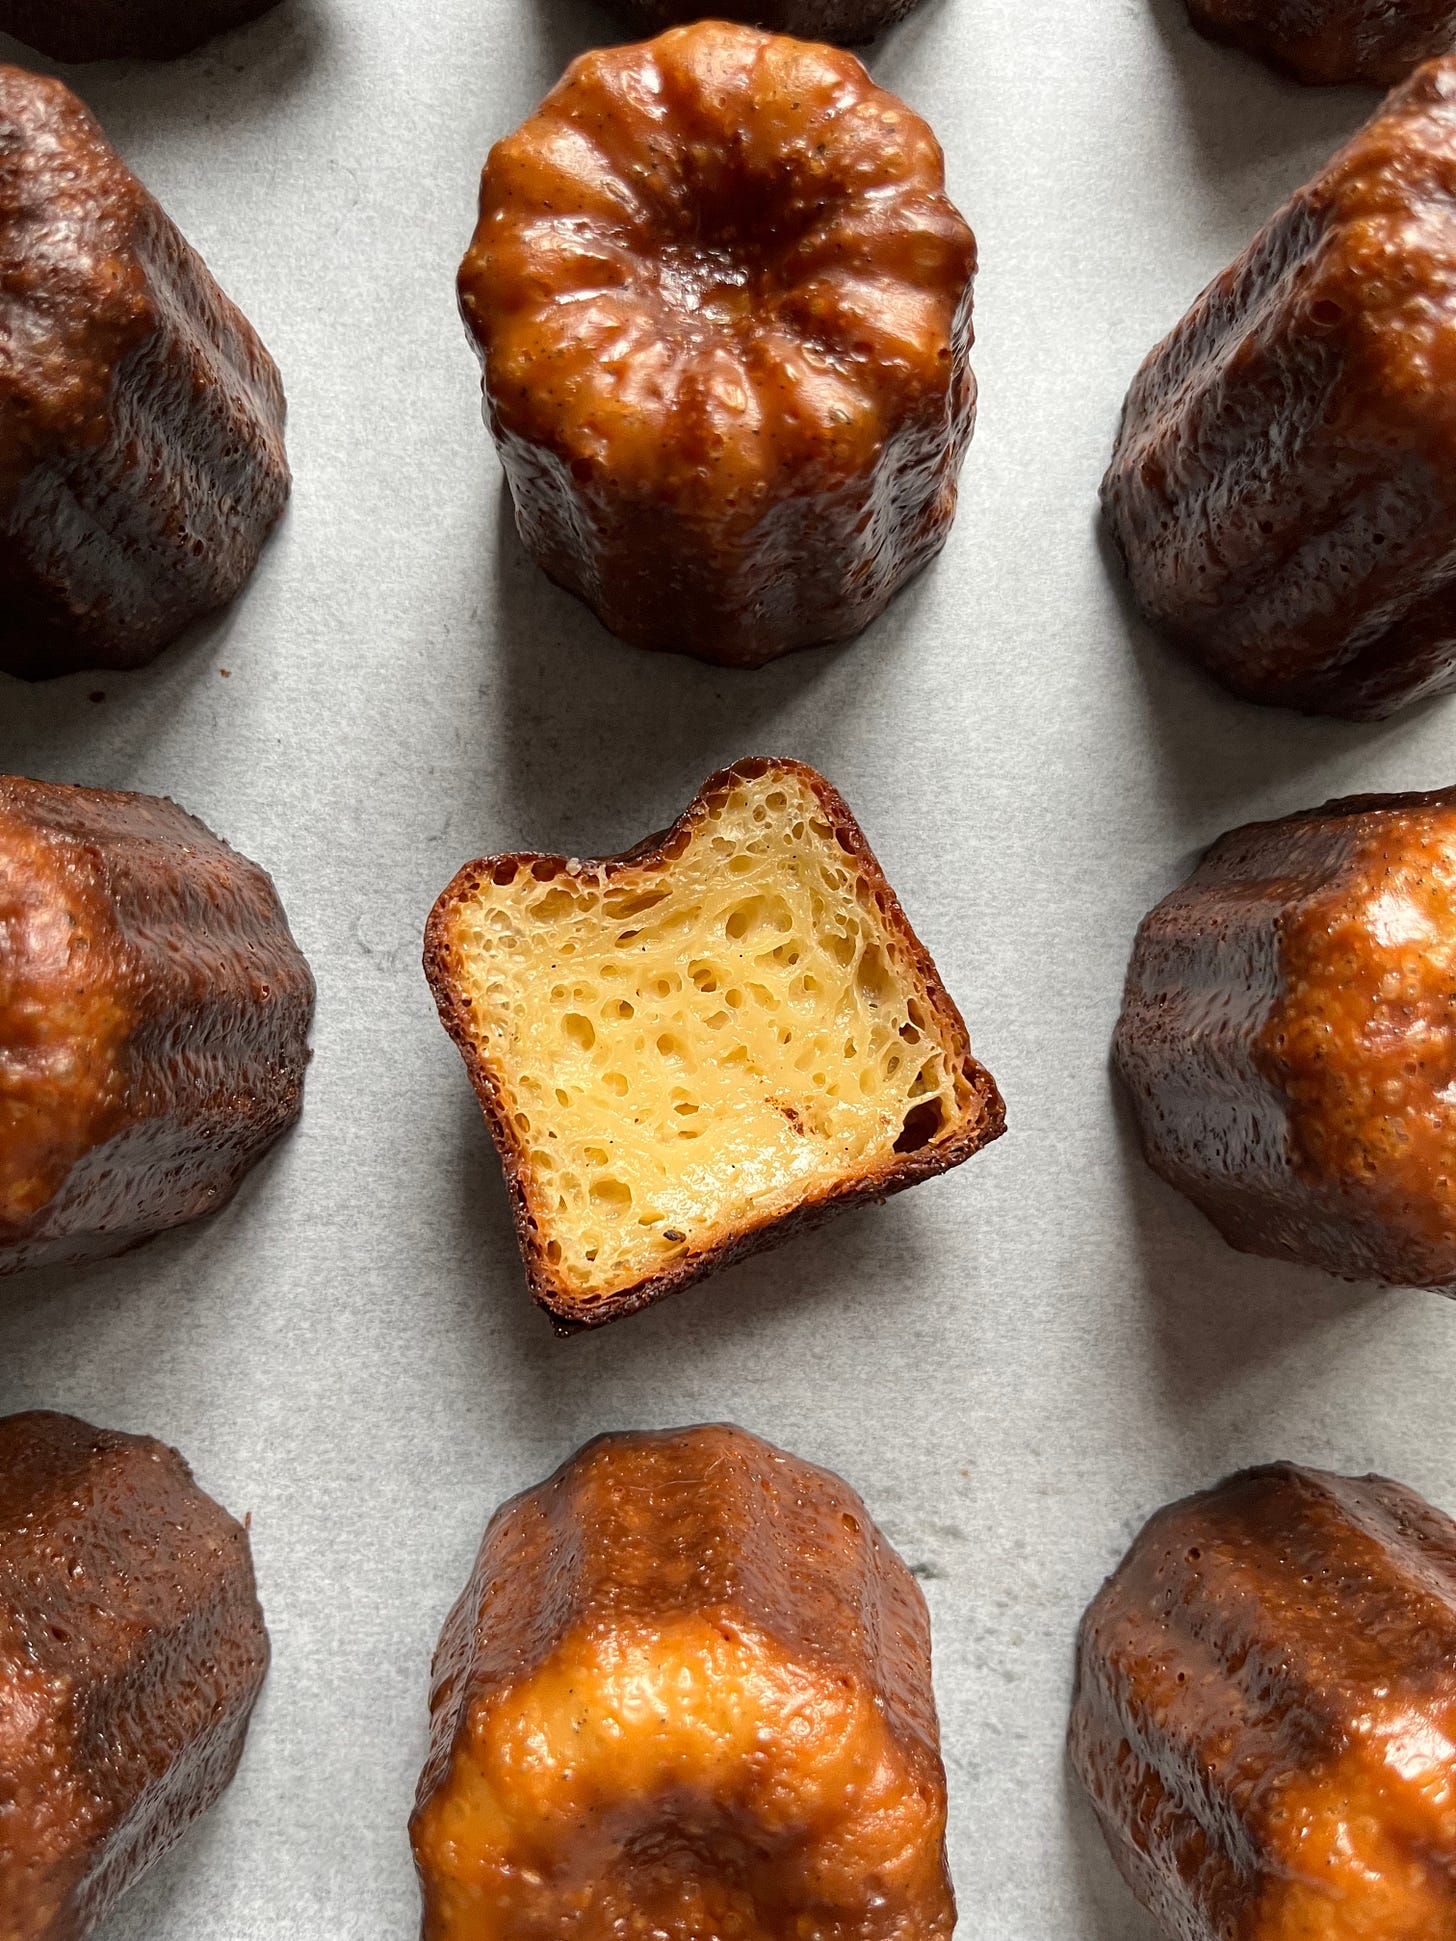
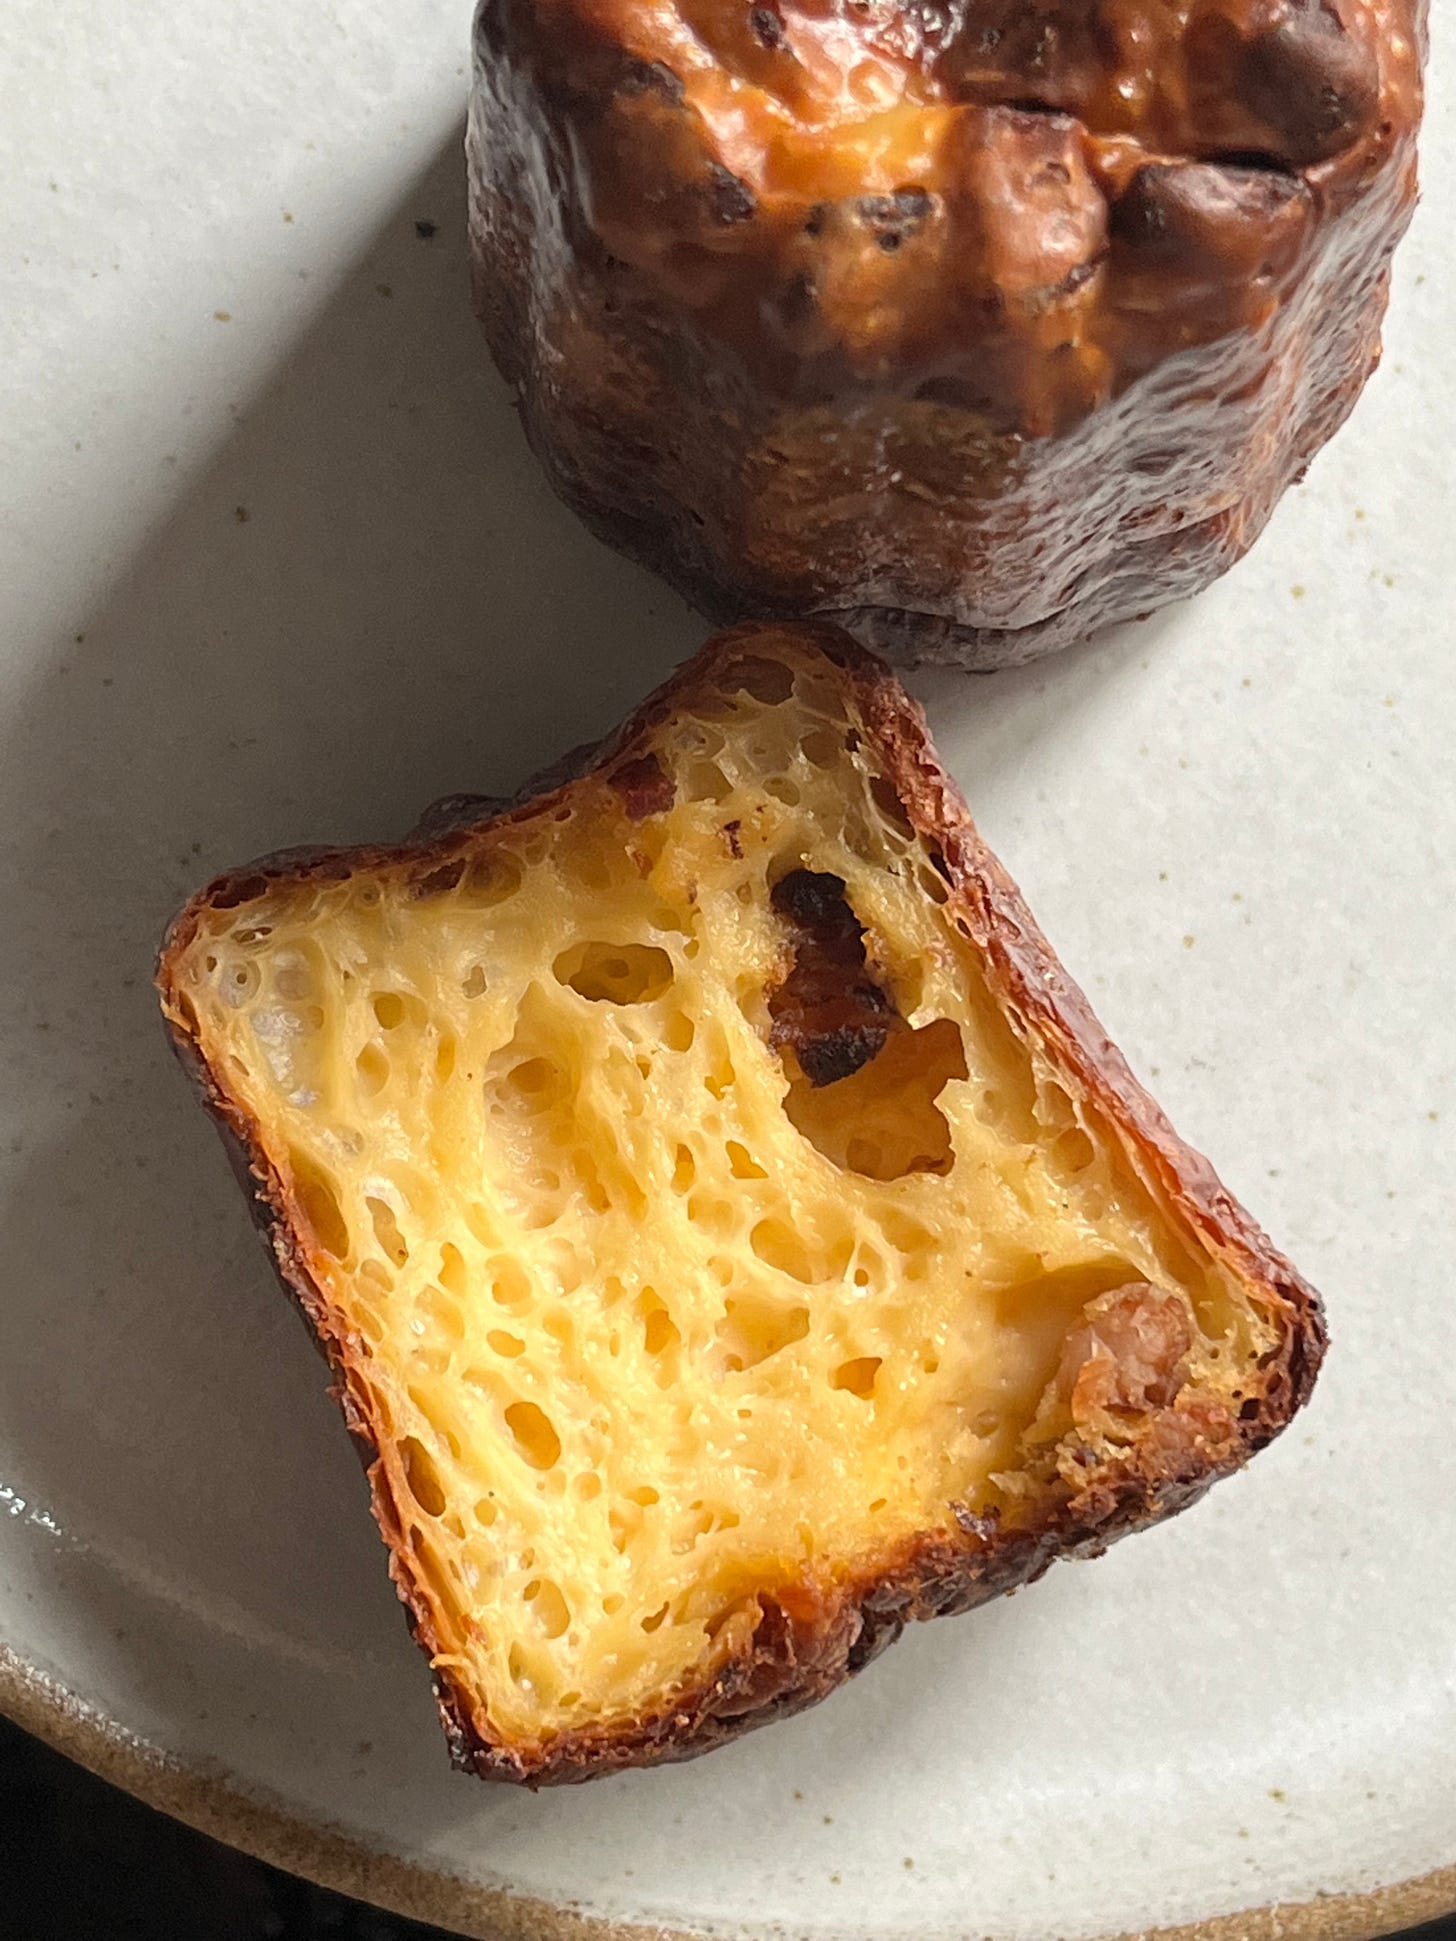
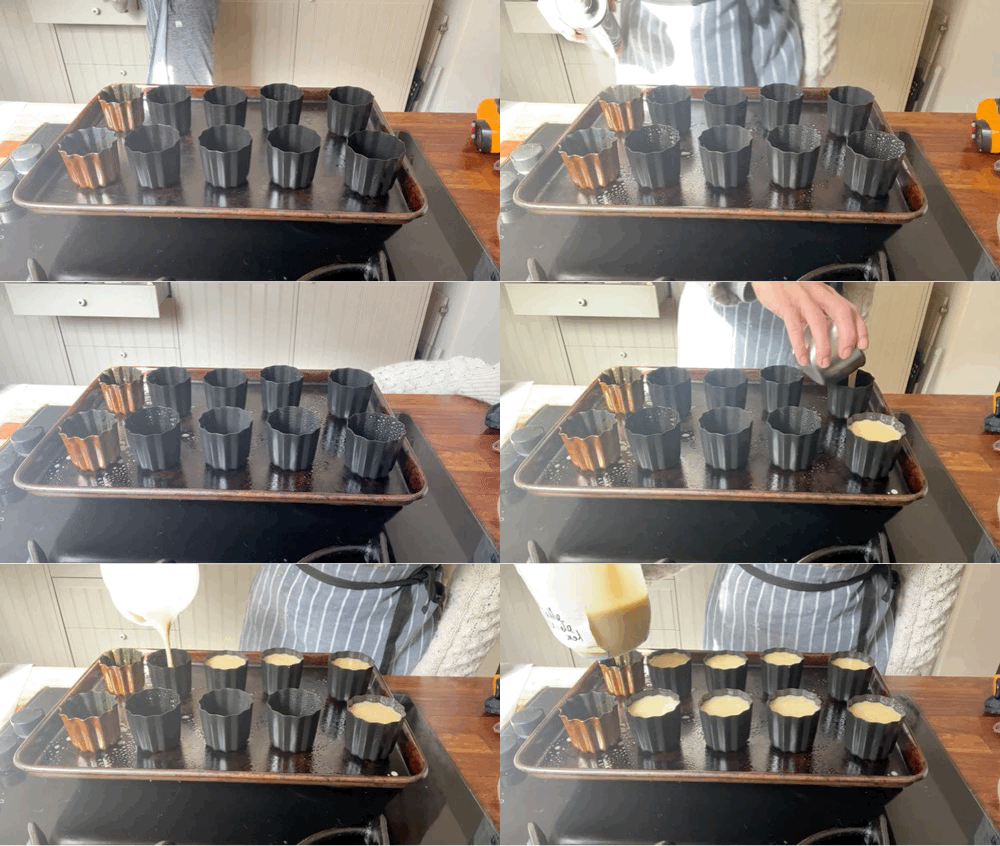
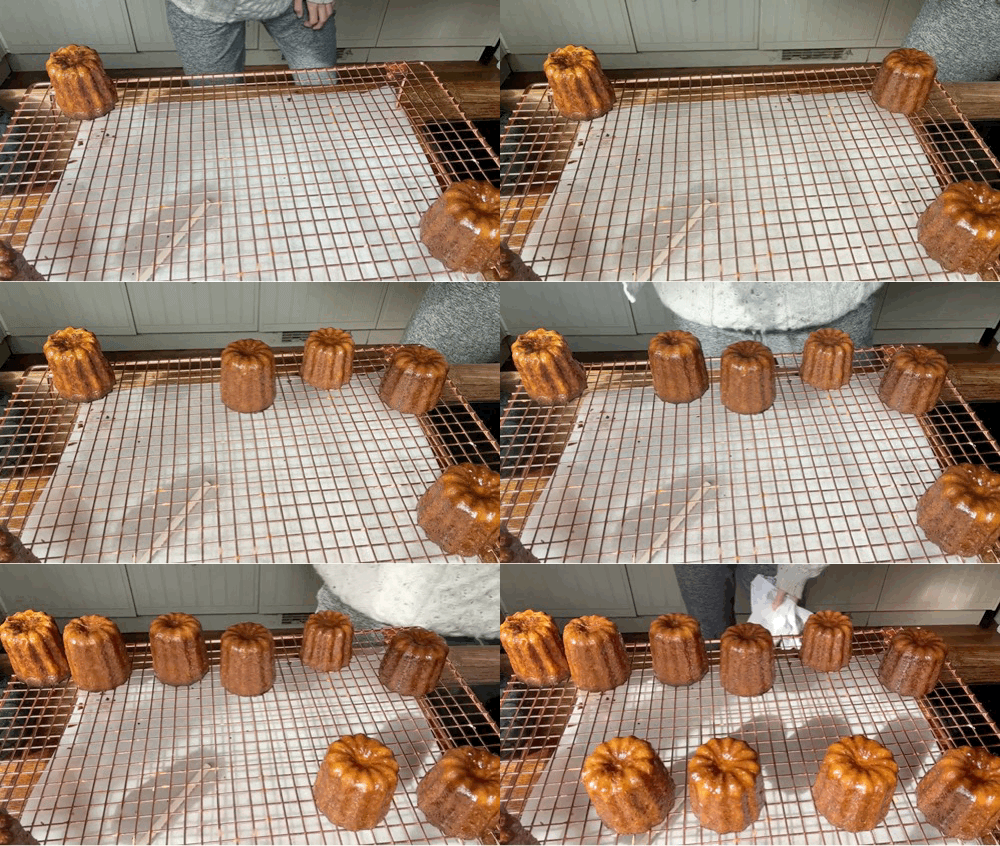
In the method (it was missing from original email) you add the egg/yolks after whisking in all the milk. It's now updated in the online version! OOPS. Happy Canelé making, everyone!
For anyone with silicone moulds - I have the deBuyer elastamoule moulds that come as 6 to a sheet. You don't need to wax these but as I had been gifted some beeswax by a lovely beekeeping colleague I decided to try. Nicola suggested 50/50 beeswax/clarified butter as we thought I would need to brush it on. Turns out what I actually found easiest was to fill 1 mould at a time then tip it back out into the saucepan of wax/butter - eg working from top right corner, fill, tip out over the corner, left corner repeat. The edge of the moulds gets messy but you can clean that up after. Aim for thin layers and build them up (to avoid too much pooling in the bottom) and try to avoid handling the sheet in a way that squashes the cavities as this will crack the wax layer.
PS a plastic bench scraper is your best friend when trying to clean up cold, solidified wax from work surfaces/sheet pans/stoves. Hopefully doesn't need to be said but don't let melted wax go down the sink or your drains will be deeply deeply unhappy!