Hello,
Welcome to today’s edition of Kitchen Projects, my recipe development journal. Thank you so much for being here!
I’m so excited about today’s newsletter because we’re back for a ‘teacher’ series. This week, I learnt about the world of Iced Biscuits with cake designer/artist Pam Jones, owner of Lemon Tree Cakes.
Over on KP+, and keeping in with the whole V-Day theme, I’ve got something soft and squishy you can make for yourself or a loved one: Rhubarb Marshmallows.
What’s KP+? Well, it’s the level up version of this newsletter.By joining KP+, you will support the writing and research that goes into the newsletter and get access to extra content, community chat threads, and more. Subscribing is easy and only costs £5 per month:
Love,
Nicola
The intersection of science and art (via biscuits)
I have this theory that everyone who loves to bake as an adult is either a repressed artist or a repressed scientist - sometimes both. This is because baking is the perfect fusion of art and science, an exploration of these two worlds sometimes posed as opposite. And unlike (most) art forms and (most) science experiments, we get to eat the results.
Today’s newsletter definitely leans towards the artist inside us all: Welcome to the world of iced biscuits.
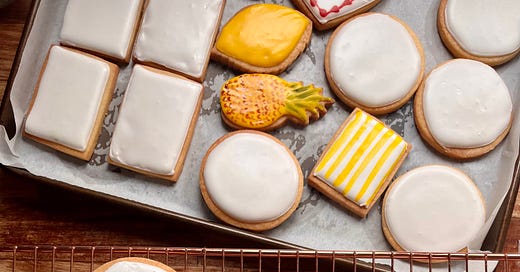
As someone who spent many years obsessing over the explosive crust patterns of sourdough (the freakier, the better), it sometimes feels ‘out of my wheelhouse’ to explore an aesthetic that feels so… perfect? And so pretty? I tend to feel more comfortable with a dough scraper than a piping bag. But I can’t deny the appeal of a beautifully iced biscuit. I’m completely charmed by them. They make fantastic homemade gifts and are endlessly customisable.
But what of all that sugary icing? For all my anti-icing friends out there, I respect you and understand. Perhaps you’re thinking… do iced biscuits really eat all that well? From my perspective as a full-fledged fondant lover who eats the thick coating on cakes with utter joy, I think, ‘Yes!’.
I believe there’s a time and a place for all baked goods, and sugar-coated cookies often get short shrift. This week I reimmersed myself in the absolute pleasure of biting down on a freshly iced biscuit - the rich buttery base gives way to a slightly gooey icing with its pleasantly powdery crusted top. It’s like the eating equivalent of stepping down on fresh snow.
Years ago, I would regularly stop into the ‘Biscuiteers’ icing cafe in Notting Hill; It’s a charming place - there’s a biscuit shop on the first floor but with space downstairs to drink tea and ice your own biscuits. It was always my go-to hang idea for a cute non-boozy bonding session (friend dates and romantic dates) where you could while away an hour surrounded by sugar. I’m not a huge Valentine’s person - though I make LOVE love - but icing biscuits with your family, best friend(s), or lover(s) is the most adorable activity. I don’t know about you, but 2023 has been all about having wholesome hang options, and this definitely qualifies.
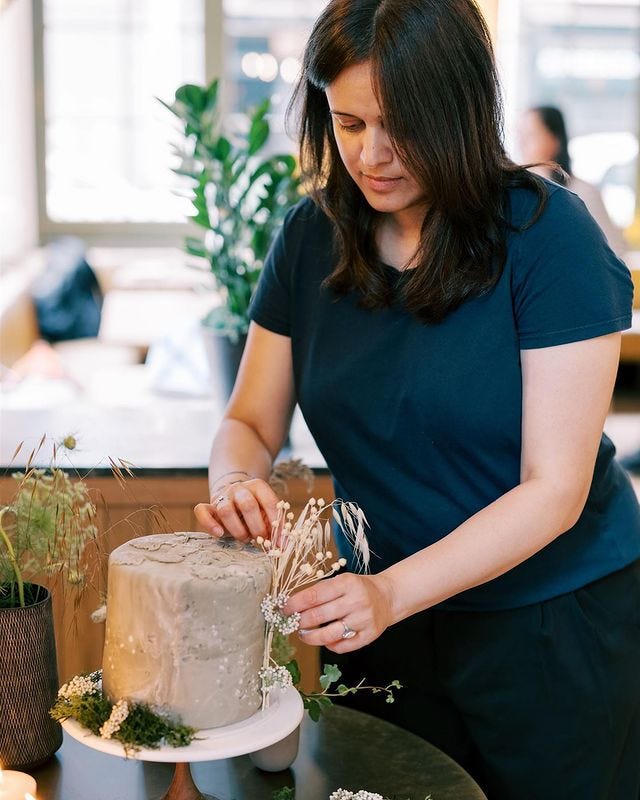
Since I’m firmly in the ‘fan’ category of iced biscuits, this subject is the perfect opportunity for one of my favourite series in this newsletter - a Kitchen Projects Teacher edition featuring cake designer and biscuit artist Pam Jones, owner of Lemon Tree Cakes, a London based cake studio. Her biscuits and cakes, all handmade to order, are undoubtedly works of art with a strong eye for texture and shape, taking inspiration from nature to create cakes that are more in the realm of the supernatural.
This week Pam acts as our biscuit spirit guide, telling us all the tricks and tips on making beautiful iced biscuits, even if the idea of royal icing terrifies or horrifies you (hi, it me / was me before this week) and the science that underpins it all.
What IS the Kitchen Project teacher series?
A huge part of what drives this newsletter is a curiosity about food. Exploring the ‘hows’ and ‘whys’ of the food world and passing on the tips and tricks I’ve learnt over the years is a total joy. After dropping out of pastry school all those years ago, I created my own curriculum to learn the trade - from patisserie to cakes, to ice cream, to sourdough, to viennoiserie - and I’ve been lucky to have incredible teachers and mentors throughout my career so far.
I’m the first to admit that my expertise has limits, and I love nothing more than learning and listening. That’s why I started the Kitchen Projects teacher series.
Every now and then, I’ll be heading into the kitchen or workspace of an expert and becoming a student all over again! I’ll spend the day learning from them, asking ALL the questions, passing that knowledge onto you, and sharing their food story. I’ll also share one of their tried & tested recipes for you at home.
I firmly believe that knowledge is power, and I’m so excited to explore new techniques and skills with you. I can’t wait to learn all the commonalities and differences, pick up some new skills and delve into the unknown. First, we’ll learn about how Pam got started in cake-making before getting deep into the skills. So let’s get into it.
Introducing.. Pam Jones!
Pam Jones loves lemons. “I love the colour! It’s a happy colour - you know, sunshine, brightness. Young. Youthful. And then also in terms of flavours, its zesty, gives it a bit of a kick.” she tells me. So when it came to naming her business in 2015, it was an obvious choice. Although Pam is known for her sculptural cakes, with gravity-defying sugar work and extraordinary textures and shapes at Lemon Tree Cakes, her first foray into the baking world was biscuits. “I started with cookies. Cake just seemed so daunting!”
Before taking a step into owning her own businesses and exploring her creativity through baking, Pam had a nine-to-five job and was, put plainly, “miserable.” Having grown up in Pune (a city about two hours from Mumbai) - and with her family still there - she was missing home and couldn’t help but wonder, “Is this what my life is all about?!” After falling pregnant with her son and her 9-5 being less than accommodating with her new responsibilities as a mother, Pam was finally pushed to quit, forcing her to reevaluate her career.
Observing the careers of “absolutely phenomenal” cake designers from around the world, Pam “just fell in love.” with cake as a medium for art. She watched Maggie Austen, a US-based cake designer, create a multi-tiered cake on The Today Show and was struck with inspiration. It gave her the confidence push she needed to give it a go. “If she can do it,” Pam thought, “maybe I can try!”
So, Pam took to the kitchen. “I taught myself how to use the oven.” It wasn’t exactly natural at first: “Growing up, we didn’t have an oven. My friends did, but our specific household didn’t. I had never seen an oven in my life!”
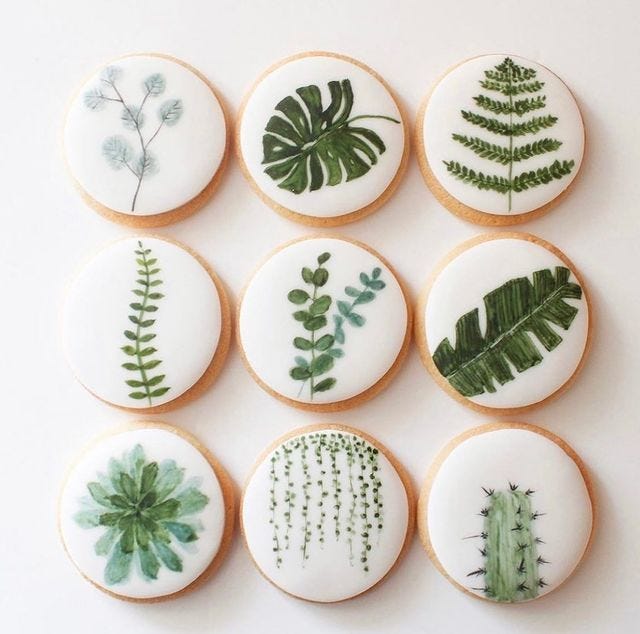
After six months of focused recipe development, Pam learnt about every element of the process. From dough to icing, piping to packing, she developed her first biscuit design, which she still sells today: Botanical biscuits. She launched them online. “I was so nervous!” she tells me, “But they became a huge hit on Instagram. I didn’t know at the time that I was creating something that would be loved by so many people.”
Even though it was 7 years ago, she still intricately remembers her first customer. “He had ordered it for his sister’s birthday, and he said that she loved them”. It was feedback like this that spurned her on to create more and invest more in the world of baking.
Hearing Pam talk about her journey from not knowing how to use an oven to now making actual works of art was inspiring. And actually, the biggest takeaway I had from spending time with Pam was just how possible it is to make miniature works of art, in biscuit form, at home. I’d always thought there was a huge barrier to entry - so much kit, so much expenditure, too much faff - and avoided it. Unlike some sugar or decorative works, to create Pam’s botanical biscuits, you only need one colour and only one piping bag - win, win.
All about that base
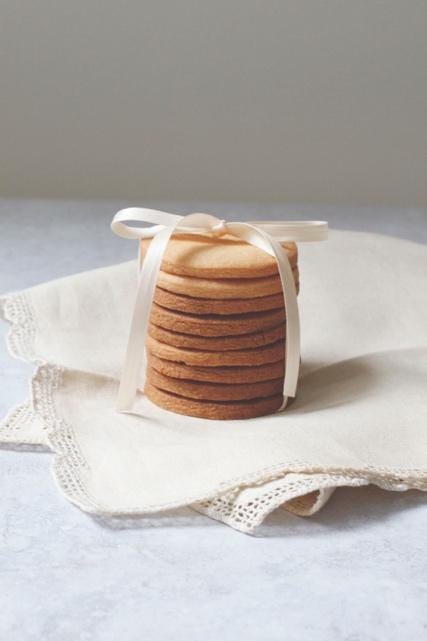
It all begins with a great and stable base. Pam’s basic vanilla cookie is “delicious, and you can up the quantity easily.” With a ratio of 1:1:2 butter, sugar, and flour (and a little egg for moisture, a quarter of the weight of the butter and sugar), it’s both strong and tender. The high flour ratio means that it doesn’t spread, making it a good option for intricate biscuit cutters. It’s also a great starting point for flavours. “You can add cocoa powder, zest, cinnamon, and cardamom is great.” When I made the biscuits a few weeks ago, I subbed 25% of the flour for ground almonds and added a little almond extract - they were perfect.
The dough should be rolled relatively thick - a mistake often made with iced biscuits is the ratio of icing to cookie. The biscuits we made together were around 3-5mm and this was perfect. And what about re-roll? Pam will roll her biscuit dough out twice and then save the scraps to reincorporate a bit at a time in future batches. Nothing goes to waste.
To bake, Pam prefers a hot oven - 180c fan - but notes that “every oven is different.” She aims for a bake time of 15 minutes but advises caution on this number. The biscuits should be golden all over, perhaps a touch darker on the edges, but no further.
The cookie dough can be mixed and rolled out in advance - it will keep in the freezer well-wrapped for 3 months or in the fridge for 3 days. Once baked, the cookies - in theory - will last in an airtight container for up to a month, though, as with all baked goods, there are diminishing returns.
About the icing
Although Pam mainly works with fondant now (and concedes that it ‘gets a bad rep!’), she spent a lot of time investigating royal icing, a type of icing which sets hard and firm when exposed to air. Its history can be traced back to the 18th century when Elizabeth Raffald, the housekeeper of Arley Hall in Cheshire, developed the formula to coat formidable wedding cakes. It was developed just in time for Queen Victoria and Albert’s wedding, which boasted a two-tiered cake some 10 feet in circumference. Its name, of course, comes from its most well-known use in royal wedding cakes. It was, and still is, loved for its stability rather than its taste - much like caramel, it’s a glue of the pastry world. And much like caramel, it can be upset by humidity.
To understand why we must first understand what icing is. Standard sugar icing is a simple combination of icing sugar (finely ground sugar with starch, usually cornflour, to prevent clumping) and liquid. The liquid can be water, milk, or fruit puree. As the sugar dissolves into the liquid, the viscosity increases, and you can adapt the icing to the correct flow: The more free water, the more it can flow. As we add more sugar, the water molecules are stuck in the sugar network and unable to move. If you leave the icing exposed to air, a crust will form as water evaporates. Since there is a relatively low amount of water in icing (some 5-6x sugar to water), this happens quite fast.
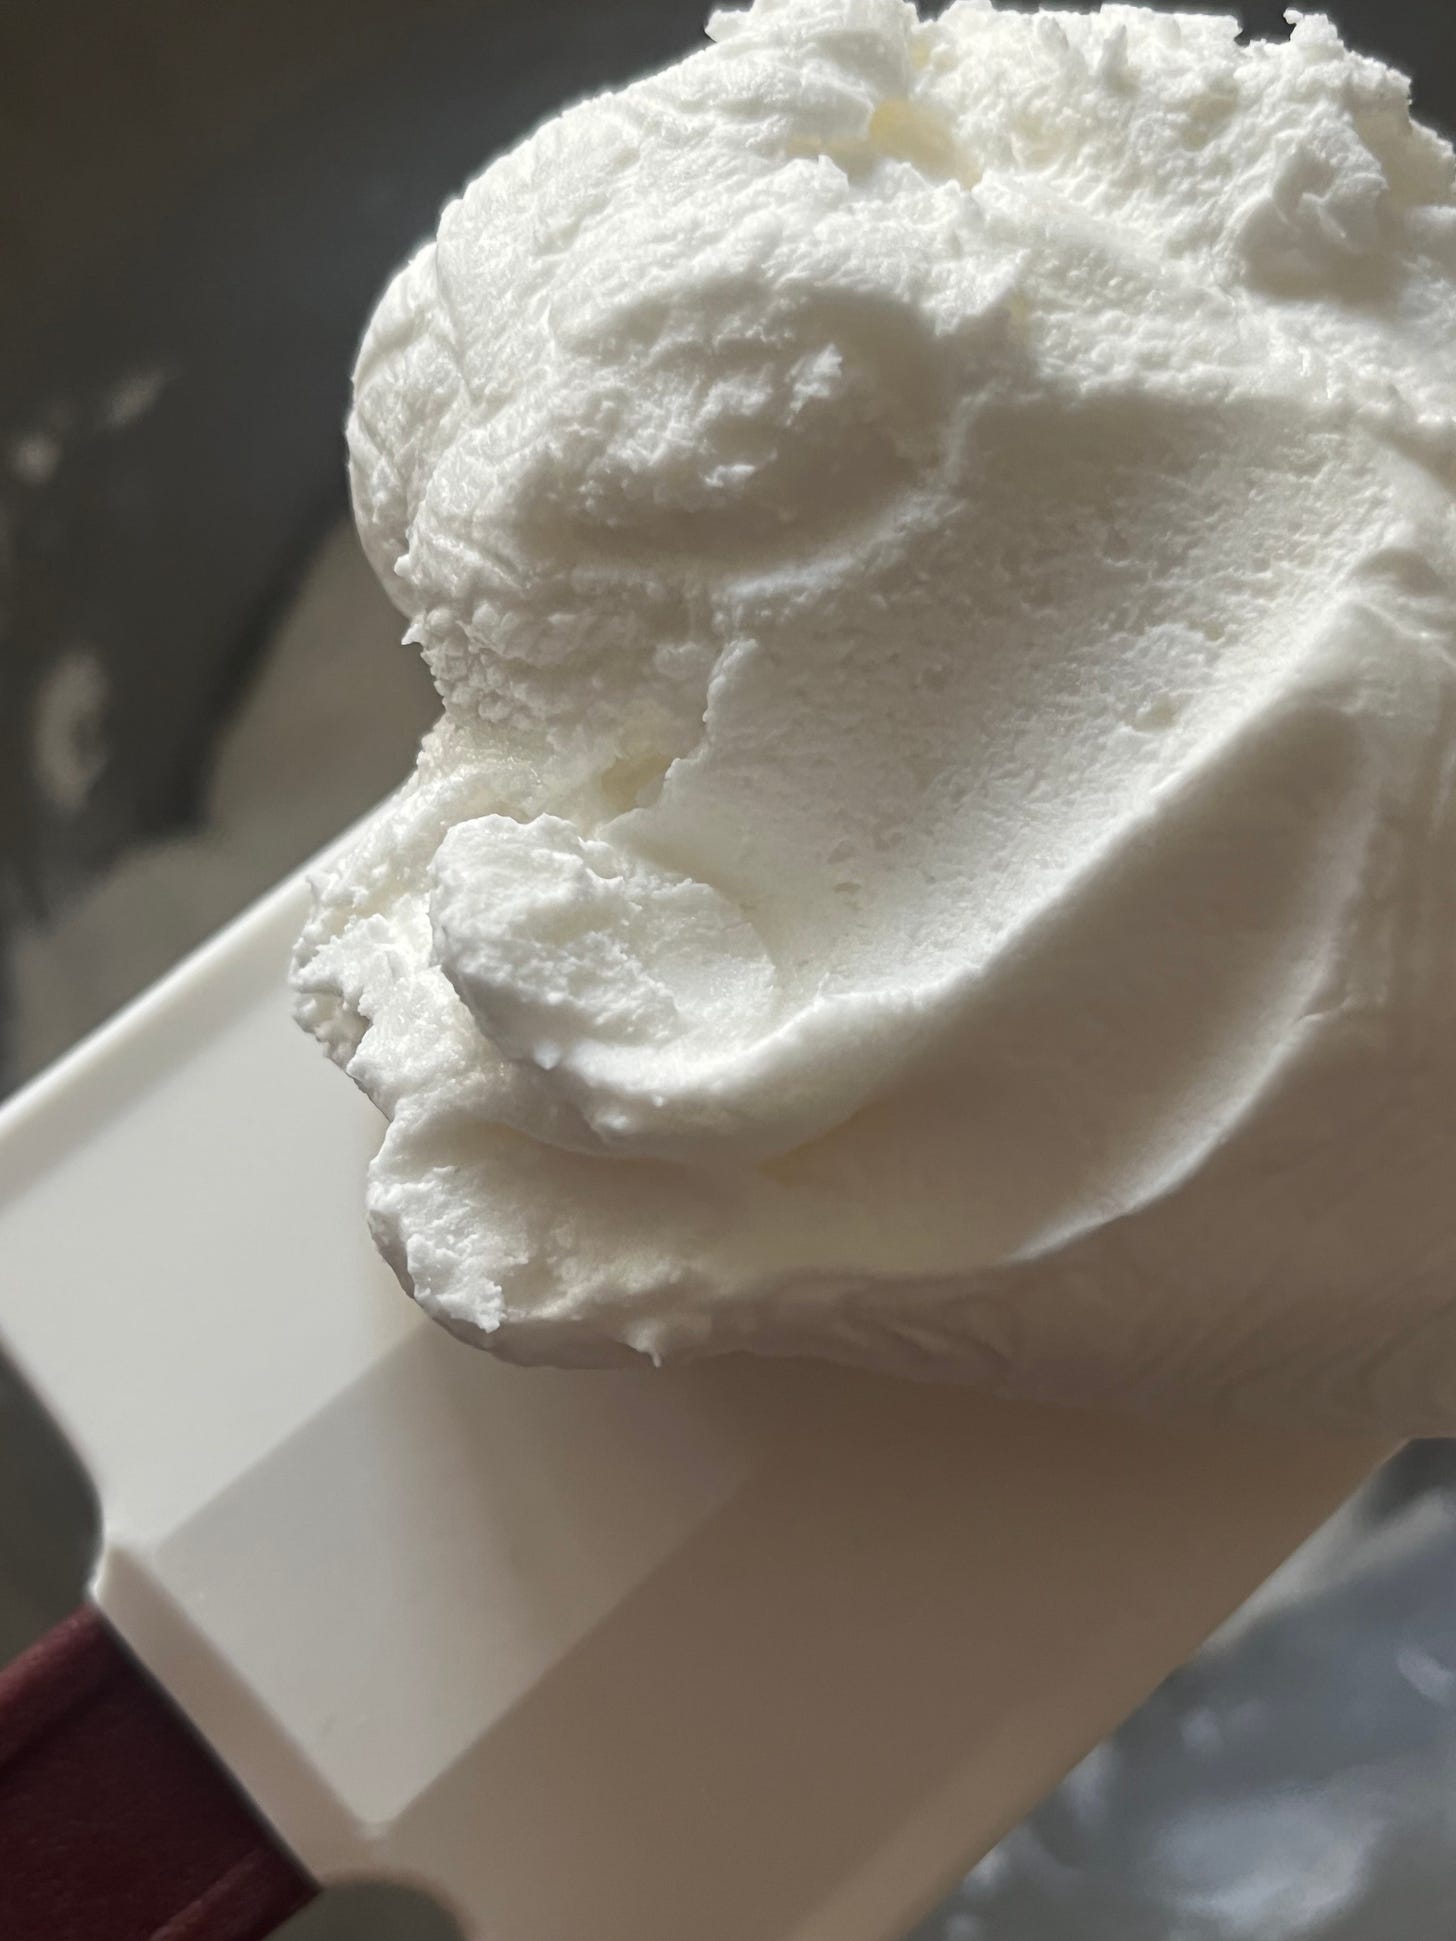
Royal icing is a bit more involved. It’s a mixture of icing sugar and - crucially - egg whites. The two are beaten together until it reaches a stiff, toothpaste-like consistency. It may be useful to think of royal icing as an extremely high sugar ratio meringue - rather than light and airy, it is dense. The mixing process, Pam tells me, should always be done with the paddle attachment and NOT the whisk. “You risk incorporating way too much air.” This is a problem later down the line. “It gets too thick”, and it can set with unsightly streaks. As royal icing is beaten, a small number of bubbles are also incorporated into the mixture resulting in a strong, crack-resistant network of proteins, sugar, starch and liquid. As the small amount of liquid evaporates, the proteins, air bubbles and sugar are left in place, resulting in a super stable and firm structure.
So… what’s the difference?
Compared to standard icing, royal icing dries in a matter of hours. Pam’s formula also includes a little lemon juice which further stabilises the proteins in the egg whites as well as seasons the mixture. She also explains that “You can also add glycerine”, a compound derived from vegetable oil, to soften a royal icing mixture. This adds pliability to the icing without hydrating it further, but it’s usually a technique reserved for “coating an entire cake” rather than piping. If you do prefer a more tender bite in your icing, you could add ½ tablespoon of either corn syrup or glycerine to Pam’s icing recipe.
Whatever you use, taking good care of your icing once mixed is essential - if you’re not careful, it will begin to set, and you’ll be left with a crusty hard lump of icing. To prevent this, Pam opts for clingfilm touching the surface, then a damp tea towel on top. If you accidentally leave it uncovered, Pam has a solution, simply “spray it with water, cover it and wait for maybe 10 min for it to soften and then mix it till it all comes together.”
Judging the thickness and best practice
Once mixed up, the consistency of the royal icing can be adjusted with water (boiled and cooled or filtered for the best final product - tap water is a bit impure and can result in less-than-perfect iced biscuits); Going drip by drip may seem overkill, but it’s better to go slow otherwise you may find yourself in an endless cycle of adding icing sugar, then water, then icing sugar ad infinitum.
Straight out of the mixer, the icing is like toothpaste or dense marshmallow - it is sort of pipeable (but only just), in a crispy 50s wedding cake kind of way, but it is advisable to adjust it. From here, you need to add water to reach piping consistency - useful for outlines - and flood consistency, which is best for filling in patterns. For the piping consistency, you want the icing to hold a line but still be thick - one teaspoon per batch of icing is likely enough. For the flood, you need to go looser. One method for judging the icing is the ‘count’ method. Pam explained it to me, “basically, you just score a line through the icing. And then you count to 10. Once you count 10, the line should disappear.” Whilst the ‘count’ value may vary from baker to baker, a slow ‘one elephant, two elephant’ type count worked perfectly for us.
Colouring the icing
One thing all iced biscuits tend to have in common is a bright colour palette. Although you can get every colour under the sun, the cost of this can add up, so Pam suggests starting with the primary colours - red, blue and yellow (embarrassingly, I admit I had to google this!) and mixing your own. She, of course, has her favourites, like ‘Spruce Green’ and ‘Canary Yellow’.
Because we are making smaller quantities, we mixed up a single batch and then coloured smaller amounts individually. If you are making one colour, Pam suggests adding in the colouring right at the beginning of the mixing process. This way, it is evenly distributed throughout, and you are less likely to overmix when incorporating colour later. There is also such a thing as too much colour - by being heavy-handed on the gel, you can upset the balance of moisture in the icing, which leads to bleeding later on.
There are a few options for colourings: Powders, gels and oils. For really dark colours, like deep hues of reds or blues, Pam favours powdered colour pigments because you can add a lot without changing the consistency. Powdered colours are also good for recipes that are liquid-sensitive, like macarons. Gel colours (e.g. sugarflair) work well in wet batters and icings and work well for most colours, especially for pastels. For buttercreams and ganaches, oil-based colours (e.g. colour mill) are the best and incorporate seamlessly.
Once the icing is made, “You can put it in a container or bowl, wrap it in cling film and place a small damp towel on it and store at room temp or, if in a hot country, in the fridge for up to a week.” Pam tells me. “Just bring to room temperature before mixing and using again.”
Icing techniques
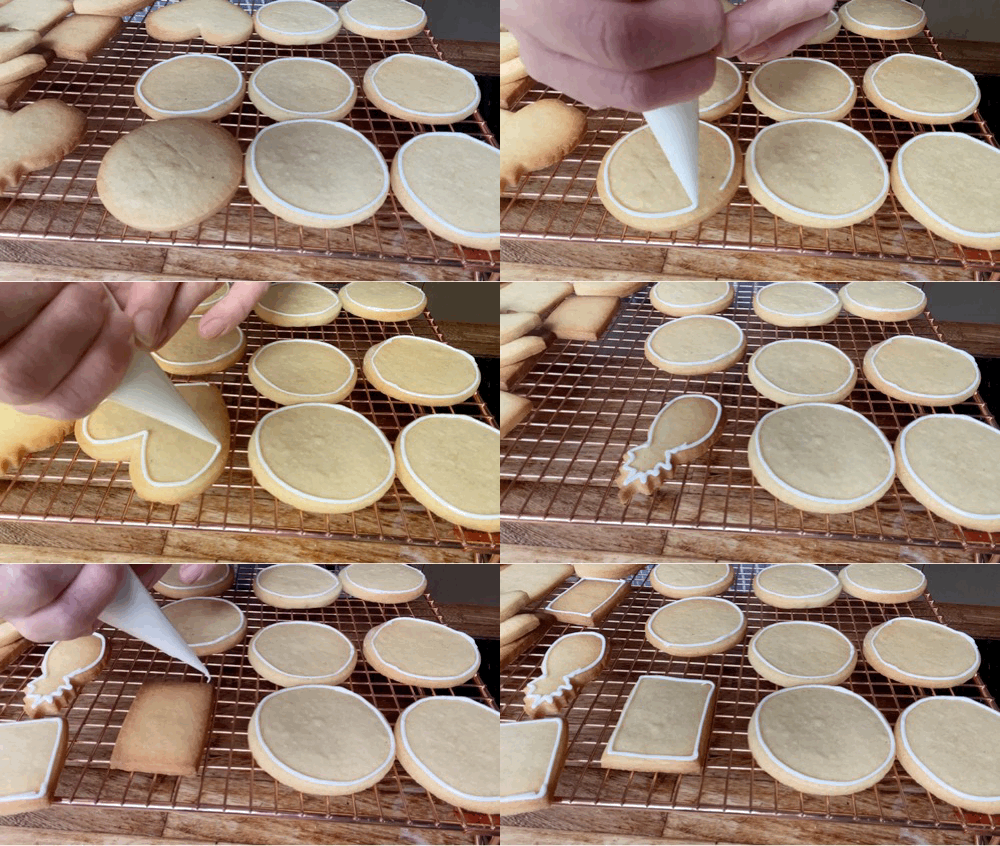
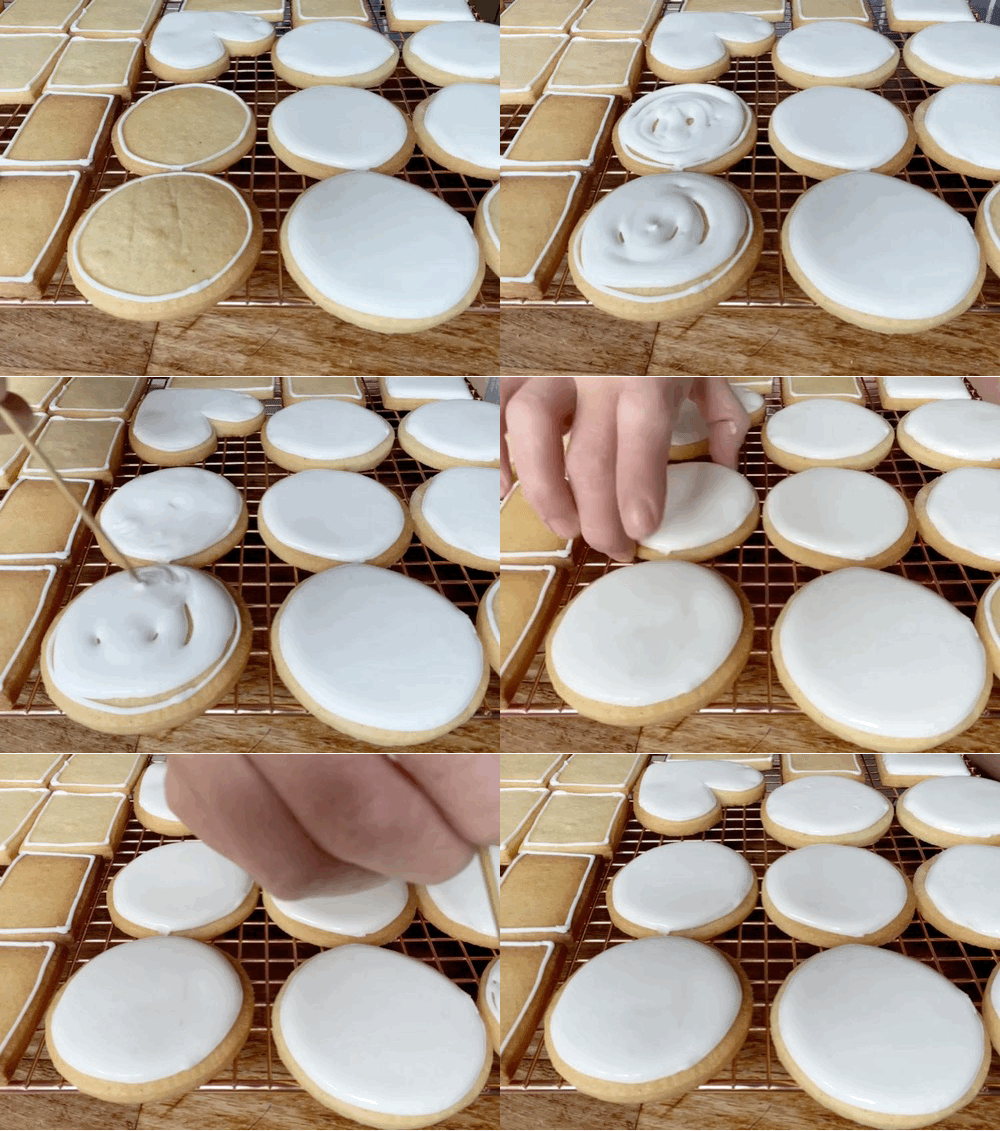
All iced biscuits begin with an outline - when you use a thicker icing to trace the edge of the cookie - before being flooded. The outlined line is much thinner than I’d imagined - only about 1.5mm! To flood the cookie, snip a 5mm hole in a piping bag and roughly fill in the whole shape, following the line. Don’t worry if there are gaps! Once flooded, Pam taps the biscuit a few times on her palm, or on the side, to help it spread out. Finally she then utilises a little pointy metal stick called a ‘scriber’ to help pop air bubbles and help nudge the icing to spread evenly, moving it in a circular action. A toothpick will work just as well. Any further imperfections can be adjusted by dipping the end of a small paintbrush in water and drying it briefly before dabbing the imperfect bits.
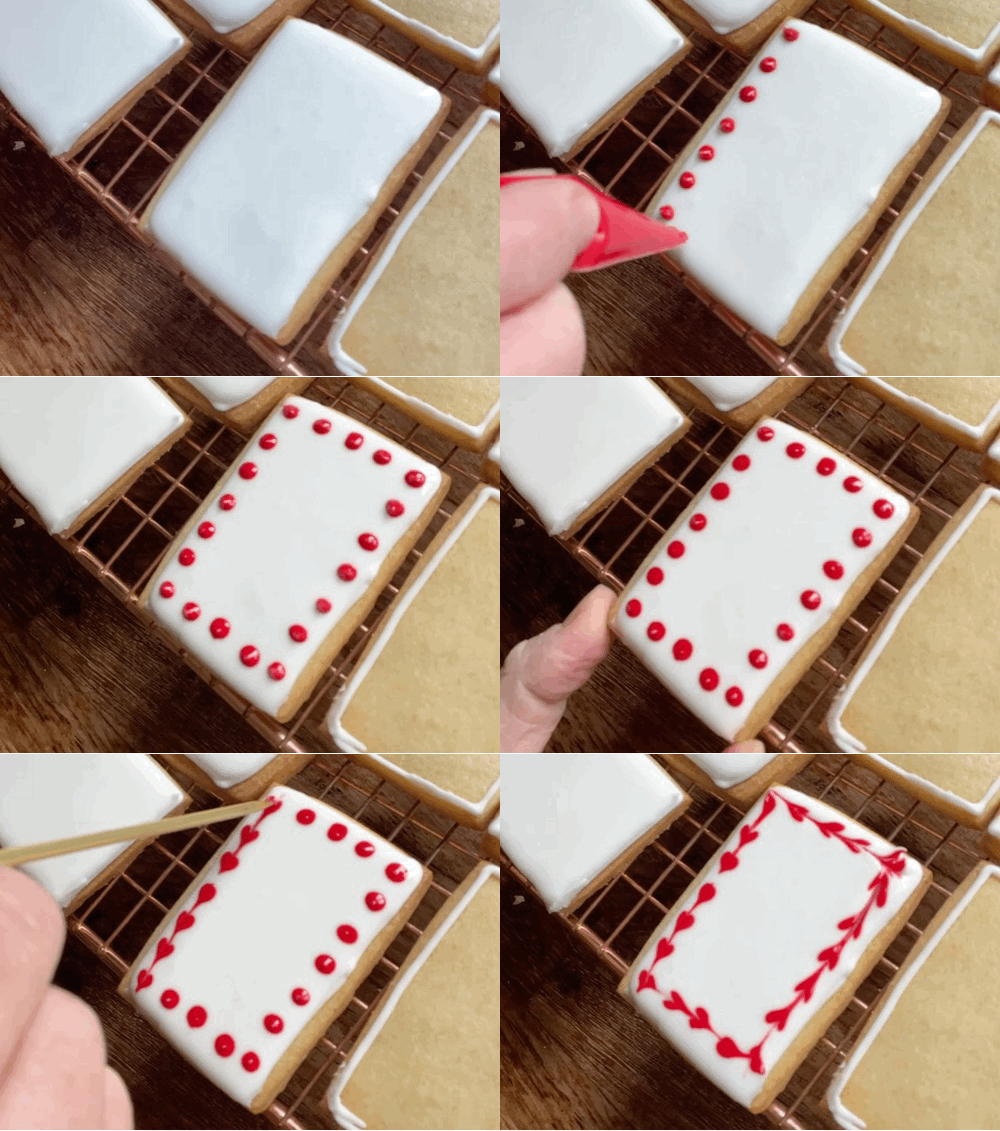
Although there are endless ways to decorate cookies, there are two main categories - wet on wet and wet on dry. The first is a technique where you apply several icings when wet, creating a seamless-looking design that can be dragged and swirled.
The second is when you flood the cookies and leave them to dry before applying more icing on top - this is standard for cookies with fine details. Pam also showed me a wonderful technique that I had 1) never considered and 2) am now completely obsessed with - painting directly onto the dried royal icing, using the cookie as a canvas. “It’s just like watercolour,” she tells me.
As well as looking absolutely beautiful, this technique also means you don’t need to mix up a bunch of separate icings and reduces the piping bag consumption. Pam adds a little vodka (because it evaporates and dries quicker than using water, though you can use water if you want) into a small container. She then drops in some gel colour onto one side - she then dips in her brush and starts painting directly onto the royal icing. You can adjust the pigment by dipping the brush into the gel containers or wiping the brush on some kitchen paper between strokes. If you don’t feel like detailed works of art are for you, you could try more abstract stroke-type designs.
To dry out the cookies, you can either leave them to harden fully at room temperature or, as Pam showed me, you can pop them into the oven on the lowest heat temp (I did mine at around 30c) for 20-30 minutes. The airflow of the oven fan will help dry the cookies and give them a beautiful shine.
Notes on environment and storage
Now you’ve got your cookies! They will last up to two weeks in an airtight container (perhaps more, but with diminishing returns). It’s worth noting that Royal Icing is extremely sensitive to humidity. As we know, sugar is hygroscopic, e.g. water-loving, and it will draw water from anywhere it can - the air included. So, if there IS a lot of water in the air, it will dissolve into the sugar and prevent the icing from setting, as well as offering the perfect environment for the colours to bleed into each other.
Useful equipment
For today you will need at least one piping bag, the colours you want to use and some paint brushes.
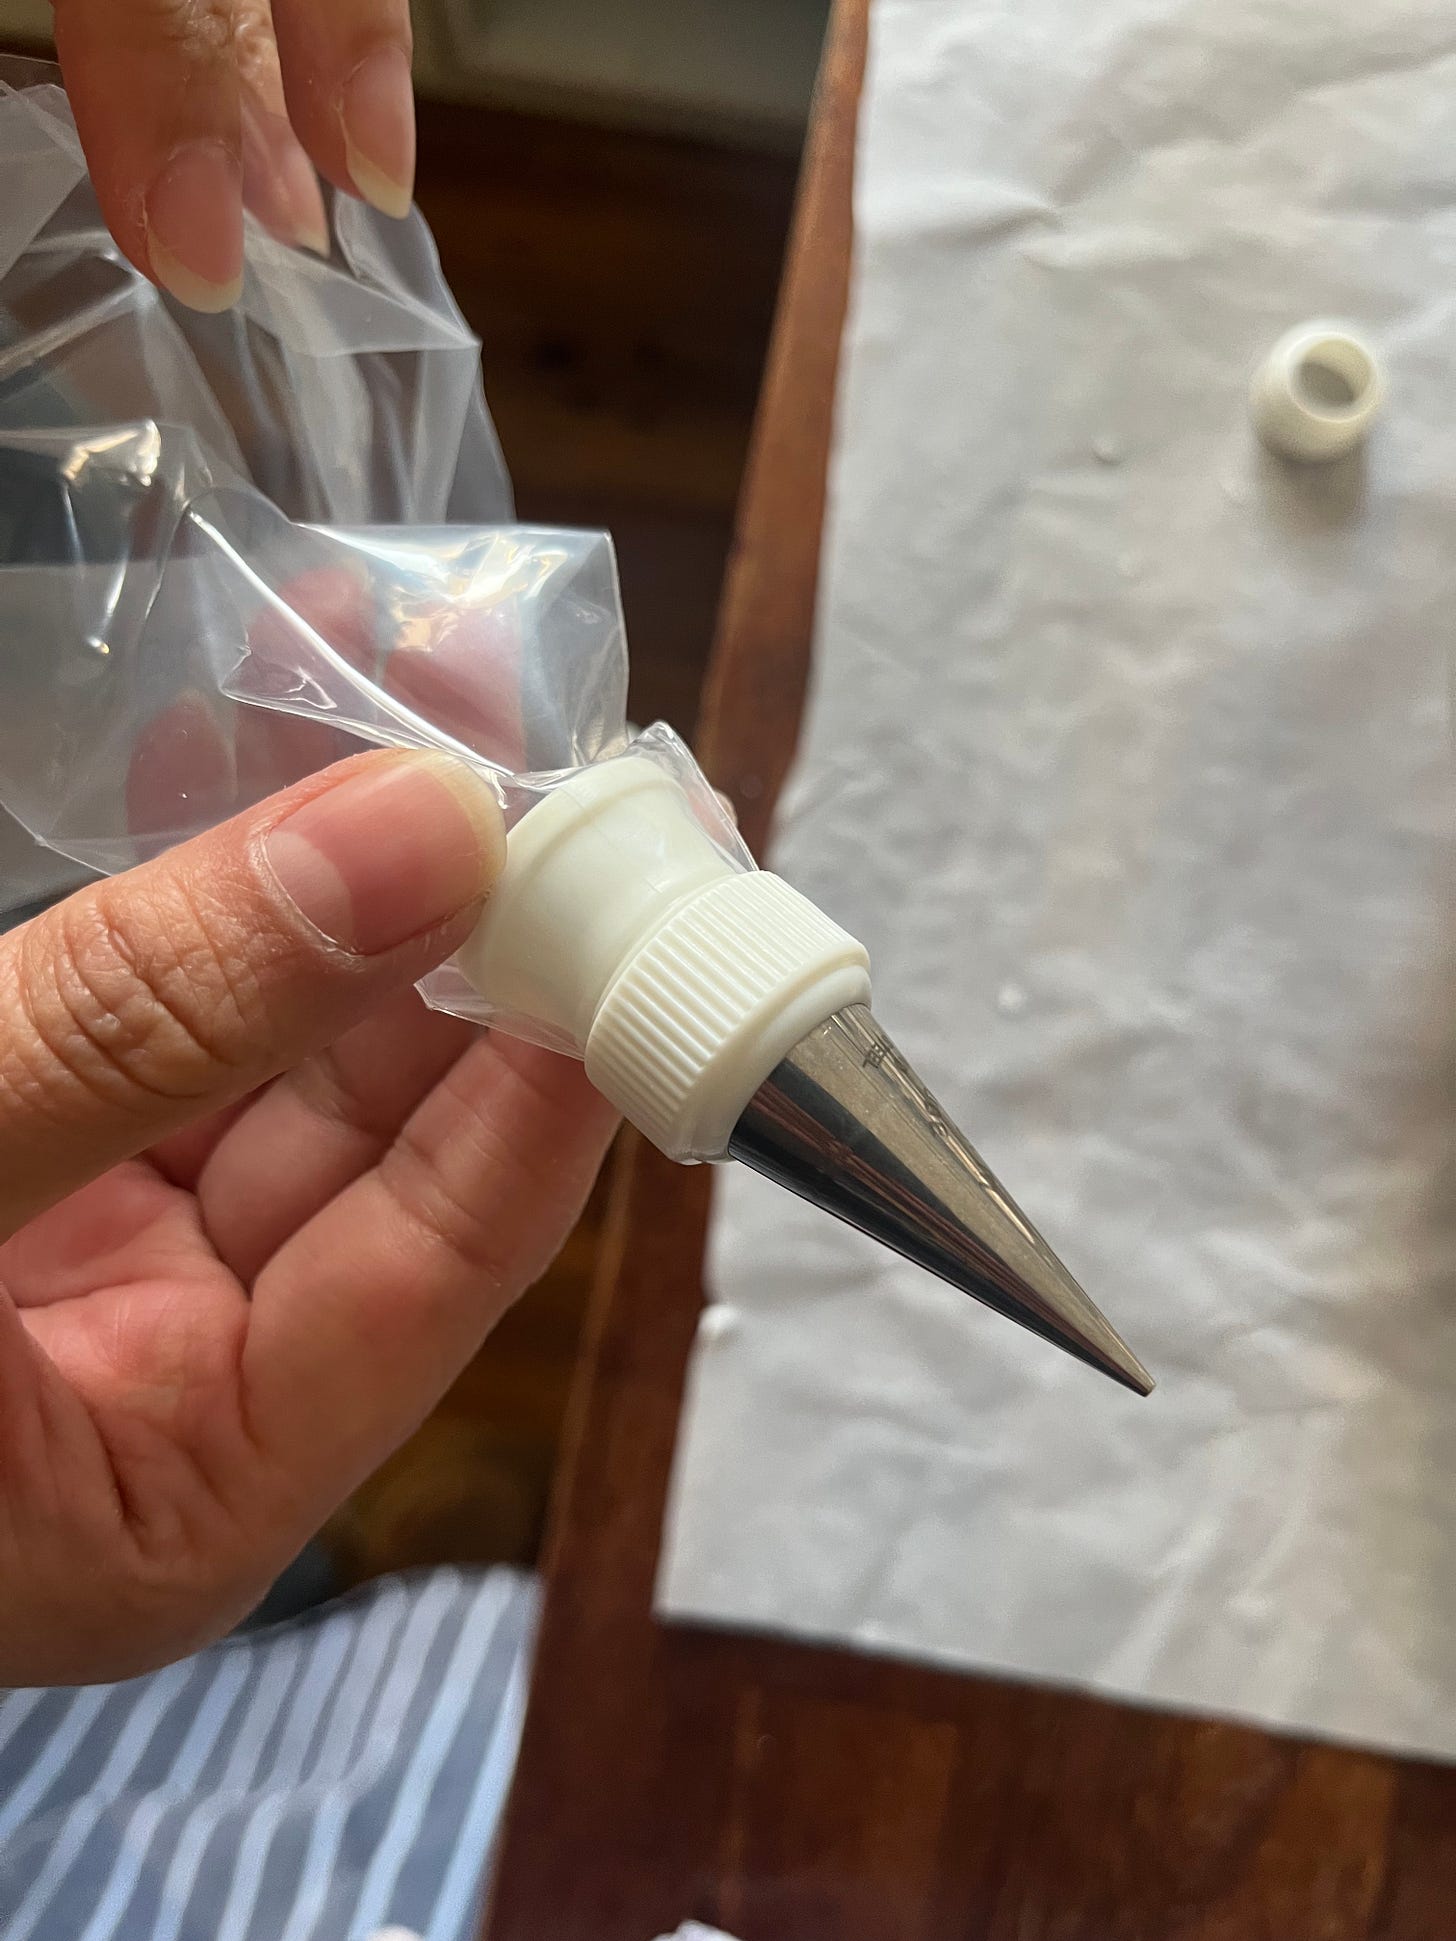
Although I’m always keen to keep the equipment down, Pam showed me a piece of equipment that I was super impressed by: A coupler. A coupler is small plastic nozzle in two parts that you can use to swap out piping tips mid decoration. SO SMART. We didn’t end up using them for the biscuits but I wanted to share this with you.
Alright, let’s make them!
Iced biscuits
By Pam Jones, Lemon Tree Cakes
Cookie Recipe: (Makes about 30, 6-cm round cookies)
200 g unsalted butter
200 g caster sugar
1 egg
400 g plain flour
1 tsp Vanilla extract or paste
Method:
Combine butter and sugar in a stand mixture and mix on medium speed till just combined. Add the egg and beat again, scraping down the sides of the bowl, followed by the flour. Stop just as the dough starts to come together. we don’t need to over-mix the dough.
Take the cookie dough and at this stage you can form it into a ball or spread it out a bit and leave to chill in the fridge for 30 min. I roll my dough out between two pieces of baking paper and then put it in the fridge.
Line a baking sheet with baking paper and turn your oven on to 180ºC fan.
Once the dough has chilled for 30 min, I take my round cookie cutters and cut out the number of cookies I need. Place them evenly on the baking sheet and bake for 12 - 15 min - the cookies should look dry and be lightly golden. Timing may vary depending on your oven. Mine tend to bake in 12 min.
Once out of the oven leave to cool on a cooling rack. If you are royal icing the cookies, make sure the cookies are completely cool before you do so, or the icing will melt.
Royal Icing Recipe (enough for white outline and flood icing on all the cookies):
30g egg white
250 g icing sugar, sifted (actually do this)
1 tsp lemon juice
Pinch of salt
Method:
Combine the ingredients in a bowl and mix until roughly combined to prevent the sugar from going everywhere. Mix on a low speed with the paddle attachment for 5-10 minutes until the mixture comes together and is the consistency of firm toothpaste: Thick and smooth. At this stage, add colours to your icing or divide the icing if you are going to be using several colours.
To adjust the consistency: Add water sparingly - you can always add more but can’t take off any if too much has been added at the beginning. For piping icing, add about 1 tsp water - it should be able to hold a line when pipe. Outline the biscuits with the firmer icing with a 1.5mm piping tip (or just cut the end off the bag).
For flood icing, add water until the flow is ‘10 count’ consistency - this means when you draw a line through it, it will take 10 counts to fill back in. Move into a piping bag and snip about 5mm off the tip then fill in the cookie, following the outline. Tap it a few times to encourage the icing to spread out. Finally a pointy ended stick, like a toothpick or sharp knife, to nudge the icing into place - go gently to make sure it doesn’t go over the edge of the cookie. If there are any air bubbles, use a damp paintbrush to pop them.
If adding wet details, add them immediately! If you are building up layers, put cookies into the oven at the lowest temp - 30c if possible - for 25-30 minutes until firm and shiny.
Add your design on top or make yourself a palette by adding vodka or distilled water into small pots - dot some food colouring in there and begin painting as you would a watercolour. Have some kitchen roll nearby to dab the brush. It might take a few goes to get into the flow! For darker details, dip your brush directly into the gel colour.
When you have finished decorating your cookie you can put the cookies in the oven again for 20-30 minutes to dry.
Tips
Always have a damp tea towel handy so you can cover your tools like scarper, palette knife in it to stop the royal icing from crusting.





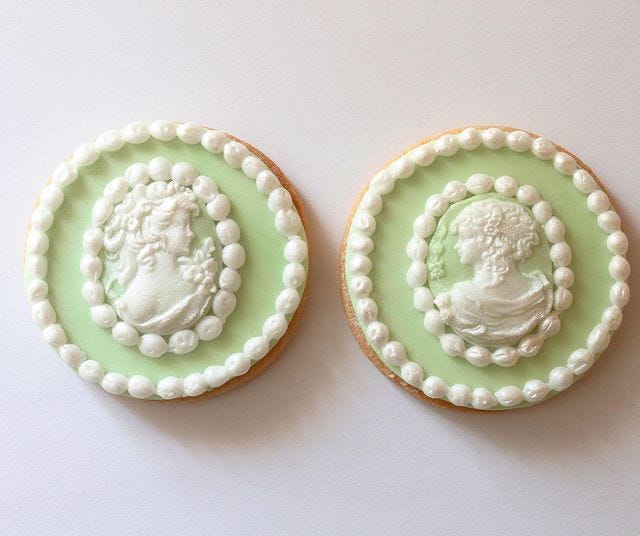


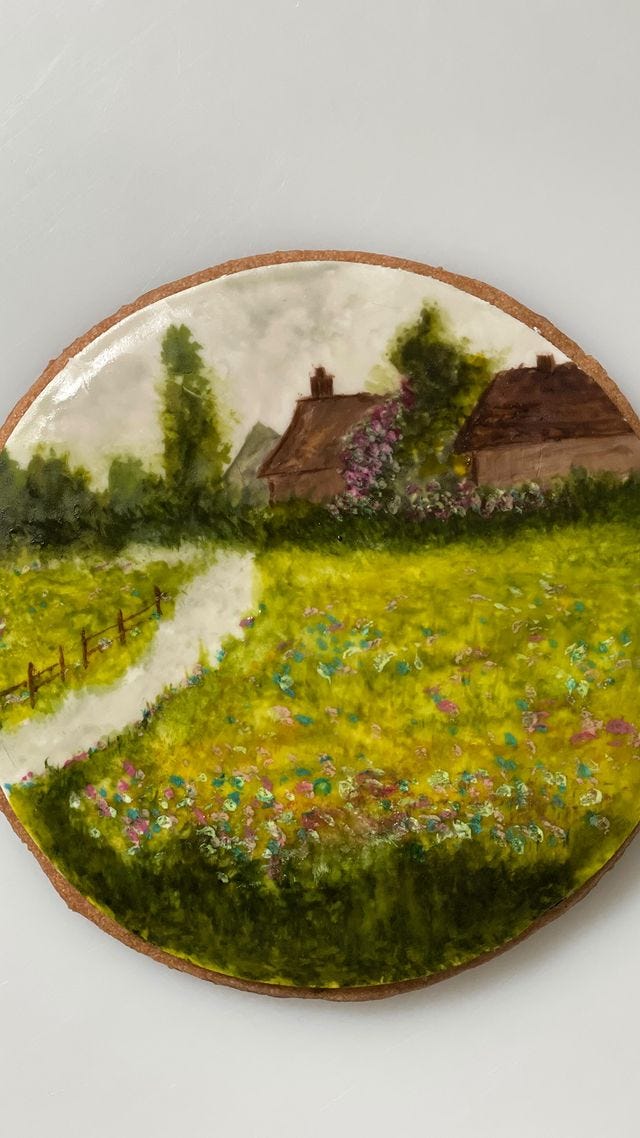
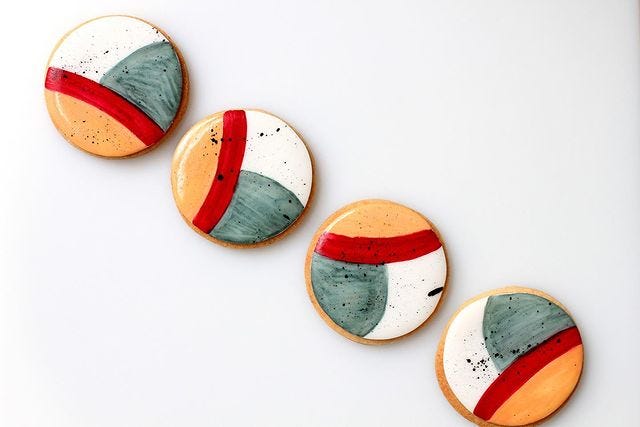

Nicola thank you so much for the honour. I loved every minute of this. Here’s to many more. Thank you for being so kind and generous, with your time. Baking is such a joy 😊❤️🙏🏽
I LOVE icing biscuits (and watching people ice biscuits), but haven’t done it for ages. Might have to remedy that