Hello and welcome to today’s edition of Kitchen Projects!Thank you so much for being here.
Today we’ll be jumping head first into the world of Ligurian style focaccia, the crispy-chewy-oily dream bread, the fruits of my full blown focaccia crawl. Over on KP+, I’m so excited to share all my Liguria travel tips + map as well as a recipe for cavolo nero pesto by the brilliant Jordon King. Click here for the recipe.
Kitchen Projects is 100% reader funded; By joining KP+, you will support the writing and research that goes into the newsletter and get access to extra content, community chat threads, and more. Subscribing is easy and only costs £5 per month:
Alright, let’s do it!
Love,
Nicola
Will travel for Focaccia
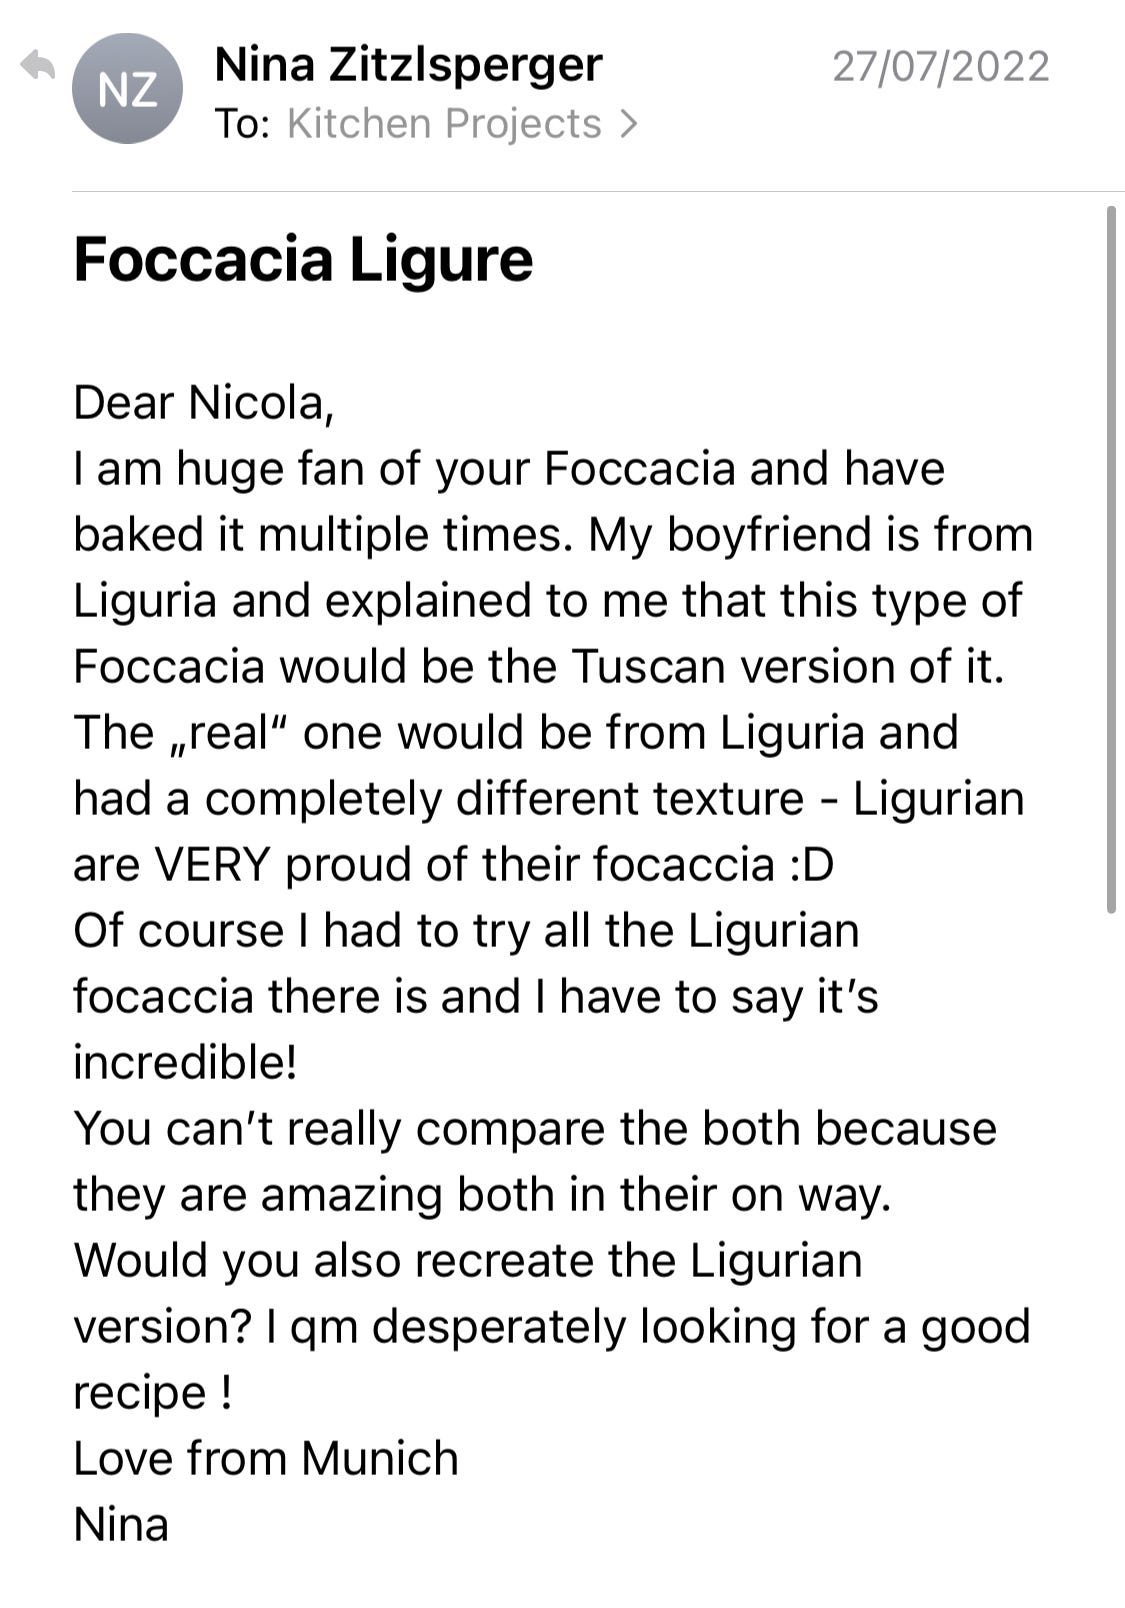
The story of this newsletter actually began a few months ago when one of my dear Kitchen Projects readers, Nina, got in touch to talk to me about focaccia. In particular, Ligurian style focaccia:
I was immediately curious, of course. And Nina, thank you for this. I hope I’ve done you proud.
If you’ve been following this newsletter for a while or knew me before this substack began, you’ll know that I am TEAM FOCACCIA through and through and I’m never not obsessed with my 3-day recipe. BUT…. in all honesty, I didn’t think much about provenance and history - I was simply sharing the focaccia that I was taught to make: An ultra fluffy, crispy, oil, holey, airy thing of beauty. But as time has passed, I’ve come to think of this focaccia as London focaccia. Though I’m not particularly well-travelled in Italy, come to think of it, I’ve never seen this cloud-like style whilst travelling. Correct me if I’m wrong (I genuinely thrive on being corrected, so please!), but this bubbly type seems to have developed its own life outside Italy. This high hydration dough has become primo content on Instagram - I’m certainly guilty of an ASMR-style focaccia press video.
So, does something need to be authentic to be good? I don’t think so. I’m not sure when the taste in focaccia deviated from the typical - still airy, but more spongy - styles that are more particular to Italy vs this ultra lofty, aerated, highly-hydrated bread that we’ve come to love so much. Fortunately, I think we’ve all got enough love in our hearts for both styles and plenty more in between. And though I think of myself as an avid focaccia fan, I know now that I have HUGE gaps in my flat, oily bread knowledge. So there was really only one thing to do:
After receiving Nina’s email, I KNEW I needed to jump down the rabbit hole. And so the great Ligurian focaccia crawl was born! Liguria is a province on the north coast of Italy that borders Tuscany to the East and France to the West. It’s not an area I’ve ever travelled to before, and I can highly recommend it; I have come back with SO many ideas and will spend the next few months exploring all of the discoveries here on this newsletter. There is so much joy to be had there, so much to discover. And for anyone who can’t drive, you can take advantage of the wonderful train system.
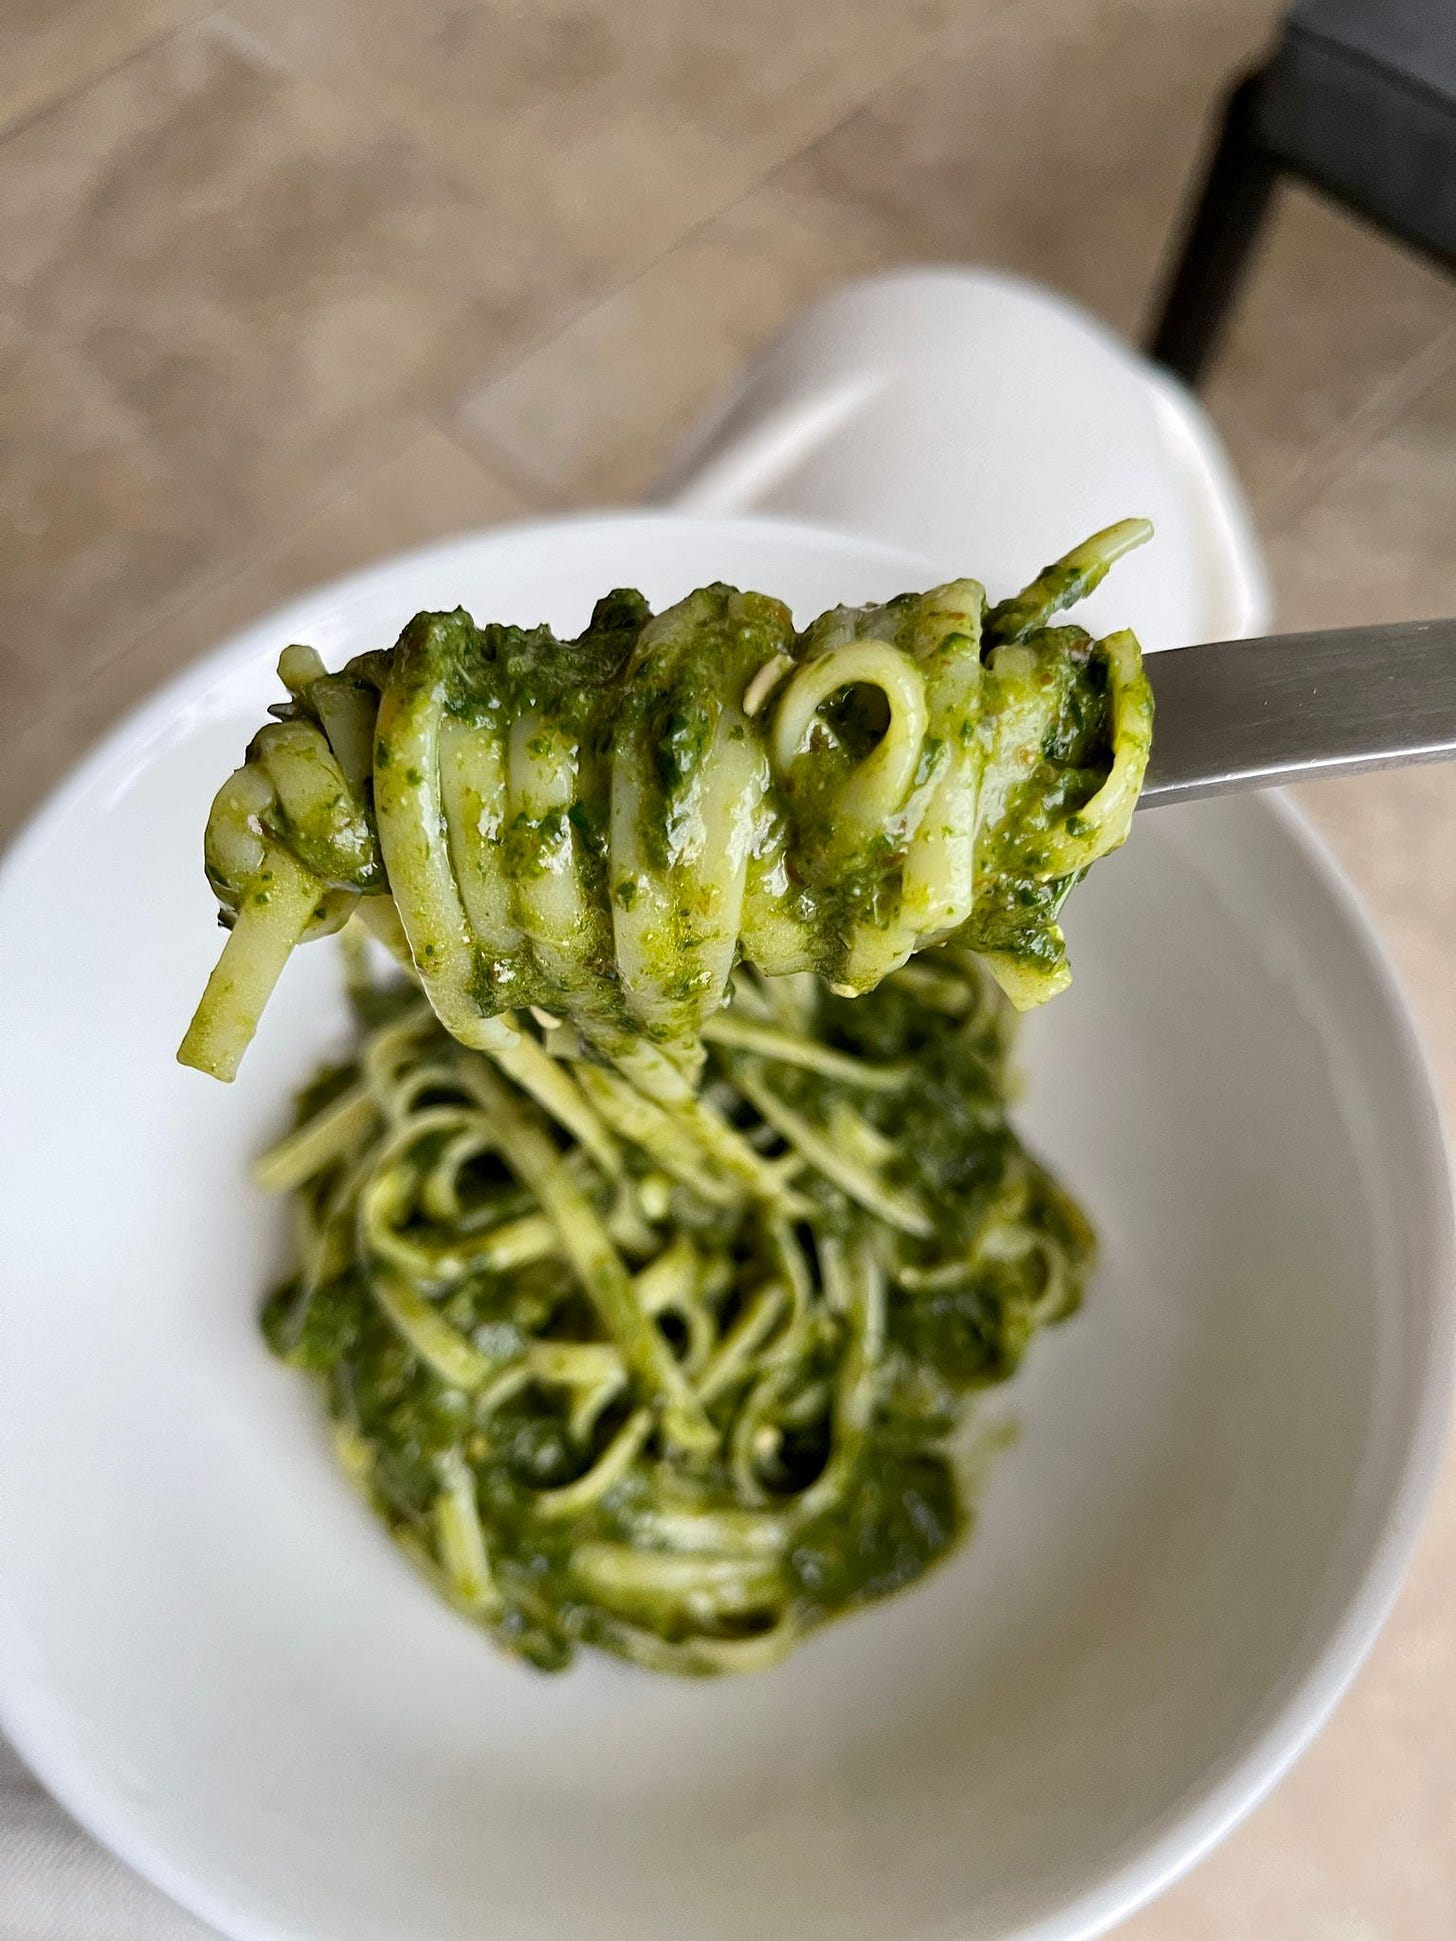
Over on KP+, along with a recipe for wintery Pesto from my travel companion Jordon, I’ve shared a map of all the places and areas we stayed, in case you want to plan your own trip. Liguria is famous for a few things, but the three that really stand out are Pesto (Genovese style with basil, pine nuts and olive oil), focaccia and olives. I mean, if you’re going to be famous for three things, wouldn’t those be your picks? As Jordon informed me on the trip, Pesto is actually more of a verb or a technique than a specific ‘thing’, though I’ll let him tell you more about that on KP+.
The region of Liguria has ‘focaccaerias’ and bakeries everywhere and every baker has its own unique take - it’s part of the everyday fabric that weaves the city together. The simple joy of dipping warm oily focaccia into a hot frothy cappuccino - the quintessential Ligurian breakfast - cannot be underestimated. It’s a snack that can be eaten throughout the day, and you won’t find it served with meals. The only place I saw it on a restaurant menu was as dessert, with a cappuccino, naturally.
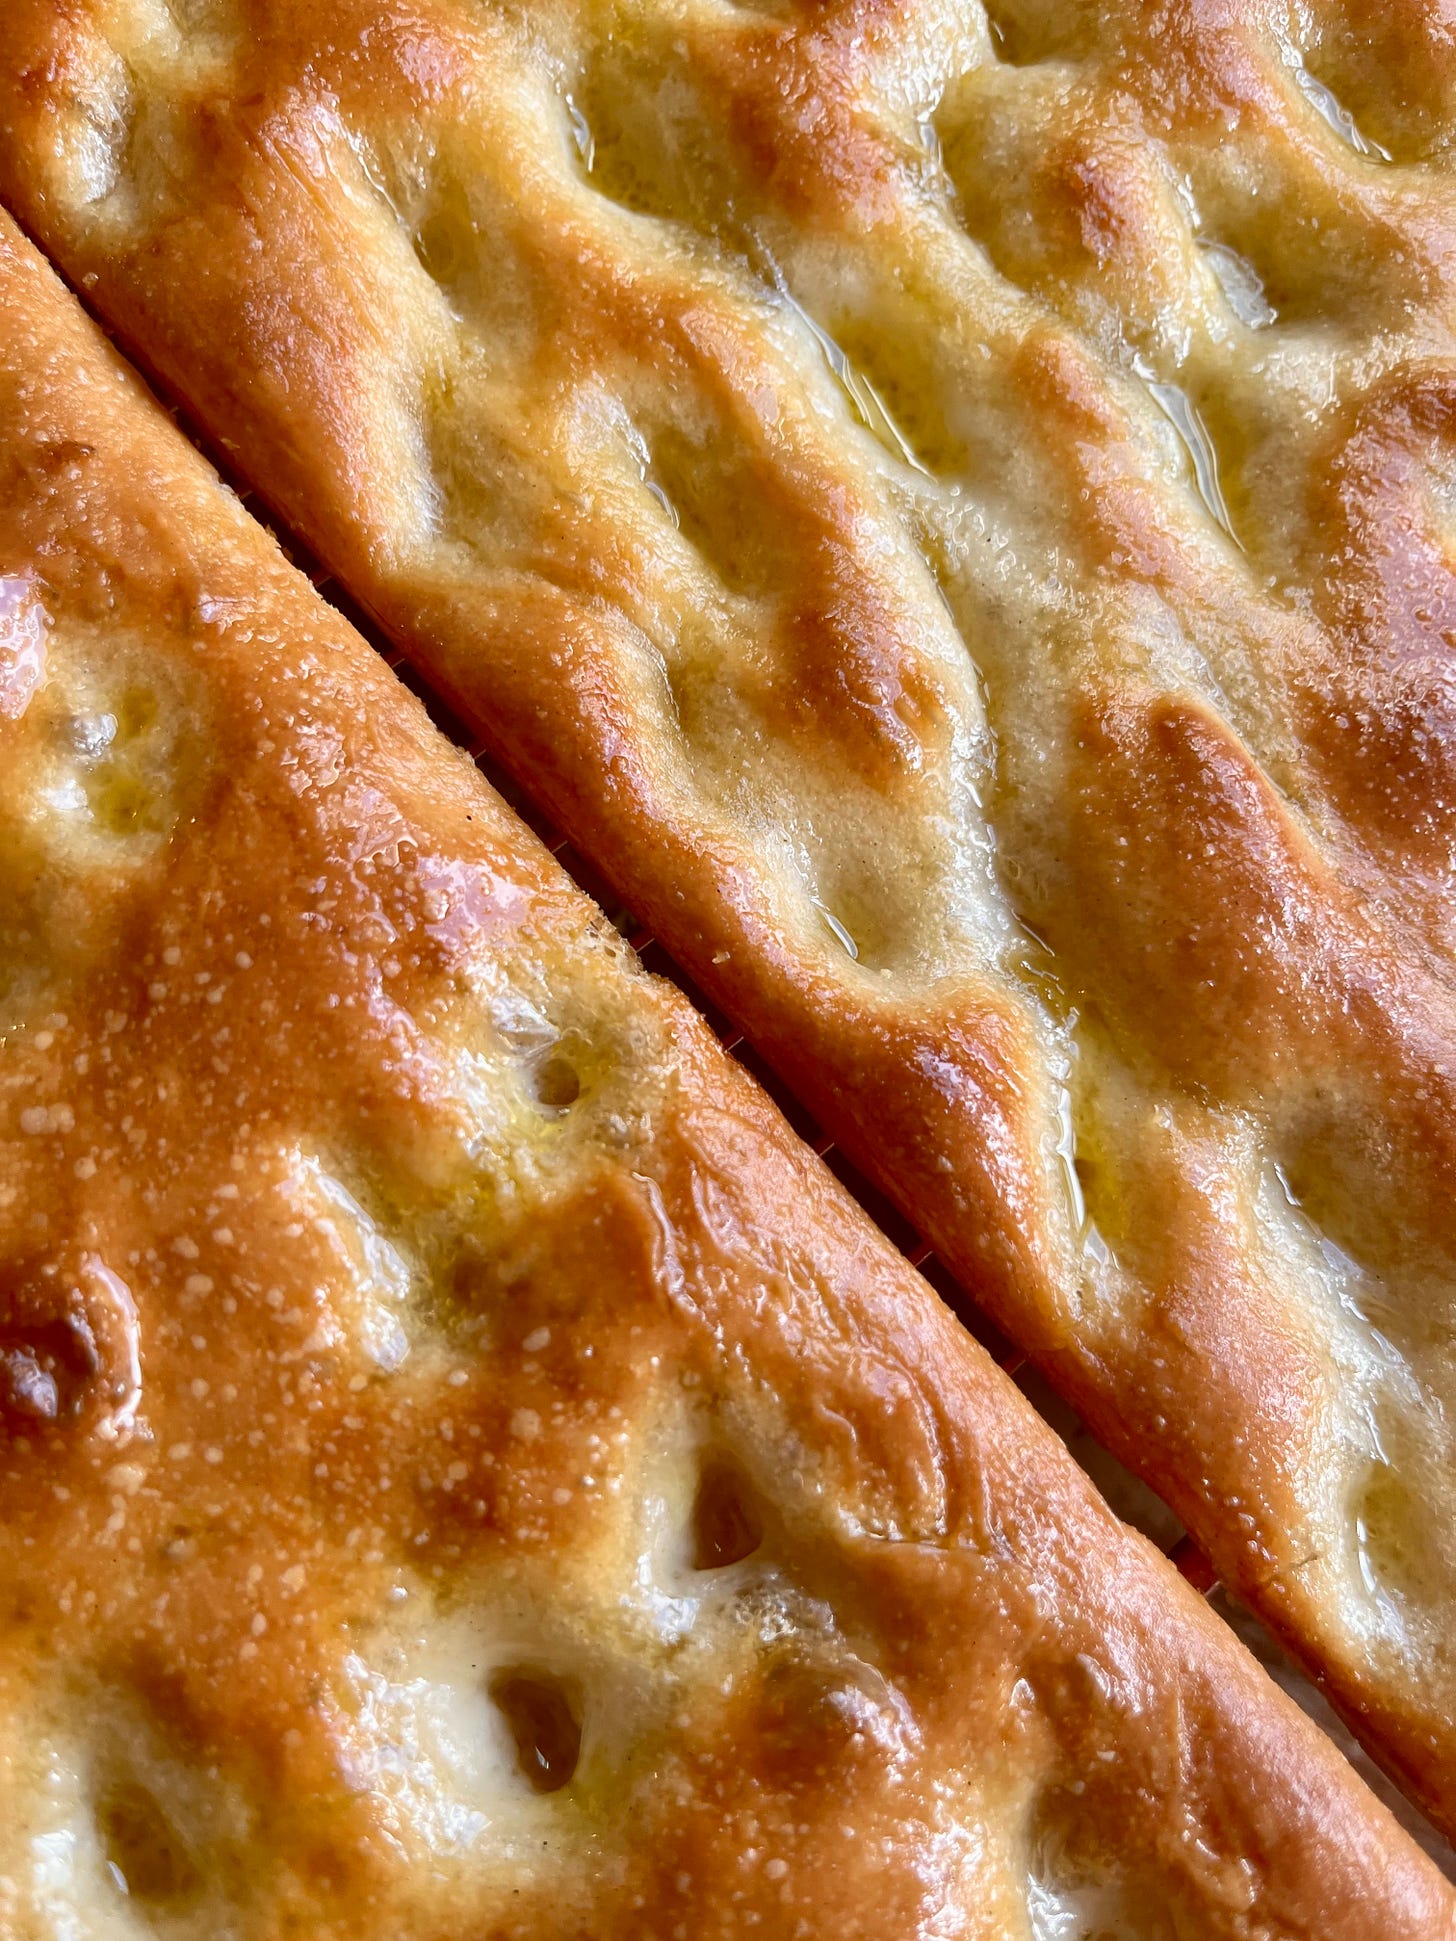
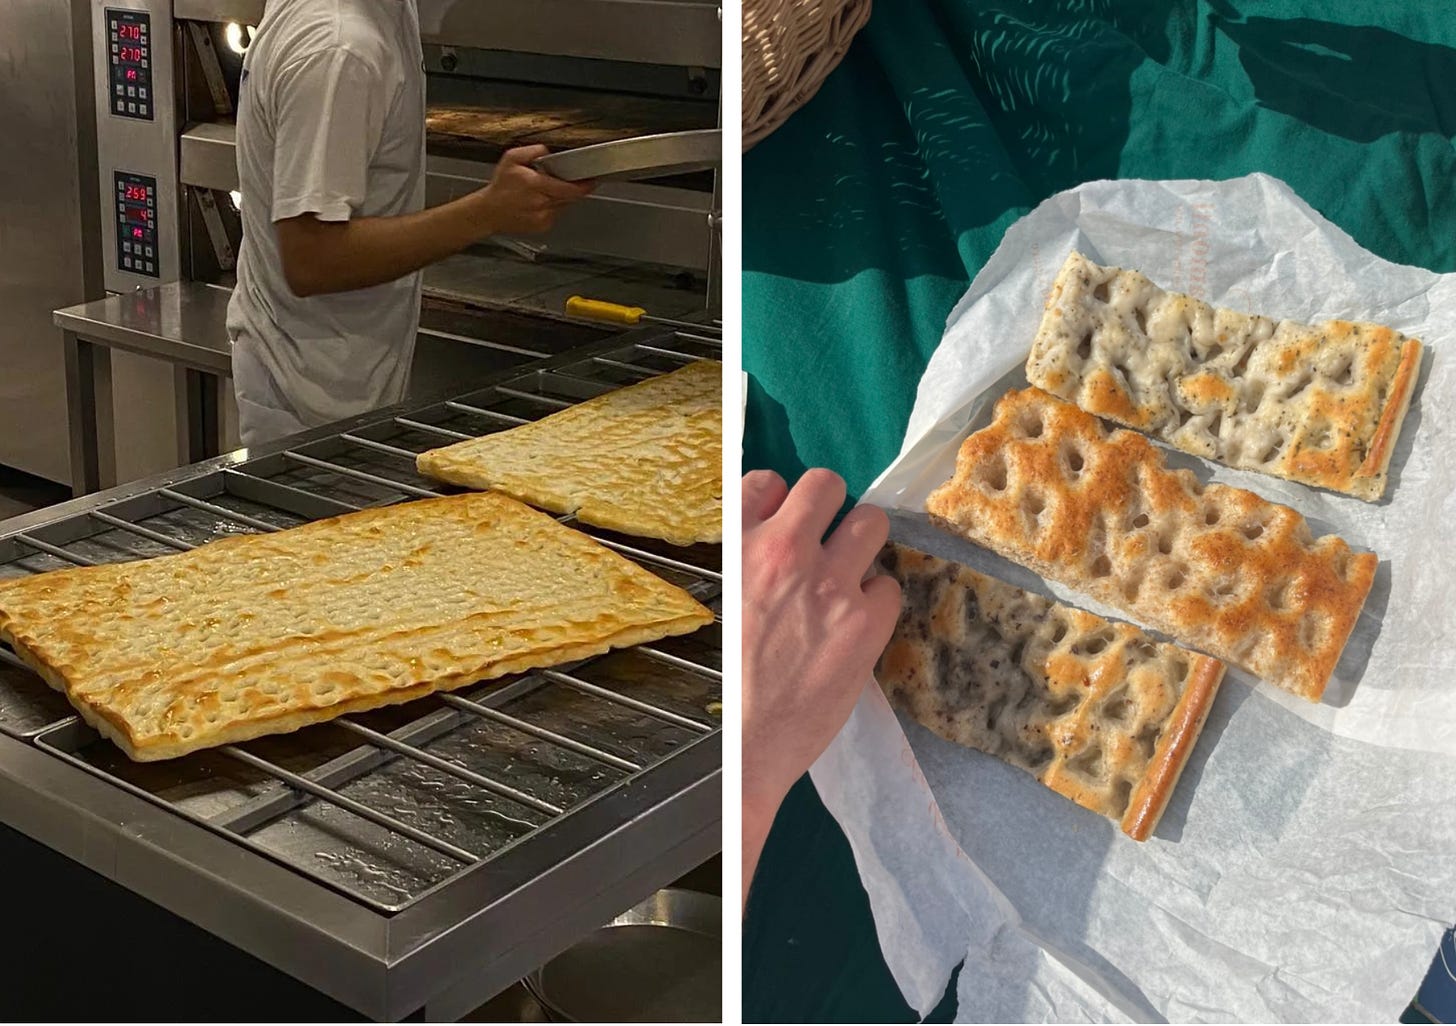
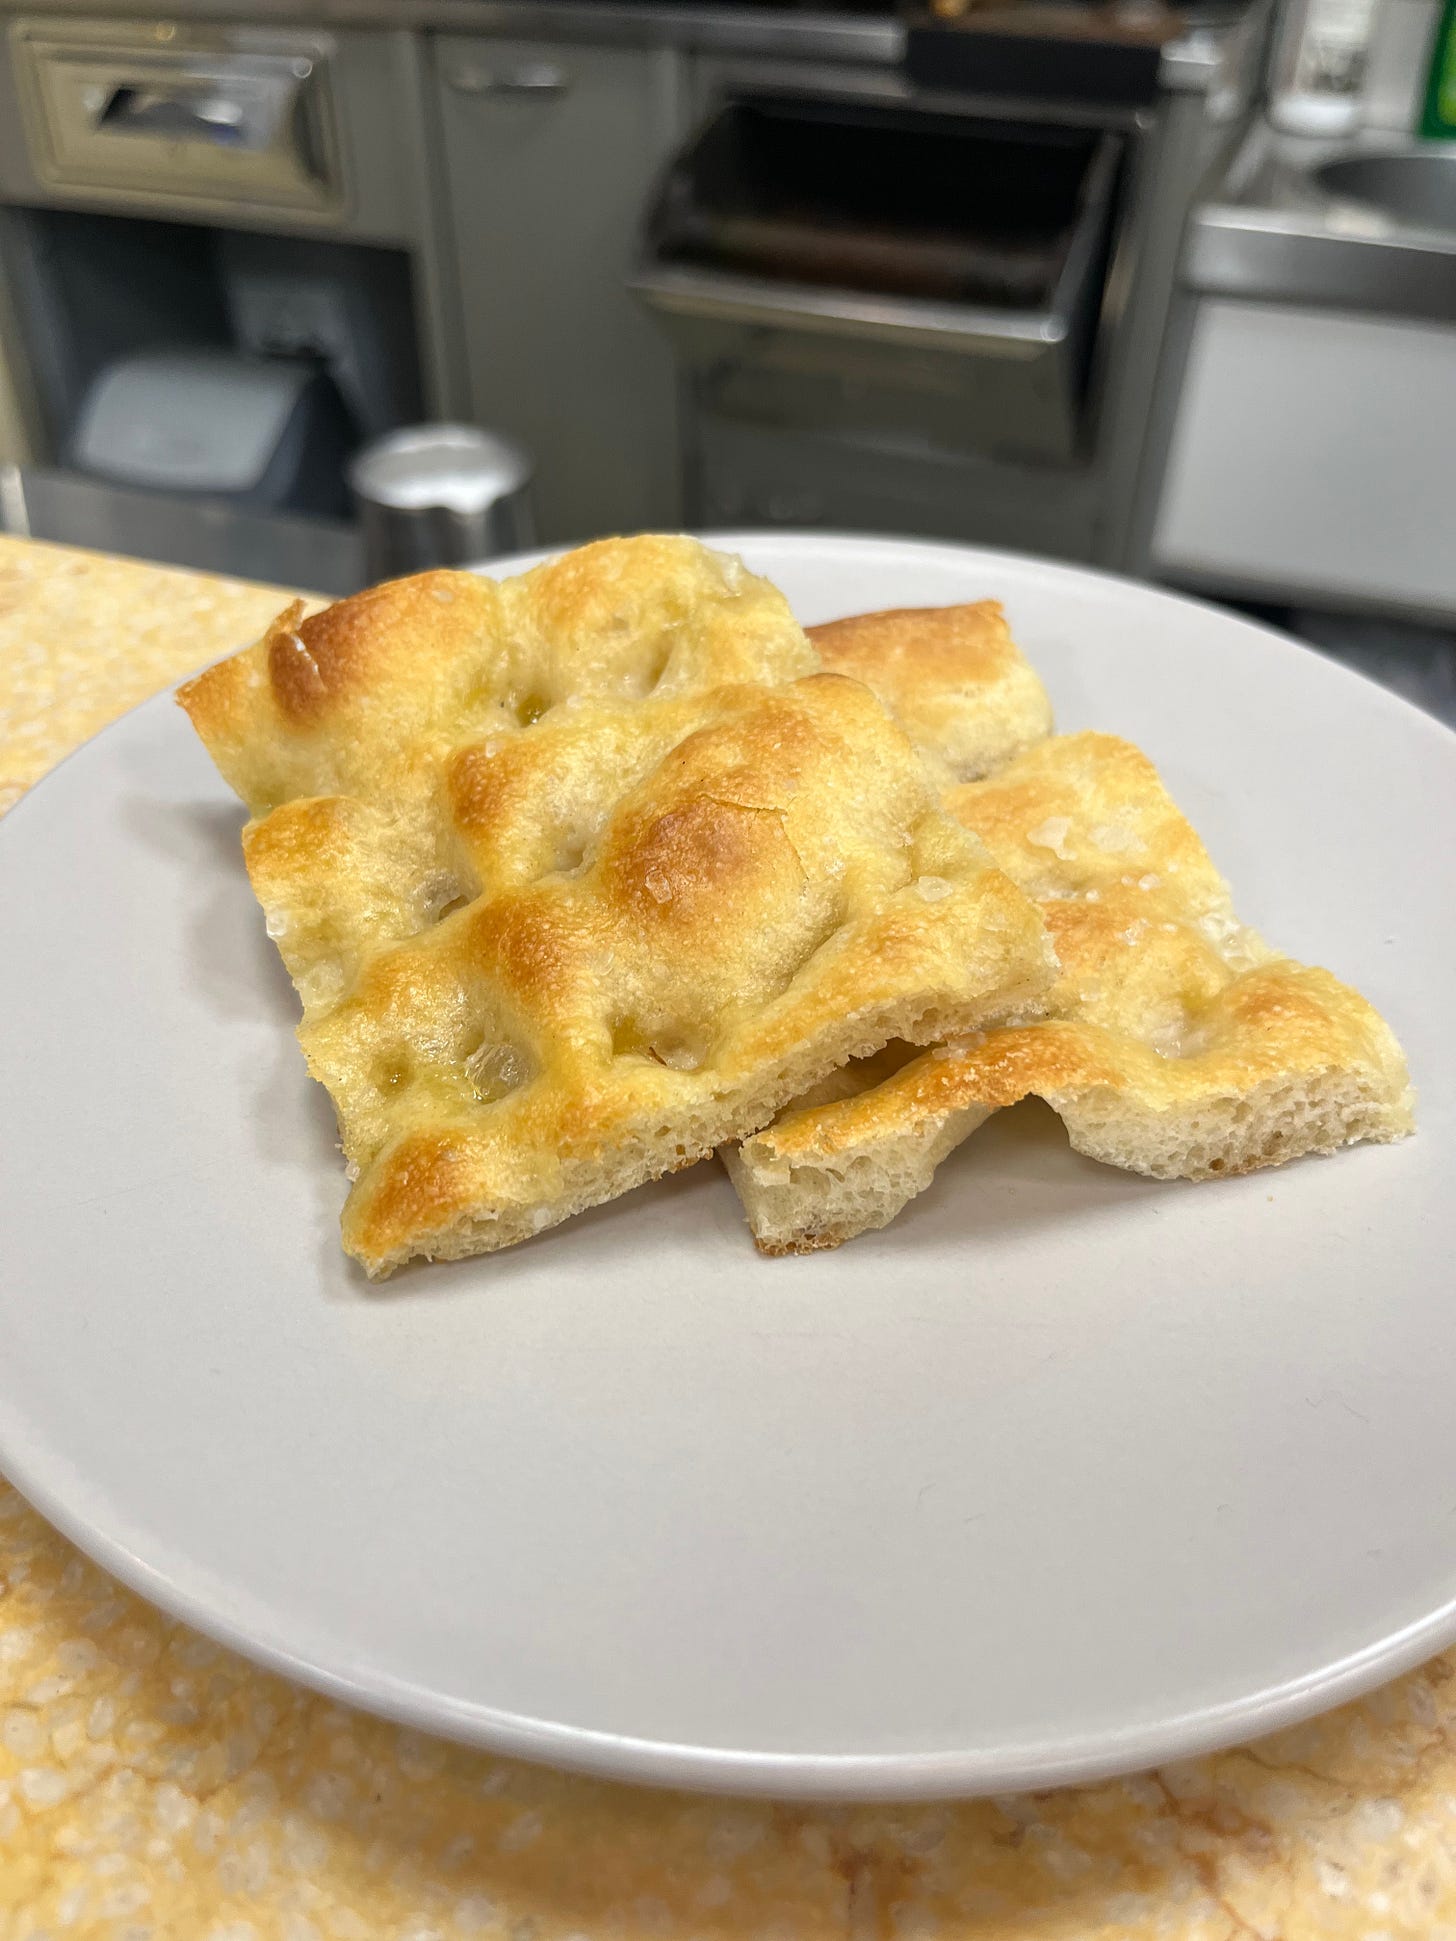
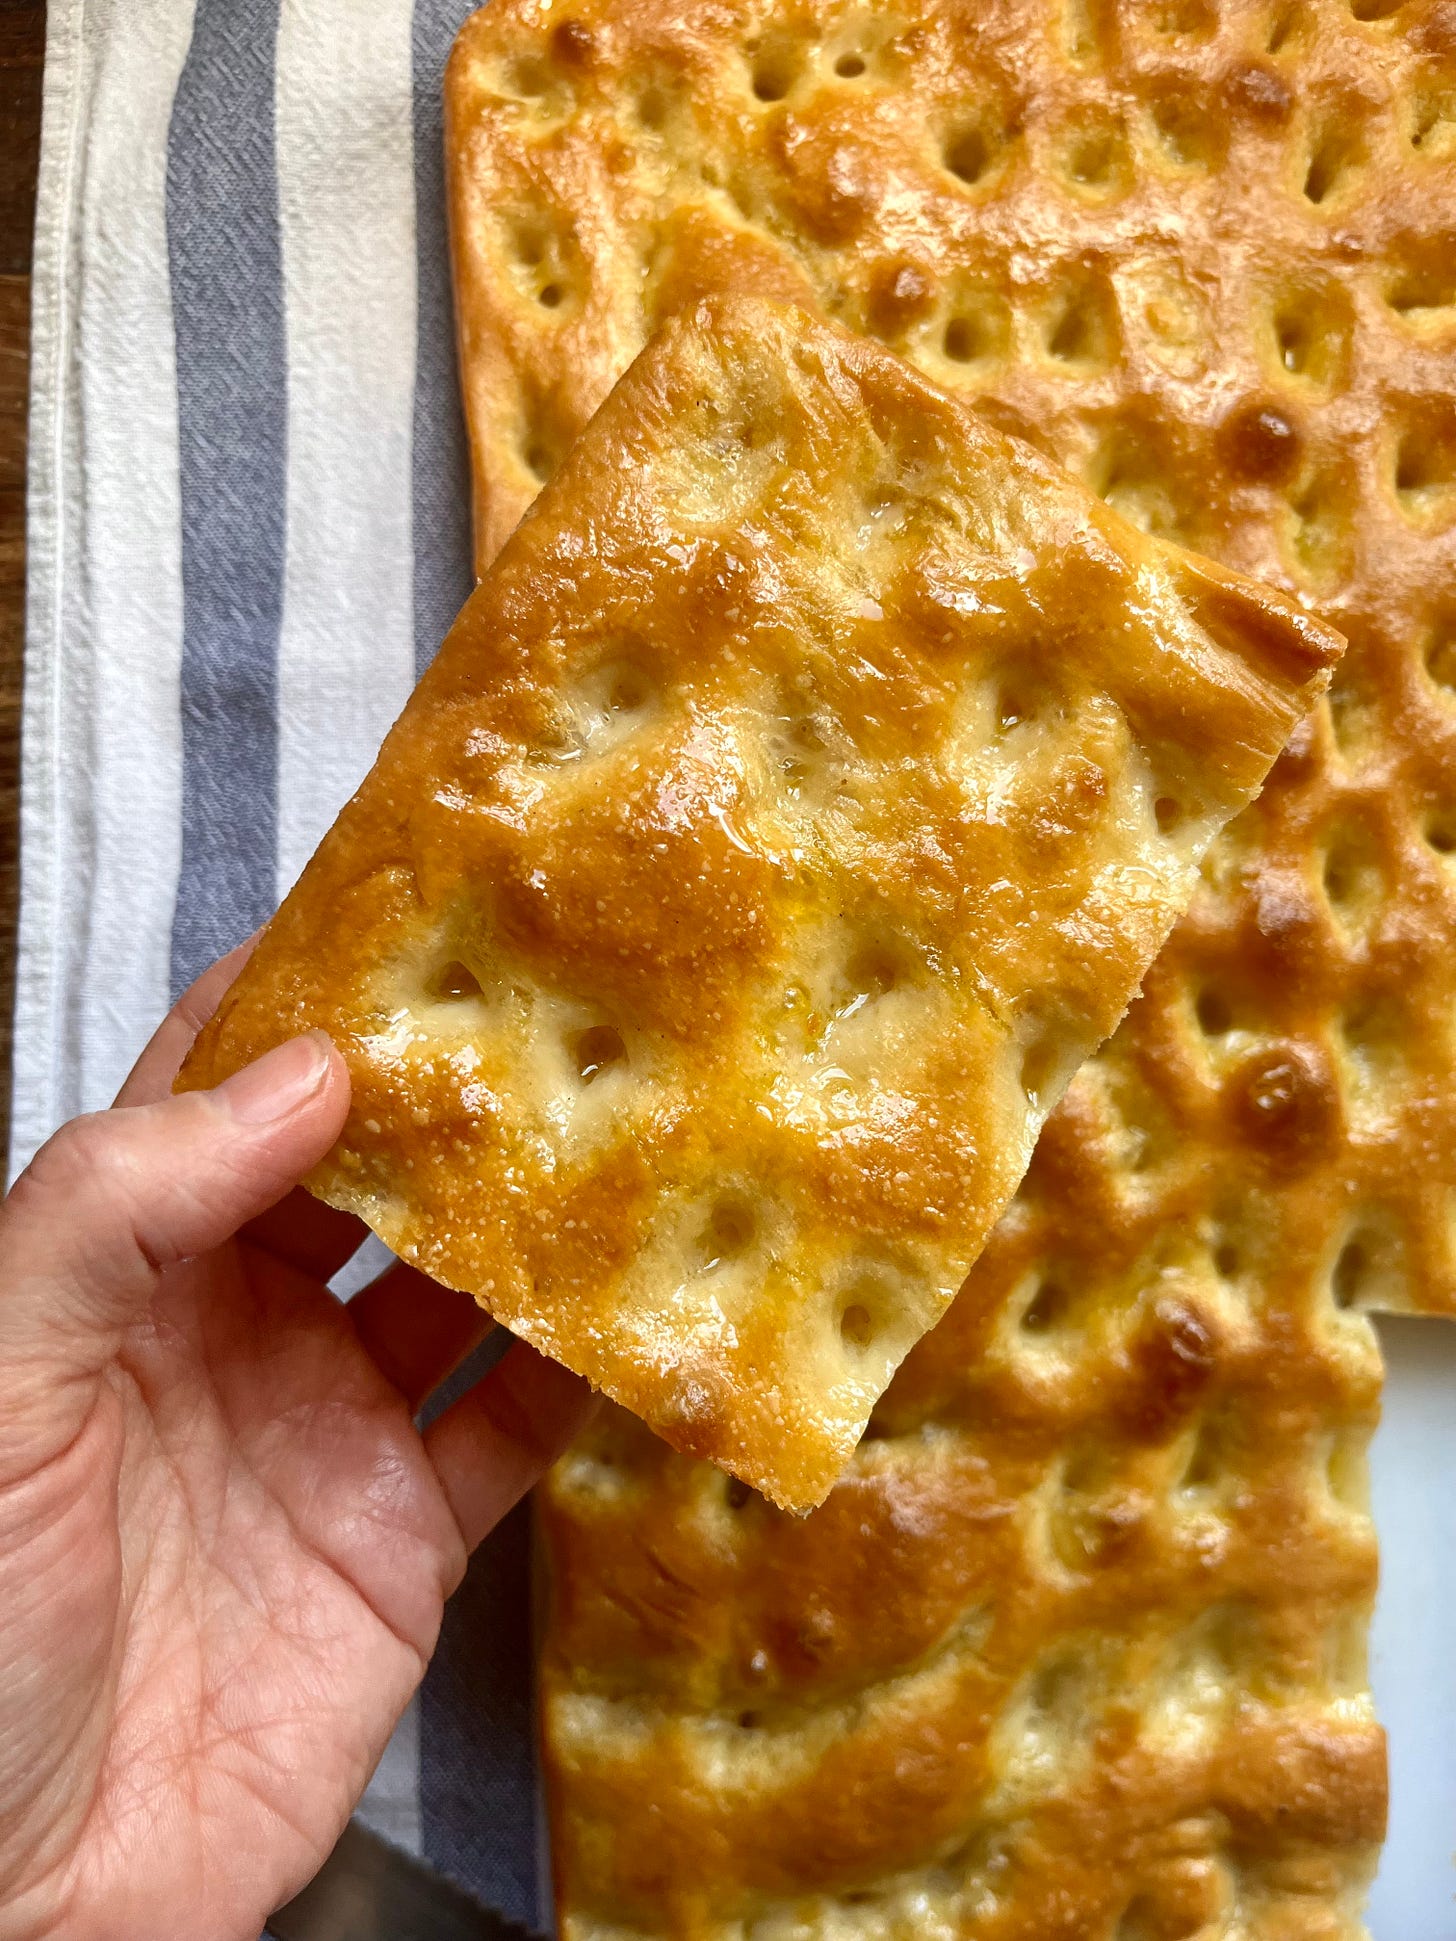
So what IS this magical bread? The typical Ligurian focaccia is thin, around 2cm maximum - it ranges from spongey to crisp to chewy - sometimes all three - and is unapologetically olive-oily and salty, thanks to the brining technique. Beyond the classic, the most common toppings I saw were olives, sage/herb, or white onions though I imagine this changes throughout the year.
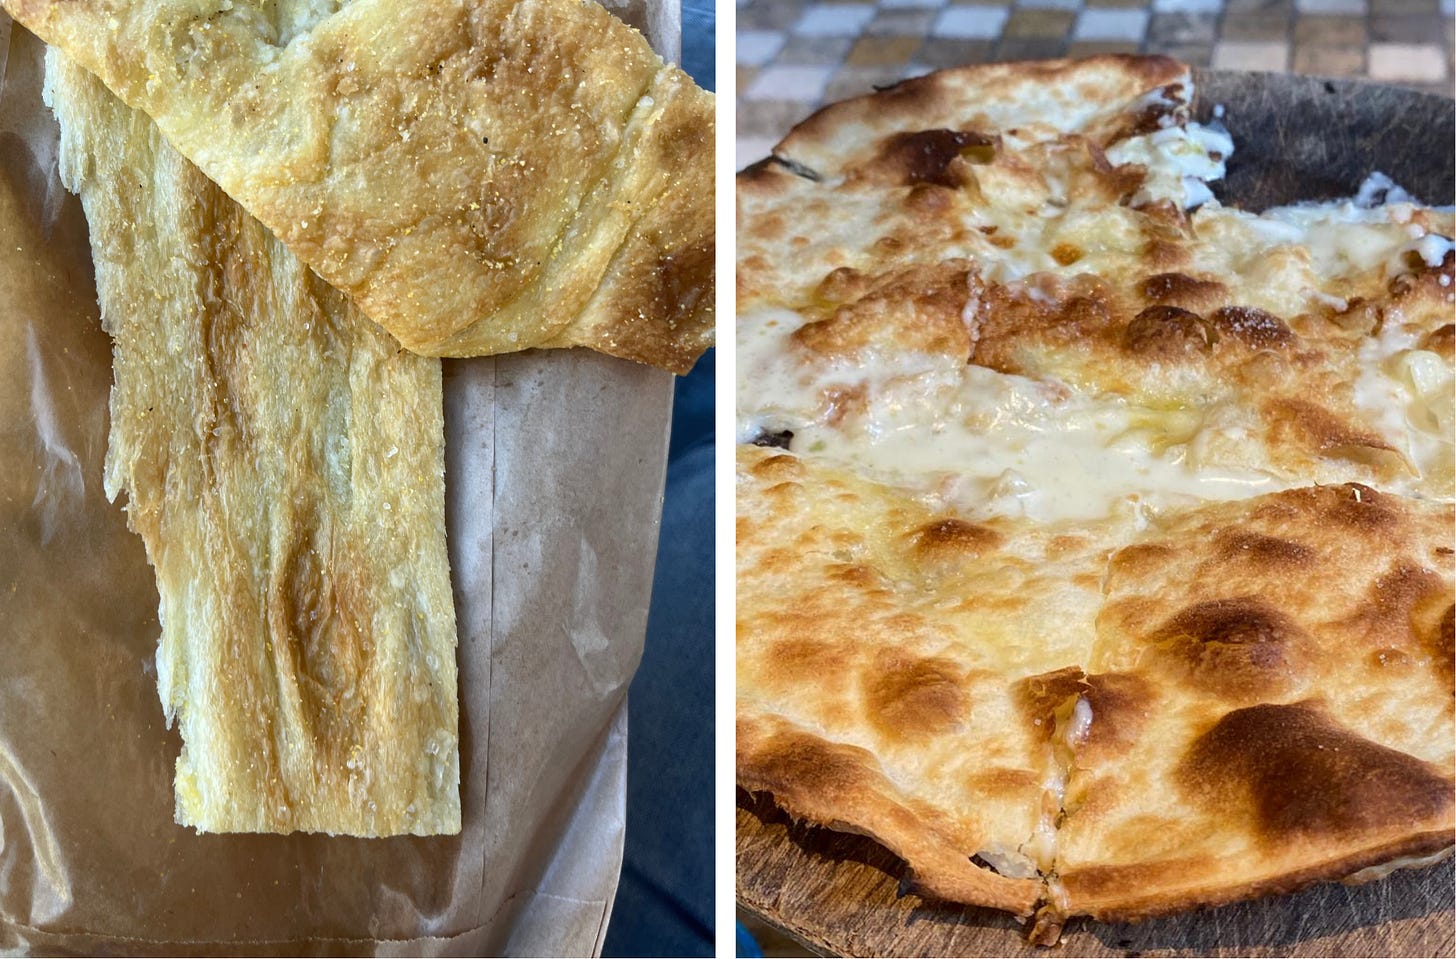
There are, of course, regional variants: A favourite of ours was the Focaccia de Priano, a bakery in Voltri (a short train ride from Genoa), an ultra salty, rich, thin, soft bread that is stretched with polenta and had a distinctly smoky taste, probably from the well-worn bakery ovens. And, of course, you can’t go to Liguria and not mention the utterly outrageous Focaccia Di Recco, an unleavened (!) focaccia stuffed with fresh cheese. These variants will be explored, developed and shared in the coming months because there can never be enough bread in our lives.
But today, it’s all about the OG; I’m on a mission to build my very best ode-to-Liguria-Ligurian-Focaccia. There are a few areas I need to nail. Shall we get to it?
Hydration
The dough itself is relatively simple: A mixture of strong and plain flour for a mixture of chewy and spongy textures, a little sugar (in the form of malt syrup - traditional - honey, or just plain sugar), a small amount of yeast, olive oil and most importantly: Water.
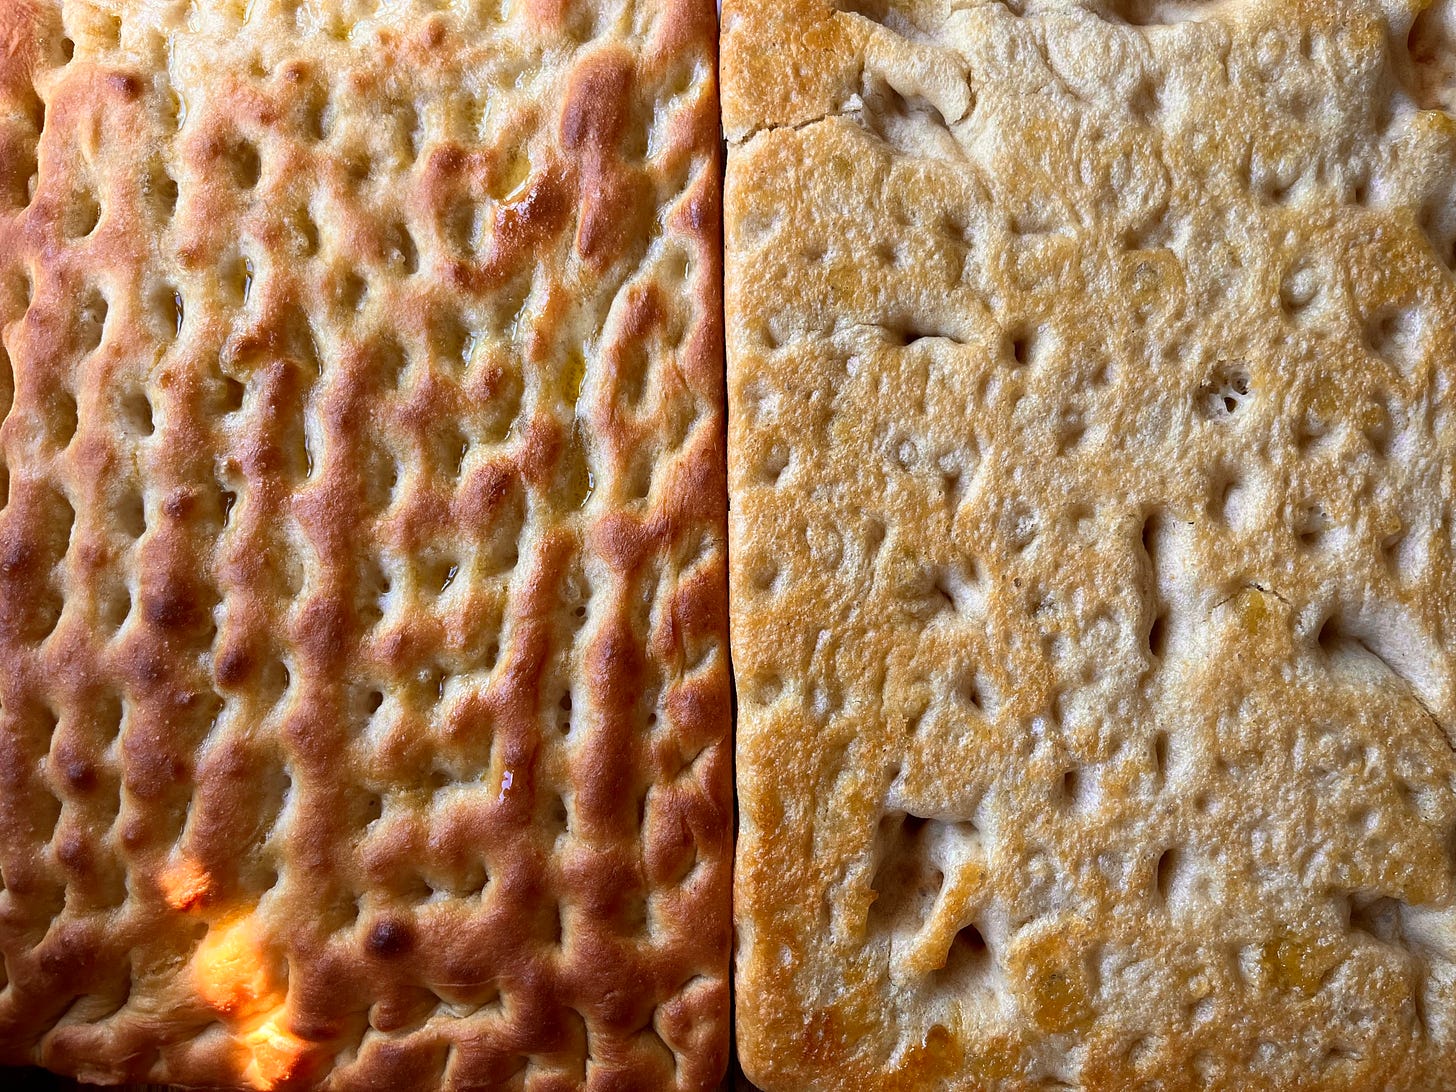
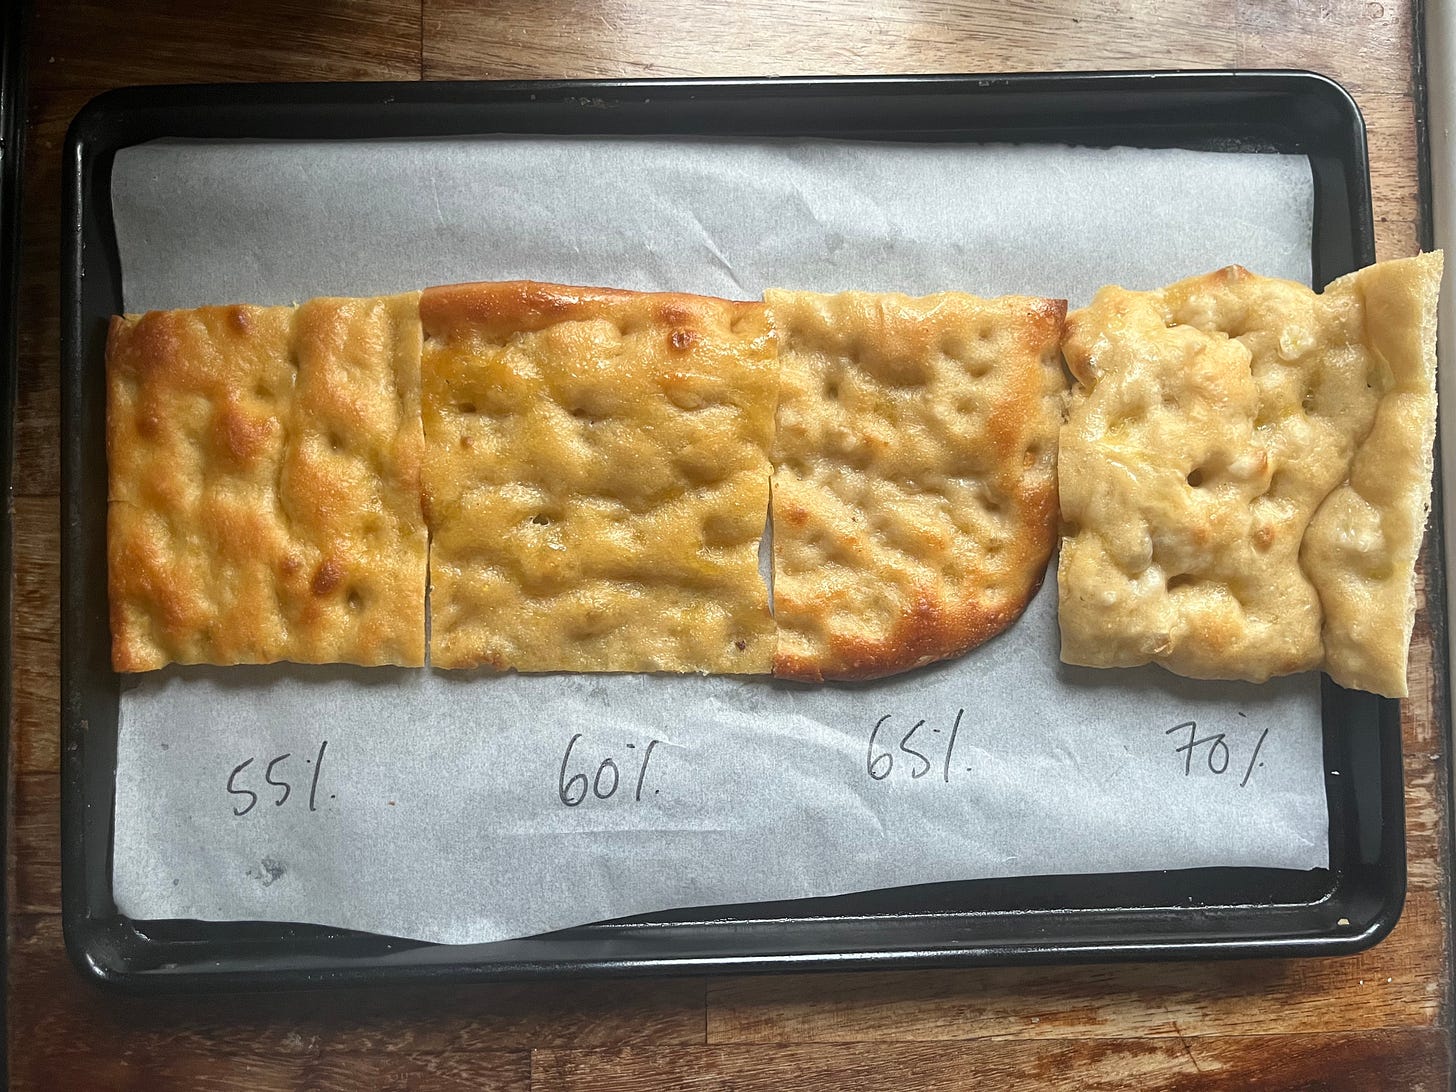
When I was tasting the focaccias on my trip, the first and most distinct difference was immediate: The hydration. I admit that I am a hydration junkie when it comes to my focaccia dough, but the Ligurian focaccia is definitely more in the 55% - 65% range: The bubbles aren’t as big, and the dough isn’t as squishy and soft, but it’s all the better for it. Lower hydration in your bread will give you a chewier, spongier texture that is incredibly satisfying to eat, especially with the rich olive oil.
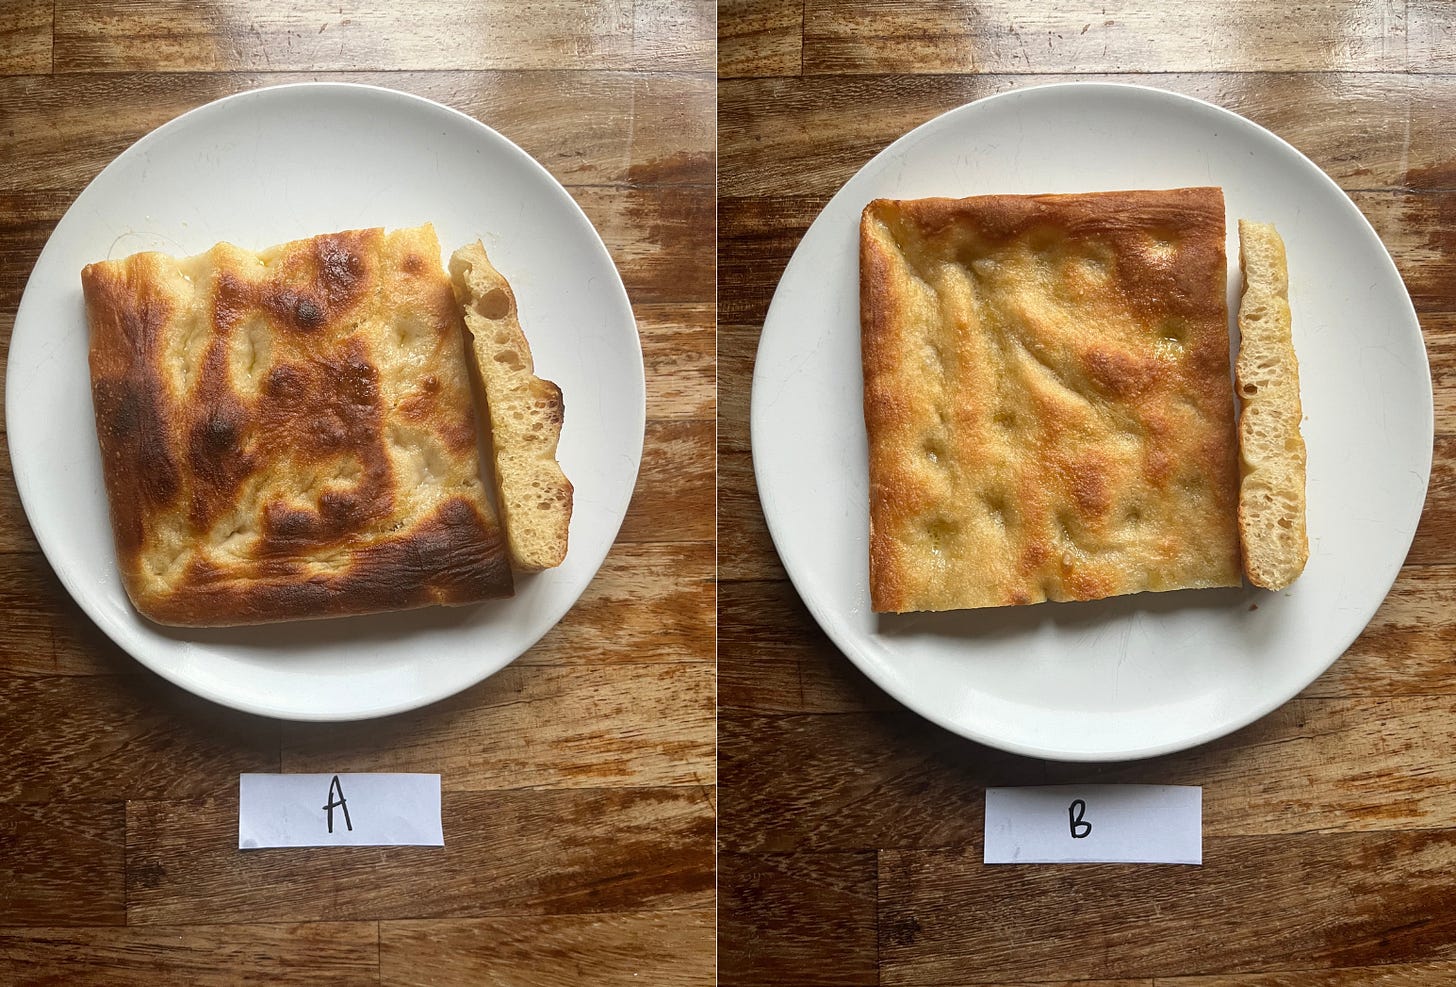
I put this to the test:
I preferred the lower hydration bread by MILES. The higher hydration doughs are fun, sure, but the Ligurian focaccia I tried was not very airy nor had ultra tender squishy middles, typical of a higher hydration dough. A lower hydration is also practical - holds the dimples and thus the olive oil much better. This bread stands out by having a good chew and denser texture. In the end, I’ve decided to go for 57% for my final hydration.
It’s worth noting that lower hydration doughs will also take longer to develop gluten. Flour contains proteins - Glutenin and Gliadin - that, in the presence of water, form gluten bonds. Gluten provides structure and stretch to your dough. The presence of gluten allows the dough to be both elastic (holds its shape) and extensible (stretches). With less water available, it takes longer for the flour to sufficiently form those gluten bonds.
Although mechanically kneading the dough can help build strength in the dough and organise the gluten bonds, gluten will actually form very happily on its own. With less water available, lower hydration dough may appear less active than a higher hydration dough, but this is not true - hydration has no bearing on yeast activity, but a higher hydration dough will look more bubbly, loose and aerated compared to its stiffer counterparts.
Preferments/poolish and cold-fermenting
I know that one of the reasons people tend to shy away from making bread is the time commitment. And two of the most significant time / organisational commitments? Preferment and cold proofing.
I’m a sucker for a preferment. That’s because when you make a dough, time is an ingredient! As the dough ferments, the yeast converts sugar into carbon dioxide and alcohol (which burns off when you bake!). Flavour compounds are also produced here. So, in theory, spending a bit more dedicated time on the ferment stage is a great way to improve the overall aroma and flavour happenings in your dough. That’s where preferments come in - incorporating a preferment into your dough is like giving it a kickstart, the sort that allows you to build layers of flavour and complexity: the preferment goes into the dough, the dough rises, the dough is shaped, and risen again before baking. With the preferment, we’ve been able to sneak in an extra few hours of flavour and texture building thanks to the gluten that has formed.
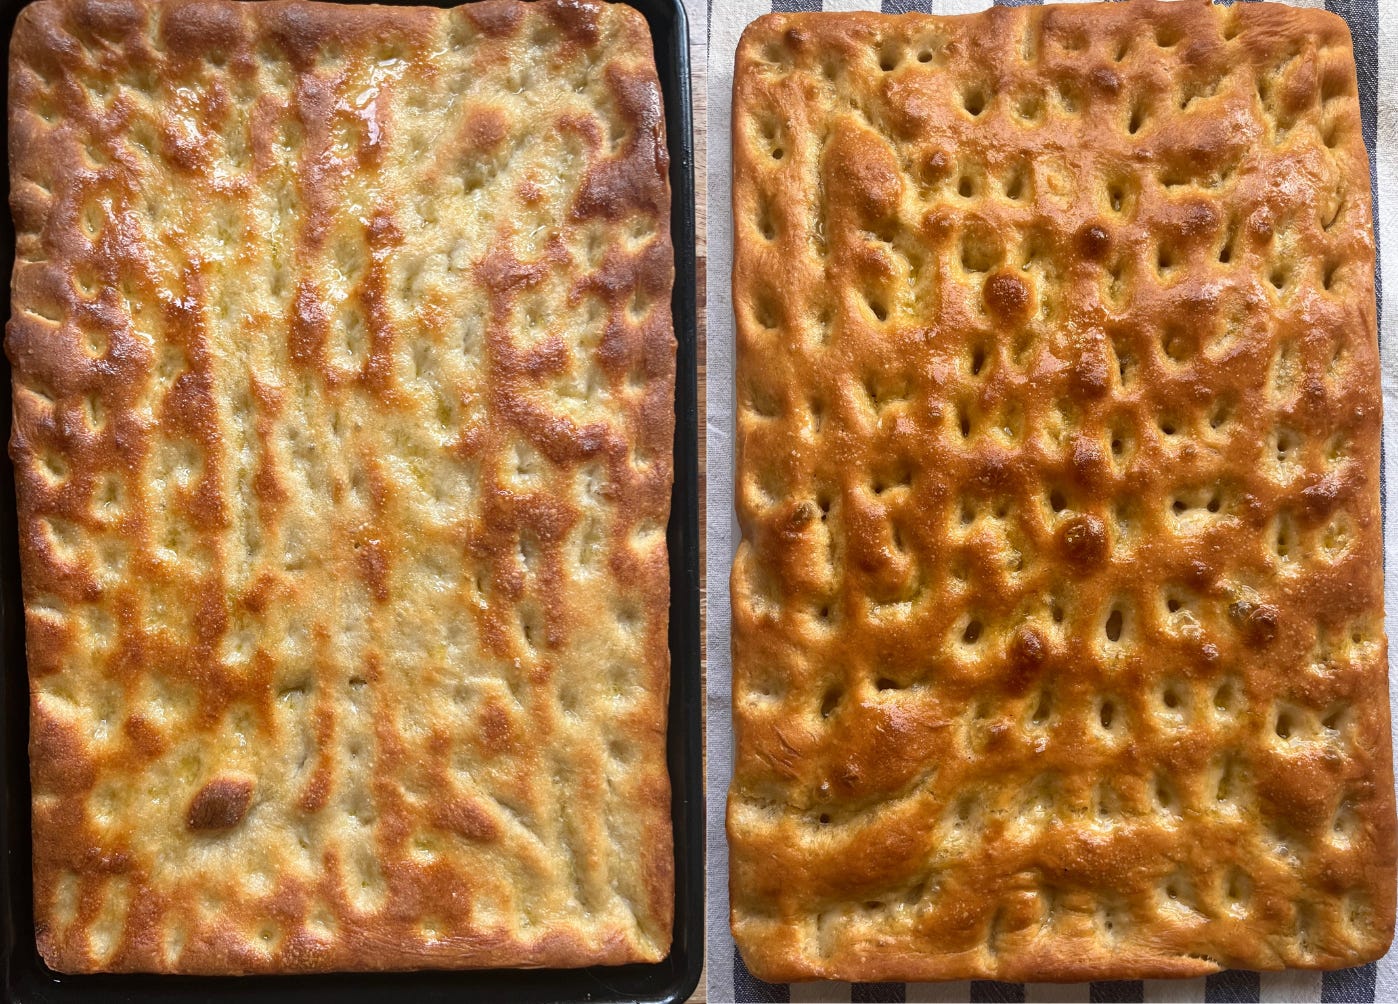
I tried out both:
You may be happy to hear that whilst incorporating a poolish into the dough is great, it is not essential for the success of the recipe. Much like the strecci from earlier this year, the preferment is really handy for flavour and getting great height and outrageous bubbles, but it’s less prominent in the thinner dough. As well as this, cold fermentation did not make much difference either: Ligurian style focaccia, or at least the ones I tried, do not rely on deep fermented flavours and is the sort of bread that should be eaten fresh - the flavour comes from the olive oil and salt, rather than from anything overly strong from the fermentation itself.
So, my final verdict is: If your schedule allows for it, make the poolish! But if you’re in a hurry, you’re welcome to approach this as a straight dough.
The stretch
We had our first cappuccino and focaccia of the trip at a lovely spot called Patisserie 918 in Genova. Although it specialises in french and Italy classic patisserie, it still had focaccia on offer. Speaking to the owner, she explained that their focaccia is different each day depending on who shapes it. She prefers a thicker, fluffier focaccia whilst her husband prefers it thinner, chewier and oiler. The only difference? How much they stretch it. I absolutely loved hearing this. Today I have decided to go for a fluffier style focaccia and have scaled this recipe as such, but if you prefer a chewier product, simply use less dough per tray! Instead of 500g ish for a standard baking tray, try stretching out 400g. Sometimes the differences in final product is not to do with the recipe, but it as simple as a quantity control. And I love that.
The brine
The brine is a very particular part of the Ligurian focaccia making process, but it felt good to investigate a technique and tactic that felt so novel: Once your dough is ready (we’ll talk about when that is later), you do something that on a surface level may seem unthinkable: you cover it in water. Freaky but valuable.
Brining is something we see a lot in food. Whether in preparing meat or simply the water that comes in your tin of tuna or olives, it’s essentialy just salty water. For the focaccia, the brine has two purposes: Firstly, to season and secondly, to create a steamy environment which helps promote a spongy, soft texture in the final product.
Water also has an effect on the colour of the focaccia - despite being cooked at very high temperatures, focaccia in Liguria is not a deep brown: This is thanks to the watery brine preventing rapid Maillard reactions from taking place. As we know from the process of browning butter, or if you’ve ever poached food, things can’t brown in the presence of water: In the case of the Ligurian focaccia, the brine acts as a protective layer for the top of the focaccia, limiting its browning potential in the first part of cooking. Once all the water has evaporated, only the oil is left, and browning takes place - in some cases, the focaccia won’t brown at all in certain areas; the bread is almost poached in a salt water. SO. GOOD.
The brine is also accompanied by a heavy pour of oil. As we well know, oil and water don’t mix, happily, so we have two options here. The first: the salt water and oil are applied separately then mixed on top of the bread. Option two is to shake up the water, salt and oil into a temporary emulsion then pour this on top.
Turns out there was very little difference - I can see how in a production environment, using an emulsion is a more efficient way to brine the focaccias, but at home I actually found it more prohibitive to find something to shake the oil, water and salt together in - it was definitely easier.
For the brine, I use an ‘on the safe side’ 5% salt to water ratio. This is because I also add flaky salt on top, which brings a different ‘pop’ of flavour into the mix, and I realise we only have so much salt tolerance! As well as this, I prefer to err on the side of caution since a slightly underseasoned focaccia can be fixed afterward.
The proofing
Although you can usually get away with proofing your bread on the countertop, the relatively low hydration of this bread makes it very susceptible to drying out, so I’m going to have to recommend a divinely soggy proof for this. When I was trying out the focaccias, I got the absolute best results by turning my oven into a makeshift proofing box just to keep things supple. It’s a simple process: Bring a small pan of water to the boil and put it into the oven with the door closed. After 5 minutes, pop your focaccia in and proceed as usual. Once an hour, reheat the pan to keep the temperature toasty and the air humid.
Dimpling
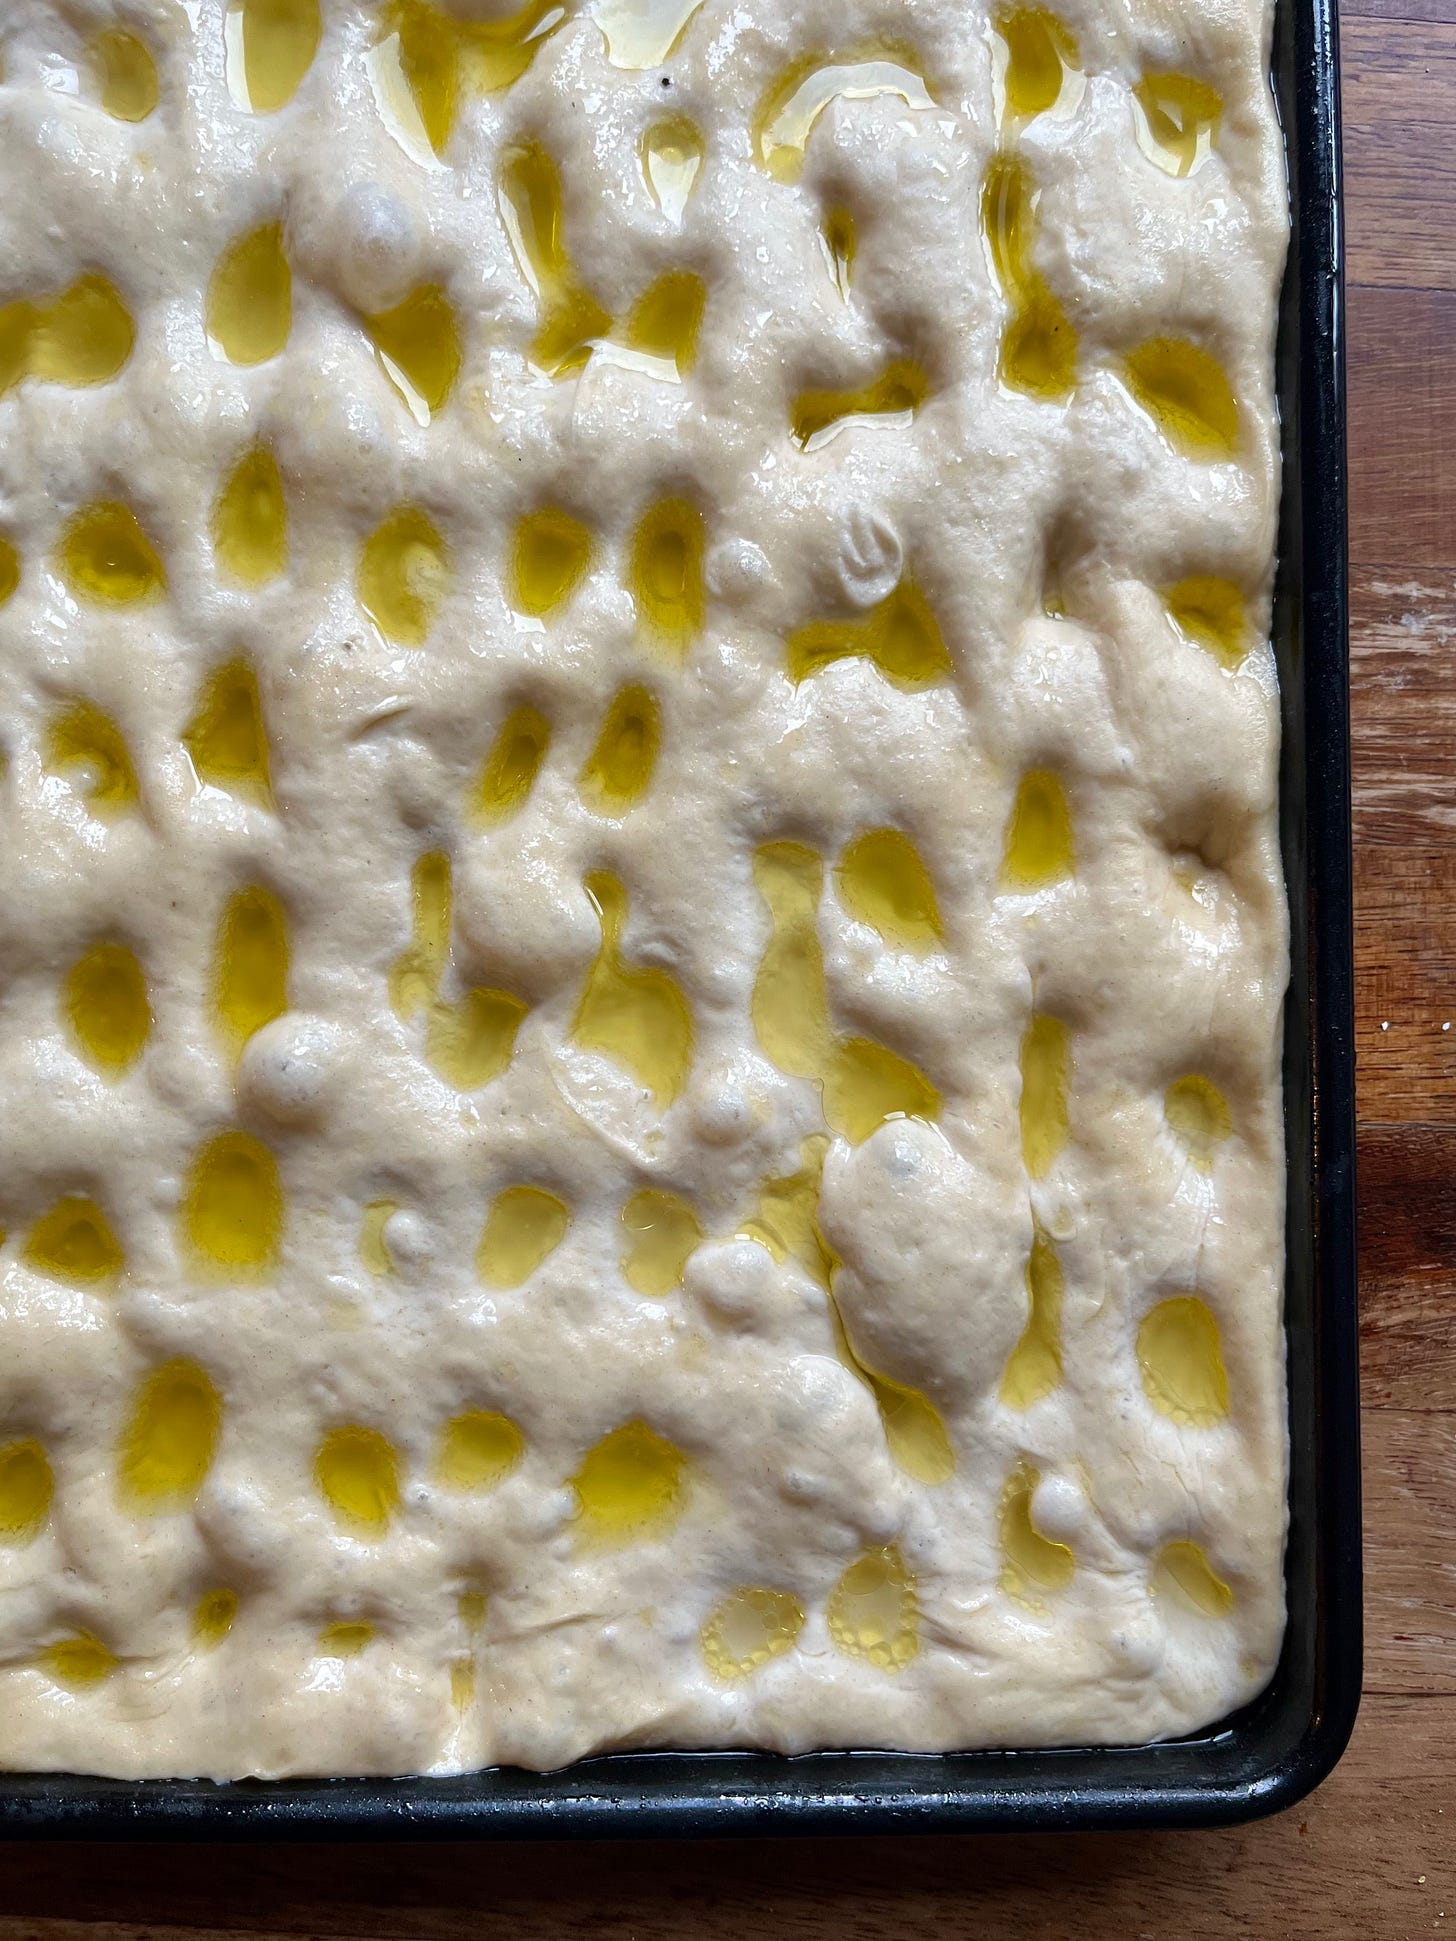
The distinctive dimple marks in Ligurian focaccia are much more regular than the wild landscapes we’ve become used to seeing in the higher hydration types of focaccia. This is an example, in my opinion, of perfect design in bread: The lower hydration dough holds its shape much better and, as a result, we are rewarded with juicy pockets of oil or water, or a mixture. Thanks to the on-going feud between oil and water, there are some divots that become filled with the brine and the oil ends up on top; In this order, the oil prevents the water from escaping quickly during the bake and we are rewarded with these fantastic doughy pockets which contrast so beautifully with the crisp top.
Figuring out when to dimple was vital for me. I had three options:
Dimple before proofing
Dimple after proofing, but before brining and oiling
Dimple after proofing and after brining and oiling
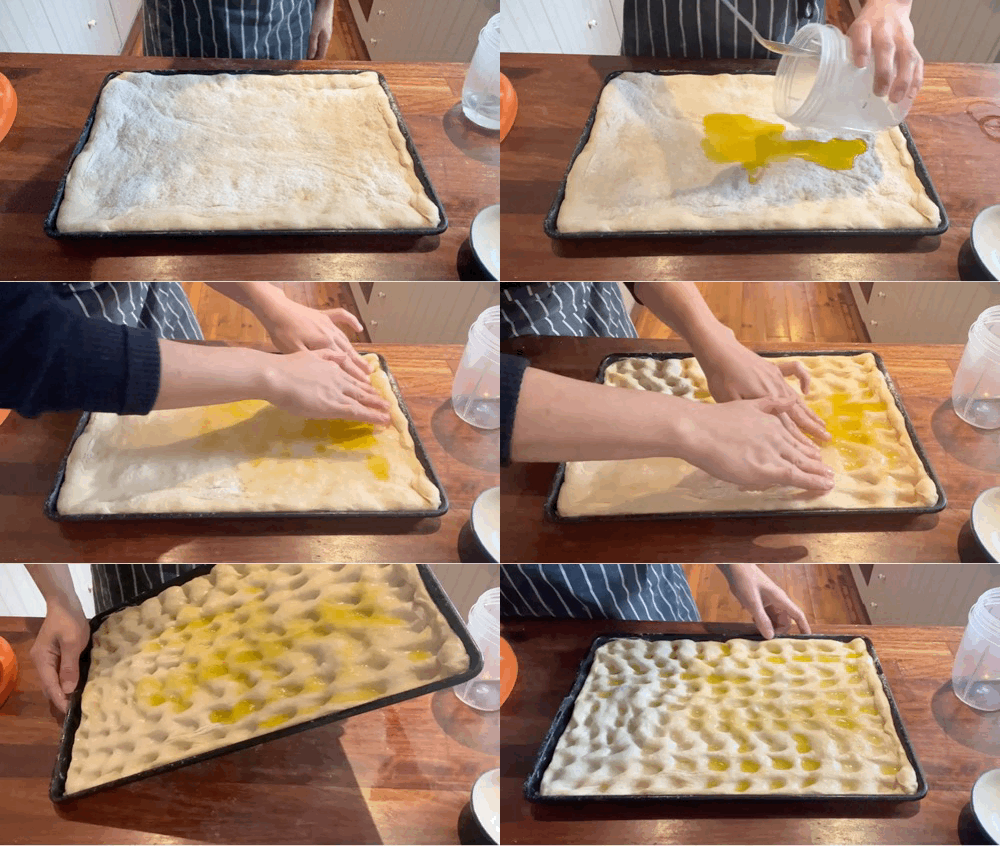
Although I didn’t expect this to make much difference, I found the absolute best holes were from option three. They retained their shape best when baked and gave me the best range of textural/doughy/crispy. Dimpling before proofing was semi successful, but it’s definitely worth waiting for the half-way point to get the best texture in my opinion. As well as this, Jordon made a compelling point - dimpling the dough post brine “stops your fingers sticking to the dough as you do it”!
The bake
Baking bakery-style breads at home is always going to be a challenge because the kit is so radically different - we are not blessed with deck ovens at home. A deck oven is the typical bakery oven - usually stacked 2-4 levels high, it is a massive piece of equipment that is lined with stones which are heated up over a long period of time. It holds heat very well and it is very good for baking bread. It is incredibly stable and can get very hot. Rather than cooking by convection, it cooks by conduction which is static heat. It has no fan to help circulate the heat, it simply radiates warmth from hot stones and bread is baked through this radiant, infrared heat. This direct heat helps ensure you get a crisp base, much better than a traditional fan oven does - this is where pizza stones come into action! So, if you have a pizza stone, you can use it here but it is not essential.
I tested out several ways of baking the focaccia and I found the absolute best way was to heat the oven up to 230c FAN and then once the bread was in, I changed this to static heat and baked for around 15 minutes, though you could reduce or increase this depending on what you like. I have provided a range of baking instructions in the recipe so you can decide for yourself. Fan forced air is excellent for achieving colour, but is a bit too intense for our focaccia - since it is thin, we want to cook it relatively gently (in the grand scheme of things) to ensure it stays tender and fluffy, rather than crispy and burnt. Because of the low hydration, this bread can go from soft to hard very quickly.
Extra crispy top
Though I may not win any points here for being traditional, to achieve an extra crispy top, we can borrow a technique from another area of cooking: A light dusting of flour. Taking inspiration from shallow frying, where you might dip a piece of fish in flour before frying to get a crisp coating, a light dusting our focaccia with flour can also achieve something similar. I’m not sure if this is traditional, but I did notice that whenever I saw bakers in Liguria preparing the focaccia dough, they were not shy with the amount of flour they used to shape it and it was not dusted off afterwards. The effect is this: As the oil and brine are poured onto the top of the bread, a sort of batter is created. As the bread proofs and eventually, bakes, once the water has evaporated, the crusty oil/flour/batter bakes, and you get a delicious extra crunch.
The deal with staling
This focaccia dough has a relatively low hydration compared to the 65%+ breads we are used to eating, which means it’s already ‘closer’ to being ‘stale’. When bread goes stale, we tend to think of it as ‘drying out’ but moisture loss isn’t the only culprit for stale bread, in fact, dehydration and staling are totally different things. Dehydration is.. Dehydration, so bread losing moisture. Staling is actually due to the recrystallisation of starch molecules. Bread begins its life as individual granules of flour. Once we add water, it transforms into the bread dough we know and love. When the bread bakes, these swollen starch molecules burst. As the bread cools, the starch, with its lost water, tries to return to its crystallised state. You can reverse this a bit by heating it but to be honest, this style of focaccia is best eaten and enjoyed on the day we bake it. One of the most life-affirming things about being in Italy is that daily wander to the bakery to enjoy the fresh bread and eating it there and then, rather than seeking out products with the best shelf life (no shade on the UK, but our obsession with a weekly shop has GOT TO GO!)
To paper, or not to paper?
That really is the question. When it comes to baking focaccia at home, in sometimes *less than well seasoned* baking trays, I think it’s a sensible insurance policy to use a sheet of greaseproof paper on the base to prevent sticking. If you know you have relatively new trays that don’t have various leftover grime-crimes, then you might be okay putting your bread straight onto the tray, but it is a risk. There is nothing sadder than focaccia stuck to a baking tray.
Because we are using a brine and because flour + water = flour glue paste (aka gluten), things can get sticky and, if underbaked (which can often happen in home ovens), you may get an overly attached focaccia, no matter how well you grease the tray. That being said, a focaccia baked directly onto the tray without paper will get a more golden crust on the bottom.
The olive oil
I LOVE how everything happens for a reason in food, how dishes have been created in line with geography and local growing traditions - it’s a sort of historical footprint that we can very clearly follow to see why. The olive oil, at the heart of Liguria’s Pesto and focaccia, is a perfect example of that. Imperia, the western part of the Ligurian coast, is the home of Taggiasche olives. These fruity little black olives, in comparison to others, are prized for their mild, delicate and aromatic flavour. The oil produced, as EVOO or table oil, is known to be incredibly smooth, making it the perfect oil to be the backbone of a pesto Genovese or to cover your focaccia. So, I recommend that you seek something similar for this recipe if you can: A mild and smooth extra virgin olive oil is going to make your drippy focaccia experience 100% better. Avoid anything too peppery or robust in taste otherwise, it could be overpowering, too bitter, or too grassy.
Ligurian style focaccia
Makes 1 x focaccia in a 26 x 39 cm tray. Please note that tray size is essential and how much you stretch your focaccia will impact the final product - you want the dough to comfortably stretch to the edges.
Poolish - start the night before
75g plain flour
75g water
1/8th tsp yeast (literally a pinch!)
**As per the preferments section, you can skip this stage. If you do, just add the poolish quantities into the main dough below**
Main dough
All of poolish from above
230g strong white flour
100g water, tepid/slightly warm to touch
3g dry yeast
20g olive oil
5g salt
10g malt syrup, dark brown sugar or honey
Brine
60ml water
3g fine sea salt
30g olive oil
Plus more olive oil for finishing and flaky salt
Poolish method
For the poolish, mix together the flour and water and yeast. Cover and leave for 6-12 hours before using. It will be fluffed up and risen and be extremely thick, creamy and bubbly.
Dough method
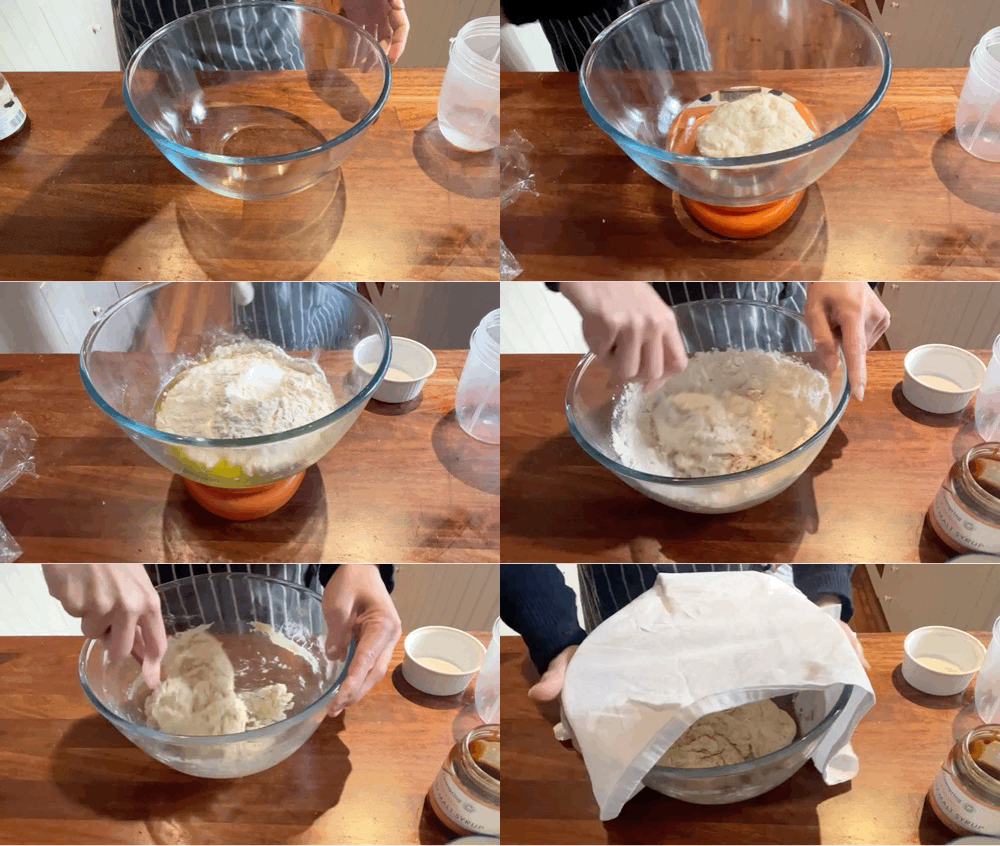
If using the poolish, add to a bowl then add tepid/slightly warm water (to get the fermentation going!) and dissolve well. Then add the flour, yeast, olive oil, salt and malt syrup. Mix well to a rough dough, then leave to autolyse for 10 minutes, covered.
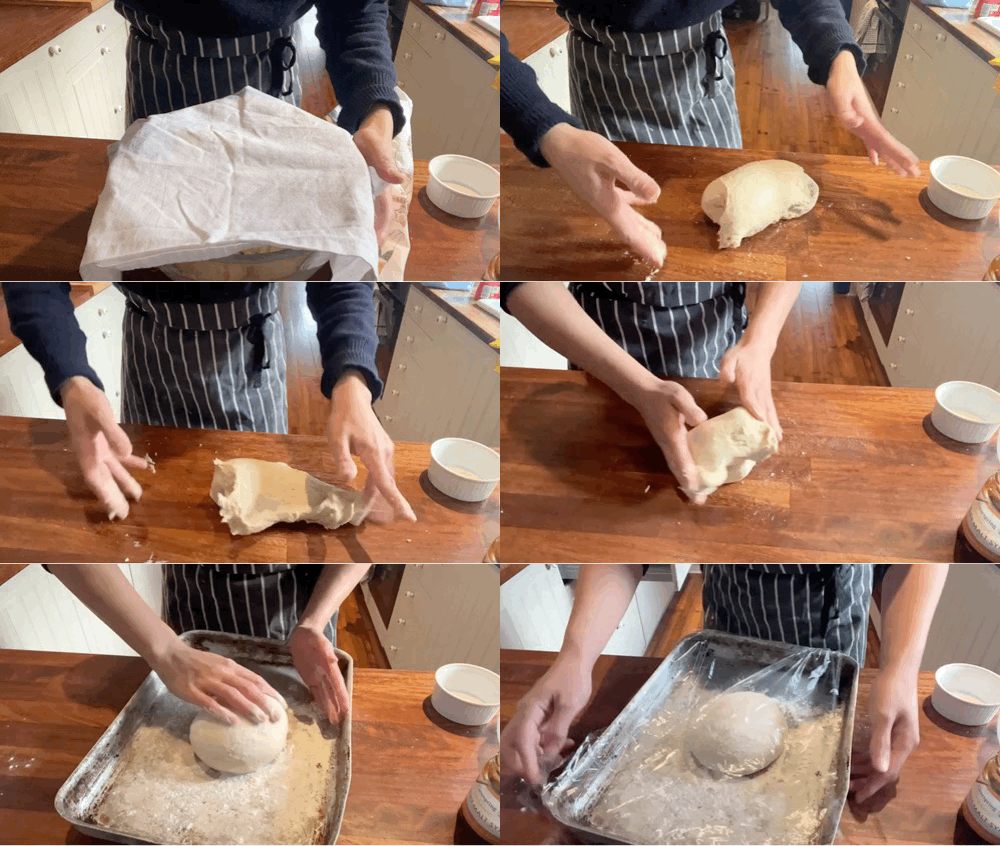
This is the time when the flour absorbs the water and gluten begins to form. Now knead until smooth, about 10 minutes. If you have a stand mixer, you can do this all in the mixer and forgo the autolyse, simply mixing on a medium speed for 6-10 minutes.
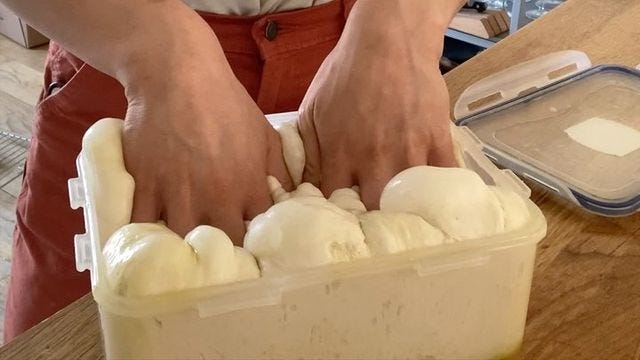
Once the gluten is developed, smooth the dough, move onto a well floured tray and sprinkle with more flour. Cover with a tea towel/cling film and leave to proof for 1.5 - 2 hours until somewheat puffed.
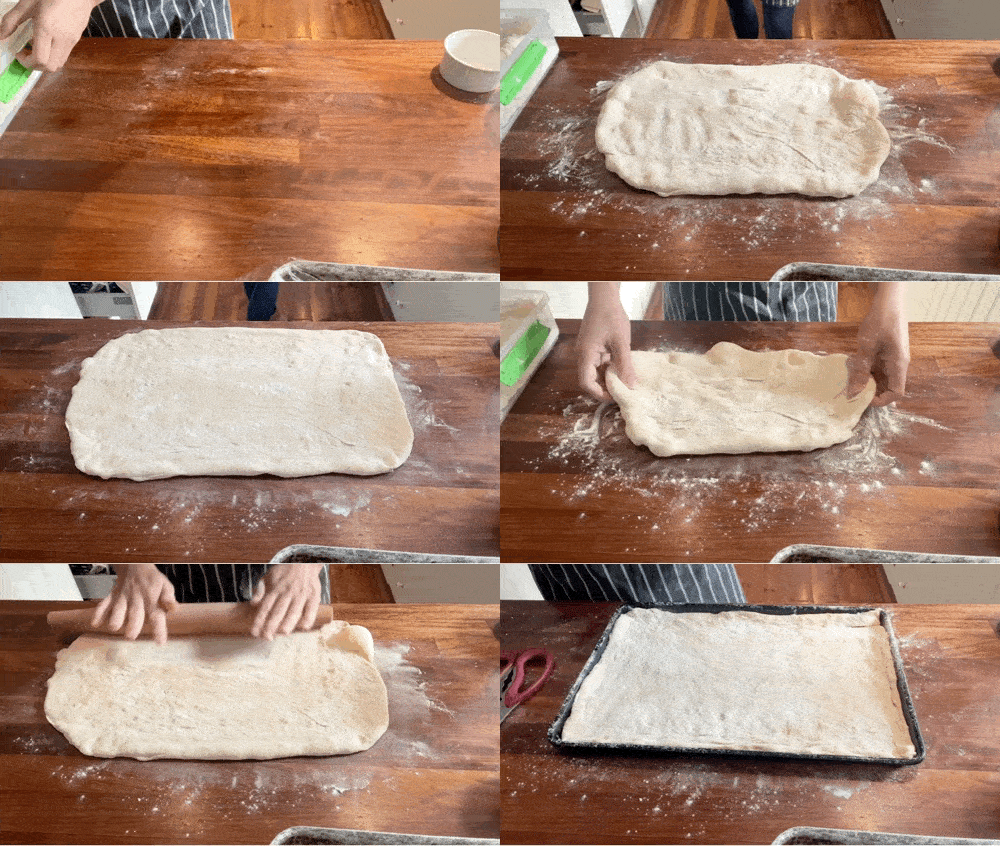
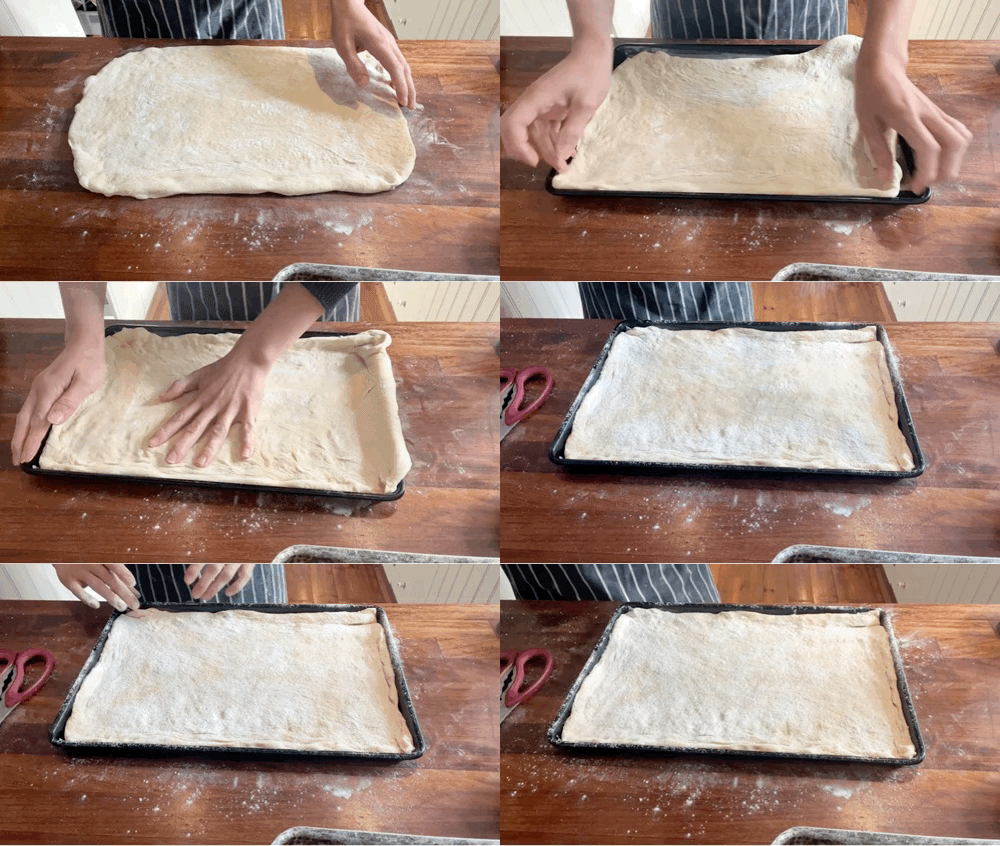
Carefully move the dough onto a floured surface and press out using the pads of your fingers, being careful not to stab it or break too many bubbles. Then use a rolling pin and gently roll the focaccia to be about the same size as your tray.
Spread around 20g / 1.5 tablespoons of olive oil onto your tray lined with a paper (up to you though, refer back to the main newsletter to see the options there!).
Place the dough gently onto the baking tray and press it into the corners as well as you can. For the crispy flour top, sift an even, light dusting of flour across the top of the dough.
Move the tray into your proofing chamber if using. To make a proofing chamber, bring a small pan of water to the boil and put it into the oven with the door closed. After 5 minutes, pop your focaccia in. Proof for 1 hour
Now it’s time to add our brine! The dough should look puffy and active: Pour the olive oil onto the dough, followed by the brine. Spread it out over the top slightly and then use the pads of your fingers to create divots and dimples across the top of the dough. Don’t be afraid to go deep and use your whole finger tips. I prefer to use my three middle fingers. The brine and oil should fill in the holes - move the tray around a bit if this doesn’t happen immediately.
Proof for another 30mins - 45mins until very bubbly and jiggly. During this time, some of the brine will have dissolved into the bread. Sprinkle extra flaky salt on top now, if desired
Pre-heat oven to 230c fan, using a pizza stone if you have one. When heated, reduce to 230c and change to static oven (if possible) and put in the focaccia. Bake for 15 minutes until puffed and golden - if you prefer a darker bake, leave in for another 3-5 minutes. If you prefer a more gooey/juicy/tender focaccia, take it out at 12 minutes! If you don’t have a static oven setting, I recommend baking at 200c fan for the entire time.
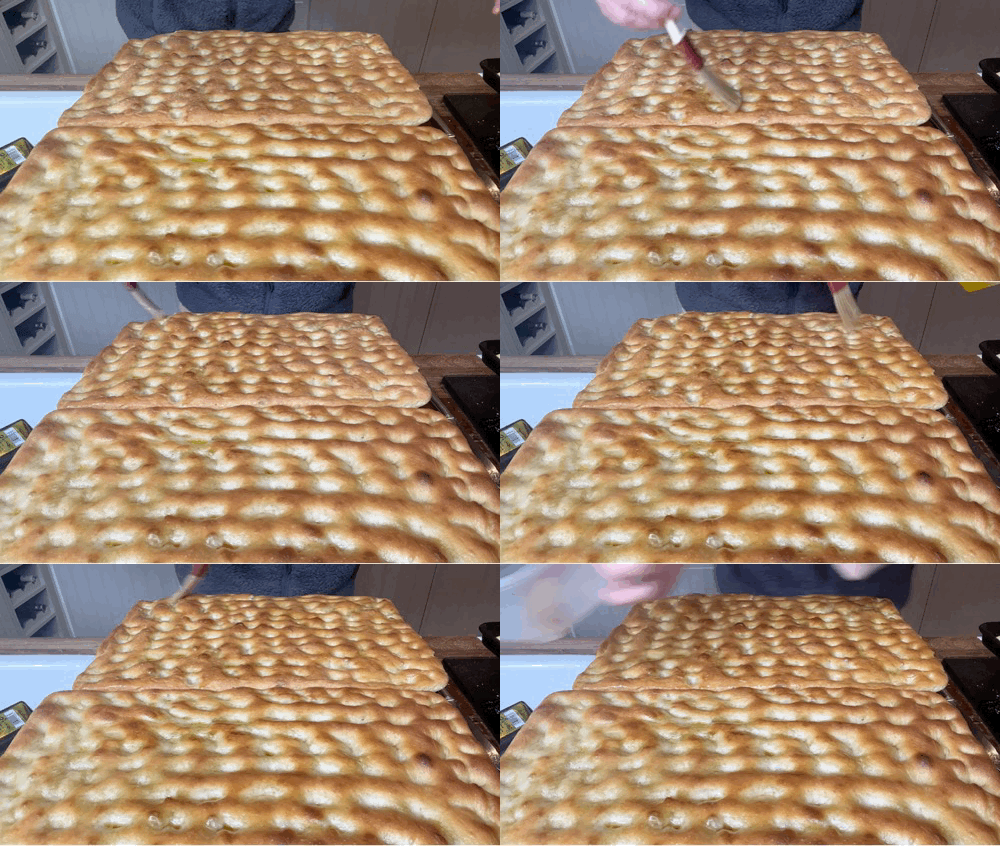
Remove from the tray once it comes out the oven and leave to cool on a rack to prevent a soggy base. If desired, brush with more olive oil for that beautiful extra sheen.




Thank you. Look forward to trying this version (the 3 day focaccia does have legendary status in our house!)
Nicola!!! I LOVE seeing the investment you put into your research <3 When you were in Liguria have you tried the Ligurian focaccia which isn't fully baked on the top, so it is extra juicy/moist? I love that one and usually you can ask for it in bakeries :)
Also, since you love focaccias and stuff that much.. you should get yourself the book from 'cooker girl' aka Aurora Cavallo. It is called 'come l'aqua per la farina' (translated like water to flour) and it comes out in two days! It is full of just focaccia and pizza recipes from around Italy and she really made her research to put the book together. She also has a cool insta if you want to follow her :)