Hello,
Welcome to today’s edition of Kitchen Projects. Thanks so much for being here!
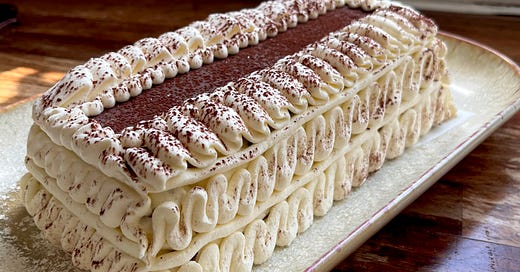
In response to the outrageous British heatwave this week, I have turned to the freezer and am excited to present you with a recipe and technique for DIY Viennetta. Yes. Viennetta! And the effort to pay off ratio is also excellent.
Over on KP+, I’m taking the Viennetta concept up a notch and sharing a recipe for a totally silly but VERY joyful Pina Colada Viennetta - click here for the recipe.
What’s KP+? Well, Kitchen Projects+ aka KP+, is the level-up version of this newsletter. It only costs £5 per month, and your support makes this newsletter possible. By becoming a member of KP+, you directly support the writing and research that goes into the weekly newsletter and get access to lots of extra content, recipes and giveaways, including access to the entire archive. I really hope to see you there:
Love,
Nicola
Viennetta, we love you.
This week it was just way too hot to bake. As I sat down and figured out what to cover this week, it hit me: It was time to recreate viennetta. I’ve wanted to do this for several years now but couldn’t quite work out - I was pretty sure it wouldn’t involve turning on my oven, which was reason enough to give it a proper go. I’m excited to tell you that I’ve figured it out, and it is not only delicious but outrageously simple. With only four main ingredients - cream, sugar, egg whites and chocolate - you’ll soon be the master of your own Viennetta destiny.
Viennetta is definitely one of the desserts that best straddles nostalgia with being actually delicious. If you aren’t familiar, the Vienetta is an ice cream cake manufactured by Walls in the UK - it’s layers of vanilla ice cream and crisp dark chocolate in an alternating concertina of waves. It was in the same category as the Ferrero rocher as I was growing up - simply the height of sophistication! When someone brought out a Vienetta for pudding, they immediately held a place of the highest esteem in my books.
A little history
I’m not sure how recently you’ve eaten a Vienetta, but it is pretty good. Despite having slightly questionable ice cream (you know the type - suspiciously airy!), it does hold up as a great dessert. And, to me, it’s obvious why - it’s basically a block of stracciatella ice cream in a high fashion outfit.
Stracciatella (‘Little Shred’) ice cream is made by drizzling melted chocolate into the ice cream machine towards the end of the churning/freezing process. As the chocolate sets, the blades of the ice cream machine shatter it into small pieces resulting in a bright white milk ice cream with shards of dark chocolate strewn pleasingly throughout. It’s so ubiquitous in gelato shops that it’s hard to imagine there was a time before it existed.
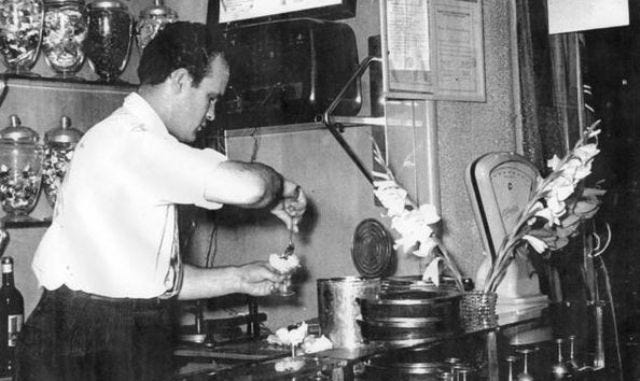
It was actually invented in 1962 by the genius Enrico Panattoni, the proprietor of La Marianna in Bergamo, Northern Italy; Panattoni was often asked by patrons visiting from Rome to prepare their favourite Straciatella soup. Despite being very popular in central Italy, Straciatella soup wasn’t well known in Bergamo, which is around 600km away from Rome - it’s a dish where eggs are stirred into hot broth, creating little shreds of cooked egg throughout. So the story goes, Enrico found serving these customers their special soup quite annoying. Fortunately, there is a silver lining; Inspiration struck Panattoni, and he was motivated to recreate the soup concept with ice cream, inventing one of the best-loved ice cream flavours today.
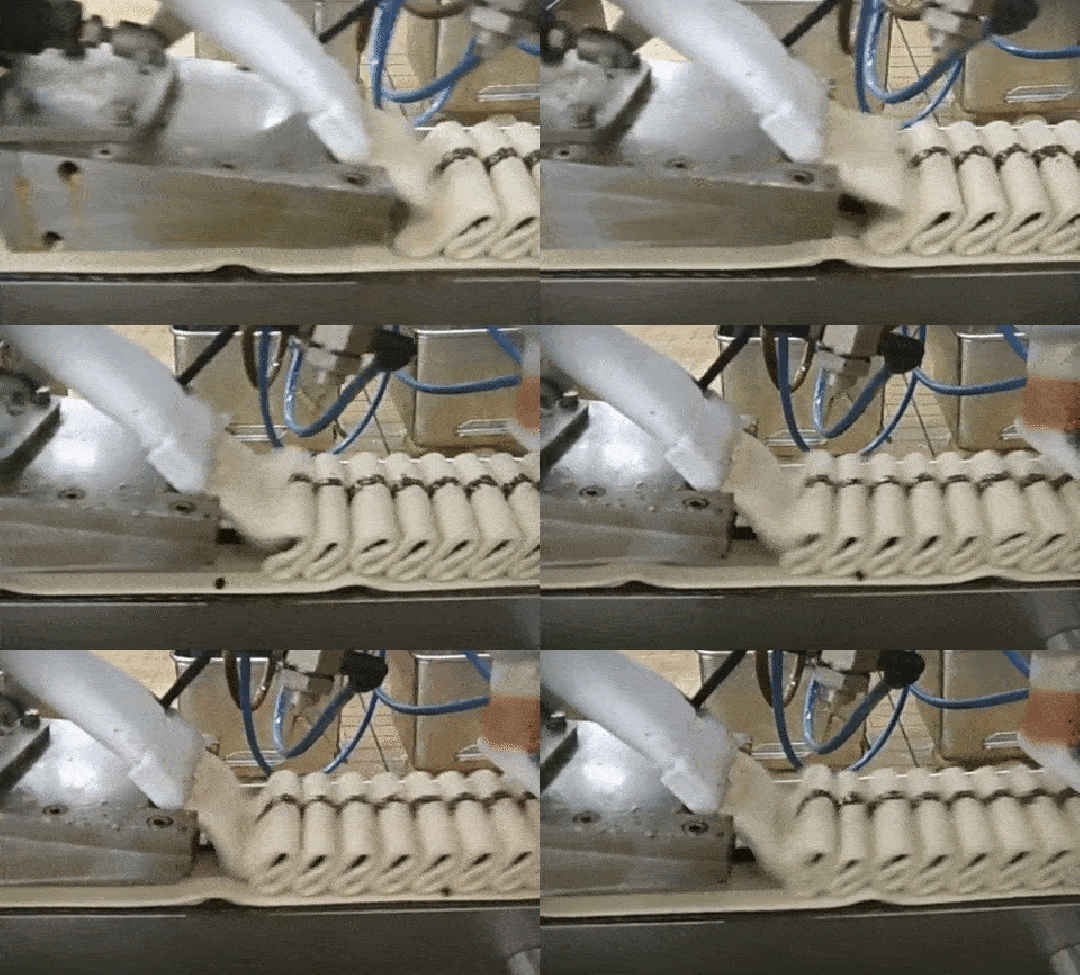
Fast forward 20 years and 100 miles North West to England’s Gloucester, 1982, Kevin Hillman, Ian Butcher and Gordon Stewart Carrick - legends - are on the precipice of Panattoni-level greatness themselves. As members of the production and development team of Wall’s, the three of them devised a new (and patented, might I add) technique for extruding ice cream at different speeds along a moving conveyor belt. This resulted in the ice cream bunching in delicious creamy waves. If you have never seen the Vienetta factory in action, here’s a link to the magic. I don’t know if I’m just tired this week, but the sight of all of the portioned Vienettas heading off into the distance to start their new lives as the fanciest dessert in the freezer aisle, coupled with the tragic shot of the ones that didn’t quite make it is proper Oscar-worthy drama.
So, what’s actually IN a viennetta?
I think we can all agree that the classic Viennetta is outstanding and, for less than £2, it’s a bloody steal. But, the price tag does come with an additional cost - just look at the ingredients list: “Reconstituted skimmed MILK, coconut oil, glucose-fructose syrup, sugar, water, glucose syrup, whey solids (MILK), fat reduced cocoa powder, emulsifiers (mono- and diglycerides of fatty acids, ammonium phosphatides), stabilisers (locust bean gum, guar gum, carrageenan), flavouring. May contain: soy and nuts.” I don’t know about you, but I prefer actual chocolate over a ‘chocolate-flavoured layer. So although the original is brilliant, it is nice to be in control of the ingredients.
The art of recreation
I’ve wanted to create a Vienetta for a long time - I first thought about how to do it whilst working at Happy Endings, the ice cream sandwich makers in East London. We never attempted it in the end, but piping ice cream?! How was that possible? As it turns out, my stubbornness not to buy an actual ice cream machine has paid off. During the no-churn tests a few newsletters ago, I found that mixing cream with sugar was the most straightforward, creamiest and most satisfying ‘ice cream’ could be made.
The samples above were mixed with 0%, 10%, 25% and 50% sugar, respectively, then frozen. The cream without any sugar was relatively icy and hard, but much to my surprise, the samples with 10% and 25% sugar were deliciously smooth. I theorised that this must be because the cream is approx 55% water and 45% fat, meaning there is lots of fat to interrupt the ice crystals forming. With this knowledge, we can simply whip the cream with sugar to a pipeable consistency and will be able to create the fancy homemade Viennettas of our dreams. So, that’s the outside sorted, but what about the inside?
Before we get to that, I’ll run through some of the critical points: When a liquid is frozen without being agitated (i.e. churned like ice cream is), the ice crystals aren’t broken up into smaller crystals which give the effect of smooth, lush ice cream. If left to its own devices, water freezes at 0c into a hard icy block. This happens because the low temperature causes the molecules to slow down so much that they settle into place, forming crystals as they line up. But these aren’t nice, smooth crystals; quite the opposite! These are jagged, stabby crystals with pointy tips that ‘crunch’ when you eat them.
Since double cream only has 45% water, it takes much less sugar to prevent iciness. You see, sugar literally gets in the way of ice crystals forming. Instead of water molecules making hydrogen bonds with other water molecules, they are forced to form bonds with the over-friendly sugar. Therefore, introducing sugar limits the size of the ice crystals and prevents that unpleasant iciness that we don’t want in frozen desserts.
The deal with semifreddo
In the family tree of frozen desserts, there are a LOT of siblings, meaning desserts that are similar in spirit (and ingredients) but have minor differences between them. The names can sometimes be interchangeable even within their own category, whether it’s semifreddo, parfait or no-churn ice cream. Although every pastry chef will probably give you their own different description of both, this is how I look at it:
No-churn ice cream is an egg-free, dairy-based frozen dessert that often features condensed milk due to its high proportion of milk solids and sugar that help prevent iciness.
Parfait is an aerated frozen dessert which combines several ‘foamed’ things, usually whipped cream and pate a bombe (egg yolks mixed with sugar syrup). It is basically a frozen mousse.
Semifreddo, which means half cold, is a combination due to the high amount of air in a semifreddo. Even if you eat it frozen, it doesn’t taste too cold, hence the name. The air is due to a hefty combination (usually) of pate a bombe, Italian meringue and whipped cream. It is lighter and airier than parfait, which is usually made with egg yolks only.
Although these are in theory interchangeable, no-churn ice cream is often served in scoops, whilst semifreddo and parfait tend to be served in slices or frozen in moulds.
Today’s recipe is a very simplified version of the ‘semi cold’ dessert - minimal effort is required. Even though we can make really delicious ice cream simply by combining sugar and cream, it is quite dense. So, to lighten everything up for the ultimate homemade Viennetta, we’ll introduce egg whites via a meringue. Since egg whites are pretty much flavourless - and colourless - we get plenty of airiness without affecting the flavours, which would happen if we used egg yolks or whole eggs.
Meringue ratios
Let’s start at the beginning: If you beat egg whites without sugar (aka a 1:0 ratio), a voluminous network of air-trapped-by-proteins will appear, but it is prone to overbeating (it’ll look kind of chunky). Once sugar is added, a stable chain of proteins will form and create the glossy stable mix that we all know and love. When it comes to sugar, it plays two roles: First, it’s there to build that shiny stable network and support the proteins to create the glossy structure we know and love. Secondly, it’s flavour.
With double cream, we know that you only need 10%-25% sugar to cream weight to make a smooth and not-too-sweet final product. So although it is tempting to add extra sugar to make a super stiff meringue, we then have a potential issue of the dessert being overly sweet.
I used a relatively high sugar to egg white ratio in my original semifreddo recipe for DIY Mars ice cream bars (I do seem to love re-inventing recipes at home). However, the sugar in question was malt syrup which, beyond sweetness, has a more complex flavour. I wanted a bright white and clean-tasting ice cream for today’s project, so sucrose was the only option. To keep in line with the lower ratio, I radically reduced the sugar to egg white ratio for the meringue as below:
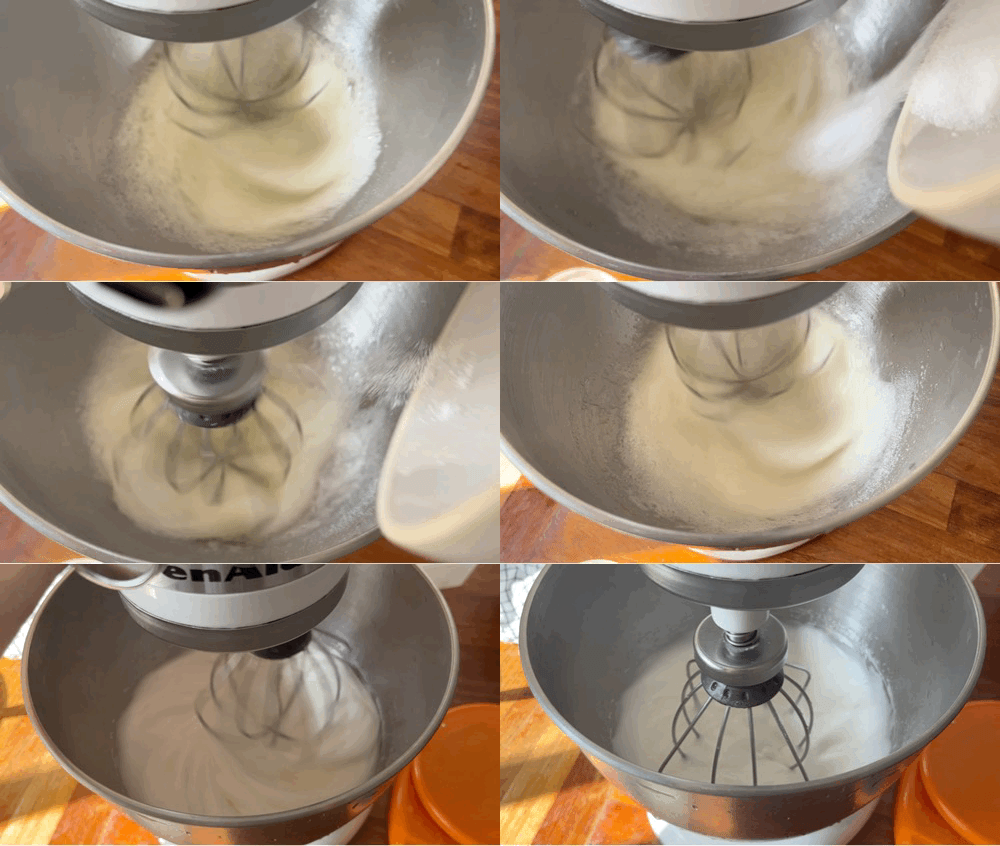
The result is a puffy, light and not too sweet base. This comes with a few caveats, though: Because of the lower sugar ratio, you need to be careful not to overwhip the egg whites - it is at risk of going chunky if you whip on too high a speed and for too long. Unlike high sugar meringues that are almost impossible to overwhip due to the stabilising sugar, this meringue can become grainy and weepy. Compared to a pavlova meringue that will be extremely thick and shiny, this meringue looks softer and never reaches the outrageous stiffness that we are used to!
For best results, I whipped my egg whites on a fairly low speed and incorporated them as soon as possible after reaching stiff peaks - do NOT let the meringue sit for too long or it can ‘set’ and become very clumpy and hard to work with.
As well as this, don’t be dismayed if the mixture looks a little bit ‘textured’ when you fold it into the cream; It shouldn’t look completely split, but don’t be stressed out if it doesn’t look perfectly smooth:
The deal with egg whites
For most mousses and recipes that are lightened with egg whites, they are often raw. So it’s best to use well-pasteurised whites that you are comfortable serving to guests. If you are still unsure, you can make the meringue as a swiss meringue - this means gently heating the whites and sugar over a bain-marie until it reaches 65-70c, whisking all the time. Be warned, since there is less sugar in this than a regular swiss meringue, it is susceptible to cooking, and you need to be very careful to ensure you don’t end up with bits of cooked egg whites throughout!
The chocolate bit
One of the best things about serving chocolate in frozen desserts is that it doesn’t need to be tempered. Even well-tempered chocolate will lose its shine in the freezer due to condensation and moisture, so there’s no point faffing about with a thermometer for this recipe. Because the semifreddo is not cold when we put it into the loaf tin, we cannot use meted chocolate to build our layers - it would be a total mess and destroy our aerated semifreddo mix. Instead, we will spread the chocolate in thin sheets on a baking tray and freeze, then snap to size, making sure to weigh down the paper on the baking tray so it doesn't curl up and go into wacky shapes. For an extra flavour, I sprinkled the chocolate with flaky sea salt before freezing, which elevates the final dessert. You do need to make sure its spread really thin though or it will be hard to cut.
How to adapt the recipe
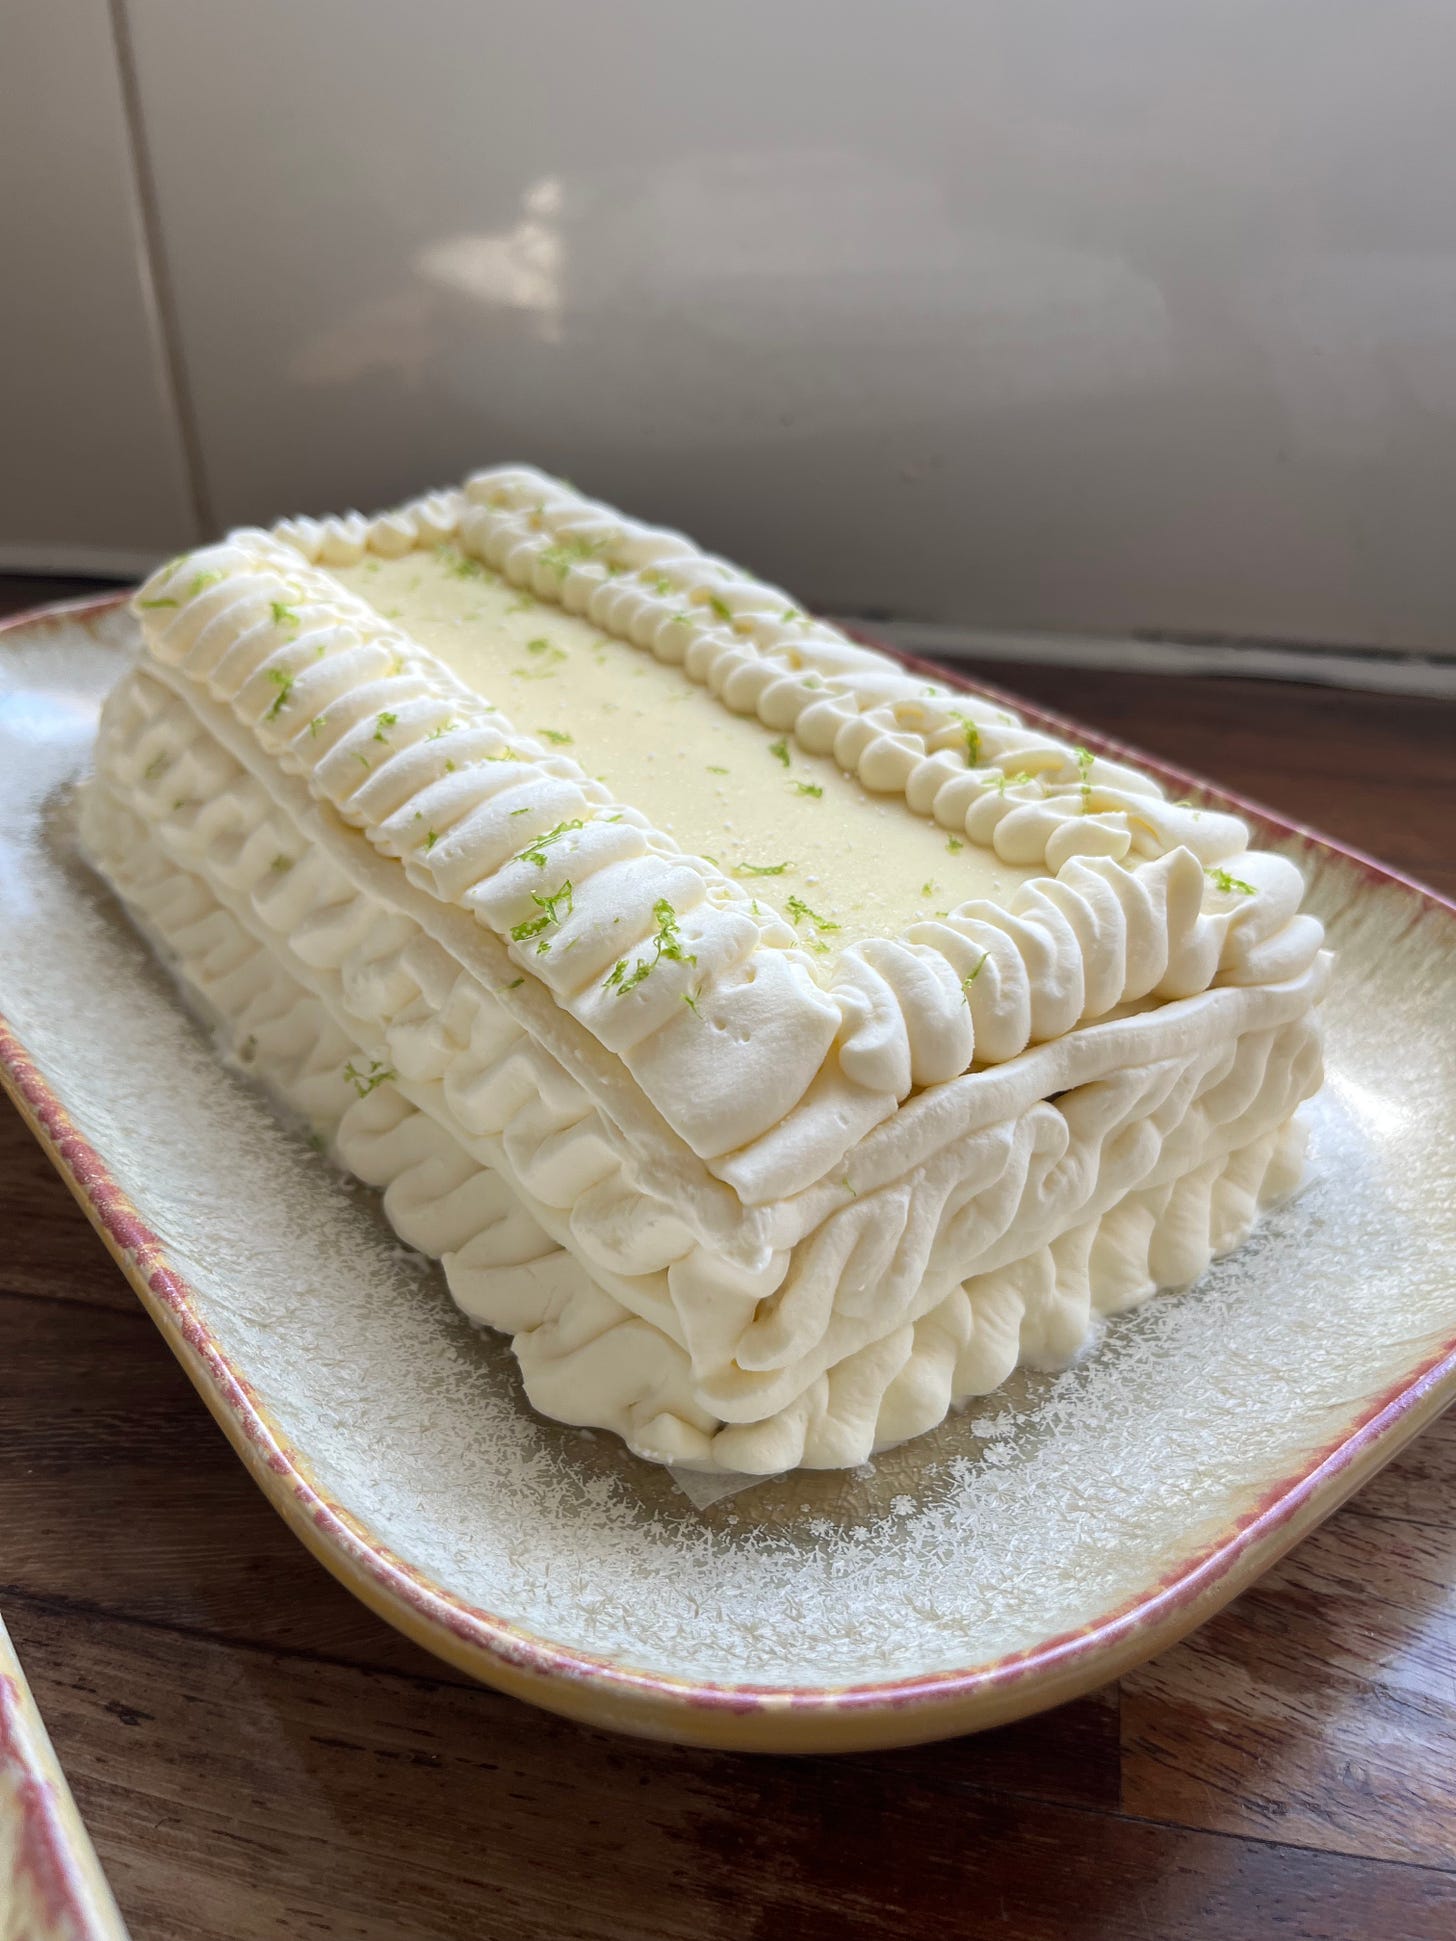
Adapting this recipe is very easy - the simplest change would be to infuse the cream with herbs, spices or anything you like - I think coffee would be great here. You could also easily change the chocolate or add jams to the layers. Because making your own Viennetta is already wonderfully camp, I decided to take it to the next level with a party dessert guaranteed to make your guests smile. Enter: The Piña Colada Viennetta ft. coconut semifreddo, pineapple jam/swirl and white chocolate lime layers. Get the recipe on KP+ now.
Ok, let’s make it!
DIY Viennetta
Serves 6. I made this in a 7inch x 4inch x 2.5inch loaf tin.
Ingredients
Base
280g double cream
110g egg whites
60g caster sugar
Pinch of salt
Optional: ½ vanilla pod, scraped or 1-2 tsp vanilla extract
Chocolate shards
170g dark chocolate
Optional: Flaky salt
To decorate:
175g double cream
35g caster sugar
Optional equipment: Ribbon piping tip
Method
First, make the chocolate shards: Melt chocolate over a bain marie, then spread thinly over two trays lined with paper, around 75g per tray, weighing the paper down with knives or something heavy, so the chocolate doesn’t curl as it cools. When spreading, make it approximately the length of your loaf tin so you can divide it easily later. Sprinkle with salt if desired.
For the top piece, make a separate shard that will sit on top - try and make this one super neat and even. Place in the freezer - it will set very quickly, around 10 minutes. Leave until you are ready to use it or break it into pieces, approximately the size of your loaf tin, and store it in another container.
Whisk the cream until semi-whipped - you do not want to take it too far, or it will split or curdle. Whisk it until there is a slight resistance when you move, and it can just about support itself.
Whisk eggs with vanilla until foamy, then add the sugar slowly, whisking on a medium speed. Add salt and continue whisking on medium speed until you get a tender-looking meringue that can hold peaks. Remember, you can also make this as a swiss meringue if you are worried about raw eggs. Scroll up for details.
Take a tablespoon of meringue and whisk it into the cream. Now swap to a spatula and fold the meringue in thirds until you get a puffy aerated mixture.
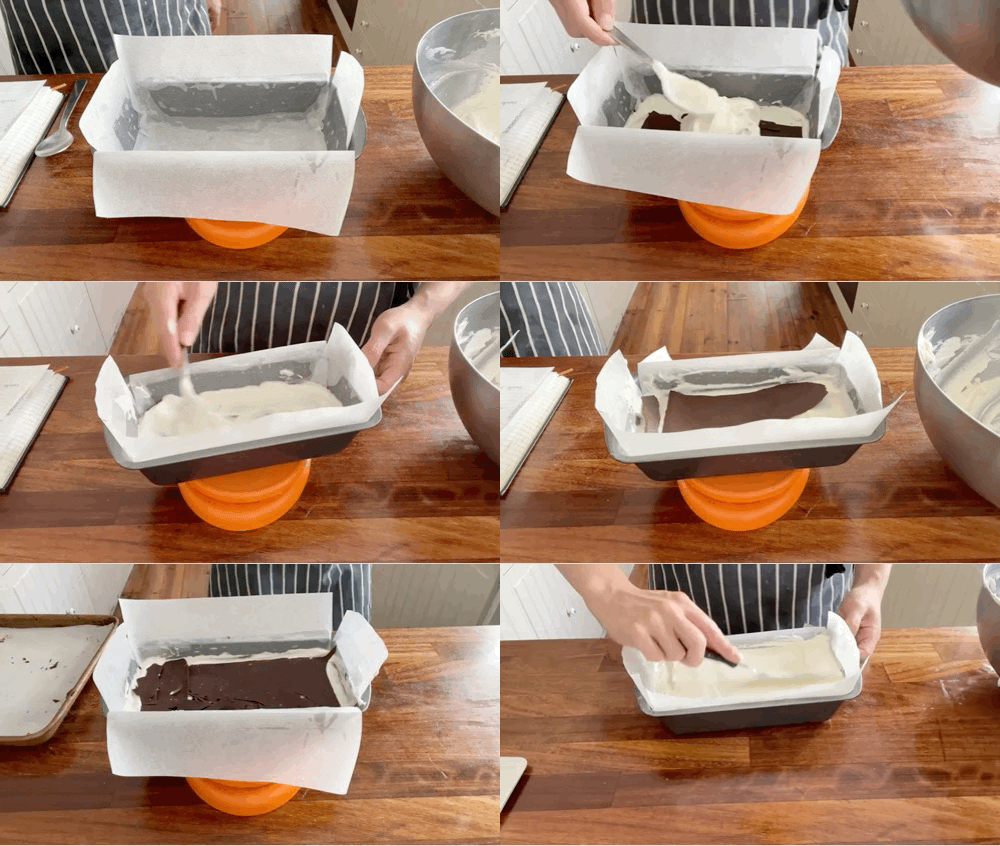
Start building your ice cream cake - start with about 50g of the mixture and spread evenly, then alternate chocolate shards (around 15-20g each) with ice cream (about 30-40g), spreading evenly until the loaf tin is full.
Leave to freeze for at least 3 hours, but it may take longer. Once solid, remove it from the tin - you may need to briefly dip it in warm water to help remove it. Place onto a tray with clean paper or onto your serving plate.
To decorate: Whip cream with sugar - try to stop whisking as soon as it looks firm enough as you don’t want it to go grainy - remember, it will continue whipping as you pipe it, so better to go slightly under.
Cut the piping bag tip at a slight angle, around 0.5cm wide and start piping - do a wiggle, then a straight line, then a wiggle, then a straight line. If you mess up, just scrape it off and start again! Place the chocolate shard on top, then pipe wiggles along each side of the cake using the ribbon tip or continuing with the same piping bag. Dust with cocoa powder
Set for at least 30 mins or until frozen
ENJOY! It lasts in the freezer for at least 1 month
Thanks for reading! This newsletter is a reader-supported publication. The best way to support my work is to become a paid subscriber and help keep Sunday’s free for everyone.










Amazing. I think I have just found my birthday cake.
hi, I have lots of egg whites in the freezer that need using up and this would be the perfect recipe.. would it be safe to heat, make a swiss meringue and then re-freeze them?