Hello,
Welcome to this week’s Kitchen Projects. Thank you so much for being here!
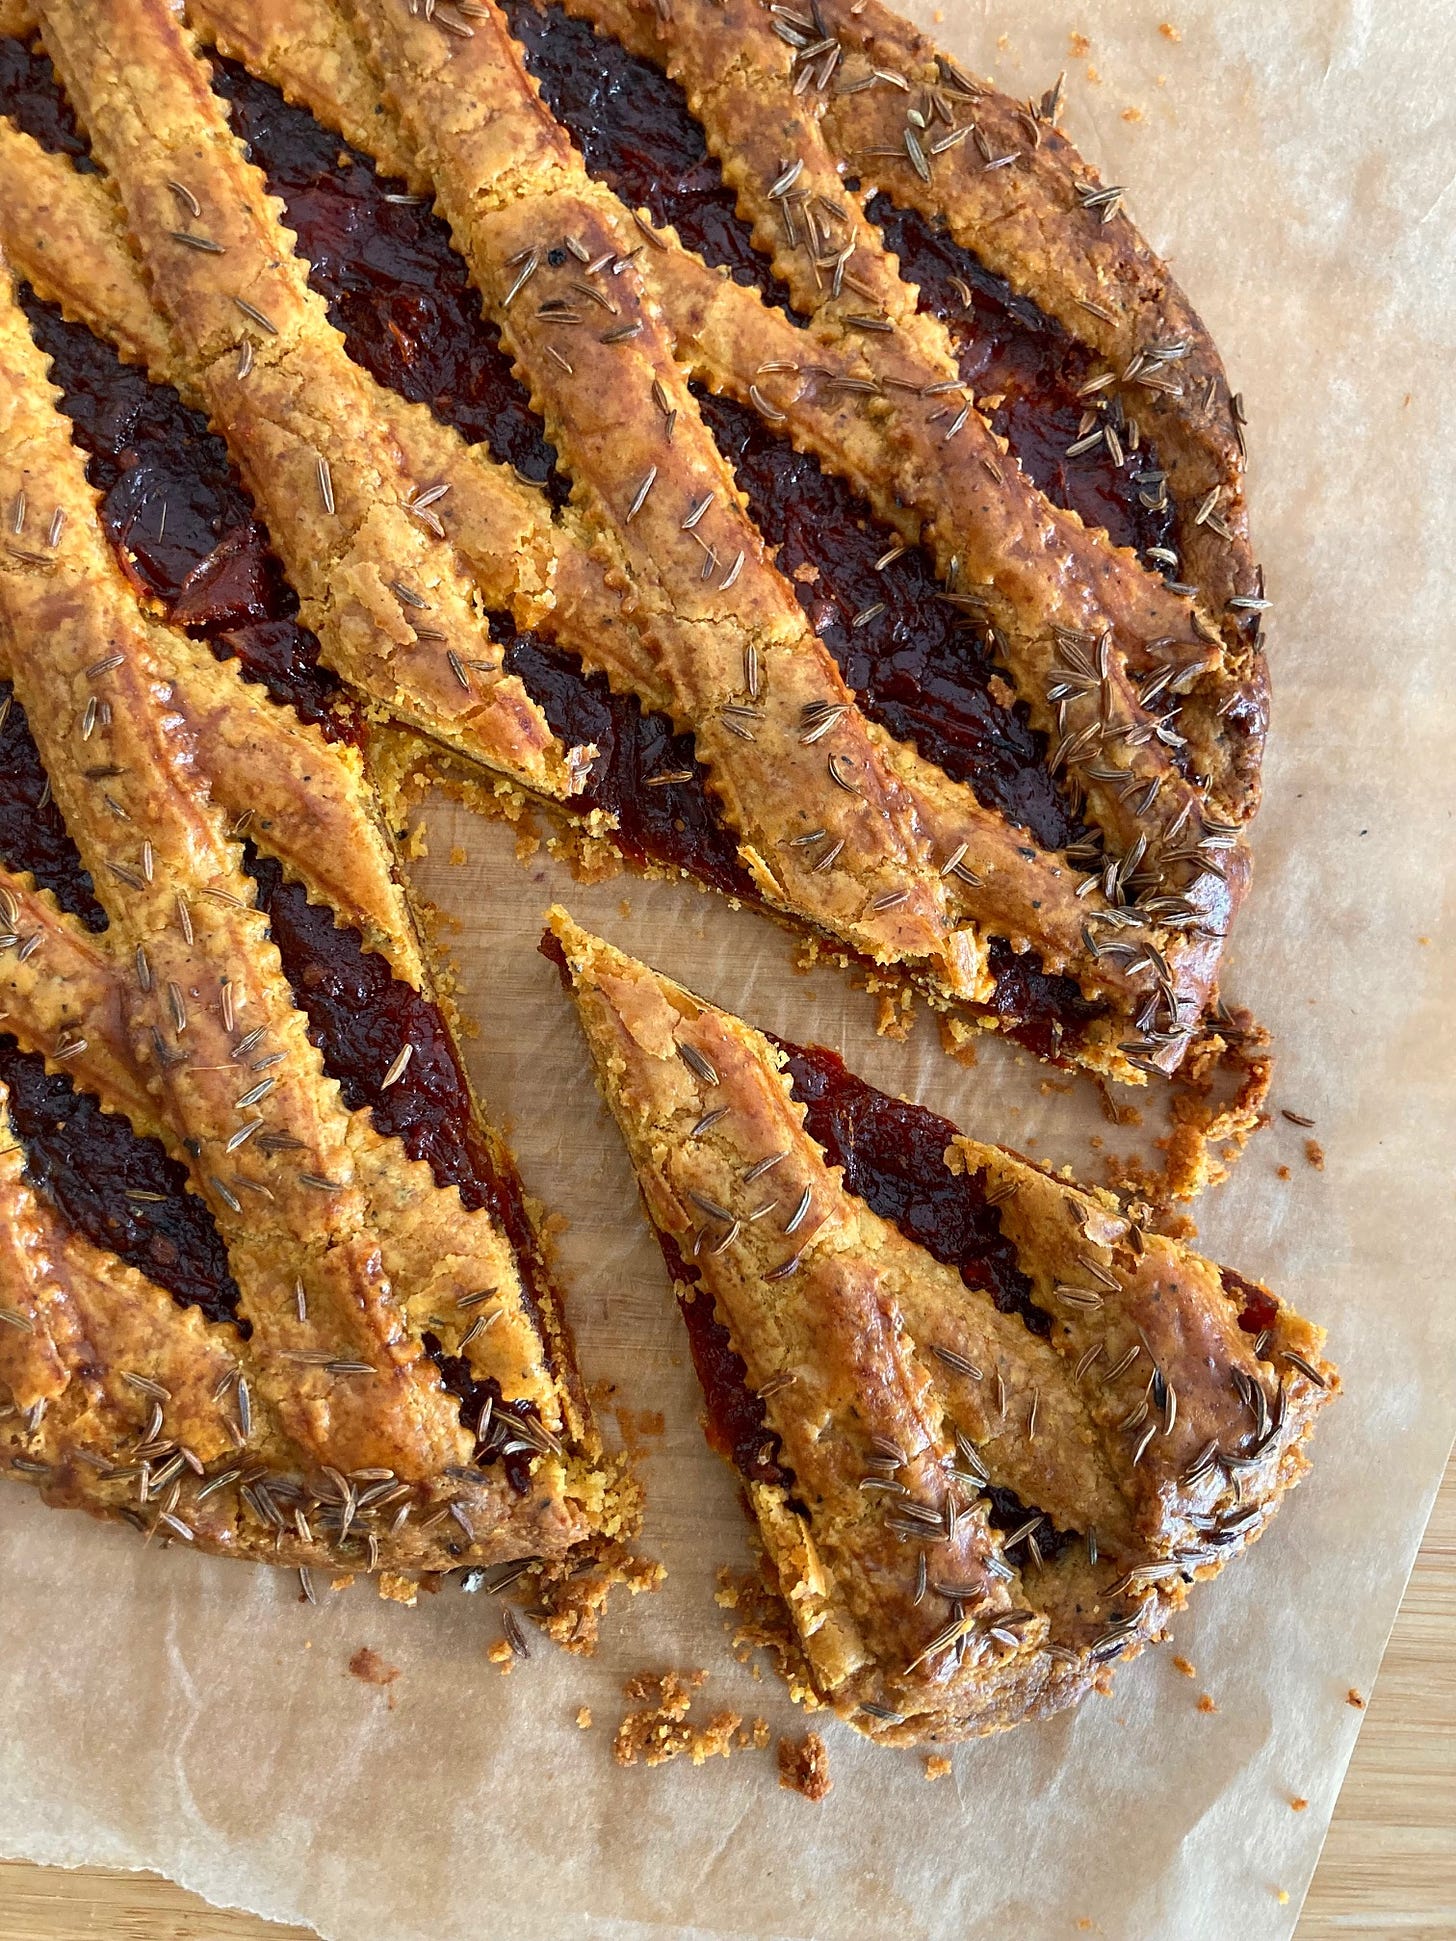
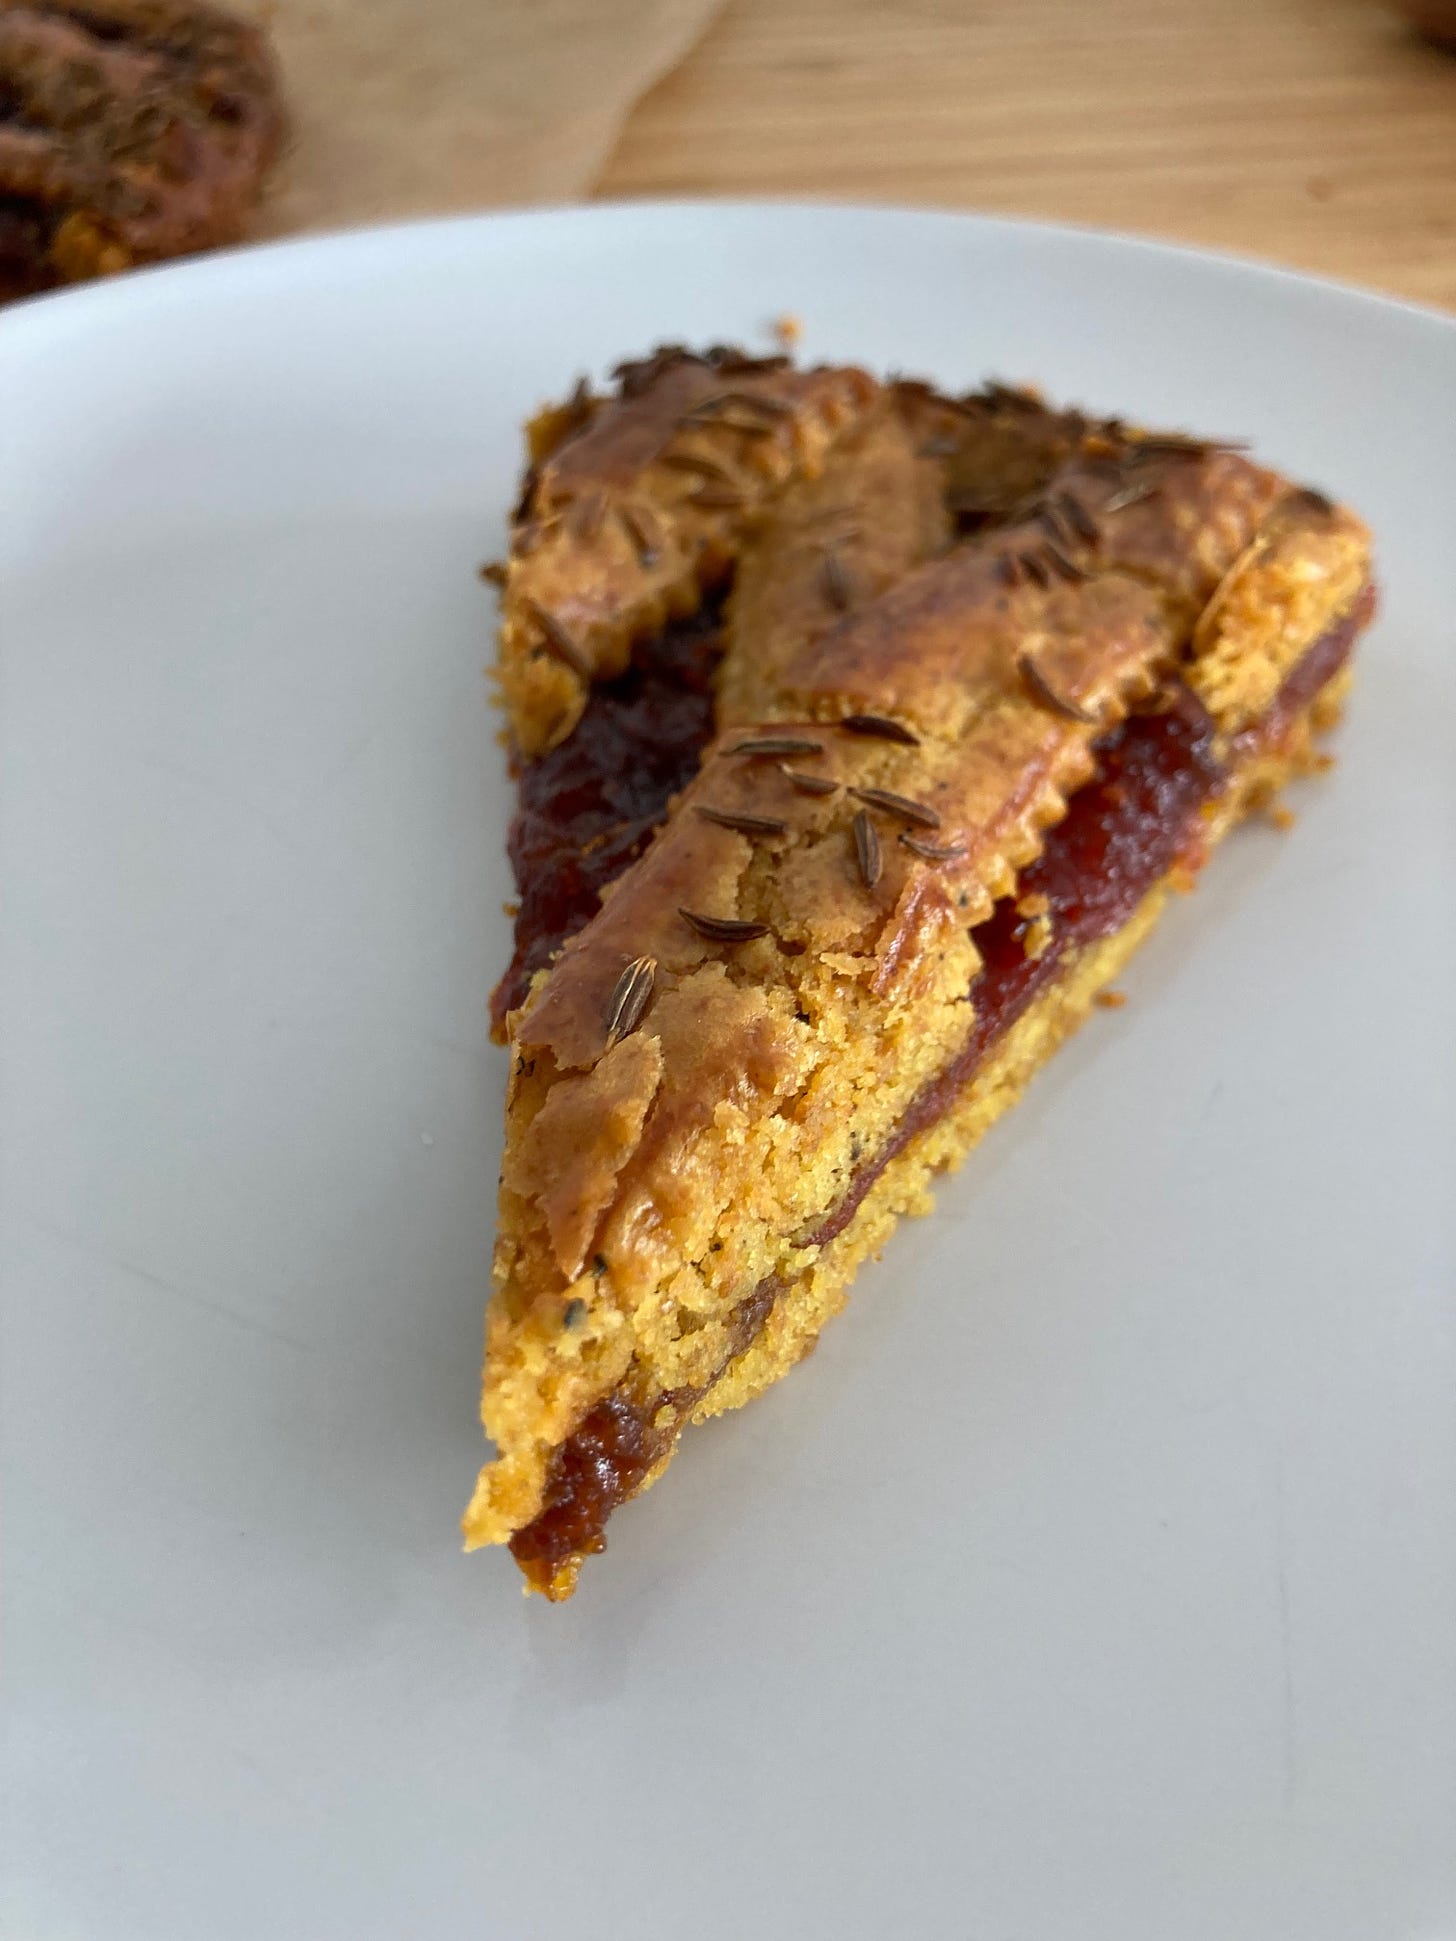
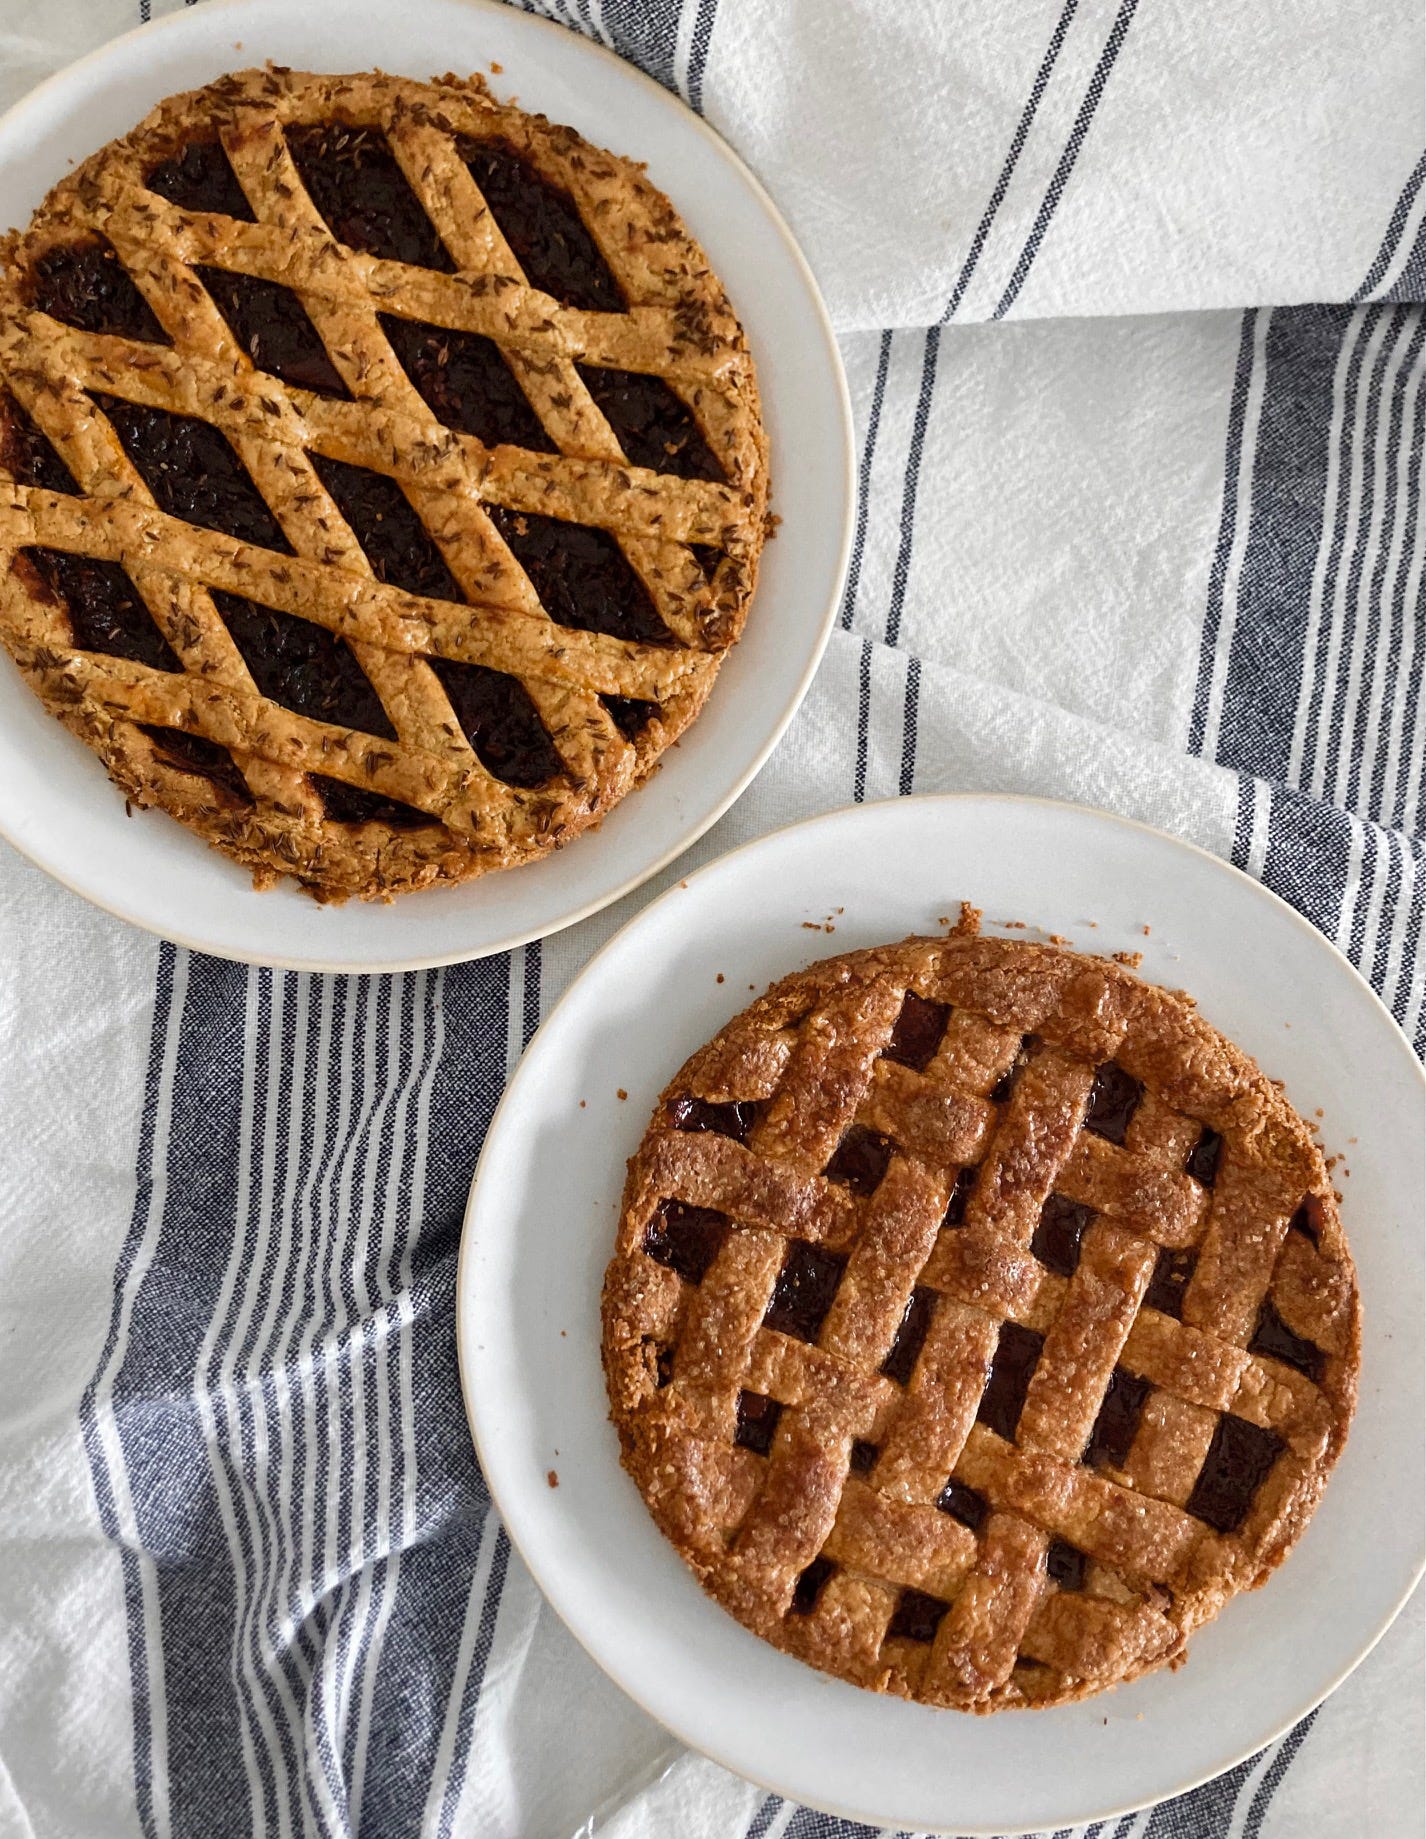
Today we are delving into the glorious world of the Linzer. More specifically, a tomato and parmesan linzer. It’s a goodie to add to your go-to savoury bakes.
Over on KP+, I’m sharing the recipe for a sweet version of the tart with walnuts and any-jam-you-like (I choose plum). Subscribing is easy and only costs £5 per month. So, if you’d like to support the writing, get access to extra content + community chat threads, click below:
Lots of love
Nicola
Linzer with a z
This week it’s all about linzer dough. Perhaps you’ve heard of it before or even made it. Either way, you’ll be BFFs by the end of this.
Used interchangeably, linzer can describe a windowpaned biscuit (like, a jammy dodger) OR it can describe a type of dough. We are talking about the latter today.
Linzer dough is a curious dough that is traditionally used for a ‘Linzertorte’. In the sweet version, jam is sandwiched between two pieces of dough and finished with a lattice. This traditional dish originates in Austria and dates back to the 18th century.
During my two months of pastry school (before I unceremoniously dropped out due to an intoxicating combination of lack of funds, visa issues and er… desire) we covered the classic linzer dough / torte in class. When our tutor Chef Christian told us about it, it sounded downright bizarre. And looking down the ingredients list for the classic sweet dough, you might feel the same:
Butter (sure)
Flour (I get it)
Sugar (totally)
Salt (oui)
Hard boiled egg yolks (wait, WHAT?)
Ground almonds / nuts (phew, back to reality)
The addition of hard boiled egg yolks is a slightly strange one but I urge you to put any initial prejudices aside and go with it because hard boiled egg yolks are the answer to getting the shortest pastry out there.
Adding hard boiled yolks to dough doesn’t crop up too often in Western baking. It’s a technique that feels a bit old worldly or dated but that is totally undeserved.
Adding the cooked yolks to the dough interrupts the gluten network. Pure hard boiled egg yolk basically gets in the way of the proteins being able to form chains leading to an unmatched melt in the mouth texture. You can achieve something similar using ground nuts in the pastry (I use both yolks and ground nuts in the sweet version!), but the addition of egg yolks leads to something both lighter and richer.
Ever since making the sweet linzer at pastry school, I’ve been obsessed. So when it came to developing a recipe for the lark! Picnic box, I started dreaming about using this crumbly base for a savoury tart. And so, the parmesan and tomato linzer was born - an ultra crumbly, very transportable and luxurious picnic perfect treat. I can’t wait to introduce you to this baby. Let’s do it.
Defining a yolk
We’ve all become discerning consumers of eggs and their golden yolks in the past few years. How many softly poached eggs with a temptingly golden bursting yolk have you seen on Instagram in the last 24 hours? I expect at least several.
We’ve become collectively obsessed with this ultra orange hue, believing that the mark of a ‘good egg’ is inextricably linked to the colour. But this is not strictly accurate. You can get a perfectly healthy and free-range egg but still have a pale yellow yolk. So why is this?
The colour of an egg yolk is exclusively determined by pigment molecules called ‘carotenoids’. These pigments appear naturally in plants and are available to animals entirely via diet. So, hens with access to a very broad diet are likely to have more vividly coloured eggs.
But farms *do* game this. By introducing brightly coloured foods into the diet of their hens via plants like marigolds or vegetables like carrots and sweet potato, farms are able to achieve a superbly bright yolk. These enriched diets are carefully formulated by nutritionists to give optimal health to the hens and optimal results in the eggs - strong shell, deep orange-y golden yolks, dream.
Clarence Court, purveyors of the gorgeous Burford Brown eggs, use both marigolds and paprika to achieve the orange yolk, too. A spokesperson from their farm also explained that the “birds are left to lay at their own natural speed, which contributes to the overall quality, taste and flavour of the egg – all while being in the best interest of the bird too.”
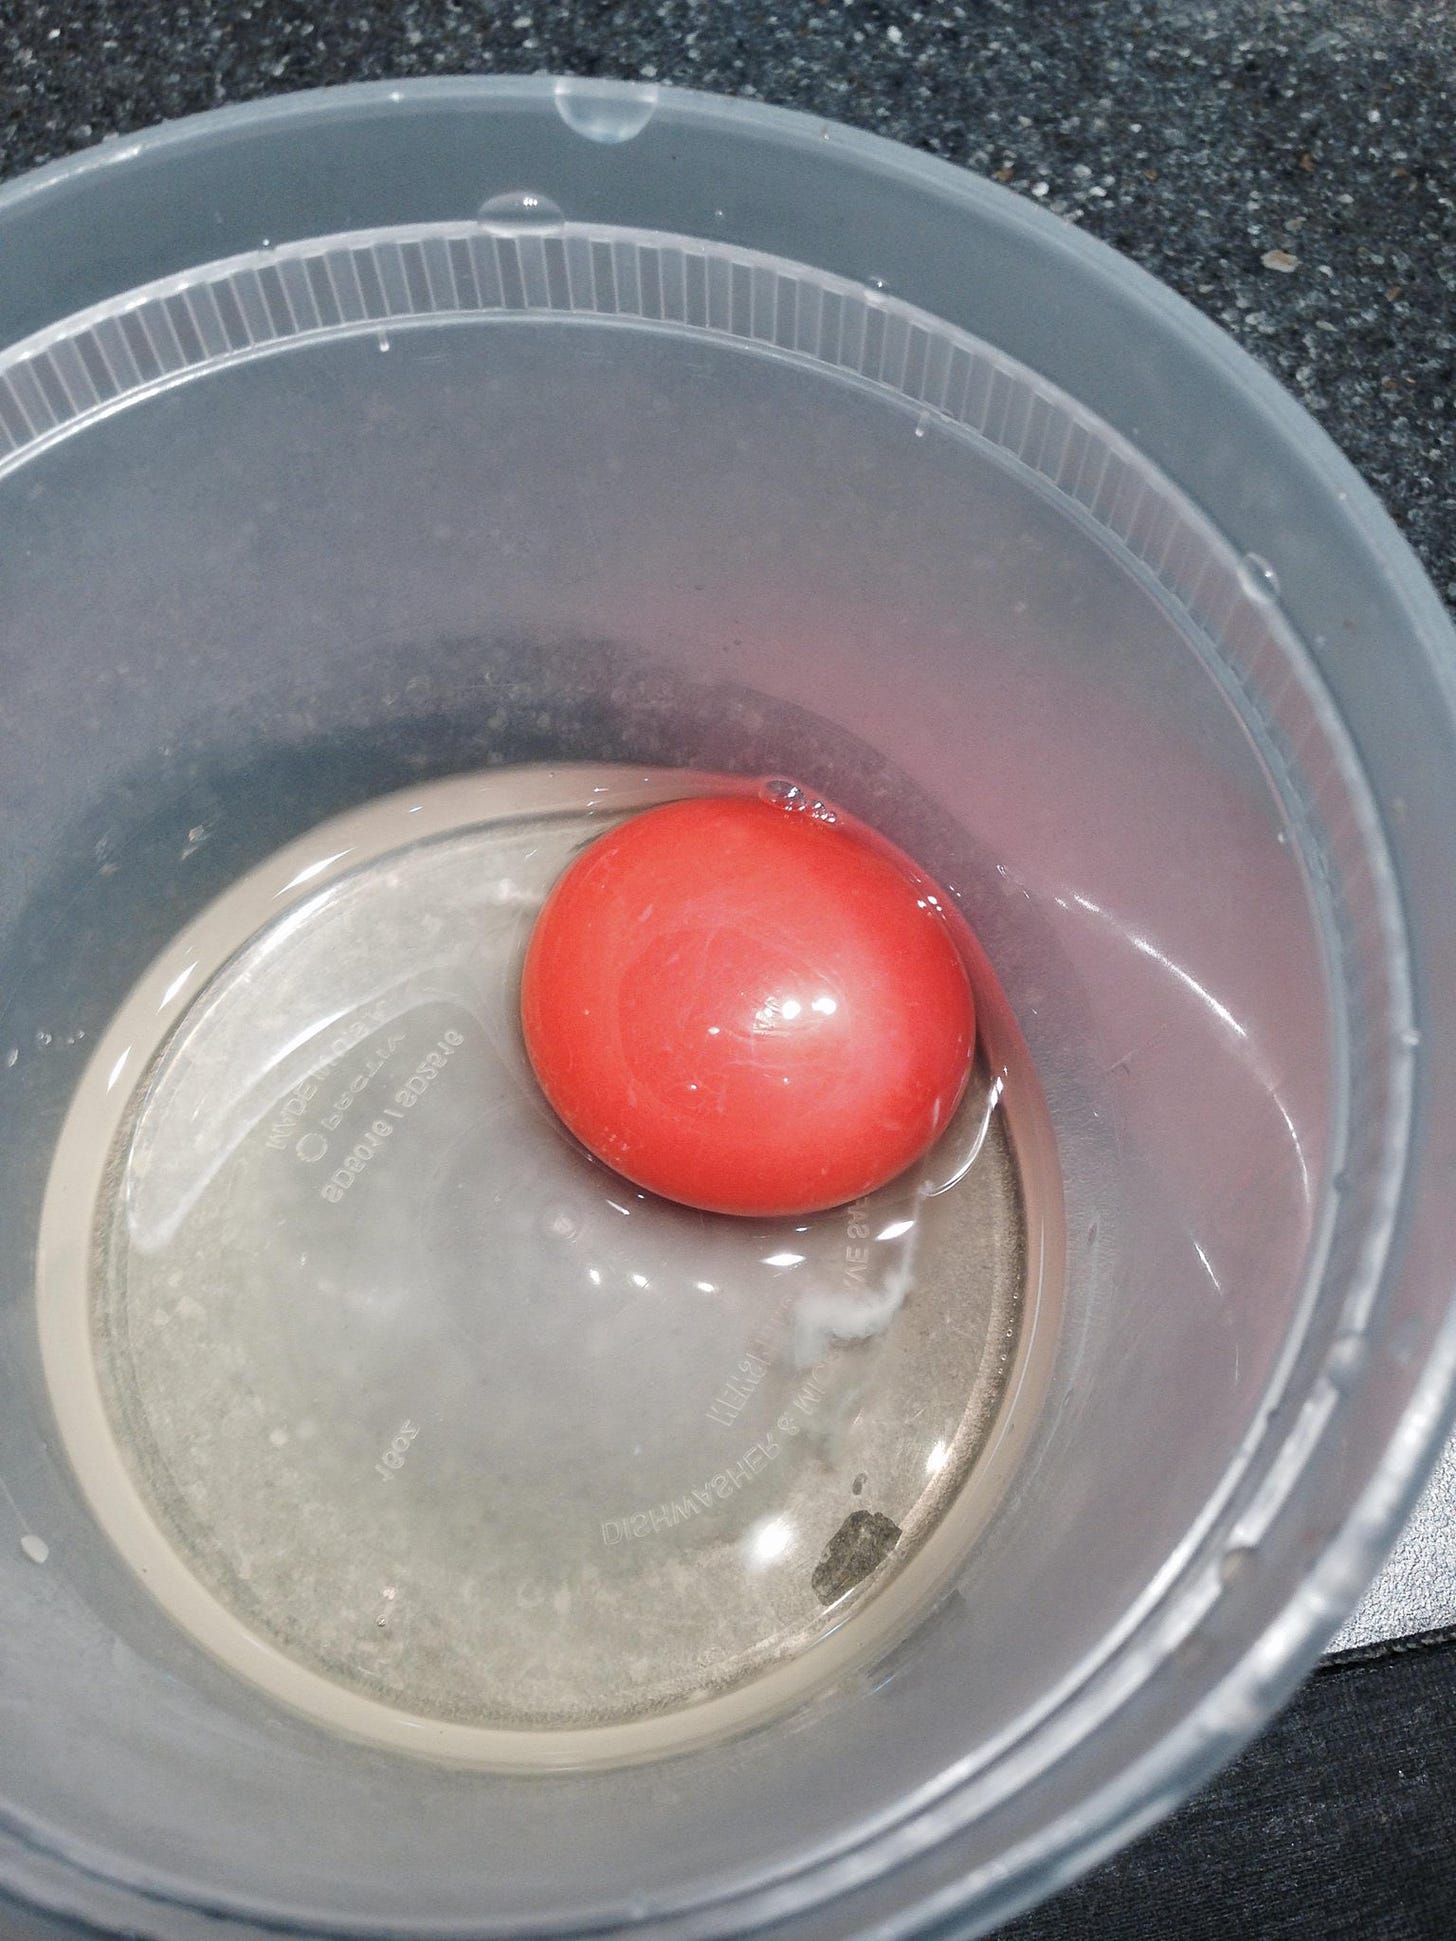
Chef Dan Barber, of blue hill fame, takes this to the extreme by feeding his hens a diet with a high percentage of pureed red pepper. The result is a vividly bright red yolk:
All of this to say, you can still have a bright yellow yolked egg that has come from a good, free-range environment but it probably just means the hens didn’t have the same access to the biodiverse pastures or specially engineered diet.
It’s worth keeping in mind that the look of your yolks is a wonderful reminder of the food chain that we are very much part of. Speaking to the power of the supermarket buyers, egg yolks have long been engineered to suit the preferences of the consumer - the pale yellow sunshine-y yolk has been the signature trademark of the egg in cartoons, media and advertising for the last 50 years, with the deep orange yolk only really coming into fashion in the UK and US in more recent years. The American Egg Board insists there is no relationship between egg quality to egg yolk, for example.
How to cook the yolks at home
The most traditional way to get the yolks ready for your Linzer is to simply hard boil the whole eggs. And I mean really boil them - not even a hint of ooze, please. We want the yolks to be dry and chalky - around 10 minutes is perfect. If the yolks are at all jammy, you won’t get the intended result - the flakiness will be diminished as the moisture from the yolks will wick into the dough. Although you will probably still get a very delicious dough, you won’t get the wild crumbliness and shortness we are after.
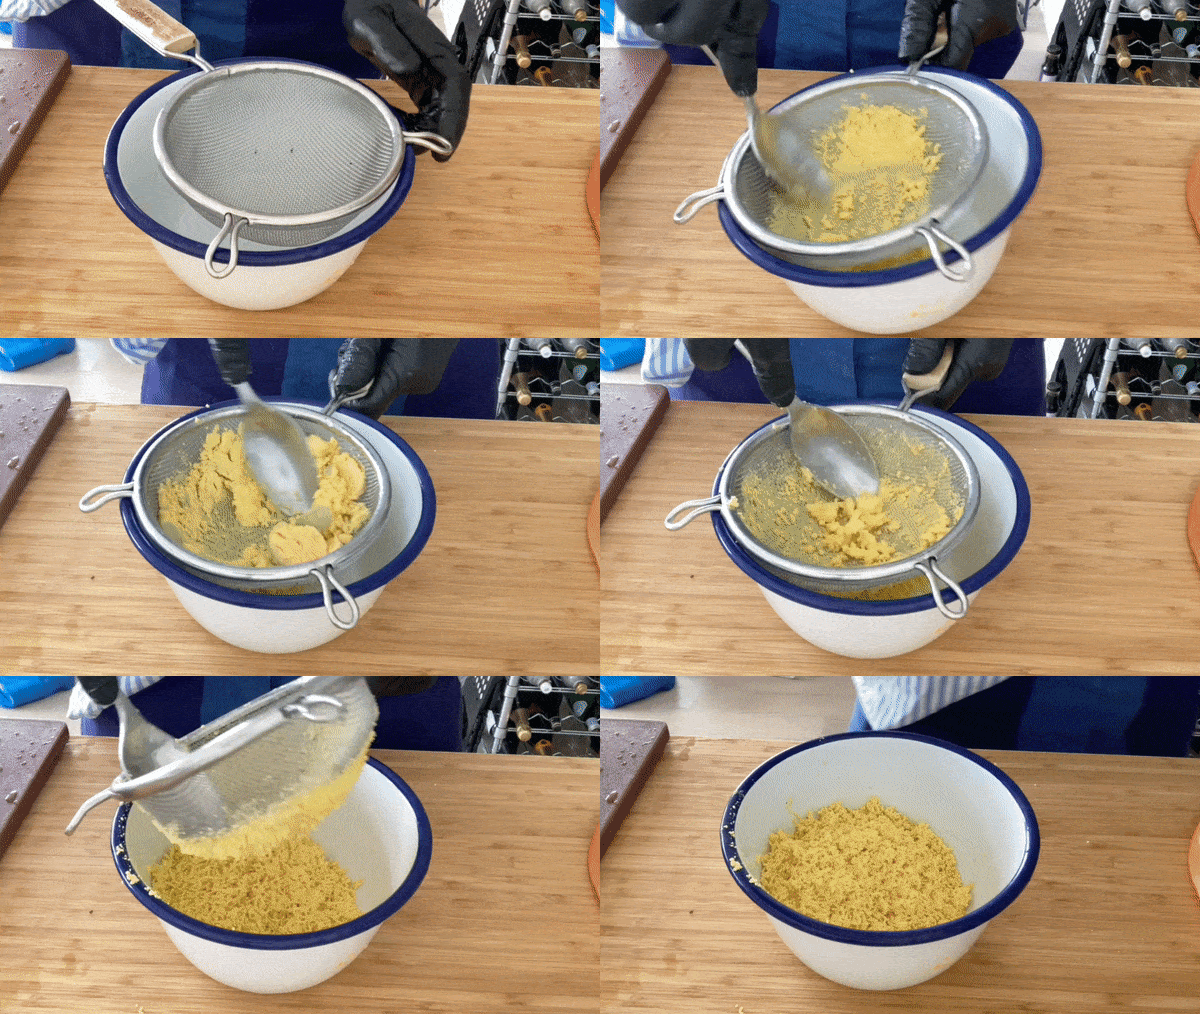
Once boiled, the eggs are peeled and the yolks are removed whole (or in halves) and then passed through a sieve. This action breaks the cooked yolk into small pieces that distribute beautifully in the dough.
Although this method is pretty fail safe, the slightly unfortunate thing about boiling the whole eggs is the inevitable leftover whites. For small at home batches, this isn’t too traumatic and the whites can be enjoyed in a salad or sandwich. BUT scaling it up? It’s a whole new world.
A tale of micro-woe-ve
When I was getting ready to make Linzer dough for the lark! pop-up, I looked at the quantity - I needed 1500g of hard boiled egg yolk. That’s approximately 100 hard boiled eggs worth.
I’m happy to eat a white or two, but having a potential waste of 100 egg whites was way too extreme. To counteract this, I went back to the drawing board on how I could cook the yolks. Here’s how the list and thought process went:
Idea: Hard boil the eggs then just eat egg whites for dinner for 1-2 weeks
Verdict: It’s a no from meIdea: Cook egg yolks over a bain marie
Verdict: Tried it, doesn’t work - the eggs never go fully hard and you get uneven cookingIdea: Travel 2 hours to my parents house to use my Dad’s sous vide/water circulator machine to cook the yolks in a big bag
Verdict: Maybe?! Let’s look at train times...
With Idea 3 looking most realistic, I got in touch with a friend who runs a patisserie in Brighton (where my parents live) to see if I could order egg yolks to his place for my big yolk adventure and, although he supported my yolk pilgrimage, he suggested that I could forgo the train journey and that it was possible, in his experience, to simply cook the yolks in the modern machine that is… a microwave!
Genius, right? So, thinking all my problems were solved, I took my 1.5kg of yolks and found myself a microwave, hit GO and waited for magic. In hindsight (oh what a beautiful thing that is) I probably should have tested a smaller batch first.
After 10 minutes of nuking, the yolks were definitely cooked but… they looked a bit weird. Kind of spongy. Not the dry, chalky yolk I was used to in my small, boil-only batches. BUT, it was kind of too late. You know that saying about *not* putting all your eggs in one basket? The same applies to microwavable bowls.
After trying, and failing, to pass the aerated but cooked yolks through a sieve, I ended up blitzing it up in a food processor. The yolks looked kind of legit but the microwave cooking had left them in a slightly odd state - a little bit rubbery? In a hard boiled yolk, you can press it to powder between your fingers, whereas in the microwaved yolk, the curds didn’t truly compress under force. I had a funny feeling about the yolks but had no choice but to continue. It was late and I had no more yolks and I had to take a leap of faith.
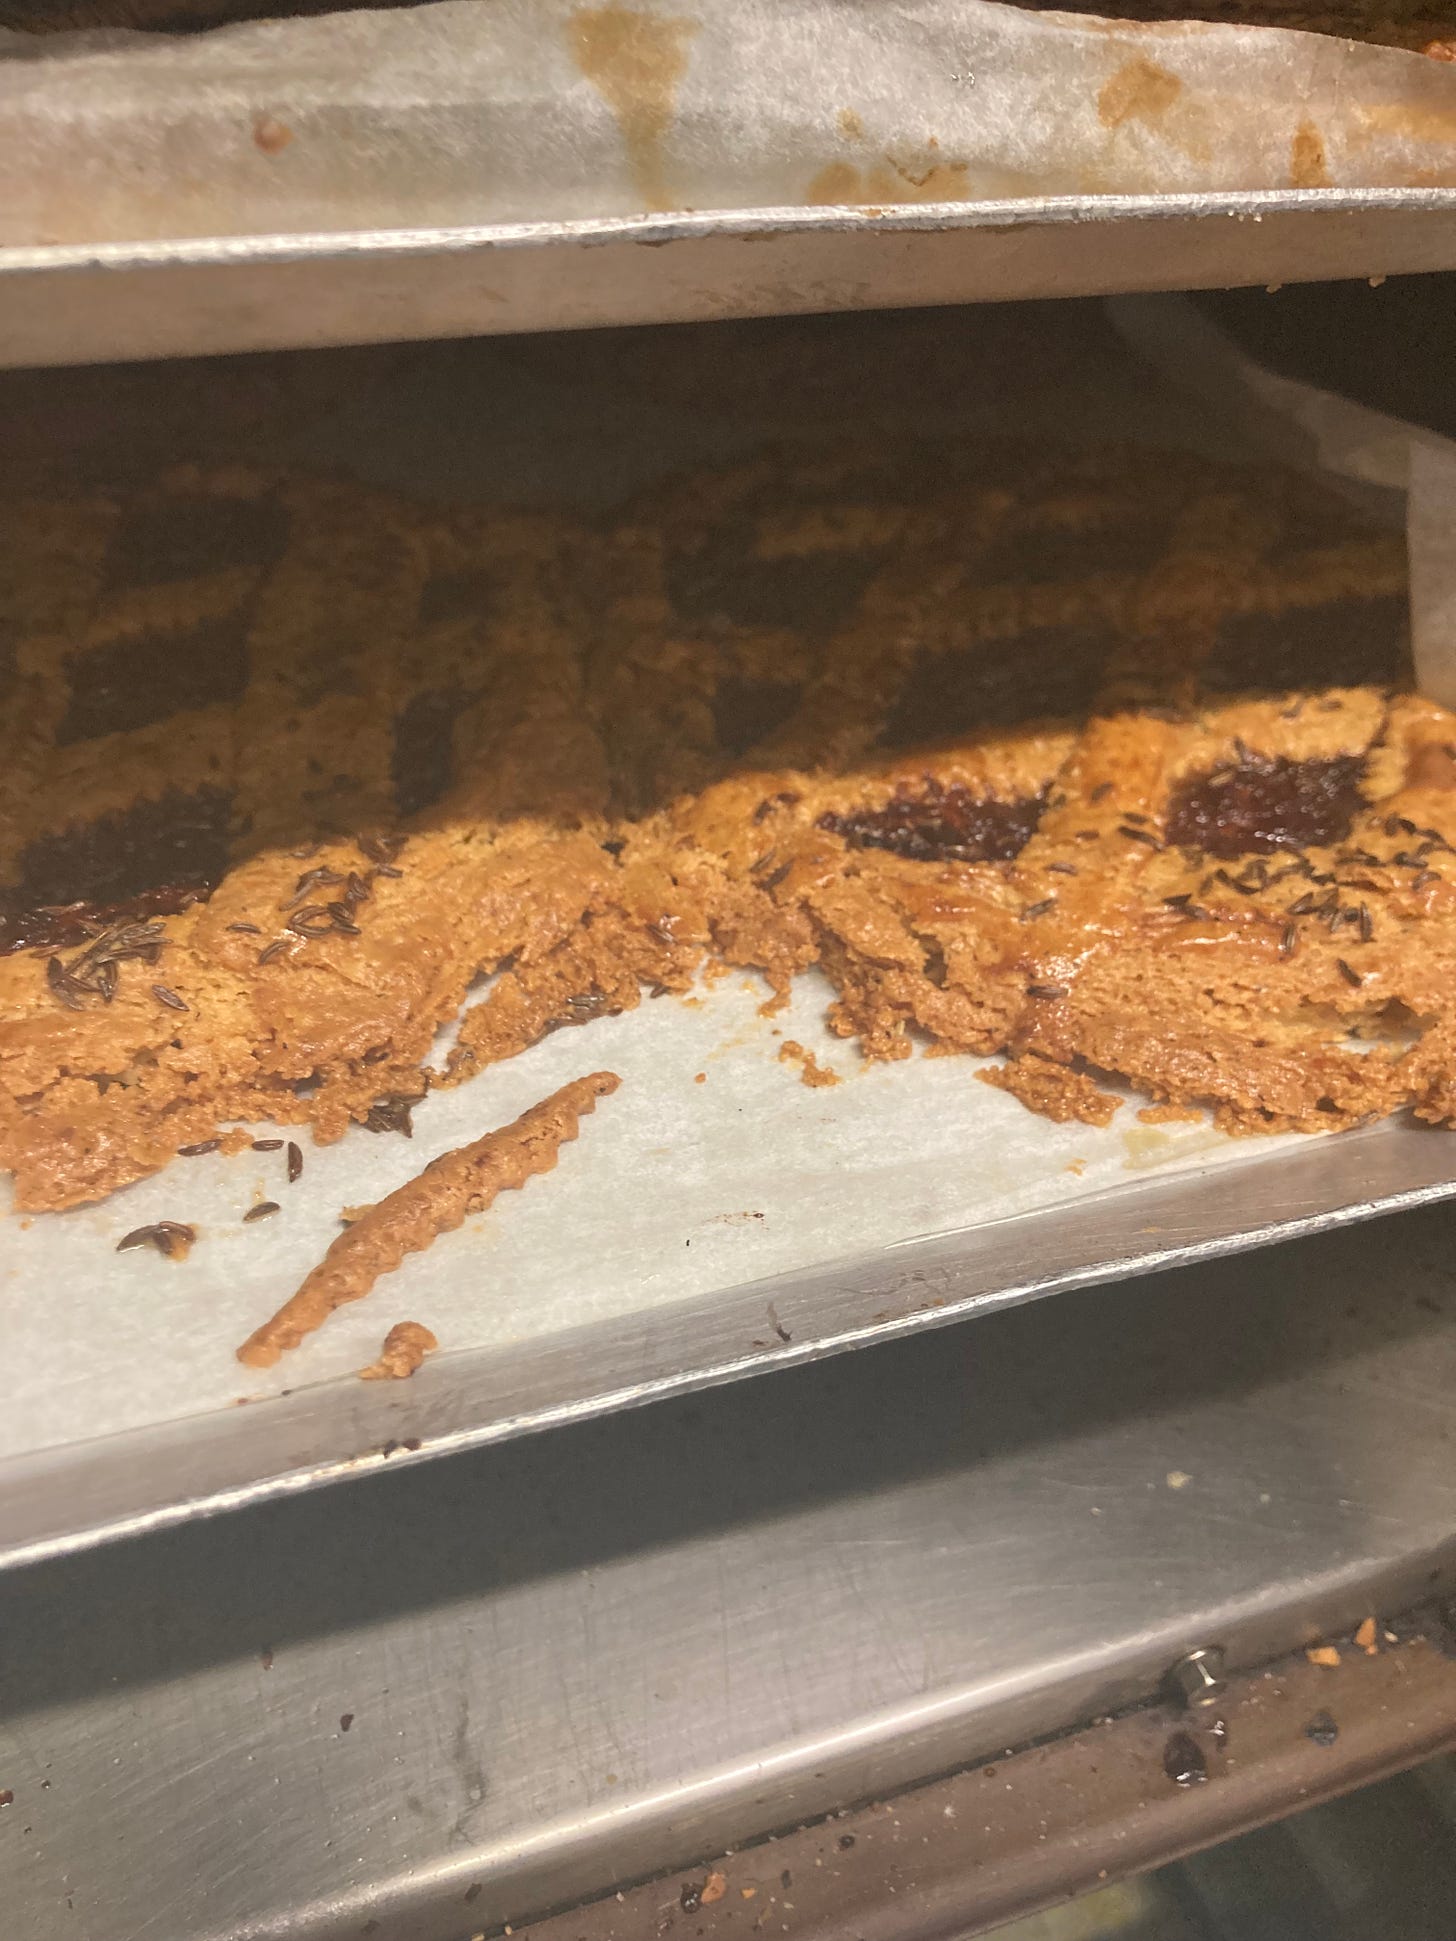
When it came to baking the tortes the next night, I was filled with anxiety. And, of course, the pastry spread. Like crazy, it was like the edges had all exploded. Here’s a slightly blurry stressed out photo taken at midnight, hours before we were due to pack them up for the picnic boxes:
There was nothing I could do! They were so crumbly they almost fell apart just looking at them. Feeling so futile was AWFUL. So, I took a few deep breaths, let them cool and the next day I trimmed them til they looked respectable.When boxes were collected, I informed everyone of the lacking-linzer and refunded them the value of the tart. Although they tasted great, I knew deep down in my heart that they weren’t as perfect as they should be.
So what happened?
Taking time to reflect, the microwave method definitely was where it all went wrong. Although it was overall less wasteful and it was super speedy, the results were a bit regrettable. I never thought I’d be covering the science of microwaves on KP but here we are: Microwaves heat food by sending electromagnetic waves through molecules, causing the molecules to vibrate and this movement creates heat - the food is heated from within. As the water heats up, steam is created and moisture is lost. This is what happened to my egg yolks - some of the water (there’s 50% water in egg yolks) was expelled from the yolks leaving a spongy, holey and rubbery eggy mixture which caused havoc with the dough.
Art of poaching
SO, after my microwave disaster it was back to the drawing board. Although hard boiling the eggs in their shells is a fail-safe way to get good results, I know having leftover whites isn’t always a good prospect. But I have an answer for you: Poaching!
Much like poaching a whole egg, you can separate your eggs and whites then slip your whole yolks directly into simmering water. Cook for 7-10 minutes (just until its super firm), remove from the water and dry off before passing through a sieve. Problem solved!
Let’s talk lattice
One thing you guys will find out about this dough is that it’s FRAGILE! The combination of lots of butter and hardly any gluten means it is a challenge to handle. So, intricate lattice work is not highly recommended. Although for the sweet version I did do a more traditional weave, I prefer to do a simple criss cross situation for the parmesan version I’m sharing below. It isn’t cheating. It’s self-care! And it looks great. There is a lot of in-and-out-the-freezer required, I’m afraid, but I’ve tried to limit the amount of steps as much as possible to make this pretty pain free!
I happen to have a ravioli/pasta wheel which can be a nice touch to cut decorative strips.
Mould or not to mould?
Linzers are traditionally baked in pastry rings. This helps keep everything together. For the pop-up, I wasn’t about to purchase 30-40 pastry rings so I risked it with a free-form situation. Although this didn’t massively pay off with the microwave-yolk pastry, it works really well when your pastry is made correctly. So, if you don’t have a pastry ring on hand you can just cut round the shape then form it. You’ll see on the GIFs below.
If you do decide to use the ring then you’ll get slightly more compressed/thicker edge. It is lovely - I used the ring as a support for the sweet plum and walnut version (see below):
Tomato town
Does today’s recipe strictly count as a jam? I’m not sure. But what’s the real difference between jam and chutney anyway? And if we’re on this path, what’s a conserve then? Or a relish? What about marmalade? OH GOD.
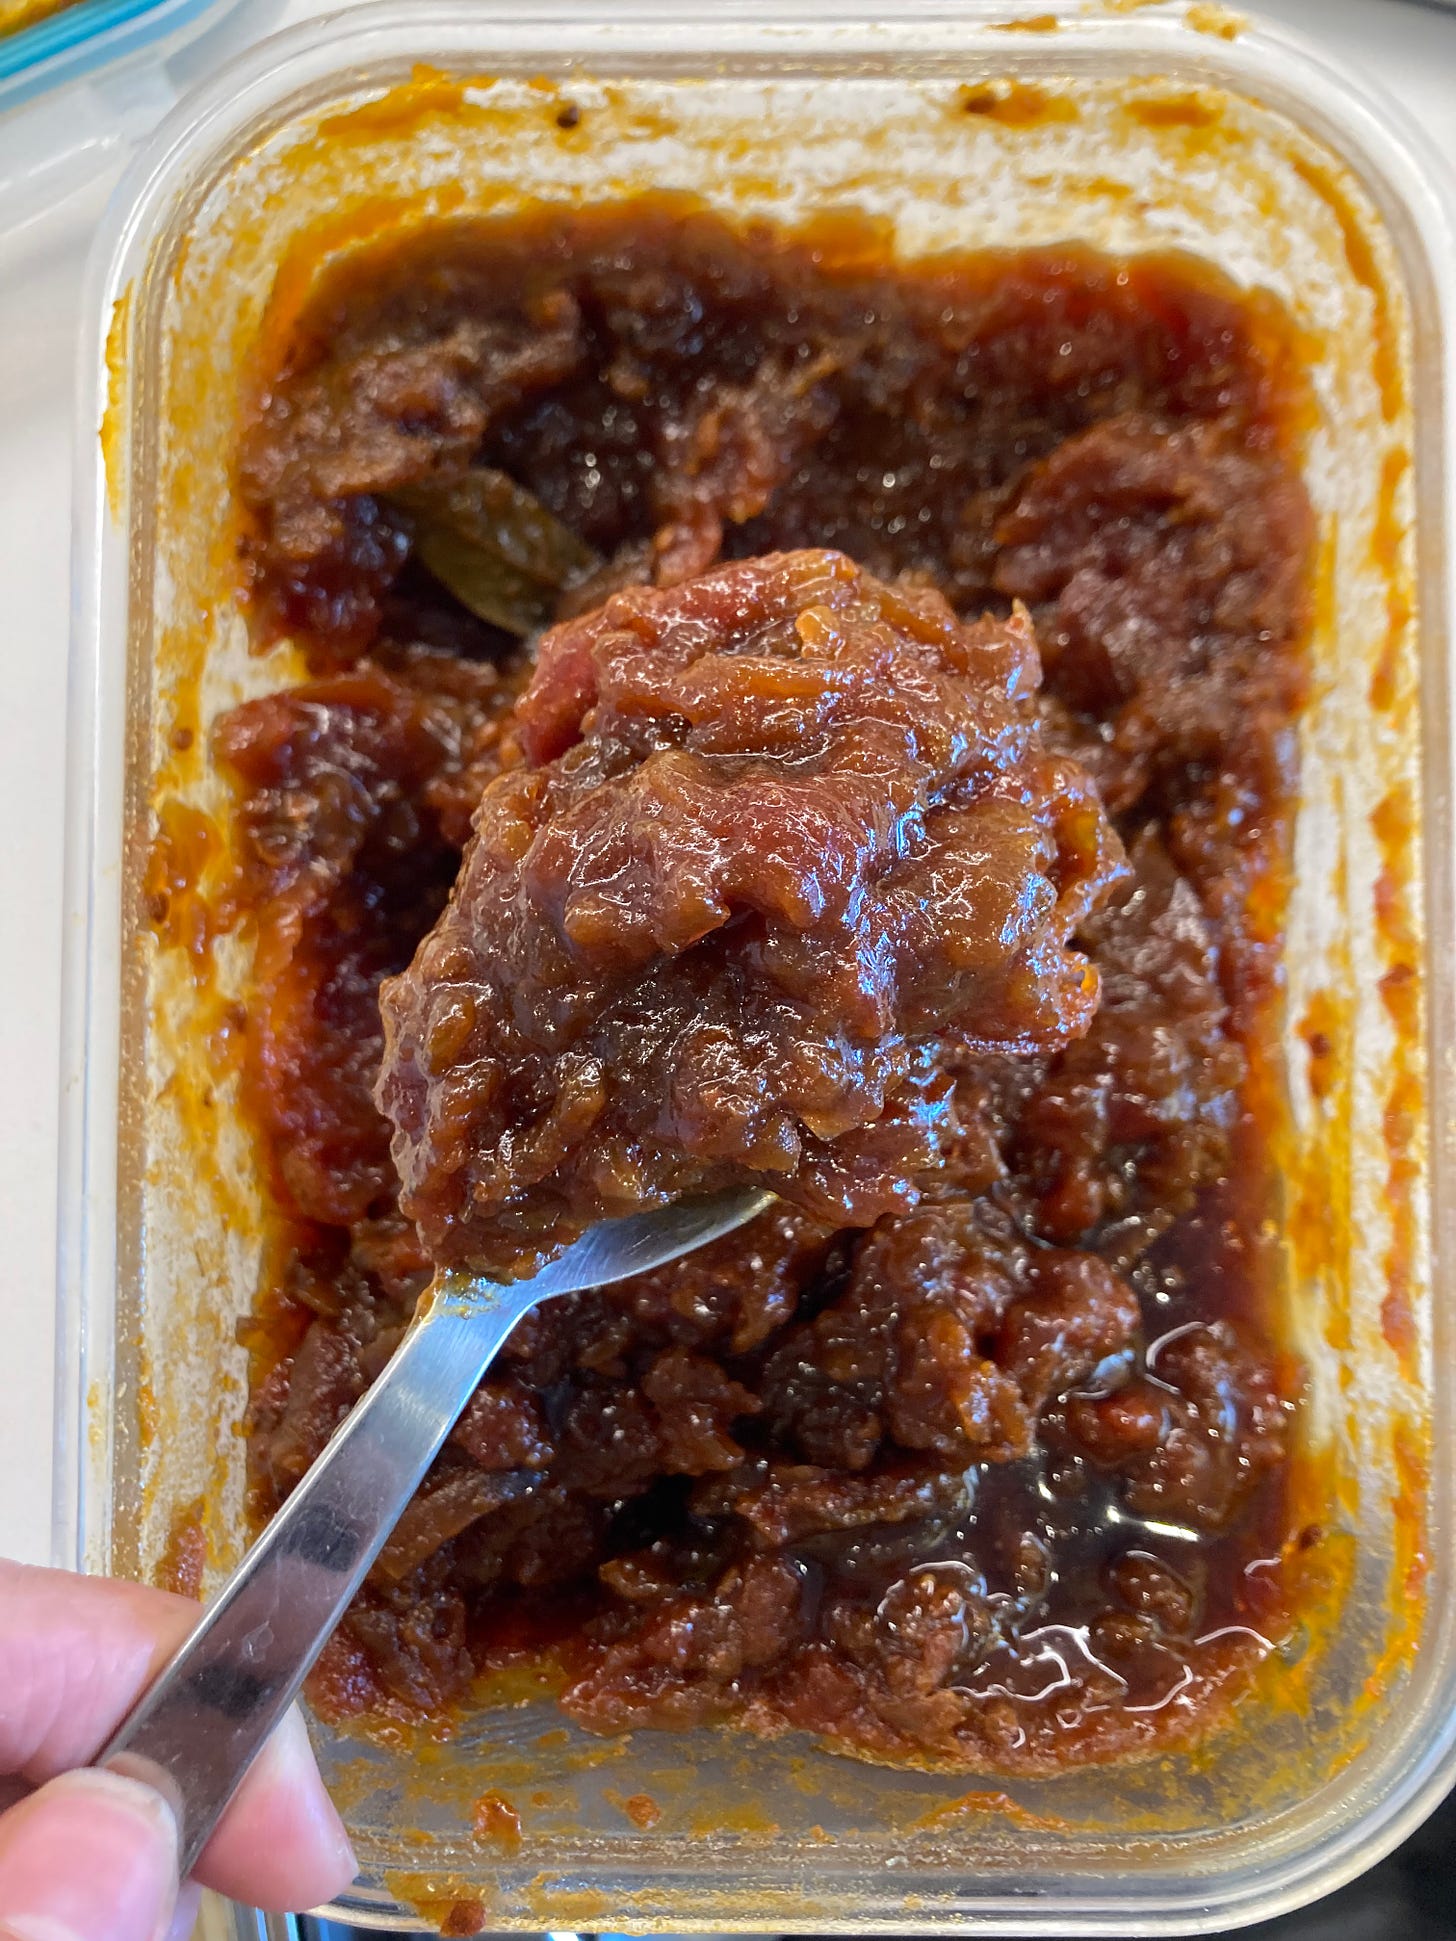
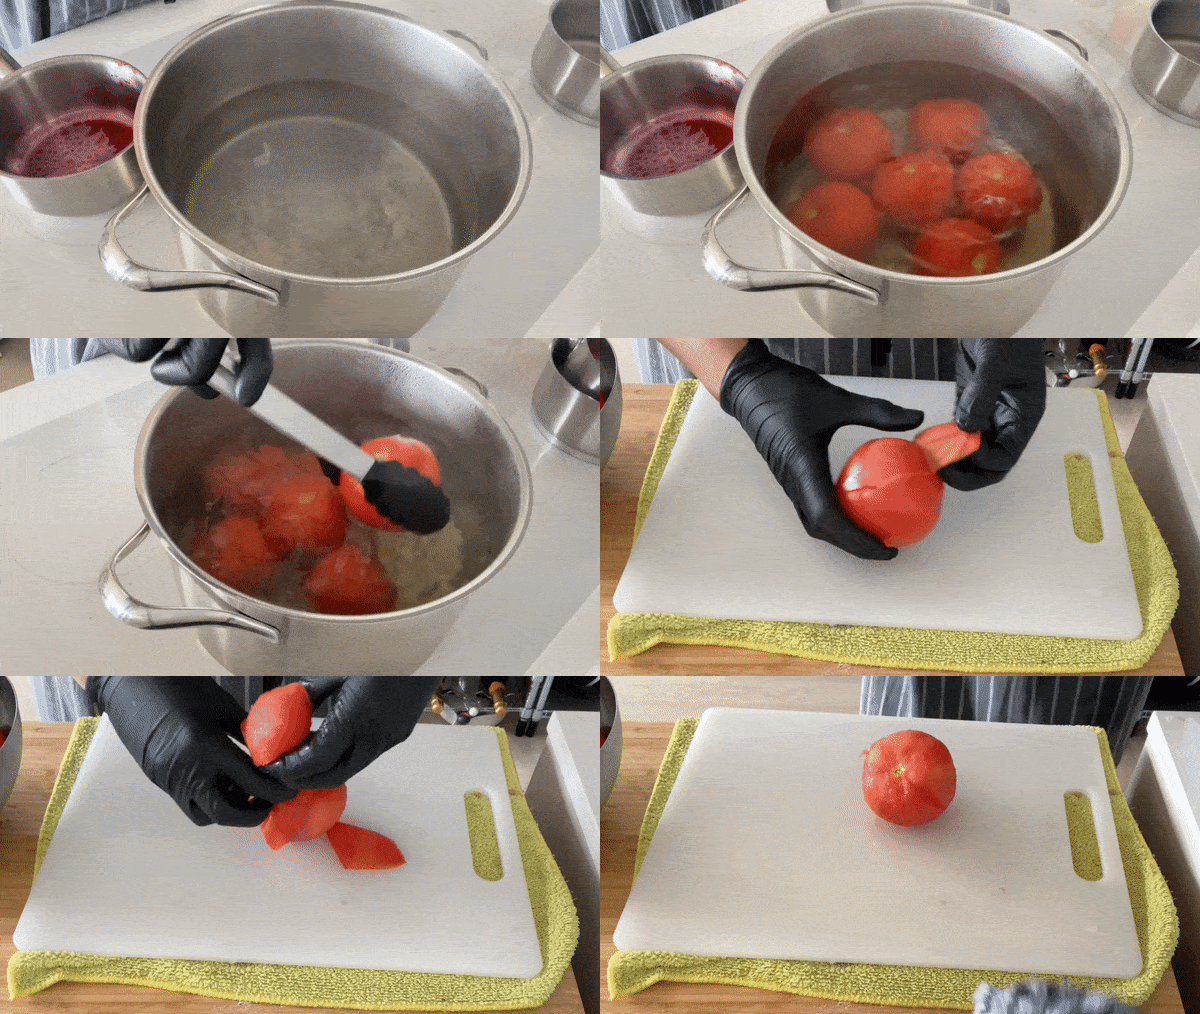
Well, we’ve got a lot going on in today’s recipe so let’s not try and sweat it too much. The reality is, whatever the heck this tomato stuff is, it is DELICIOUS and well worth making yourself especially whilst tomatoes are so fab at the moment. Skinning the tomatoes for the jam is optional but I prefer the final result - you don’t have to do it if you don’t want to, but it always ends up being easier than I think it’s going to be.
As tomatoes are about 95% water, this is one of those recipes - much like the onion confit - that disappears in front of your eyes. I made around 6kg of the jam for the lark! Pop up and was always shocked as the mountain of tomatoes turned into a comparative molehill of jam. But it is worth it. The concentrated flavour is sweet, fragrant and acidic.
We start by reducing the onions slightly (mainly from necessity, this recipe begins SO voluminously) before adding the tomatoes, vinegar and sugar. After that it’s a long road of stirring and waiting for the mixture to reduce by about 75%. If you’re doing a small batch, it should be in the region of 1-2 hours. A larger batch might have you waiting around for 5-6 hours. There’s no limit to how far down you reduce it but I like it to be spoonable and not too runny, bearing in mind it will firm up more as it cools.
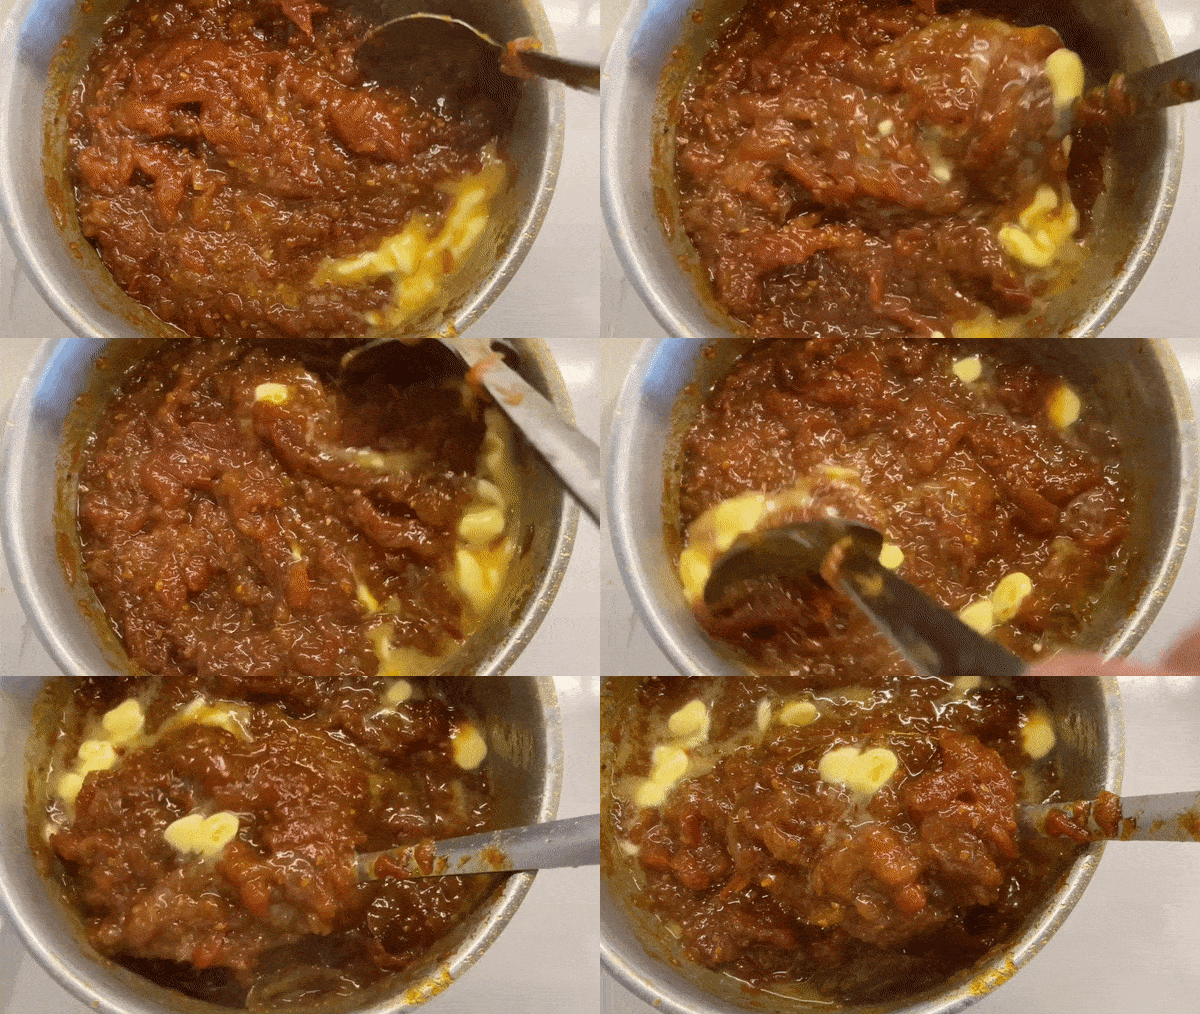
A large batch is definitely best kept for a rainy, house tidying sort of day. Finally, when the tomato jam is almost ready I sneak in a nice spoon of butter because… I mean, do you really need a reason?
Anyway, this stuff lasts for ages. I reckon it would make excellent grilled cheese sandwiches, or spread into anything that needs something sweet and tangy. You can totally adapt this tomato base to suit you. I think toasted mustard and cumin seeds would be an amazing accomplishment and addition, and you could definitely herb it up.
Okay, let’s make it!
Tomato and parmesan linzer
Makes 1 x 8 inch linzer
Tomato jam
(This reduces to approximately 30%-40% of the original weight. This will give you approximately 500g, which is enough for two linzers and leftovers)
850g fresh tomatoes
280g white onions
110g caster sugar
55g dark brown sugar
55g vinegar - cider or white wine
2 bay leaves
6g salt
75g butter
Linzer dough
55g hard boiled egg yolks (around 4 eggs)
190g plain flour
175g butter
35g parmesan
4g black pepper
2g salt
To finish
Egg wash
Caraway Seeds
Tomato Jam - method
First, if you’re skinning the tomatoes, get a large pot of water to boil for blanching. Turn the tomatoes over and make a little ‘x’ incision on the base. The reason we do this is so the skin is easier to remove later. If you don’t do this, the tomato skin will burst at random and you will still be able to remove it later but the ‘x’ makes it easier
Tip the tomatoes into the boiling water and cook on high for 1-2 minutes. Remove the tomato from the water with a slotted spoon and leave to one side. When it’s not going to burn your fingers, simply peel the skin off
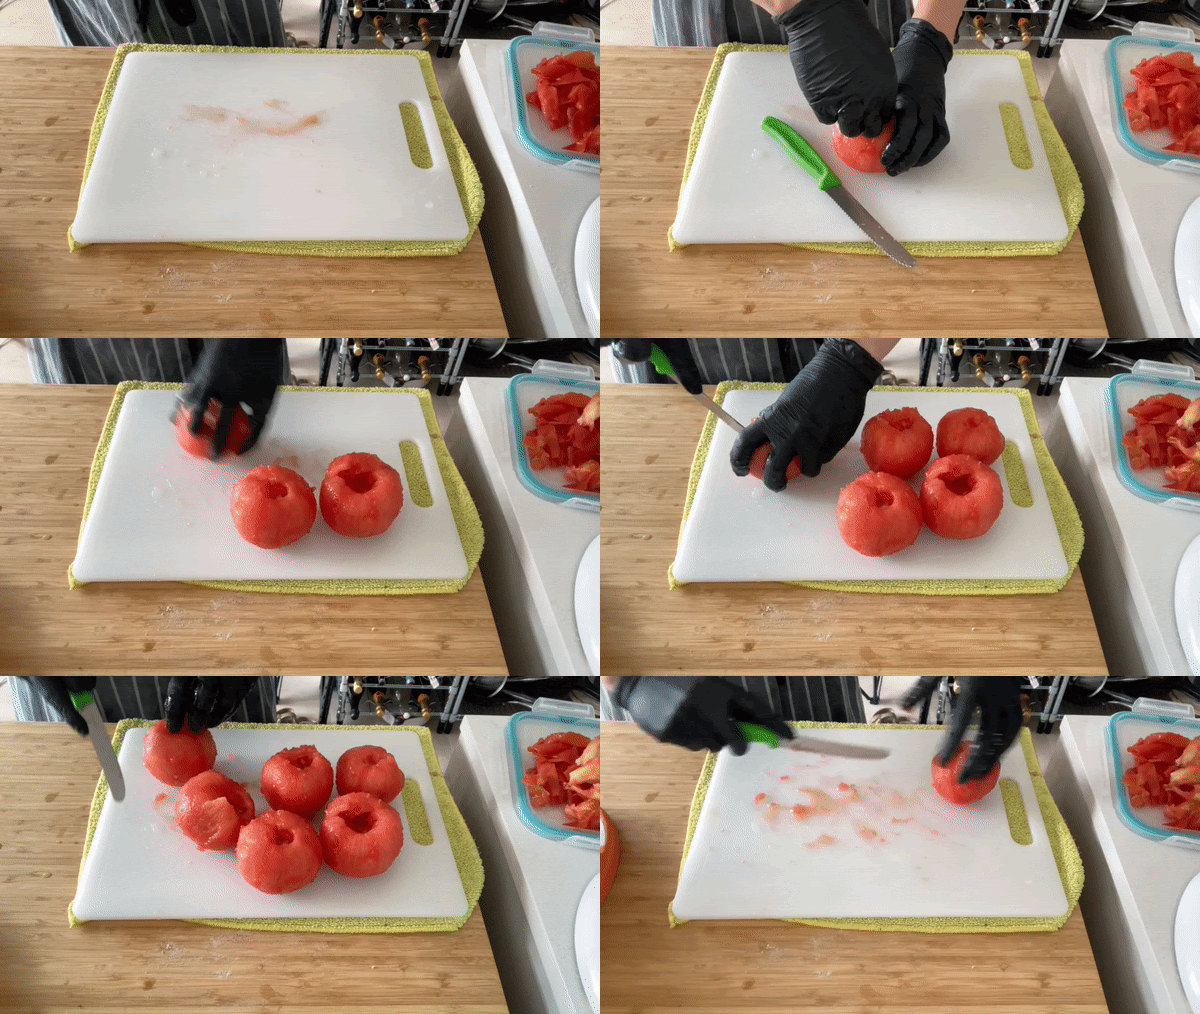
Depending on the tomato, you may want to remove the very thick core pieces as well as the stem
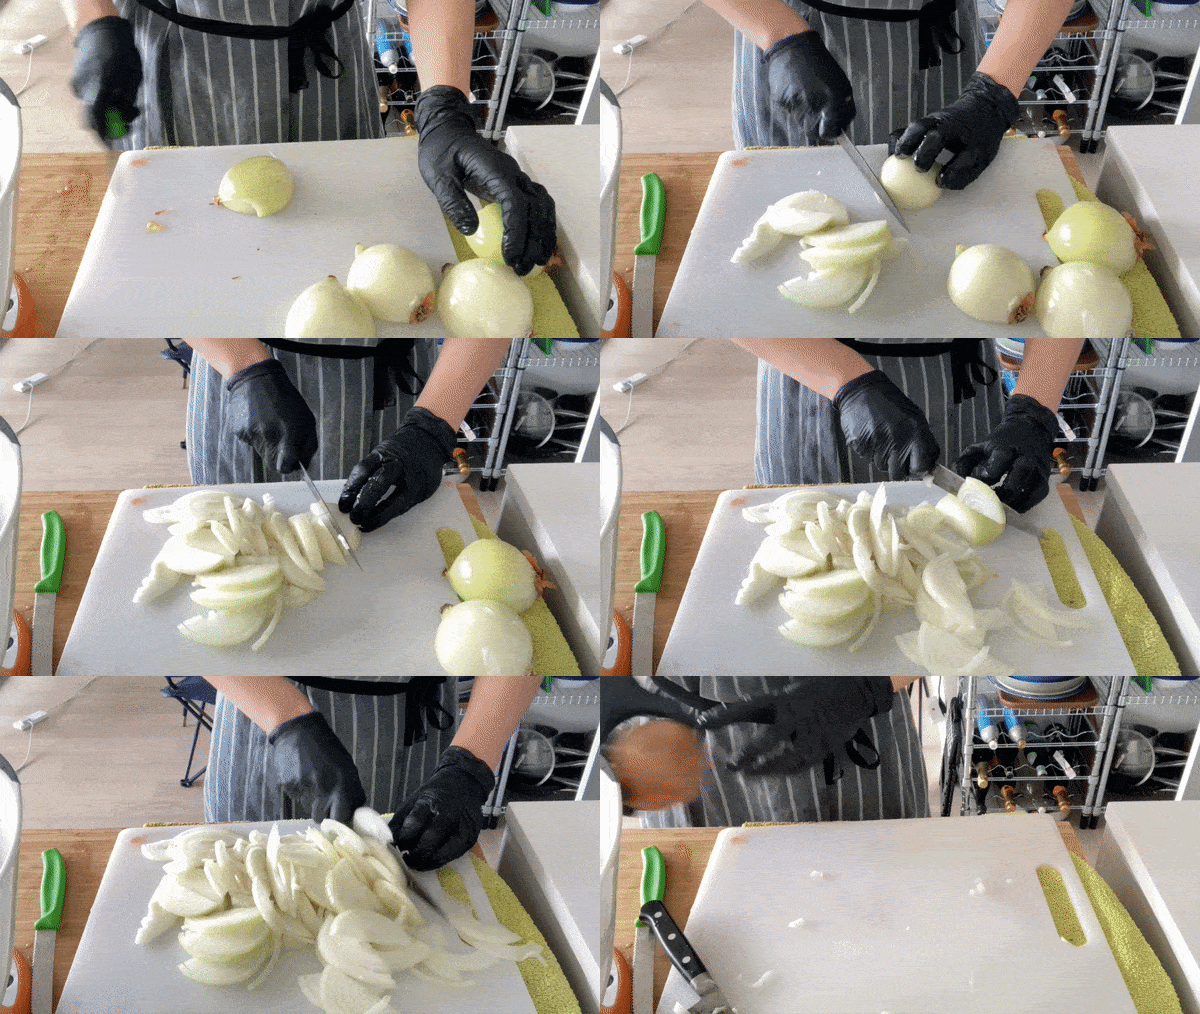
Slice white onions thinly
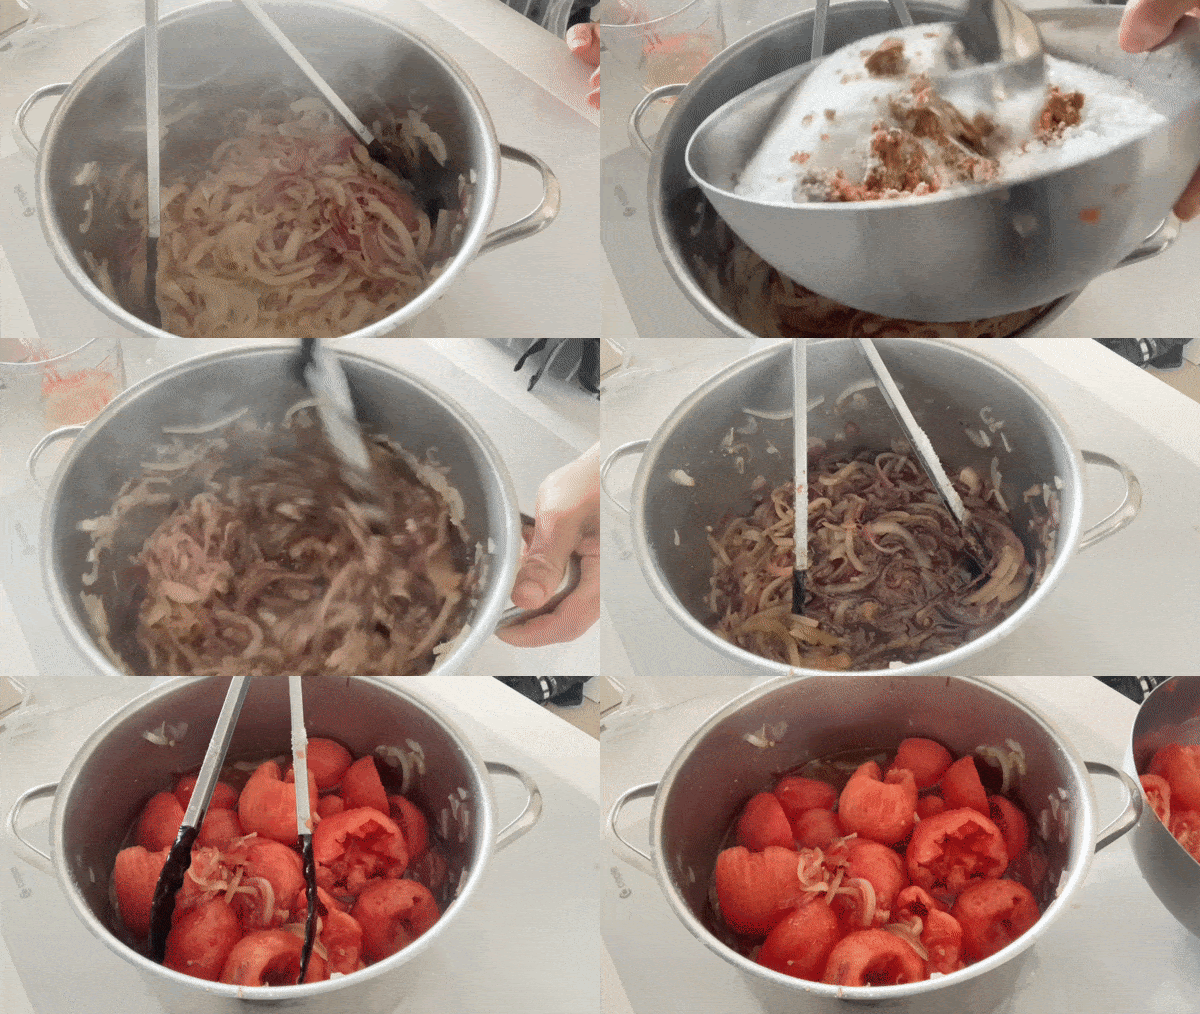
Heat a tablespoon of olive oil and throw in your onions on a medium heat. Add a lid and cook the onions (you don’t need it to colour) until they have collapsed slightly
Add the tomatoes, sugar, vinegar and bay leaves and bring to a boil. Once boiling, turn the heat down and simmer until it has reduced significantly
This will take a number of hours and you will need to stir it every now and then to check it isn’t catching. When the jam is ready, it’ll be much darker in colour and when you drag a spoon through it, it won’t fill in with liquid: the red tomato seas will simply part. At this point, stir in the butter and salt and you can take off the heat
Transfer into a clean container. Keeps for 2 weeks in the fridge. If you want to do it properly and put it into sterilised jars, you can keep it for months!
Linzer dough
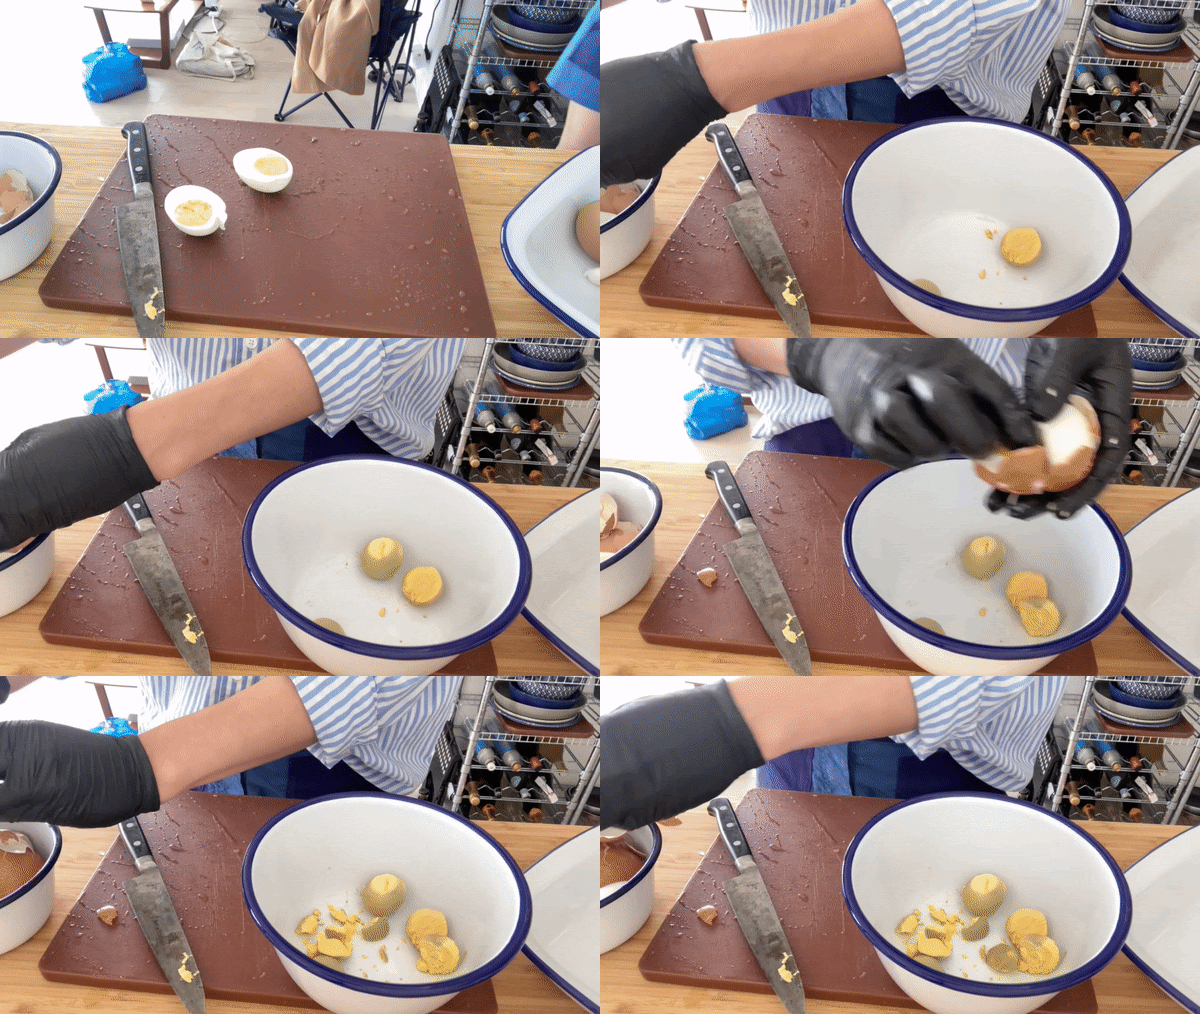
First let’s get our yolks ready. Either boil the eggs whole in their shells for 10 minutes, remove, peel and then separate the yolks OR separate your eggs and poach the yolks directly in simmering water for 7-8 mins before removing and drying off
Pass the yolks through a fine sieve
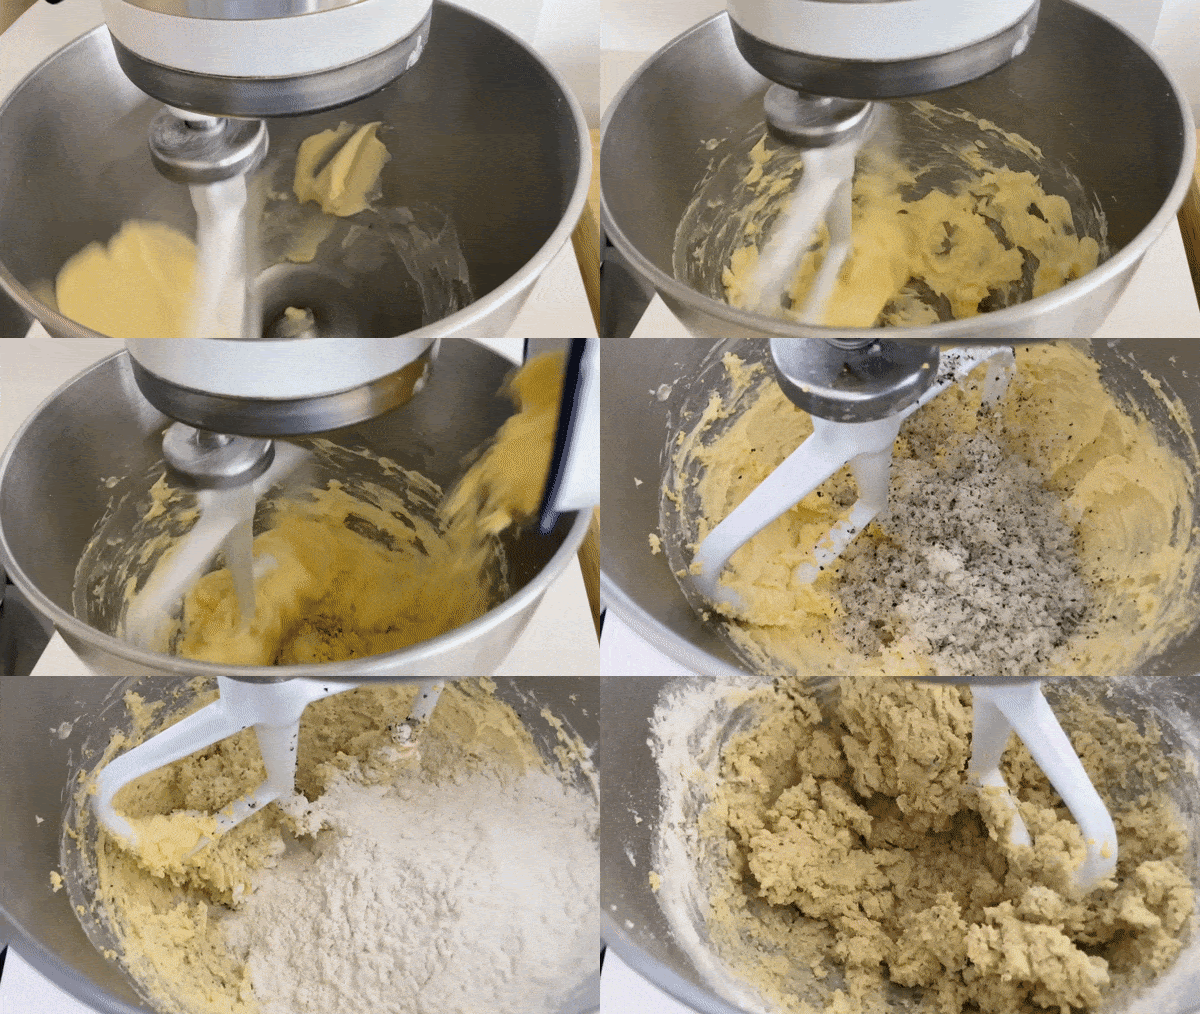
For the dough, paddle the butter until smooth then add the sieved, egg yolks and parmesan and mix until well combined
Finally stir through the flour, salt and pepper until a dough forms.You dont need to overmix at this stage
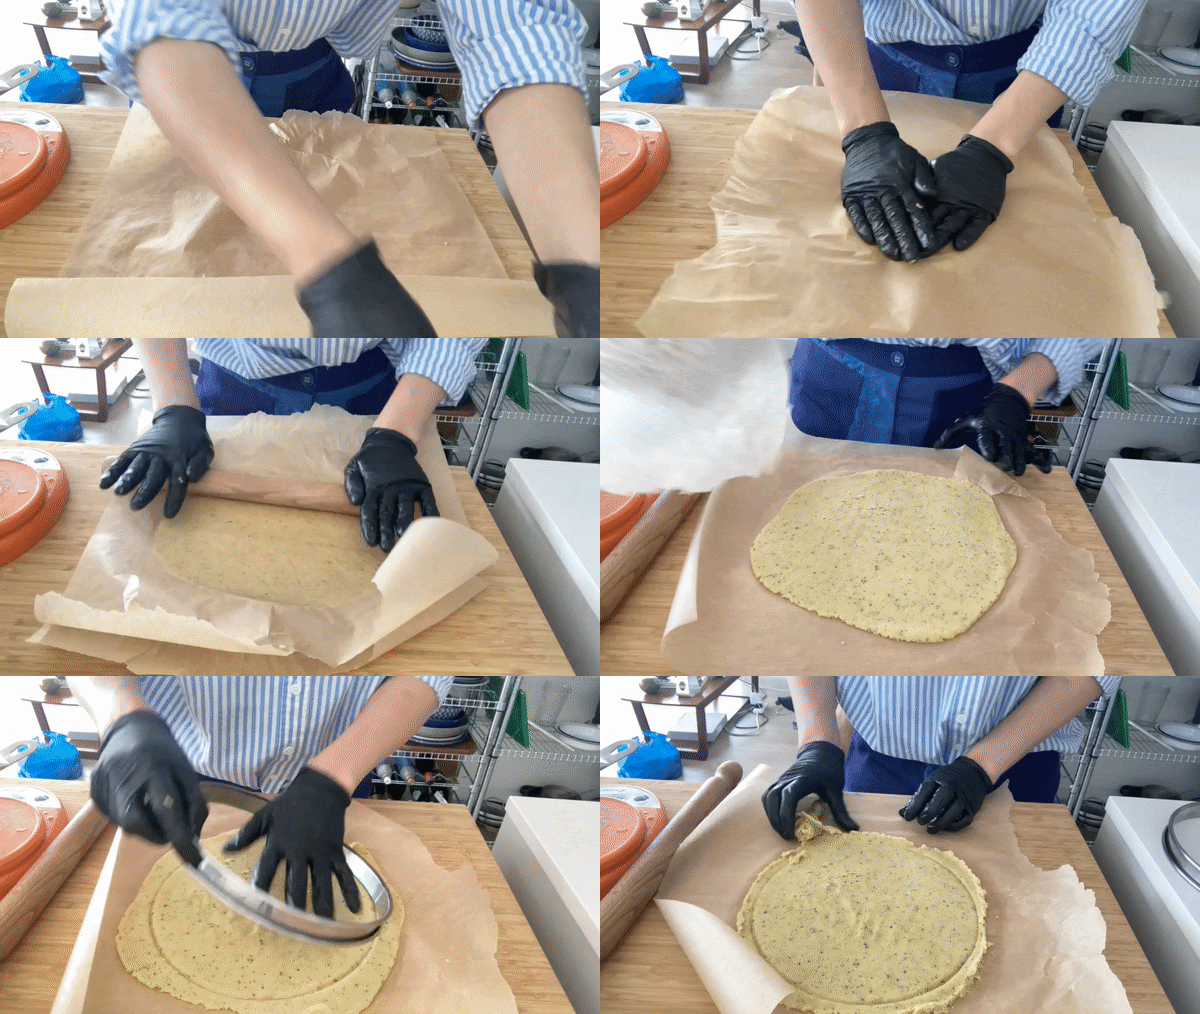
Move the dough onto the bench and work in any dry bits
Divide the dough into approx 1/3rd and 2/3rd and roll out between two sheets of greaseproof paper. We want it to be approx 3-5mm and around 9 inches
For the base: Use an 8inch pastry ring, or cake tin, or plate, to gently mark the size then cut a 2cm border. Set aside
For the top, cut out an 8inch circle then put into the freezer to chill. We don’t want to cut strips for the top lattice until it is firm, otherwise it will warp
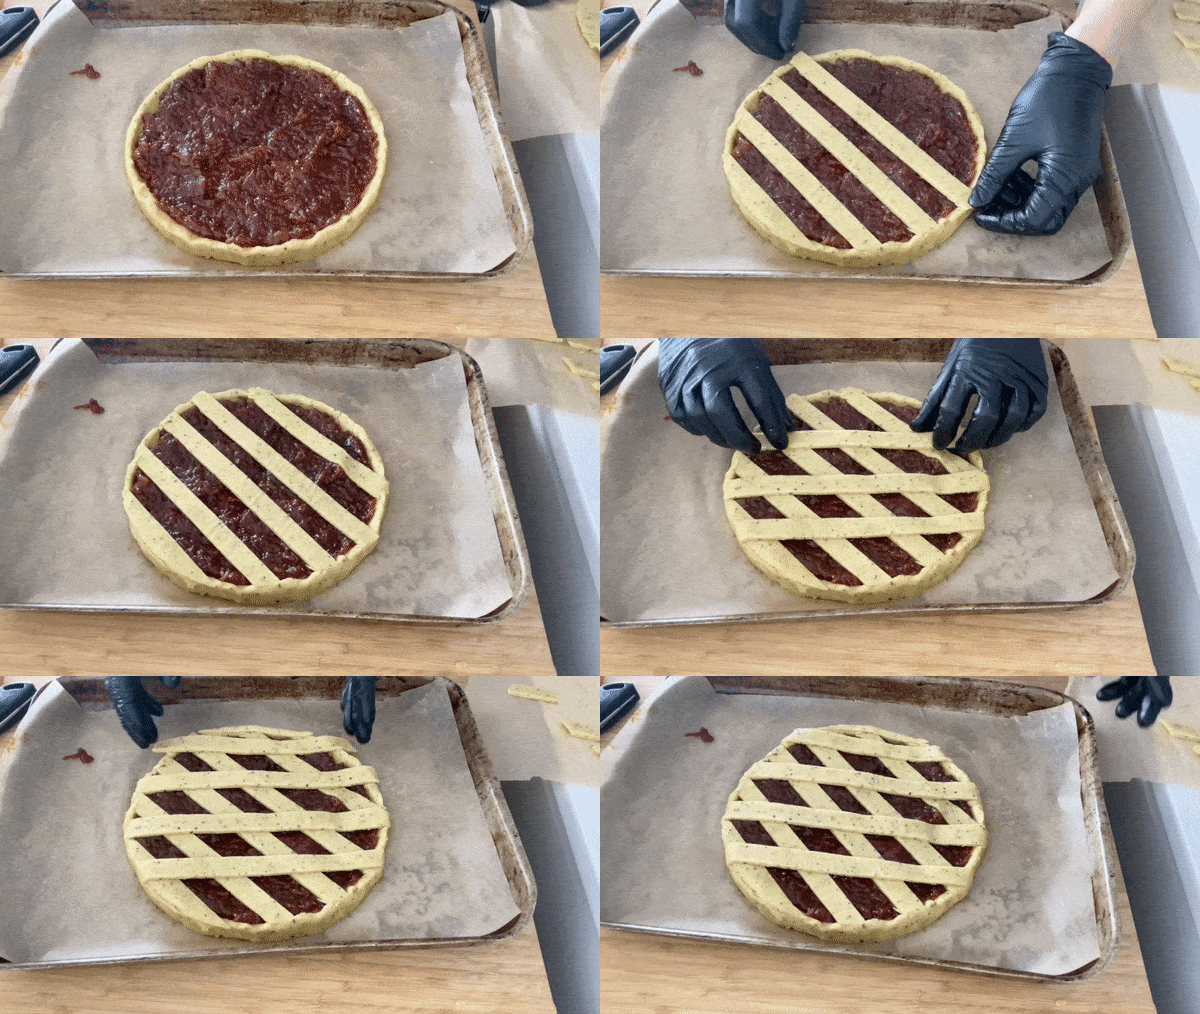
To create the tart, form the 2cm the overhang into an edge, around 1cm tall. Try to keep it in a circle shape as best you can. If desired, you can use a pastry ring to keep your tart in shape
Spoon 200g of tomato jam onto the dough and spread to the edges and set aside
Get the top piece of pastry out of the freezer and cut the disc into 1cm width strips. You can go thinner or thicker, depending on the design you want to do! 1cm is traditional
Carefully lay the strips on top of the tart at an angle
Squish the edges of the pastry with the lattice top to finish the tart
Put into the fridge to chill whilst the oven preheats
Get your oven to 175c
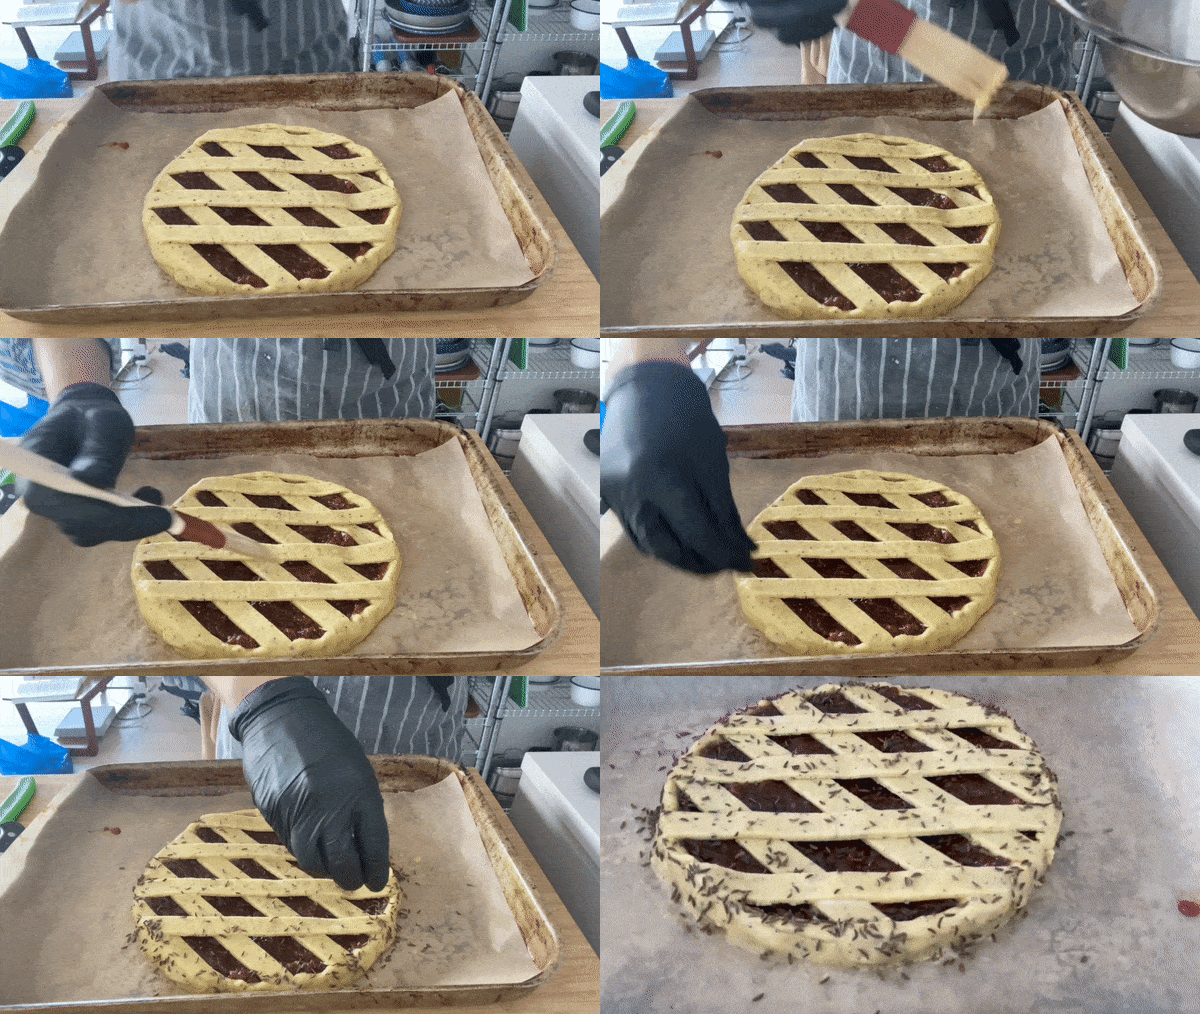
When the oven is heated up, egg wash and sprinkle with caraway seeds
Bake for 20 minutes, turn, then bake for another 20 minutes until perfectly golden





What a great recipe, so delicious. I wonder if my crust should have been quite as crumbly as it was, i mean it was practically like a "crumble..." anyone else experience this?
Loved this!! the jam, the pastry, the CARAWAY, it was sooooo delicious 👌 the pastry reminded me of cheese pepper biscuits, and the heat from the pepper was amazing.