
Kitchen Project #209: Pineapple Upside Down Cake
An All Time Classic by Bronwen Wyatt


Hello,
Welcome to today’s edition of Kitchen Projects. Thank you so much for being here.
Today, I’m so thrilled to welcome Bronwen Wyatt back to the newsletter. ICYMI, Bronwen has been regularly delighting us all with her delves into the American Baking Canon. Previously, this has included Strawberry Shortcake, Peach Cobbler and Coffee Cake to name just a few, and today? It’s all about Pineapple Upside Down Cake.
What follows is a fascinating story of this tropical delight, along with a most delicious recipe for this classic cake. On KP+, Bronwen has developed a jammy pineapple and passionfruit shortbread bar to further expand your tropical pursuits. Click here for the recipe.
What’s KP+? Well, it’s the level-up version of this newsletter. By joining KP+, you will support the writing and research that goes into the newsletter (including the commissioning - and fair payment - of all the writers), join a growing community, access extra content (inc., the entire archive with 450+ recipes) and more. Subscribing is easy and only costs £6 per month or just £50 per year (equivalent to about £4.00 per month). Why not give it a go? Come and join the gang!
Love,
Nicola
Pineapple Upside-Down Cake
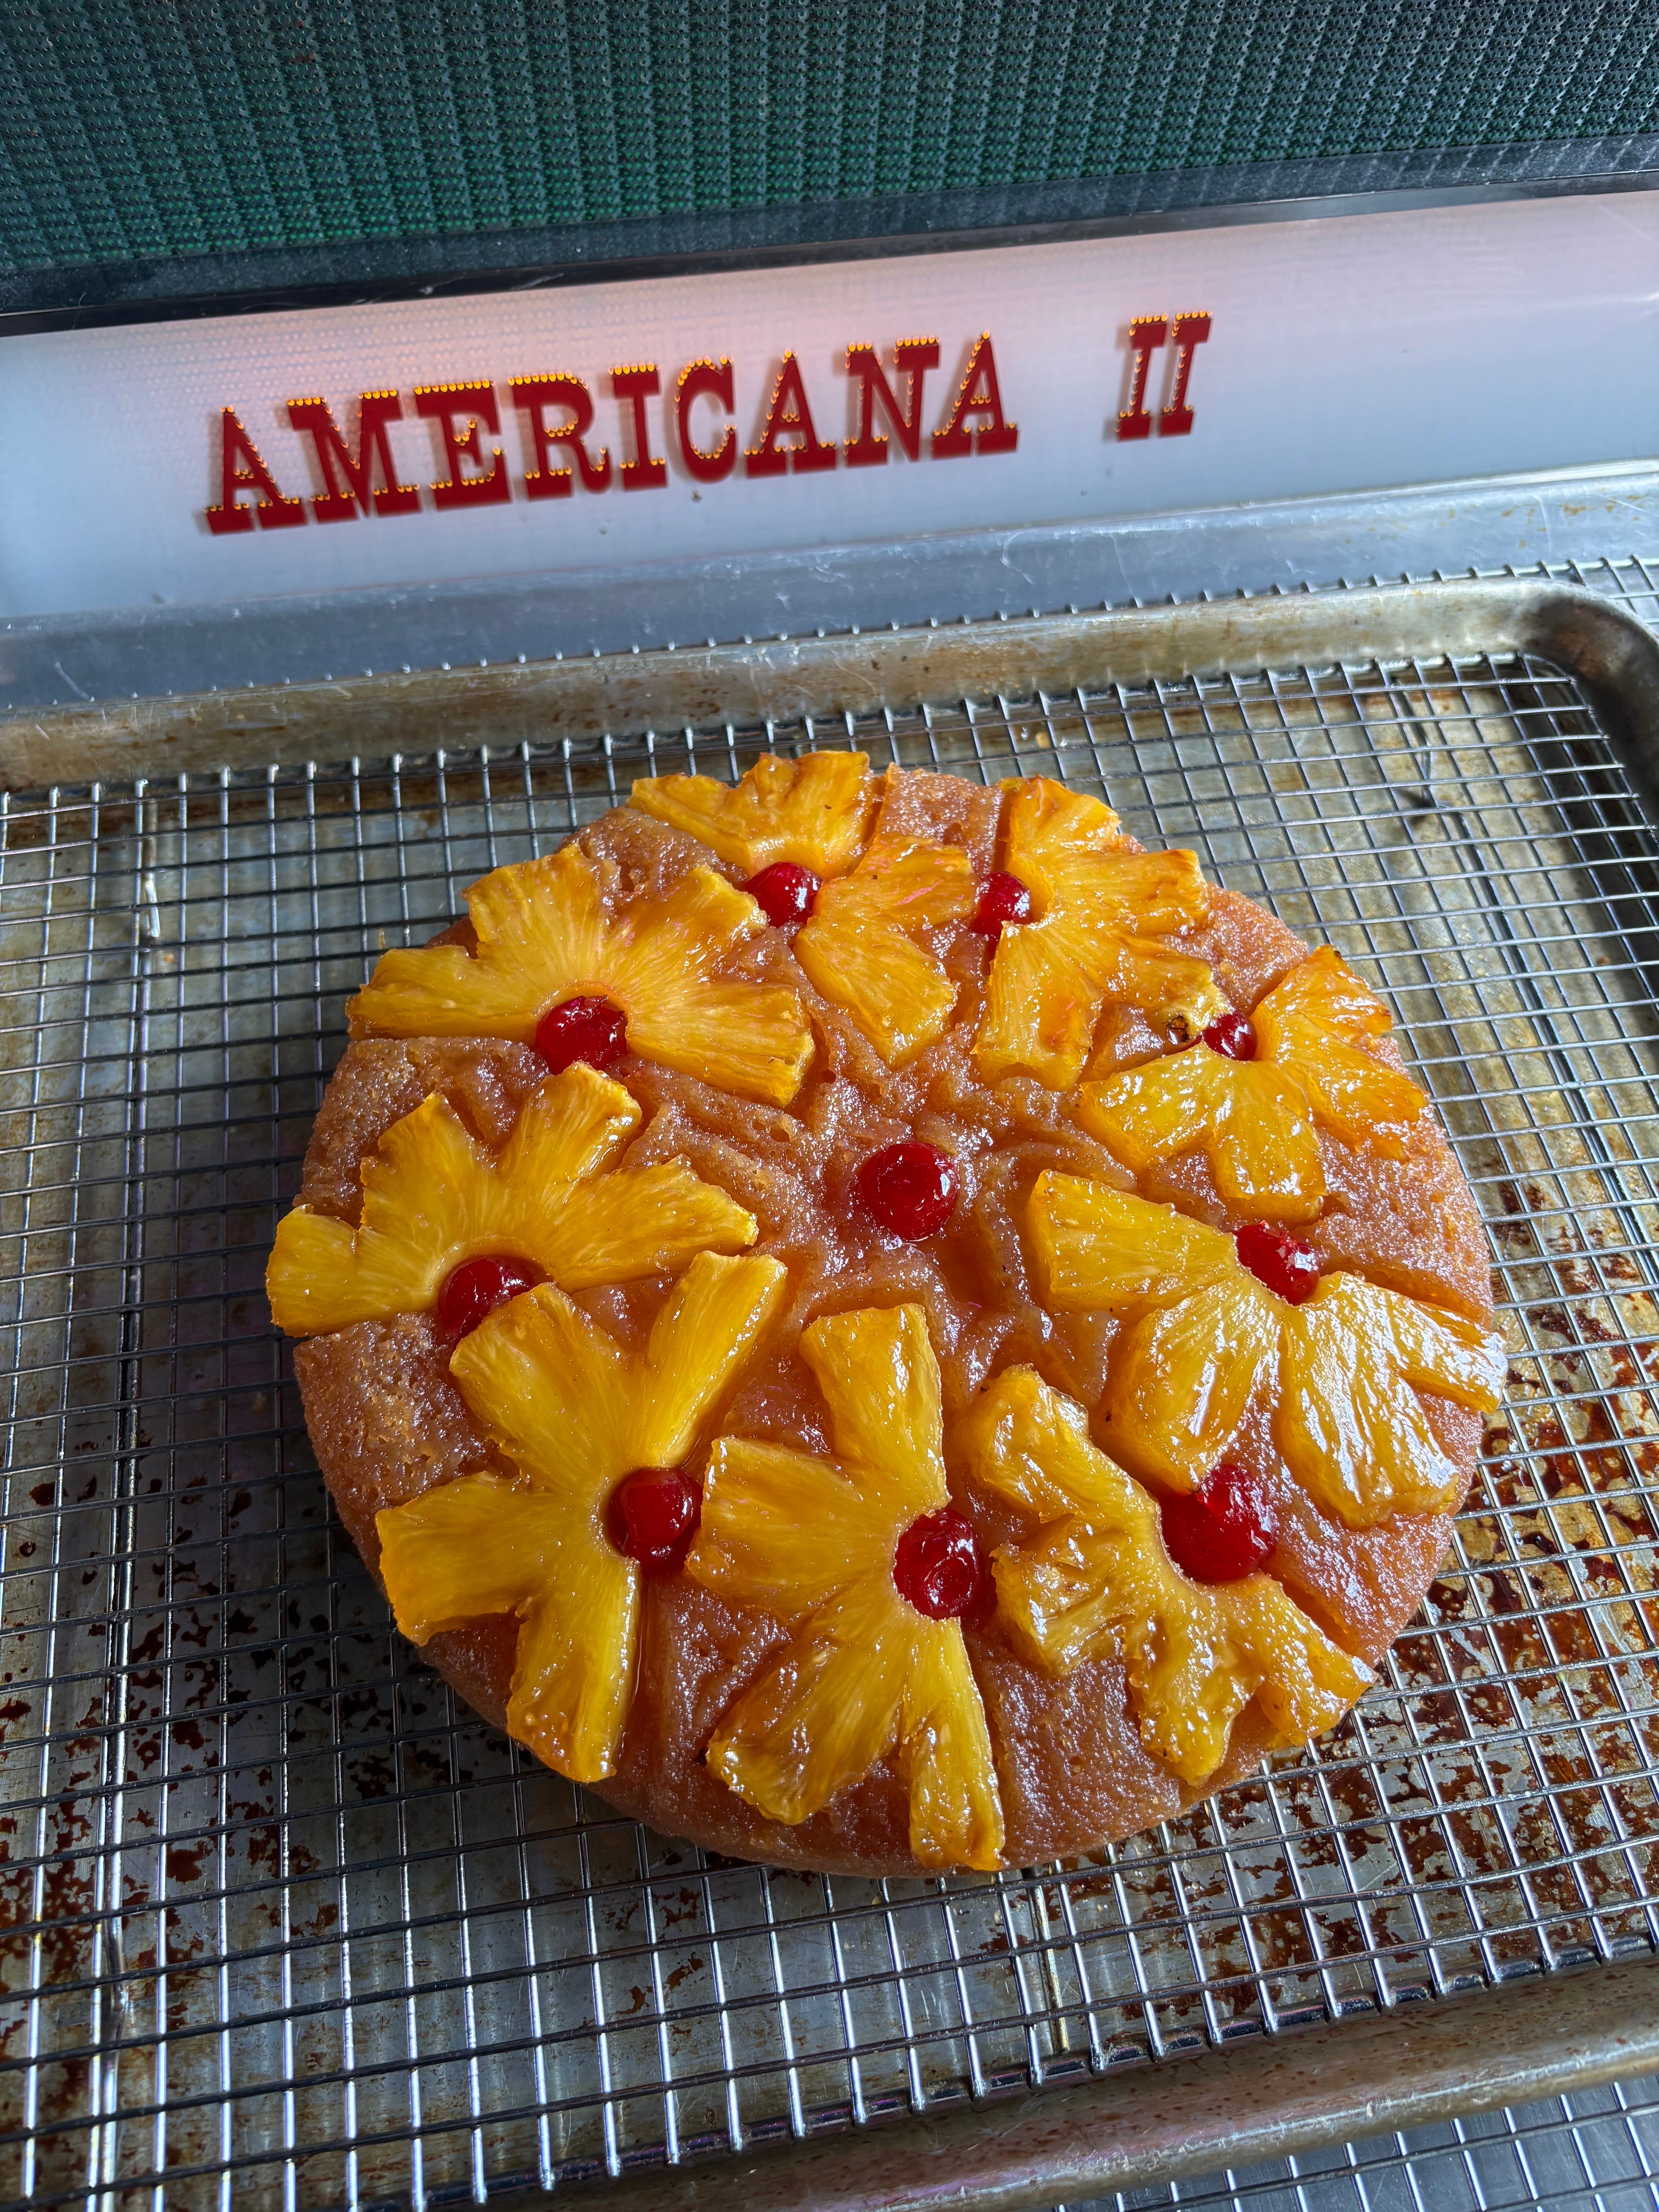
I am so pleased to bring you a recipe for pineapple upside-down cake today, a retro dessert that has more than earned its place in the American dessert canon. I’ve always been tickled by the cake’s appealingly playful appearance, and the flavor packs a surprising punch: tangy pineapple, buttery brown sugar, and tender cake are all perpetual winners in my book. Like pizza, I’m of the opinion that even a mediocre pineapple upside-down cake is pretty dang good.
Pineapple Mania!
Upside-down cakes, as a genre of cake, have existed since the 18th century. Kin to tartes tatin, these cakes generally consisted of fruit, perhaps apples, cherries, or even prunes, caramelized in butter and sugar on the stove. A batter was then added, and the concoction could either be finished on the stovetop or placed in an oven to finish baking. Right before serving, the cake was upended onto a serving platter, displaying an attractive crown of fruit and caramel. But when did the tropical pineapple, indigenous to South America, become the fruit of choice for this iconic U.S. dessert?
When the pineapple was first introduced to Europe, it became an object of fascination, if not infatuation, among the upper class. The price of exporting the fruit, which had not yet been successfully cultivated on the European continent, was so astronomical that to display one at a party became a status symbol. Pineapple mania swept across the continent, leading to fierce competition among horticulturists to successfully grow the pineapple domestically. Pineapples found their way into the decorative arts, cropping up as staircase finials, on gravestones, and in wallpaper, textiles, and furniture. In “King of Fruits”, author Étienne Fortier-Dubois writes:
“Thus, in 1764, at the peak of pineapple mania in England, it is estimated that the average cost to cultivate a pineapple – taking into account the construction of the pinery, the import of pineapple plants from the Caribbean, and the gardening labor for three or four years – was approximately £80. This translates to about £12,000, or $16,000, today.”

To this day, the pineapple remains a symbol of hospitality (in more ways than one- rumour has it displaying an upside-down pineapple on your person is a nudge-nudge wink-wink that you are open to swinging).
Eventually, advancements in agriculture and the invention of the steamship, which sped up the transportation of pineapples from their growing regions to Europe and the mainland of America, allowed the astronomical price of the pineapple to begin to drop. The further commercialization of the pineapple is often attributed to the Dole Corporation, an American company that pioneered the process of canning pineapple on an industrial level. Its founder, James Dole, built a vast pineapple-growing and canning empire on Hawaiʻi. He was able to establish his business on the islands because his extended family, including cousin Sanford B. Dole, led a coup against the Hawaiian royal family in 1893. Hawaiʻi’s rightful ruler, Queen Liliʻuokalani, had been working to restore authority to the monarchy and Native Hawaiians while reducing the influence of American and European business interests. As a result of her political activism, she was deposed, paving the way to Hawaiʻi’s annexation by the U.S. and the continued presence of American corporations on the islands. By 1922, Hawaiʻi produced up to 75% of the world’s pineapples.
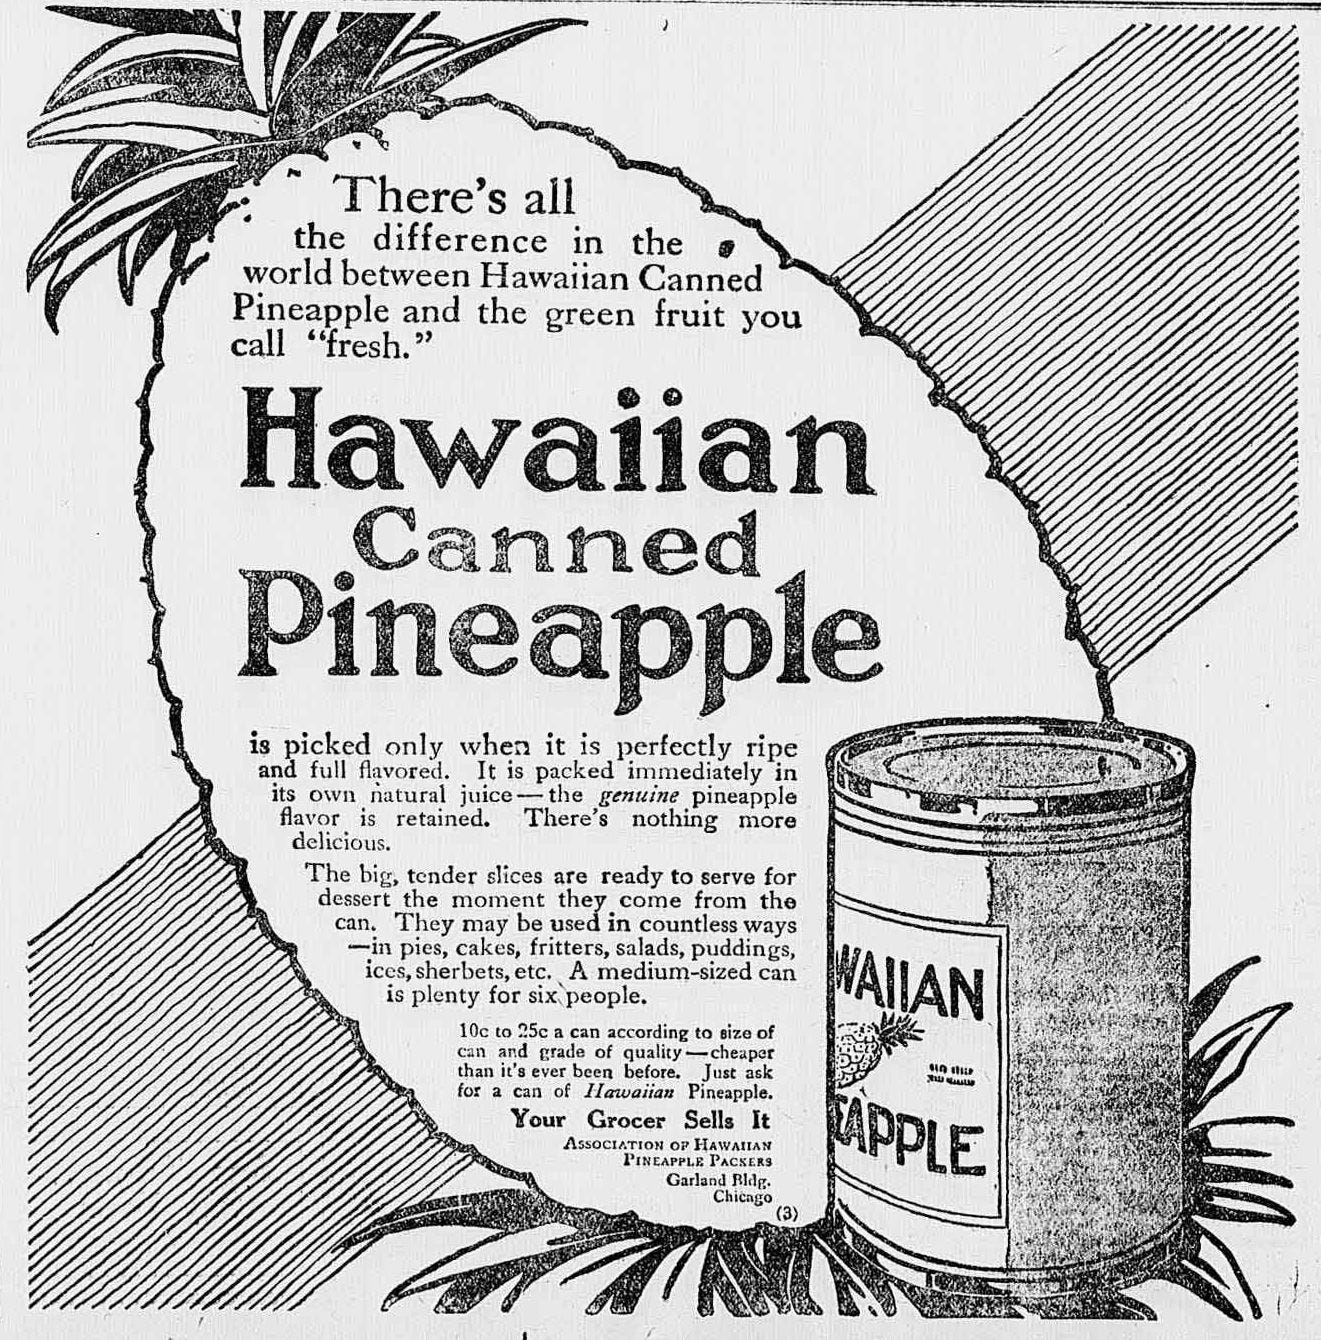
In 1913, Dole cornered the canned pineapple market by implementing a device called the Ginaca Machine, which peeled, cored, and sliced pineapples automatically. Until then, the labor of processing the fruit was still done, laboriously, by hand. The canned pineapple ring was further democratized when Dole ran a nationwide ad campaign (apparently one of the very first of its kind) for the fruit. By the 1920’s, they had gone from a fantastical luxury item to a broadly popular pantry staple. In 1925, Dole (under the name Hawaiian Pineapple Company) ran a contest encouraging home cooks to send in their favorite recipes. The winning dishes were bound into a promotional book, leading to the first appearance of a pineapple upside-down cake recipe in print:
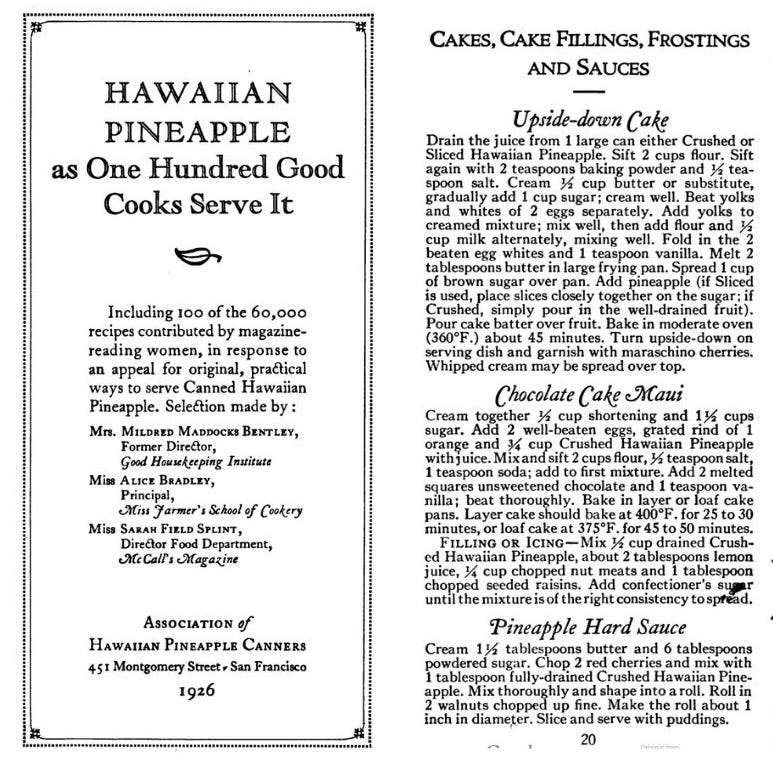
This particular version was apparently among several thousand pineapple-upside down cakes submitted to the contest (how did they choose? To be a fly on that wall!). It’s unclear who was originally responsible for pairing the newly popular canned pineapple with the older staple of the upside down-cake, but the two were clearly already intertwined in 1925. And even here in its earliest printed incarnation, the pineapple upside down cake includes maraschino cherries, those impossibly cheerful, almond-scented, electric-red confections. I haven’t been able to find any historical record as to why the cherries are so often paired with pineapple upside-down cake, except that both were enjoying equal popularity in this era. Perhaps the color combo of sunny yellow and cherry red was simply too alluring to resist!
Most contemporary pineapple upside-down cake recipes adhere to this early model: a brown sugar mixture is poured into the pan, topped with canned pineapple rings, and finished with a sturdy butter-based cake batter. My next step was to determine if this classic could be improved.
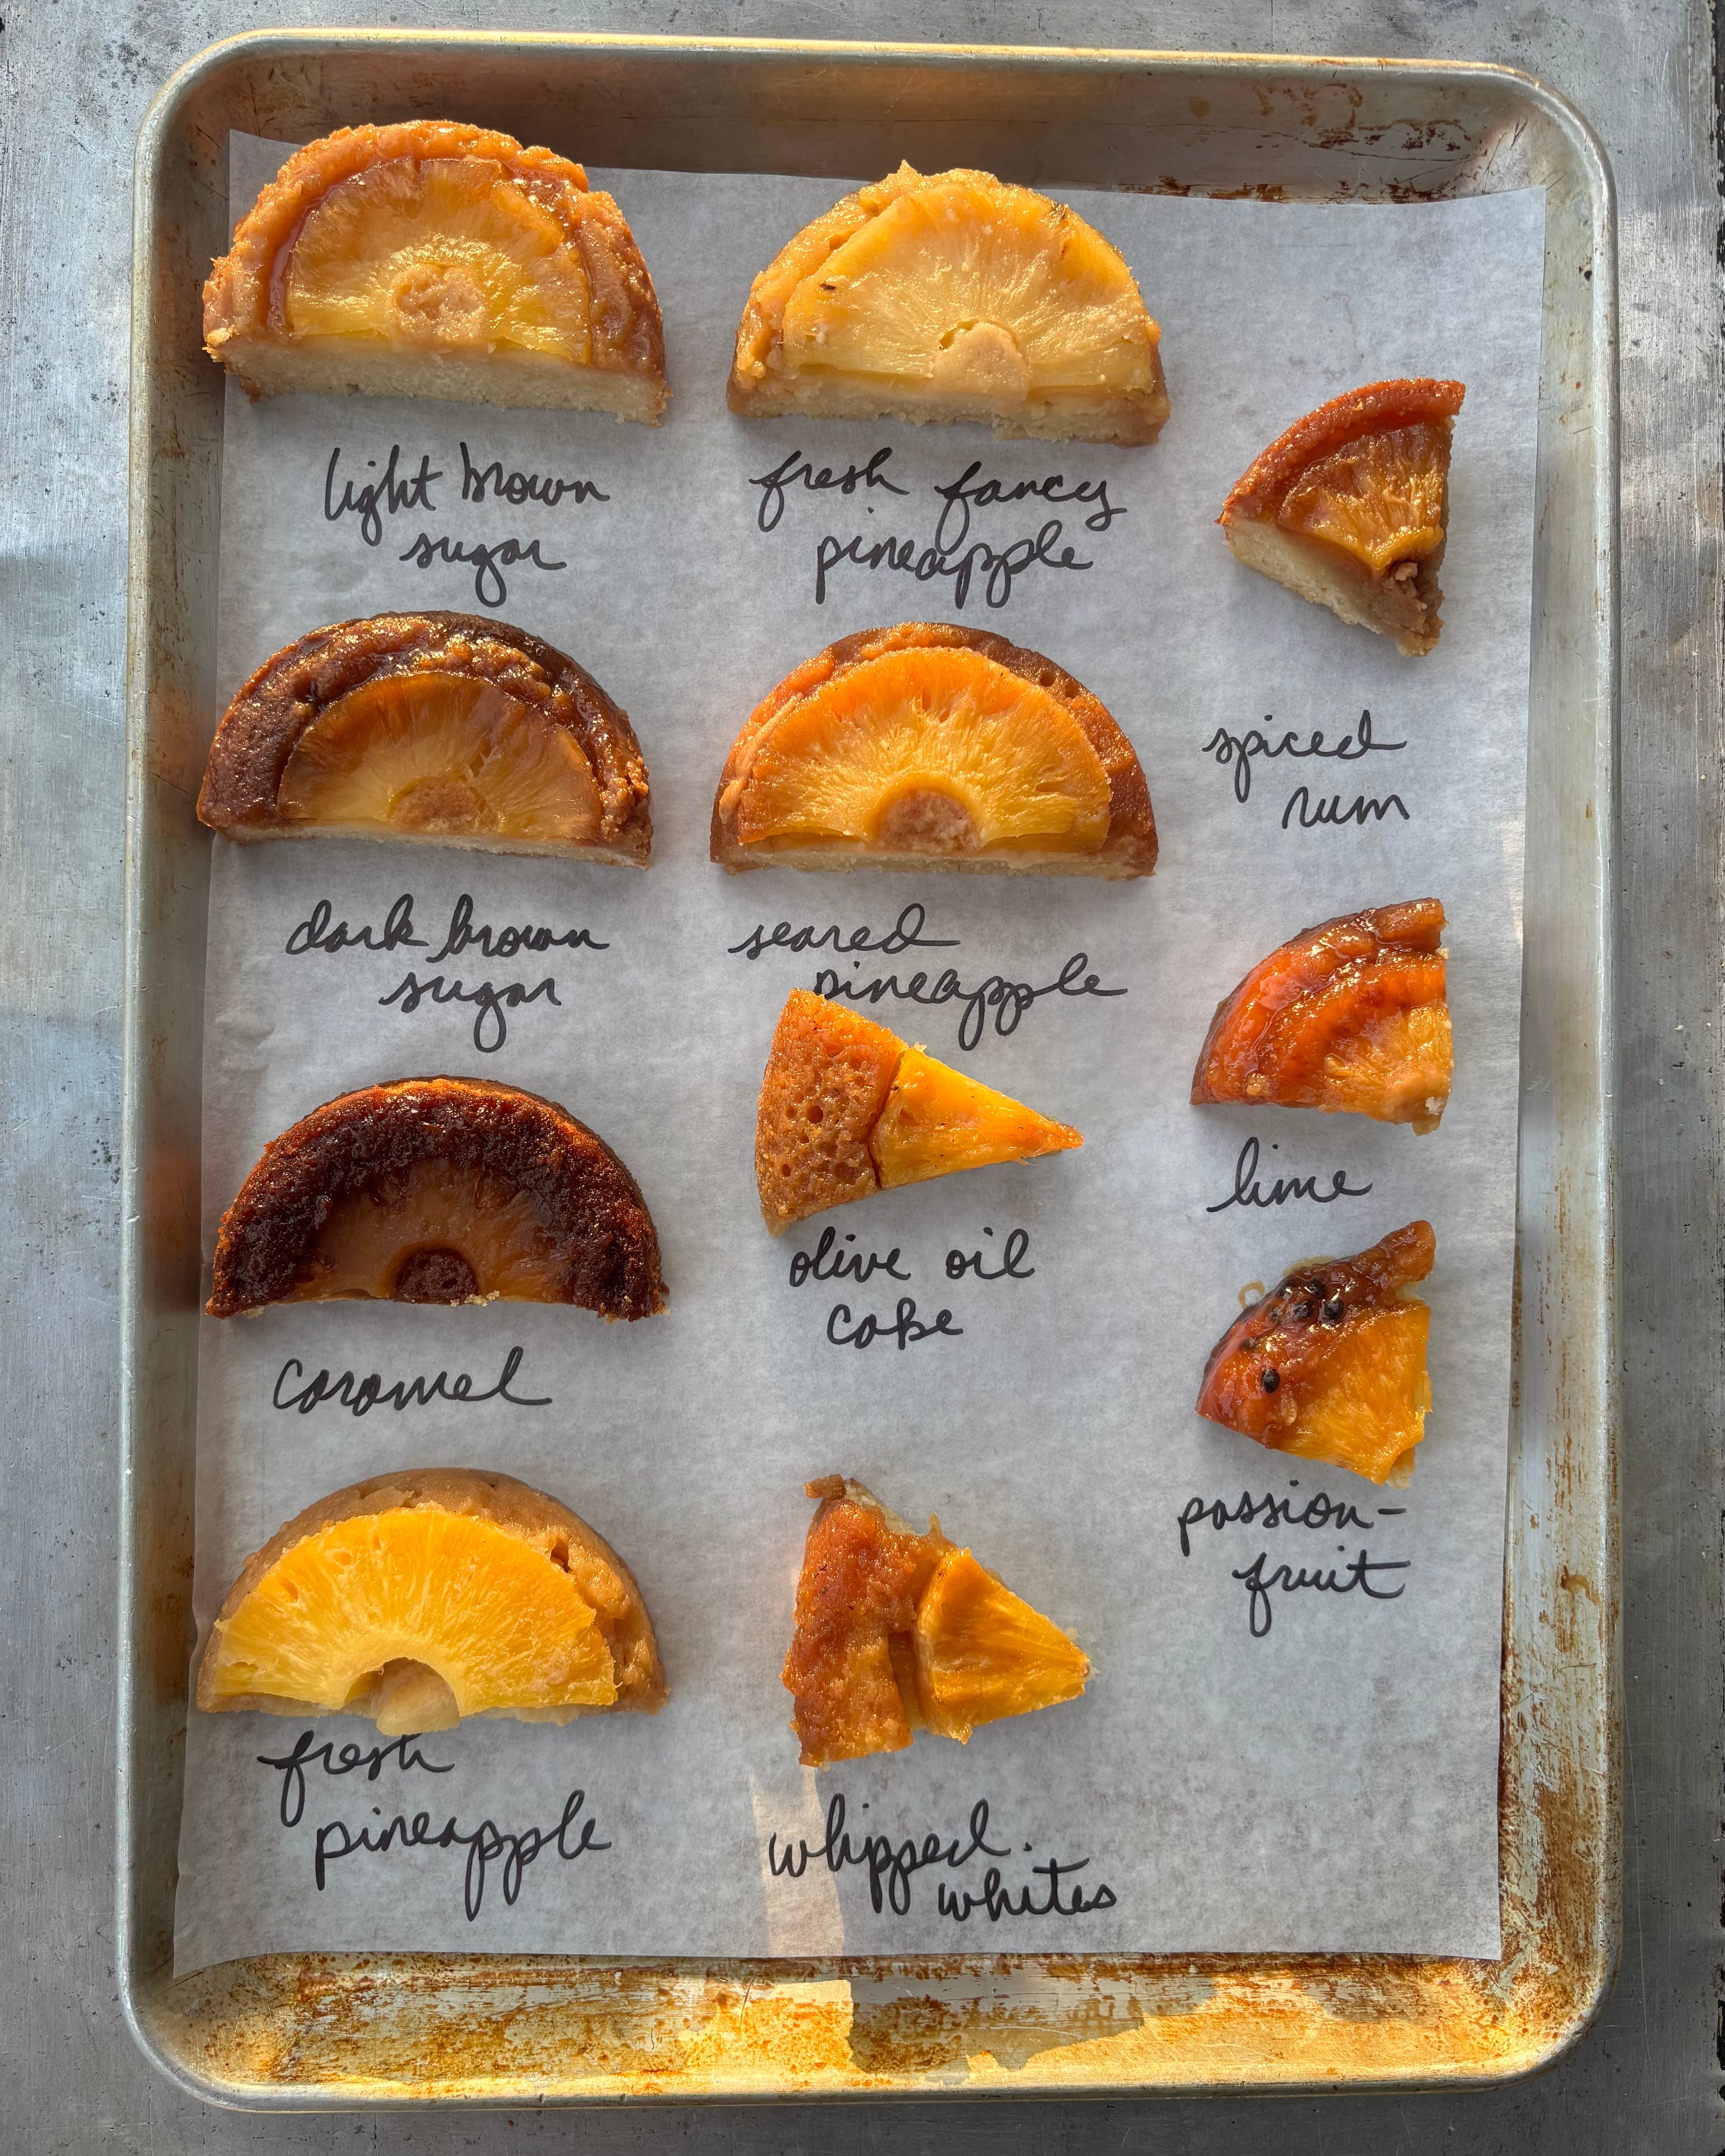
I decided to tackle my tests in three stages. First, I would address the caramel, then the pineapple, and then the cake.
ON KP+ TODAY: Jammy Passionfruit Shortbread Bars
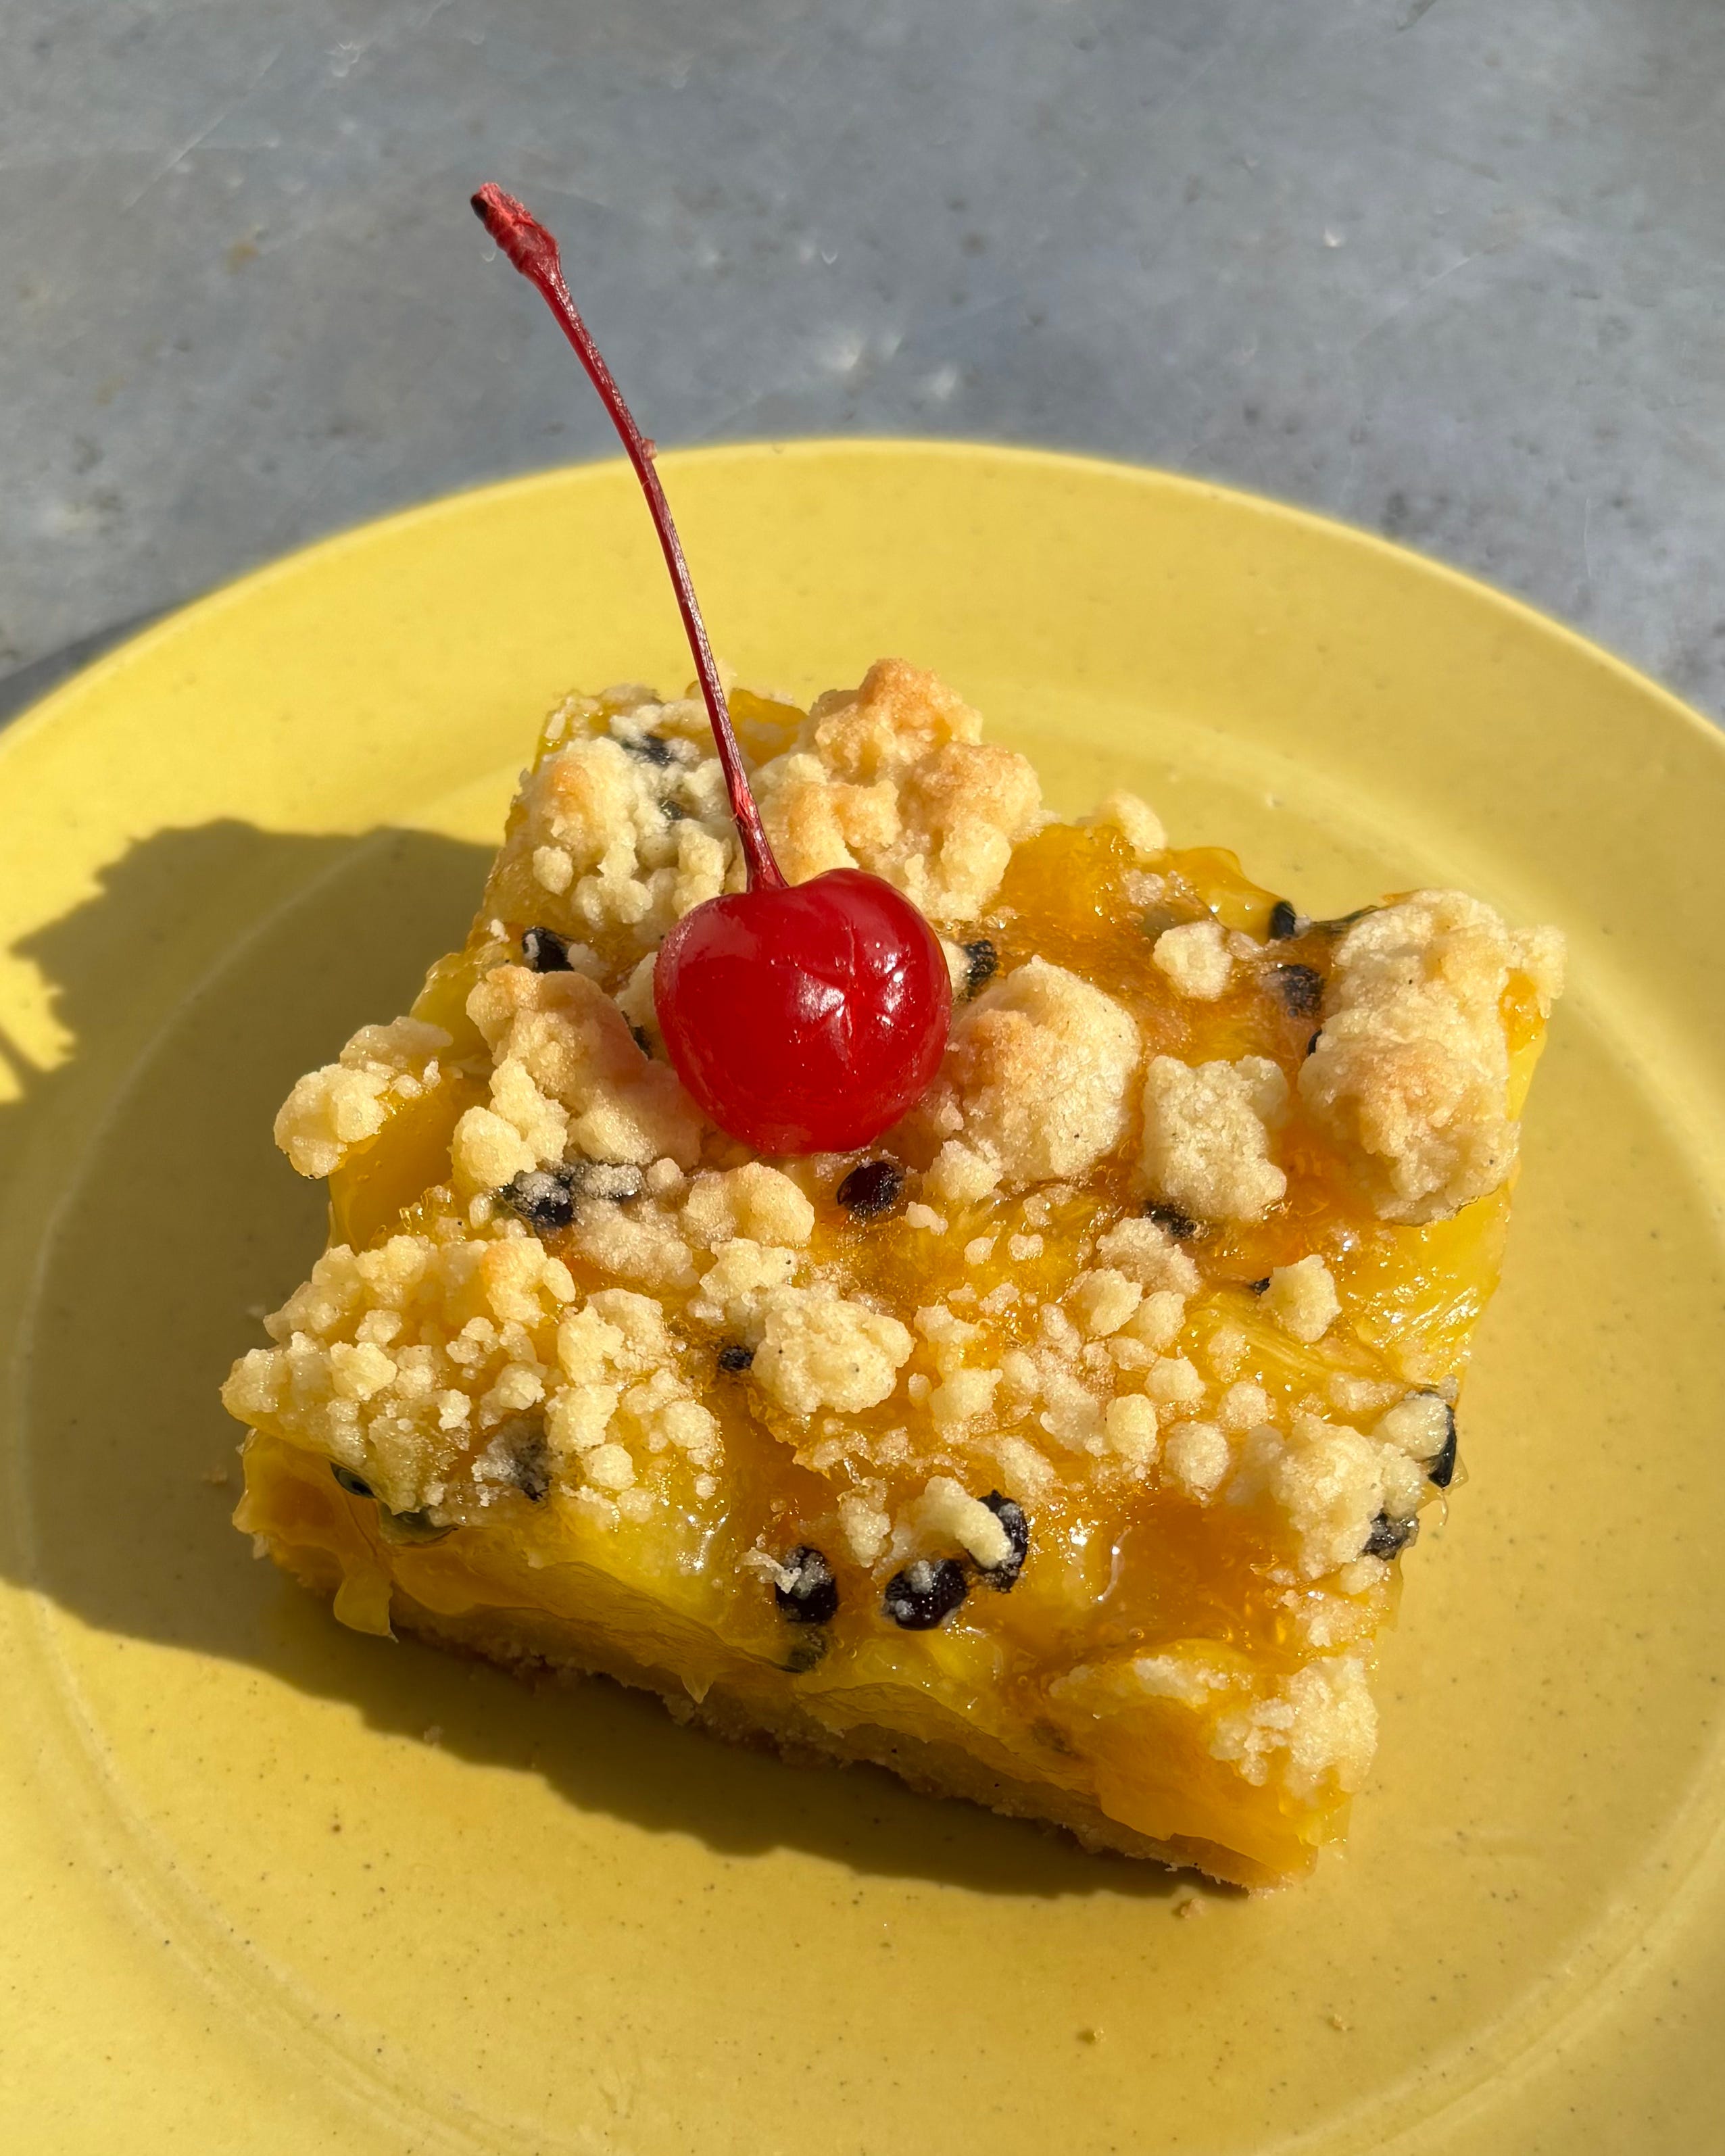
A delicious way to use up pineapple scraps, and a winning combination of buttery shortbread and bright, tangy tropical flavours. What’s not to love?
The Caramel
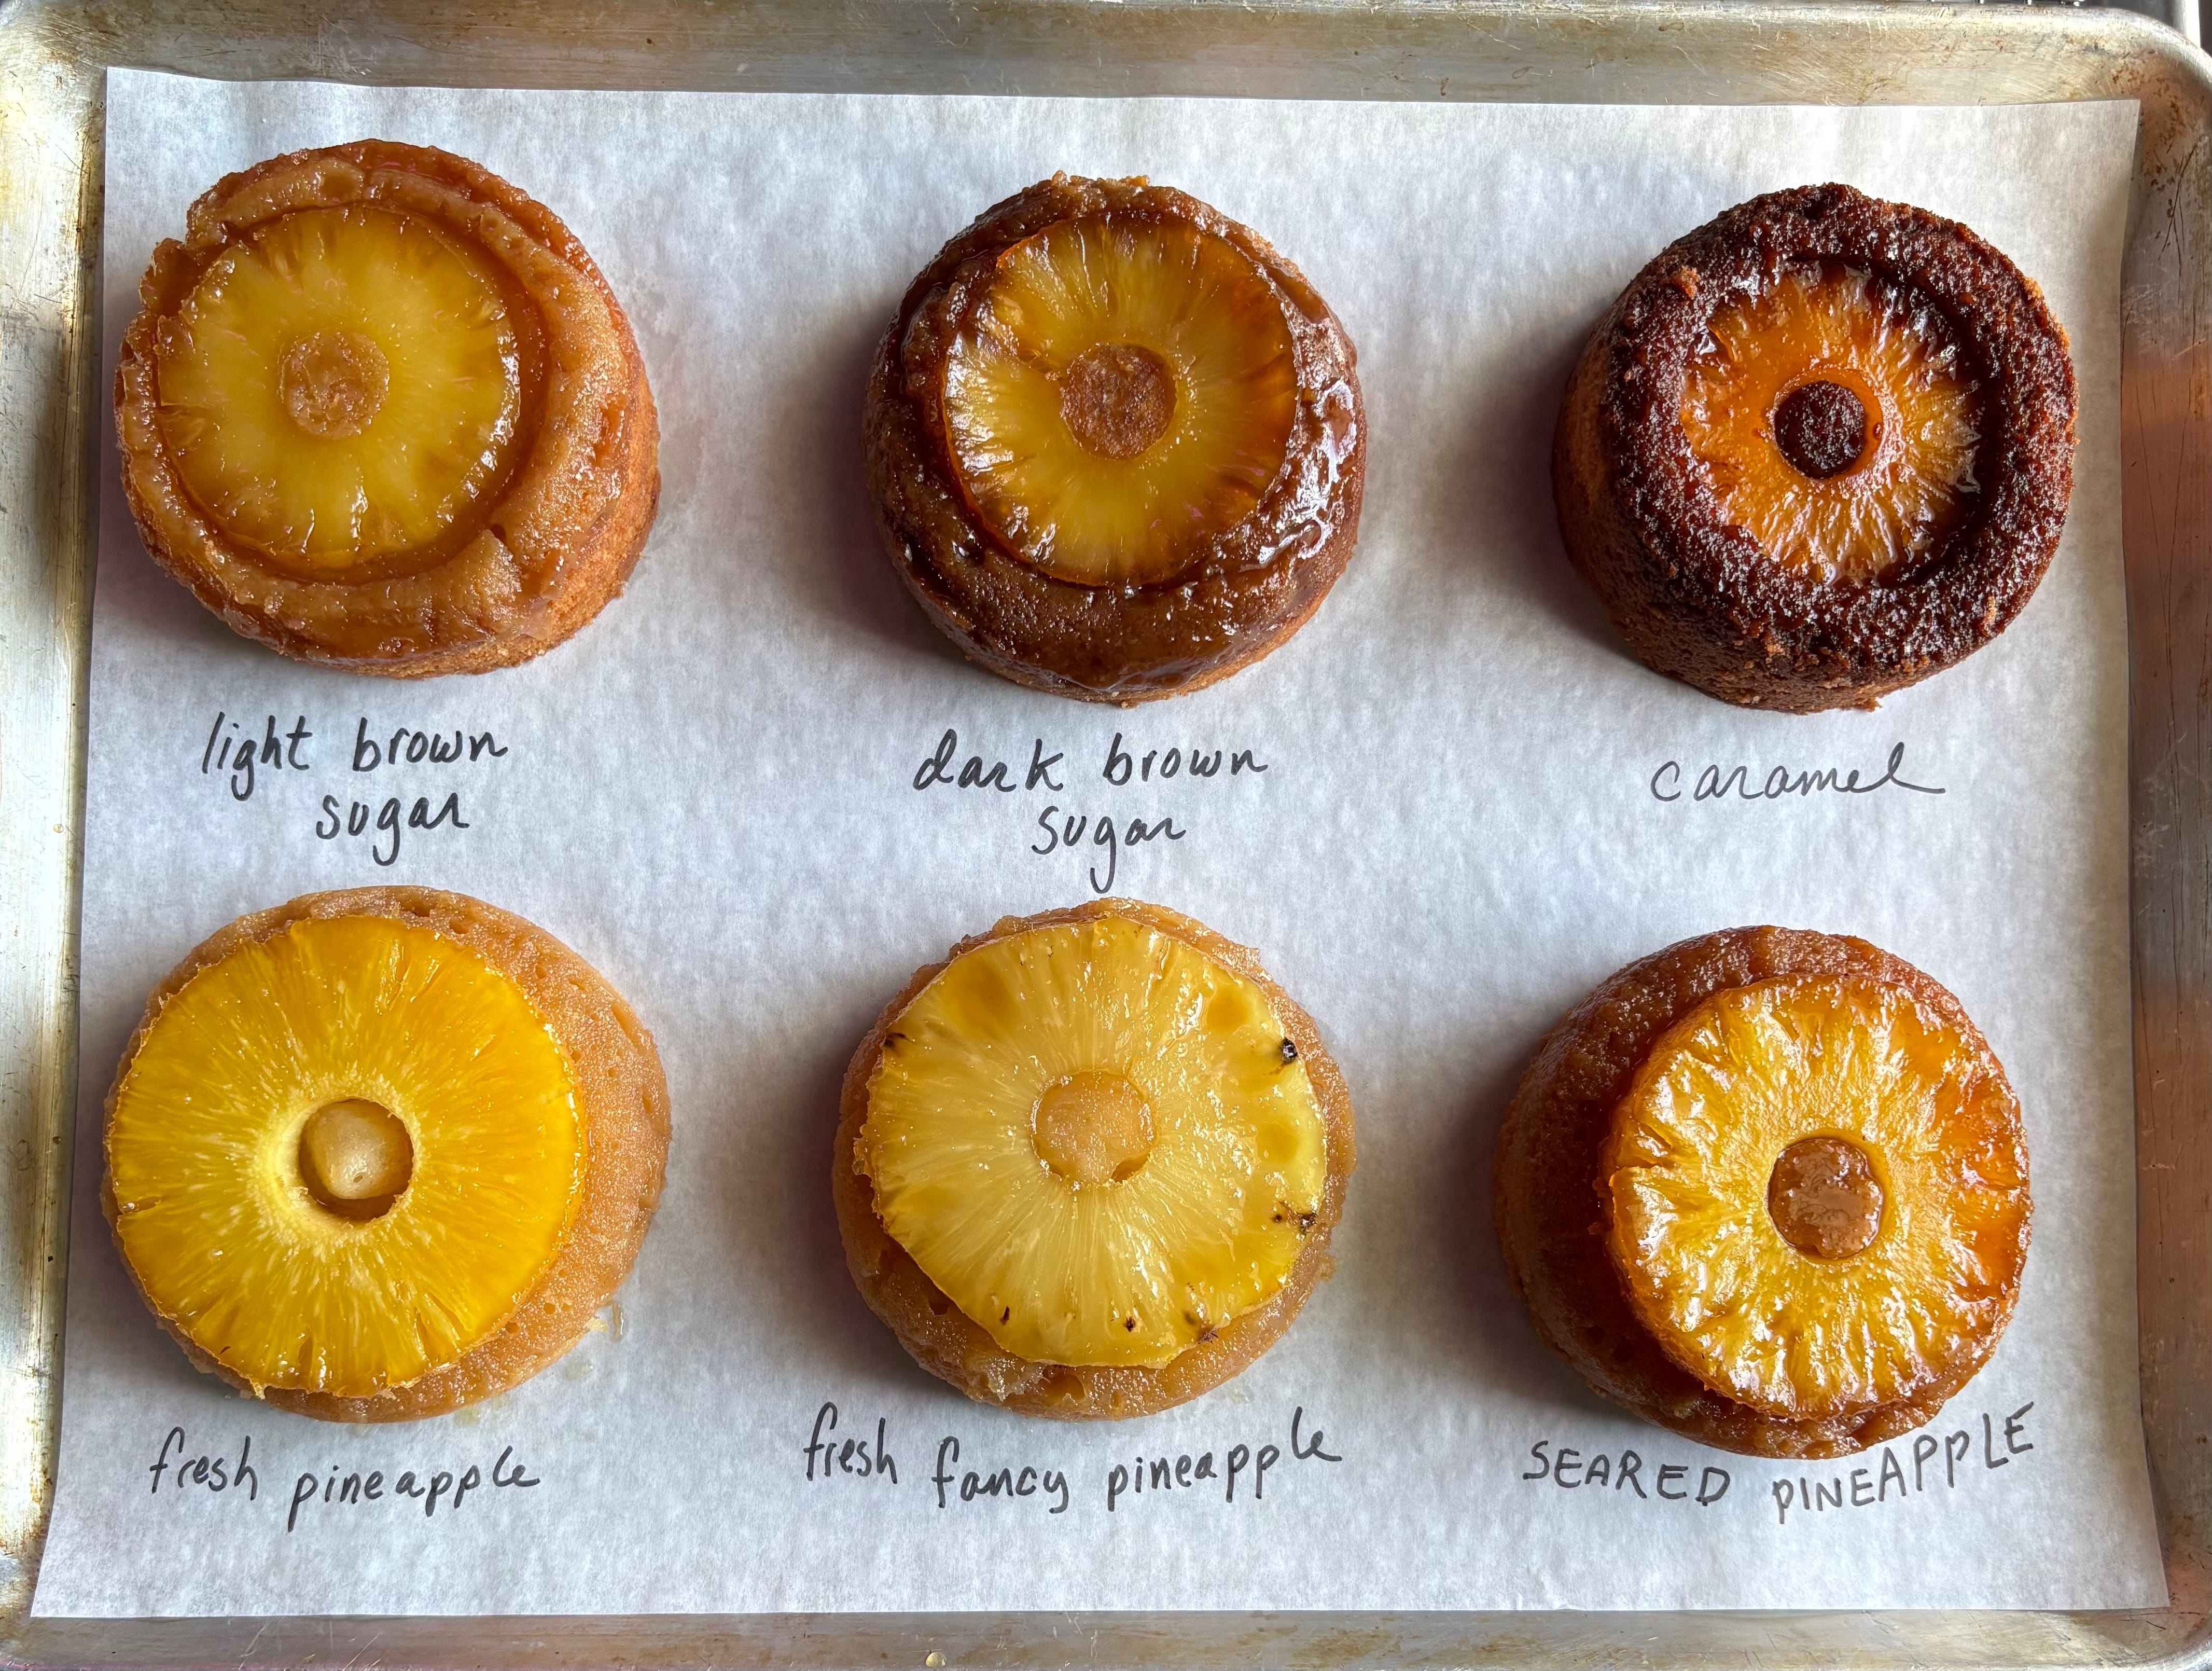
I’m honestly a bit loathe to call the sugary amber substrate that the pineapples nestle in a “caramel”, since it’s more often than not simply brown sugar rather than caramelized sugar, but the only alternate word I can seem to come up with is “goo”, which does not sound very appetizing at all. So caramel it is! Here in the states, we generally only have access to “light” brown sugar and “dark” brown sugar, which are both granulated sugars that have had molasses added to them in lesser or greater amounts. I tested both, as well as a proper caramel I made by caramelizing white sugar and adding butter.
While I think we can all agree I took the caramel a little too far for this application, I still felt like that test was the least successful - the stronger caramelized notes overpowered the delicate, fruity-floral pineapple flavor. Both the light and dark brown sugars hit on the nostalgic appeal of the original dessert, and both were honestly equally delicious. I ultimately chose the light brown sugar for aesthetic reasons: its paler color allowed the pineapple to maintain a sunny glow.
After some tweaking, I settled on a ratio of butter to sugar that would allow the caramel to maintain a distinct layer on top of the cake and yet still remain liquid enough that some would seep into the cake crumb. Too much butter, and the pineapples slid around on the surface of the cake after flipping, unable to get a purchase. Too much sugar, and the caramel remained rigid after flipping, sometimes sticking to the pan and tearing the crumb off the cake.
The Pineapple
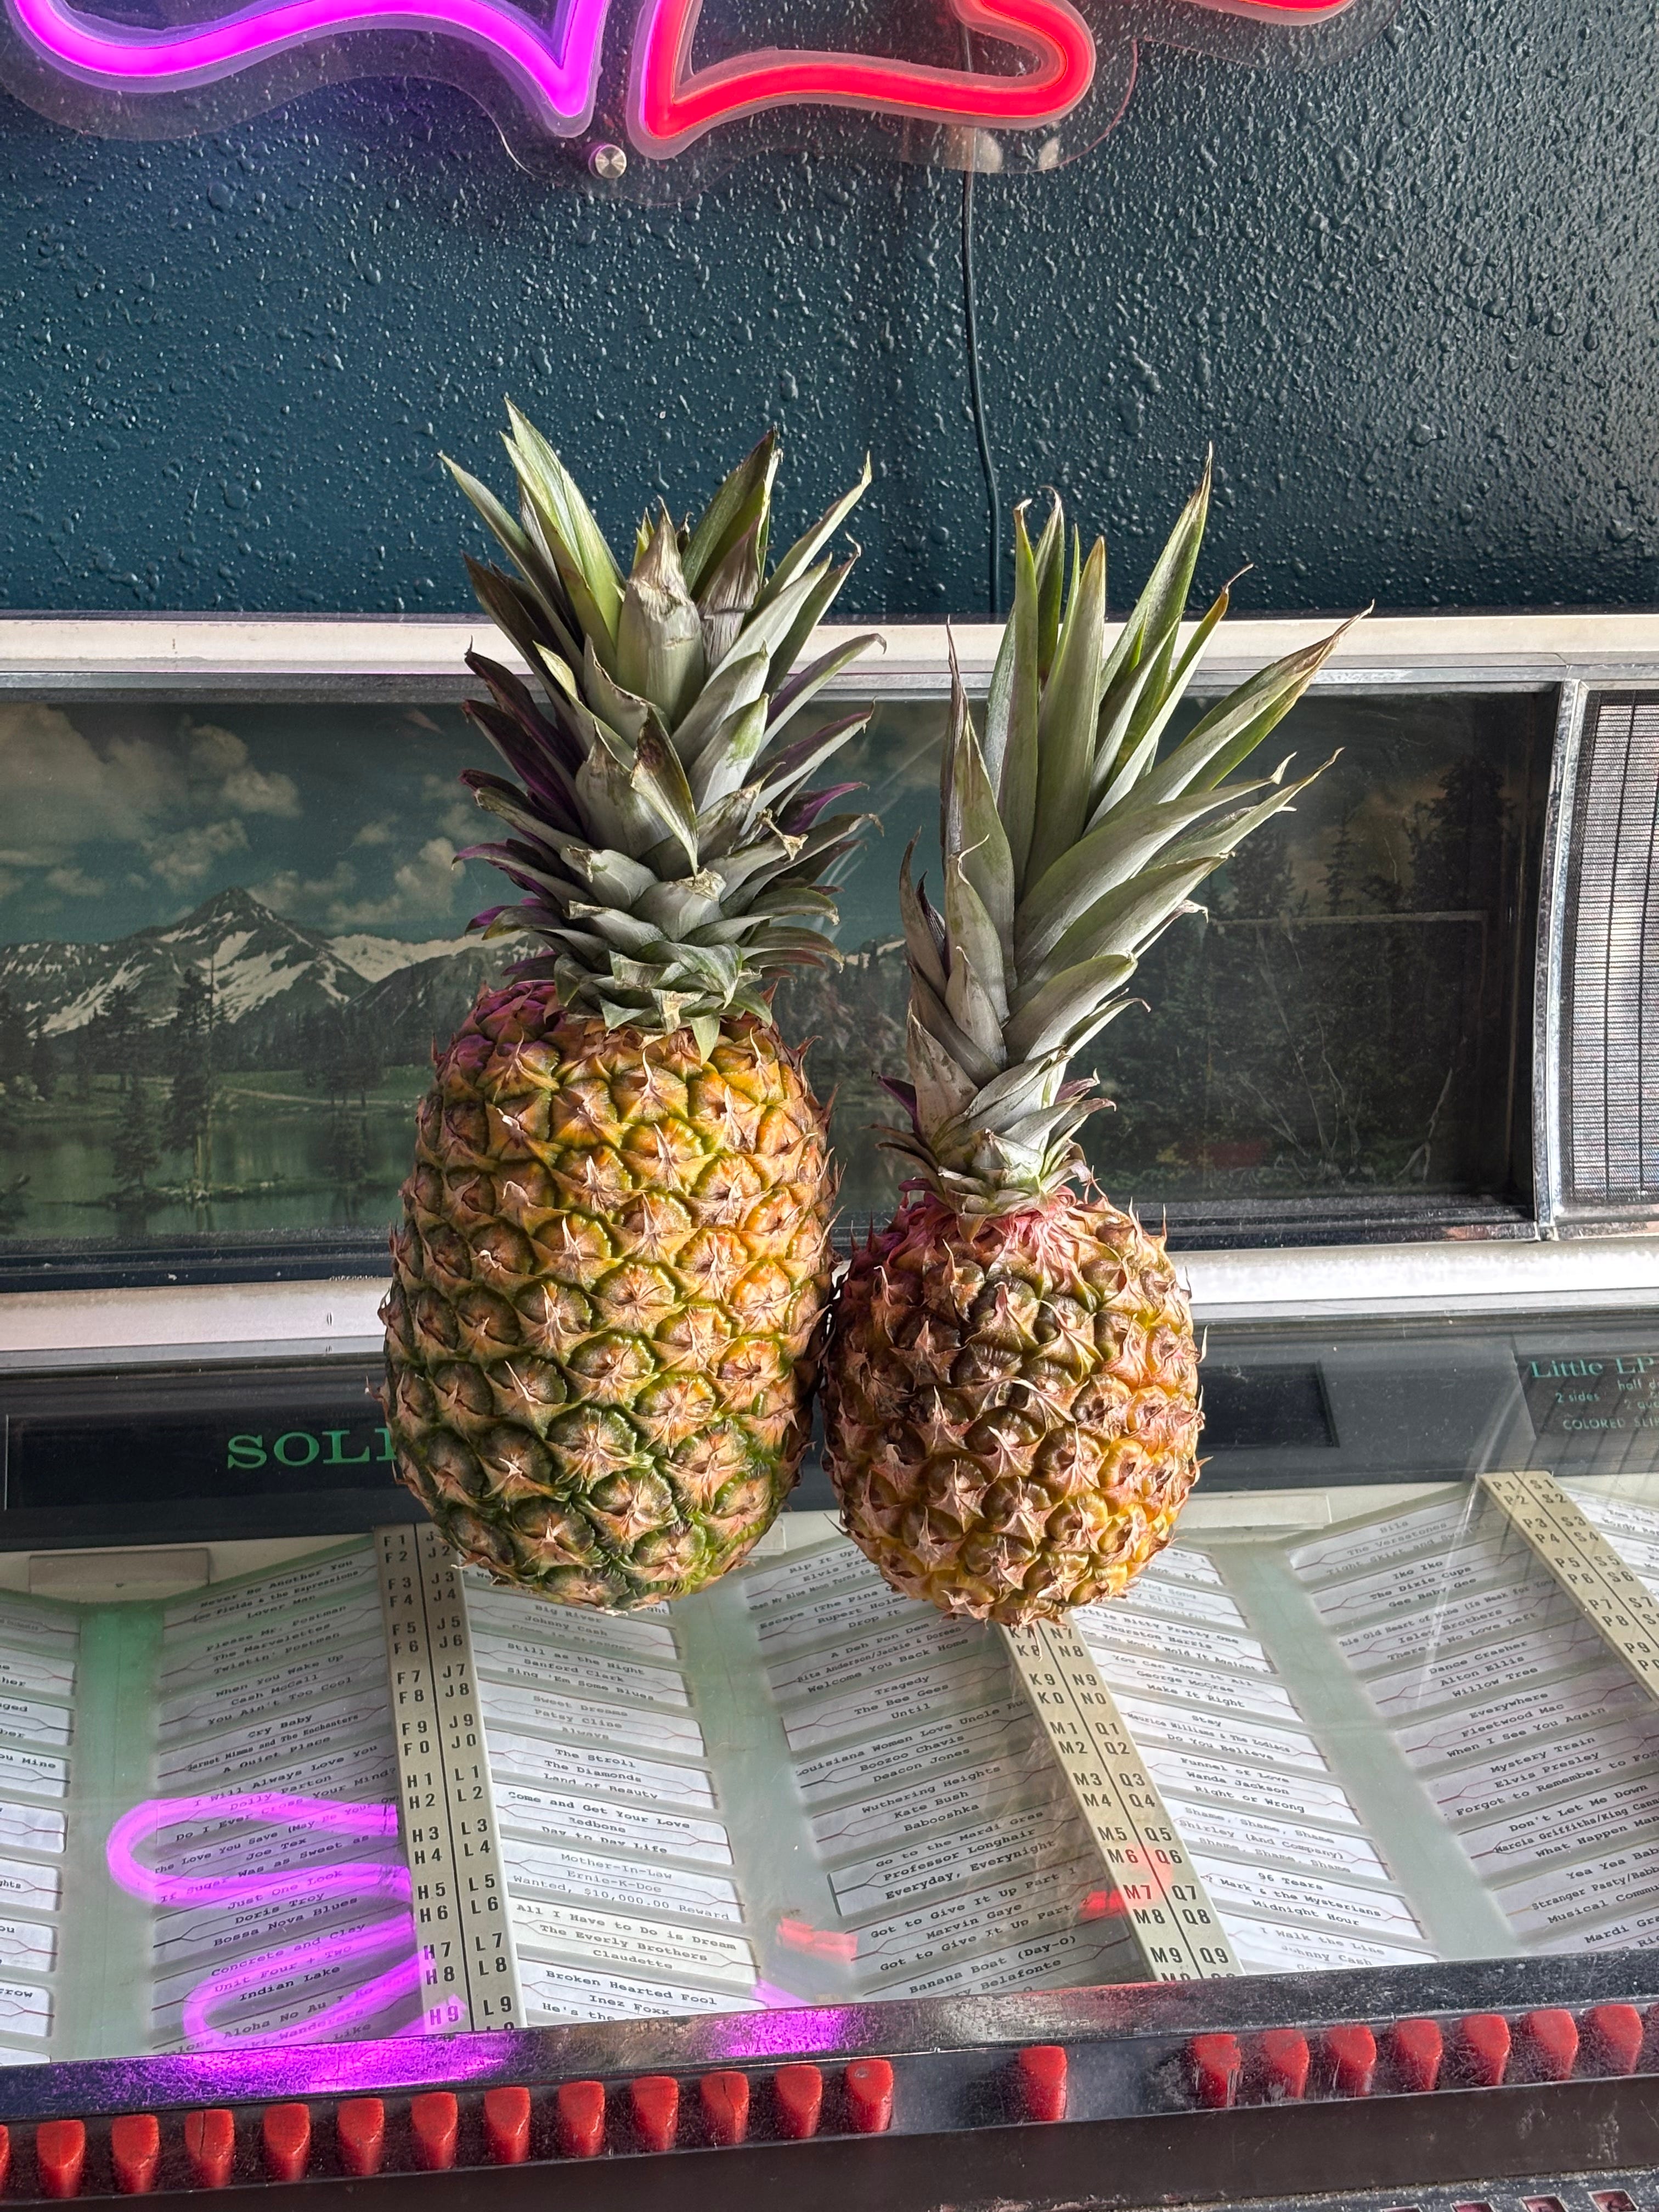
For my initial tests, I used canned pineapple for tradition’s sake, but next it was time to bring fresh pineapple into the mix. My local grocery had two types of pineapple - a conventional one, and a fancy, new-ish hybrid variety that was half the size and twice the price. Pineapples do not continue to ripen after being picked, so selecting a good one is important: it should be tinged yellow, feel a little soft when pressed, and have a fragrant scent at the base. While your underripe pineapple may continue to turn yellow at room temperature, that’s a factor of the chlorophyll in the hull degrading, not an indication that the fruit is getting any sweeter. The fancy pineapple I purchased had none of these characteristics of a perfect pineapple, but I was seduced regardless.
Part of why I wanted to introduce fresh pineapple to the tests was the opportunity to cut the fruit thicker than a commercial canned slice allows. I love a high ratio of fruit to cake in my desserts, and the canned slices felt wimpy to me. But my next two tests were a bit of a flop. Both the conventional and the fancy fresh pineapple exuded too much juice into the caramel mix, producing blond and under-baked looking upside-down cakes. The fancy pineapple was also astonishingly bland, almost white in color. When I went to slice into the cake, both pieces of pineapple felt too firm against the yielding texture of the cake.
It was then that it occurred to me that canned pineapple is actually pre-cooked - in fact, the canning process poaches the pineapple rings in the liquid. For my next step, I seared a slice of pineapple on the stovetop before incorporating it into the cake. This solved my issues: I was still able to use a thicker slice of pineapple by driving off some of the fruit’s liquid and pre-tenderizing it before it went into the cake.
Here I must admit that I strongly considered mail-ordering a Pinkglow Pineapple, a proprietary, genetically modified pink-fleshed pineapple produced by the Del Monte corporation, for a test, at least until the carbon footprint of delivering a single, fifty-dollar piece of fruit to my door shook me from my reverie. Besides, the EU has not approved them for sale, anyway. (Full disclosure, I actually have eaten a pink pineapple several years ago, and while it was astonishingly delicious, I couldn’t bring myself to do it more than once).
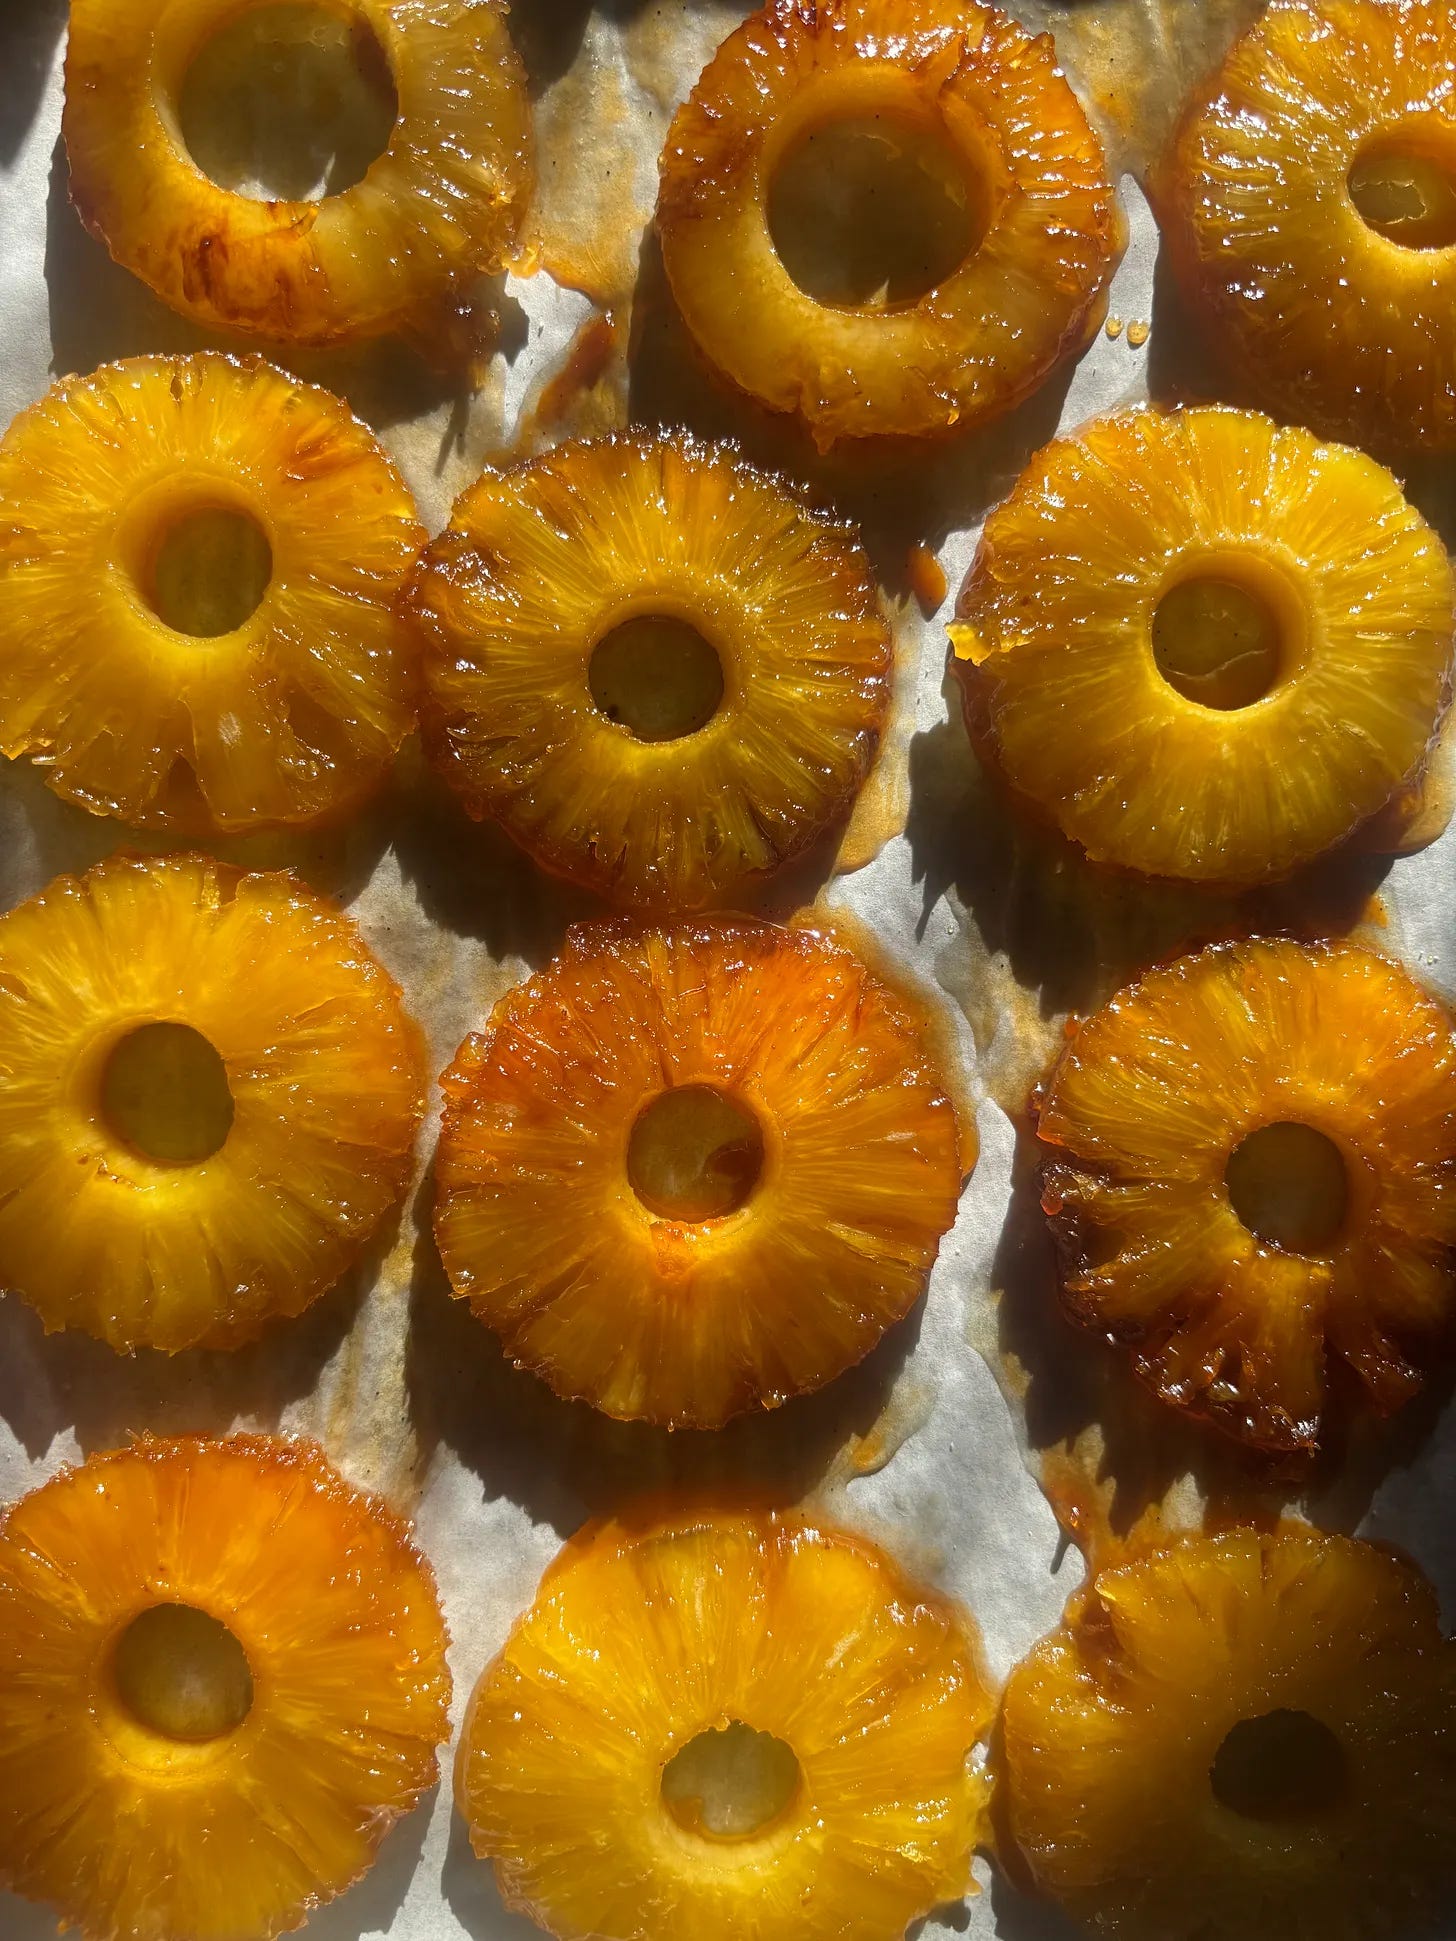
Without resorting to buying expensive designer fruit, could I still boost the pineapple’s flavor? After all, if we’re going to the trouble of processing a fresh pineapple rather than cracking a can, it ought to feel worth it. Fresh pineapple is fruity, tart, and prickly. I actually ate so much fresh pineapple while processing fruit for these tests that I had to take a twenty-four hour break from recipe testing to let my palate recover. Pineapple has an enzyme, bromelain, which breaks down proteins: including the proteins in the delicate layer of skin in your mouth. It’s why you can’t set a pineapple dessert with gelatin, as the fruit messes with gelatin’s ability to form bonds. Cooking the pineapple cancels out some of this enzyme, but it also mutes some of the pineapple’s verve. I decided to incorporate fresh lime juice, rum, and passionfruit into the caramel layer to help boost the flavor on the cakes.
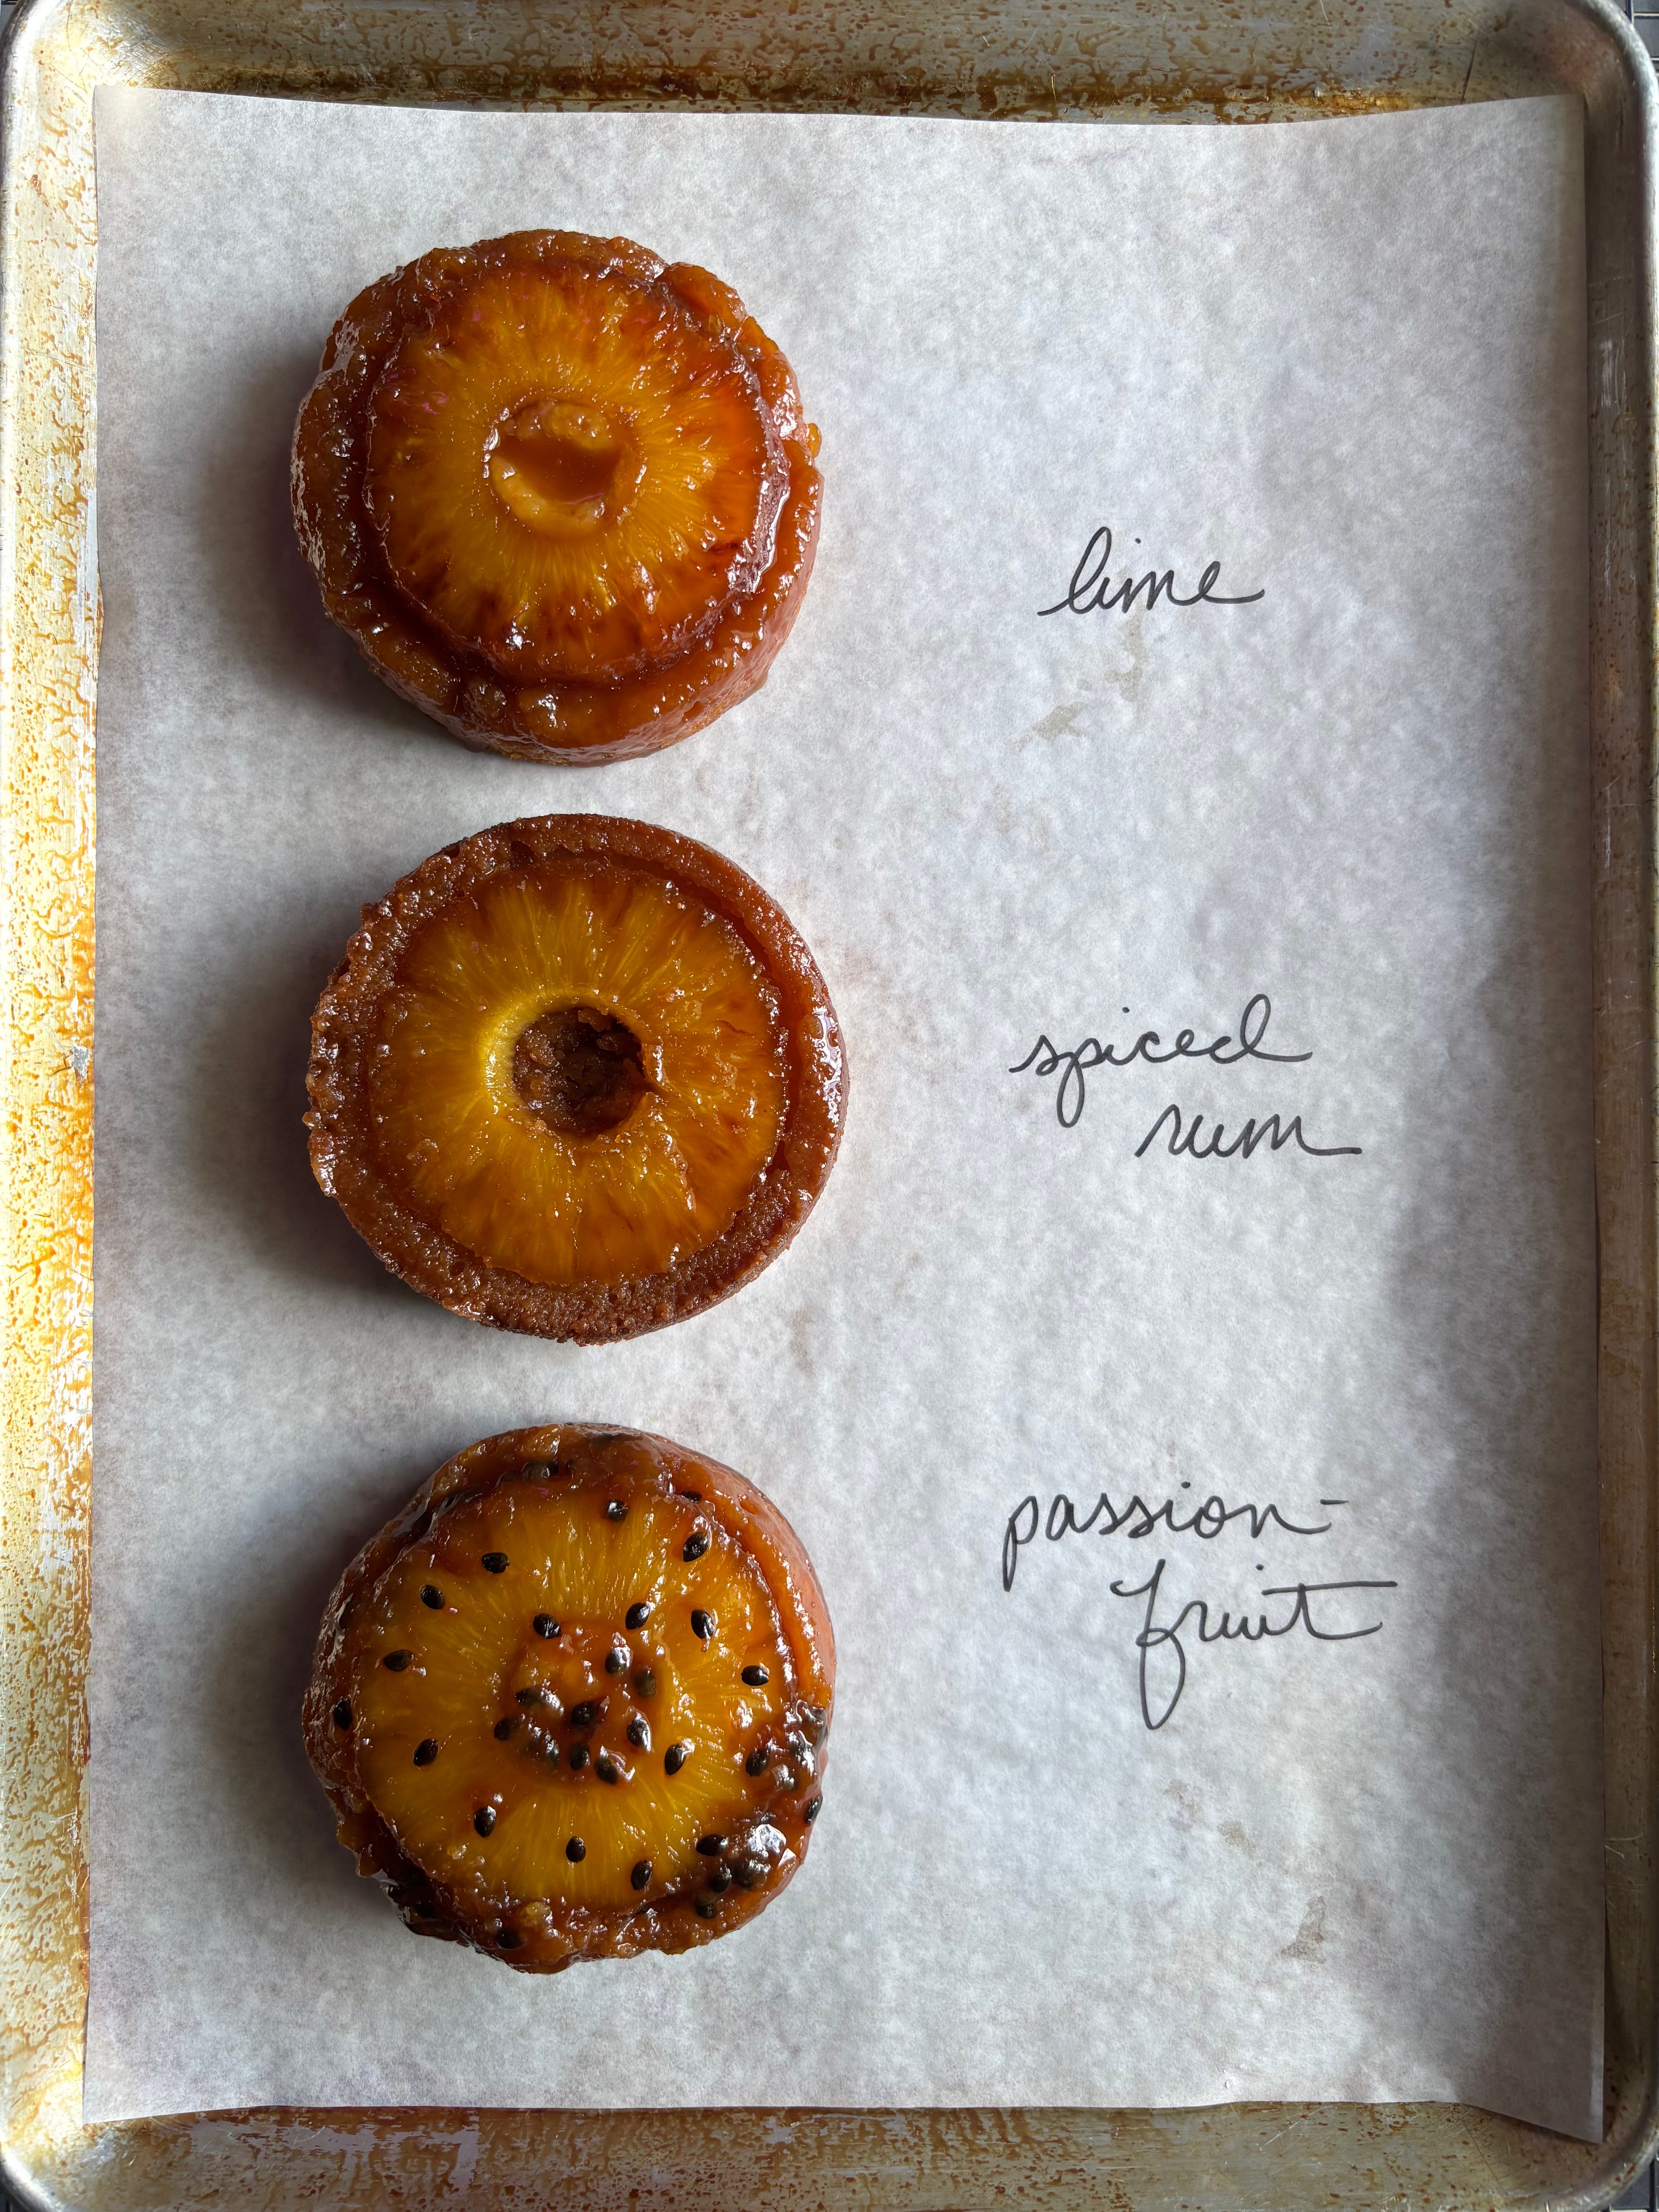
The lime overpowered the pineapple, but the rum and passion fruit were a delight. I’m especially fond of the crunch of fresh passionfruit seeds set against the pineapple. A final version, where I incorporated pineapple juice and citric acid into the caramel, felt like the truest representation of the pineapple flavor, but I wouldn’t kick the rum or passion fruit out of bed.
The Cake
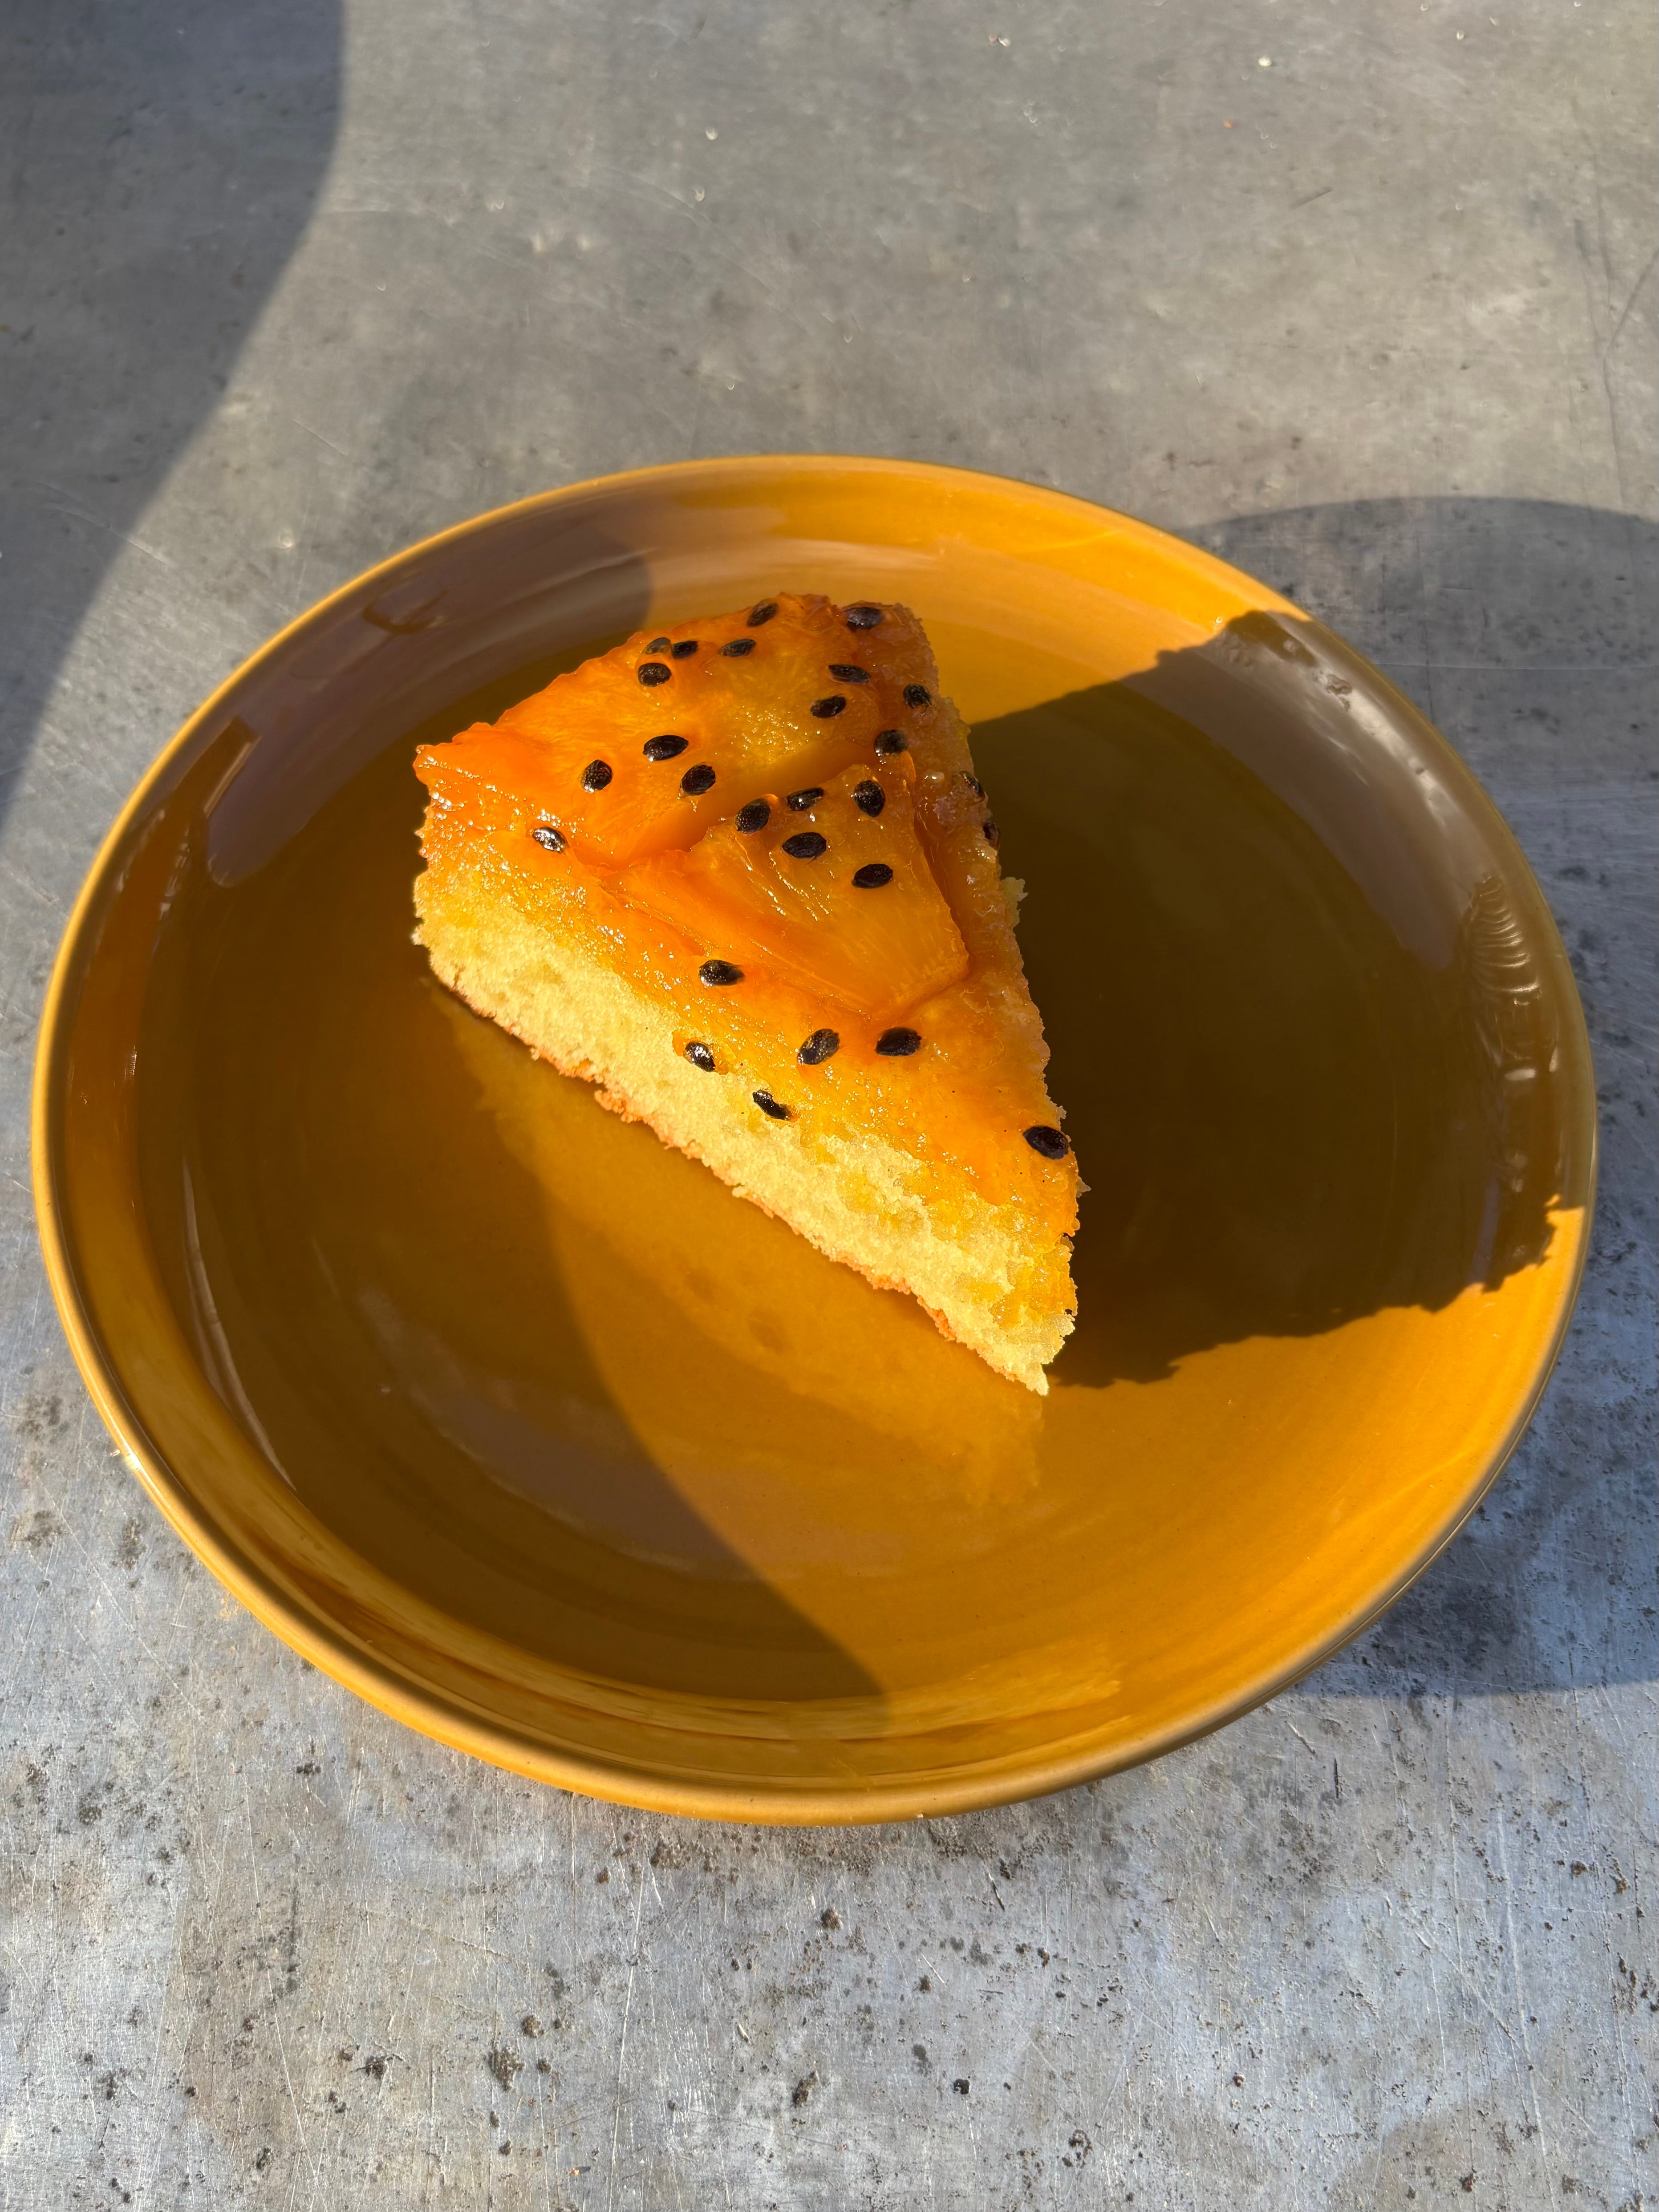
For all these initial tests, I used a butter and sour-cream based cake that I’ve had in my back pocket for a while. It’s sturdy enough to hold up to all that flipping, and the tang of the sour cream is nice with fruit. Ultimately, however, I wanted to keep pushing the recipe forward, so that it could be as flavorful as possible, without straying too far from the original standard.
Quite a few pineapple-upside down cake recipes rely on box cake mix. The most popular suggestions are “yellow cake” mix or boxed “pineapple cake” mix that is expressly made for producing an upside-down cake.
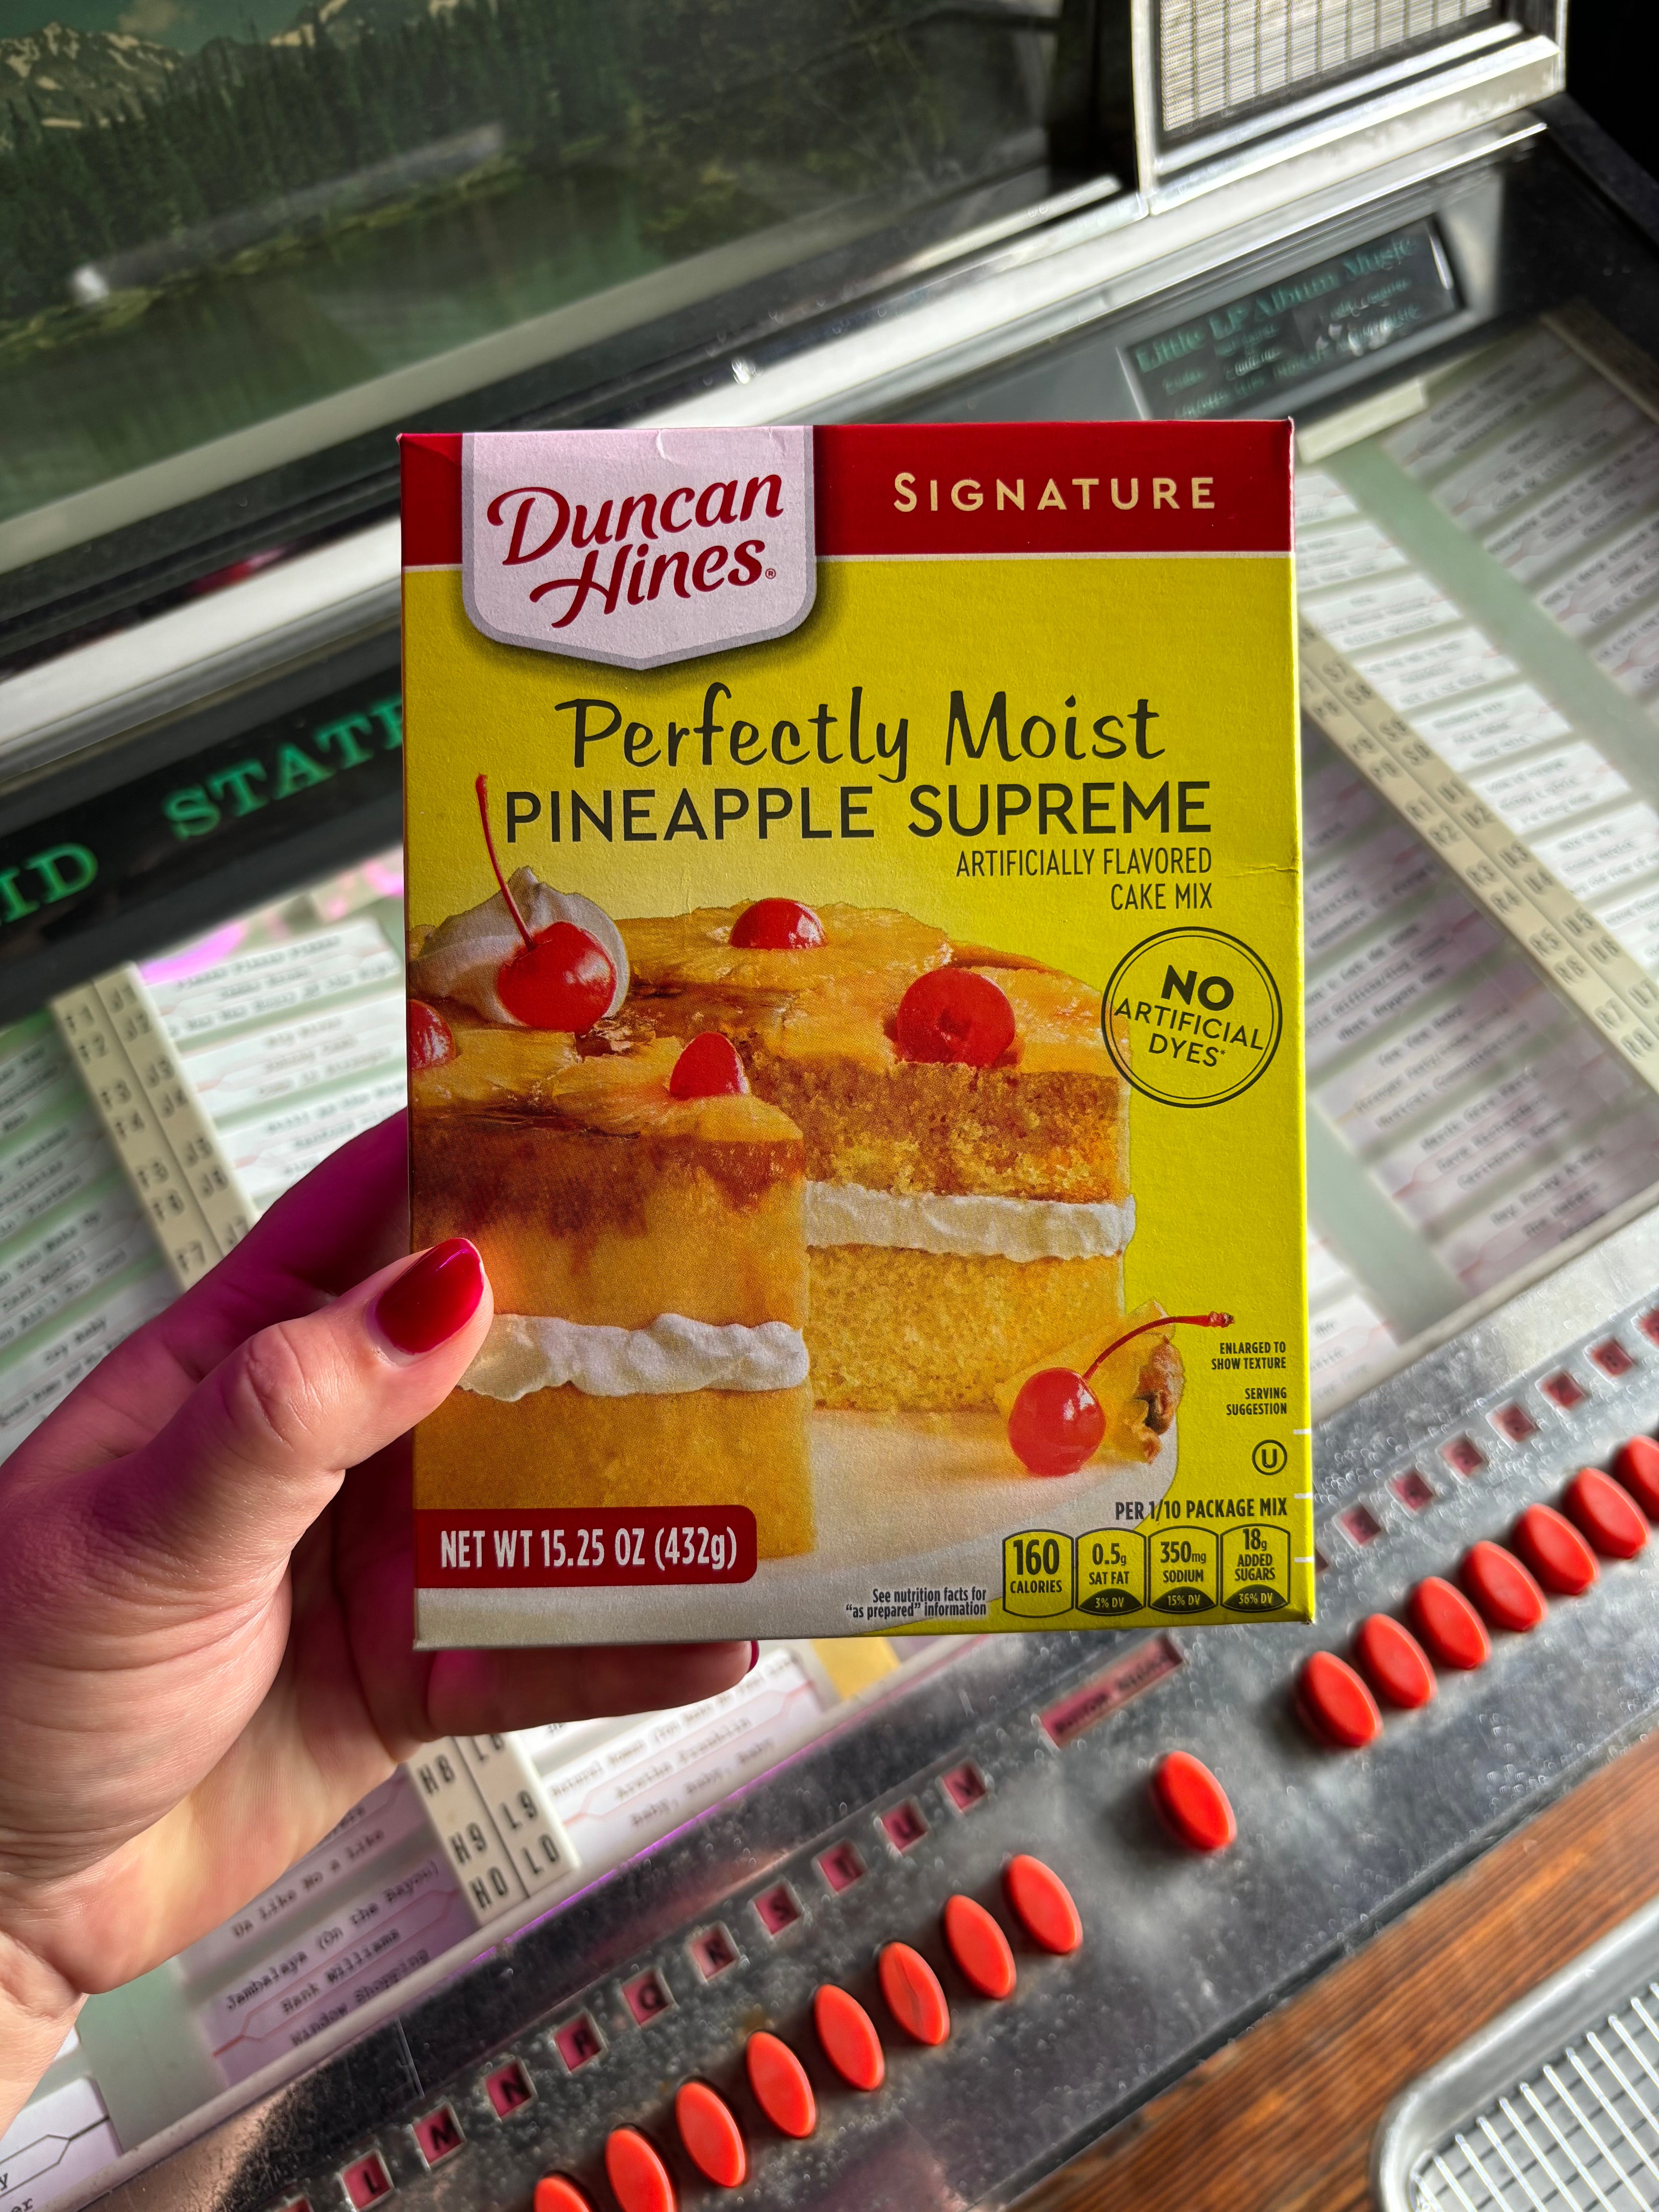
I’d never actually had boxed pineapple cake before, so I promptly made one. It was… fine? The pineapple flavor was muted, and it honestly just tasted like a boxed yellow cake with a whiff of a tropical vibe.
From what I understand, the idea of “yellow cake” made waves recently across the pond when Paul Hollywood was introduced to the concept for the first time. Quote: “yellow is not a flavor!”. Here in the states, the flavor of yellow cake is generally associated with boxed cake versions, which have an intense, artificial vanilla flavor and a signature moist texture produced by shelf-stable fats included in the cake mixes. “Artificial” vanilla has a bad rep, but I’m of the mind that it should be its own category of vanilla, one that has the nostalgic appeal of classic birthday cakes. The pastry chef Christina Tosi famously recommends using artificial “clear” vanilla extract in some of her recipes to call back to those same commercially-made baked goods.
Homemade yellow cakes exist too, of course, tinged yellow by the inclusion of additional egg yolks. I decided I’d make my own tropical yellow cake, inspired by the boxed versions. I used both butter and unrefined coconut oil, both for the flavor and for that particular mouthfeel that solid-at-room-temp vegetable fats impart. I use the reverse creaming technique to further push it into box-cake territory, since reverse creaming coats the flour in fat before the liquid ingredients are added - much as you would for pre-made cake mix. Reverse creaming also helps inhibit doming in cakes, which is helpful for an upside-down cake (too much of a dome and the fruit might slide off the sides). Lastly, I used coconut milk in place of the dairy for a further flavor boost. A tiny dab of almond extract rounds it out, reminiscent of both the maraschino cherries and of orgeat, an almond and orange blossom-flavored cocktail syrup that is a staple of tropical cocktails like the Mai Tai. The end result is a rich slab of coconutty yellow cake, the perfect vehicle for caramel and pineapple. I tested versions with both artificial vanilla, and conventional vanilla, and found both to be delicious.
Are artificial flavors and neon maraschino cherries bad for you? In this, as in everything, the dose makes the poison. If they bring you joy, have at it: one cake won’t do you any harm. If you’re not a fan of those flavors, you could certainly turn to vanilla beans and Luxardo cherries instead.
RECIPE: Pineapple Upside-Down Cake
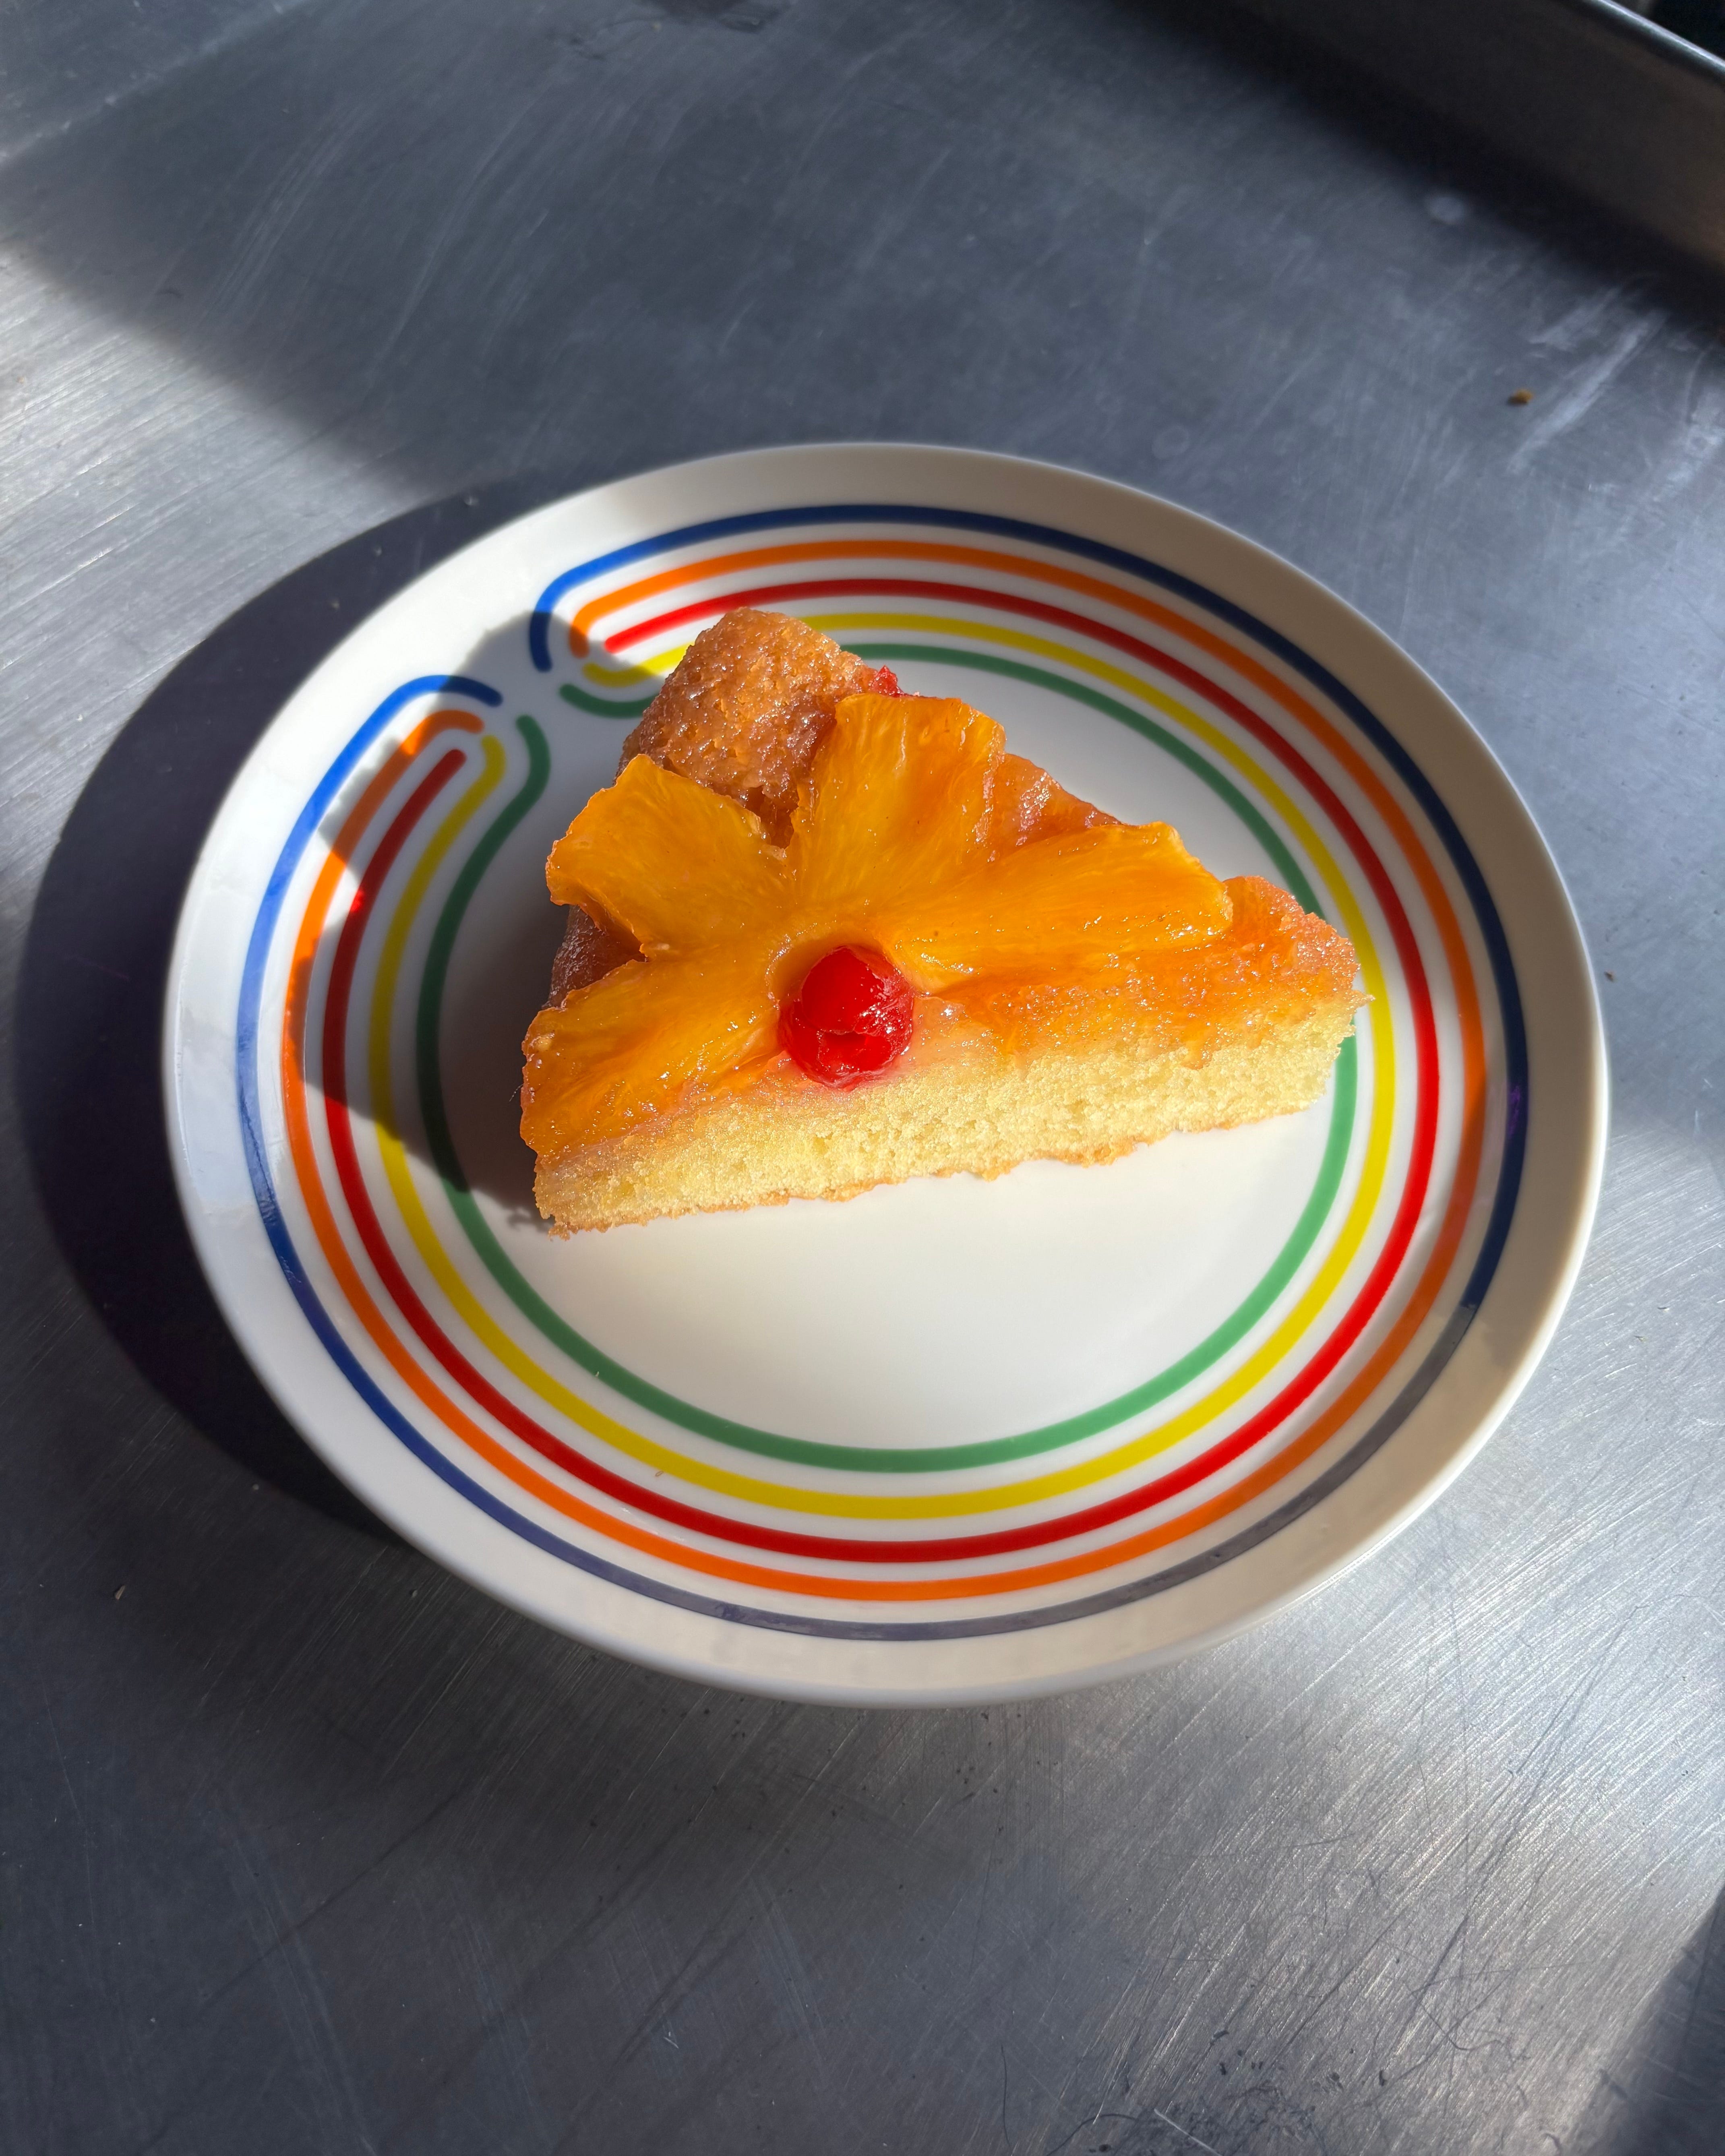
Note: This recipe was developed in a 9-inch cake tin. It can also baked in an 8 inch / 20 cm round tin with at least 3” sides, or in a 8 inch by 8 inch / 20 cm x 20 cm square tin. You will notice a little more doming in the 8 inch round tin (aka the cake will bake up flatter in the 9 inch / 23 cm round tin). I personally like a nice flat look and slim cake in my upside-down cakes, but both will taste delicious. When baking in the 8-inch round tin, I found it helpful to scale down the amount of caramel slightly - see the end of this recipe for quantities.
For the seared pineapple:
One large pineapple, about 1.4-1.8 k
14 grams butter
40 grams granulated sugar
15 grams pineapple juice or rum
For the caramel layer :
140 grams light brown sugar (or dark, or muscavado: all will work)
55 grams butter
45 grams pineapple juice, passionfruit pulp (with or without seeds), or rum
Large pinch kosher salt
Large pinch citric acid (optional but nice)
Maraschino cherries (optional)
For the Coconutty Yellow Cake:
150 grams all-purpose flour
150 grams granulated or caster sugar
1 ½ teaspoons baking powder
½ teaspoon kosher salt
75 grams butter, room temperature
20 grams unrefined coconut oil, room temperature
120 grams coconut milk, room temperature
1 large egg, about 50 grams, room temperature
2 egg yolks, about 36 grams (cold is fine)
¾ teaspoon vanilla extract
a dash of almond extract
Method
![caramel texture when cooked enough.MOV [optimize output image]](https://substackcdn.com/image/fetch/$s_!MCJC!,f_auto,q_auto:good,fl_progressive:steep/https%3A%2F%2Fsubstack-post-media.s3.amazonaws.com%2Fpublic%2Fimages%2F837f29d8-5146-4a39-a072-e3349105b5c6_800x1422.gif "caramel texture when cooked enough.MOV [optimize output image]")
For the seared pineapple, trim the stem and base off the pineapple. Using a serrated knife, trim off the peel. Slice the pineapple into rounds about 1.25 cm thick. You can go classic, using a sharp metal biscuit cutter to punch out the center core and outer border of the pineapple rings, or cut the pineapple into fanciful shapes, using an overturned 9-inch / 23 cm cake tin as your guide of how much pineapple you’ll need. I like to pack my pineapple in pretty generously, and as the pineapple pieces will shrink a bit when cooked, you should sear a few extra pieces so you have plenty when arranging your slices.
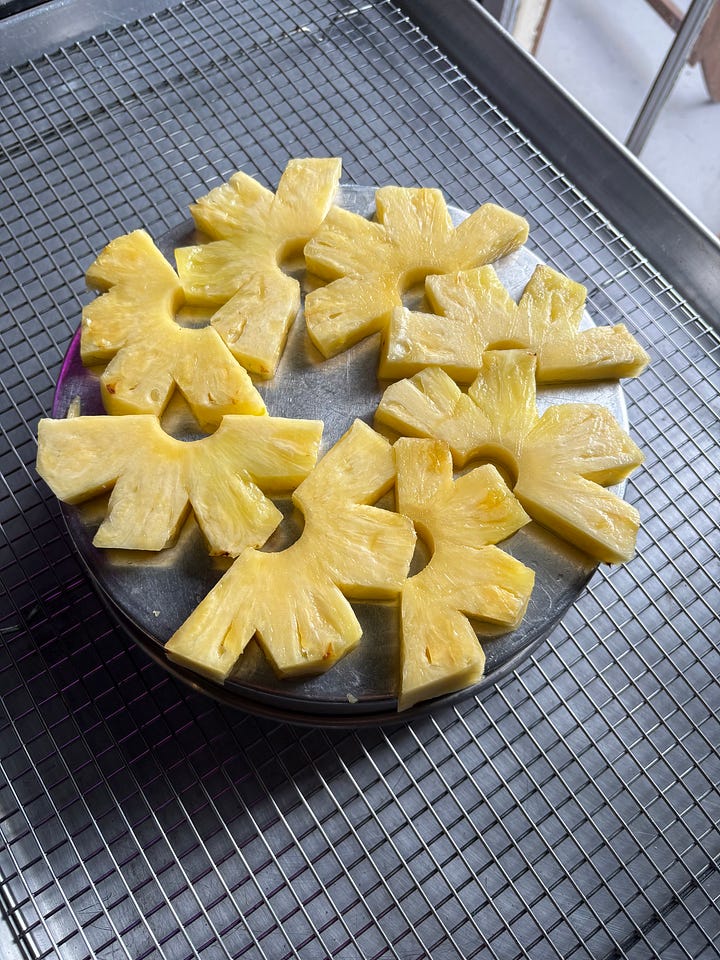
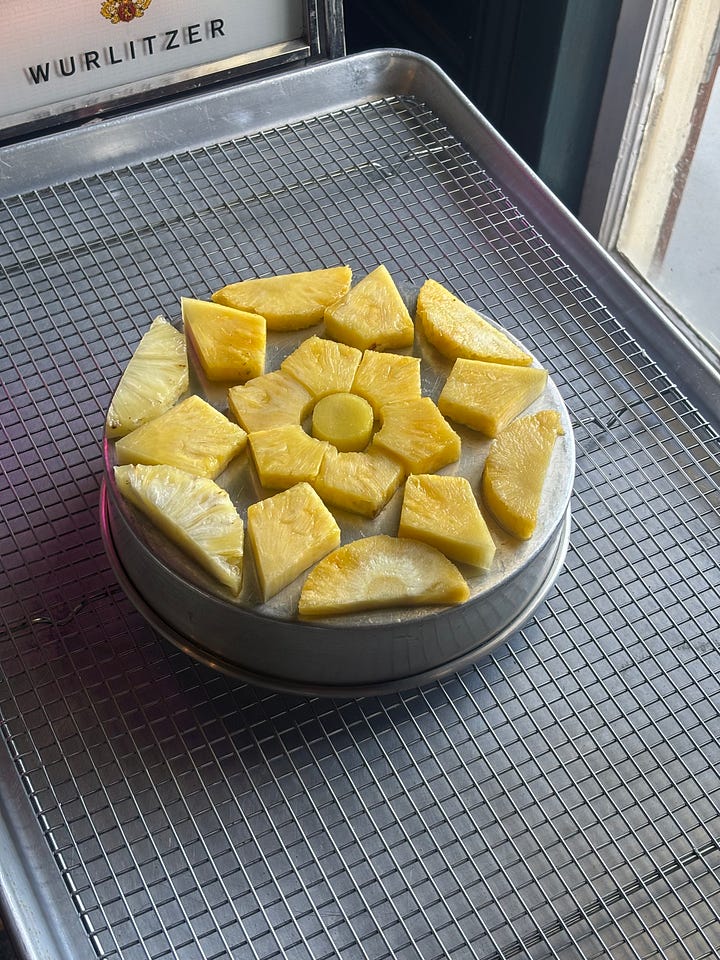
fanciful pineapple cutting! Save the pineapple scraps for snacks, freeze for smoothies, or make the Jammy Pineapple Passionfruit Shortbread Bars (KP+ recipe).
In a wide, non reactive pot, melt the butter over medium heat. When the butter is melted, sprinkle in the sugar. Arrange the pineapple slices over the sugar and turn the heat up to high. Cook for about 5-8 minutes, shaking the pan occasionally, until the sugar has begun to tinge golden brown. Continue to cook until the sugar is amber colored, then flip the pineapple pieces over. Deglaze the pan with the pineapple juice (or rum), shaking the pan until the pineapple slices are all nicely coated in a caramelly-syrup. Continue to cook until the juice in the pan has thickened, about 1-2 minutes, and then remove from the heat. Remove the pineapple slices from the pan and place on a tray to cool. There’s no need to wash the pan before the next step.
For the caramel layer: Line a 9-inch / 23 cm cake tin with parchment paper and grease the bottom and sides with pan spray.
In the pineapple-searing pan, melt together the brown sugar, butter, juice or rum, salt, and citric acid over medium heat. Continue to cook until bubbling, whisking all the while. Once the mixture is at a rolling simmer, cook for about one minute to one minute and thirty seconds before removing it from the heat (don’t overcook, or the mix will get too stiff). Immediately scrape the caramel into the prepared pan and let cool. When the caramel has cooled for ten minutes, it should be firm enough that you can leave an indent in it with a finger (any looser and your pineapples may slide around on top of your cake). Arrange the pineapple slices over the caramel, followed by the cherries (if using).
![caramel texture when cooked enough.MOV [optimize output image]](https://substackcdn.com/image/fetch/$s_!MCJC!,w_1456,c_limit,f_auto,q_auto:good,fl_lossy/https%3A%2F%2Fsubstack-post-media.s3.amazonaws.com%2Fpublic%2Fimages%2F837f29d8-5146-4a39-a072-e3349105b5c6_800x1422.gif "caramel texture when cooked enough.MOV [optimize output image]")
Caramel texture guide For the cake, preheat the oven to 350°F / 176° C / low fan.
In the bowl of a stand mixer, whisk together the flour, sugar, baking powder, and salt. Cut the butter into chunks and scatter it on top of the flour. Add the coconut oil to the bowl. Mix on medium speed for 1-2 minutes with a paddle attachment, or until the butter and oil has almost fully broken down into the flour mixture and the flour has a sandy appearance.
Whisk together the coconut milk, egg, egg yolk, vanilla, and almond extract. Add half of the liquids to the bowl with the flour and mix on medium speed for one minute. Scrape down the sides and the paddle and add the remaining liquid. Mix for an additional minute, or until the batter is fully emulsified.
Scrape the batter into the pan with the pineapple and caramel and spread it in an even layer. Bake for 35-45 minutes, or until the cake is a deep golden brown and springs back from the touch.
Remove the cake from the oven and place on a cooling rack for ten minutes. After ten minutes, run an offset spatula around the border of the cake (don’t wait any longer, or you may struggle to get the cake to unmold). Using oven mitts or kitchen towels, set a serving plate over the cake tin and flip it over. Carefully remove the cake tin away from the cake. If any pineapple has been left behind or displaced, you can use the offset spatula to set it to rights. Let the cake cool for another twenty minutes before serving.
The cake can be kept at room temp for 48 hours, or refrigerated for longer storage, up to four days.


NOTES:
8-inch tin caramel layer recipe
110 grams light brown sugar (or dark, or muscavado: all will work)
43 grams butter
35 grams pineapple juice, passionfruit pulp (with or without seeds), or rum
Large pinch kosher salt
Large pinch citric acid (optional but nice)
Maraschino cherries (optional)
Reading this instantly cured me of the post-holiday blues. Thank you!
Oh I am so excited to make this next weekend on our big very midwestern family vacation and wow my mother in law with some Americana!