
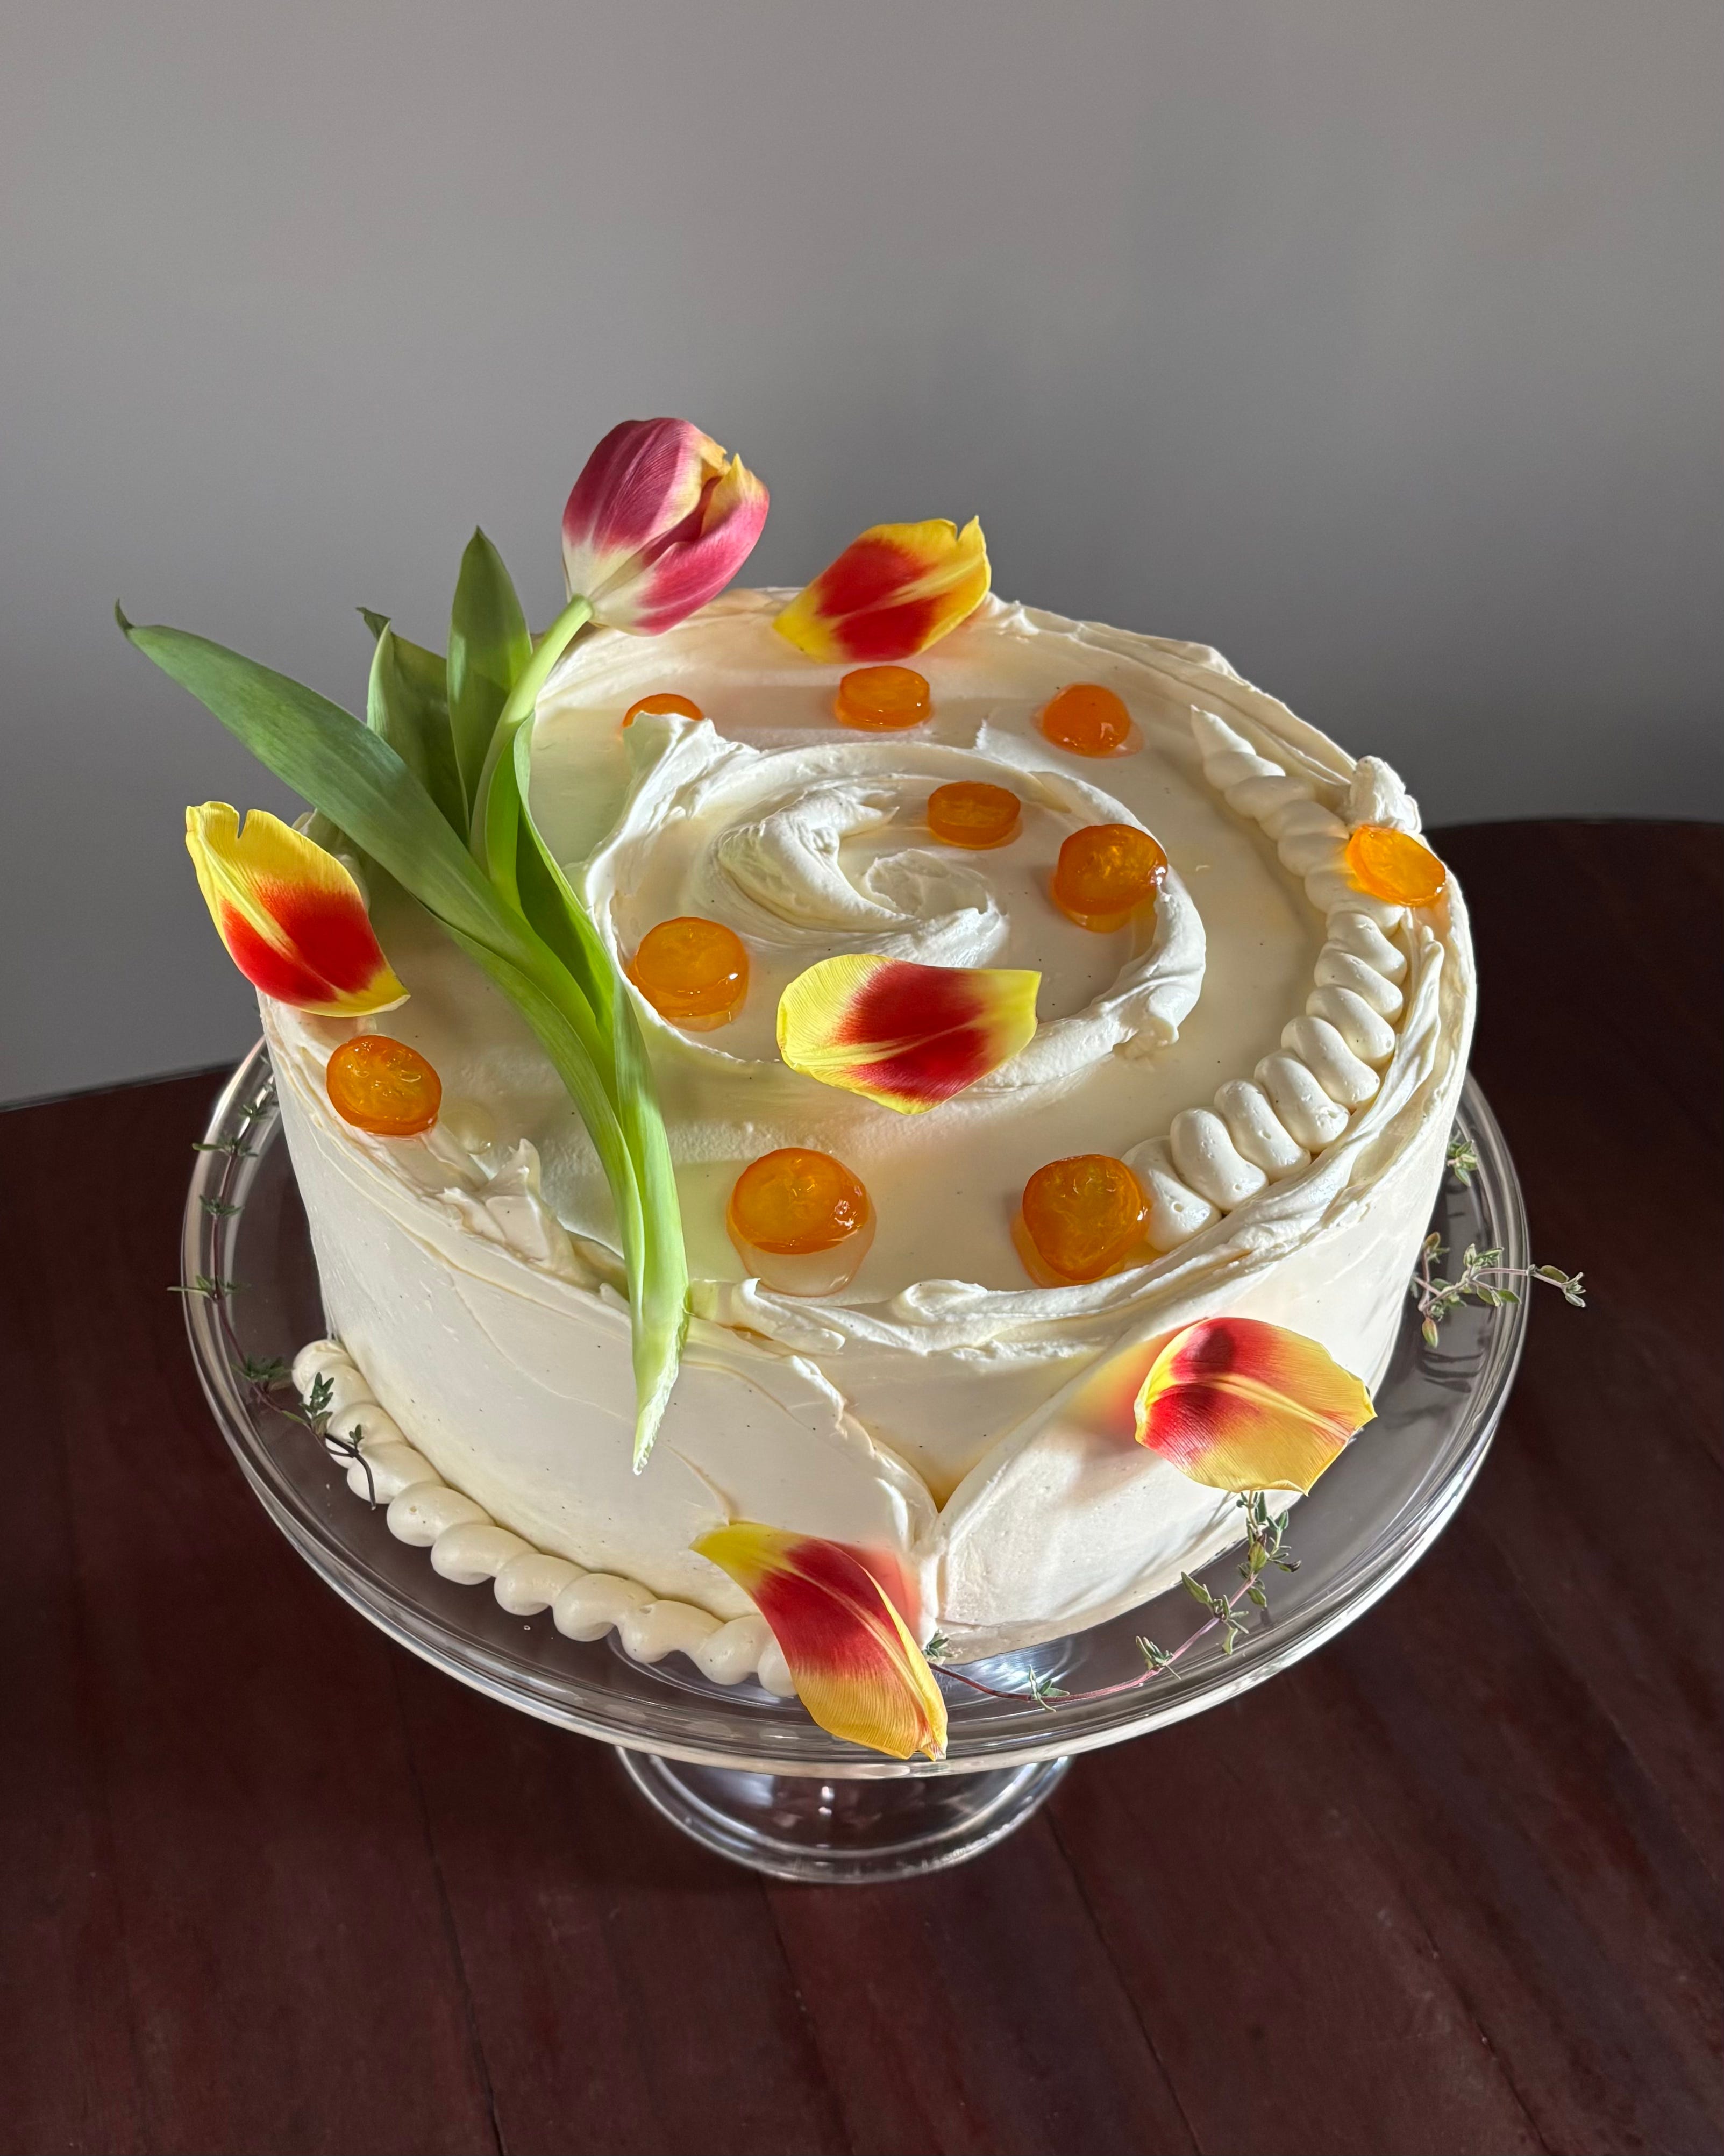
Kitchen Project #197: Bronwen Wyatt's Carrot Cake
A New Edition of My Dream Birthday Cake

Hello,
Welcome to today’s edition of Kitchen Projects. Thank you so much for being here.
Today, we have a brand new edition of ‘My Dream Birthday Cake’, a rotating guest column all about birthday cakes. Today we welcome regular columnist Bronwen Wyatt, the brilliant New Orleans-based baker, recipe developer and writer, to tell us all about the birthday cake of her dreams: Carrot Cake.
Over on KP+, I’m very excited to share a bake inspired by Bronwen’s recipe: One-bowl tiny carrot cake cookies. These are crisp at the edges, soft in the middle, and taste like eating the edge of a carrot cake! Click here for the recipe.
What’s KP+? Well, it’s the level-up version of this newsletter. By joining KP+, you will support the writing and research that goes into the newsletter (including the commissioning - and fair payment - of all the writers), join a growing community, access extra content (inc. the entire archive) and more. Subscribing is easy and costs only £6 per month or £50 per year. Why not give it a go? Come and join the gang!
Love,
Nicola
Welcome back to My Dream Birthday Cake, a rotating guest series here on Kitchen Projects
Here, we’ll invite a guest author to tell us all about their dream birthday cake. Whether that’s a simple single-layer cake, a litter of kittens made out of chocolate mini rolls, or a lasagne, this column will explore and honour the role that cakes, or conceptual cakes, play in our lives. You can read the previous editions of this newsletter here:
The Crudi-cake - A co-production by Milli Taylor and I
Today’s Edition
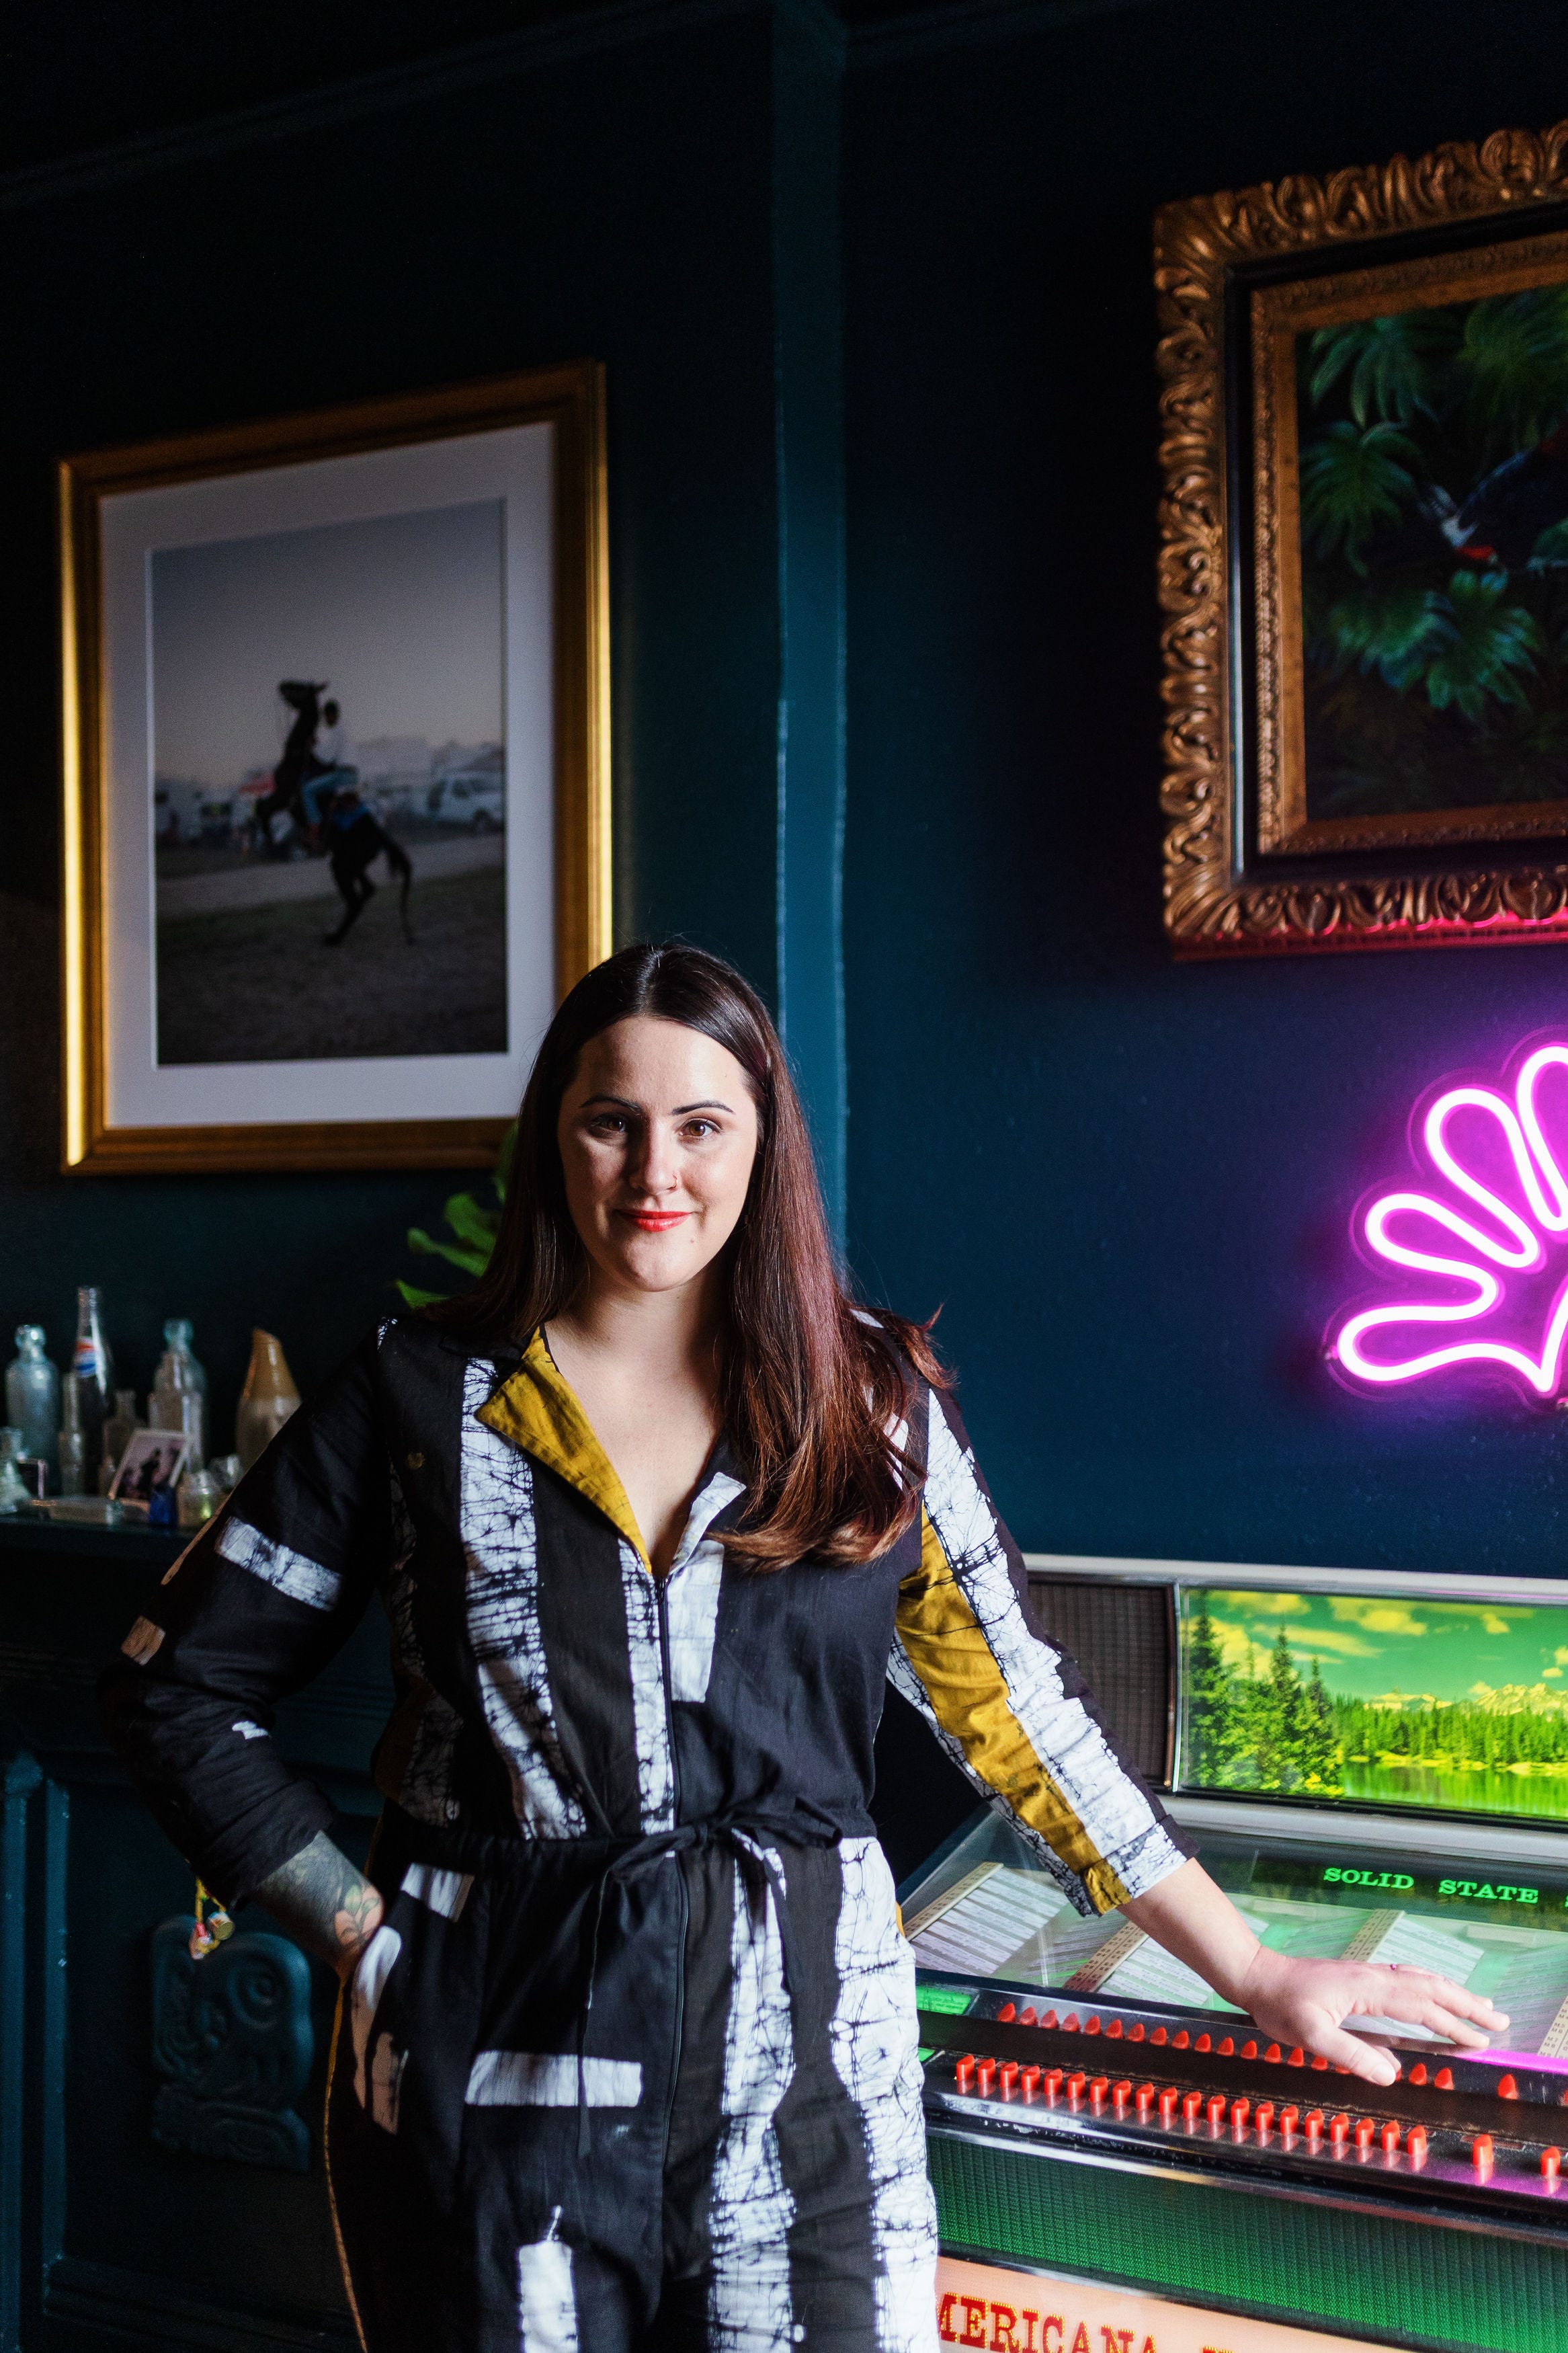
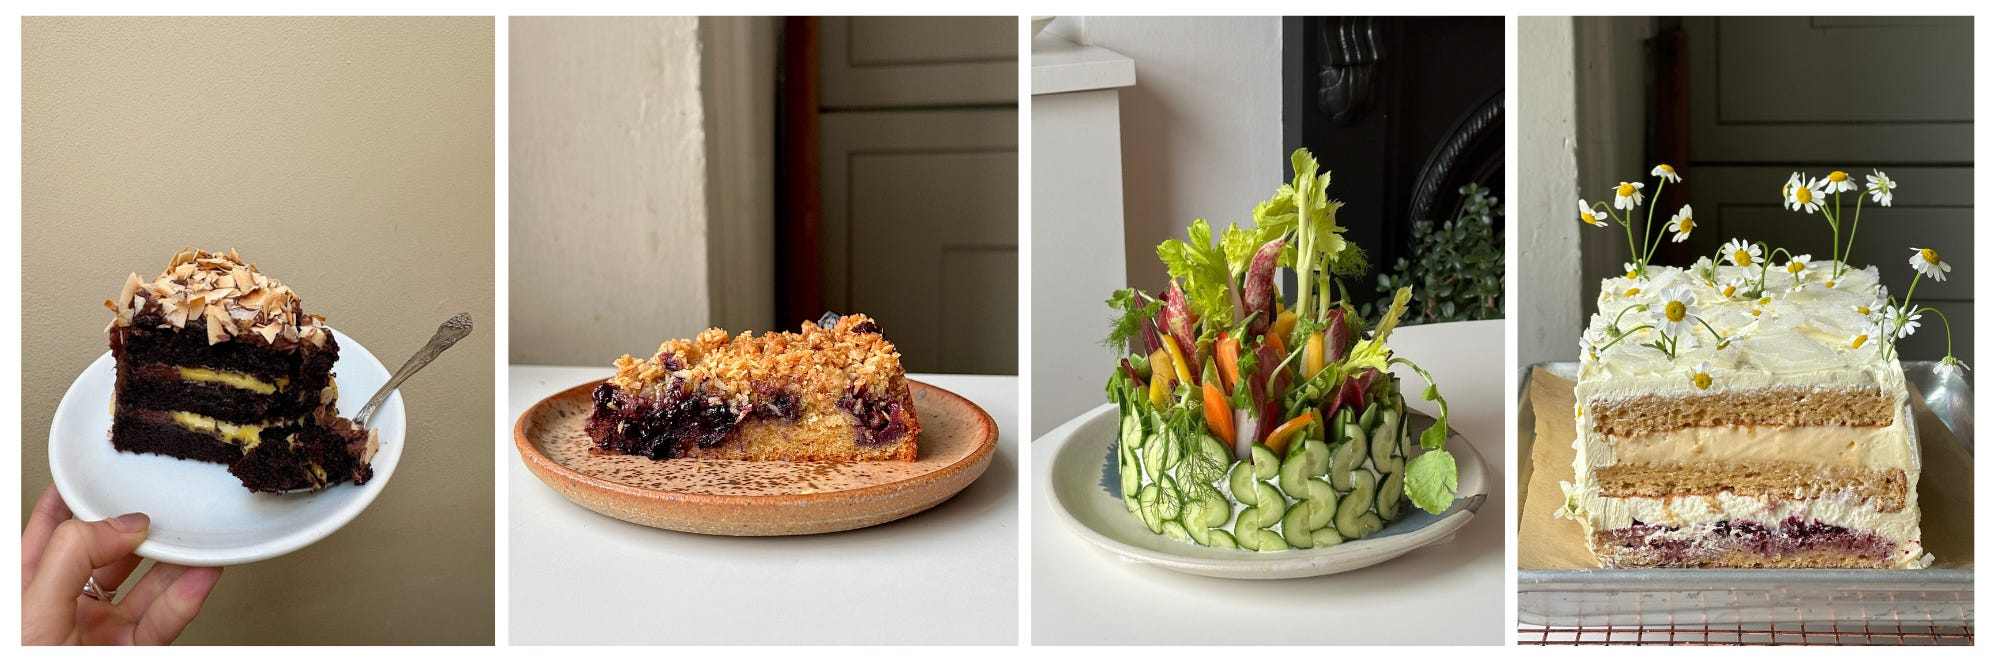
Joining us today is New Orleans-based writer, recipe developer and baker Bronwen Wyatt, also known as ‘Bayou Saint Cake’. I first came across Bronwen’s work via her Instagram page, which continues to thrill and inspire bakers (including me) around the world — known for her signature squiggles, artful composition and balance of flavours, I’m so thrilled to get to publish Bronwen’s Dream Birthday Cake right here on the newsletter. I’ve had so many requests for carrot cake over the years, and I just know that Bronwen’s version will blow us all away! So, shall we?
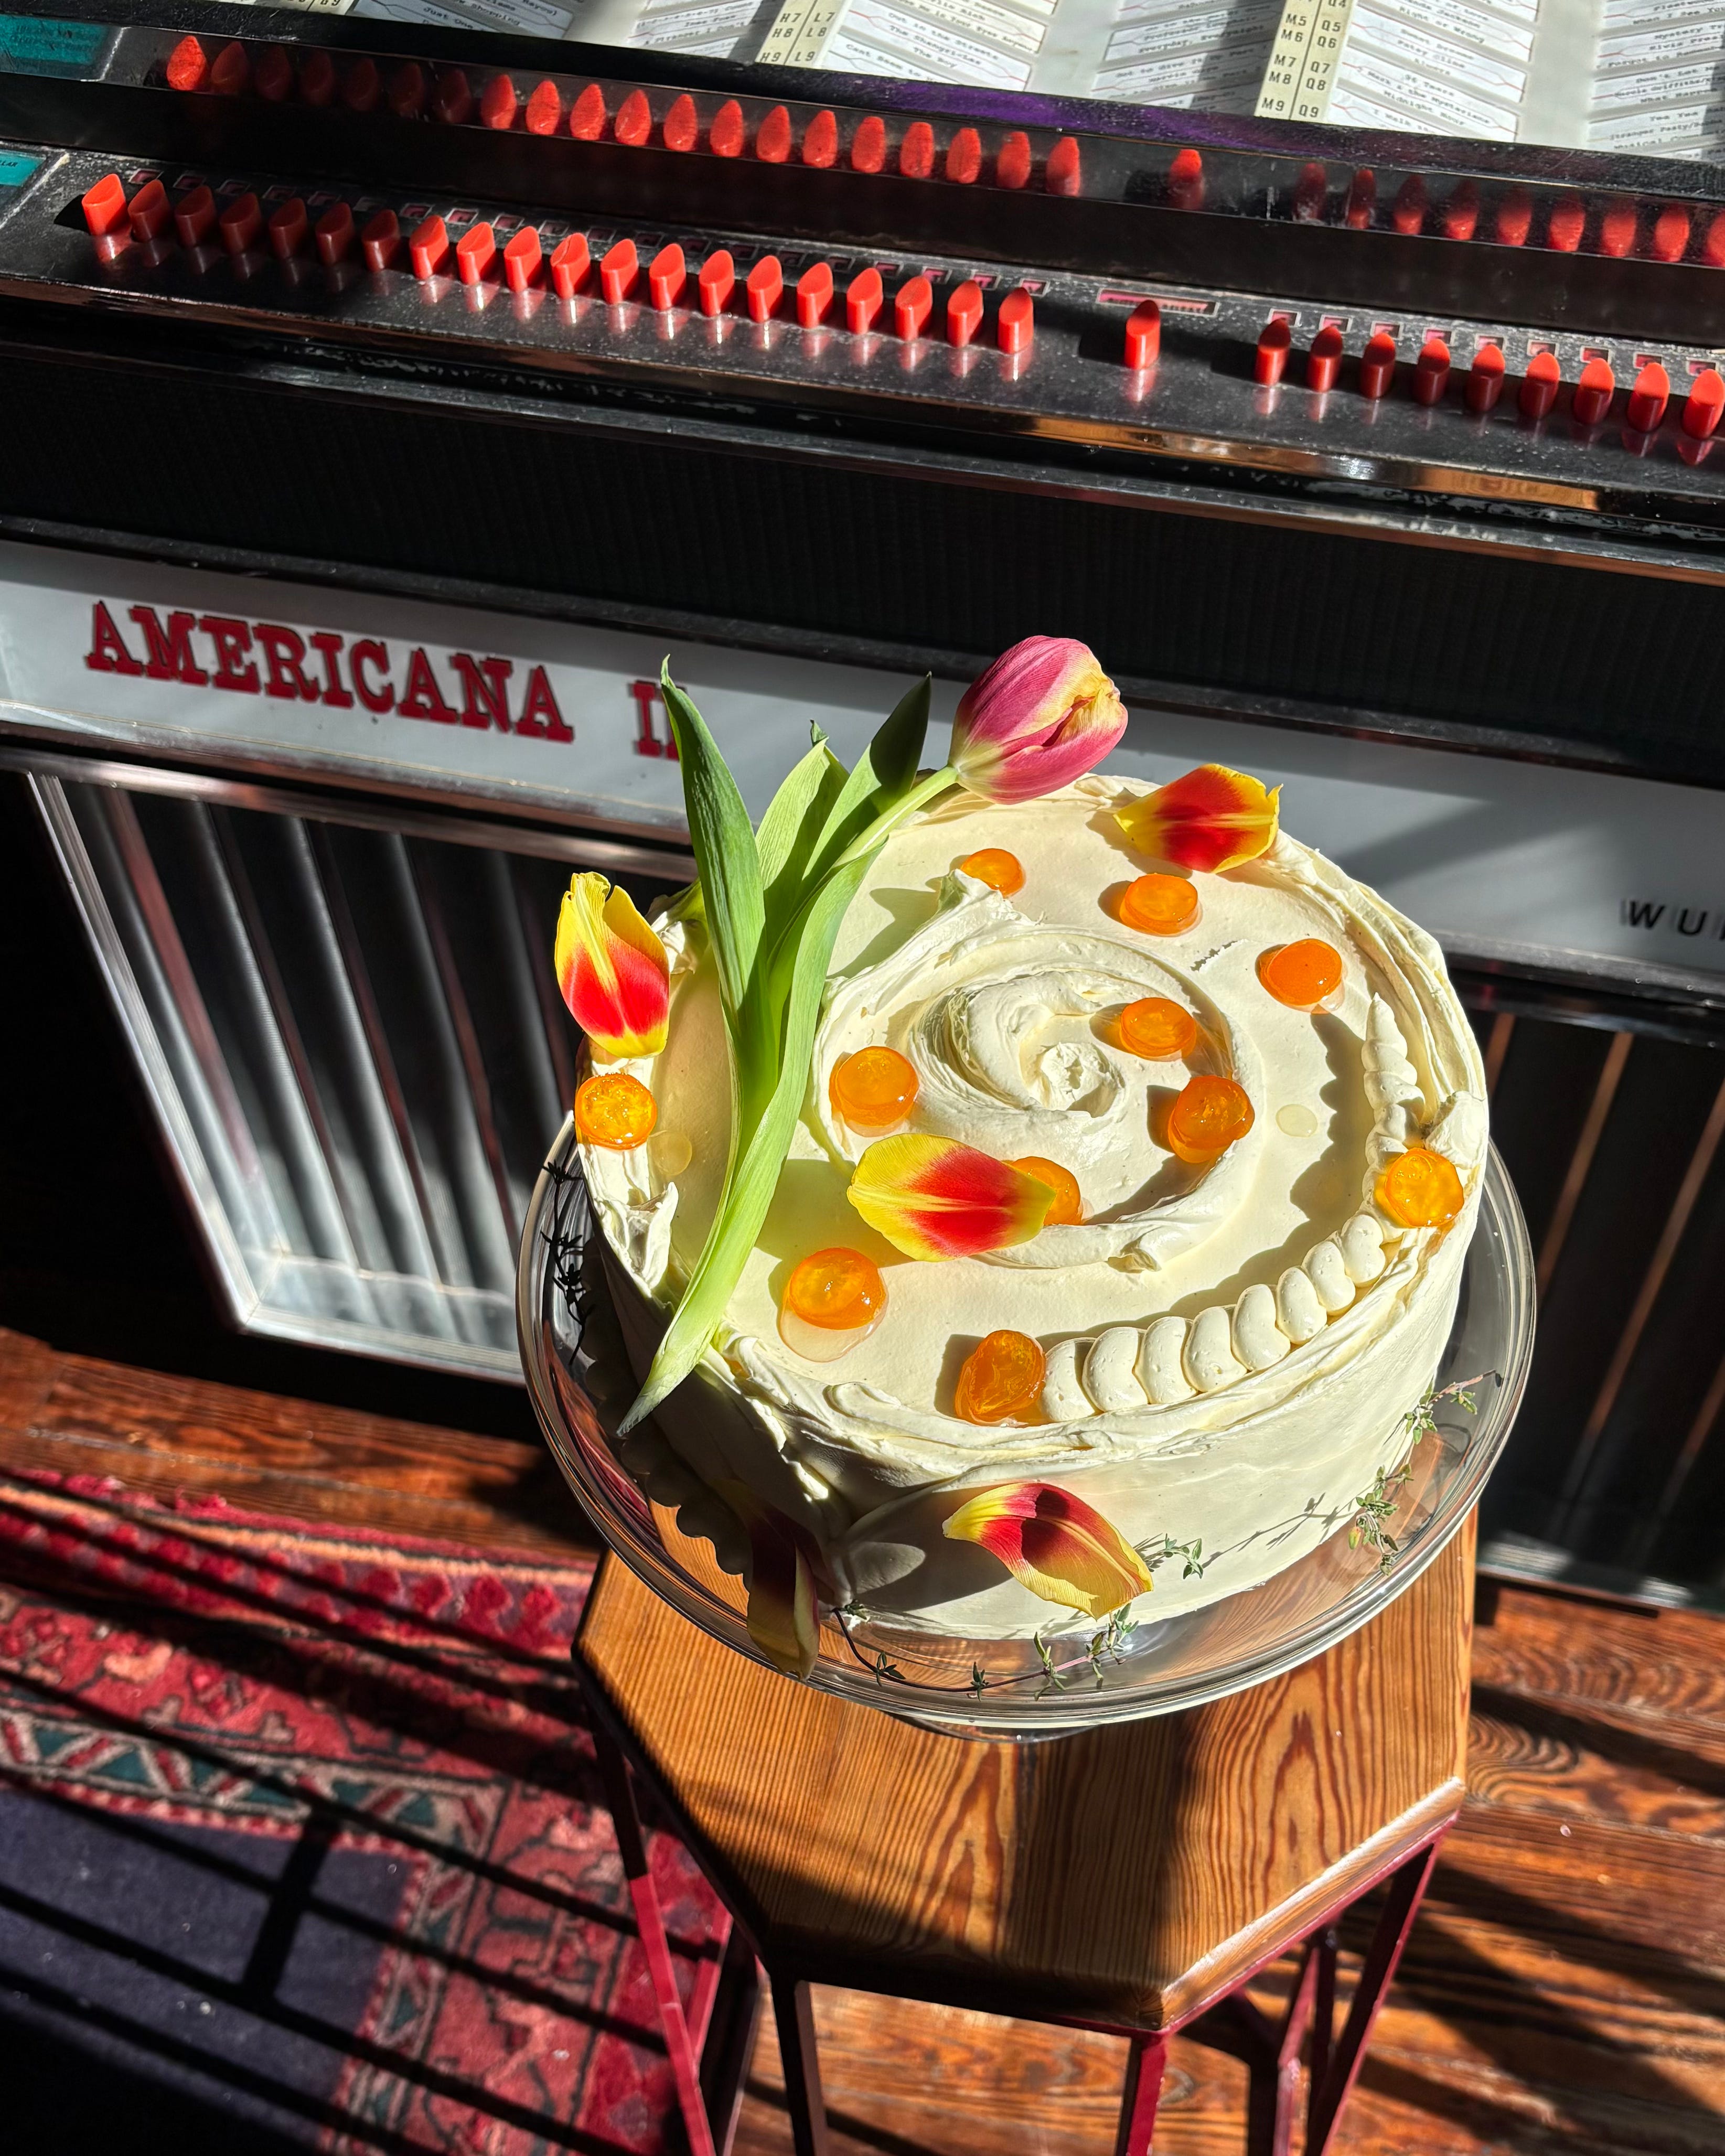
What a joy to present this cake! My dream birthday cake is a recipe I’ve been tinkering with since my very first solo pastry chef job. I was incredibly green when I became the lead pastry cook (and frankly, the only pastry cook) at a tiny neighbourhood restaurant in San Francisco called Outerlands. I’d just left a year in the trenches of a brutal pastry program at a Michelin-starred restaurant that left me feeling battle-scarred and exhausted.
Outerlands was like balm, filled with a sweet-natured crew of young people who were mostly making it up as we went along. We were led by then-owner Dave Muller, who had taught himself to make gorgeous sourdough bread with the simple dream of serving grilled cheese and soup to surfers coming off the waves of Ocean Beach. I made a handful of desserts each day, including a carrot cake that I paired with orange blossom and vanilla cream cheese frosting and candied kumquats. It became a beloved staple of my tiny dessert menu, and I’ve carried it with me ever since.
The version I present today reflects my current tastes. The cream cheese frosting, once an American-style buttercream, is now custard-based, which gives it the most delicious creamy texture (and makes it less sweet). I’ve leaned into my pairing of warm spiced carrot cake + citrus by including a lime and condensed milk curd, which has a terrifically nostalgic flavour like key lime pie. A little coriander in the carrot cake plays nicely with the citrus, and I still add a splash of orange blossom water and a hefty dollop of vanilla bean paste to the buttercream. The flavour still takes me back to those chill foggy days in San Francisco and the restaurant that still remains my favourite cooking job I’ve ever had.
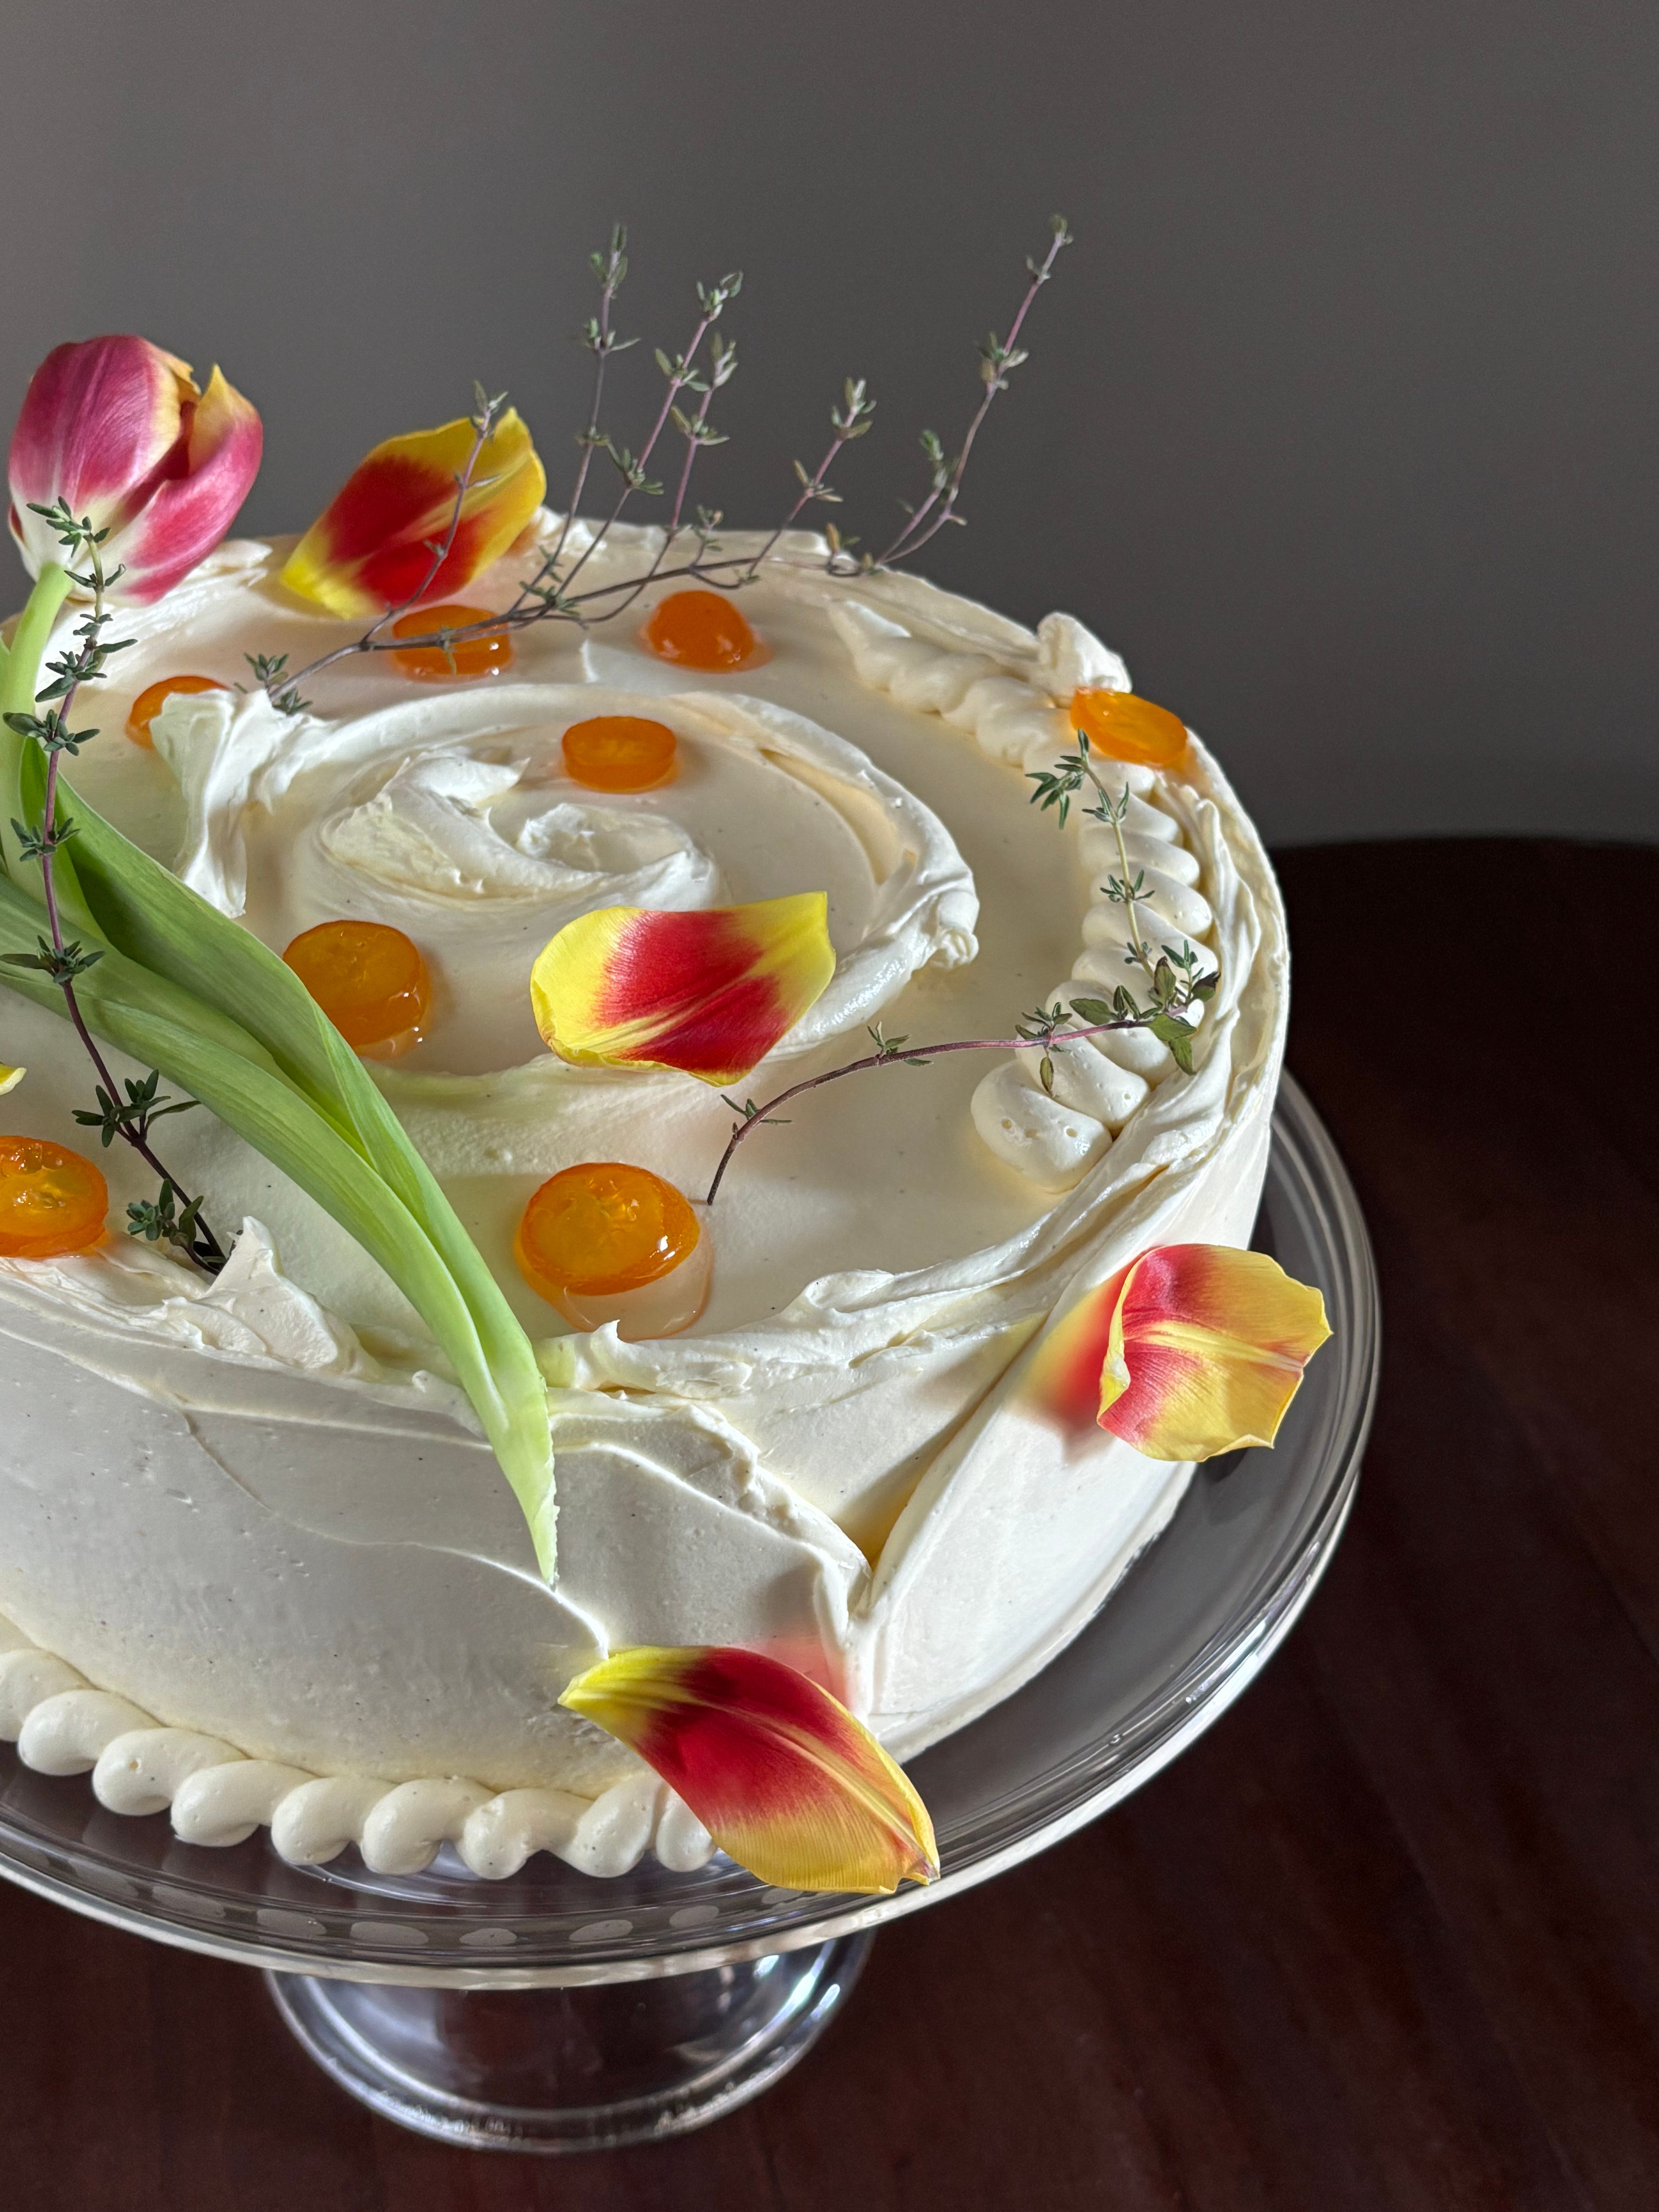
This isn’t a massive stacked layer cake like I used to make. These days I prefer two slimmer layers. I’ll always top it with candied kumquats, though, which are simmered slowly in the oven in a bath of simple syrup to preserve their shape.
On KP+ today
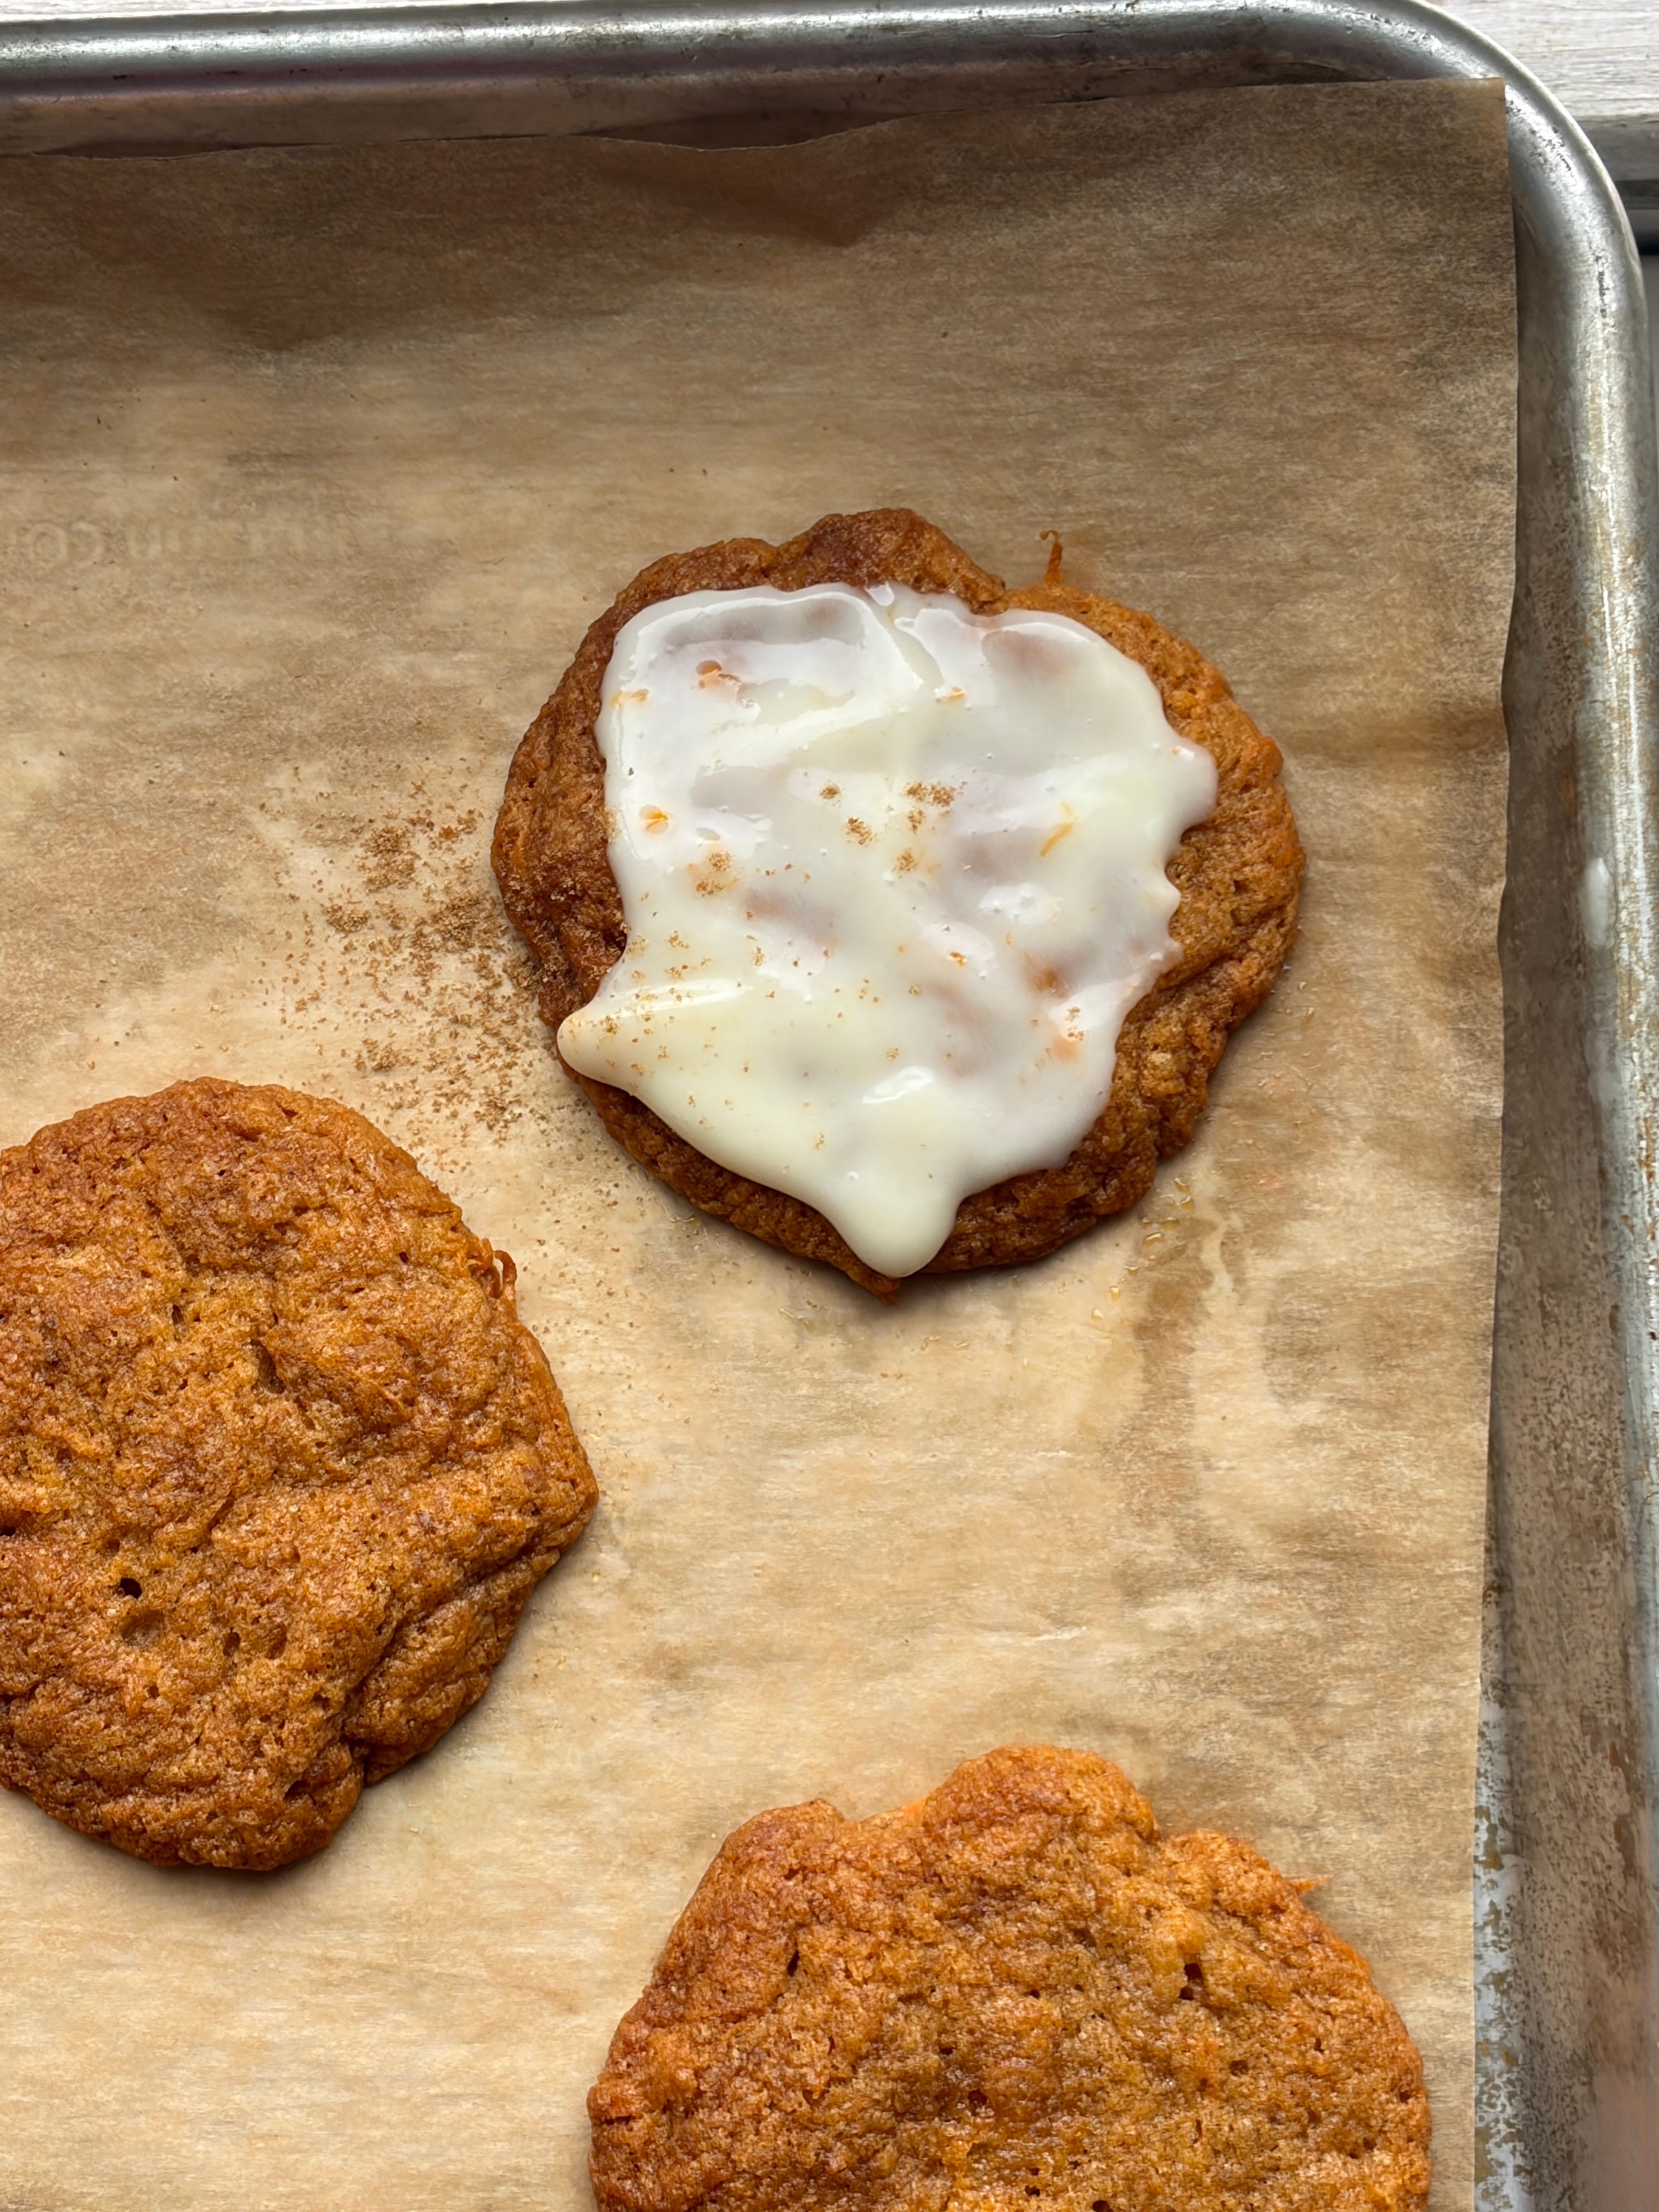
Over on KP+, you’ll find a recipe for Tiny Carrot Cake cookies, a one-bowl carrot cake fix that tastes like the crispy edges of the cake. Glaze with a little cream cheese if you wish!
The buttercream
The buttercream took me a few tries to finesse. My ultimate goal was a custardy buttercream, light as air but with enough structure that you could pipe it if you wished. German buttercream is just pastry cream with soft butter beaten in, like an exceptionally rich mousseline. It has a delicate milky flavour, reminding me of the packets of Bird’s custard my mom used to make for me as a treat as a kid (Bird’s remains one of my favourite British exports - if you’re in the States, you can find it at World Market!)
The great Stella Parks has a German cream cheese buttercream. She relies on a pastry cream thickened with a quite high percentage of cornstarch (11%) and whole eggs as the base. The result is an almost bouncy mouthfeel. I wanted something a little softer and more yielding, more akin to my beloved Swiss meringue buttercream in texture.
My base German buttercream recipe uses more custard than butter - about 65% pastry cream to fat. However, when I used this ratio and swapped 50% of the butter for cream cheese, the result was a slack mess: cream cheese is less stable than butter, with its lower fat content and higher water content.
I tightened up my pastry cream a hair, raising my ratio of cornstarch to milk from 6% to 8%. One of the joys of a custard buttercream is its ability to infuse delicate flavours into the hot milk, so I made sure I introduced my vanilla bean paste at this stage to take full advantage. I then played around with my butter/cream cheese ratios until I hit a balance that produced a pipeable buttercream, with all the tangy flavour of cream cheese and the sturdiness of butter. Ultimately, in order to get the structure I needed I settled on a higher ratio of add-ins to custard - about 42% pastry cream to the cream cheese and butter. A pinch of citric acid boosts the cream cheese flavour, and a 60/40 ratio of butter to cream cheese produces a buttercream firm enough to easily stack a layer cake.
All buttercreams live and die on their temperature when applied. In the photo below, you can see how this buttercream behaves at a range of temperatures. At 78°F (25 °C), the buttercream is too loose, with a greasy appearance. In the centre, the temperature is just right - pipeable and silky at 72°F (22 °C). On the right, the buttercream is colder, and you can see that it’s clumsy to pipe with a slight clotted appearance at 68F (20 °C).
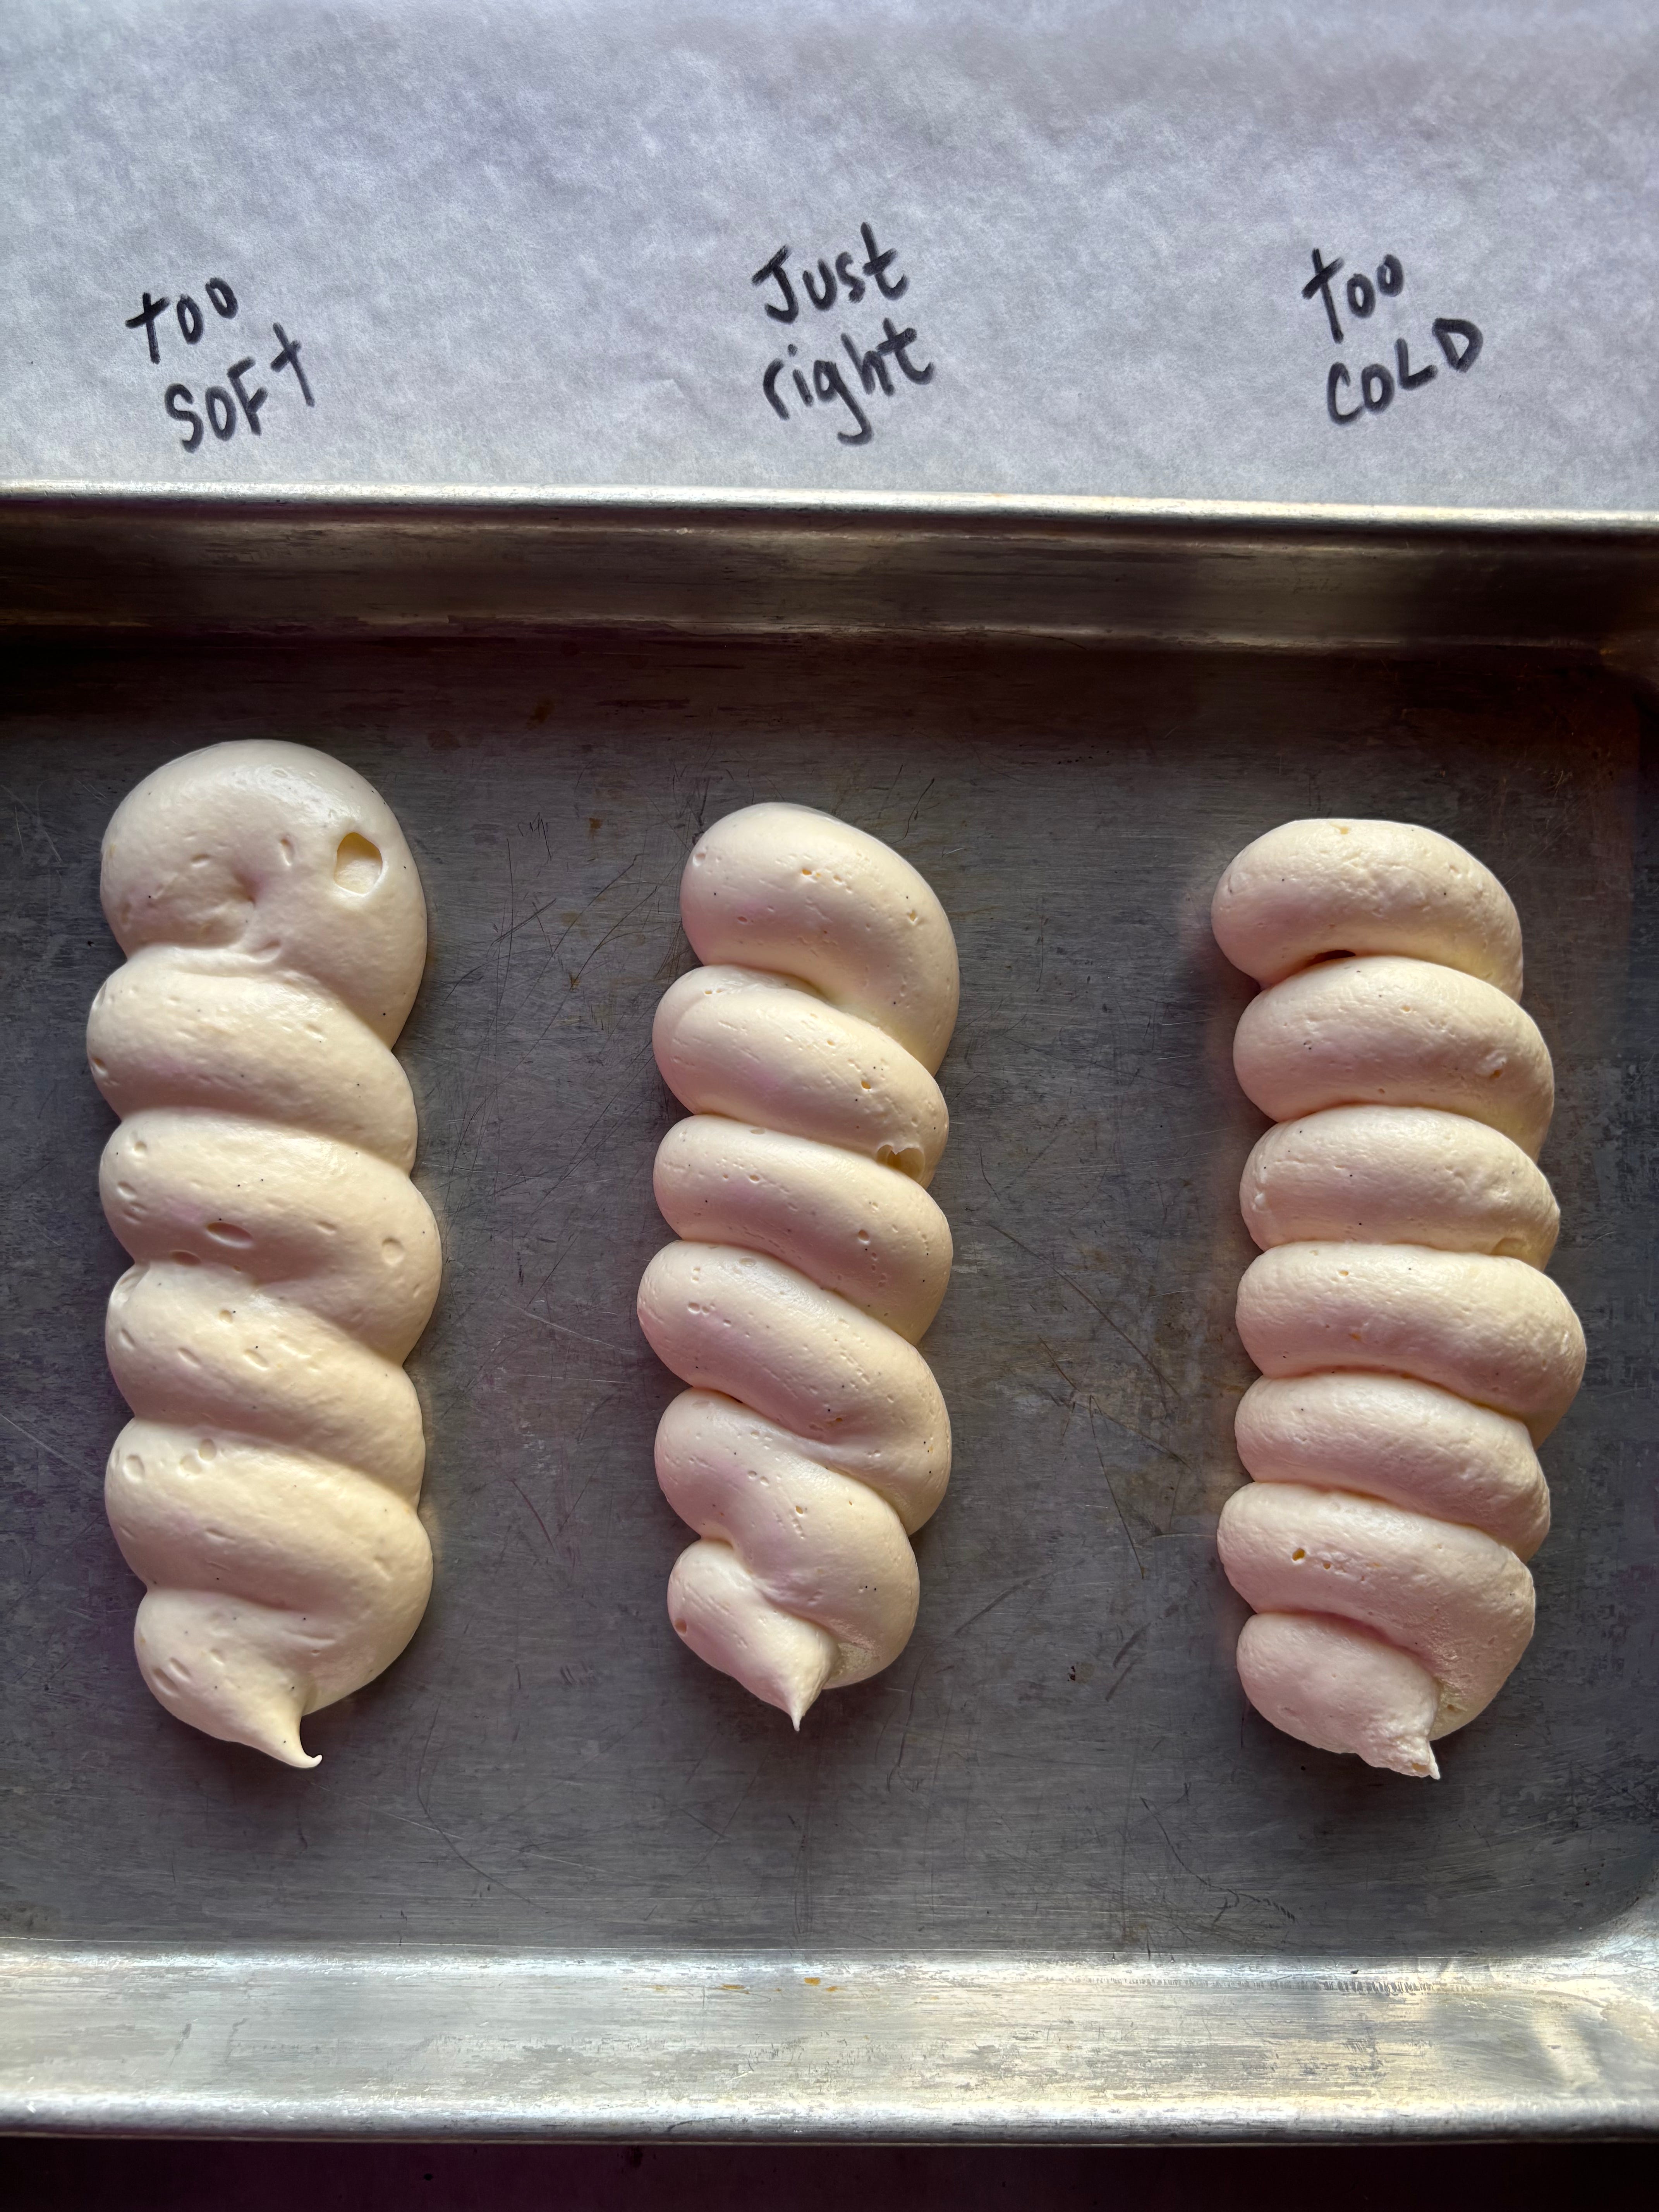
If you need to chill your buttercream in a hurry, spread it in a thin layer on a sheet tray and pop it in the freezer. If you need to warm your buttercream up, pop the bowl of your stand mixer over a bowl of simmering water for a few seconds, or hit the bottom of the bowl with a kitchen torch briefly while the mixer is running.
A note on my pastry cream recipe.
You may notice I don’t fuss with ladling hot milk into eggs a little at a time to temper. This step isn’t always necessary, as I learned years ago from Harold McGee’s On Food and Cooking. I suspend the cornstarch in sugar and whisk it thoroughly to prevent it from getting lumpy. I then stir in my cold milk, egg yolks, and vanilla bean paste. You can then bring the whole mixture up to temperature on the stove, stirring all the while. The cornstarch will prevent the eggs from curdling, and I personally find this method faster and less fussy. In my opinion, when using vanilla bean paste, this brief contact with the heat is plenty to suffuse the custard with flavour. If you did want to do a longer steep, you could warm the milk separately with your flavouring. Just allow it to cool before adding it to your egg yolks.
RECIPE: Carrot + Coriander Cake
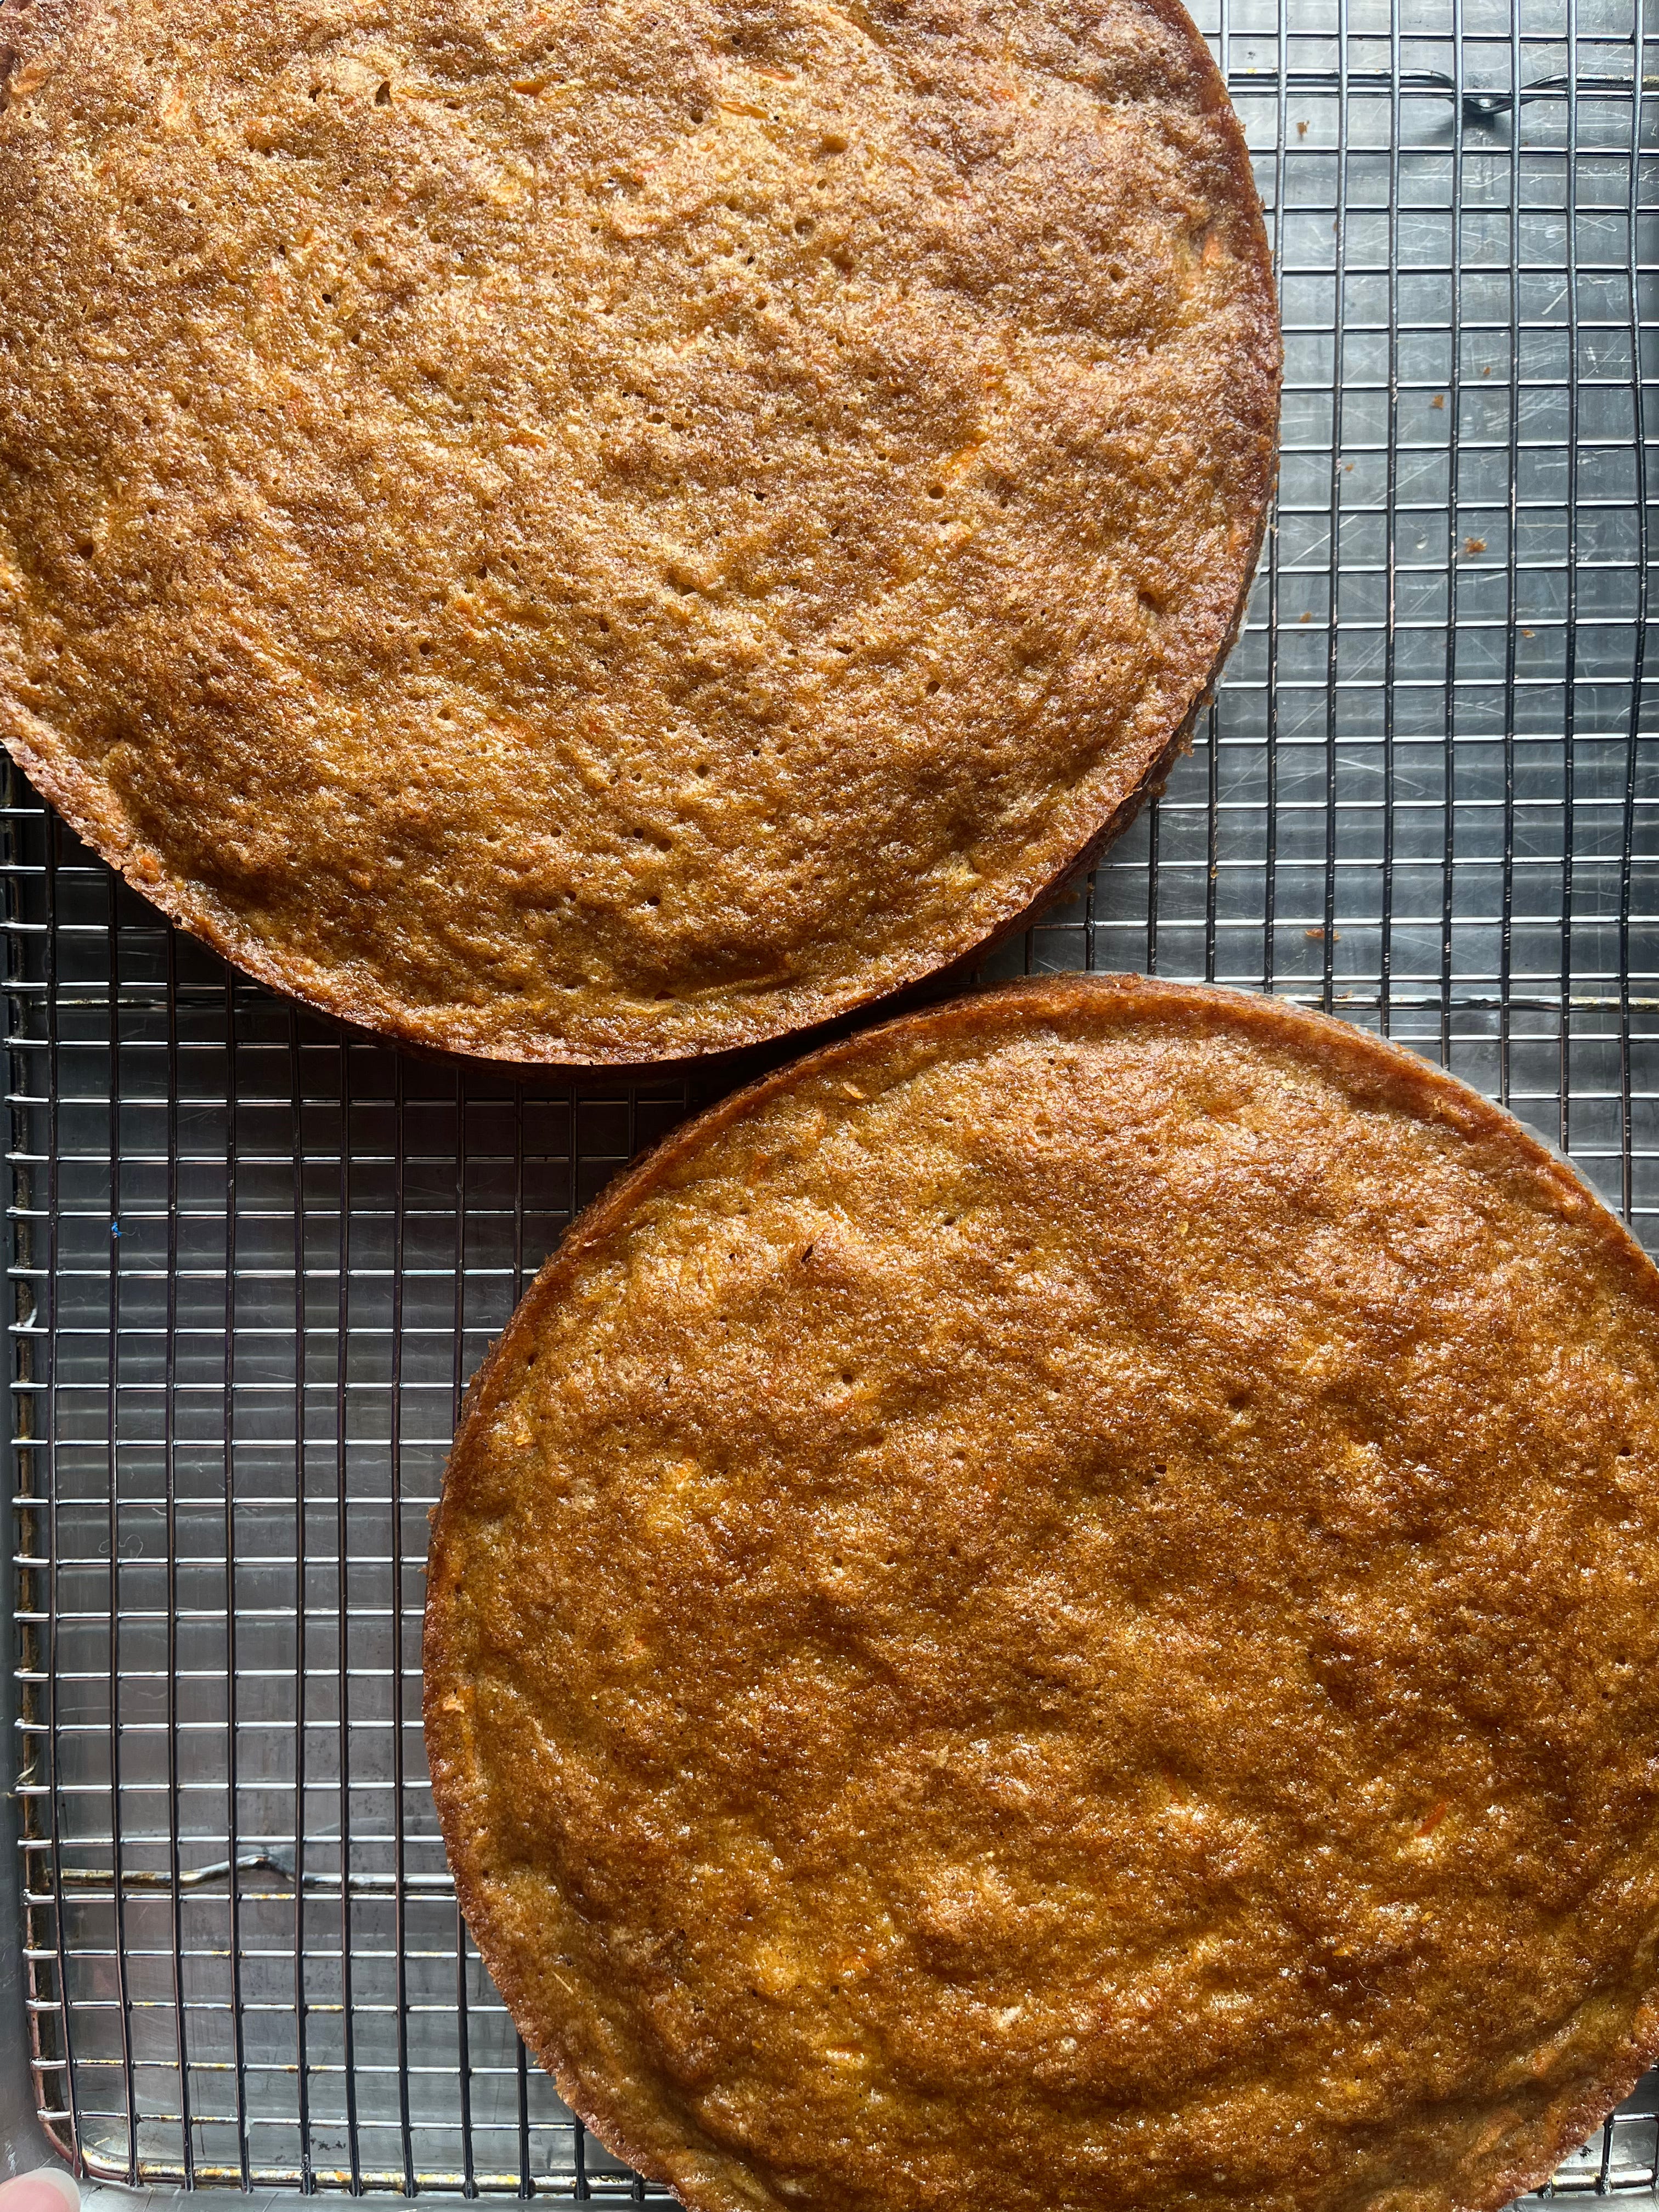
The layers this cake makes are slim - around ¾ of an inch high - but I still like to bake them in two separate pans (rather than attempting to tort a taller cake), as the carrot cake is very moist and sticky, and difficult to trim in half. If you do want to bake this as a single-layer cake, you’ll need a cake pan that is at least 3” high, such as a springform pan.
If possible, I always like to grind my own coriander from whole seeds: the flavour will be much brighter.
Ingredients
240 grams / 2 cups all-purpose flour
300 grams / 1 ½ cups sugar
1 ¼ teaspoons baking powder
¾ teaspoon baking soda
¾ teaspoon salt
2 teaspoons cinnamon
1 teaspoon ground coriander seed
302 grams / about 11 oz (about four medium) carrots, shredded
100 grams whole eggs, room temperature (from about two eggs)
180 grams / ¾ cup olive oil\
1 tsp vanilla extract
60 grams / ¼ cup buttermilk
Method
Preheat the oven to 350 degrees F / 176 °C / 160 °C fan.
Line two 9” cake pans with parchment paper and spray generously with pan spray.
Shred the carrots - you can either use a box grater (I would suggest the largest hole size), or do what I do, and use the shredding attachment of a food processor (I detest using a box grater, no matter how many food processor parts I have to wash). Set aside the shredded carrots.
In a large bowl, whisk together the flour, spices, leaveners, salt, and sugar.
In another medium bowl, whisk together the olive oil, buttermilk, eggs, and vanilla. Combine the wet and the dry ingredients and whisk until just combined.
Fold in the shredded carrots with a rubber spatula and mix well. Scrape the batter into the prepared pans. You’ll put about 600 grams of batter into each pan.
Bake for about 35-40 minutes, or until the top of the cakes springs back lightly when pressed and the surface of the cake is a deep golden brown. Don’t be afraid of a good bit of colour here. Olive oil- based cake can take a lot of caramelisation without drying out in the least.
Allow to cool in the pan for about half an hour, then remove the cakes from their pans and let them cool completely on a rack. I’ll often pop the layers in the freezer for an hour or so before assembling - this makes them much easier to handle. You can also wrap them well in plastic and freeze them completely for up to several weeks. I’ll then assemble the cake from frozen, letting it slowly defrost in the fridge for at least 4 hours before serving.
Key Lime and Condensed Milk Curd
Sweetened condensed milk is not for everyone, but it is for me! I could eat it straight with a spoon (and sometimes do). This recipe uses half an American-style can of condensed milk, which is a little awkward if you’re not fond of eating it plain, like I do. You can, of course, double the batch and freeze the extra lime curd for later.
I’ve borrowed a tip from Nicola herself here, using a good bit of citric acid to boost the acidity and assist the set of this curd (more from her incredible curd deep dive here).
198 g / ½ cup + 2 tablespoons sweetened condensed milk
100 g whole eggs (from about two eggs)
18 g egg yolk (from about one egg)
56 g / ¼ cup lime juice, freshly squeezed (from about 3 large limes)
¼ tsp citric acid
Large pinch kosher salt
Zest of three limes
113 g / 1 stick butter, cut into rough chunks
Method
Fill a medium pot with about four inches of water and bring it to a simmer.
Whisk together the condensed milk, whole eggs, and yolks in a medium heatproof bowl. Whisk in the lime juice, citric acid, salt, and half of the lime zest, reserving the remaining half of the zest for later. Add the butter.
Set the bowl over the simmering water and whisk until the butter has melted and the curd has achieved a pudding-like consistency, about 15 minutes or so. Strain through a fine mesh strainer into a shallow dish and stir in the remaining zest. Press a little plastic wrap onto the surface and chill until completely cold, about two hours. Taste and another pinch of salt or so if you like - it helps bring out the tart flavor.
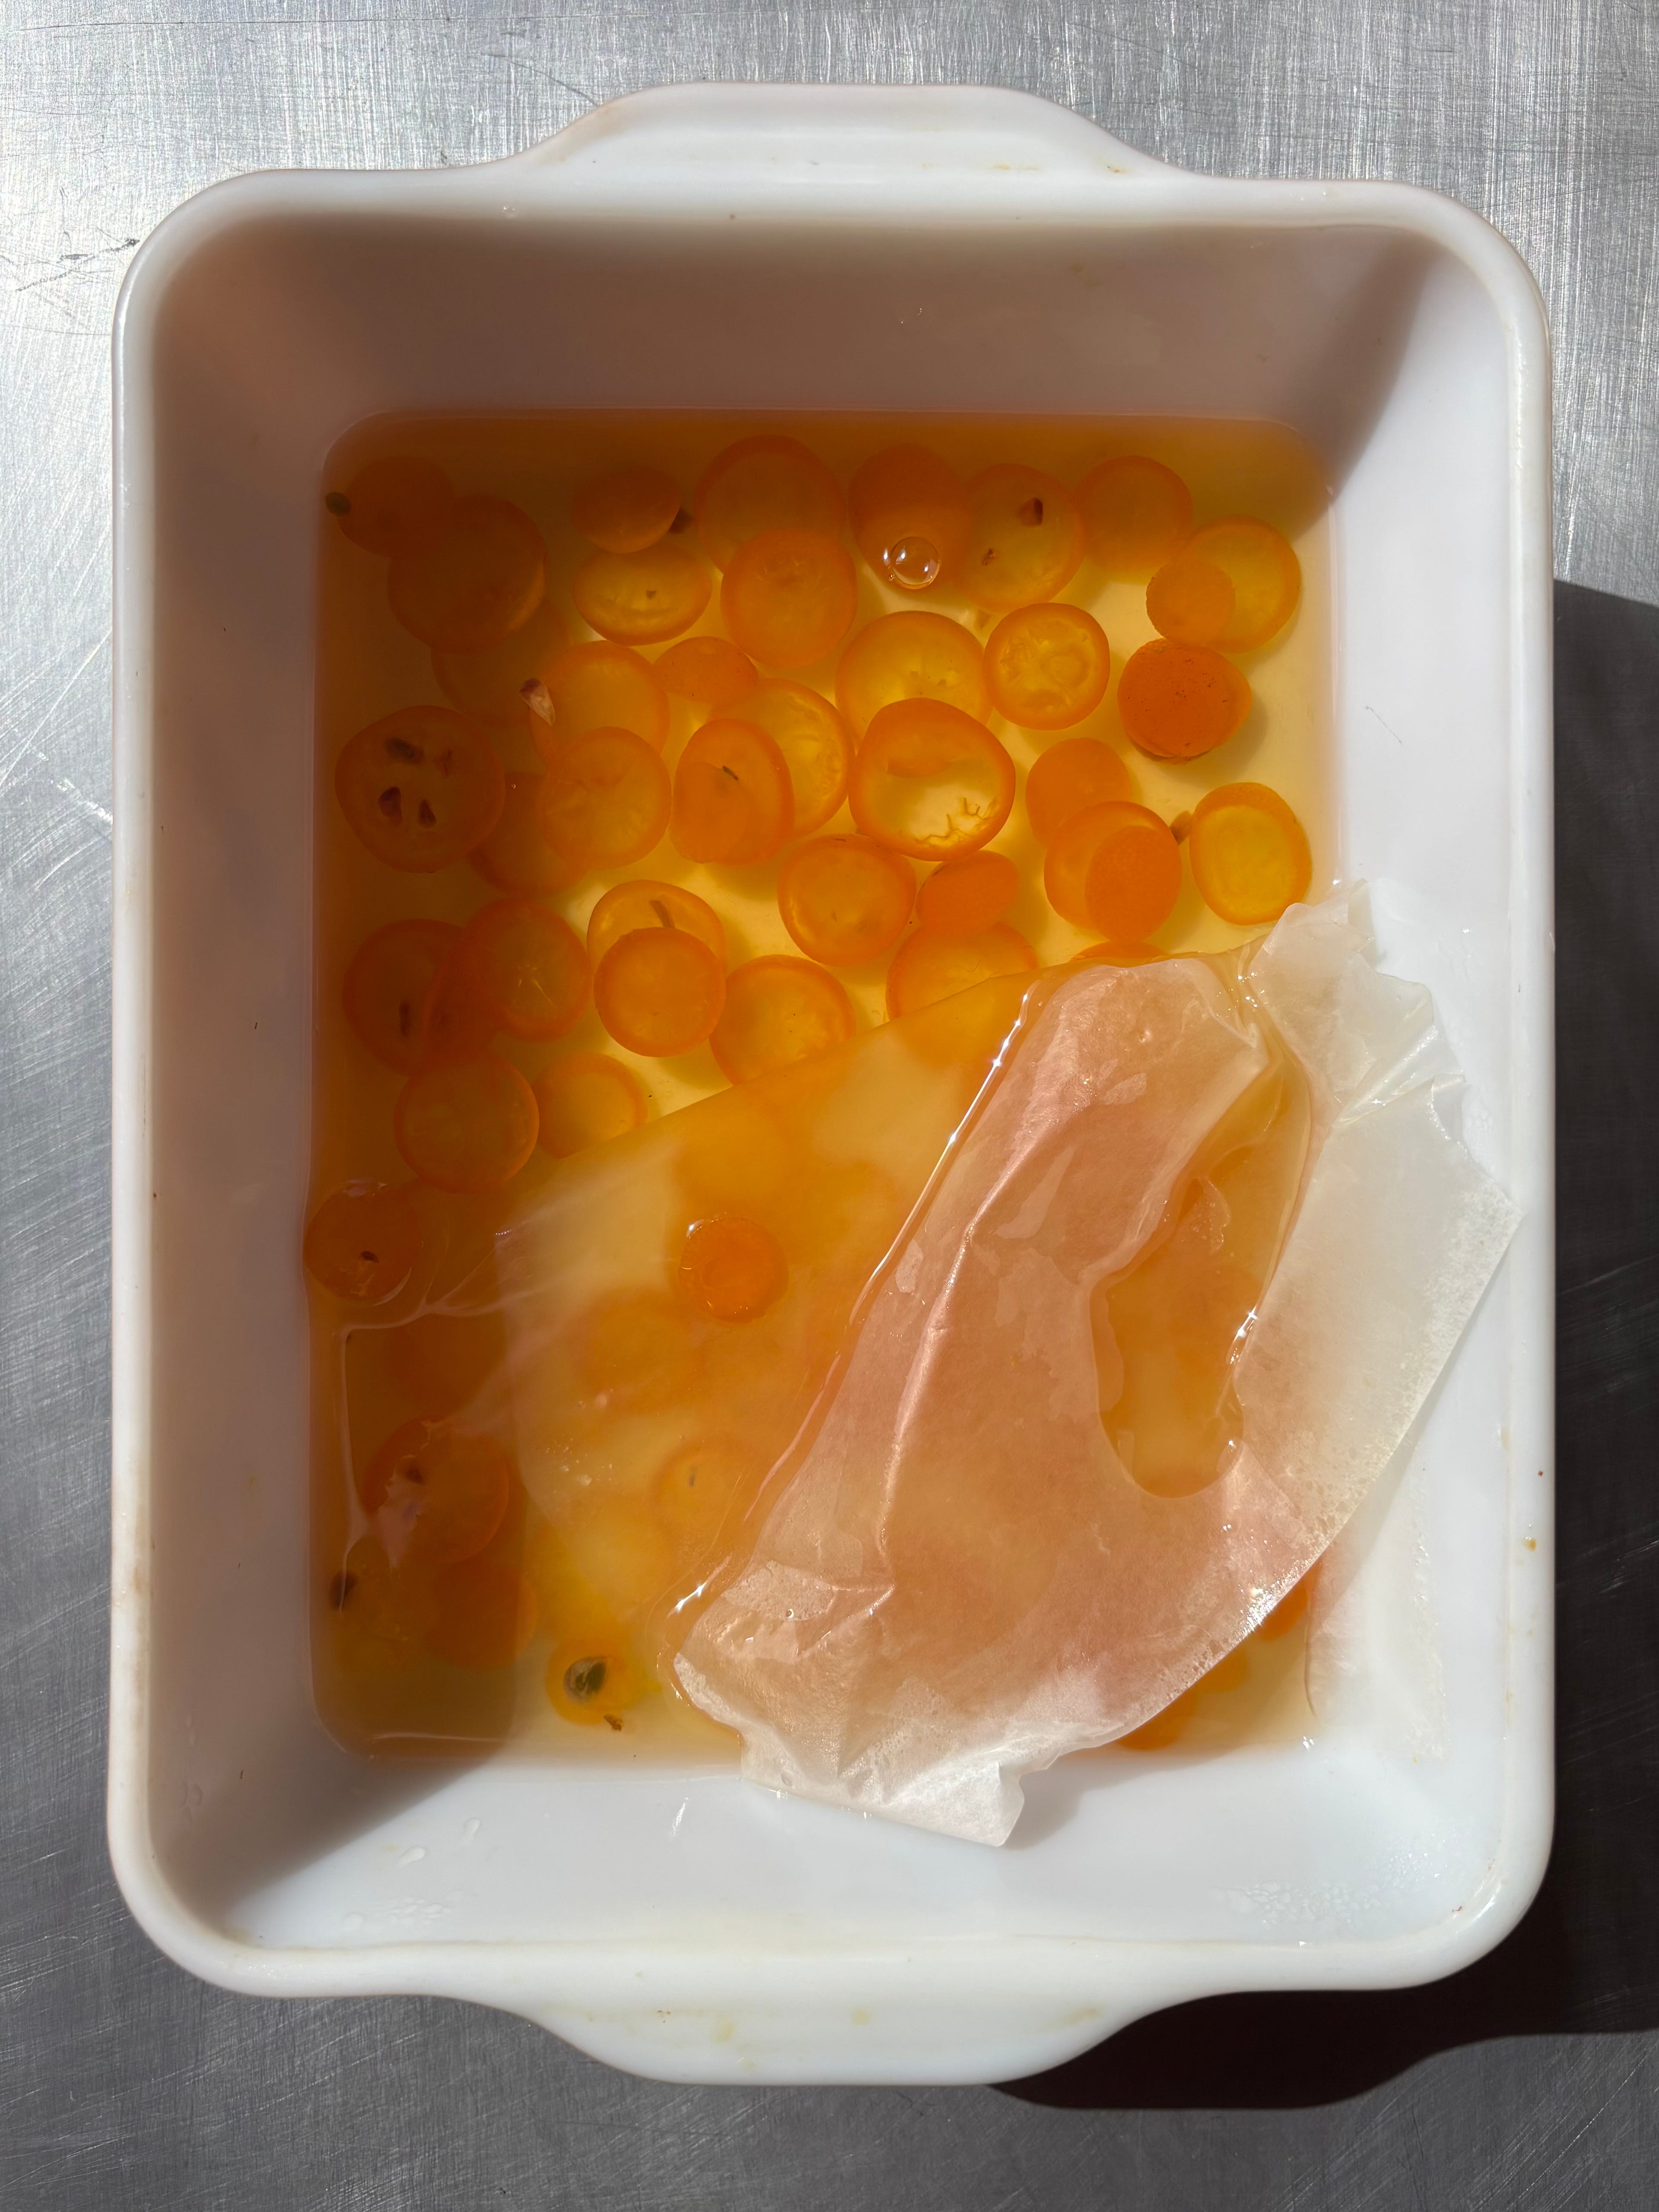
Candied Kumquats
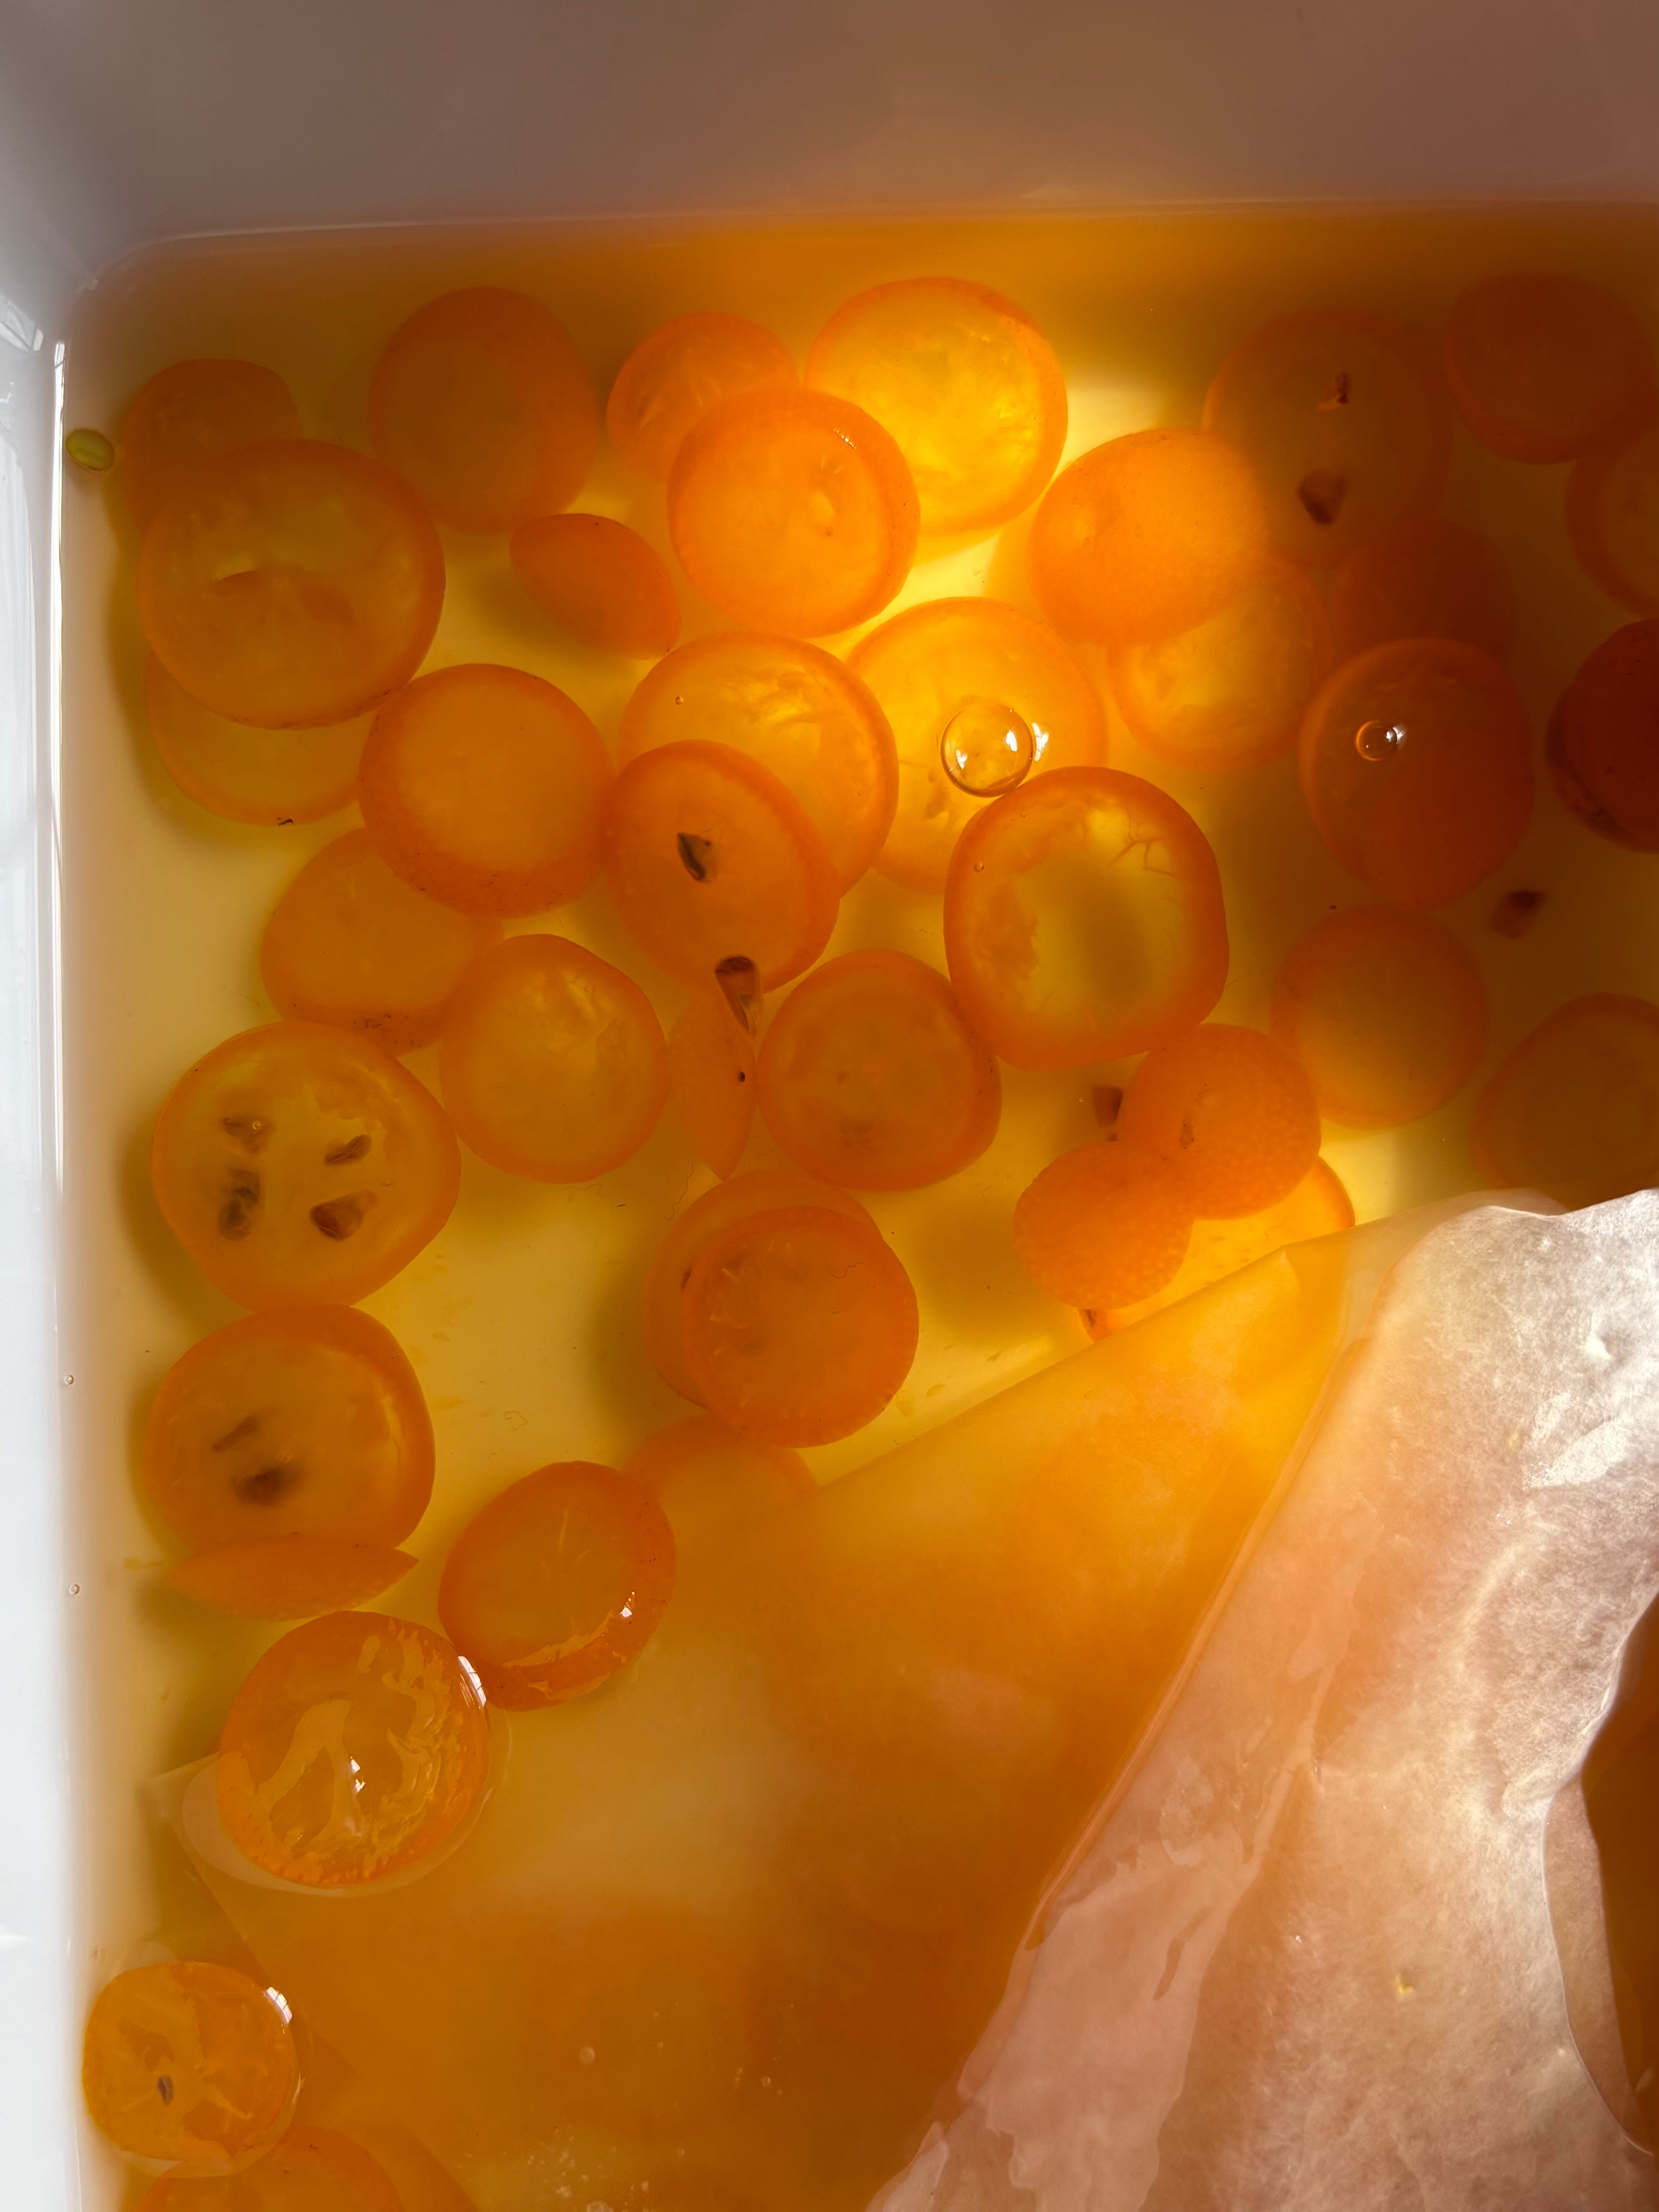
I learned this method from the pastry chef Michelle Polzine, who baked her candied sliced kumquats in a bath of simple syrup slowly in the oven to preserve their shape.
Ingredients
240g / 1 cup water
200g / 1 cup granulated sugar
113g / 4 ounces kumquats
Method
Preheat the oven to 300°F / 150 °C fan (low if possible)
Combine the water and sugar in a small pot and warm until the sugar is totally dissolved.
Slice the kumquats into thin coins, a little less than half a centimetre thick. Place them into a small shallow baking dish and cover them with the simple syrup. Cut a piece of parchment to the same size as your baking dish and place it on the surface of the kumquat/syrup mixture to keep the slices submerged. Cover the pan tightly with foil and place in the oven.
Bake for 40 minutes to an hour and 20 minutes, taking a peek every now and then to nudge any errant kumquat slices below the surface of the syrup. The kumquats are done when their centres are translucent and the peel tender. Allow to cool in the syrup. They will keep in a sterilised jar, refrigerated, for several months. This batch makes a little more than you will need for the cake, but the leftovers are amazing stirred into cocktails or served with cheese plates.
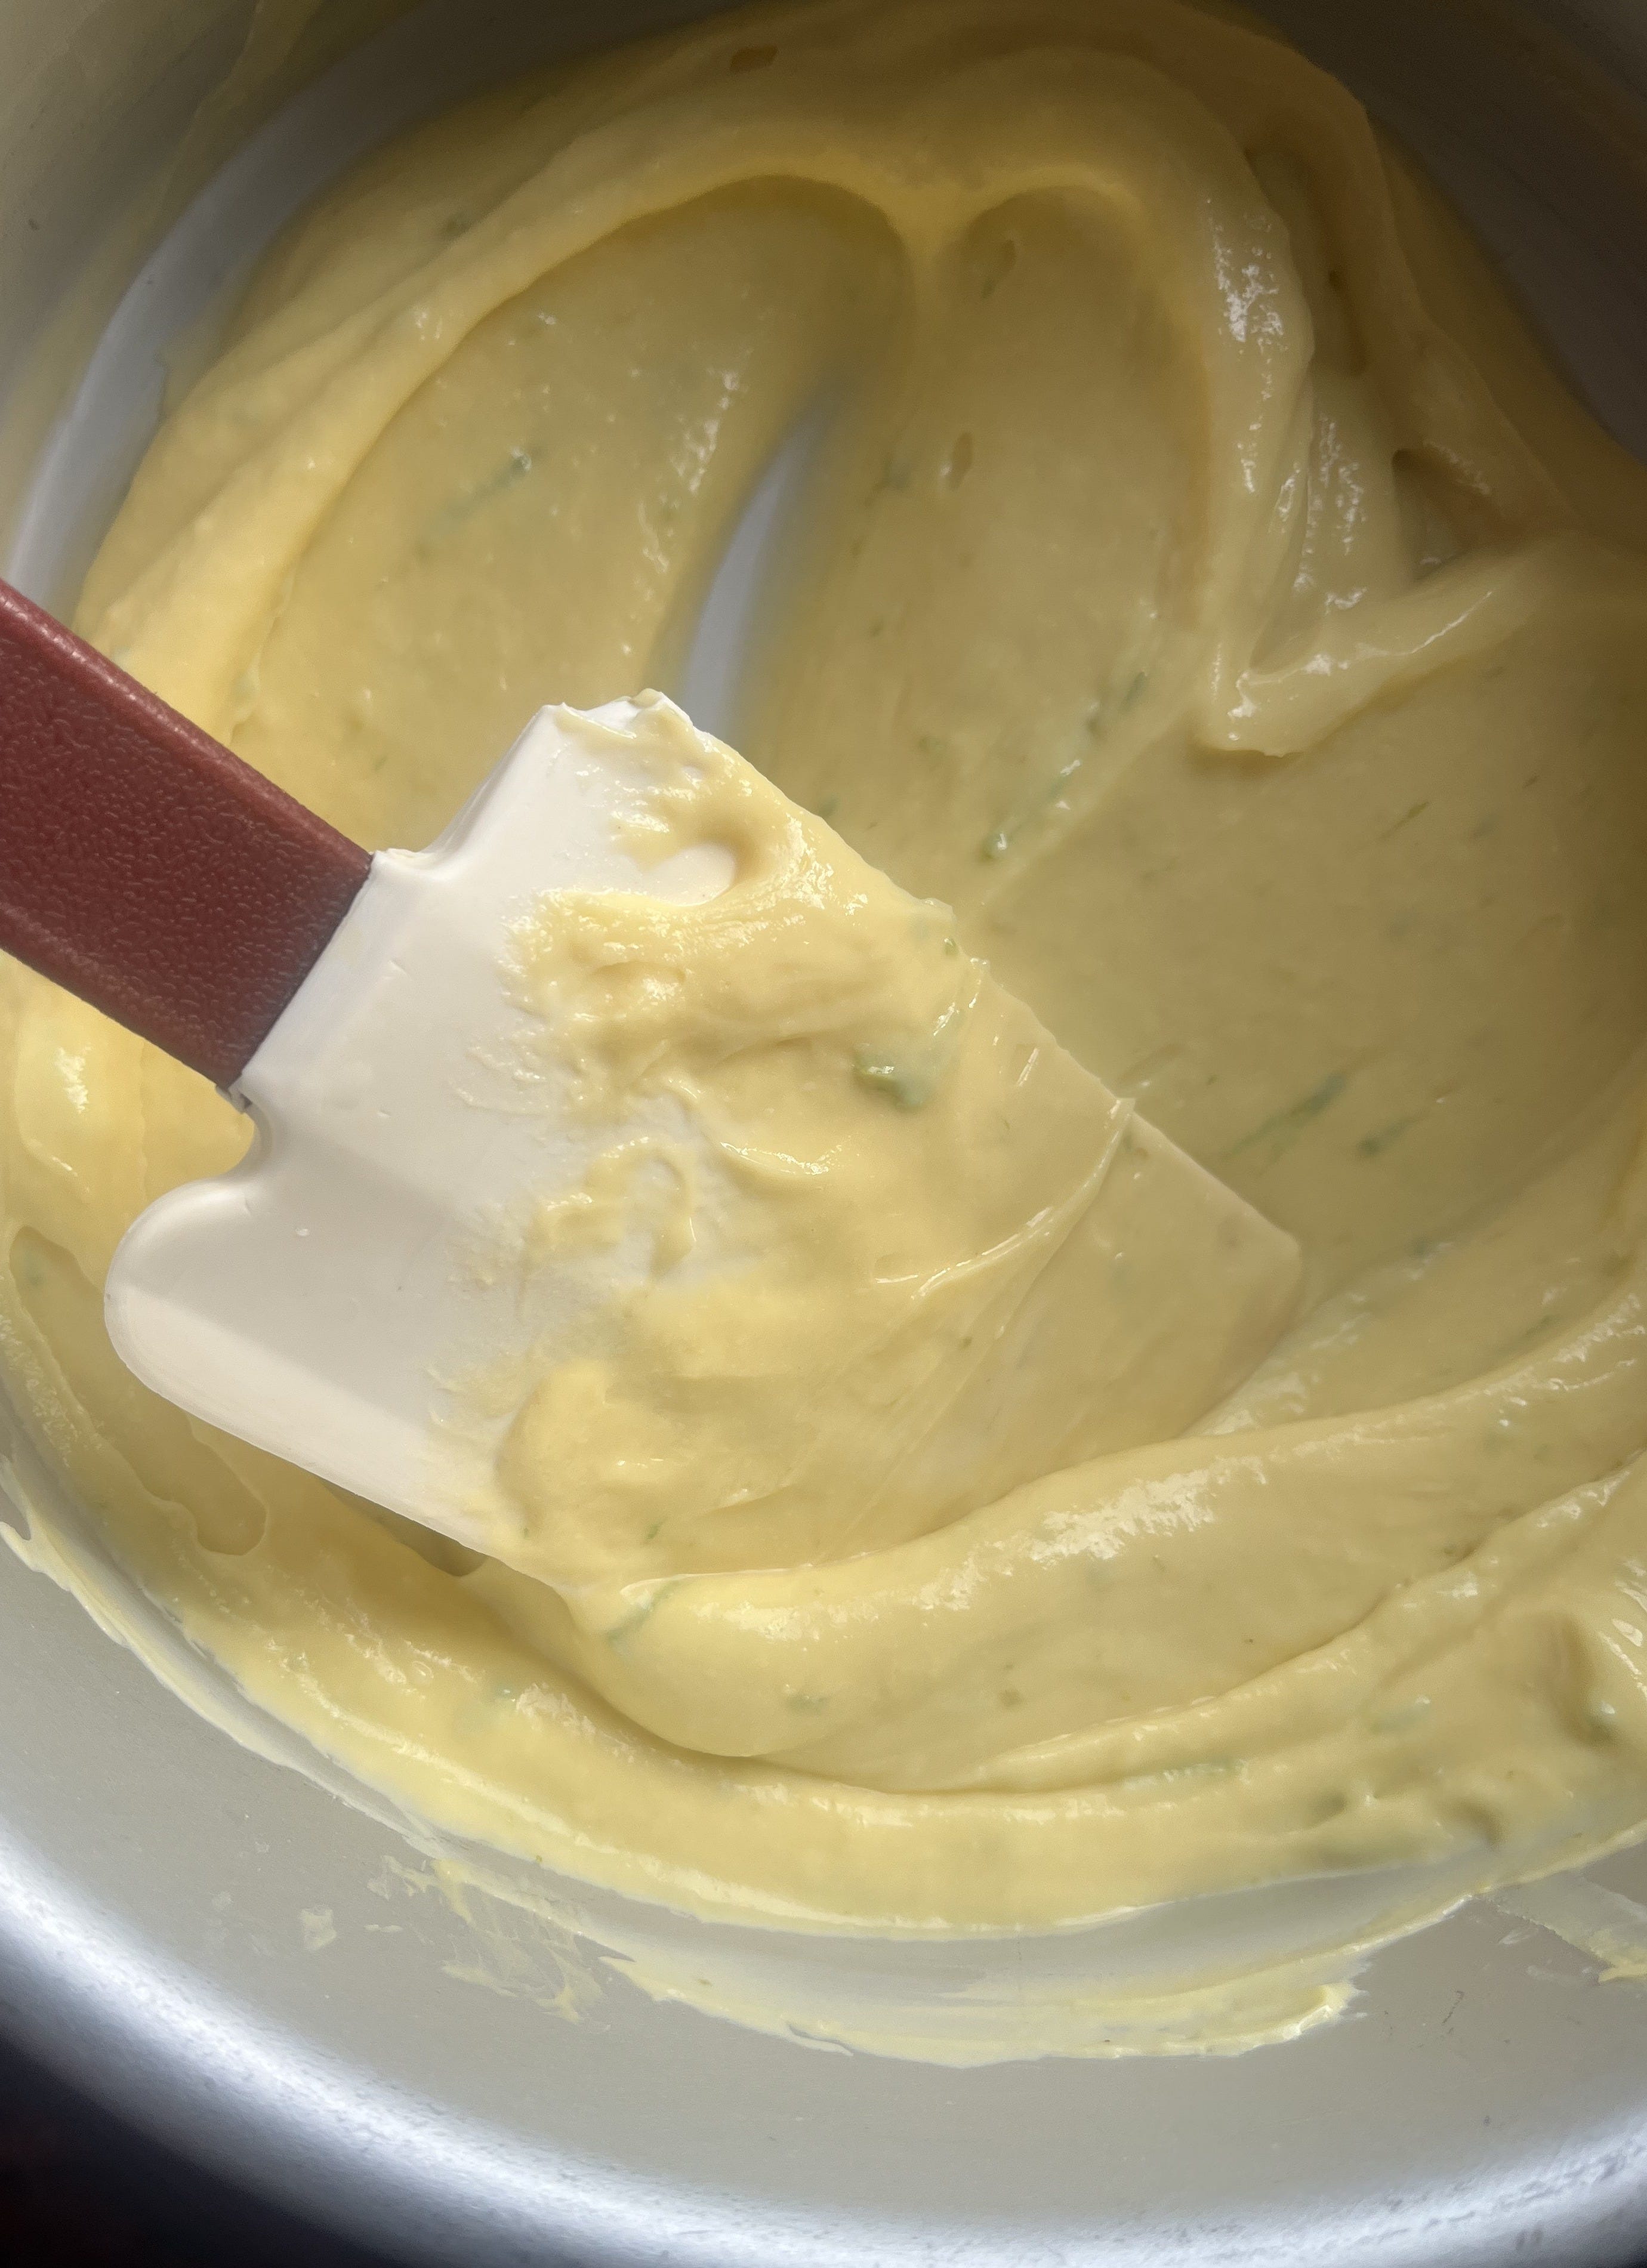
Cream Cheese German Buttercream
German-style buttercream relies on a base of pastry cream, which then has soft butter whipped into it. Here, we substitute some of the butter for cream cheese. The buttercream can be made ahead and re-whipped - you’ll just need to bring it up to cool room temperature first.
Ingredients
100 g / ½ cup granulated sugar
20 g / 2 tablespoons cornstarch
¼ tsp salt
240 g / 1 cup whole milk
36 g egg yolks (from about two eggs)
1 tablespoon vanilla bean paste
340 g / 3 American-style sticks of butter, cool room temperature, divided
225 g / 8 ounces cream cheese, cool room temperature
30–60 g / 2tbsp - ¼ cup confectioner’s sugar
A few drops orange blossom water
Pinch citric acid (or a few drops of lime or lemon juice)
Method
Whisk the sugar, cornstarch, and salt together in a small non-reactive pot. Add the milk, egg yolks (these can be straight from the fridge), and vanilla bean paste and whisk until well combined. Set aside 2 tablespoons / 28 grams of the butter.
Place the pot over medium heat. Cook, whisking constantly, until the mixture just begins to bubble. Cook for about another 1-2 minutes, or until the mixture is quite thick and all the powdery cornstarch flavour has cooked out. Whisk in the 28 grams of butter. Strain through a fine mesh strainer into a shallow dish, and press plastic wrap to the surface. Chill until just cool (this will happen quite quickly if you pop it in the freezer).
When ready to assemble your cake, beat the cream cheese in a stand mixer with a paddle attachment at medium speed until creamy, for about a minute. Add the remaining 308g soft butter and beat it in until it is totally combined and fluffy, about another 2 minutes, scraping down the sides of the bowl frequently.
Remove the paddle attachment, scraping any butter/ cream cheese mixture off of it first, and switch to the whisk attachment. Remove the pastry cream from the fridge and give it a little stir to break it up (it will be quite thick). Add to the bowl of the stand mixer and beat it with the butter/cream cheese mixture on high speed until fully combined and velvety.
Add the confectioners’ sugar, beginning with the lesser amount, as well as the orange blossom water and beat to combine. Taste - if you like your buttercream a little sweeter, you can add the full amount of confectioner’s sugar, though I generally lean towards the lesser amount myself. You may also add an additional pinch of salt, depending on the sodium content of your cream cheese.
If your buttercream has a slack, loose appearance and texture, let it chill for twenty minutes or so and re-whip - it will come back together and be thick enough to frost. If the buttercream looks curdled or lumpy, it’s likely too cold, and needs to be warmed up a bit - see the note above for full details.
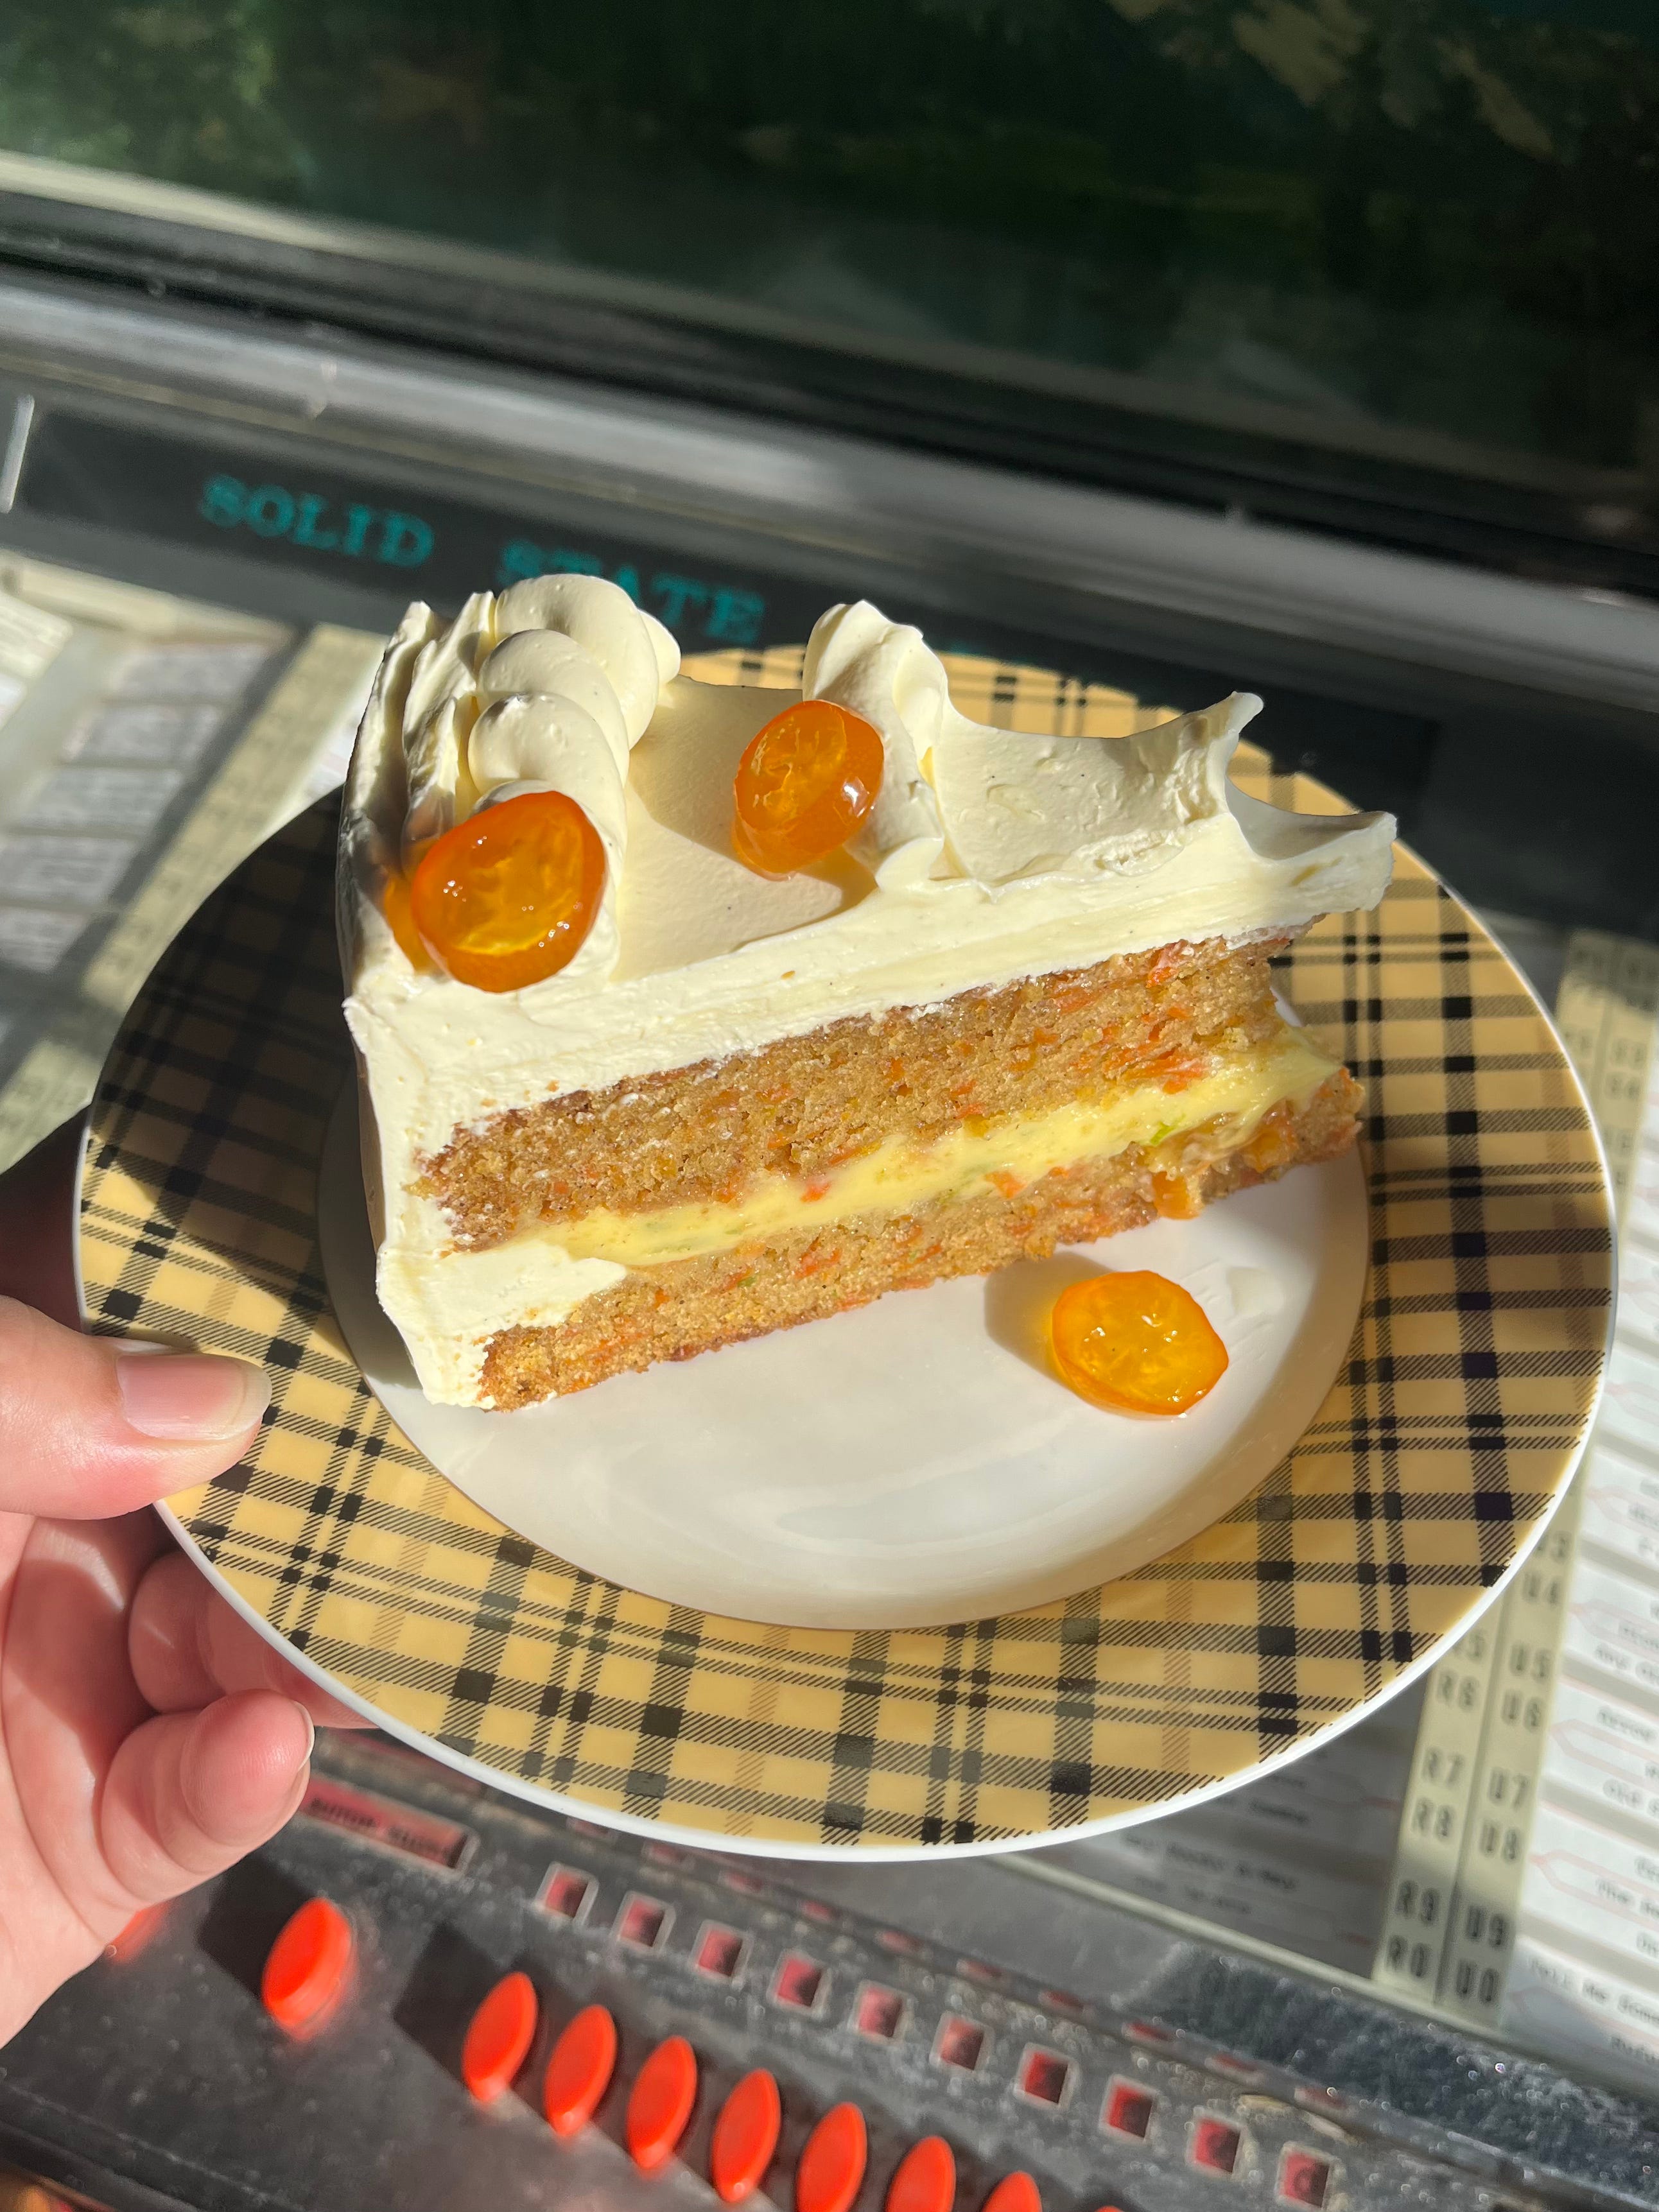
To assemble the cake
Take one of the layer cake rounds and place it on your turntable (I use an 8” cardboard round on the base to help transfer the cake from the turntable to a serving platter for presentation). Trim off the slight doming to expose the crumb. Pipe a one-inch border of buttercream around the edge. Drizzle the centre with a little of the kumquat syrup and dot it with about half a cup of candied kumquats, reserving some for garnishing the top of the cake. Scoop the cooled lime curd in the centre and spread it to the buttercream border. Chill for fifteen minutes or so to firm up the curd and buttercream. Meanwhile, trim the doming from the second cake layer.
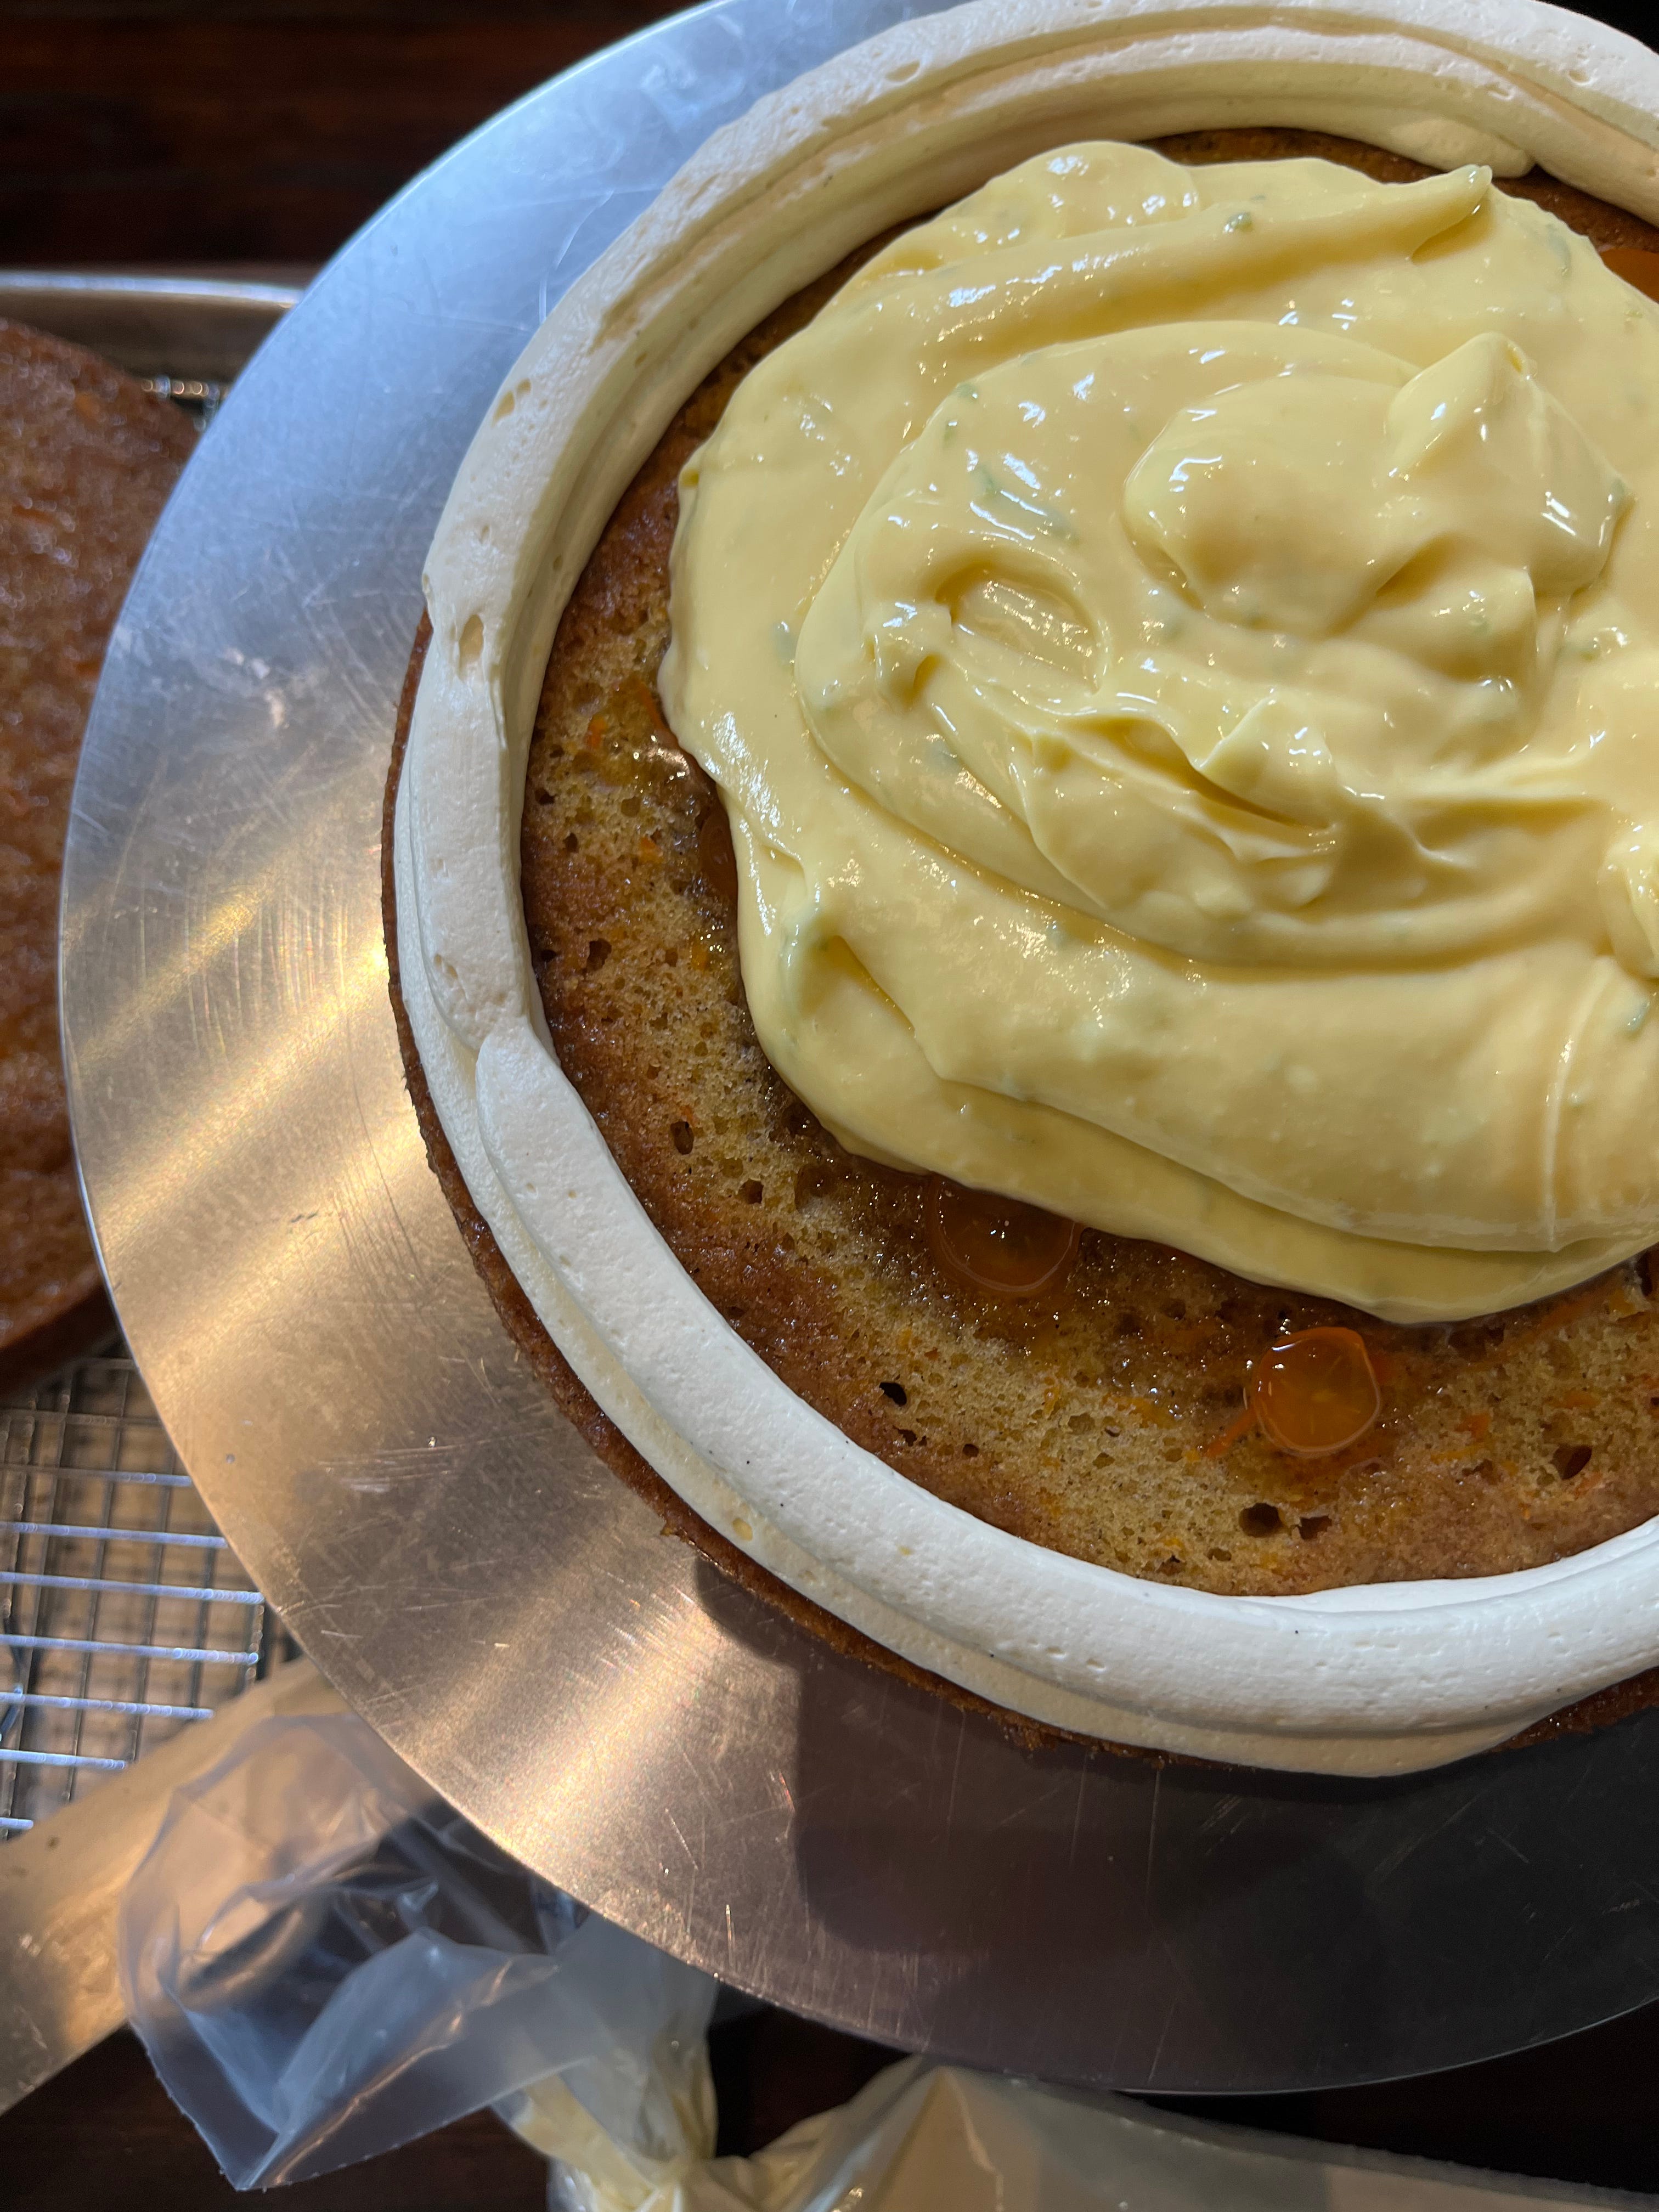
When the buttercream border is firm, top it with the second cake layer (bottom-side up to make a nice, flat surface). Crumb coat the cake and allow it to chill for another fifteen minutes or so before applying the finishing coat of buttercream. Dot the top of the cake with the remaining candied kumquats.
Keep the cake refrigerated until about an hour before serving. Remove from the fridge and allow the buttercream to temper before eating.
This looks increeeedible! I love this series! In terms of the buttercream, just wondering if Nicola would advise any changes in method given the UK/Ireland’s more temperamental cream cheese? Thanks 🧡
Gosh I love a good carrot cake and this looks wonderful, if a little impossible for me at the moment ! I will save it for when I’m back in my kitchen !