Hello,
Welcome to today’s edition of Kitchen Projects. Thank you so much for being here.
I’m so excited for today’s newsletter. It’s been in the works for months, and I’ve just been waiting for the right time to publish it. Here to teach us about a total classic is Clodagh Manning, pastry chef of Lyles, London. The classic in question? Tarte Tatin. Glassy, perfect, it’s everything you could want in a TT recipe.
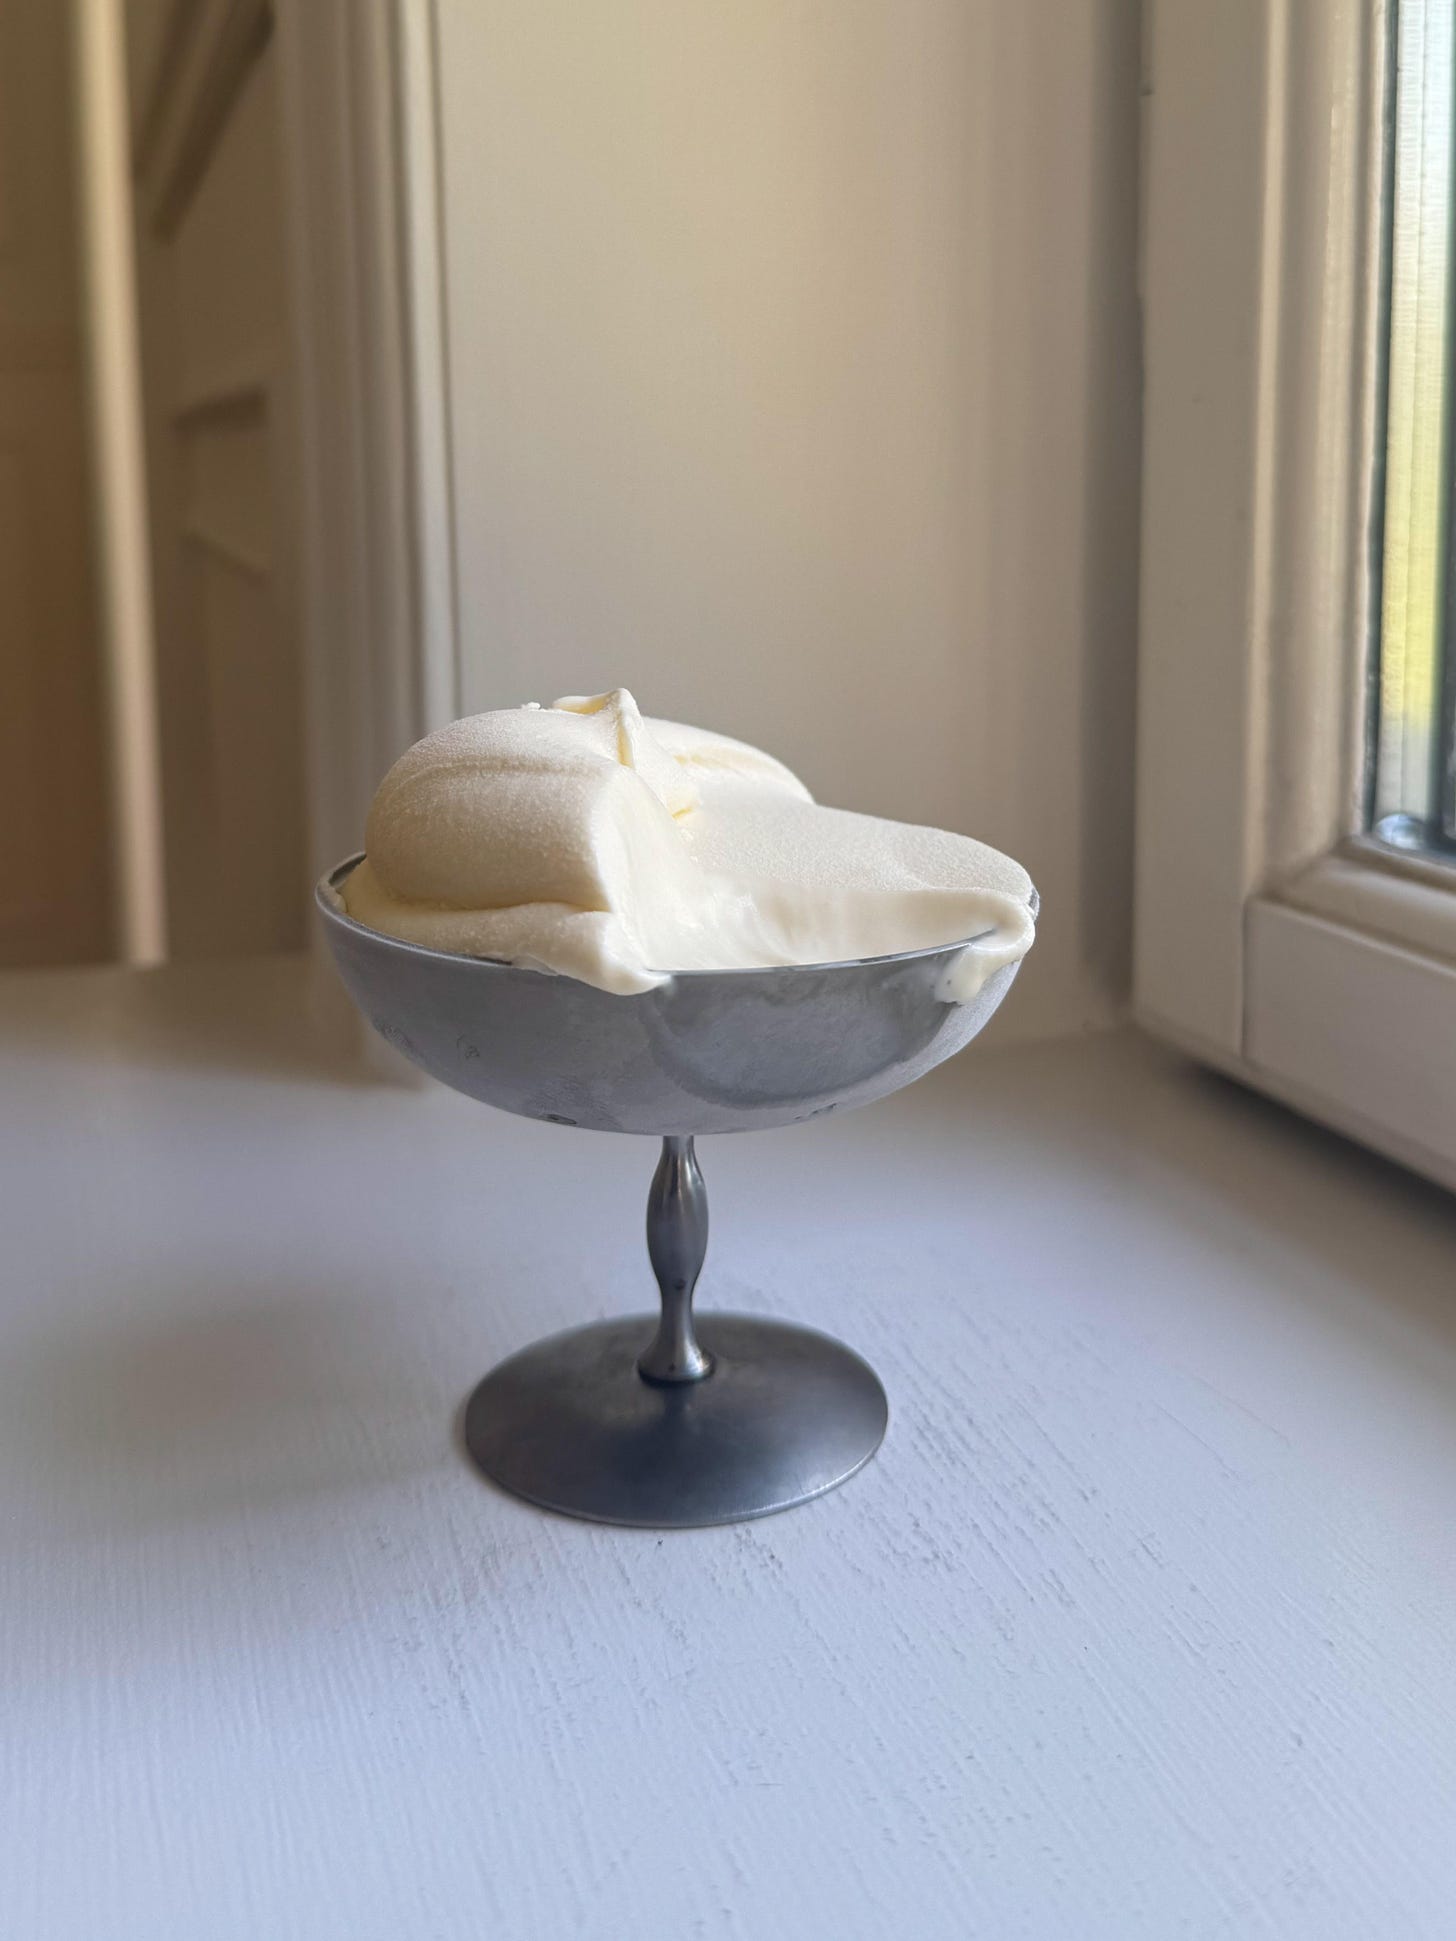
For KP+, I emailed ice cream queen Marie Havnø Frank last month to ask her what she felt would be a perfect pairing for Tarte Tatin. She replied - Amaretto. And she was right. Amaretto Ice Cream + this Tarte Tatin is actually the stuff of dreams. Click here for the recipe.
What’s KP+? Well, it’s the level-up version of this newsletter. By joining KP+, you will support the writing and research that goes into the newsletter (including the commissioning - and fair payment - of all the writers), join a growing community, access extra content (inc., the entire archive) and more. Subscribing is easy and only costs £6 per month or £50 for the whole year. Why not give it a go? Come and join the gang!
Love,
Nicola
PSSST: SIFT is out in the US in a month!
I CAN’T BELIEVE IT BUT my debut book SIFT: The Elements of Great Baking will finally be out in the US and Canada in a month. It is available to pre-order now! I’m also heading to the US on tour (click here for more info) - I can’t WAIT for you to finally get this book, and hopefully to see you soon!
Tarte Tatin
I enjoy any dessert that highlights the flavours of fruit. Above any cake or ice cream dessert, a plate of fruit reigns supreme in the hierarchy of last-bite pleasure. Its most noble form is a tart: with a crisp or flaky texture at the bottom and supple fruit or custard fillings, it brings out the best of every element within it. It's no reach then to say, with certainty that tarte tatin is one of my all time favourite, desert island desserts.
The tarte tatin is named after sisters Stephanie and Caroline Tatin, who owned a hotel in a village near Paris in the 1880s. According to one legend, Stephanie (Fanny) Tatin, while preparing apples for a tart one Sunday, left the fruit cooking a bit too long. Alerted by the wafts of smoke, she quickly covered the apples with pastry and baked it, creating the iconic tarte tatin. Another legend suggests the tart was born from an accidental fall, prompting one of the sisters to cover the smashed tart with caramel and call it a day.
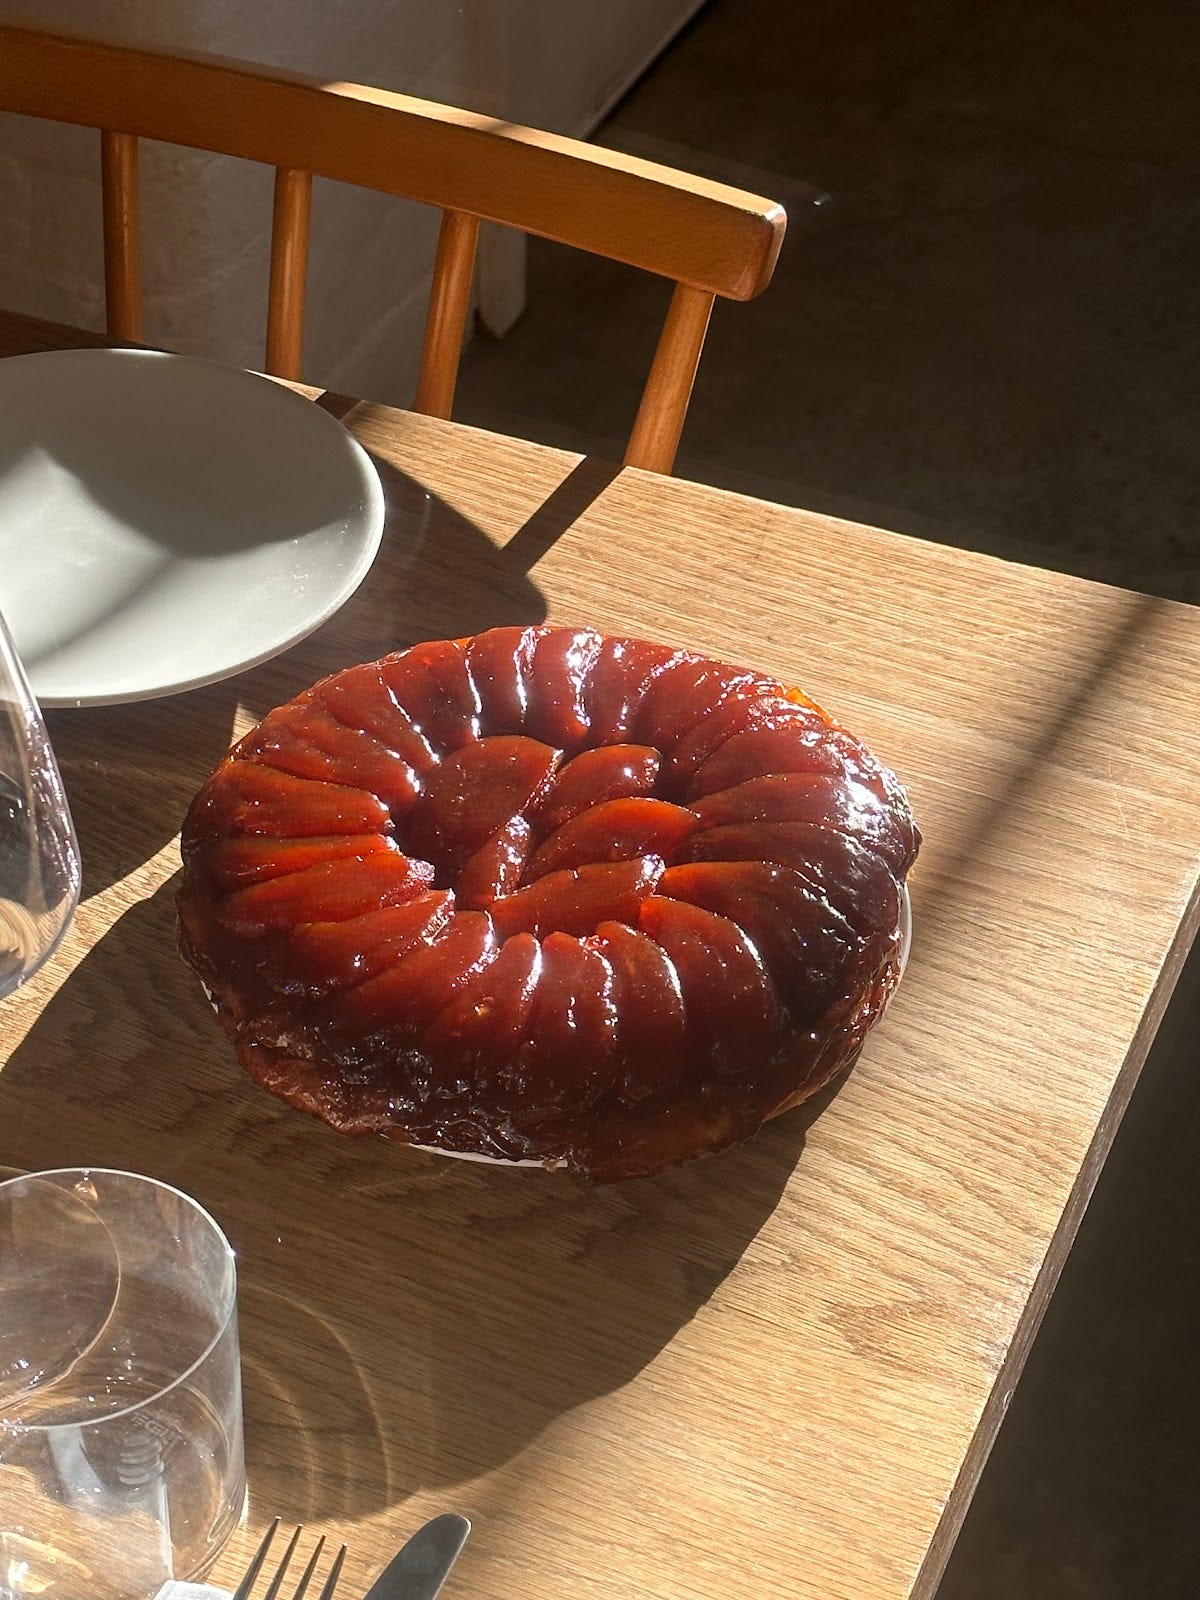
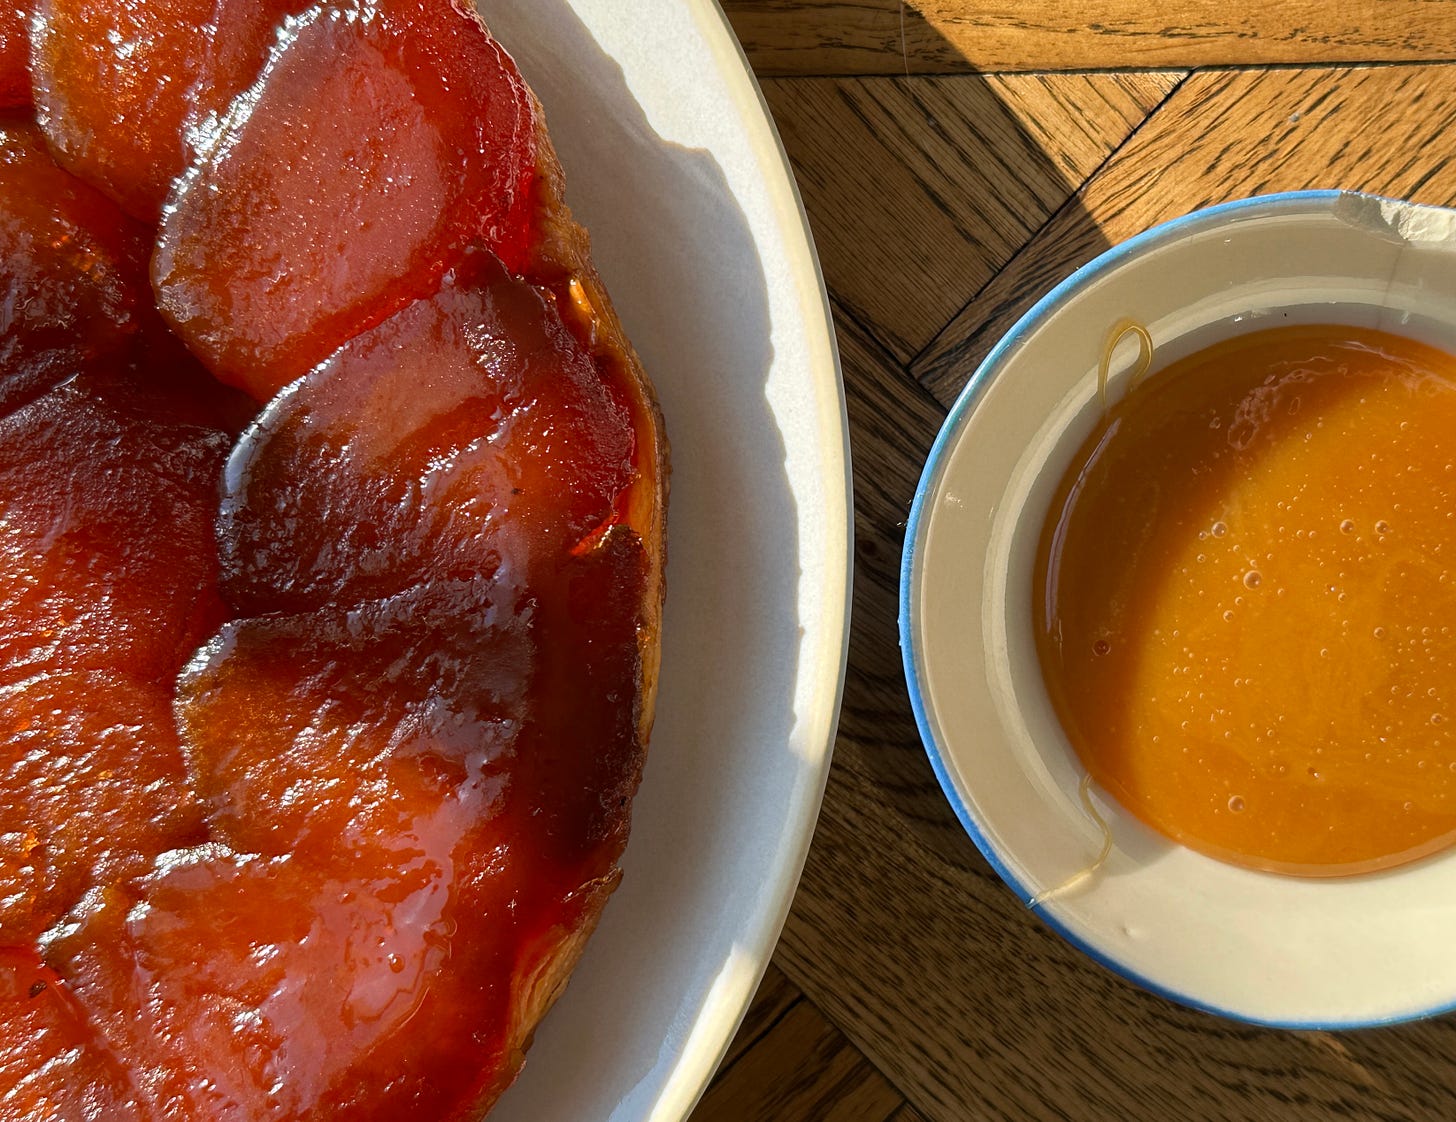
Since the 1880s, the best possible tarte tatin has featured apples that are glassy and thoroughly infused with caramel. The apples are sweet but soaked with a rich caramel that adds bitterness. The texture is equally important; the apples should have a chewy exterior and a tender, supple interior and pastry is always crisp–famously, no one likes a soggy bottom.
It is a simple dessert on paper, but proper execution relies on expert management of the many variables at hand. This is backed up by Julia Child’s comments in ‘The way to cook’, she found it tricky to make… “the caramel juices can refuse to thicken, the apples can be either so loose the tart collapses when unmoulded, or so stiff, they stick to the pan….”. I've dedicated considerable time experimenting with the many variables Julia encountered to perfect my ideal tarte tatin! This is a recipe for fruit lovers and devotees to a timeless classic- crisp pastry, sweet juicy apples and that bitter caramel topping, a far cry from the apple tarts of my irish childhood, which feature eggy cake like pastry and sweetened bramleys- also delectable.
The Elements
Characteristic of Gallic cuisine, the tarte tatin spotlights fruit rather than pastry. Originally, the tarte tatin was crafted with two regional apple varieties: Reine des Reinettes (Pippins) and Calville. Over time, more commercially available varieties, such as Braeburn, Granny Smith, and Gala, have replaced these heritage varieties. For fun, the tarte tatin can also be made with other fruits or vegetables, including pears, bananas, quinces, peaches, pineapple, tomatoes, or even onions.
Most published recipes feature one of two pastry options; shortcrust/pâte sablée or puff pastry, which both have their selling points. Shortcrust pastry, with its resistance to soaking up apple juices, ensures a fully and evenly cooked base, even where it touches the juicy apples. Puff pastry, due to its airy texture, feels lighter on the palate. This contrast with the decadent caramel-soaked apples is delightful.
In my tarte tatin recipe, I opt for a flaky American pie dough. For me this pastry has the best of both; bite and body as well as flake. A crucial point is that pastry should, where possible, be made with well-sourced, freshly milled flour. I use 100% Landrace Milling soft Winter Red Lammas in my pastry, which works beautifully. But since heritage wheat flours can be hard to find in a fine, sifted variety, using commercially produced white flour mixed with 20-25% of a heritage grain like emmer or einkorn provides a decent alternative. Tarte tatin uses so few ingredients, so it's essential to make sure they are of the highest quality whenever possible.
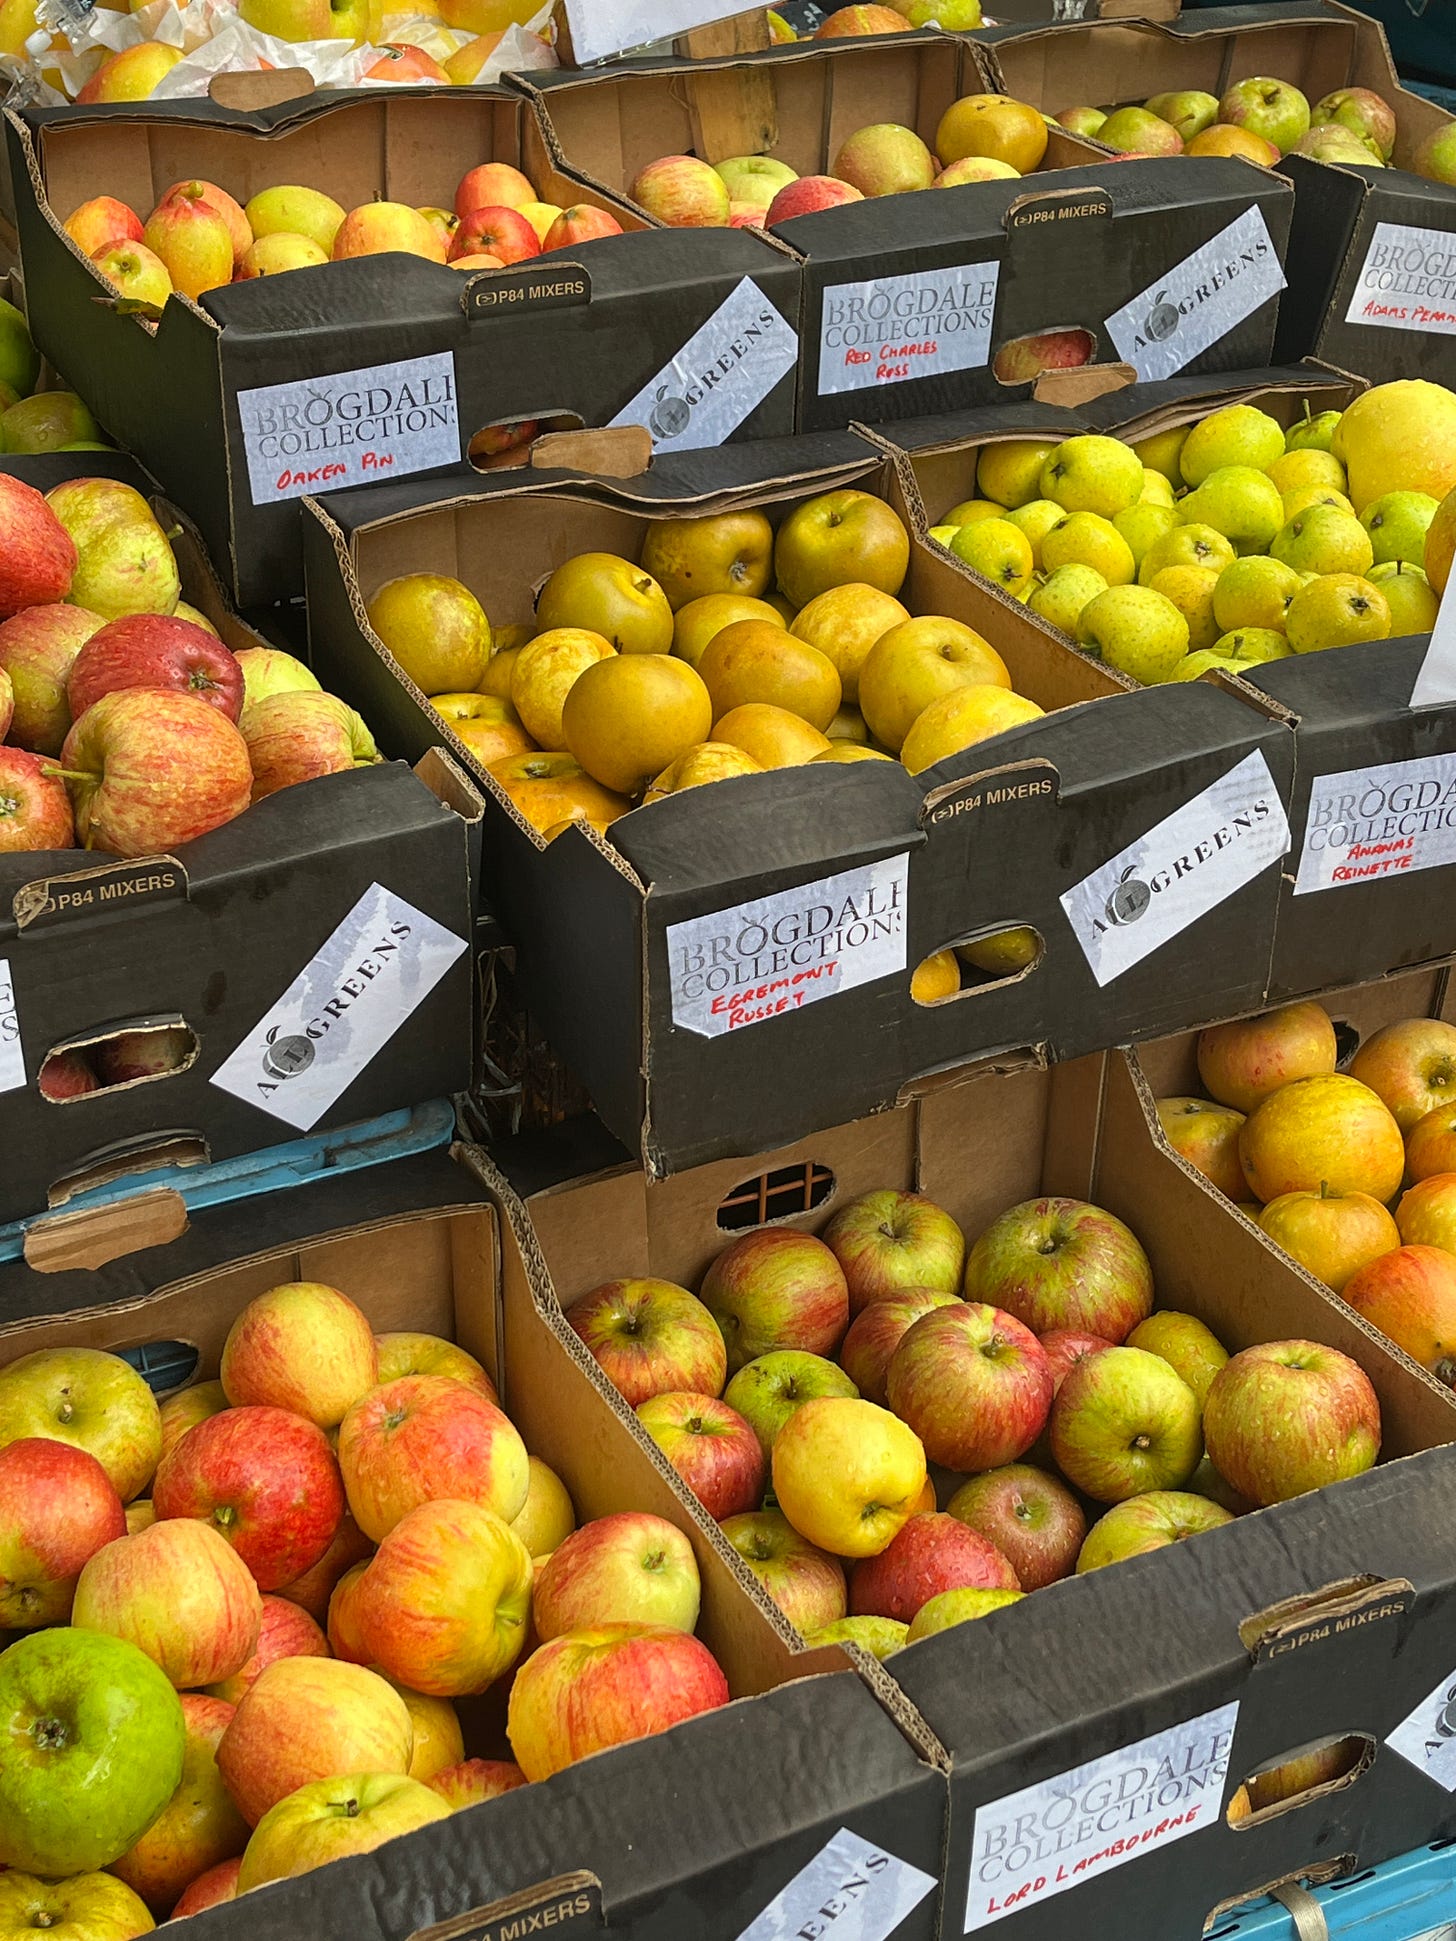
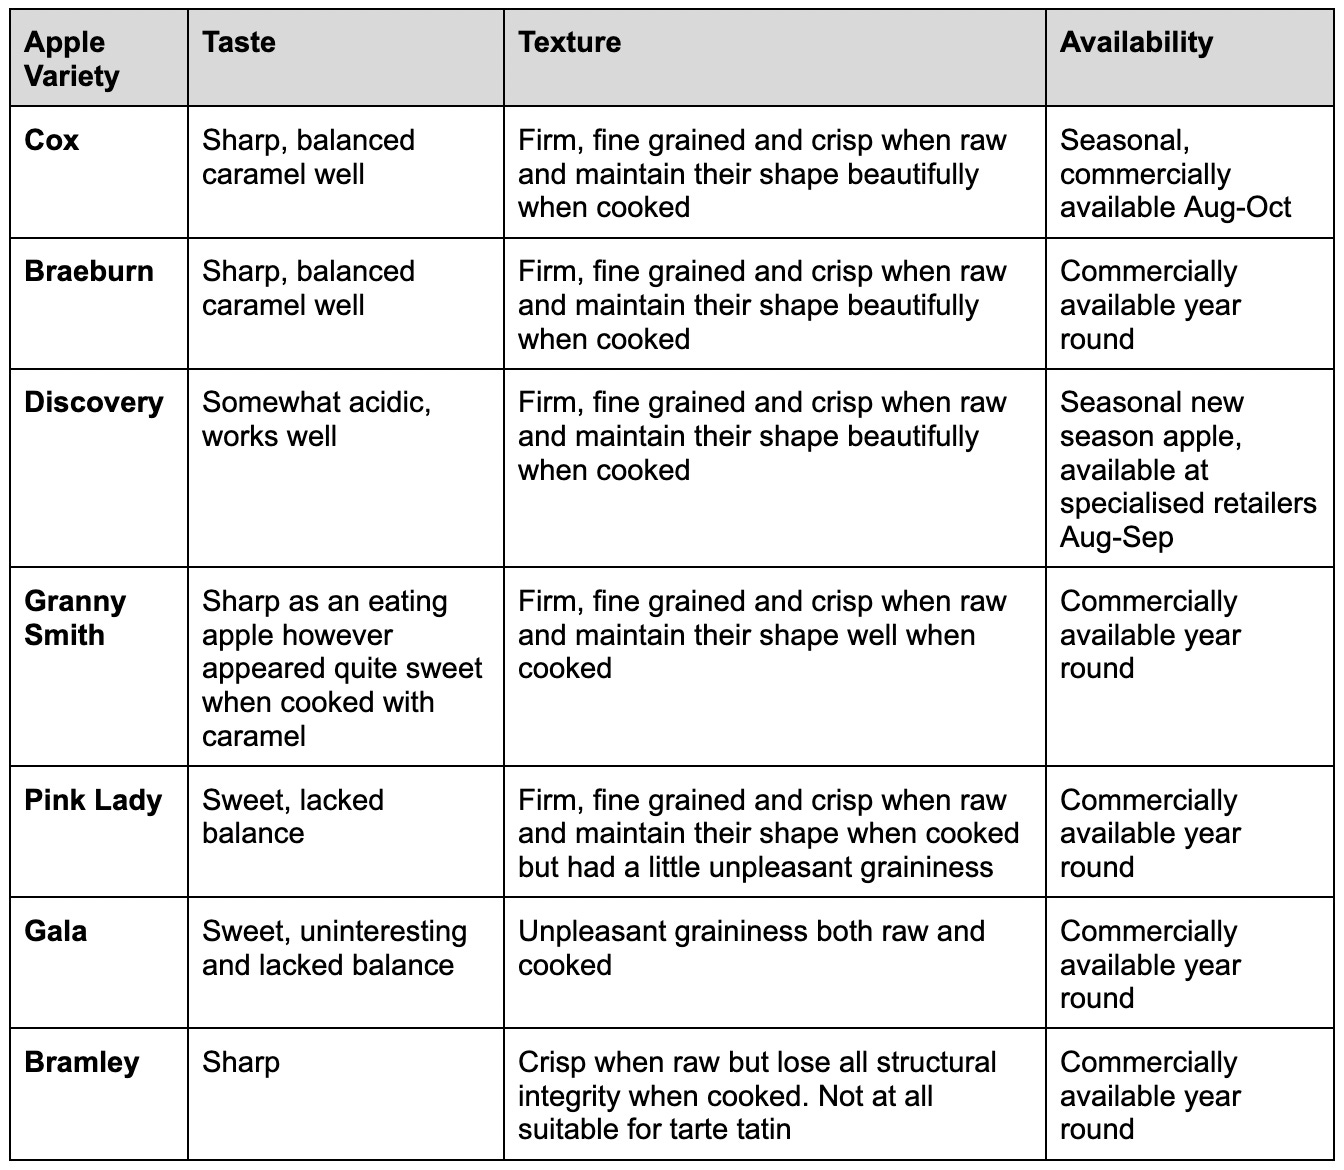
Another very important sourcing mission.. Choosing the correct apple. This time of year we are spoiled for choice. Great green grocers will source the best of what's available any given week, so throughout the season their offering will change. My advice would be to pick up the fruit (if allowed!!) and feel for weightiness because density=juice=flavour. My second tip is to taste the fruit. Some grocers will be happy to provide samples, otherwise I will buy a couple of apples to try before committing to my bounty. The ideal apple for tarte tatin should be crisp, dense and juicy with well balanced acidity. I’ve devoted space on the table below to more commercially available “household apples”, which are accessible to more people, especially if you choose to make this recipe... (gasp!) out of season. Honourable mentions go to some heritage favourites of mine which I am lucky to be able to access through my job: deljonca, dalliclass & santana. Apples have such fun names!
Shapes & Assembly:
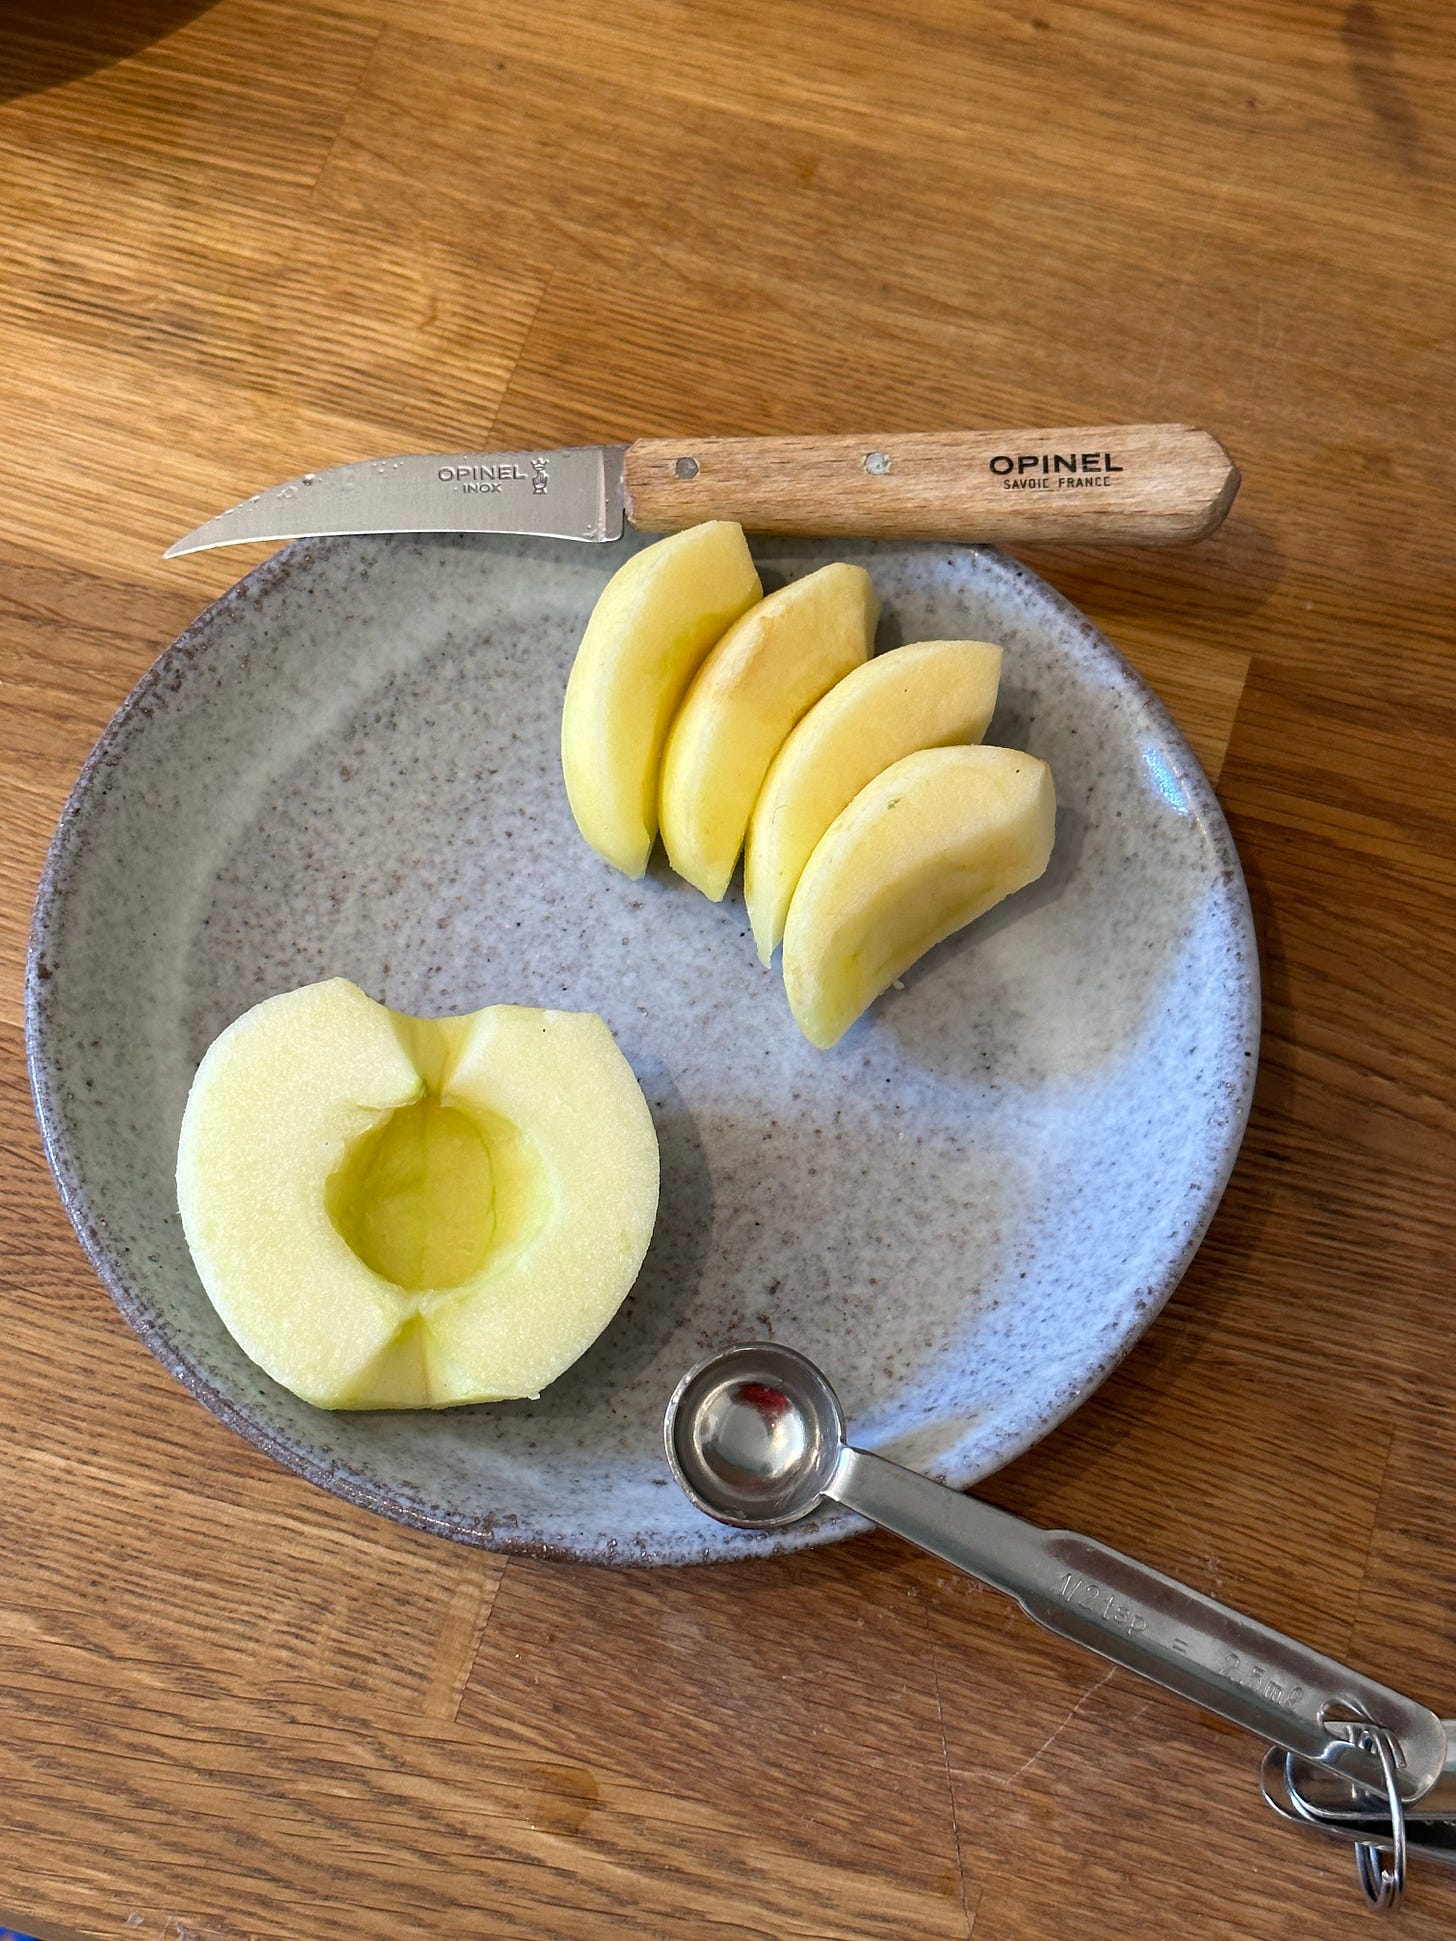
The shape of the apples is entirely up to the baker. Personally, I prefer quartering my apples and carving out the pips with a turning knife. Some people choose to simply halve the apples and use a measuring spoon or corer to remove the core.
I opt for quarters because they allow me to pack as many apples as possible into the tart. Using halves can leave gaps in the tart, which, as a fruit lover, makes me anxious! I find that halved apples also take longer to cook and with greater distance to travel, the caramel struggles to make its way into the centre of these larger apple halves, leaving us with pale centres to the apples. This fault is mainly cosmetic and if this happens to you, please be assured that your tart will still taste great!
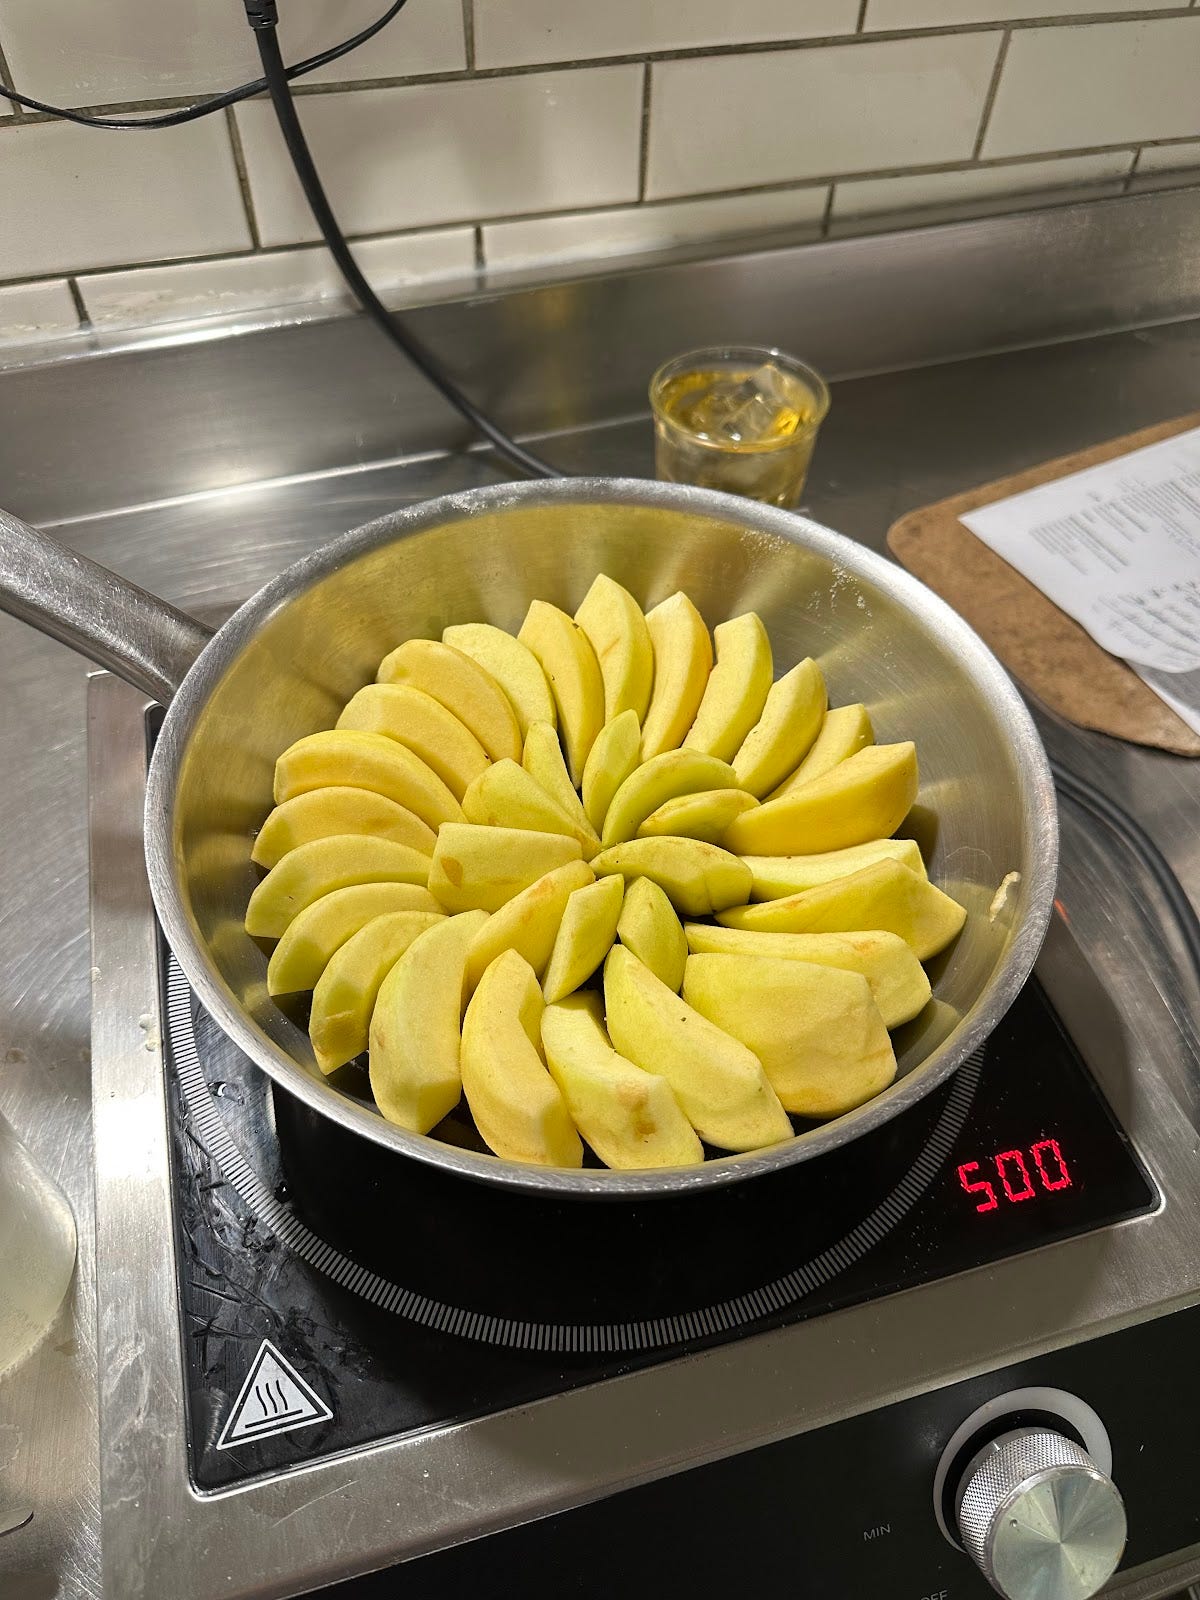
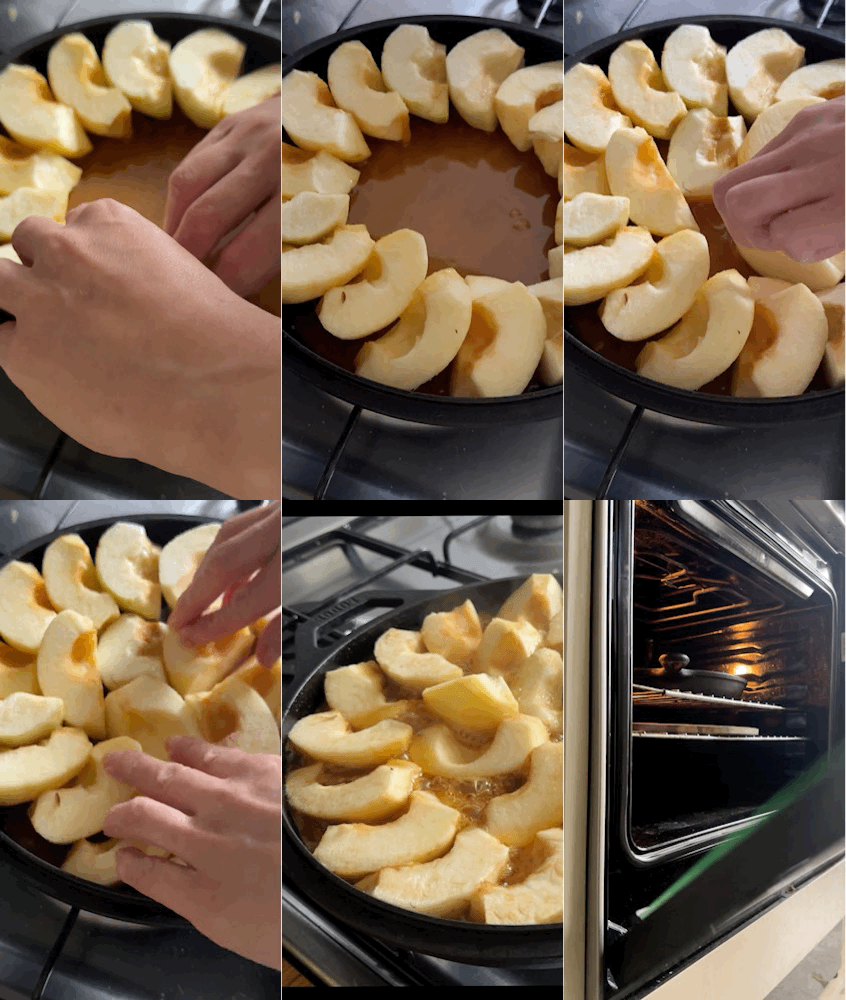
Below, I have included depicting apple assembly. Credit to my friend Tom who taught me almost everything I know about tarte tatin, including how to create this beautiful arrangement!
Method head to head
Although the most basic recipes involve adding apples, sugar, and butter to a baking pan, covering with a pastry lid and whacking it directly in the oven, I prefer to start with a caramel sauce and apples on the stovetop, then move the pan to the oven for further cooking before adding the pastry. The oven provides an indirect heat that helps soften the inside of the apples and encourages the coveted fully caramel-soaked apple. I find that after 25-30 minutes at 160°C the apples are fully cooked and saturated with caramel.
Method 1: All in One
Apples were caramelised in the pan, moved to the oven for cooking and while hot, topped with a pastry disc and the entire tart baked.
The quickest, most simple to execute and totally acceptable in a pinch. The results are delicious but a bit more rustic than the other tests. The apples had no time to conform to the shape of the pan, so once turned they slip and slide. Caramel soakage is minimal, resulting in apples with pale interiors, far from the coveted glassy apple we're after. Additionally, the caramel quantity is reduced because the tart goes into the oven hot and already caramelised. However, if you adament a quick tarte tatin, you can adjust for this by taking the caramel slightly lighter during the stovetop stage.
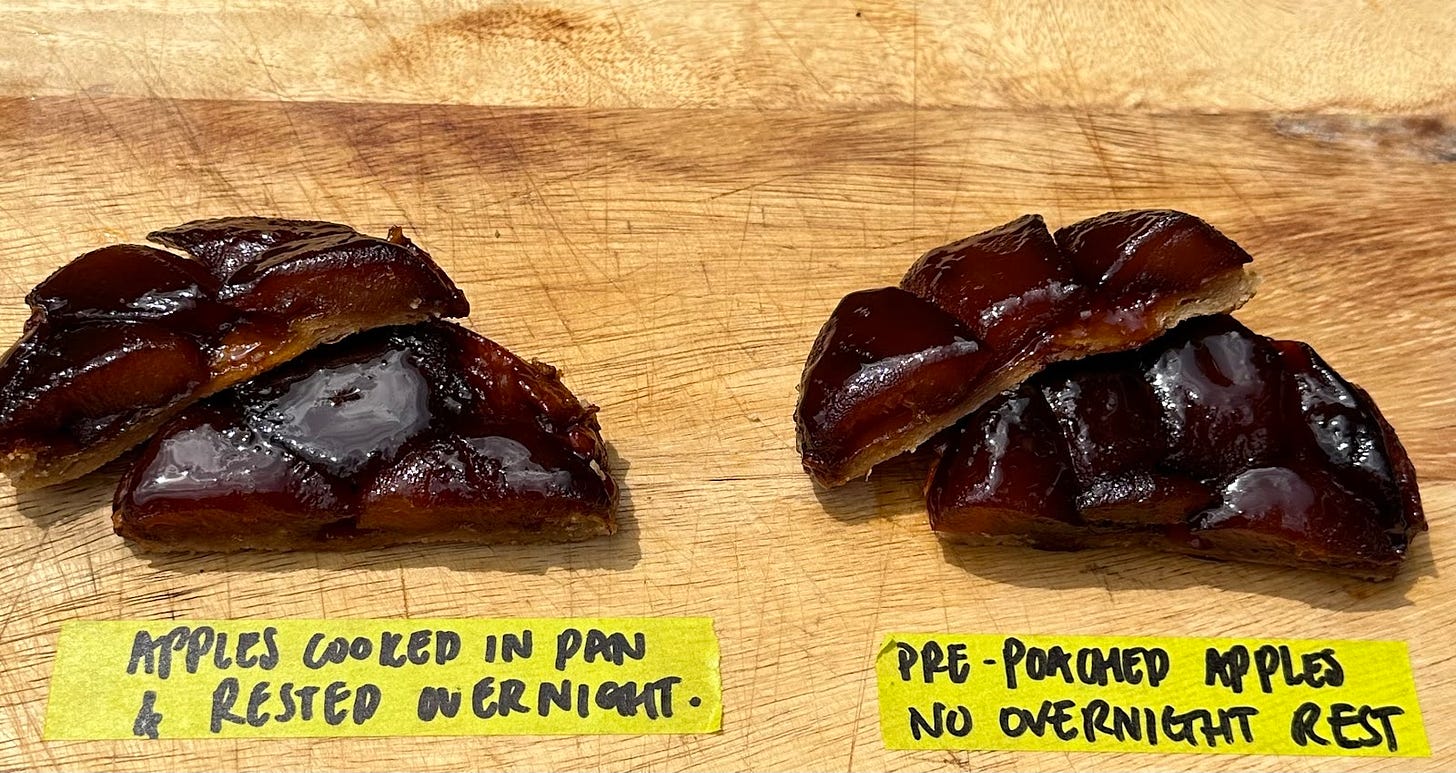
Method 2: Drying overnight
Here, apples were prepped and dried overnight uncovered in the fridge. The next day apples were caramelised in the pan, moved to the oven for cooking, topped with a pastry disc and baked.
As emphasised by Julia Child, managing the liquid levels of the tart can be challenging. Snooping on the internet I came across a technique by Gordon Ramsay which involves drying the prepared apples overnight before assembling and cooking the tart. The idea is that moisture loss in the apples overnight helps mitigate a sloppy tart. This extends the project by a day, which is quite the faff, but is the extra work justifiable? In my case, the apples formed a seal on their surfaces, acting as a barrier against the caramel, resulting in pale interiors in the finished tart. However, the texture was beautiful, the apples chewy around the outside and collapsing on the inside. Although delicious, I found this technique to be unnecessary. pain-free way of preventing a soupy tart is by choosing the correct apple - if you’re unsure, please reference the table above!
Method 3: Poaching the apples
Apples were poached in a caramel syrup, removed and added to caramel sauce, topped with a pastry disc and the entire tart baked.
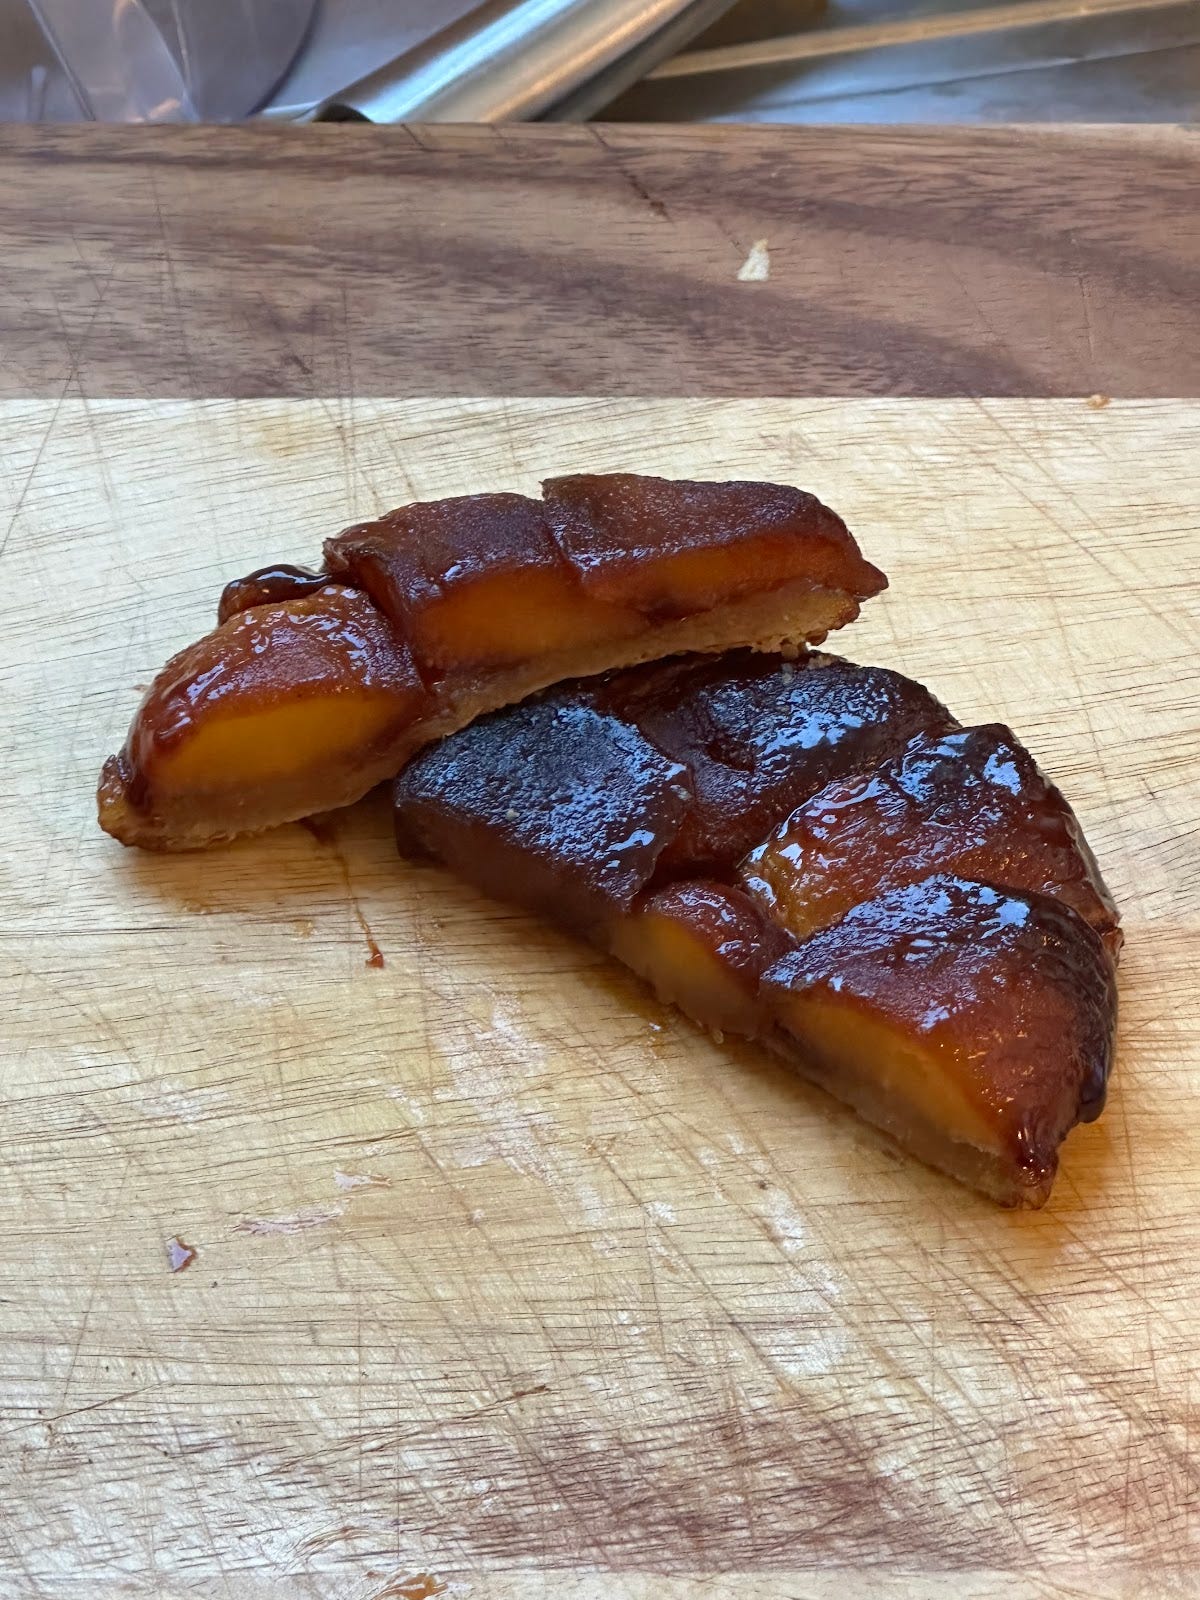
I have struggled in the past with packing the fruit tightly enough to achieve that beautiful, full tart we all covet. Apples shrink during the baking process, which can leave dreaded gaps. A method by French pastry chef Christophe Michalak helps us jam-pack the tart with fruit; in his recipe, apples are poached in butter, water, and sugar syrup before baking them in the oven. Poaching the apples makes them softer and more malleable, allowing you to pack them tightly in the pan and minimise the chance of a sparse tarte tatin. This technique results in apples completely saturated in caramel, with an even colour throughout. However, the apples were soft throughout and lacked the chewiness I enjoy. The apples also lost a little of their own flavour throughout the poaching process and so instead of getting both apple and caramel on the palate, the caramel dominated in a way that I found less interesting.
Method 4 Overnight Rest in Caramel
Apples were caramelised in the pan, moved to the oven for cooking, chilled in the pan overnight. The following day they were topped with a pastry disc and the entire tart baked.
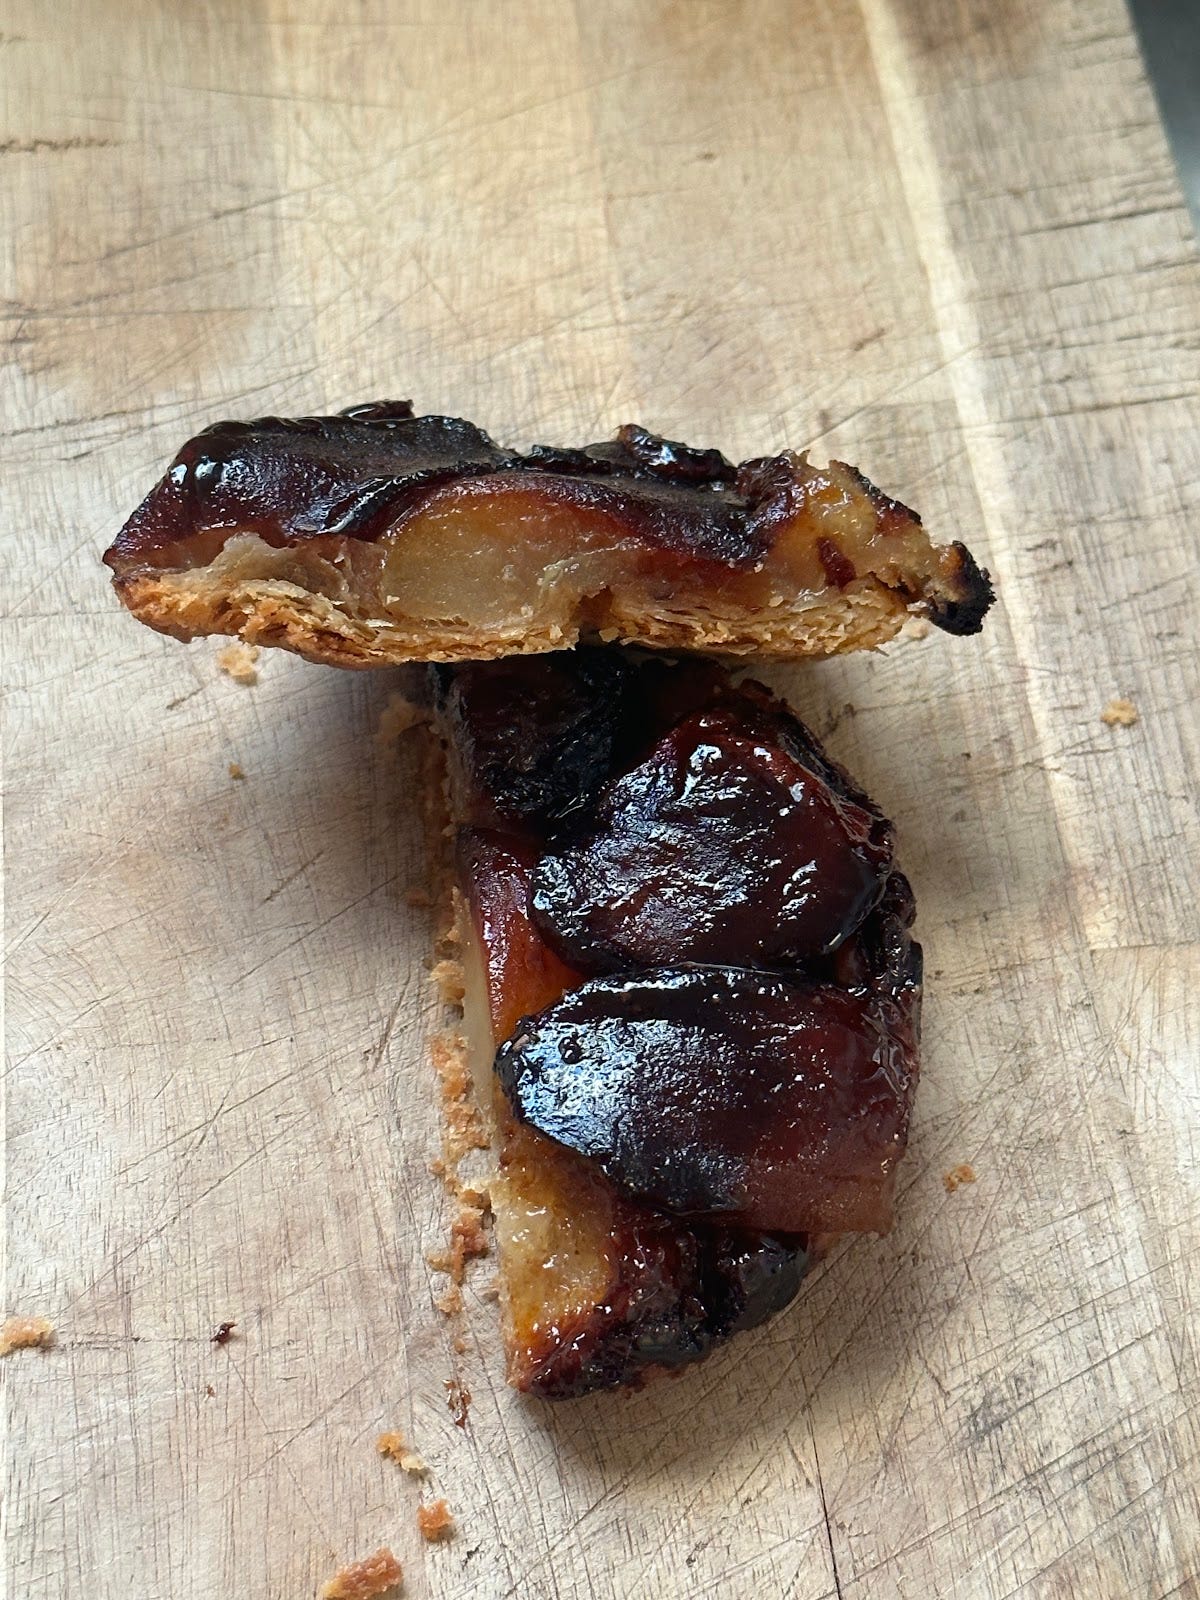
Here, allowing the apples to rest in caramel encouraged them to continue soaking up caramel and settle into the pan, moulding to its shape. The result is a beautiful, cohesive tart with great colour on and throughout the apples. The direct heat from the stovetop caramelisation imparts an irresistible chew, almost candied finish on the outer edges of the apples, while the centres remain lush.
Chilling the tart overnight also means that when the pastry gets added to the top, the entire tart hits the oven in a chilled state. This is essential in achieving those layers characteristic of flaky pie dough! Furthermore, chilling the caramelised apples gives us more colour control. The chilled apples will be coming back to temp during the final bake and will pick up little colour. This means that the majority of carmelisation is done with the lid off, when we can actually see the apples.
The caramel
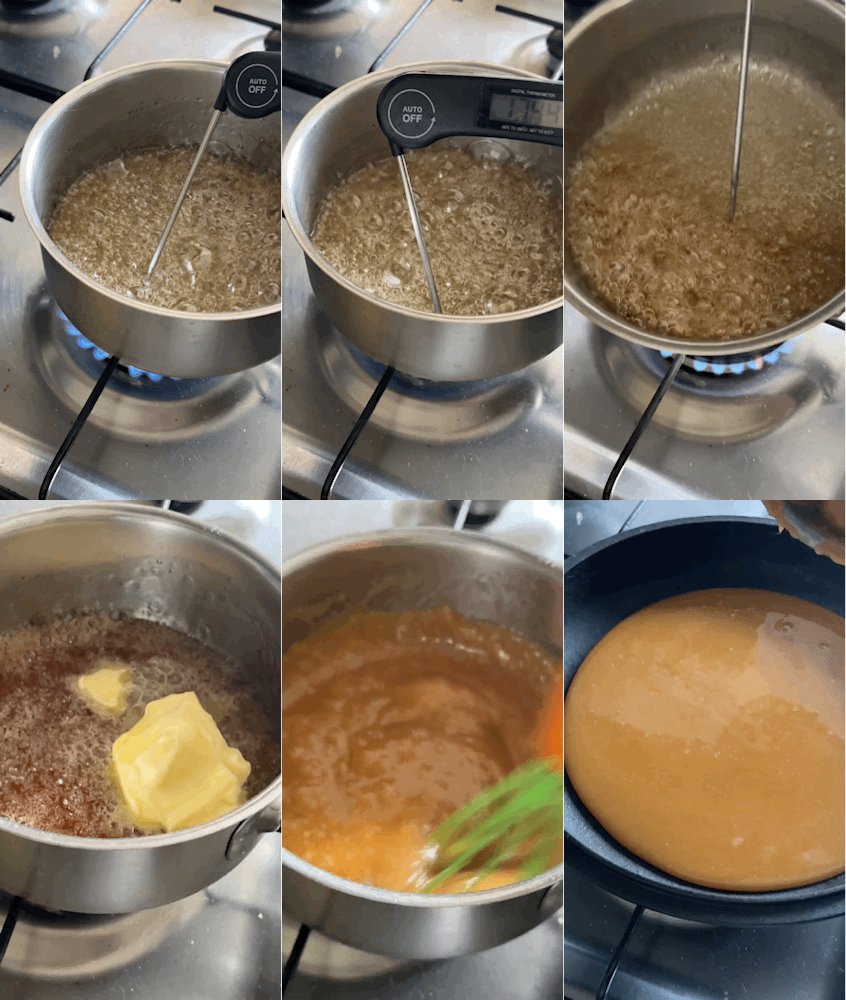
During testing, I experimented with sugar-to-butter ratios and settled on a 4:1 ratio of white sugar to butter as the gold standard. This provides enough fat to make the tart feel decadent without overwhelming the palate. We want to be able to taste those beautiful apples after all!
I prefer using regular caster sugar for this recipe, but to enhance the caramel flavour, you can replace one-third of the white sugar with dark brown sugar, coconut sugar, or panela. For a dairy-free option, coconut oil works wonderfully. I prefer taking the caramel sauce quite dark (see pic) because the bitterness adds a nice balance to the final dish, but this is entirely up to the baker's discretion.
Just know that as the apples cook in the caramel, the colour will darken. You can use temperature (see recipe below) or rely on visual cues to find your perfect shade of caramel. I find making caramel in a white or enamel pan makes it easier to judge. I also like to make my caramel in a separate pan and transfer to the tarte tatin pan to avoid splashes up the sides.
Flavouring / spicing
Although my favourite way to enjoy tarte tatin is unadulterated, with just apple cider vinegar and salt for seasoning, adding flavourings is an option for those seeking more. Calvados and vanilla are classic choices. A more local option, woodruff would work well infused into the caramel.
Over on KP+: Amaretto Ice Cream
Ice queen Marie Havnø Frank has developed a recipe especially to pair with Tarte Tatin: Amaretto Ice Cream. It truly is a glorious pairing.
Recipe: Tarte tatin
Equipment: 10 inch stainless steel pan but cast iron will also work
Serves 10
Time:
Day 1: 1 hour active + overnight rest (or ~6 hrs)
Day 2: 1 hour + 1 hour rest
Ingredients:
6-8 Braeburn or seasonal apples (quartered and cores removed, see gif)
250g sugar
65g cold butter
1 tsp apple cider vinegar
Pinch Maldon
Plus:
11 inch round of pie dough, rolled 3-5mm
Method:
Pre-heat your oven to 160c fan.
Set a small saucepan over medium heat and add sugar along with 2-3 tablespoons of water and ensure there are no sugar crystals on the edge of the pan. Cover with a lid for the first 5 minutes to help prevent crystallisation - a small pan will also help. Heat and allow the sugar to caramelise until it reaches a medium amber colour of 185°C. The colour of your caramel will darken several shades during the tart tatin making process, so be aware of this when judging the colour. Remove from heat, then add butter, salt, and vinegar, and stir or whisk until smooth and emulsified.
While hot (it will begin hardening very quickly) transfer the caramel sauce to the tarte tatin pan and arrange the apple quarters in concentric circles, starting with the outer ring. [Editors note: The way you place your apples will have a significant impact on the final look of the tart - if you put it cut side down, hugging each other like in Clodagh’s photo earlier in the piece, then the tart will be taller. If you put it more rounded side down, as I do in the GIF below it will have a more circular but flatter final look!) Press gently with your hands to ensure there are no gaps. Return the pan to the heat and cook for 10 minutes on low, or until the apples begin to saturate with caramel and start to release liquid.
Move the pan to the oven and cook for an additional 25-30 minutes at 160°C, or until the apples are fully cooked (soft and tender) and the caramel has soaked into most of the apples. The top of the apples will look a little dry on top, but the edges should be turning translucent. Allow the pan to cool, then transfer to the fridge and chill the tart overnight or for a minimum of 6 hours so the caramel seeps into the apples.
The next day, preheat the oven to 180°C fan. Cover the tart with pastry, tucking it around the edges, and prick it with a fork. Bake for 30-40 minutes, or until the pastry is puffed and crispy.
Allow the tart to cool at room temperature for about an hour before demoulding. This helps set the apples in place - if you turn out sooner, the apples may slide off. You can risk it, but you have been warned.
To demould, return the pan to the heat for about 60-90 seconds until the very bottom layer of caramel has warmed again, then turn the tart onto a plate, apple side up. You can tap on the base of the pan to help it release. Optionally, brush with a little caramel or simple syrup for extra shine. Once demoulded, you can gently rewarm the whole tart or individual slices in a 150c oven for 10 minutes.
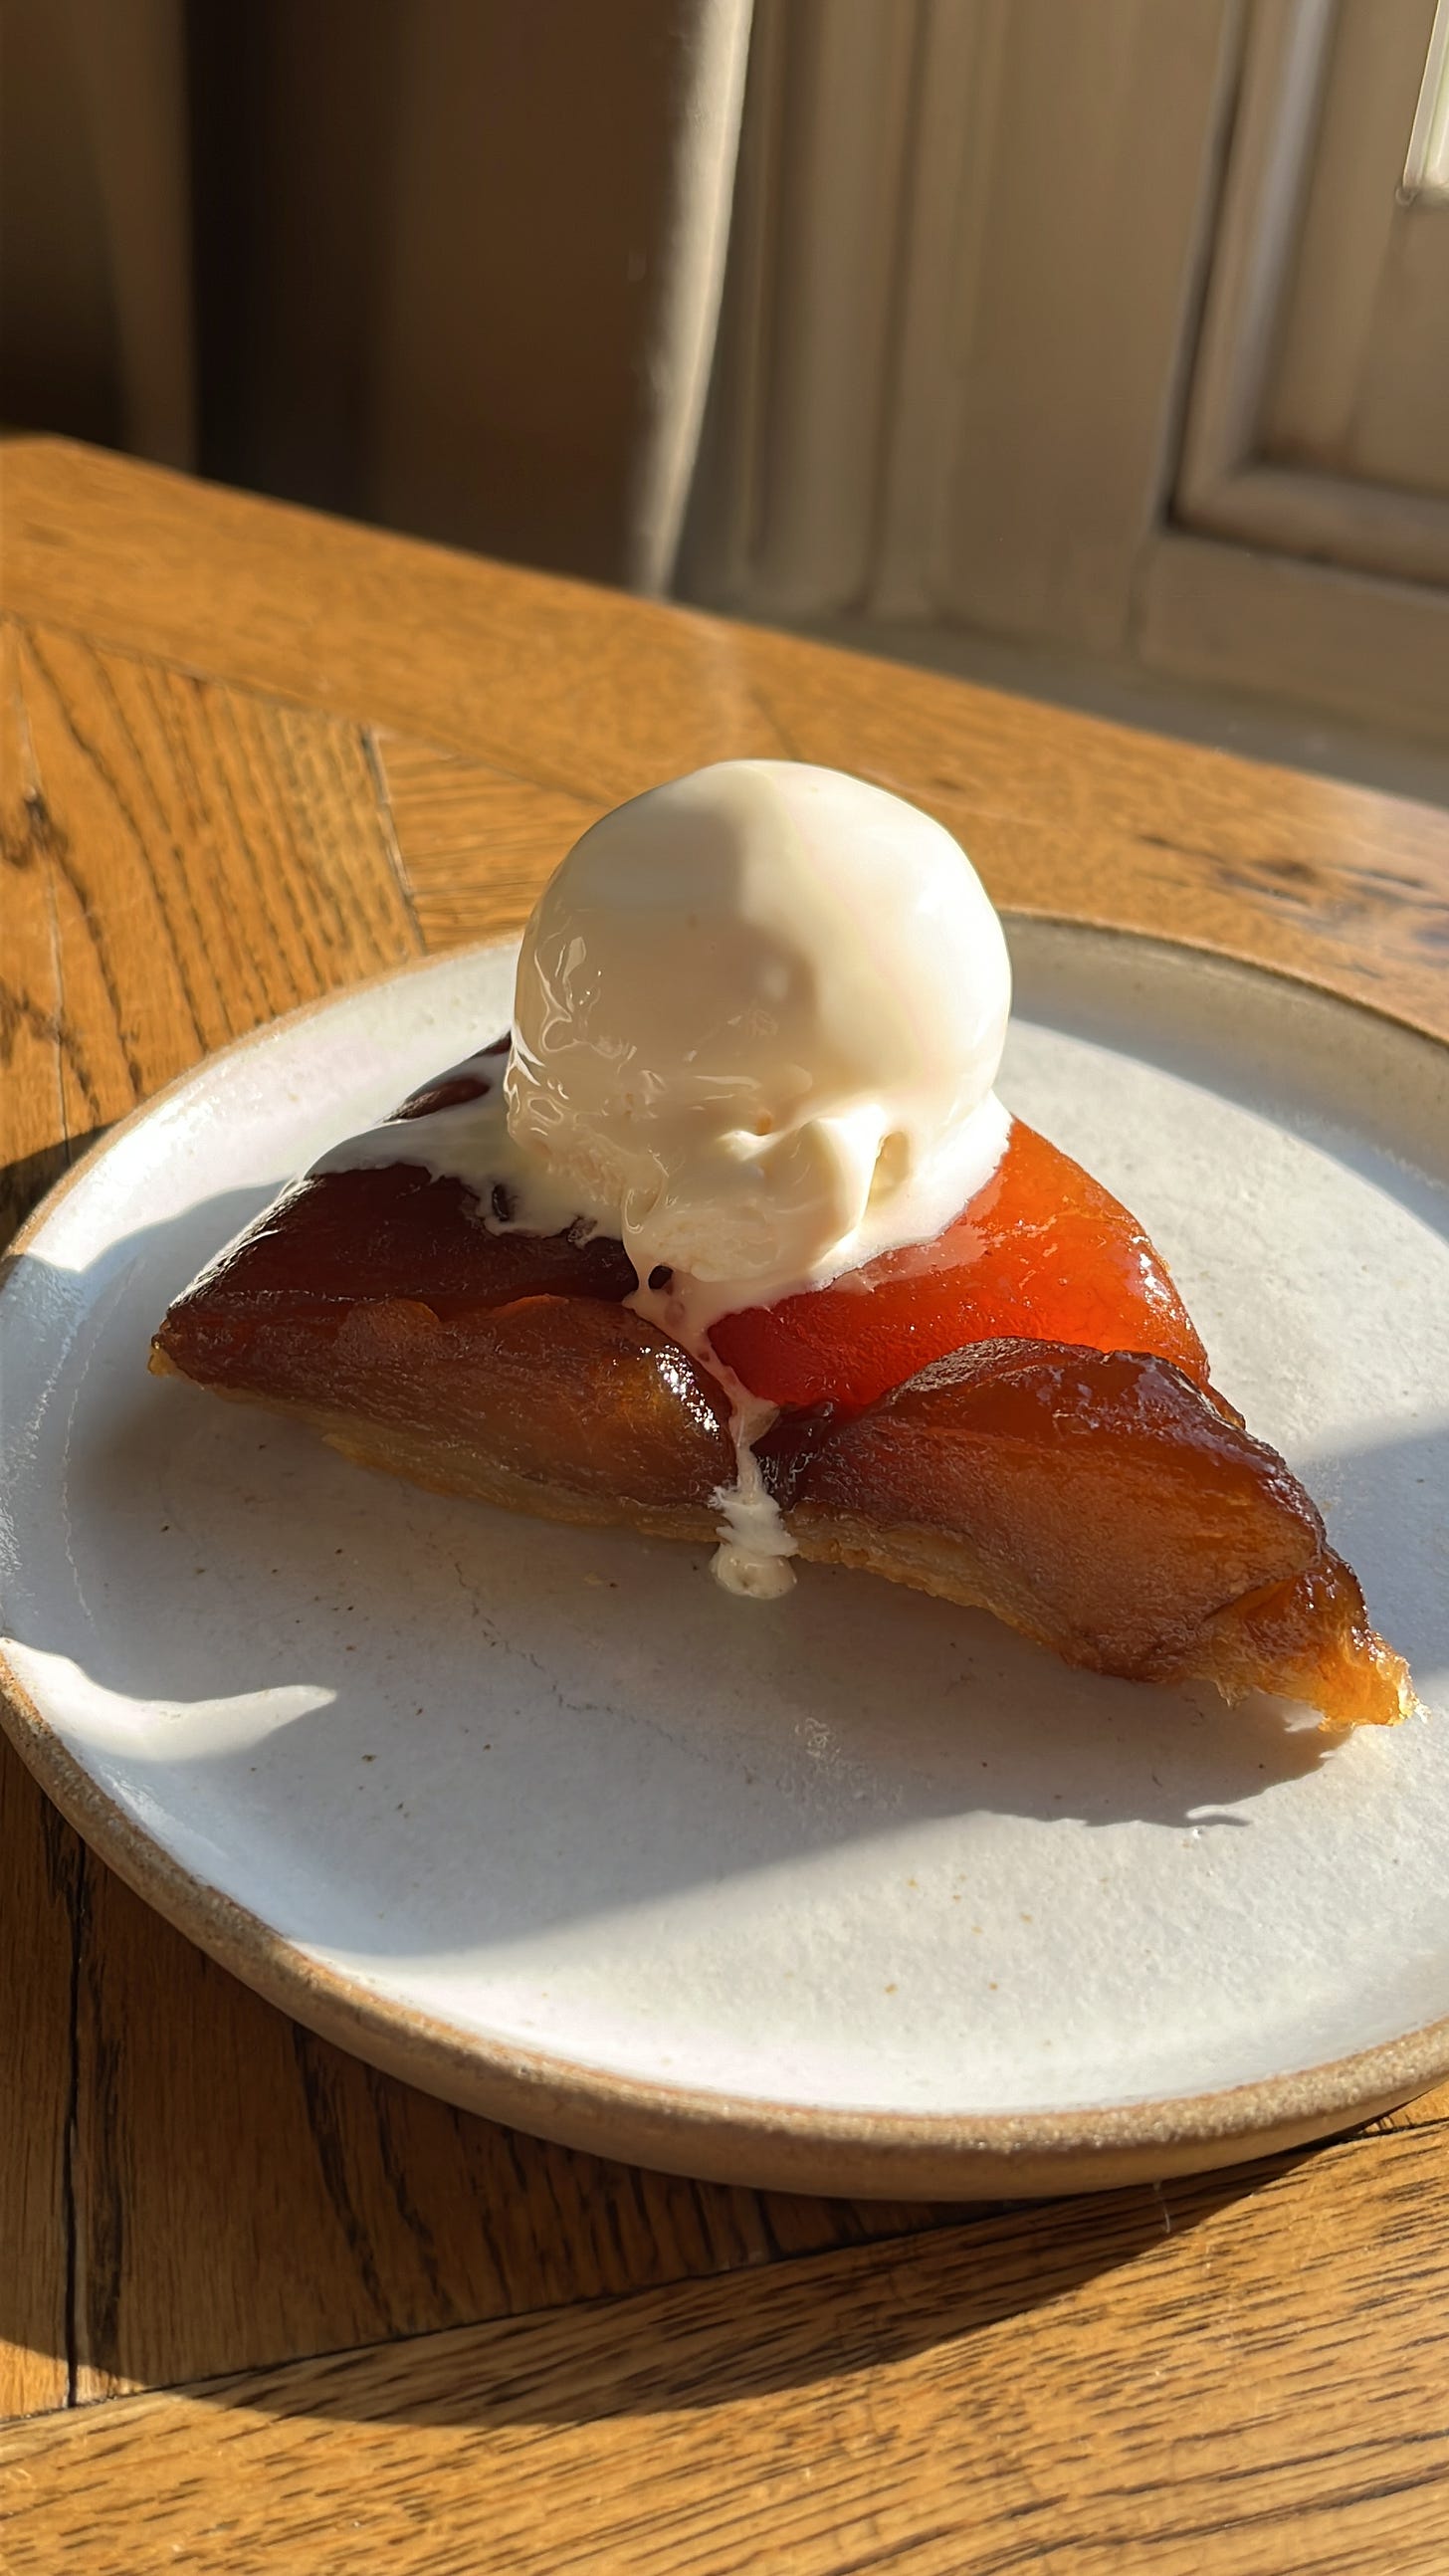
Serve warmed with creme fraiche, cream or vanilla ice cream—or all three!
Clodagh Manning is the pastry chef at Lyles. She started her food career in Dublin working at Library St. Follow her Instagram to keep updated on her desserts and collaborations (I had her dessert at Has Dac Biet @ Oranj last year and it was brilliant!)



*Learns to make a tatin 18 years ago*
*Doesn't make one for 15 years*
*...... Nicola perfects the craft (again)*
*>>> HAS to give it a go again*
🍎🍏🍎🍏🍎🍏🍎🍏🍎🍏
DELICIOUS! Can’t wait to test this recipe out, I’ve never used ACV