Hello,
Welcome to today’s edition of Kitchen Projects. Thank you so much for being here.
Today I am thrilled to share a newsletter that has been a long time coming. Welcome to the Floating Island(s)! I love this dessert and I’m SO ready for you all to love it, too.
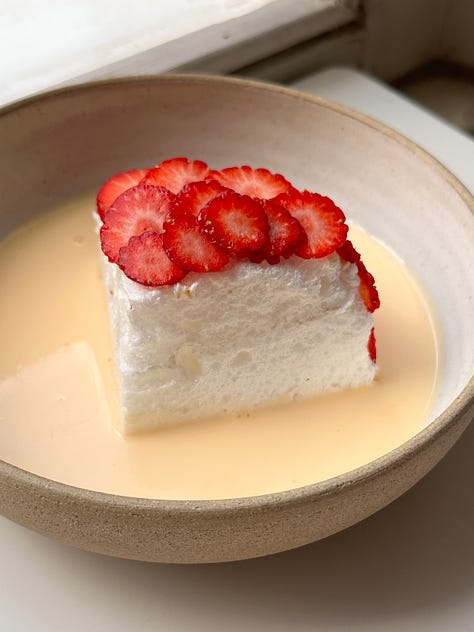
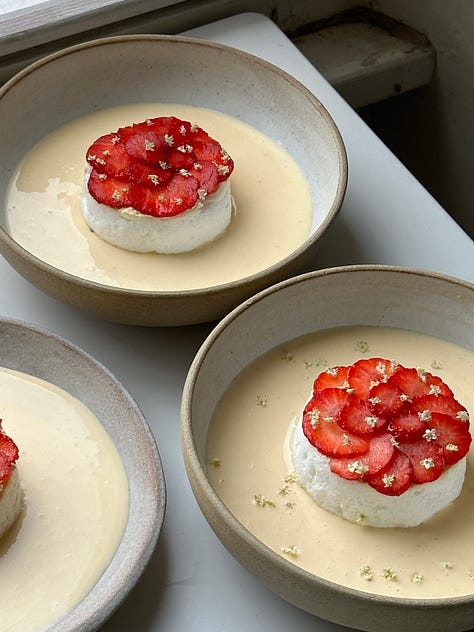
Over on KP+, I’m sharing a recipe for an alternative floating island combination: Elderflower & Strawberry Floating Island. It’s my dream summer dessert! Click here for the recipe.
What's KP+? Well, it's the level-up version of this newsletter. By joining KP+, you will support the writing and research that goes into the newsletter (including the commissioning - and fair payment - of all the writers), join a growing community, access extra content (inc., the entire archive with 300+ recipes) and more. Subscribing is easy and only costs £6 per month or just £50 per year (equivalent to £4.10 per month). Why not give it a go? Come and join the gang!
Love,
Nicola
PS. My book SIFT: The Elements of Great Baking has been out for a few weeks now and I love seeing you all bake from it! If you have a copy of SIFT and have enjoyed it, please could I ask you a favour and ask you to consider leaving a review on Amazon? You can still review it even if you didn’t buy your copy there. It helps other people find the book, too! Thank you so much :)
London Pop-up! Next Saturday 15th June!
Next Saturday, 15th June, from 12pm til we sell out, I’ll be at Leila’s shop on Calvert Ave, Bethnal Green, London E2 7JP with Cake On-A-Plate! I’m SO excited for this gorgeous pop-up collaboration with Nichola Gensler aka burnt crust pottery - she is making a bunch of gorgeous perfect cake-sized plates (£10 each), and I’ll be making a special summery menu inspired by my book SIFT. The final touches are still being put onto the menu, but expect apricots, elderflower, blackberries, custard and strawberries! I’ll also have books for sale and will be signing copies. I really hope to see you there.
Oh Buoy oh Buoy!
There are some recipes which, if I told a French Grandma how long I’d been finessing and how many versions I’d made, they’d probably think I was insane. One such dessert is the much loved Île Flottante or floating islands.
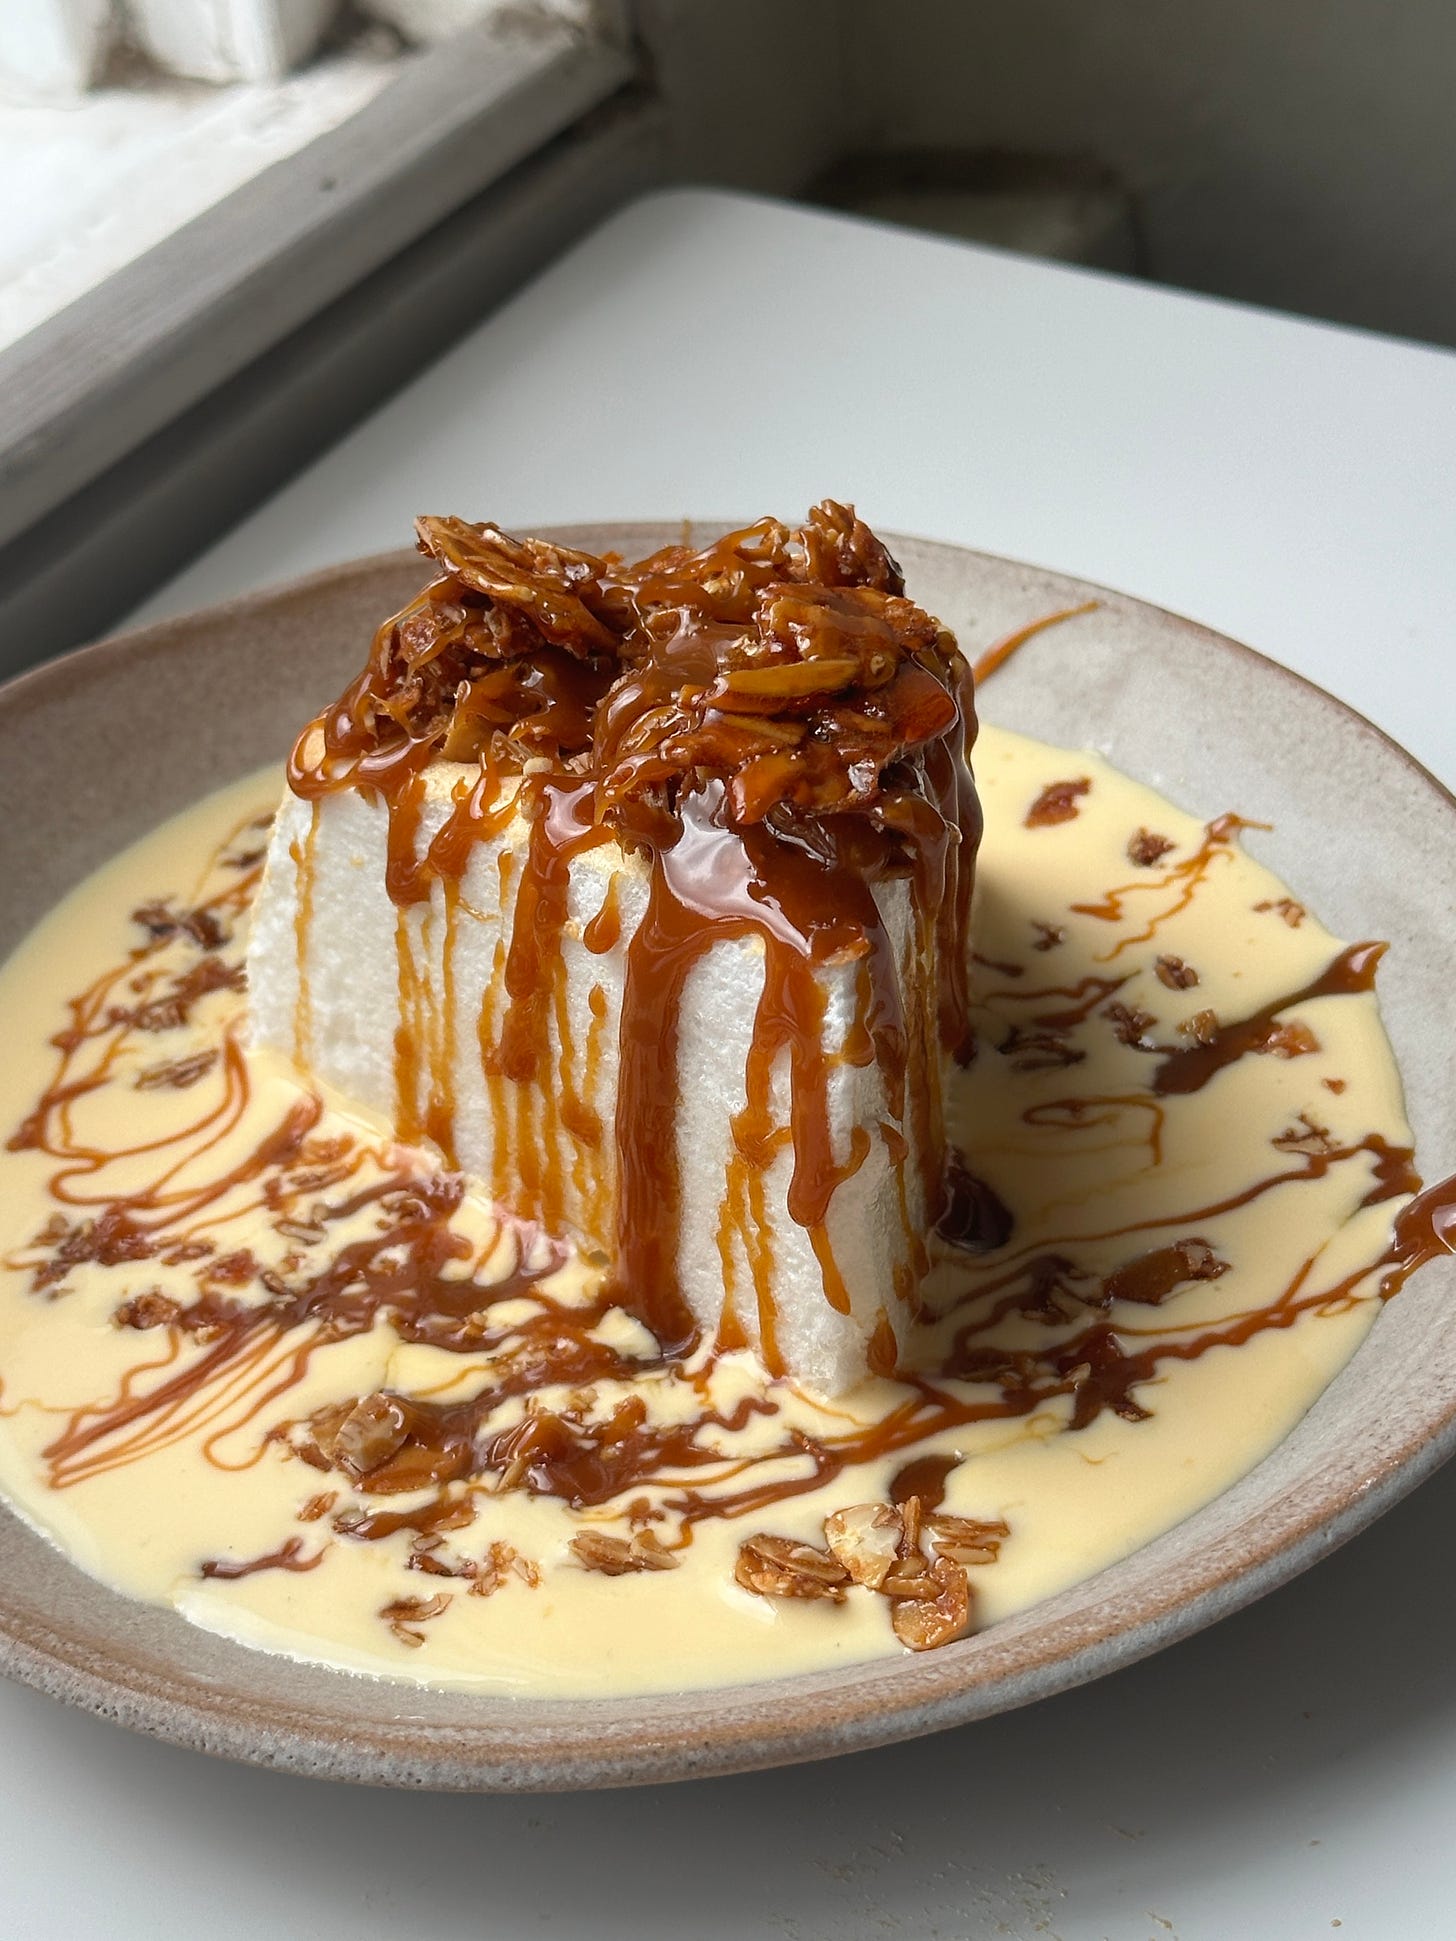
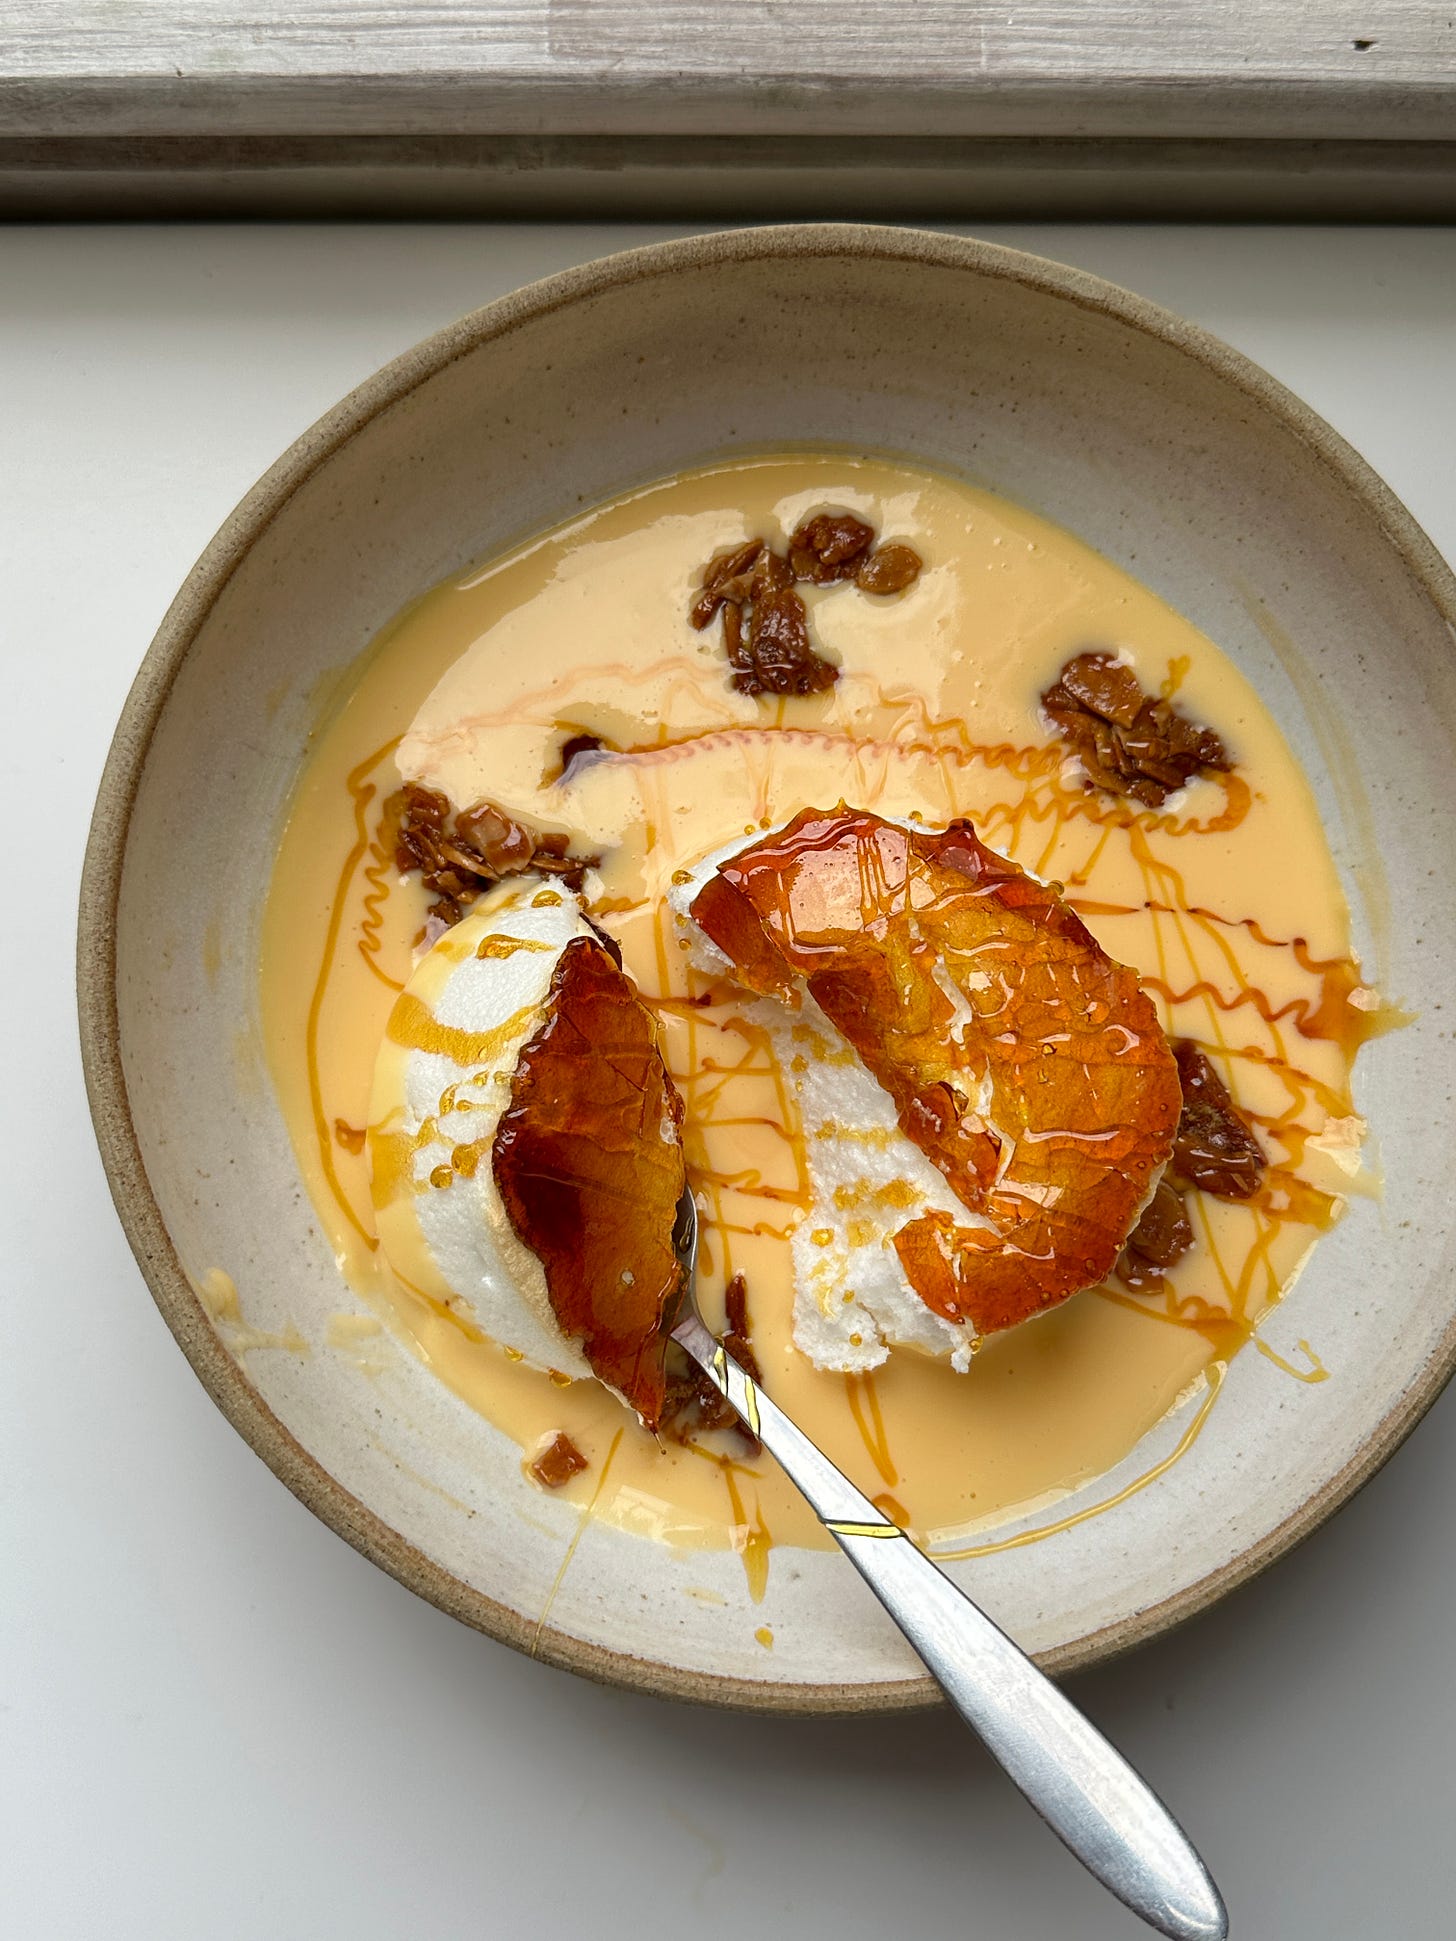
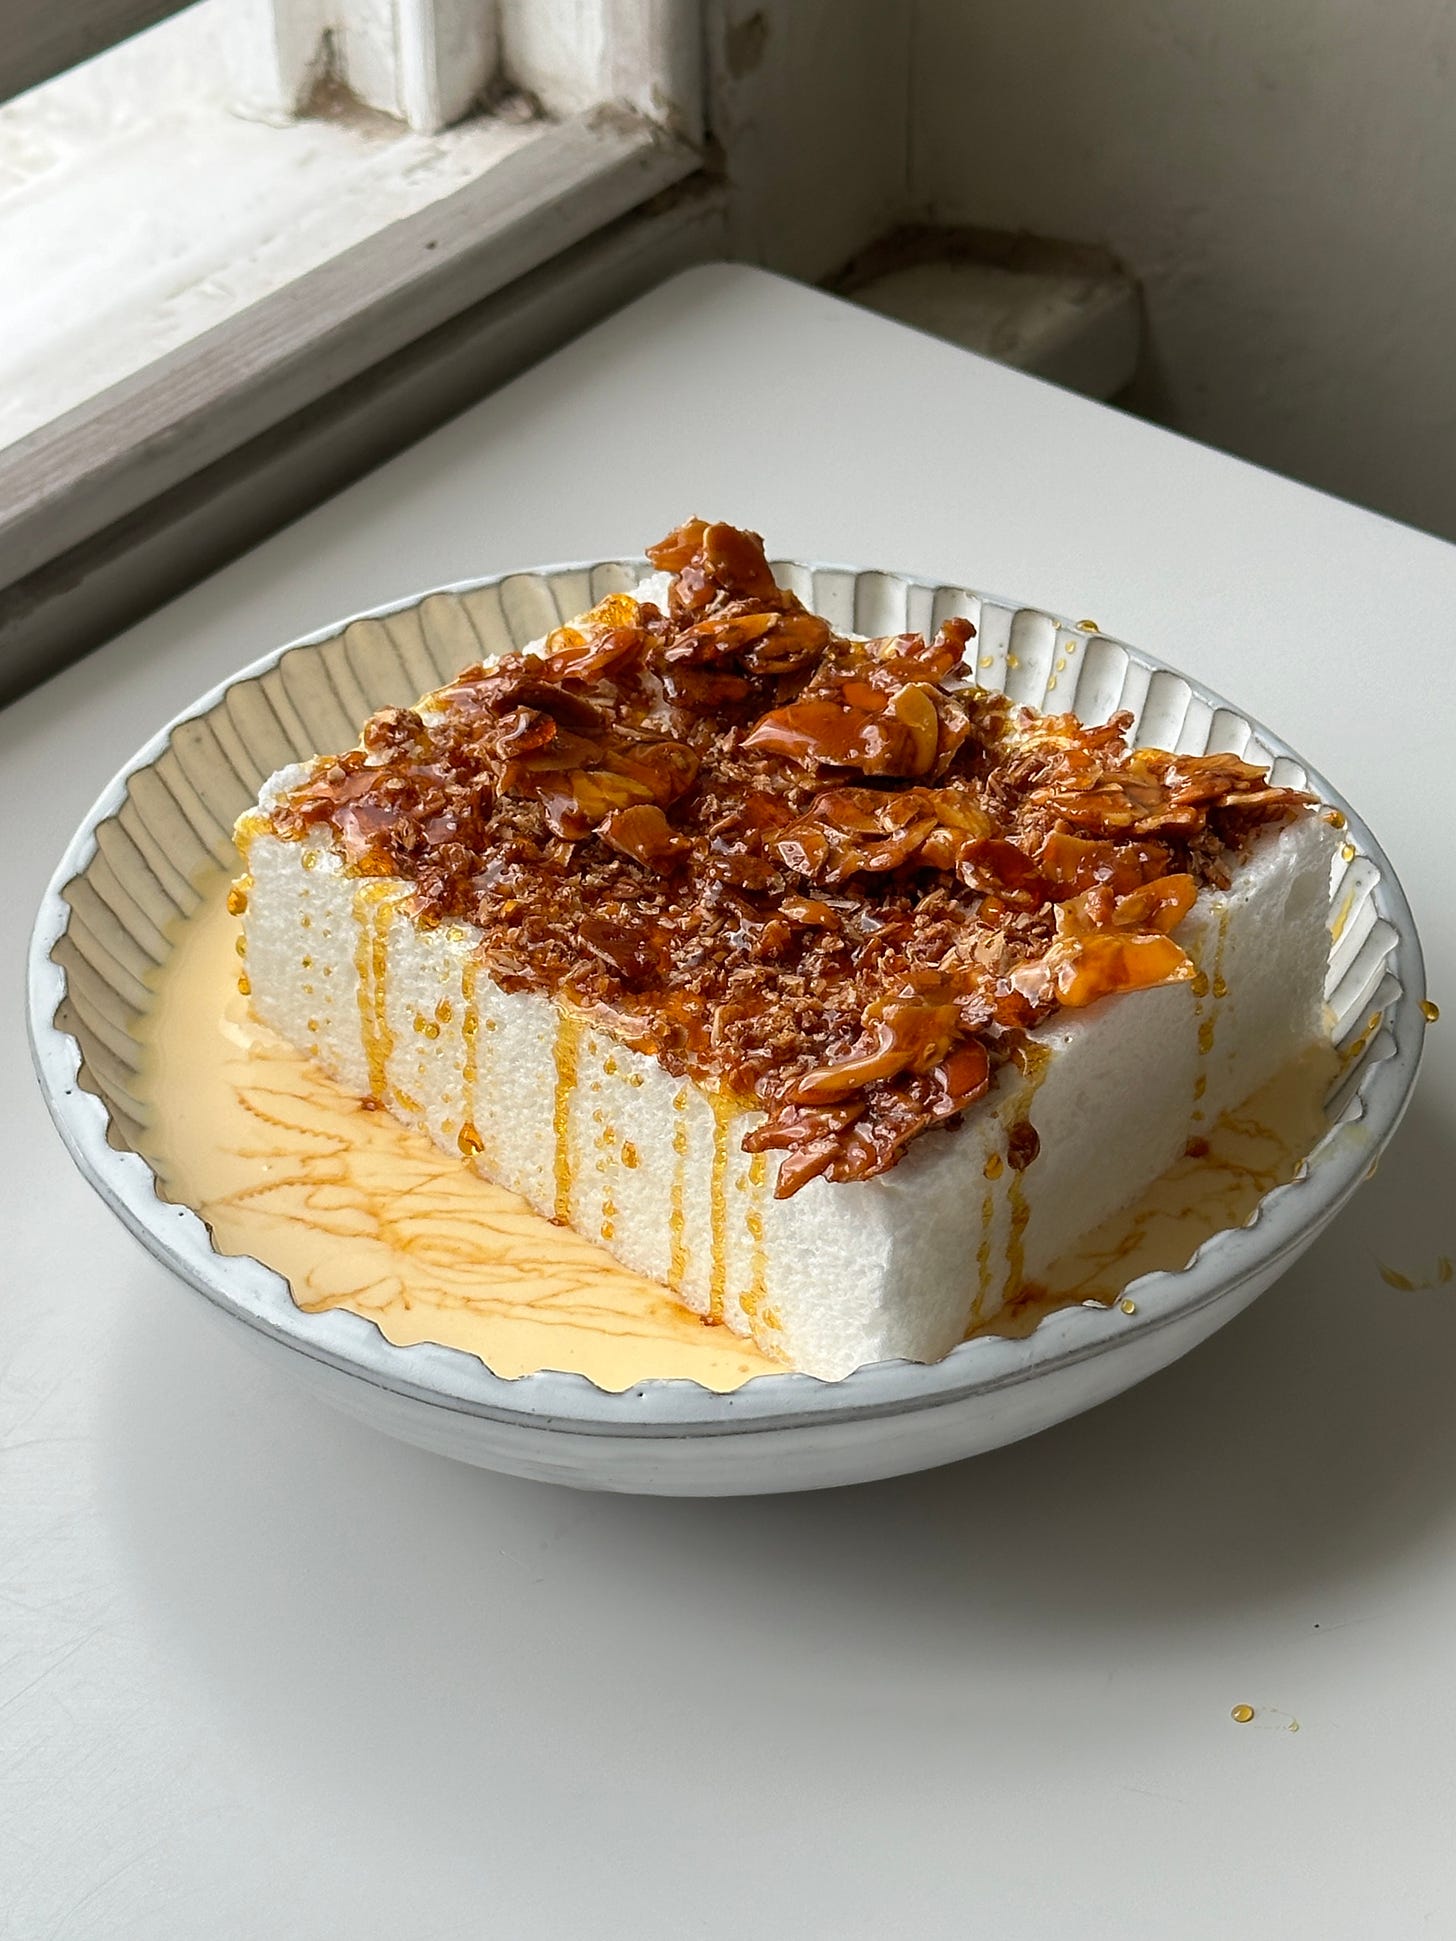
If you haven’t encountered this dessert before, it’s possibly because they have gone unfairly out of fashion outside of France. Let me set the scene for you. This classic dessert is bold in its simplicity, joining just three components - Custard, Soft, Airy Meringue, and Caramel. The name comes from the presentation, the meringue floating ethereally on top of a sea of custard. It’s always served at room temperature or cold. If you love a marshmallowy pavlova, it’s basically the inside of one of those floating on custard.
I use the word ‘sea’ on purpose - it’s a lot of custard. In fact, I was talking to an Île Flottante sceptic just a few days ago. When describing why she wasn’t a fan, she said that floating islands ‘just seemed like an excuse to eat loads of custard.’ Umm…. yes, exactly! Though obviously I see that as a huge plus.
I will admit that I’m relatively new to the floating islands scene. But it’s not my fault - or yours if you’re new to this dessert or have relatively few experiences with it. We control our own destiny! To be honest, I’d only tried it once until last year when, on a trip to Paris, I made it my mission to eat it at every restaurant and bistro I went into. I was charmed by the various shapes of meringue and the dissolving lightness of the two together.
Outside of France, I’ve rarely seen it on a dessert menu. Am I going to the wrong places, or are restaurants everywhere missing a trick? Luckily for me, and hopefully you, I’ve got all the answers on how to make this dessert at home! And it only took 100 egg whites and the potential ire of French Grandma’s everywhere to do it.
A little history
Floating Islands have a less common synonym - oeufs a la neige, aka snow eggs. When asking the difference between the two to a French friend, she responded blankly. Seemingly, the ‘snow eggs’ branding has gone out of fashion (and fair enough, it’s not the most enticing name, no offence to 17th-century French chefs.), and while there are a few articles out there that suggest one means poached smaller meringues, and other refers to a larger, single ‘island’, but this seems unfounded. Charmingly, I was told that ‘à la neige,’ ie. ‘to the snow’ translates to ‘whipped’ when it comes to egg whites, referring to the texture and appearance of a meringue resembling snow.
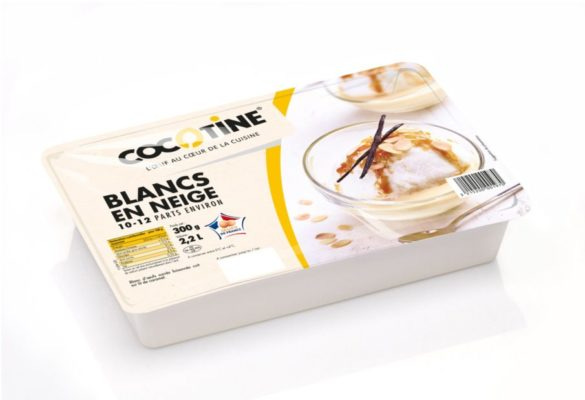
The history of the dessert can be traced back to the 17th century - over time, it has taken different forms, including a confusing segue into ladyfingers in the early 20th century, but it has since returned to a finessed version of the original vision. It had its own journey here in the UK and US, even appearing in Benjamin Franklin’s diary in the 18th Century. It is so popular in France now that you can buy the ready-made whipped egg whites, served in sliceable blocks, in supermarkets! Just add custard!
Flavour-wise, it has flirted with orange blossom and kirsch, but today’s trio of custard - usually vanilla, meringue and caramel, which was officially written into the cannon in Madame Lebrasseur’s 1890 ‘Ma Cuisine’, seems to be standing the test of time.
On KP+ today
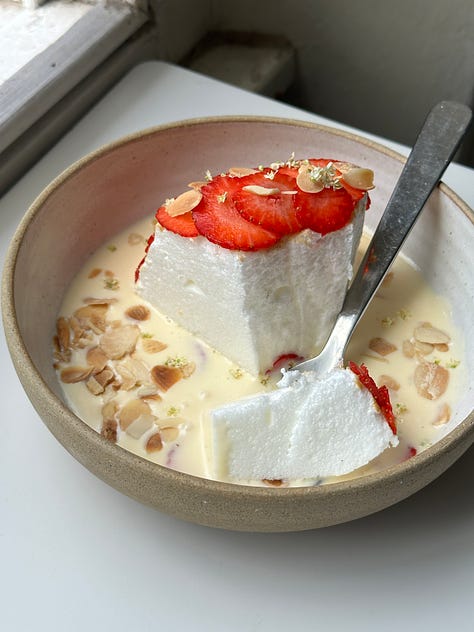
Today on KP+, I’m sharing a recipe for an alternative floating island combination: Elderflower & Strawberry Floating Island. It’s fluffy, sweet, floral and feels like the dessert of the summer.
Building your own floating island: Meringue ratio
I had actually meant to write this newsletter last summer, hot off the tails of my Parisian custard-meringue-crawl, but found myself completely overwhelmed when researching the recipe. Usually, when I write this newsletter, I check 2-3 UK/US sources and 2-3 sources in the original language that the recipe originates from to get the lay of the land. From Helen Darroze to Julia Child, I was overwhelmed by the, frankly, huge range of options out there. One of the biggest differences in recipes is the sugar-to-egg-white ratio, which ranges from 10% to -200 %! Clearly, this is an area of disagreement. It was enough to scare me off last summer, but I got back onto the sugar horse, and I’m here to share my findings.
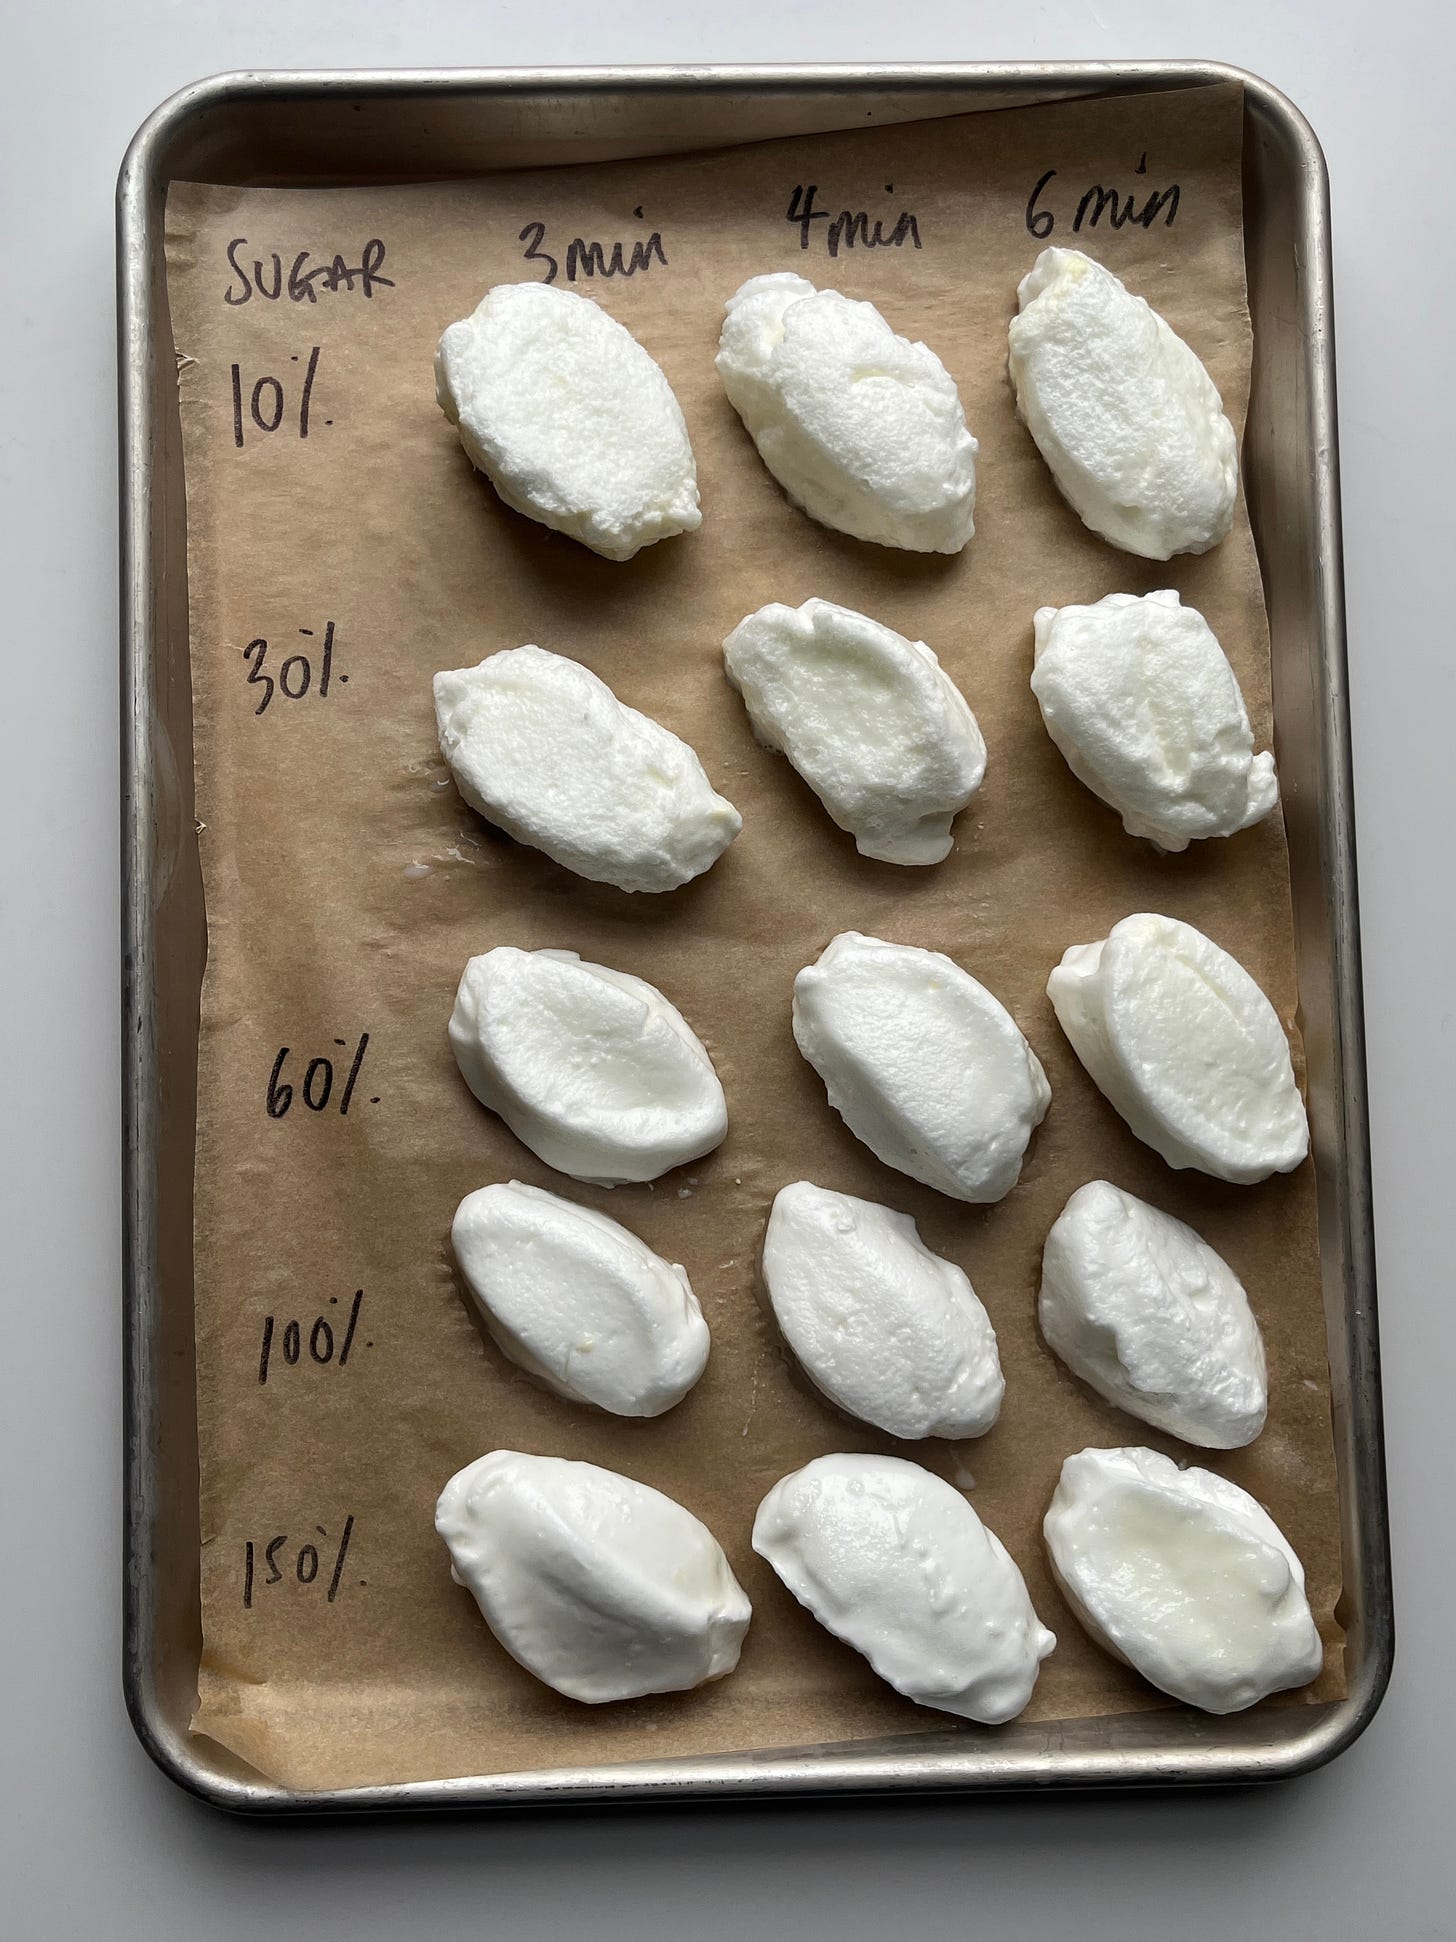
It may not surprise you that the highest sugar-to-egg white ratios are all from UK and US recipes, while the recipes from France top out at about 80%. So what’s ‘right’? I mixed up a series of meringues to compare, whisking egg whites until soft peaks then adding sugar and whisking til firm.
BTW - I did try making a swiss meringue, but with low sugar ratios it’s a waste of time - it had barely any volume and was a bit curdled.
Egg Whites are about 90% water and 10% protein. When you whip egg whites, you are denaturing or unfolding the proteins which produce a foam. The foam is a result of the proteins bonding with each other with air bubbles trapped inside. Though lofty, an egg white-only foam is prone to overmixing - sugar stabilises it by forming a syrup with the water in the whites, which coats the air bubbles and protein network, making it hard for the bubbles to pop and escape. In my book SIFT, I go into further detail about the role of sugar in aerating egg whites. Head to page 45 to ‘look under the hood’ of meringues!
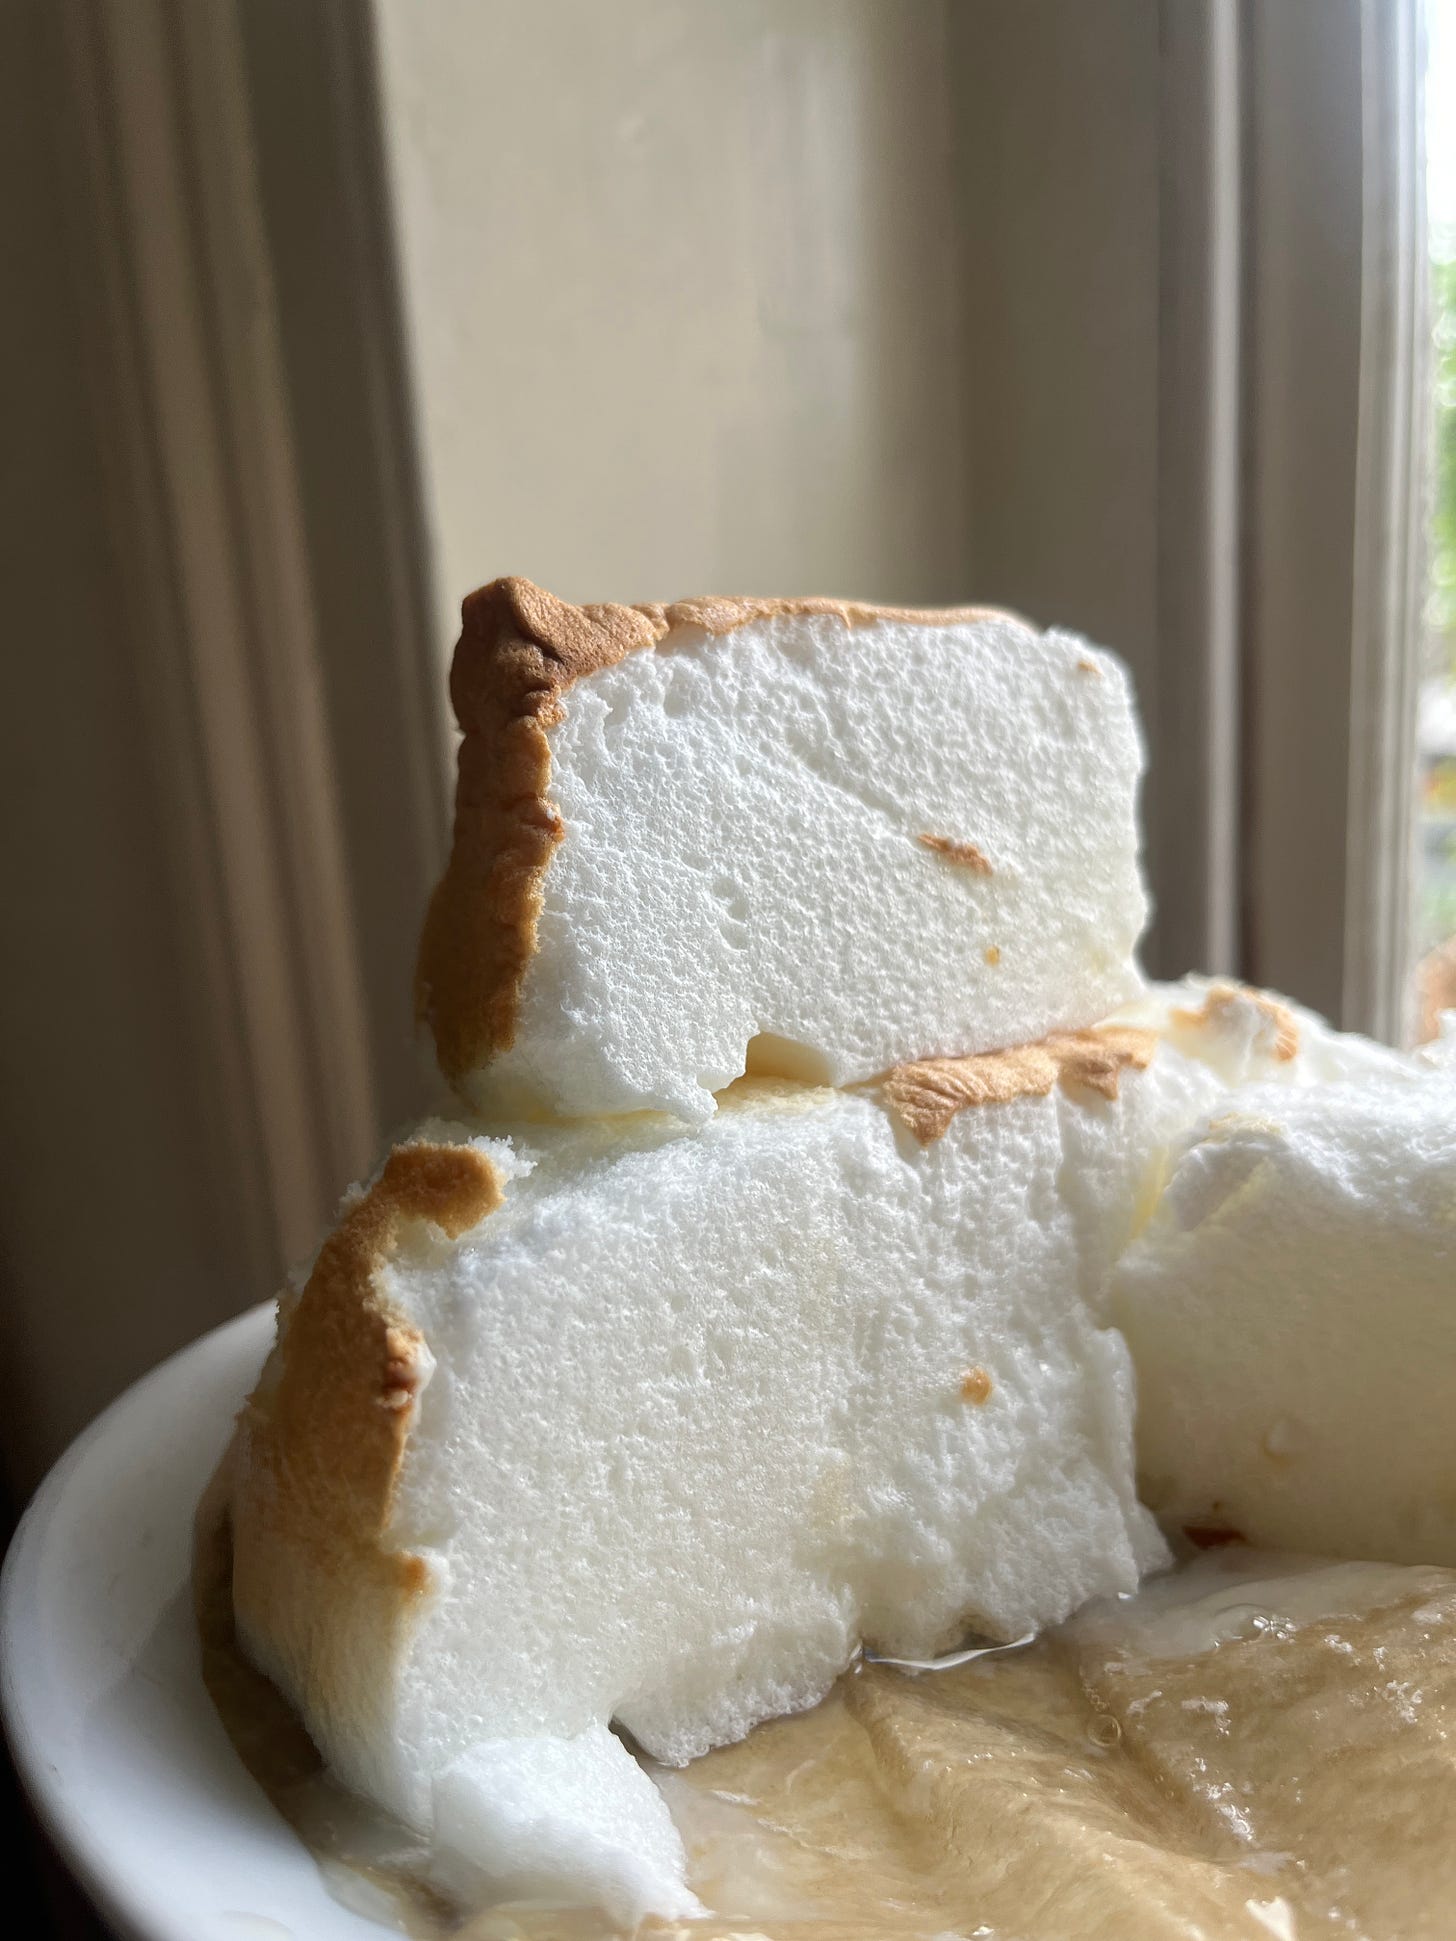
But there is a limit. The more sugar that you put into your meringue, the sweeter and denser it is. Egg whites stabilised and cooked with minimal sugar and lighter and fluffier, but also drier. I found a medium solution, between 30-40% suited me - it is the perfect compromise between sweetness, airiness and texture, especially since we are serving with sweet custard.
A note: With such little sugar, compared to the meringues you might be used to, you have to be careful about how much to beat your egg whites - you want the meringue to be firm but still smooth and flexible. Since there is less sugar to stabilise it, it can easily over whip and break down into firm proteins and weepy sugary liquid, as well as appear chunky rather than smooth. It also needs to be used immediately.
Importantly, a little sugar helps make the meringue easy to work with. Meringue made with less sugar can be quite chunky and erratic, meaning you get much less beautiful attractive shapes - you also need to work faster. It begins to set very quickly and what was once swooping, is now dry and clumpy. As always. you can adjust this recipe to suit your own tastes.
Cooking methods and shaping
So now you’ve got your meringue, what now? You have several options. Let’s go through them.
Poaching
The most common is poaching, scooping up little nests of egg white and simmering gently in milk or water. The thing that varied the most in these methods was the amount of time - from 2 mins per side to 6 mins per side. The meringues are then removed from the liquid and left to drain and cool before serving. I tested it out:
Of course, the amount of time needed to cook will depend on the size of your meringues, but I found that relatively brief cooking gave me the best results, just 2-3 min per side. There are so many great recipes online that detail this method; I feel it’s well-covered! Here’s an example, a trusty David Leibovitz recipe!
Steaming
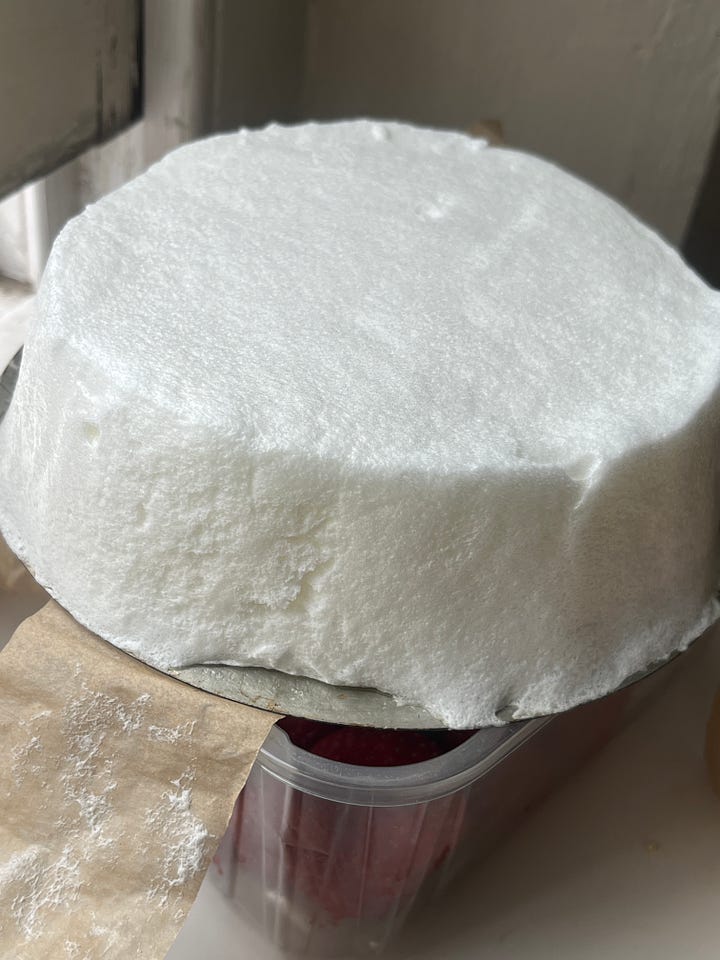
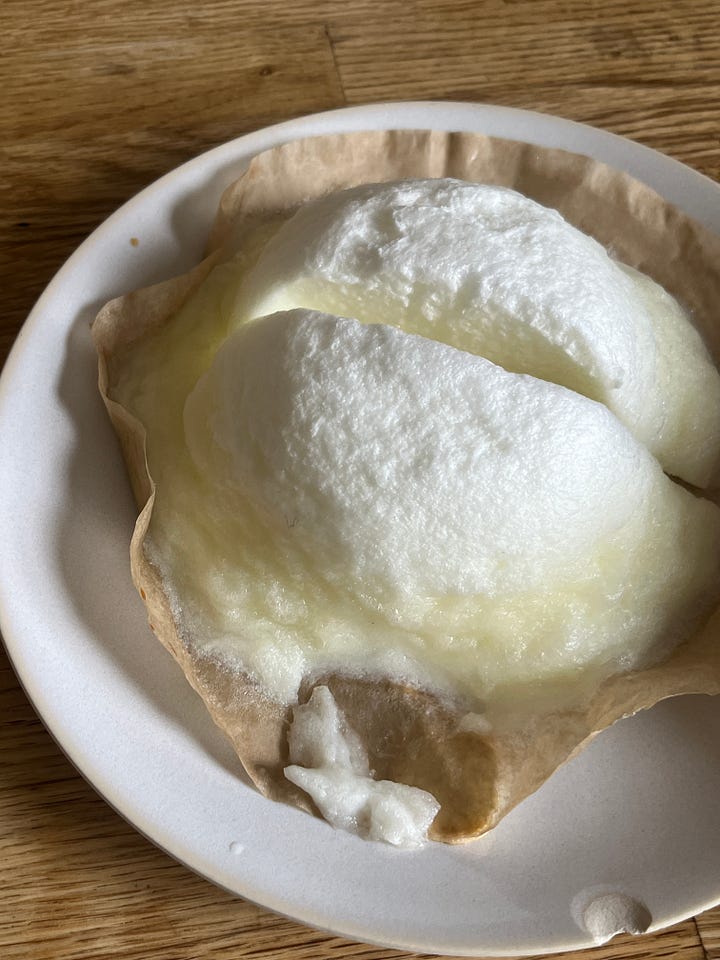
Since the meringues benefit from gentle cooking, I gave steaming a go. Though slightly precarious, lowering the shapes into my less-than-ideal steaming set-up, I liked the results. I got extra tender meringues from this method in a matter of minutes. Using a bain-marie in the oven, as shown below, gives similar results. The main difference is that the meringues stay snowy white and completely soft, compared to the baking, which can yield a browned crust. They are more prone to weeping through, due to the extra moisture imparted into the structure! A warning - over steamed egg white is quite gross so make sure you steam on a gentle temperature and - crucially - briefly. This was a real flop:
Microwave
I’ve read a few recipes that suggest a microwave for cooking your Île Flottante in a matter of minutes! Though I haven’t tested this extensively, here’s a link to a legitimate source if you want to try it out. Click here.
Baking
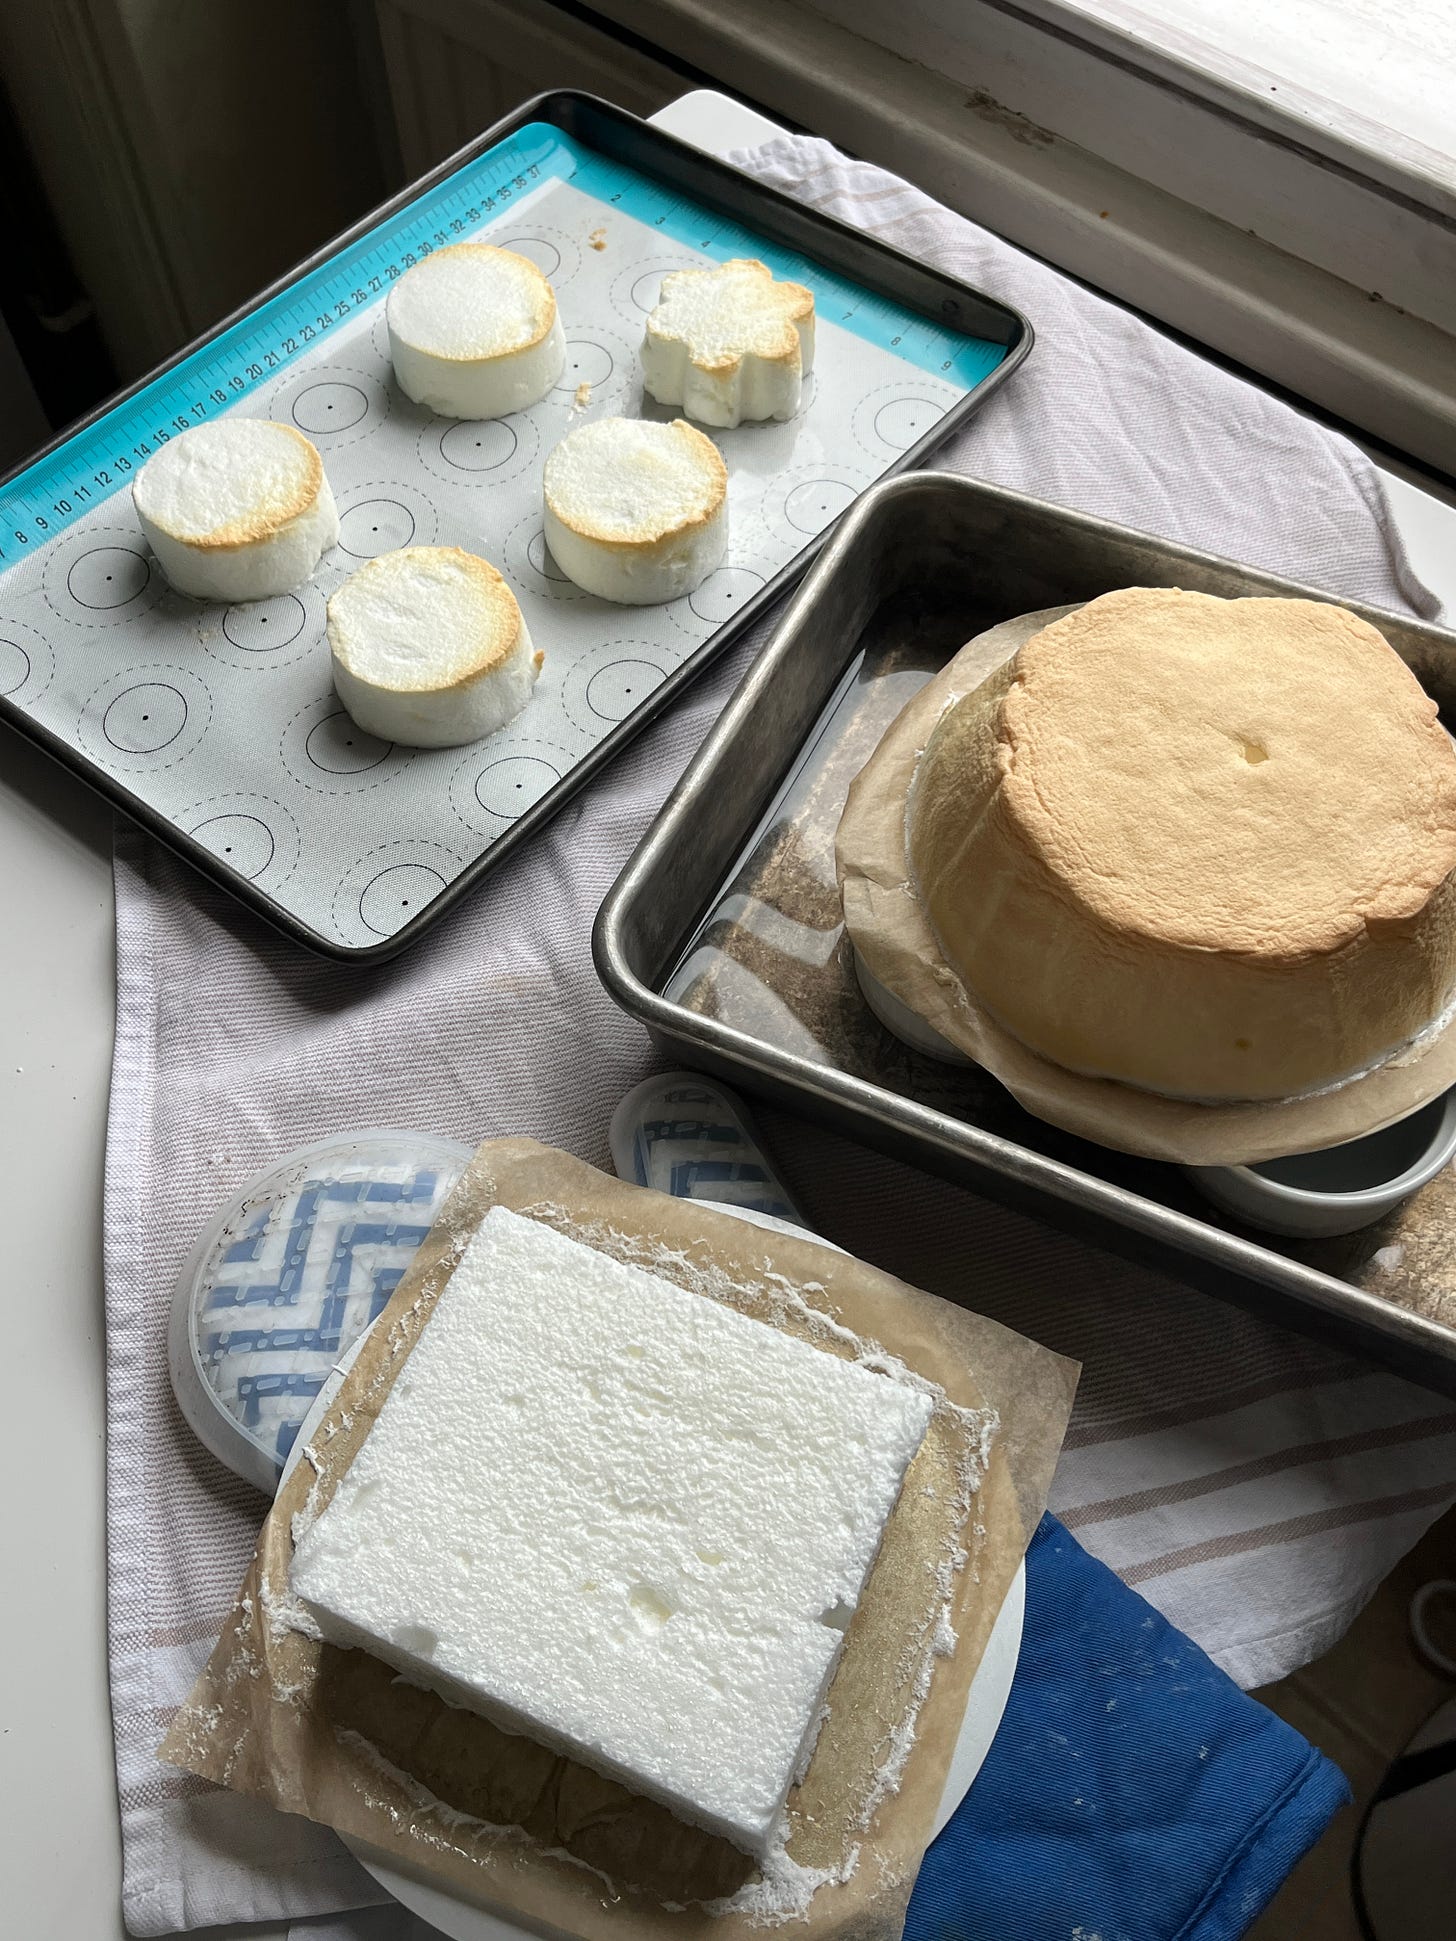
Most of the Île Flottante I tried in Paris were adorned with perfect squares or cubes of meringue - what was this magic? In recent years, I think it’s become more popular to cook the meringue in large moulds and then cut to size for service. This is nothing new, though - the aforementioned Madame Lebrasseur used a caramel-lined mould and bain-marie for her 1890 version! I love this presentation - you can get really creative with the size and shape, and it is only limited by 1) your mould collection and 2) your imagination. From piping into biscuit cutters and ring moulds to baking larger versions and cutting to squares or slices, I am enamoured! You can also freeform the meringue.
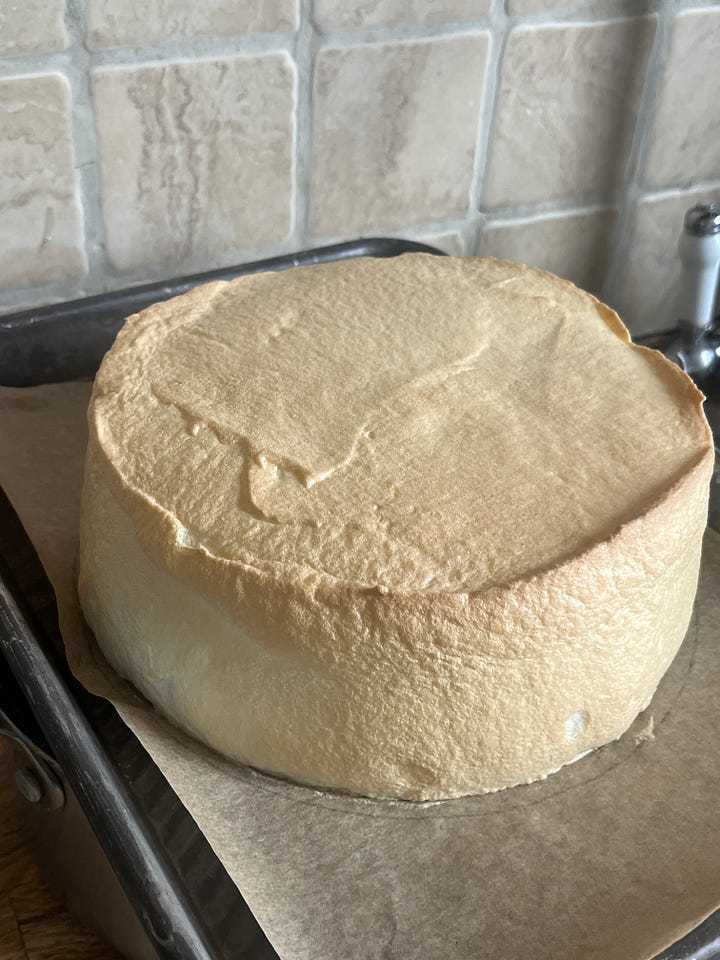
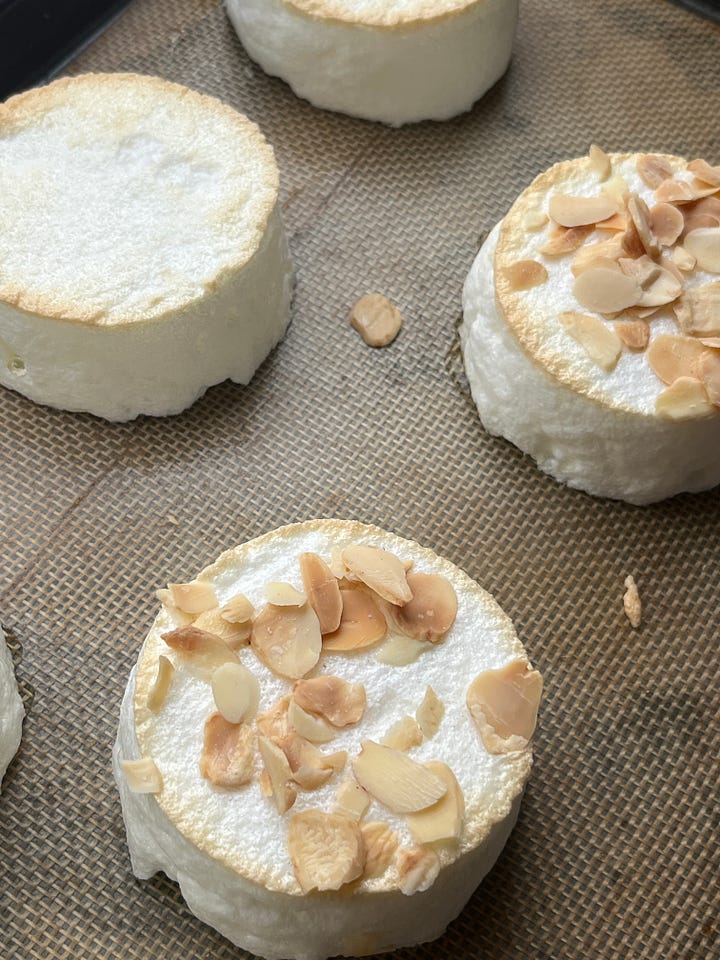
The biggest difference when baking your meringue is the colour—it will form a skin in the oven and, undergoing the Maillard reaction, turn a pale beige. I personally love the flavour of this, but it is visually jarring to the perfect white islands I’m used to seeing in restaurants. If you don’t like the beige colour, you can simply cut it off gently with a sharp knife.
Baking with steam or a bain-marie helps promote even and more gentle cooking and allows for supple expansion of the meringue. I used a pan filled with steam for every test.
I tested out a few versions, and here’s what I found:
The baking temperature and time: The recipes I found online ranged outrageously from 110c to 180c and from 3 minutes to 50 minutes. Again, some of this can naturally be attributed to the different sizes and shapes, but there’s a division out there!
Large meringue (about 180-200g, about four whites):
160c for 12 minutes resulted in a lightly browned meringue that rises and slightly falls as it cools. I would add 2 minutes per additional egg white.
110c for 50 minutes resulted in a pale meringue that doesn’t rise but doesn’t fall after baking or shrink as much - but it’s also quite fragile and hard to work with. I don’t think the extra effort was worth it.
Small meringues (about 30g)
170c for 5 minutes resulted in a mainly white but lightly browned meringue
110c for 30 minutes resulted in a fragile, soft, but fully cooked meringue
How do you know it’s cooked? I found that the advice online to see ‘if a knife comes out clean’ is a total waste of time - whip up a meringue now, mould it into shape and leave it for a few minutes. Put a knife into it and - SHOCK HORROR! - it comes out... Pretty much clean! And it hasn’t even been baked. It’s poor advice. When we are cooking our meringue, we are looking to set the whites in place by fully cooking them, so you can temp and shoot for about 70c. Rather than stabbing my floating islands, I found good results by baking until the meringue is no longer sticky or tacky to the touch. Old school, but reliable!
Holding overnight / Help my meringues have shrunk / are weeping!
When you bake your meringues, it's like they take in a big breath and expand. And as they cool down, they breathe out. Sometimes with a bit of sugar syrup in tow. Excuse me?!?!?! Well, this initially stressed me out a lot - sugar syrup seeping out of meringues is a failure, isn’t it?! Though I’ve been harsh on myself this week, I actually think it’s to be expected. When we bake a pavlova or meringues, we are completely drying out our meringues, allowing the excess water to evaporate and leaving the sugar-protein-air structure in place.
For a gently cooked meringue, we can expect a bit of shrinkage, especially if we are cooking on a higher temp. This is because there is excess water and sugar present in our meringue - without completely cooking the meringues till dry, we have to expect a little bit of shrinking and weeping. I assure you, this is normal! If you really want to hack it, you can experiment with using xanthan gum and guar gum which will help hold it all in place. You can cook the meringue until its about 80c+ inside, and then it will stay firm, but it might have an eggy sulphuric flavour and less light and smooth texture. I also tried stabilising with cornflour but found it difficult to incorporate with a relatively low sugar proportion.
This issue is exacerbated by an overnight rest in the fridge, an environment which is the enemy of meringues - the greedy, hygroscopic sugar goes off in search of plentiful moisture. All of my tests had pooled with at least a little sugar syrup by the morning, but - honestly - still ate well. Sure, they were slightly denser and drier, having lost some of their syrup and sugar, but not noticeably. The tests with the least sugar did not weep at all but were incredibly dry and hard.
Verdict: The best results are from fresh but cooled meringues, but I was pretty impressed with the texture from the meringues baked in larger shapes then cut to size. The meringue pieces cut and held overnight were very dry by the morning.
The deal with egginess
In my peach crème caramel, aka egg white custard recipe, I talk about the deal with eggy flavours, especially when it comes to egg whites. When eggs begin to coagulate at 60c, sulphur compounds begin to be released, which is totally normal, and at this stage, doesn’t release any scent, slowly increasing in intensity to 80c (when they fully cook). For our meringues, we want to head north of 70c to ensure they are cooked, so some scent and flavour are to be expected, at least when warm. Just let your meringues cool down completely - sugar will also mitigate the flavour.
To bake, or not to bake on caramel / Finishing touches.
Similar to crème caramel, you have the option to fill your mould with caramel and bake the floating island on top. This adds a thin - delicious - layer of caramel to your meringue and, in theory, prevents you from having to faff around making caramel or caramel sauce afterwards. As Phillipe Etchebest (thank you Laure!) tells us, you can reuse this mould over and over.
But I’m not sure how many of us are making floating islands so much that we need a reusable caramel mould. I did like the look and flavour, though, a drizzle of caramel sauce does just as well. I do also love the traditional beauty of a thin layer of caramel spooned on top, giving a crème brulee-esque crack - it's a bit fiddly but worth it. I’ve shared two caramel sauce recipes below, the one with water that has a honey like consistency - but the one with double cream will have a richer textur eand flavour.
Another worthy mention goes to nut praline - a match made in heaven for floating islands, though toasted nuts on top of caramel sauce is also good if you don’t want to make extra toppings.
The crème anglaise
I can’t believe I’ve left the best to the end! The yin to the yang! The reason for this dessert! Crucially, the crème anglaise must be cold, like the sea, so though we’re talking about it last, it should really be made first.
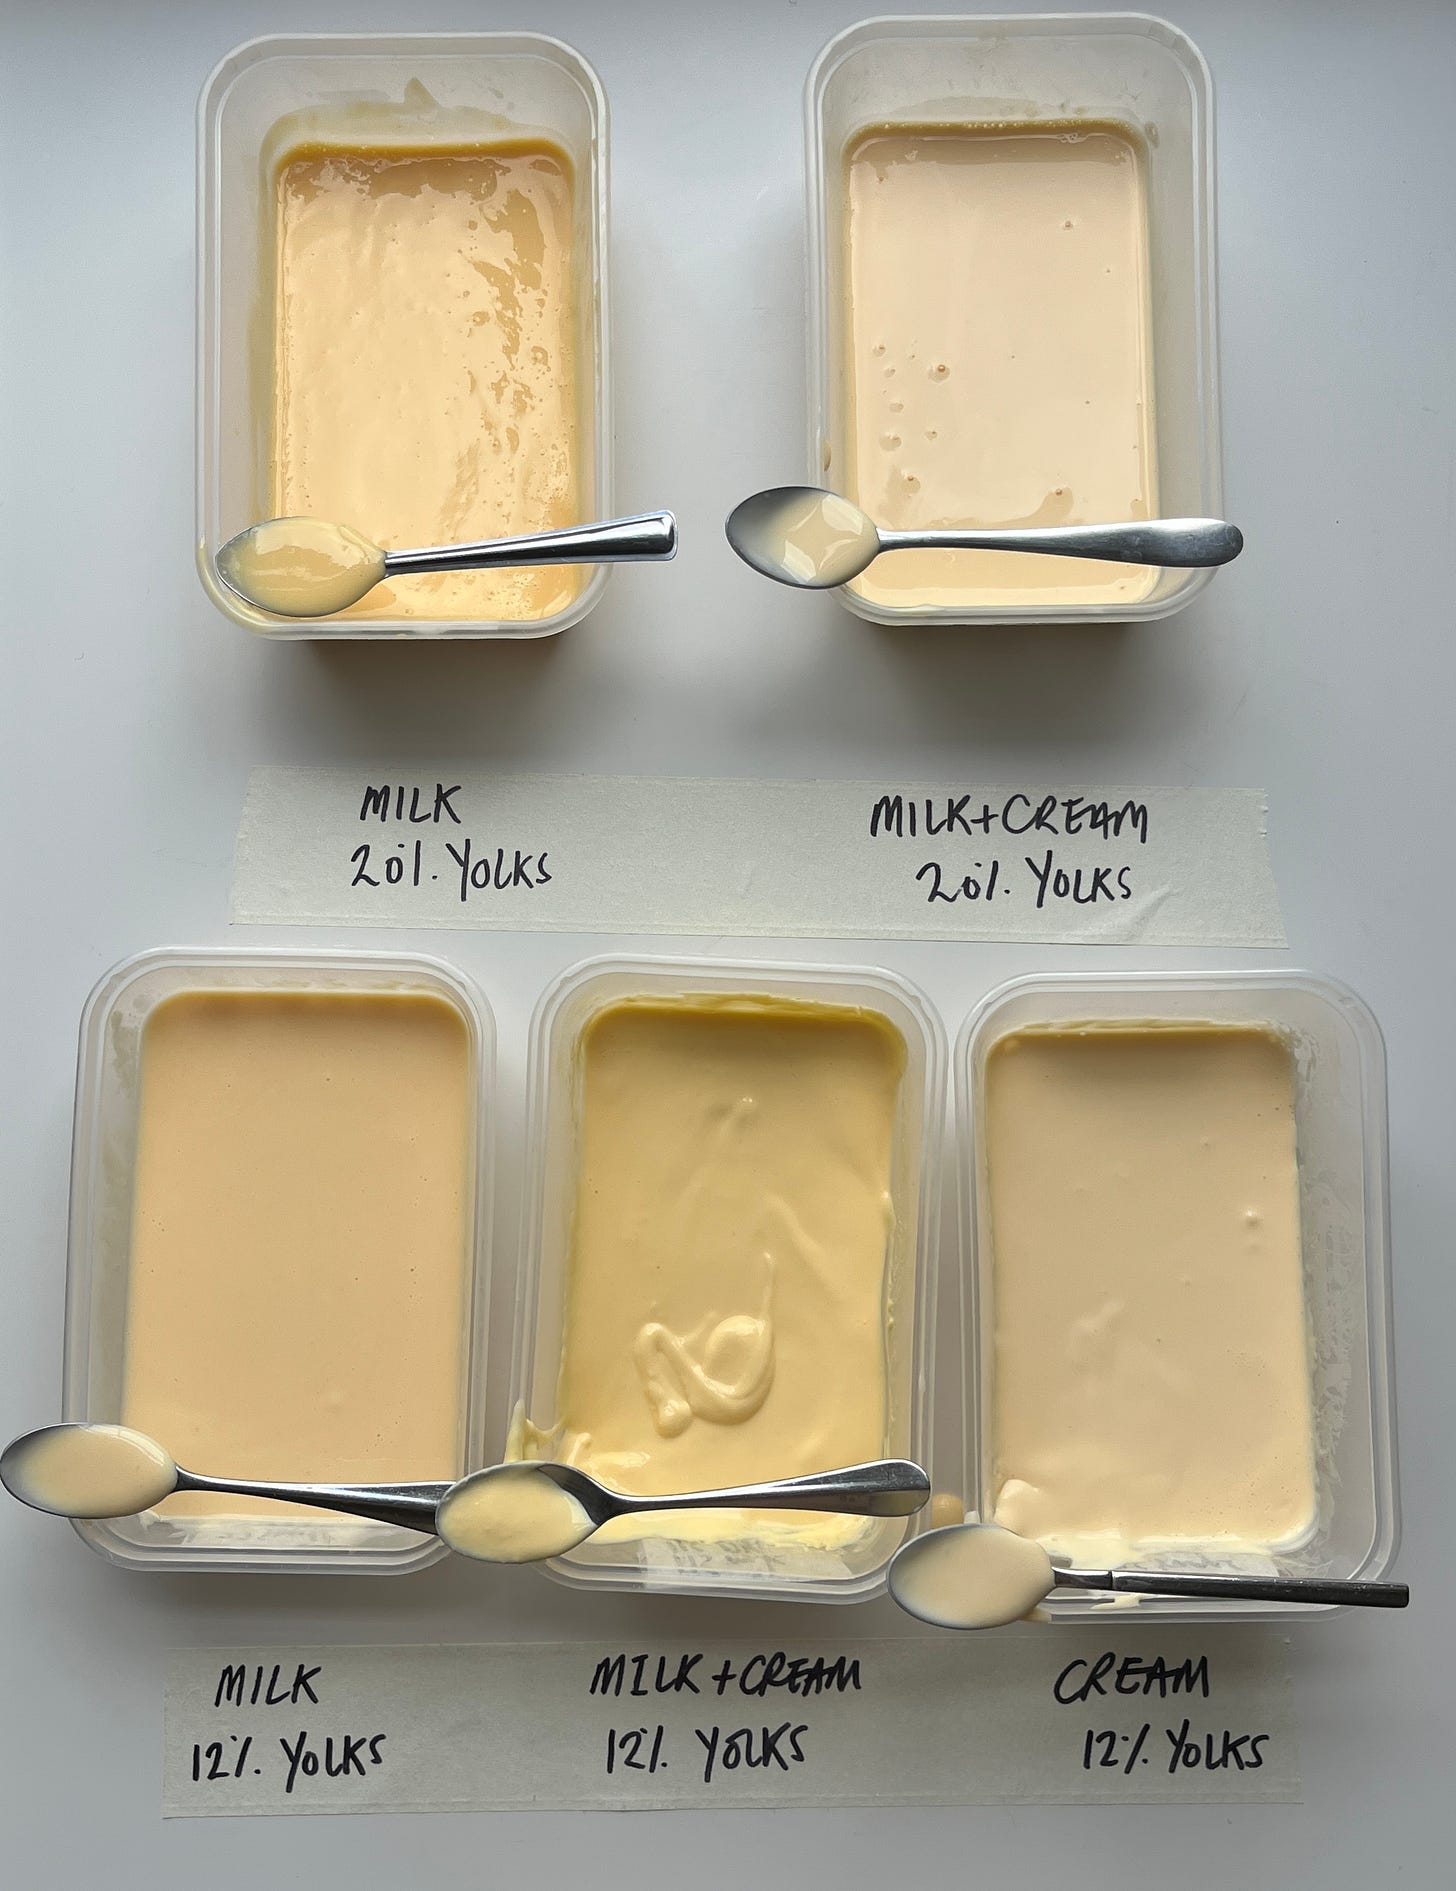
I do love a recipe that pays homage to the two parts of the egg, separating them and celebrating their unique properties. Since this recipe relies on having a great custard, I figured it was a perfect time to investigate crème anglaise. I’ve taken my custard recipe for granted for years, barely changing it - equal parts milk and cream, about 10% egg yolk and sugar. I mixed up a few batches, comparing milk only vs cream only and increasing the yolks.
The version made with all cream was too rich in flavour, with no rounded yolkiness to tie it all together. Cream smothers egg, whilst milk lifts it! My favourite, and what I’ll share below, is a higher ratio of yolks, with a little cream but mainly milk. It should not be undersold that the temp at which you cook your custard has a huge impact - while at 80C, it is thickened, you can push it up to 85C, which will give you a very thick custard. It’s important always to pass your crème anglaise through a fine sieve, though - even the most ardent stirrers may suffer a little curdling. It’s totally normal.
Serving suggestion
Though individual meringues are adorable, it’s so fun to make a big meringue and serve with spoons. It’s worth noting that these last really well assembled! In the fridge, you’ll get weeping issues, but it can definitely hold for a few hours, though caramel may get overly sticky.
Alright, let’s make it.
Floating Islands
Serves 6-8
Ingredients
190g egg whites (about six-seven egg whites)
75g sugar
For a 6inch meringue that serves 2-3, use 3-4 egg whites, about 110g and 50g sugar
For the Crème Anglaise
475g milk
200g double cream
One vanilla bean (or 1 tsp vanilla extract)
80g sugar
130g egg yolks (about six large)
Optional: Crunchy caramel topping
150g caster sugar
20g water
Caramel sauce
150g caster sugar
30g water (i)
70g water (or, for a rich sauce, 150g cream)
Almond praline
100g caster sugar
100g toasted flaked almonds
Large pinch of salt
Optional; Toasted nuts to serve
Method
For the crème anglaise, In a medium saucepan, heat the milk and the vanilla bean (if using) until just below boiling with half the sugar. If using vanilla extract, add it later with the egg yolks. In a separate bowl, whisk the egg yolks with the other half of the sugar until pale and thick. Slowly pour the hot milk into the egg yolk mixture, whisking constantly to prevent the eggs from curdling. Pour the mixture back into the saucepan and cook over low heat, stirring constantly with a wooden spoon, until the custard thickens enough to coat the back of the spoon and reaches 84c. Do not let it boil. Strain the custard through a fine sieve into a clean bowl. Let it cool to room temperature, then refrigerate until chilled.
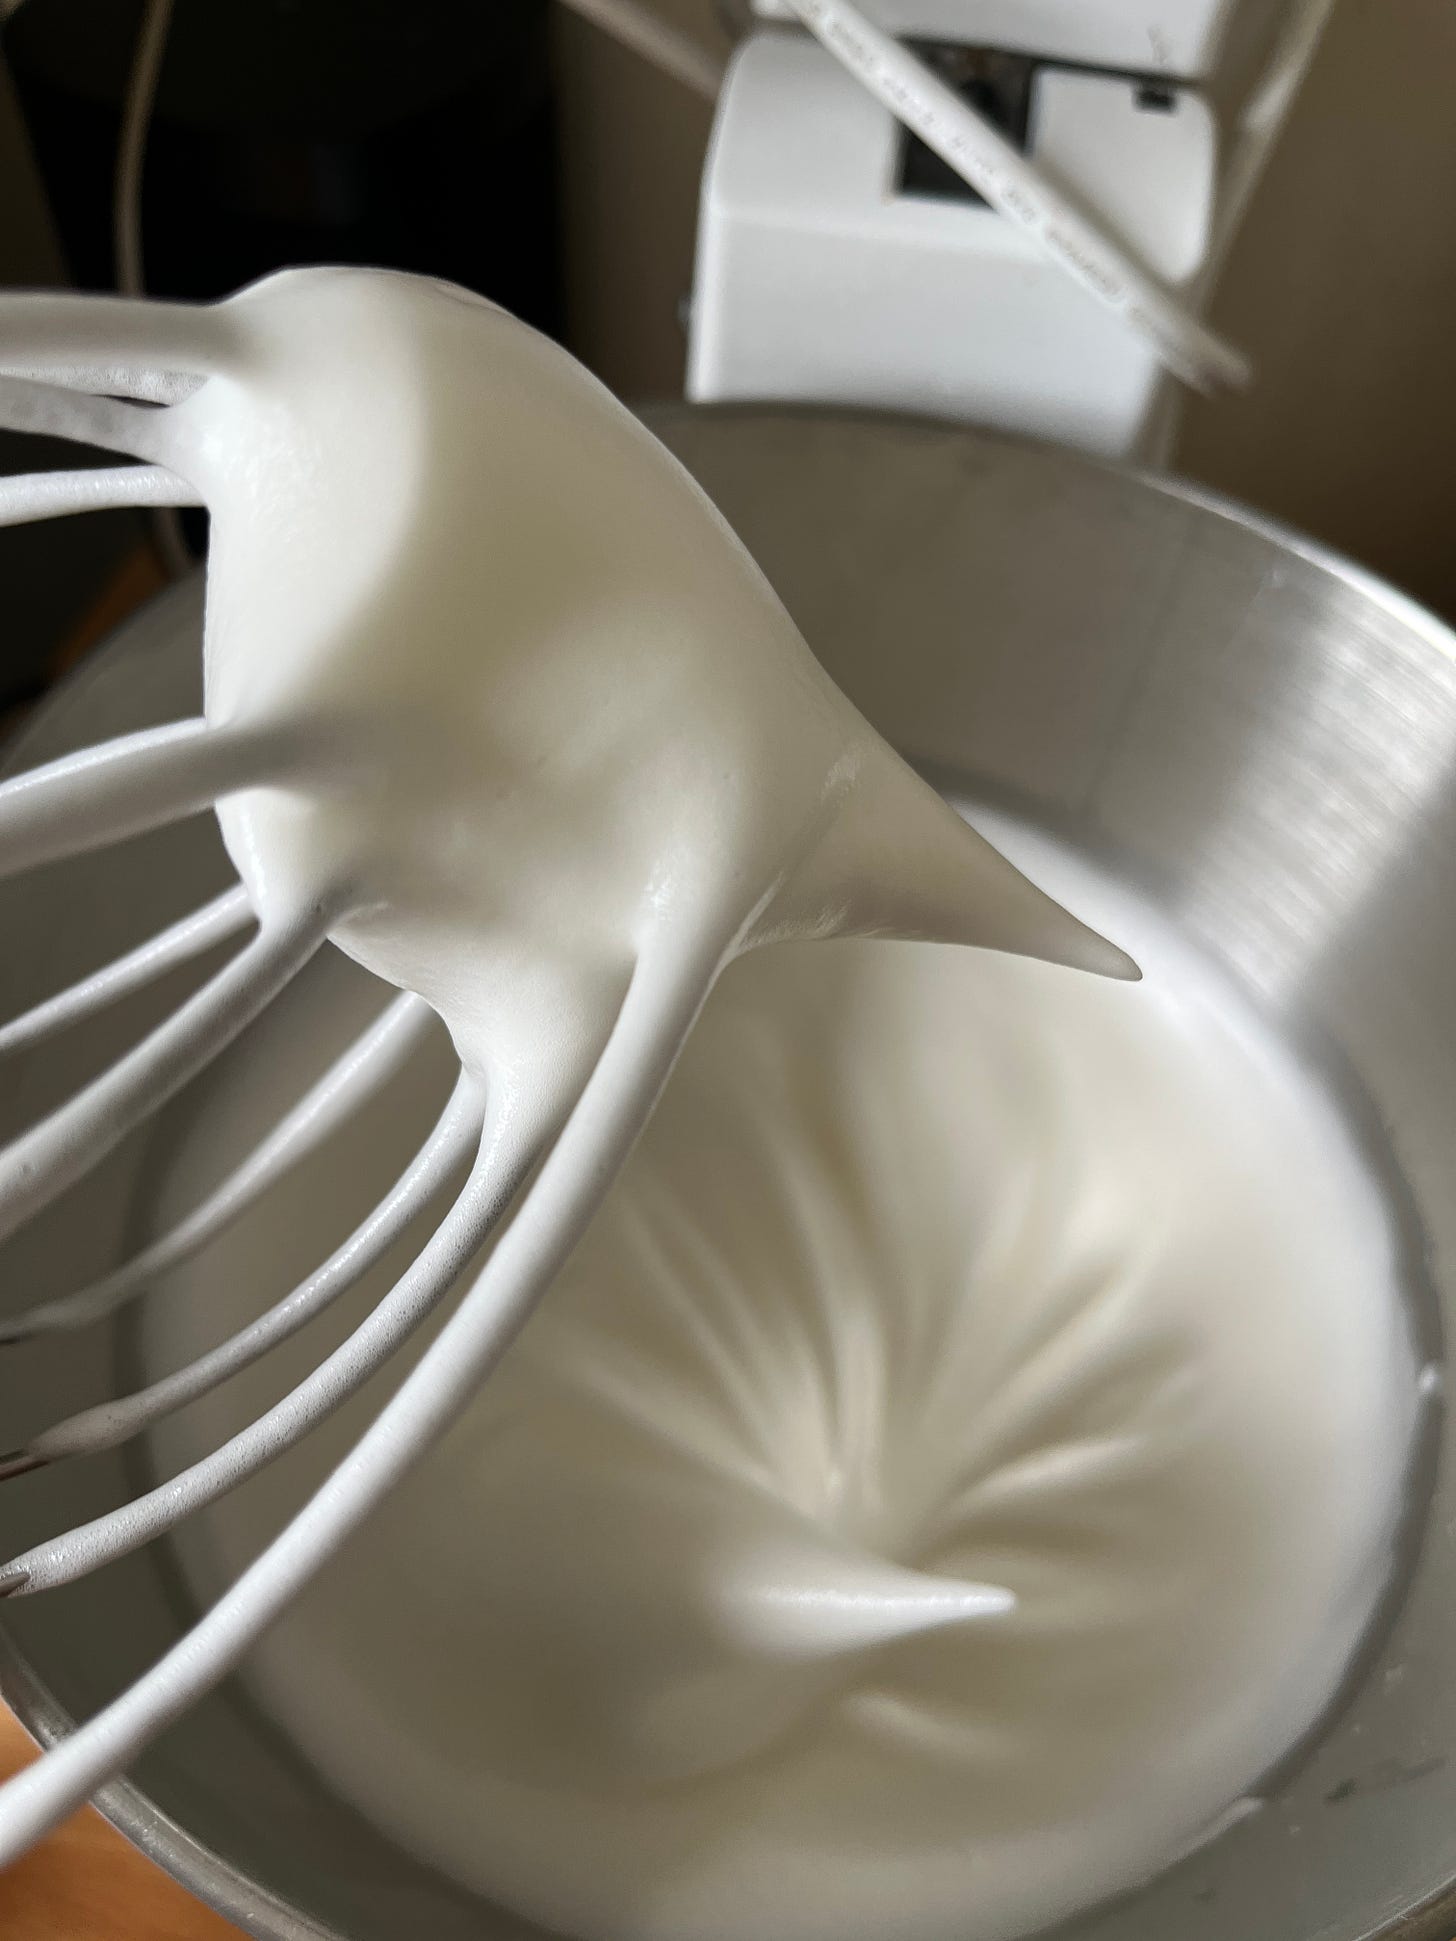
For the meringues: Place the egg whites in a clean, dry mixing bowl. Beat the egg whites on medium speed until they form soft peak, about 2-3 minutes. Gradually add the sugar, one tablespoon at a time, while continuing to beat the egg whites. Continue beating until the egg whites are firm and glossy, another 2-3 minutes. It will look light but strong, like shaving foam. If you whip too much, the mixture will become unstable and start to breakdown.
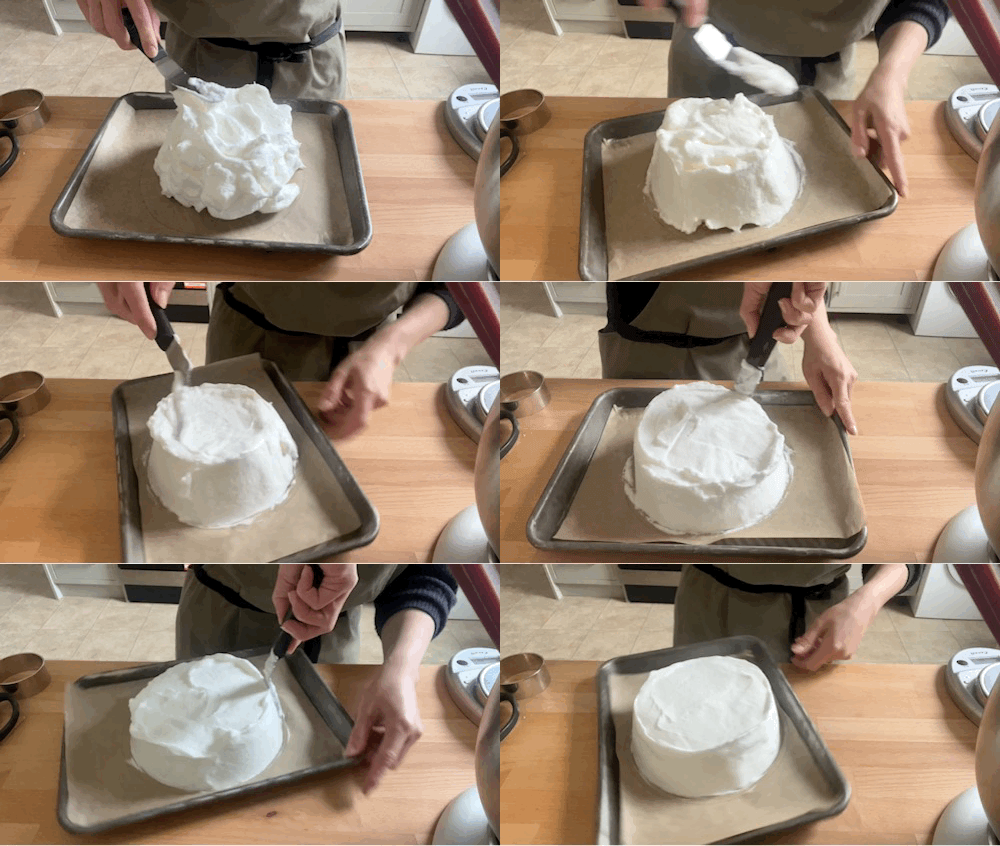
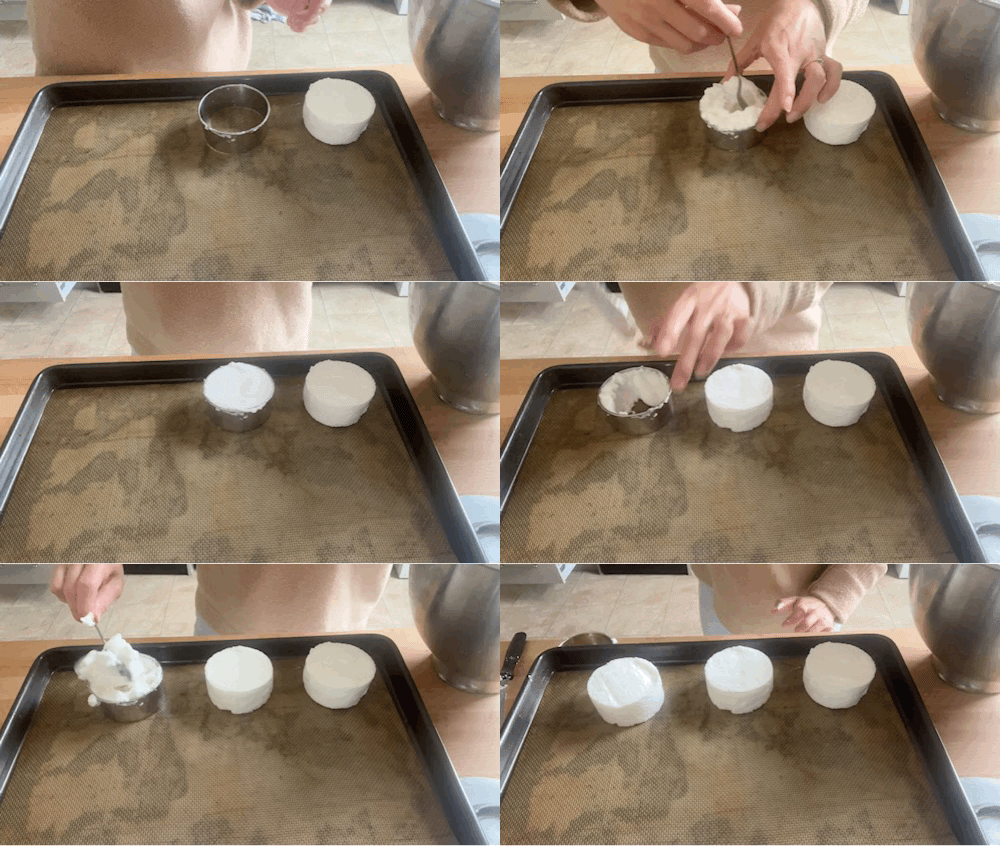
Pre-heat oven to 160c fan and boil the kettle. Mound the egg whites into a lined tin, or freeform on tray lined with paper or silpat - you can either use a tray or a cake base but bear in mind they will expand slightly. If you go freeform, you can really go wild with the shape! You can make it as tall and dramatic as you like, though very tall shapes may need 1 minute extra baking. Alternatively, spoon or pipe into your mould - it will remove cleanly leaving a perfect shape of meringue. Repeat until all meringue is finished.
If using a mould, place into a large high-sided tray then fill up to half way up the mould with boiling water to make a bain-marie. For freeform, place the tray of boiling water on a shelf underneath or on the bottom of your oven to create a steamy environment.
Bake the larger meringue for 8-10 minutes or until it has puffed up is lightly browned, and is firm and dry to the touch. For the small meringues, bake for 3 minutes, turn then another 1 minutes, or until dry. Leave to cool.
To steam: Steam large meringues gently for 6 minutes or until slightly puffed and dry, and small meringues for 2-3 minutes.
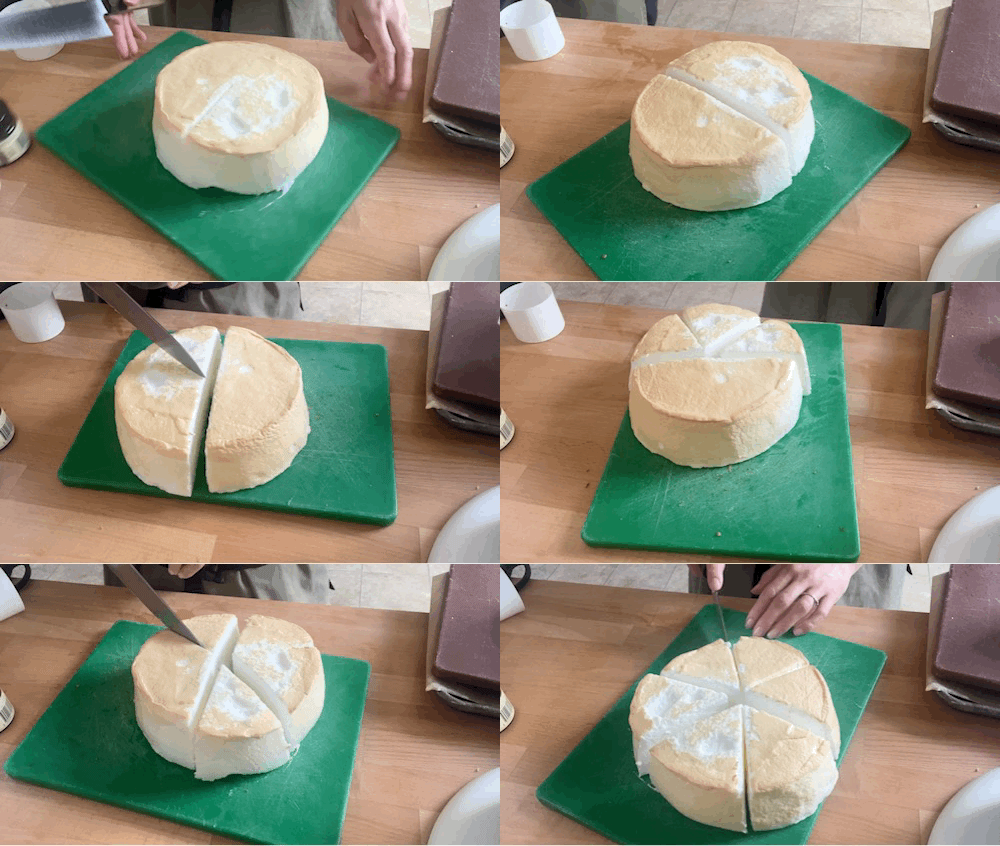
Once cooled, you can divide the large meringue into portions and, if desired, remove the browned edge, for a more dramatic look. Use a very sharp, non serrated knife for the cleanest slices, wiping inbetween cuts
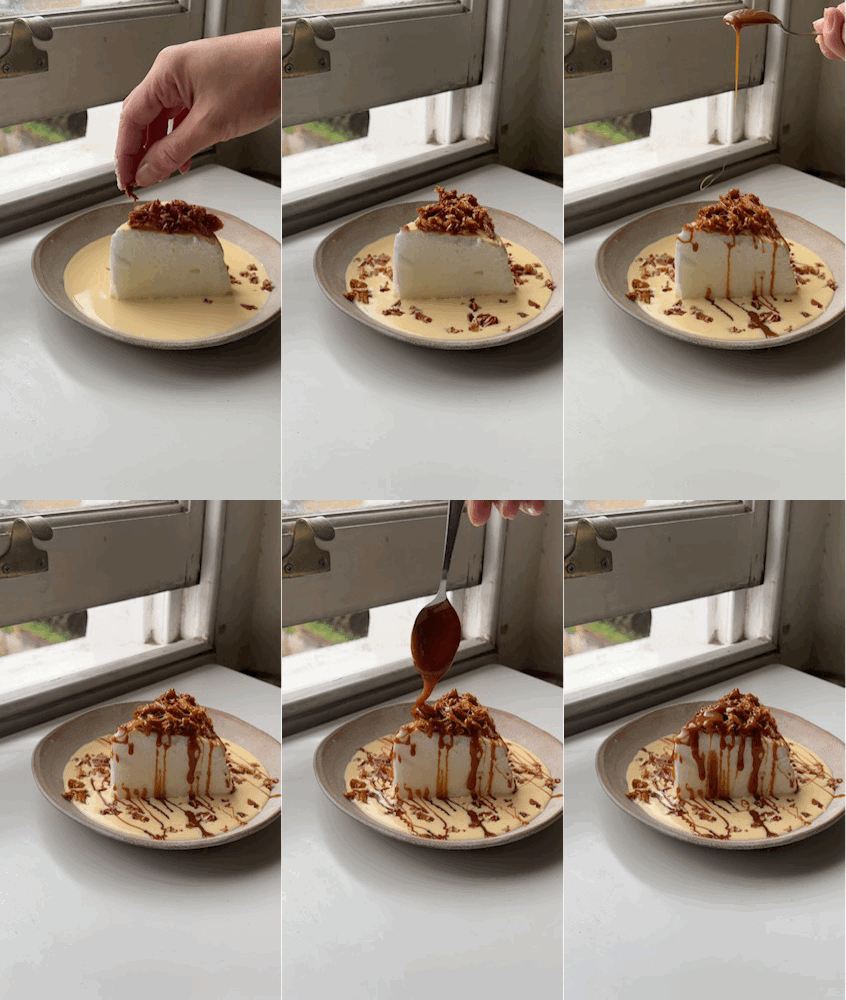
If desired, make the crunchy caramel topping, in a saucepan, add the sugar and water (i) and mix until it looks like wet sand. Heat the mixture over medium heat, swirling the pan occasionally (do not stir) until the sugar dissolves and starts to caramelise. Remove from the heat when it is pale golden. Spoon the hot caramel - careful, it will set quickly, onto the meringues and spread gently. It’s okay if a little drips down the sides. Leave to set.
To serve, pour the chilled crème anglaise into serving bowls. Gently place the meringues on top, either in individual portions or a large size. Drizzle or crumb over your toppings, like the caramel sauce and praline below.
Caramel sauce
Make a wet caramel Mix the sugar and water (i) in a medium saucepan until it looks like wet sand. Heat over a medium heat, not stirring, until it begins to caramelise. Turn the heat down and cook until the desired colour is reached. I like dark amber. Turn off the heat. Whisk in the water or cream a little at a time. It will bubble aggressively. Pour into a clean container and leave to cool. You may need to rewarm the sauce made with cream and it can set quite thick due to the fat content.
Almond praline
In a saucepan, add the sugar and water and mix until it looks like wet sand. Heat the mixture over medium heat, swirling the pan occasionally (do not stir) until the sugar dissolves and starts to caramelise. Continue to cook until the caramel turns a deep amber colour. Quickly add the toasted almonds to the caramel and stir with a heatproof spatula or wooden spoon to coat the almonds evenly with the caramel. Immediately pour the almond-caramel mixture onto a silpat or paper-lined baking tray. Leave to coolt then break the praline into pieces or blitz into a crumb.


My mother always served this for dessert in the summer, often with some sliced strawberries. She and I both grew up in southern Illinois. She used the recipe from the joy of cooking, but instead of using a soft meringue, she made regular small meringues… Crisp on the outside and soft on the inside… and floated them in the Floating island custard from TJOC. She also made the custard often if anyone was sick .
The timing of this recipe is great. I had floating islands for the first time on Friday at Eddie Scott's new restaurant in Beverley and wanted to make it at home. Also my brother had a rum baba and asked me to make some so last weeks recipe will come in handy too.