Hello,
Welcome to today’s edition of Kitchen Projects, my recipe development journal. Thank you so much for being here!
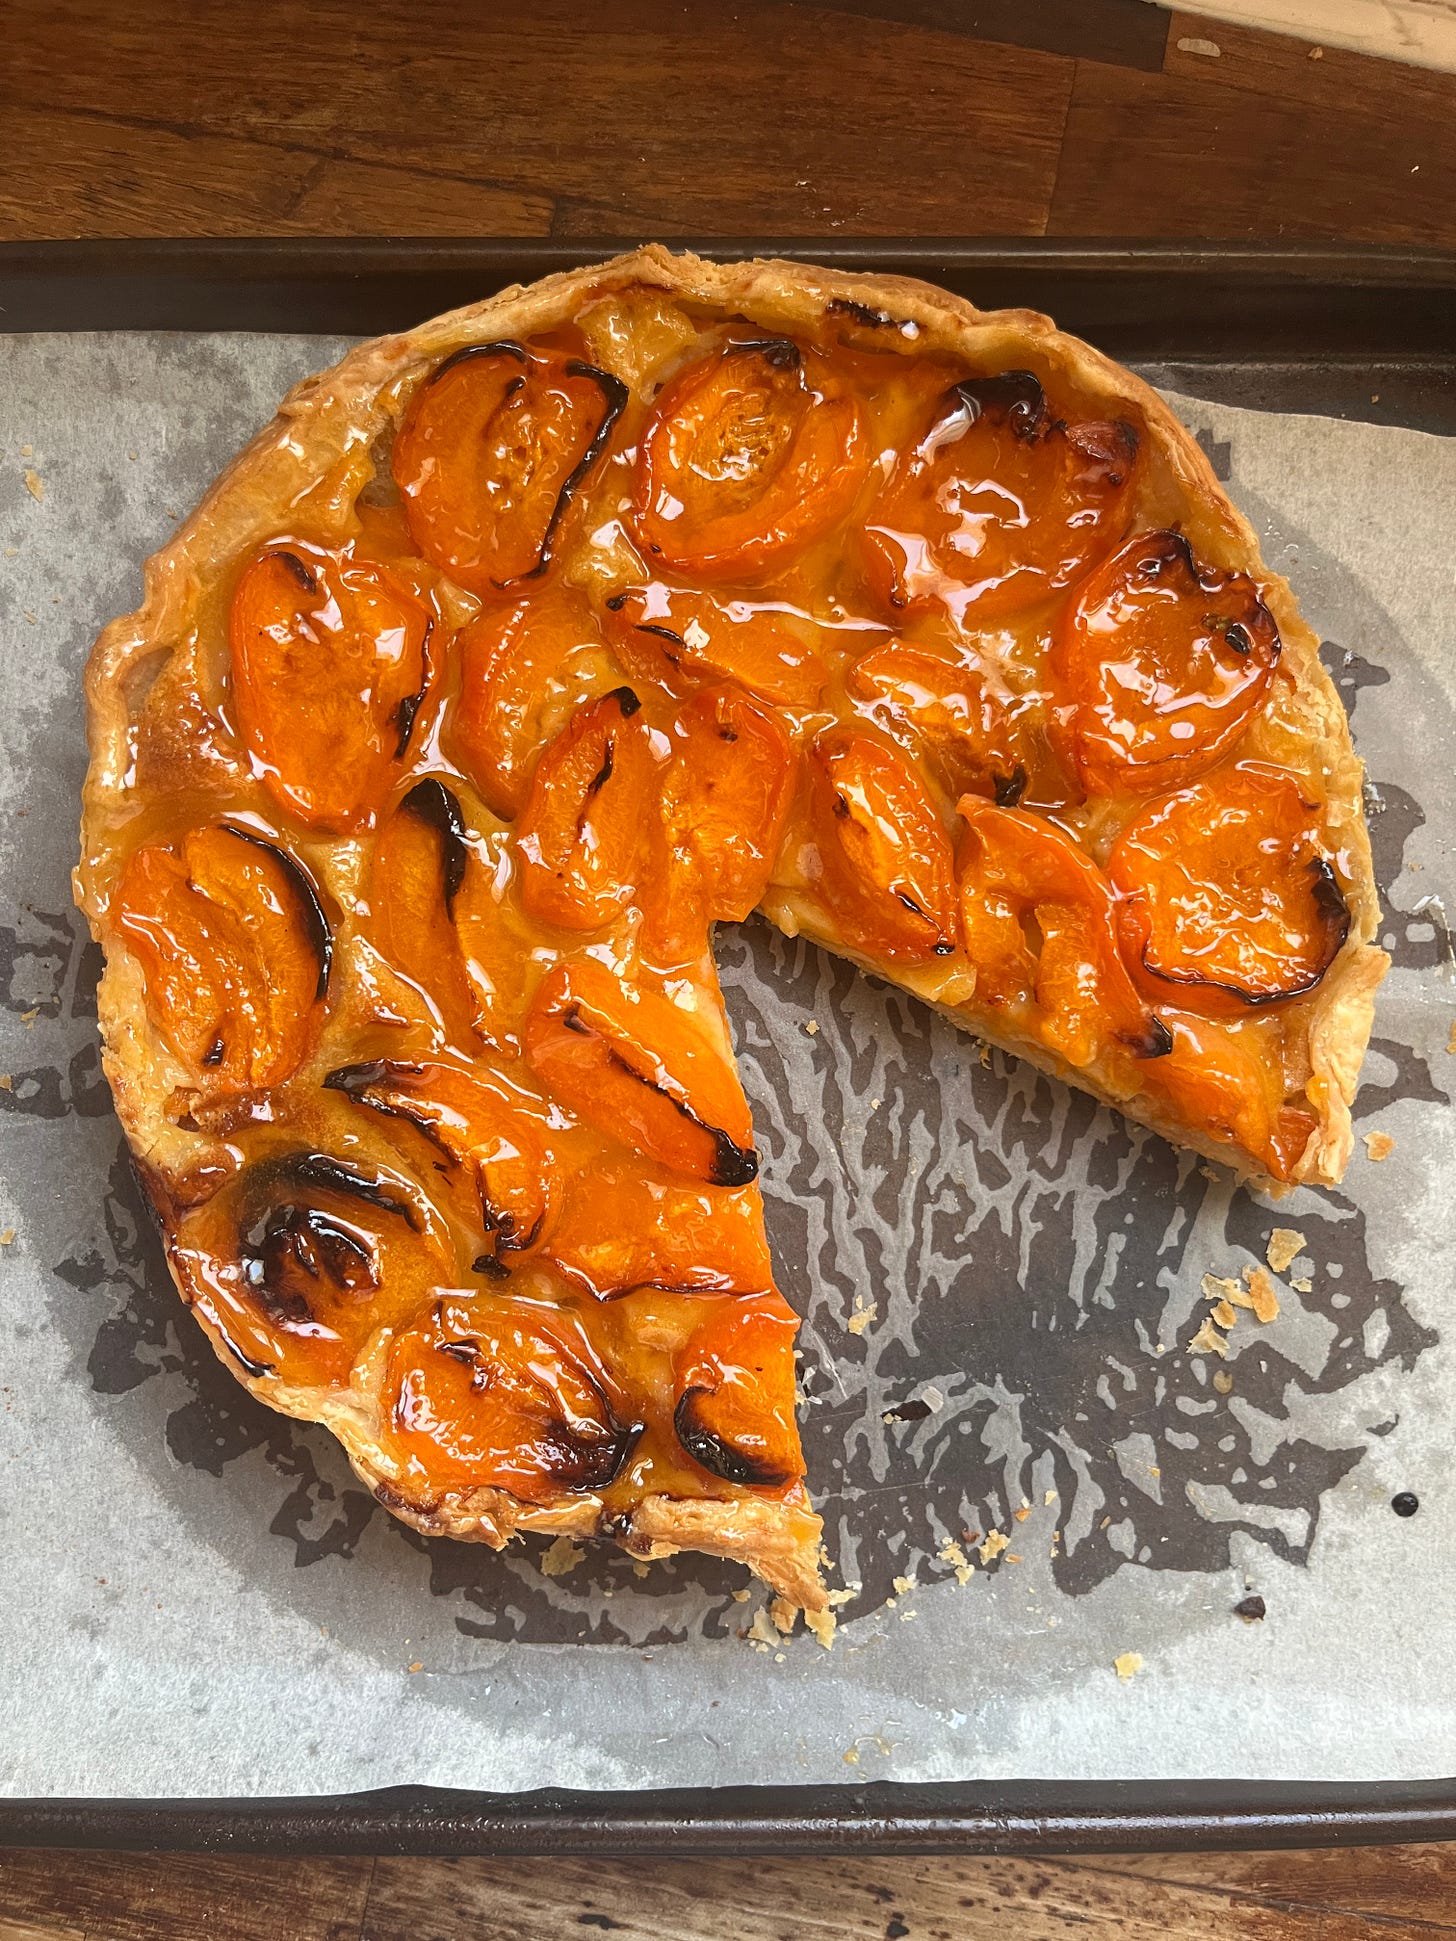
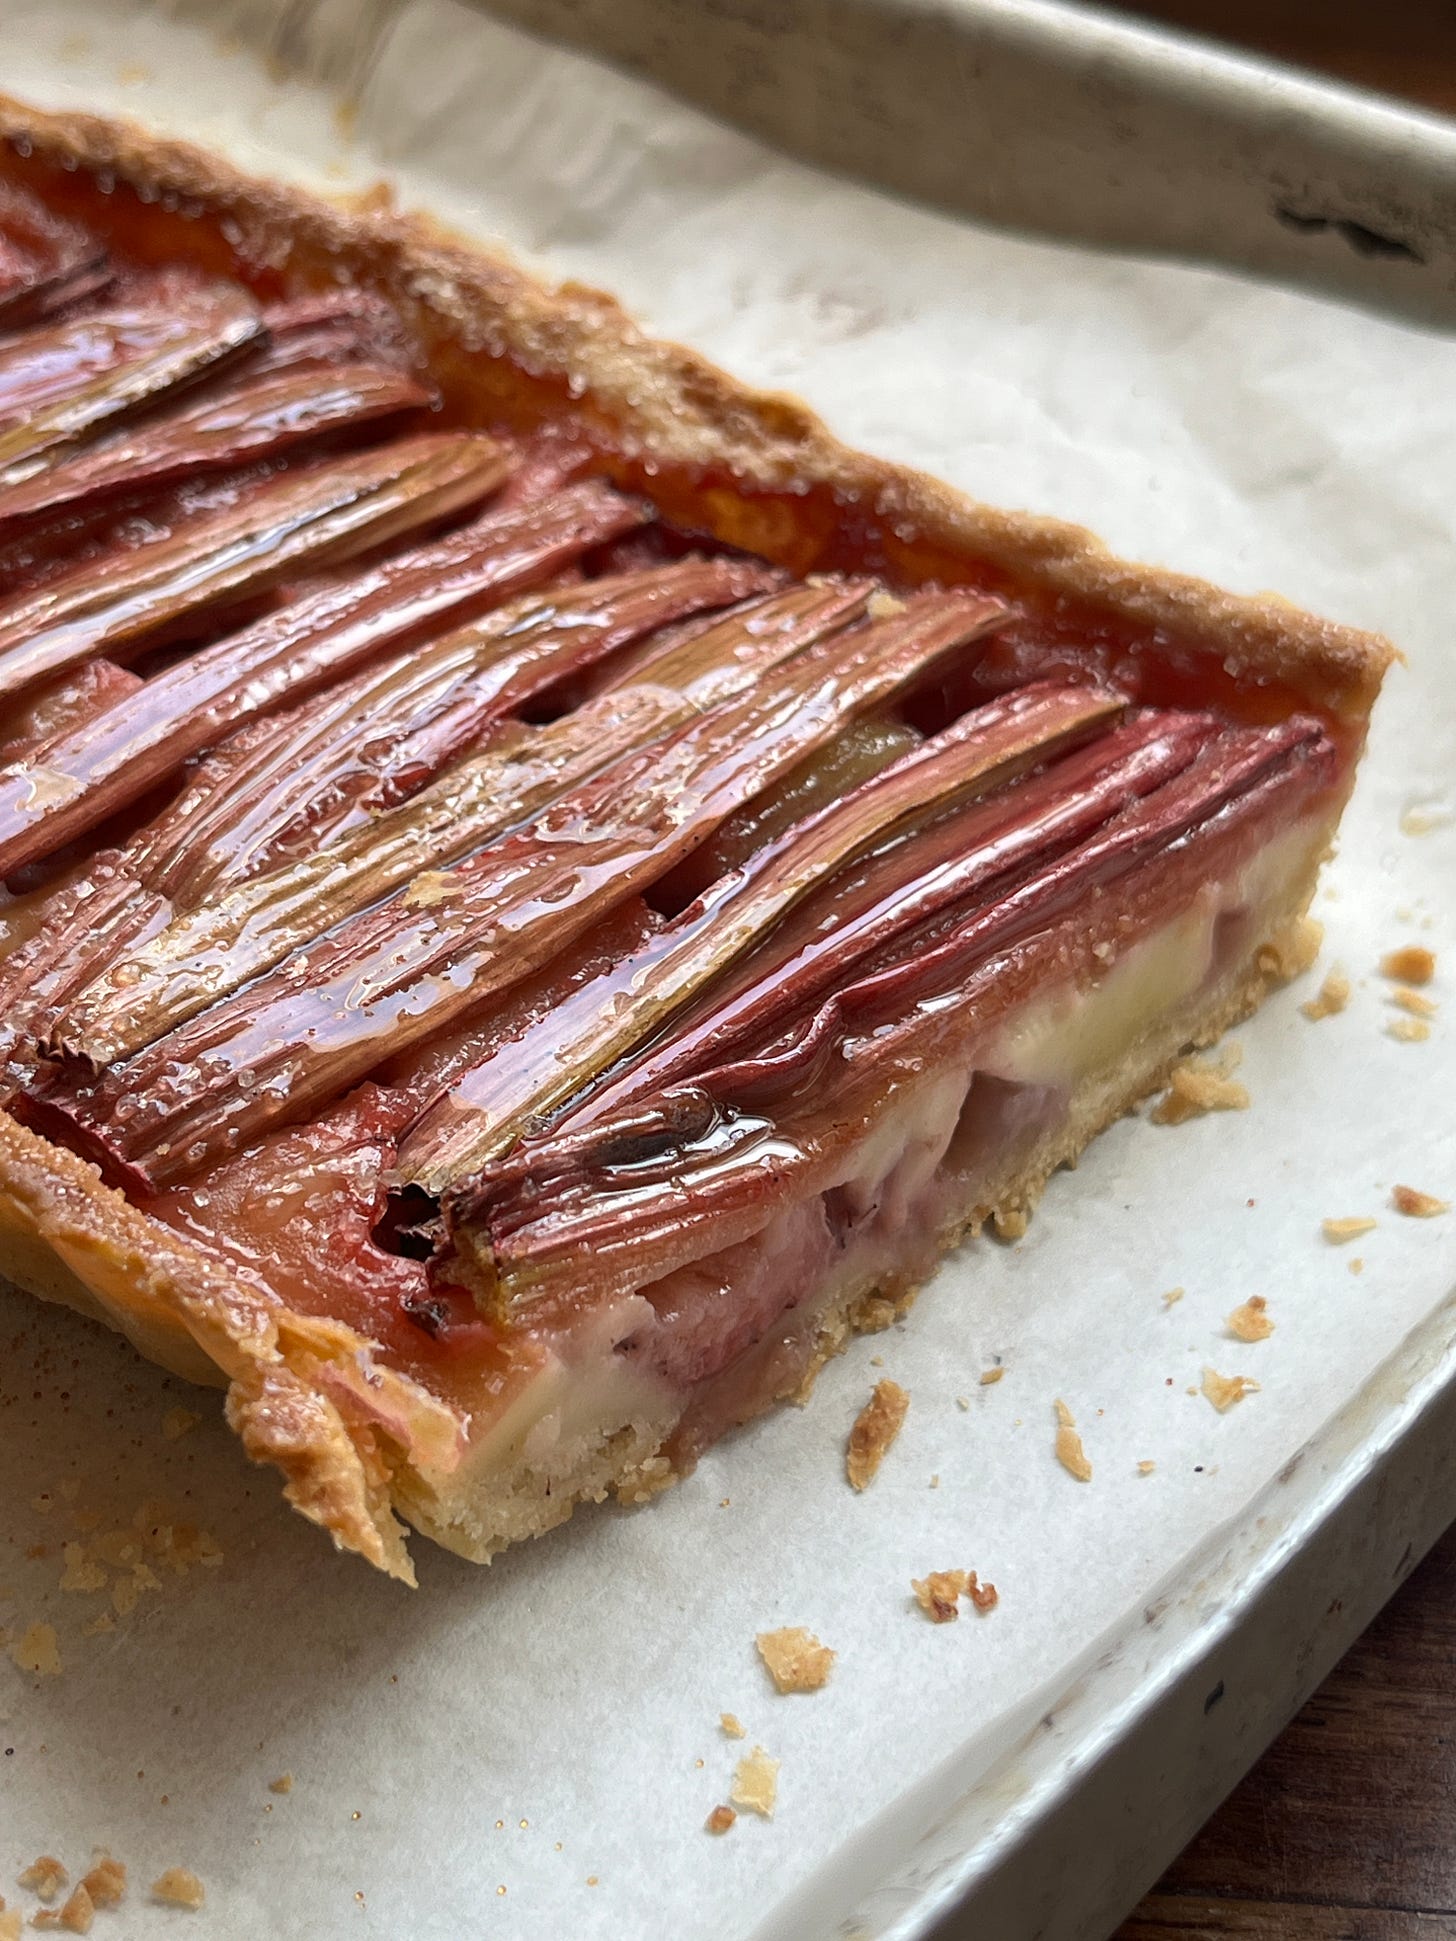
I’m so excited for today’s newsletter which is all about baked fruit tarts - thin, crispy flaky pastry laden with slightly charred fruit. I’m sharing a foundational recipe with you - ‘Pâte Brisée’ - as instructed by my new spirit guide: Monique, a french Mamie who I can’t wait to tell you about!
Over on KP+, I’m sharing Monique’s fail safe filling recipe that will have you making supermodel tarts all summer. Click here to read it.
What’s KP+? Well, it’s the level up version of this newsletter. By joining KP+, you will support the writing and research that goes into the newsletter and get access to an amazing community, extra content, the full archive, and more. Subscribing is easy and only costs £5 per month. Why not give it a go? Come n join the gang!
Love,
Nicola
A pastry foundation
Sometimes I look through the archive of this newsletter and realise there are glaring gaps. As much as I want Kitchen Projects to be supplementary to your cookbook/recipe ingestion, there are definitely subjects I want to make sure I hit and hit well.
One of the most valuable weapons in any baker's armoury is pastry, the golden dough cradles that we tuck our custard, frangipane and fruit into. The pastry that you use helps to define the character of your bake. It’s a foundation that you build upon, whether it’s buttery, crisp, flaky, rich, fluffy, dense. While a custard tart might benefit from the heft of a pastry rich with yolks and butter, a fruit tart might excel with something lighter and flakier.
It took me some time to realise this, but there really are very few wrong answers in baking. There are blunders, sure, but giving yourself the space and having the confidence to pair a pastry from here, with a filling from there, is the beginning of creating something new. Mixing and matching recipes was my first foray into recipe development - though some development is more akin to sculpting from scratch, there’s times when recipes are more like collages, patchwork quilts of ideas sourced from all over. That’s why it’s important to have as many building blocks at your disposal as possible.
One of these key building blocks is Pâte Brisée. Pâte Brisée is one of the ‘mother’ pastries, alongside pate sucree or pate sablee, aka sweet / tart doughs, and pate feuilette, aka puff pastry. ‘Brisée’ (pronounced BREE-SAY) translates as ‘broken’, but refers to a type of pastry we know as ‘shortcrust’. It can be sweet or savoury and takes many forms, depending on how you hydrate it and the way you treat the butter when you put the pastry together.
One of the best ways to enjoy the spoils of a well-made Brisée is in a stunning, simple fruit tart. Specifically, thin and crisp baked fruit tarts that show off summer’s best. And I have one person to wholeheartedly thank for inspiring this post: Monique.
What is the teacher series?
Today’s newsletter is a hybrid between a classic KP and a teacher series. The KP teacher series is something I launched last year where I spend the day cooking with an expert and report back on what I’ve learnt. A huge part of what drives this newsletter is a curiosity about food. I’m the first to admit that my expertise has limits, and I love nothing more than learning and listening. So every now and then, I’ll be heading into the kitchen or workspace of an expert, whether that’s a professional kitchen or a grandmother’s home, and becoming a student all over again! I’ll spend the day learning from them, asking ALL the questions, passing that knowledge onto you, and sharing their food story. I’ll also be sharing one of their tried & tested recipes for you to try at home.
For today’s edition, thanks to Monique, we’ll all get to channel our inner French Grandma (aka ‘Mamie’). Which is something we ALL need more of in our life. Shall we?
Fruit tarts forever!
On my recent trip to the Loire Valley in France, and wanting to learn a bit more about typical desserts from the area, I asked my dear friend Claire (who was generously hosting me with her dad Patrice) if there was anyone who might be interested in teaching me a thing or two during my stay. Although many friends of the family, aunties and grandmas came to mind - France really does know how to eat - there was one person who Claire really thought I should meet: Monique.
Monique, a close friend of Claire’s family, is an unofficial ‘Mamie’. Monique, along with her husband Bertrand, ran a bustling farm in the Loire Valley for decades. If you don’t know what serious business being a farmer’s wife is, then I’d highly recommend reading KP+ community member David Pinkerton’s glorious homage to his farm upbringing and his mum, an “OG baker”. To quote his piece:
“The people that feed the people that feed us are Farmer's Wives! I remember when I was a kid, on a Saturday, mum would have worked outside on the farm, made a cooked breakfast for several men, baked 4-5 different things, went to the shop for the paper and had time for a cup of tea and a read of the paper (while probably stopping my brothers and I fighting), and that was just the everyday.
There are also the harvest times when there are lots of extra workers to feed, (my Granny loved potato picking time, feeding lots and lots of people and days of great craic), WI baking competitions or making sandwiches and traybakes (Northern Ireland is BIG into traybakes) for a church event or making a massive boiler of Irish stew to feed 120 people at a ploughing match (farmers really do love farming!)
So here's to the chicken feeding, sandwich making, farmer feeding, jam making, beetroot boiling, calf rearing, breakfast cooking, account keeping wonder-bakers that are Farmer’s wives. And they do it all without an insta account!”
Meeting Monique
Whilst Monique was happy to show me a tart or two during my trip, she wanted to make sure that we all understood something very clearly: “It’s nothing special!” she would say over and over, “It’s just a tart! It’s so simple!”. After we promised we understood, we packed into the car and drove the 40 minute ride through the countryside to Monique’s, arriving promptly at 9:30AM (which is the perfect tart making hour, isn’t it?)
What I don’t think Monique realises, and may still not despite my persistent amazement through the day, is that throwing a fruit tart together is just not a casual thing to everyone.
Although I can’t speak for everyone and I can only refer to my own experience, I grew up fearing tarts: What if my pastry shrinks? How do I even prep this in advance? Even with my professional pastry jobs in London, I always felt like tarts were always something filled with trip hazards - make sure you avoid those soggy bottoms!? Should we blind bake?! How do we prepare this fruit and keep it its best?! Should there be frangipane? Custard?! What is the right route to take?
Over so many years, I’d built up tarts so much in my head that seeing just how casual it was for Monique to whip one up for an everyday lunch was revelatory. It made me realise how fruit tarts should be simple and fuss-free desserts that you can make on a whim when you have people over. They don’t require overthinking. They are just perfect vehicles for a glut of great fruit to shine in glorious simplicity. Whether it’s a handful of apples or a box of blushing apricots, this newsletter is all about taking the ‘scary’ away from fruit tarts and celebrating the imperfections that come with it.
The pastry
Once we’d settled into Monique’s, she produced a ball of pastry from the fridge. It was pale in colour but with large, deliberate flecks of yellow (The french really do not mess around with their butter). It was, unmistakably, a mound of Pâte Brisée.
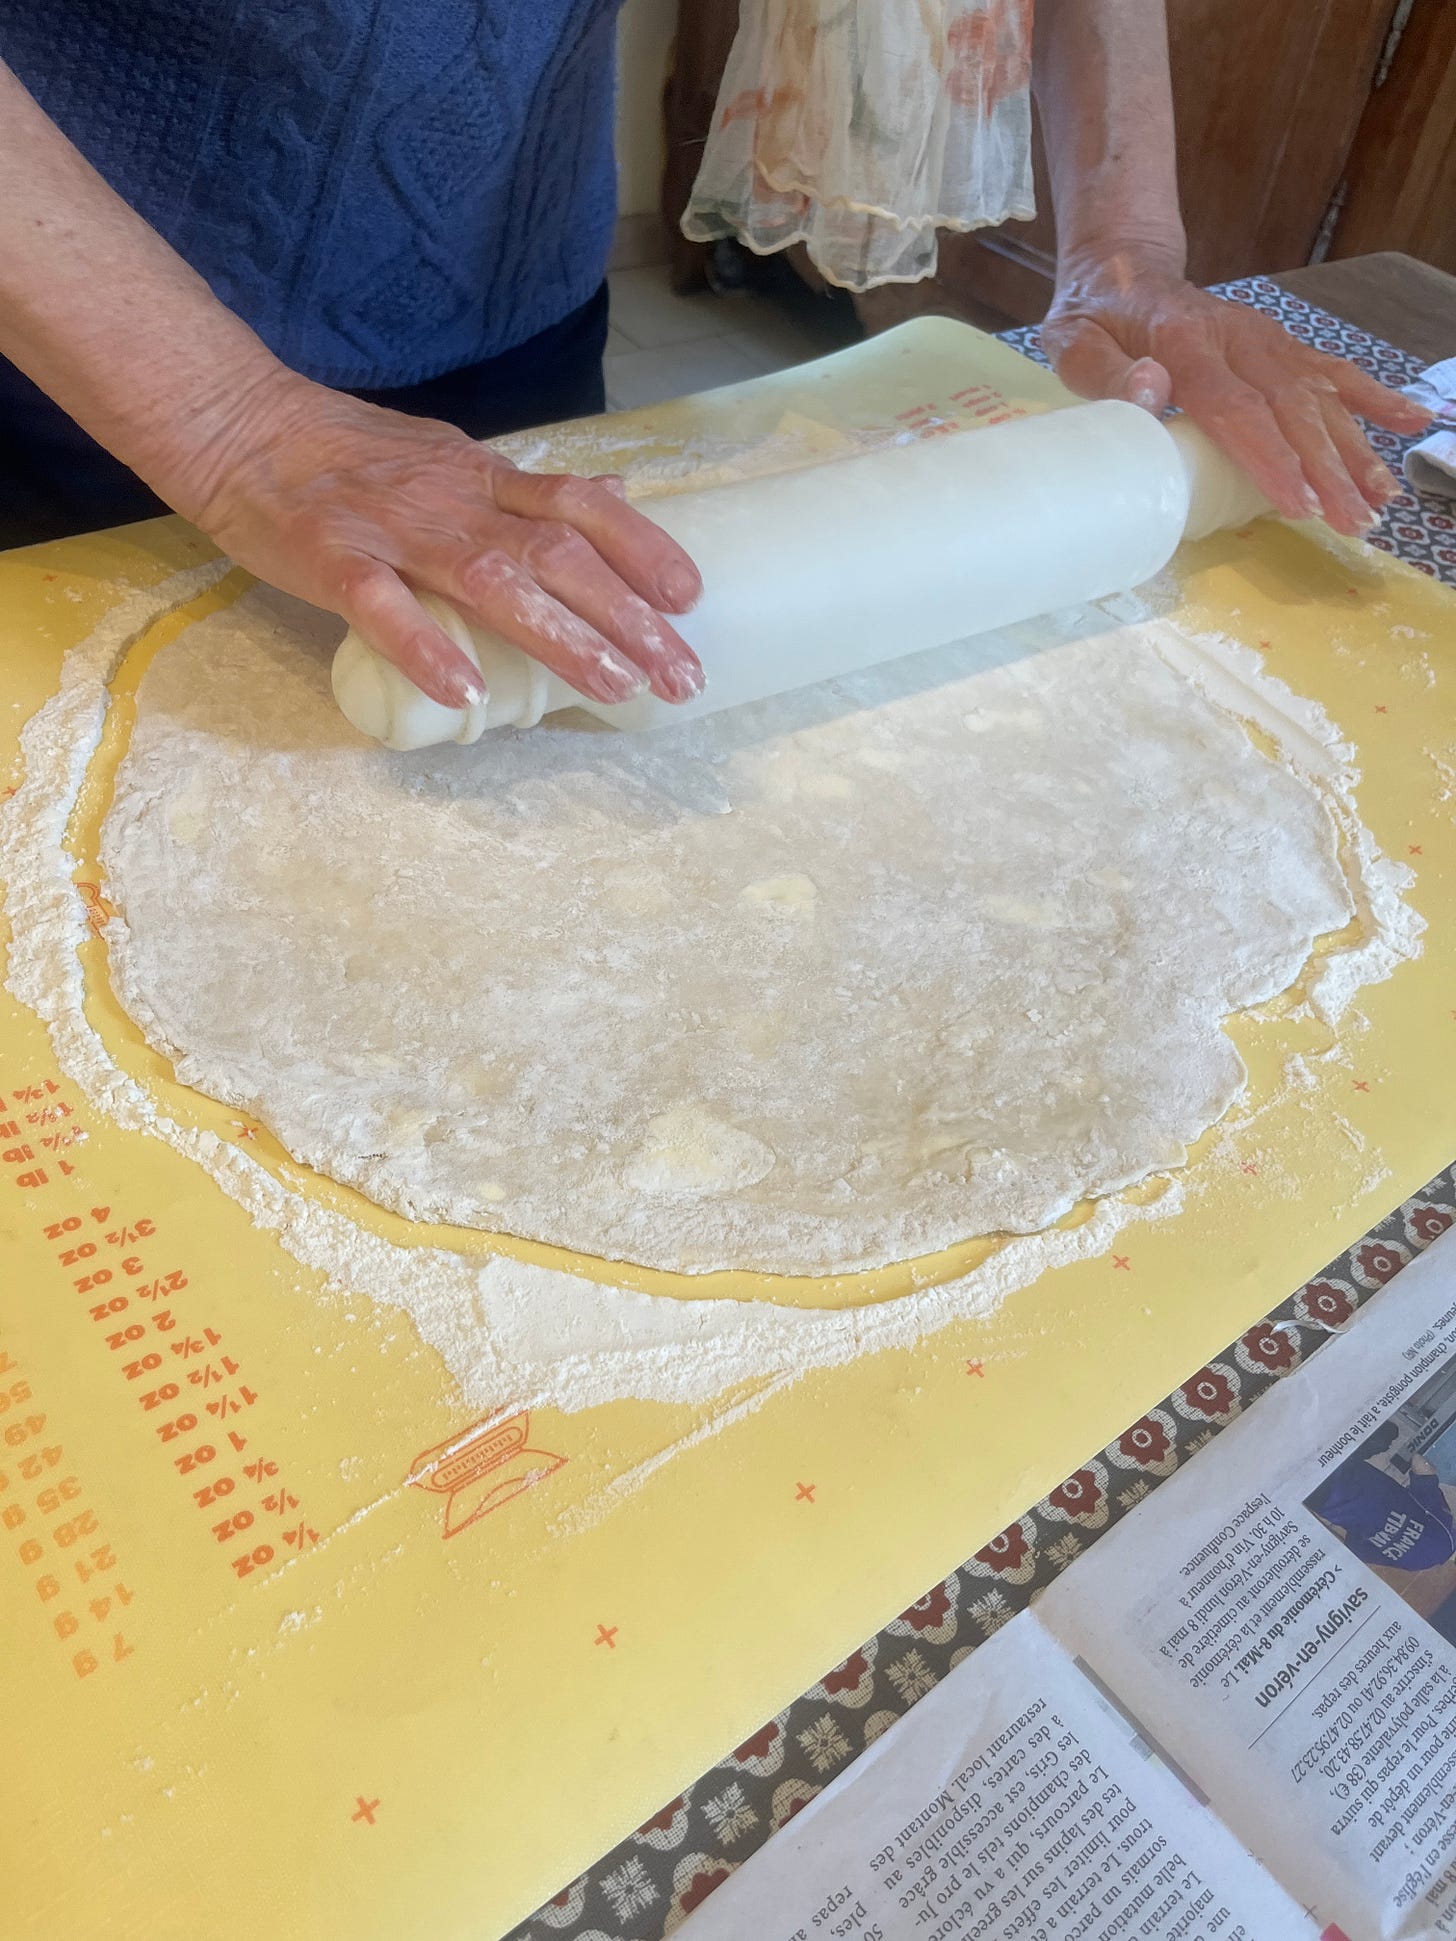
Monique rolled out the Brisée liberally with flour until it was paper thin. The thickness, she reminded us several times, was key for a crisp tart shell. How thin? Thinner than you think - about 3mm. She draped it over her well-used loose bottomed tart tin and filled it with fruit. Once it was in the oven, she demonstrated how to make the pastry, a skill taught to her multiple decades ago by her sister who attended a hotel hospitality course in Paris.
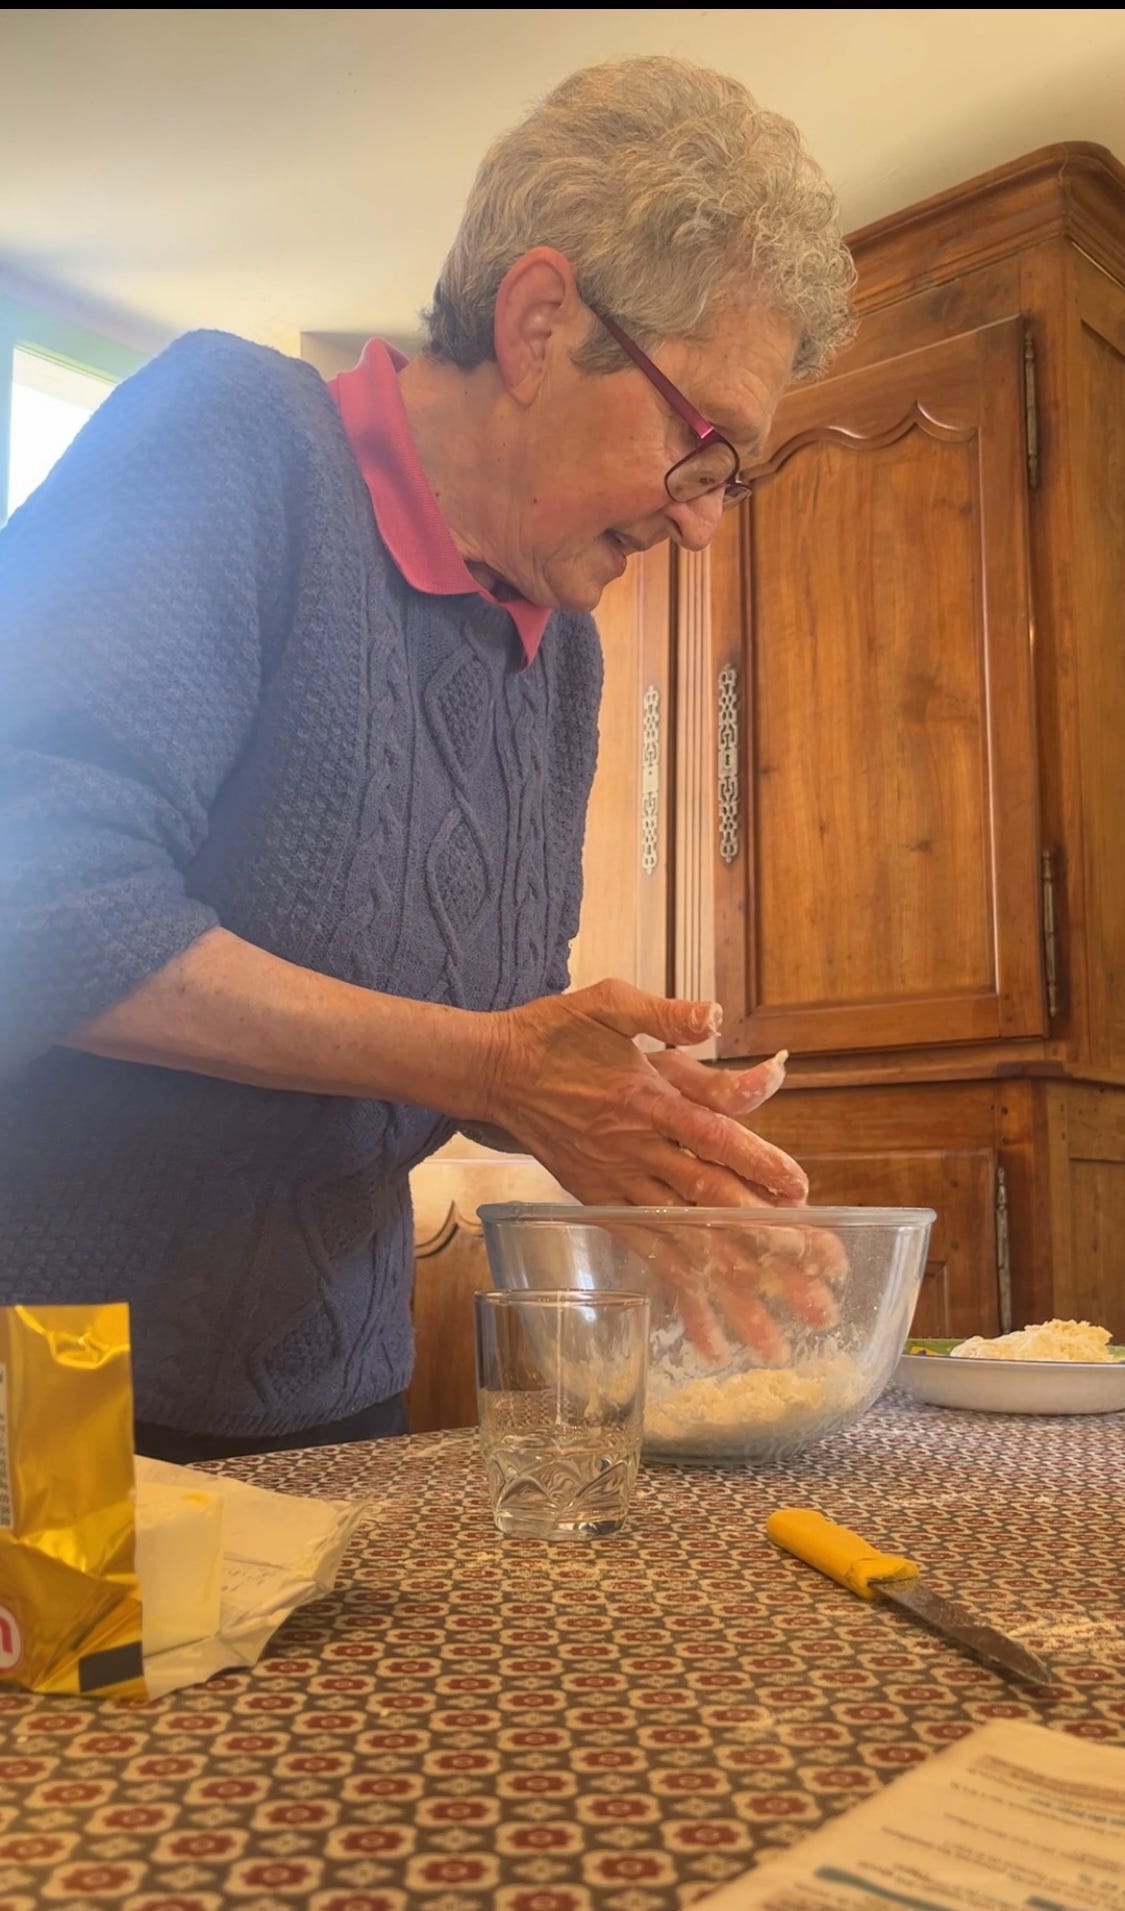
A clear sign of experience, Monique is incredibly efficient in the kitchen. There were no extra chopping boards, bowls or anything that might get in the way. For the pastry, she scaled the dries directly into a bowl (flour, salt - the fine kind, and sugar) then took cold butter from the fridge. It should not be so hard that it is solid, but it should slightly resist a press of the finger and not be greasy in your hands. Holding the butter in one hand, she took a sharp paring knife and trimmed off irregular pieces of butter, slightly triangular in shape and about 1-2cm.
After posting this on Instagram, it’s become clear that THIS technique is a hallmark of grandmas everywhere. From Poland to India, I’ve had reports that Monique’s ‘Mamie’ technique is global. And I, for one, am overjoyed to add a touch of grandma smarts to my repertoire. Other people have told me that this is something they do that they always though was ‘lazy’ - no, no, no! There’s nothing lazy about it. You’re already a generation ahead, mentally!
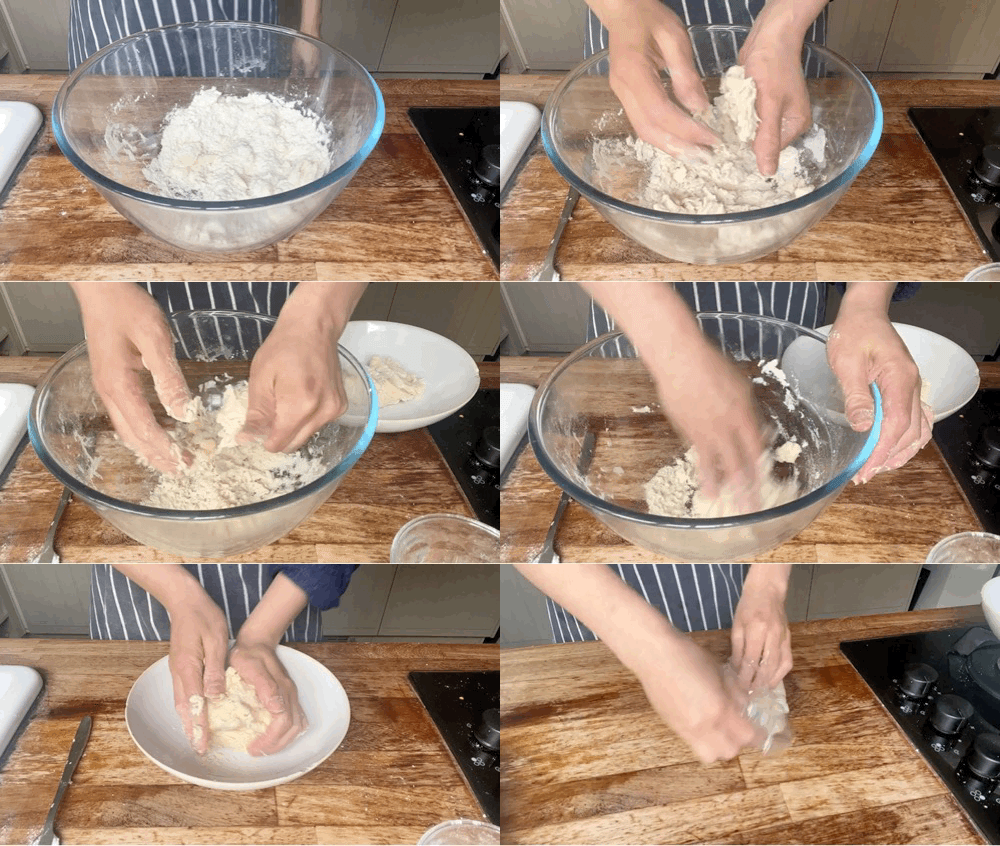
Once it was all in, she tossed the pieces in flour, working them in for about 30 seconds. The result was a mixture of larger and smaller pieces of butter, well coated in flour. From here, she added the water bit by bit. As she drizzled it in, she lightly tossed and mixed it, clumping it together with her hands slightly as she went. As larger clumps formed and held together (but still with plenty of dry bits), Monique removed them from the bowl and placed them on a clean plate. She explained that touching it as little as possible was key.
It’s a genius move: By removing the dough that has formed, you reduce the risk of overworking the dough and developing the gluten in the dough. Once the larger clumps were removed, Monique drizzled more water in the leftover dry bits, forming these into clumps bit by bit. This meant that every part of the dough was properly hydrated. There were no bits that had too much liquid vs not enough and, as a result, the pastry will be light and flaky, rather than overworked and dense (which is what would happen if you were to keep adding water and working the dough until it came together in one ball in the bowl.)
So, what actually IS Brisée?
We’ll take a brief detour away from Monique’s kitchen to look a little deeper into the world of Brisée. One of the best ways to get to know a dough is by looking at its family tree. Shall we?
Pie dough is a direct relative of Pâte Brisée. The main difference is the amount of butter. Whilst standard Brisée/shortcrust comes in at a respectable 50% fat (usually 1 part butter to 2 parts flour), pie dough recipes tend to begin closer to 70% fat. This results in a richer, more tender pastry.
Pâte Brisée is a great place to see butter in action. One of the biggest ways to affect our pastry is the size of butter pieces. For a flaky effect, chunks of butter are suspended throughout which, when baked, turn to steam and leave little buttery pockets behind in the baked pastry which easily flake apart and have an amazing flavour and texture. Depending on the recipe and technique, you’ll be asked to take the butter to various sizes. The size of the these ascertains the holes ie. flakes later on.
Working butter into the flour
Big or small, the butter will leave little holes as it bakes. Large butter bits = big holes = flaky and crisp. Small butter bits = small holes = dense and short.
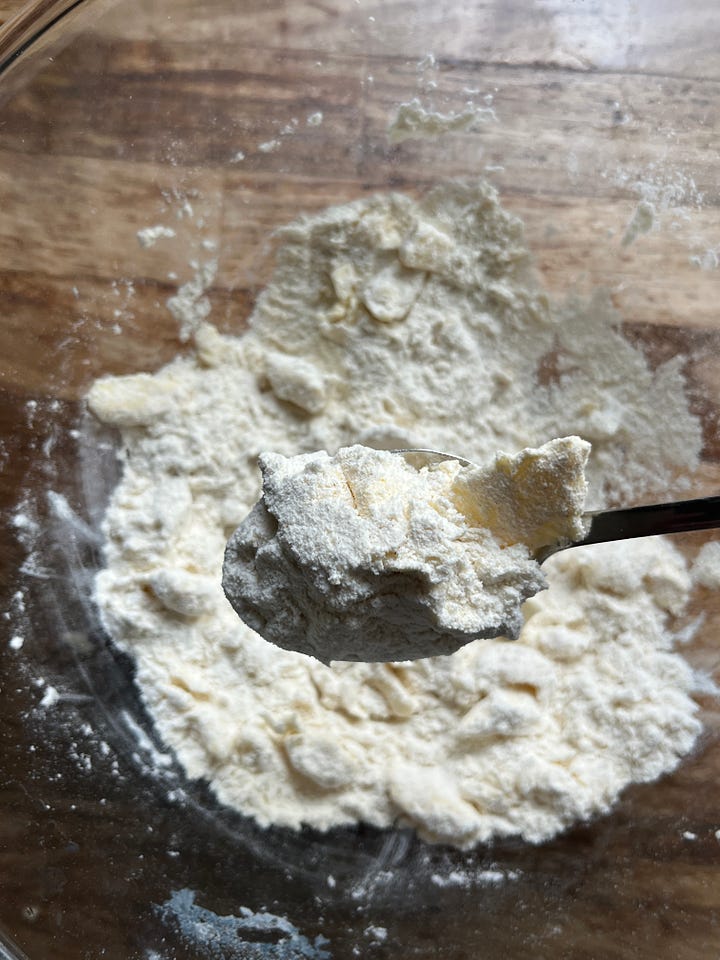
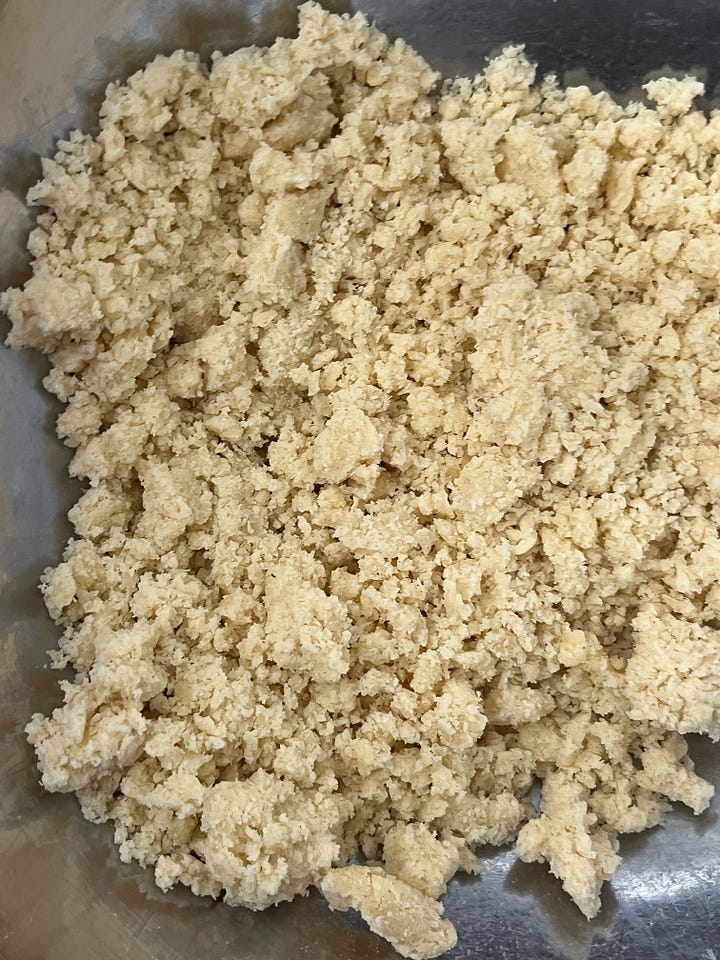
Depending who is teaching you and what the intended effect is, the butter will be worked into the flour different amounts. The mixing method is extremely important as it acertains how much hydration is required. Basically, the more you rub in the butter, the less liquid you’ll need to bring it together as a dough because the butter itself is hydrating the flour. This is why shortcrust pastry doughs seem to have relatively low hydration compared to flaky pastry. The more water there is available to the flour, the more gluten that can form. The gluten and starches harden as they bake which make pastry very crisp.
A flaky shortcrust, for example, takes about 35%-40% water to flour weight, whilst a shortcrust that all the butter has been worked into will only need around 10% water to flour weight - a huge reduction.
Here it is in action:
The texture is quite different - the pastry with large pieces of butter is crispy and flaky with a lot of bite. The pastry with the butter completely worked in is tender and rich, a butteriness that coats the tongue.
Hydrating
The pastry that Monique showed me used only water to hydrate, resulting in an ultra crisp texture. But you have a few options. I mixed up a batch of Brisée and hydrated one with eggs, and one partly with yolks and water. Scroll up to see the results.
The Brisée made with eggs or yolks is a shade or two darker and has a little more bite. The colour is due to the improved maillard reactions thanks to the proteins in the eggs. And since eggs coagulate when heated, the presence of egg whites in the whole egg batch makes it slightly crisper than the recipe made with just yolks.
Fruit filling
Depending on what is in season, Monique’s repertoire of fruit tarts rotates. The apple tart she showed me had nothing more than 8 or 9 apples and a little vanilla sugar on top. This solo fruit headliner is a great way to use up a glut of great fruit and let it shine in its simplicity, from apricots to pears to plums.
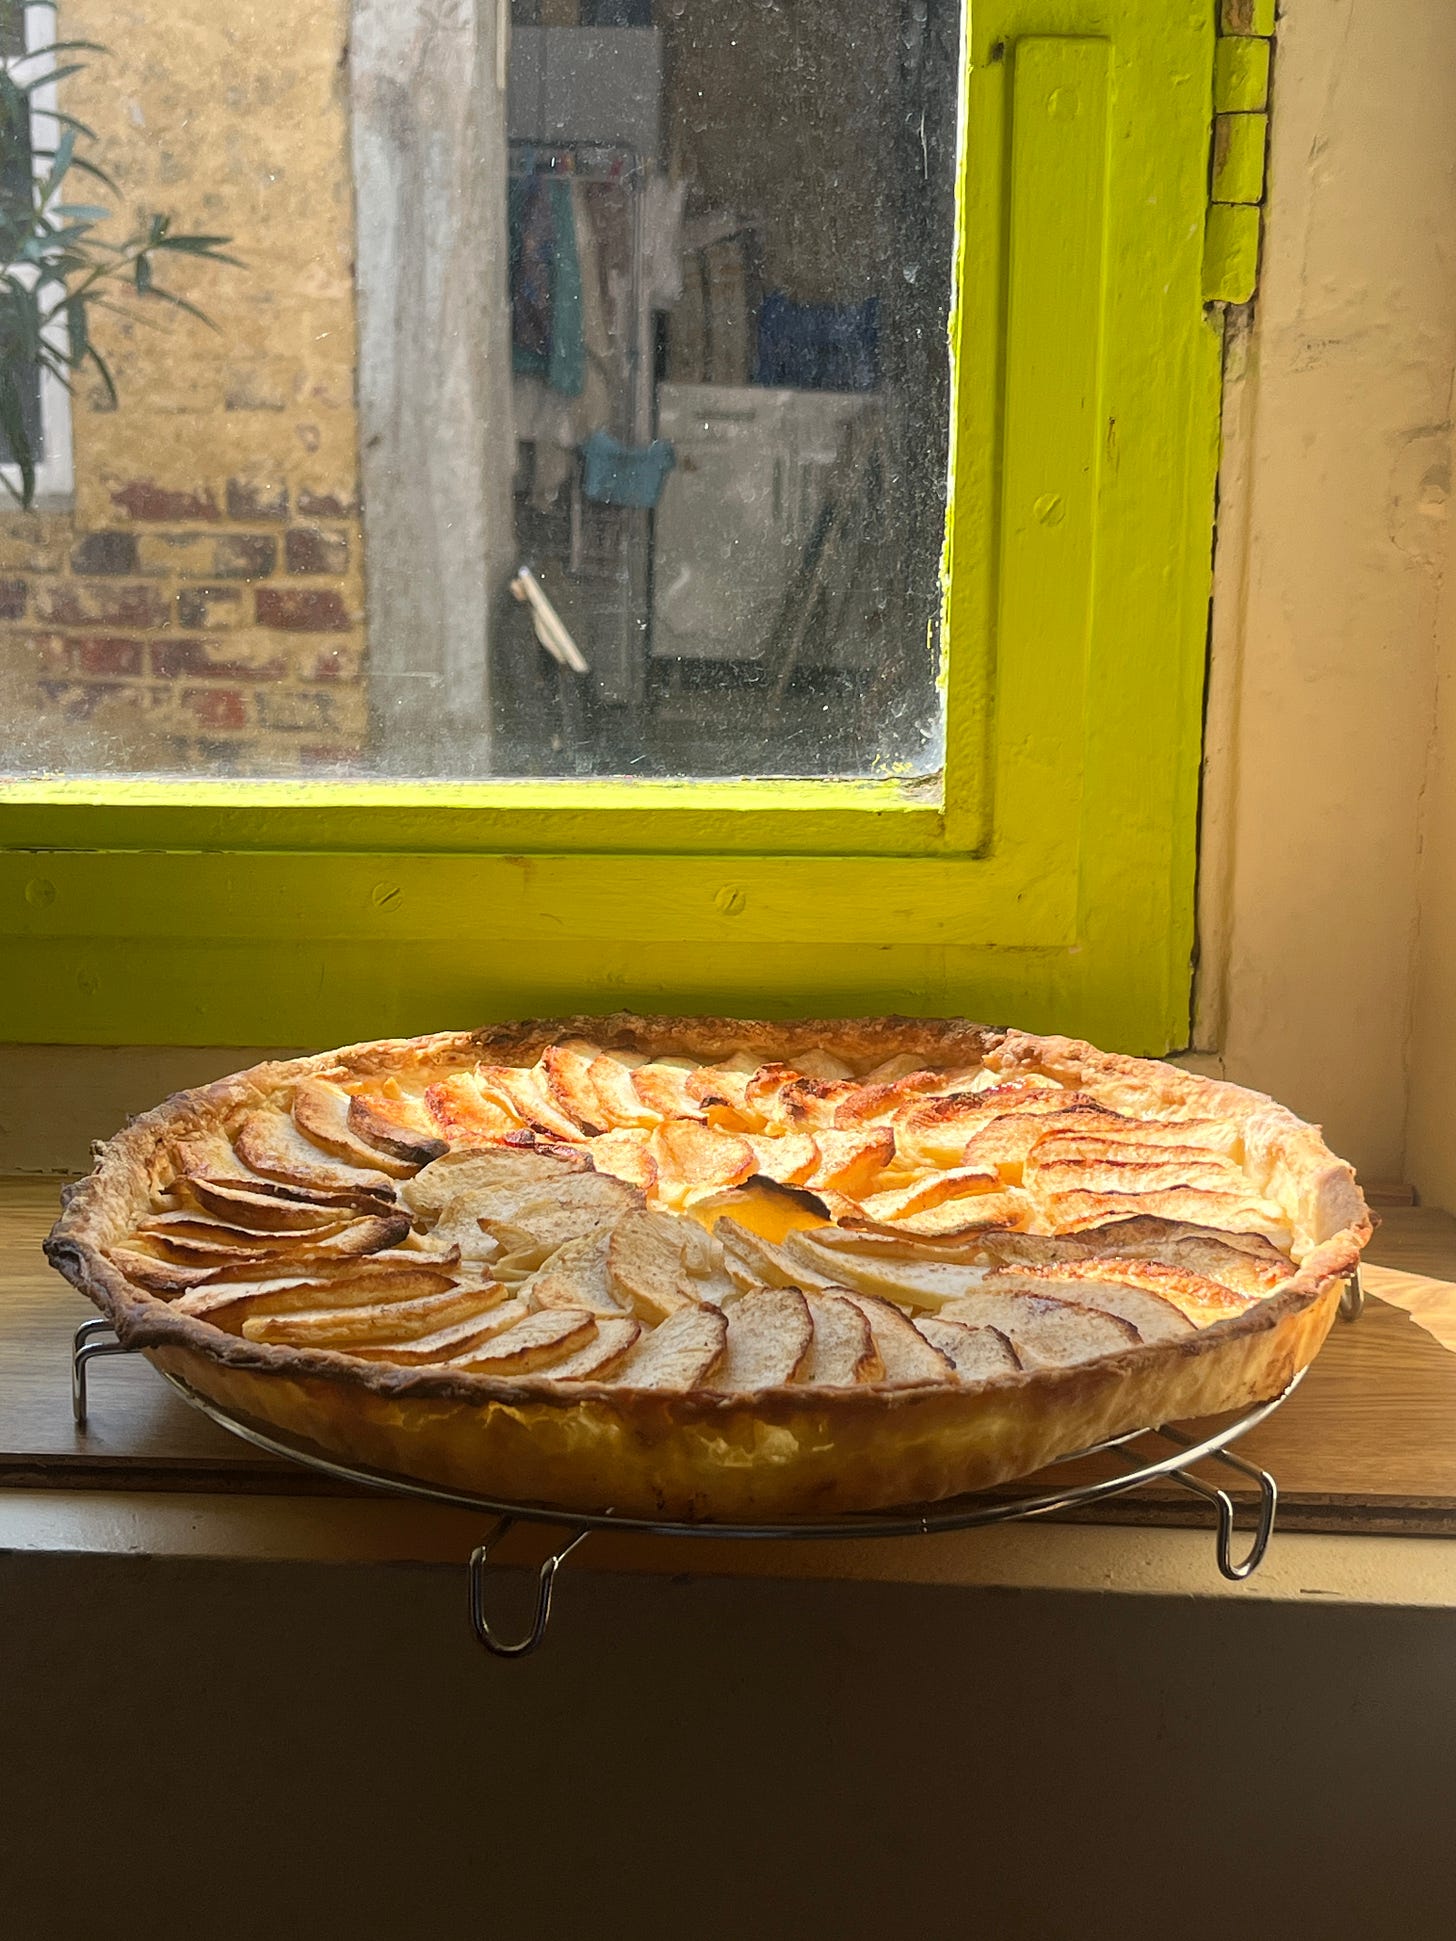
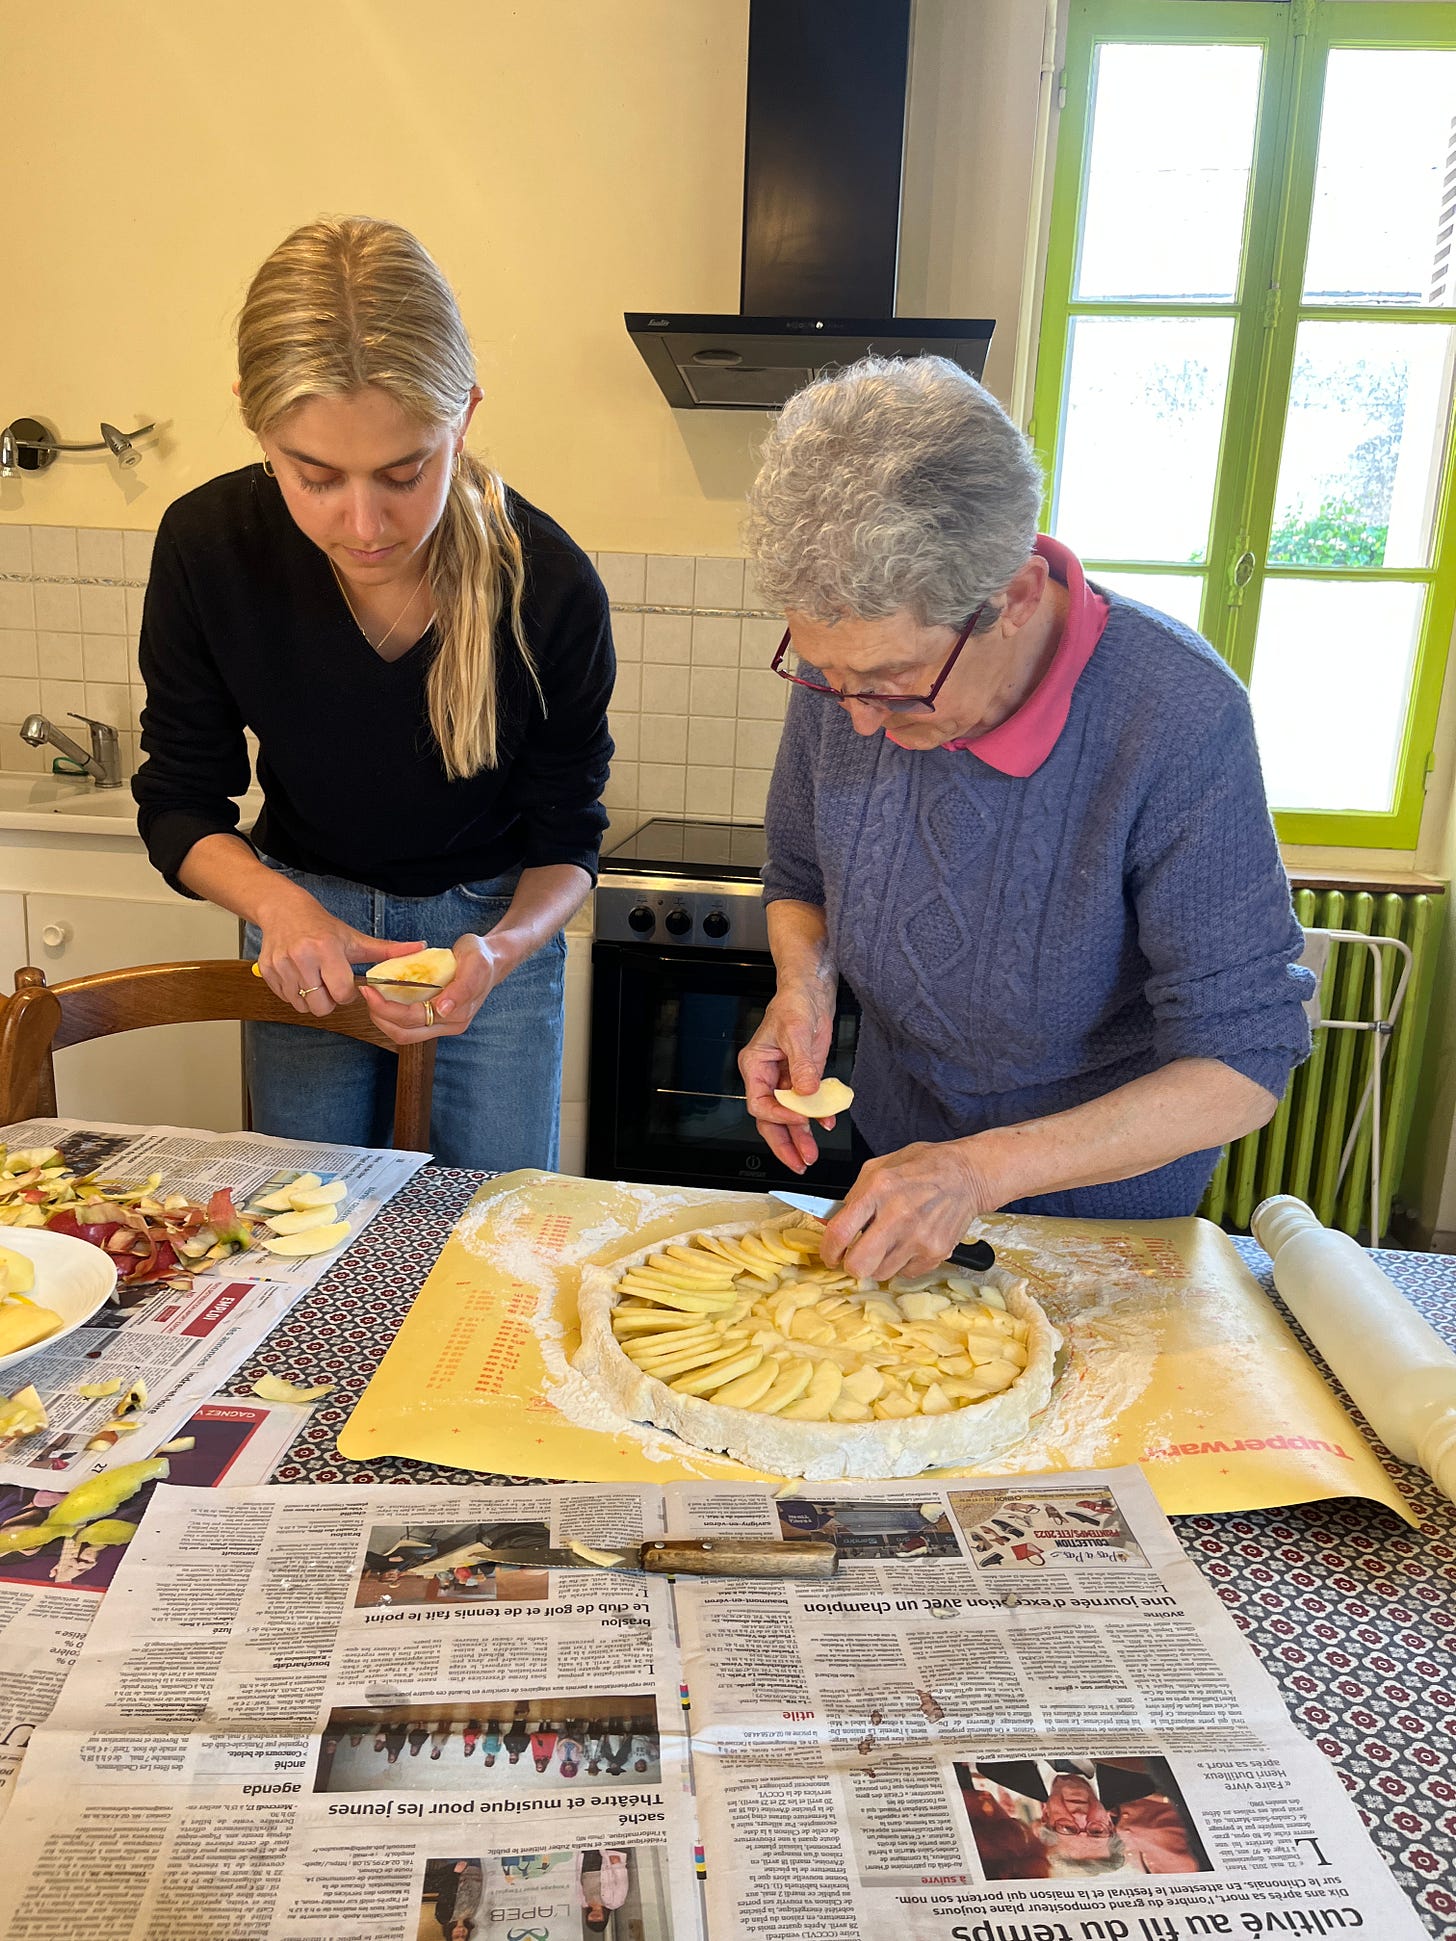
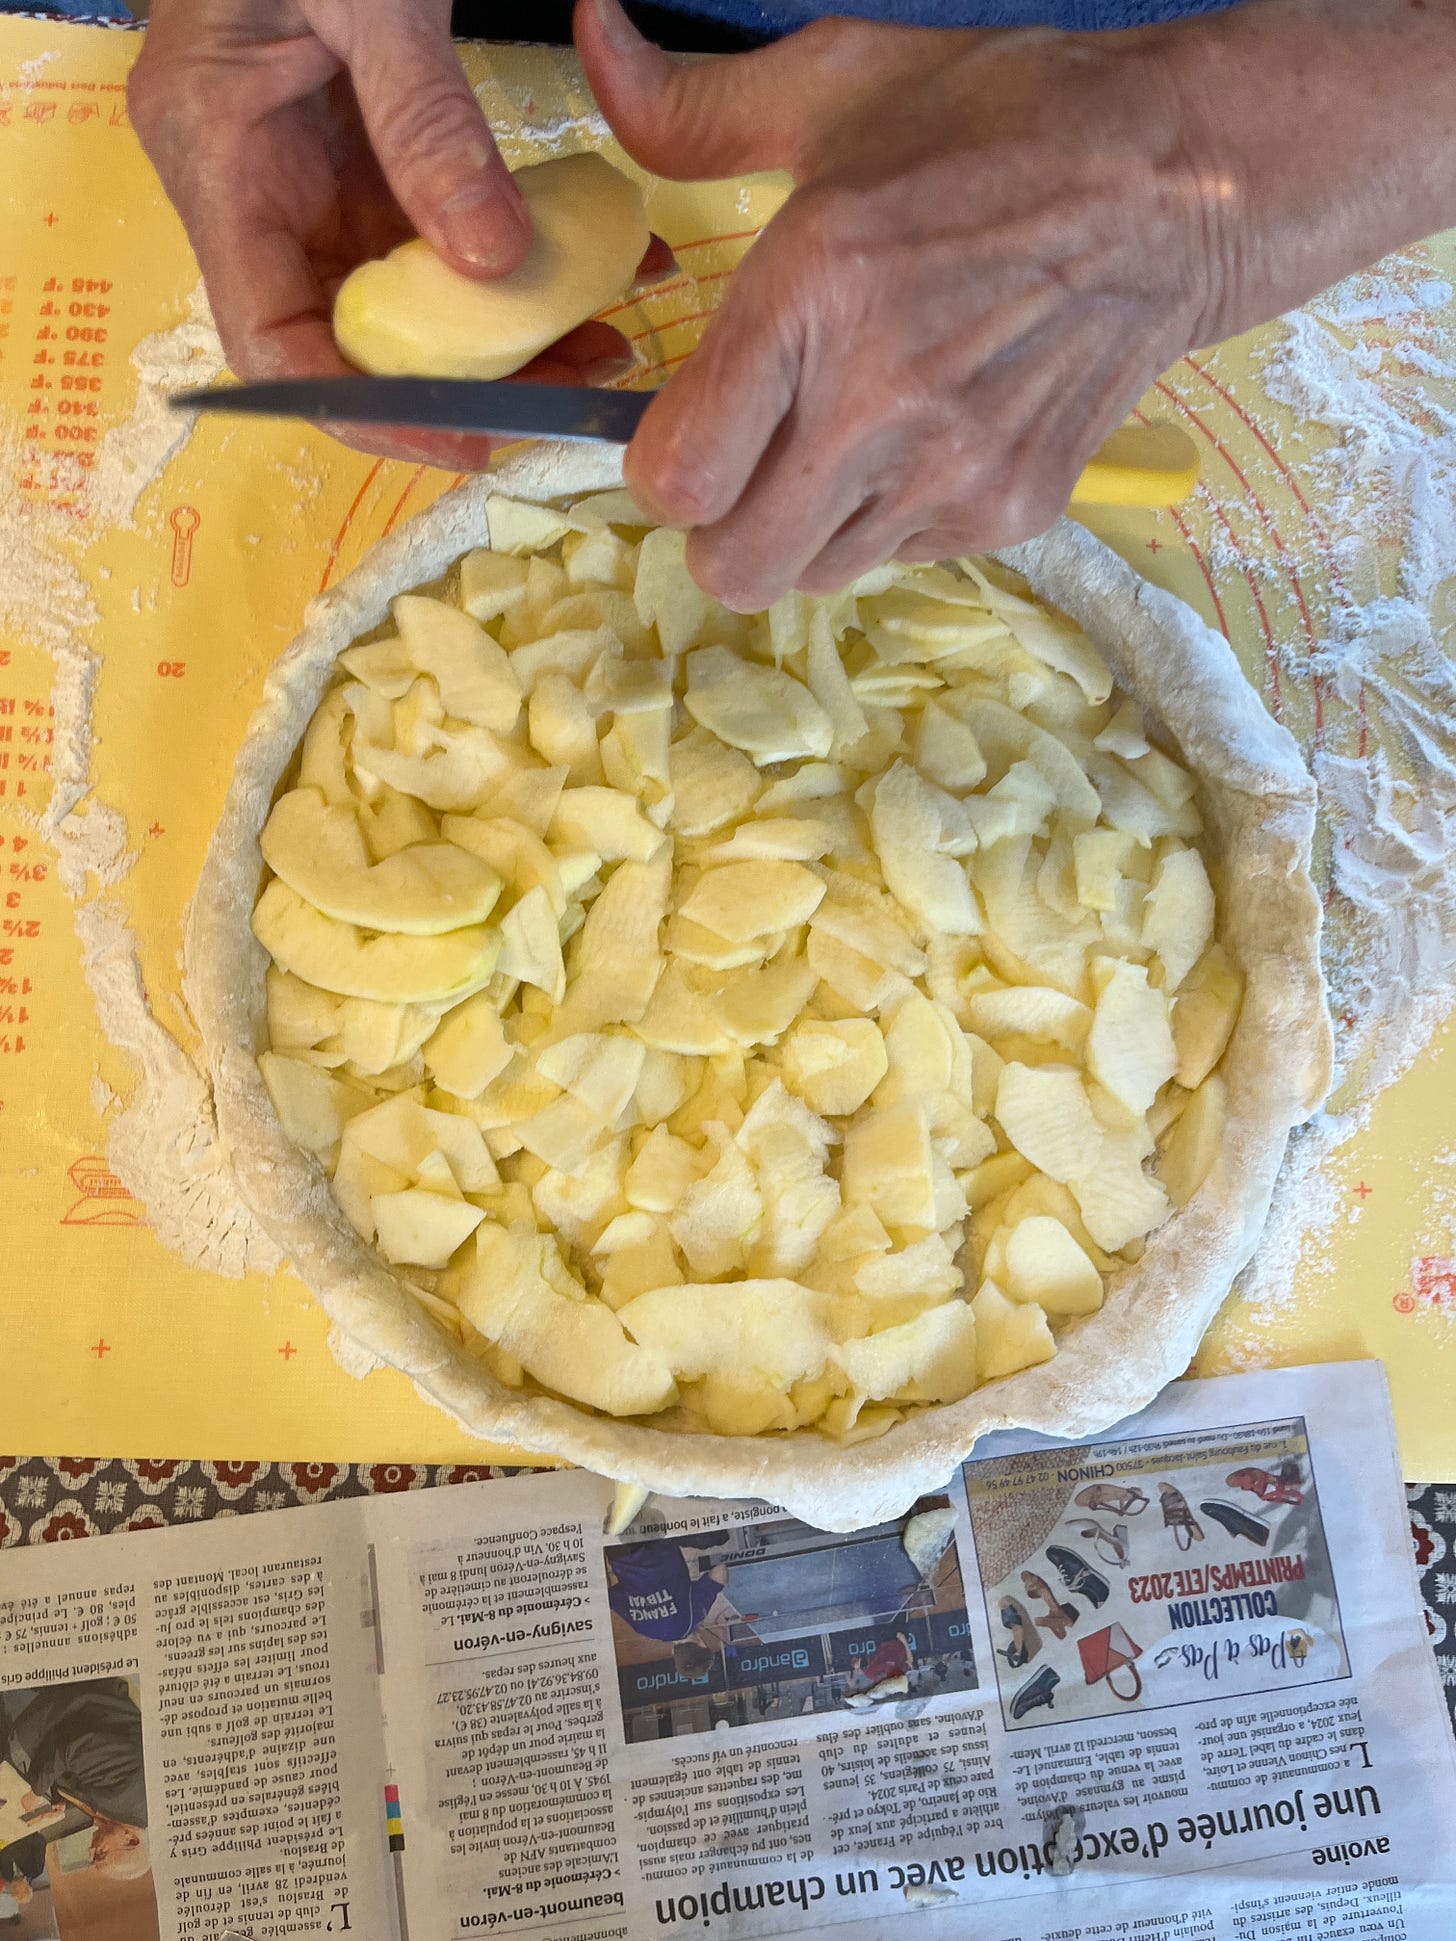
To create an interesting texture, Monique showed me how she cuts the apples thinly and irregularly for the base building up a bit of height, before placing beautiful slices on top in a spiral pattern. Naturally we do this with paring knives over newspaper with no peelers or chopping boards in sight, and of course, Monique works about 10 times as quickly as Claire and I (though we did improve a bit by the end). To finish, Monique sprinkles on the sugar and puts the tart into a hot oven; There is no chilling or resting of the dough. She reminds us that everyones oven is different - for hers, she favors a 200c fan, though she says it could be closer to 180c in your own oven. And like that, the newspaper with all of the mess is tidied away in one fell swoop. Total clear up inspo.
Other fillings
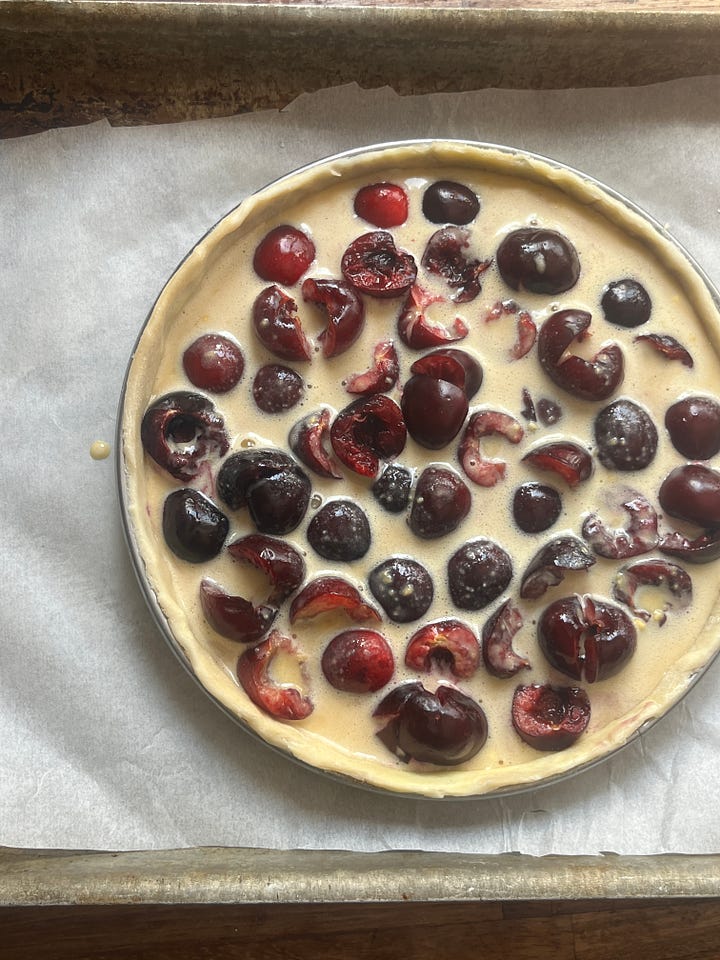
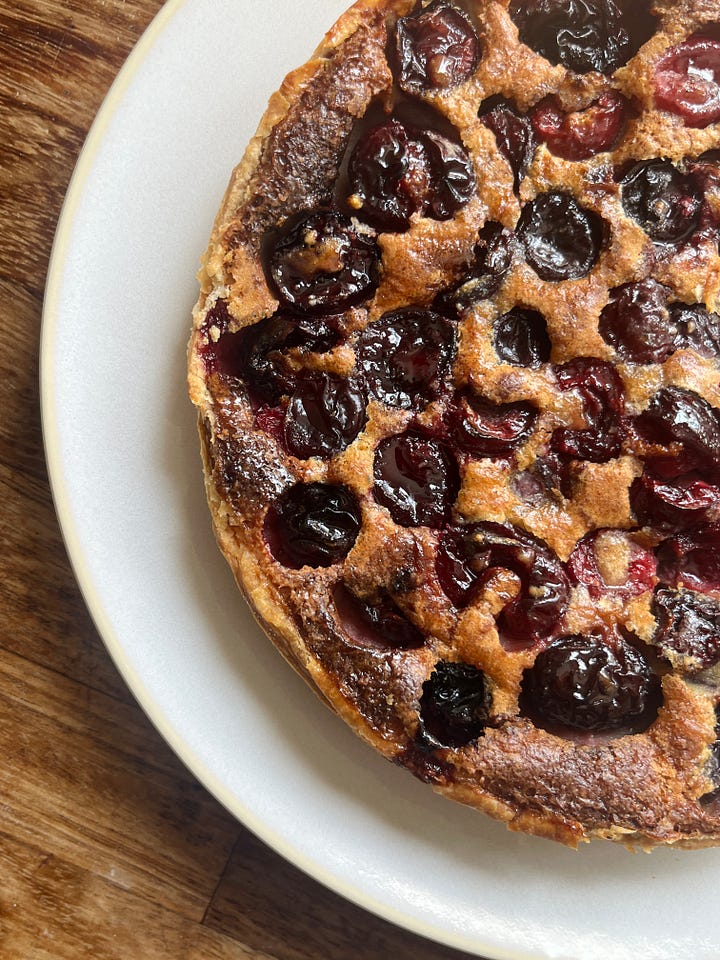
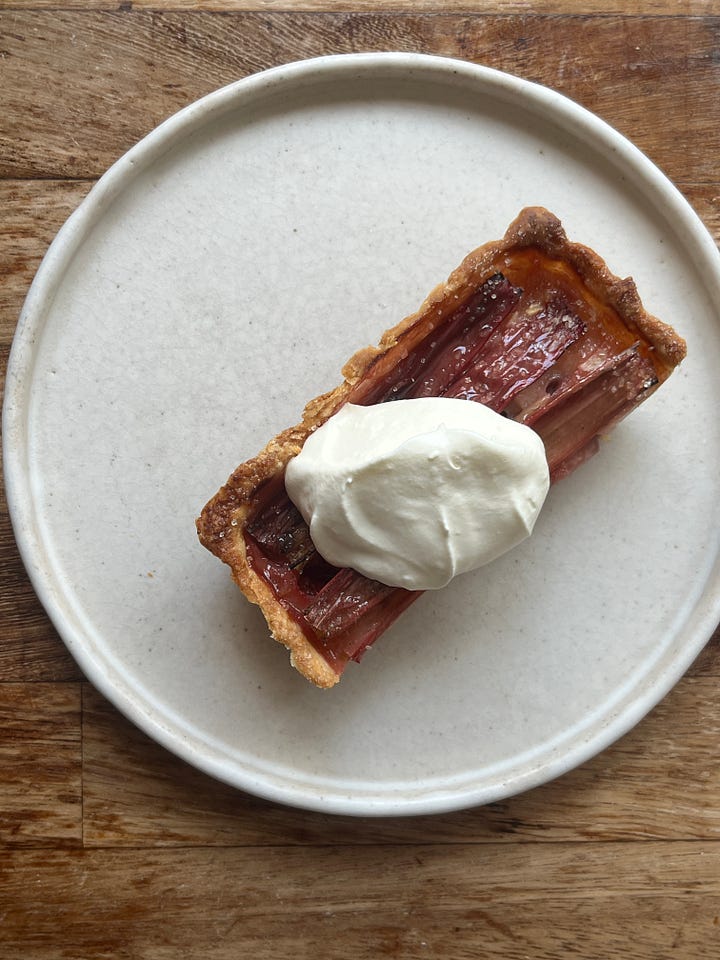
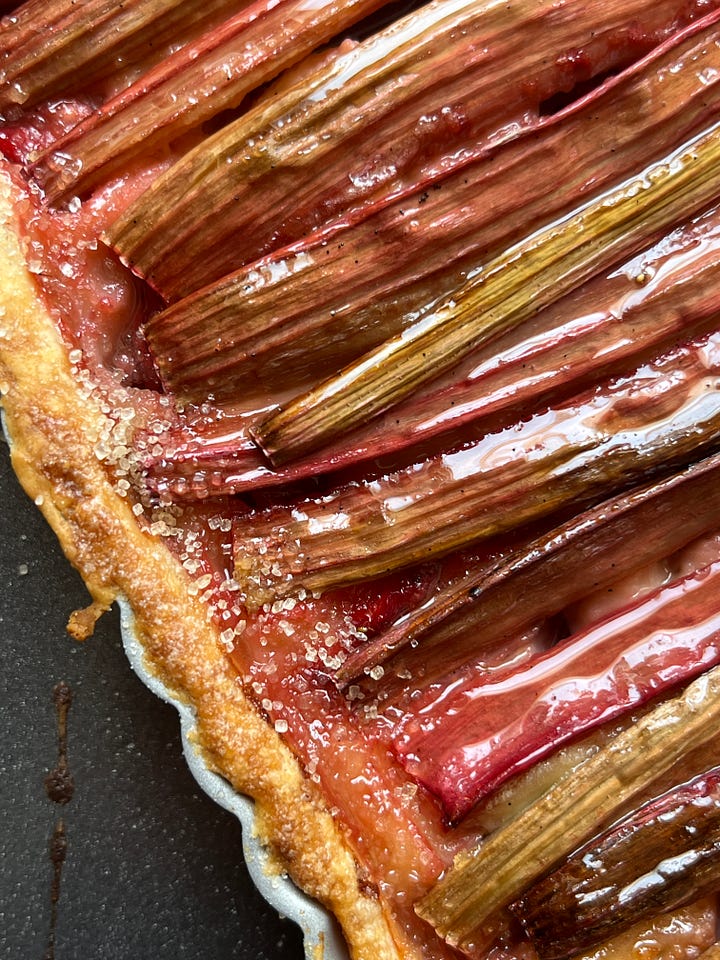
Though your gut reaction when making fruit tarts might be to whip up a frangipane, Monique shared a simple, less expensive and more everyday filling. Sure, frangipane is great, but it is incredibly rich and not always what you want for a dessert, especially when you want your fruit to sing ethereally.
Similar to a clafoutis, Monique’s tart batter results in a light, spongy, cake-ish layer that can be whipped up in less than a minute. Poured over the fruit, it bakes and browns like a dream, and the fruit nestles nicely into it. To learn how to make it, check out today’s KP+ newsletter:
Blind baking
I know we are all scared of soggy bottoms (me included!) but blind baking, the action of par (or fully) baking your pastry before adding the fillings, often aided by weights to prevent it from billowing, isn’t always necessary.
If a tart is baked on a high temp, say 200c fan or above for more than 40 minutes, you may be able to get away without blind baking the case. This is why most double crusted pies, even with the fruitiest, most sloppy fillings, will rarely ask you to bake the base separately. However if you are baking on a lower temp, or have very wet fillings, it’s probably a good idea, or just want peace of mind, then blind baking is always an option.
Additional soggy bottom insurance
Monique’s preferred technique for preventing the fruit tart turning from lush to mush is with the help of a little flour and sugar sprinkled in the base. This simple technique provides a starchy base for the liquid from the fruit to absorb into as it is released during the bake. Rather than seep into your pastry, the juice flows into the starch barrier and will gelatinise. That, along with a long, hot bake, will lead you to tart success.
You have to learn to judge the fruit - this step won’t be necessary for firmer fruits like apples and pears will likely behave well during the bake, as well as firm stone fruits. Once you get into the soft stones, like plums or super ripe nectarines, as well as treats like figs, you might want to consider laying a bed of sugar/flour beneath to capture all the goodness. if you are using frozen fruit in the tart, where the cells walls will certainly have ruptured adding to the juicy-looseyness, insurance is essential.
How do you know it’s ready?
Monique, of course, did not set a timer. Once the tart was in the oven, she showed us around the garden, her tomato greenhouse and everything that was beginning to show signs of readiness, including garden rhubarb with unbelievably large leaves. Once we returned, she started checking the tart by lifting up the base and looking underneath. Was it golden and crisp? Not yet. It was left in. This process of judging the tart happened a few times until Monique was satisfied and then out it came.
Having worked in several bakeries, I’m used to seeing ‘asbestos hands’; It’s an affectionate term we use to describe our immunity to hot things (trays, tins, liquids all included). But I’ve never seen any quite like Moniques - it was as if the tin hadn’t been in the oven for over an hour. Truly impressive.
As the tart cooled, we sat down for lunch. Aperitif. A seemingly thrown together perfect fresh spread of lentil salad and cold, mustard cream basted turkey in thick chunks. Crackling baguette. Salted butter. Vinegary green leaves. Cold carrot sticks. Rounds of cheese with homemade jellies. And finally it was time for us to tuck into the tart.
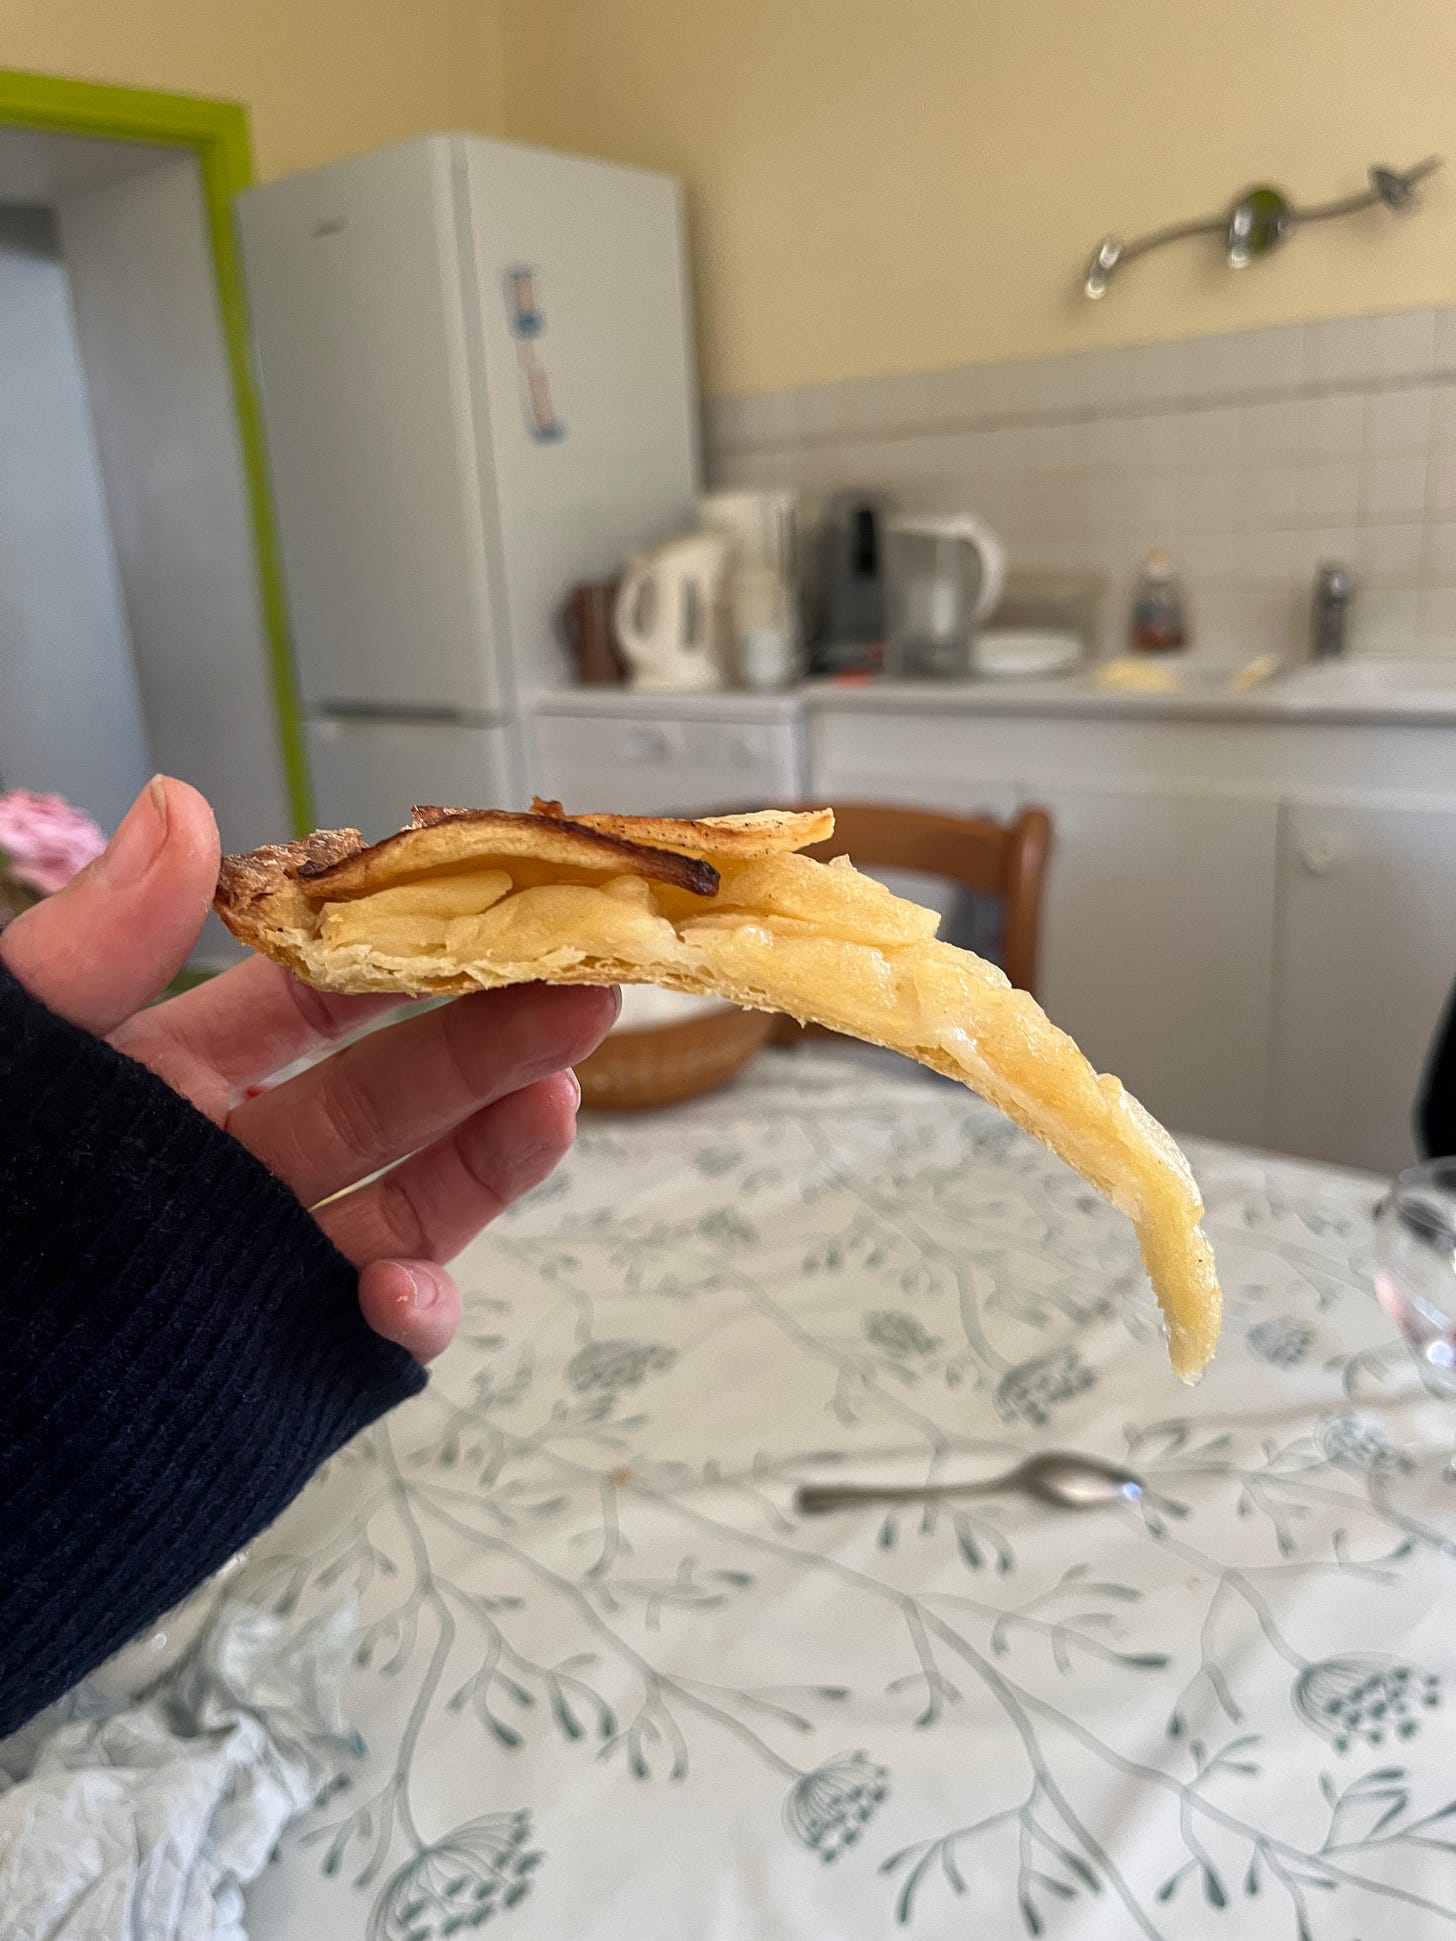
We watched on eagerly as Monique sliced the just-warm apple tart and handed it to us. As I looked for a fork, I turned my head to the right and saw the real way to eat a tart - like a slice of pizza, delivered directly into the mouth. The tart, a thin but generous 10-11inches in diameter, was gone in minutes.
Watching the tart come together, bake, cool and be eaten within a matter of hours was a perfect reminder that one of the best things about food is the way it captures a moment in time. I love spending hours fussing over dessert, preparing multiple elements and making it into an occasion, but that doesn’t make simple desserts any less of an occasion. The casualness of it all was a good reminder to make the most of the everyday, to throw a fruit tart together à la Monique. I think we could all do with channeling our inner French Grandma from time to time, don’t you?
Let’s do this.
Apple Tart à la Monique ft Pâte Brisée
This simple ratio of 2:1 flour to butter will give you a rich crust that is highly adaptable. Omit the sugar if you are making savoury pastry.
Ingredients
250g Plain flour
125g Butter
10g Caster Sugar
¼ tsp Fine salt
75ml-100ml water (you can also use 1 x egg yolk and 30ml-50ml water for a richer pastry)
Optional: ¼ tsp white wine vinegar / black pepper to season
8-9 Apples, a mixture of varieties. We used 6 golden delicious and a few pink ladies.
If the fruit is very juicy or frozen
20g Caster sugar
20g Plain flour
Method
Measure dries into a bowl and briefly mix.
Take your cold butter and cut into irregular 1 - 1.5 cm pieces. You can cut this directly off the block ala Monique or cut on a board.
Add into a large bowl along with the other ingredients and roughly work the butter into the dough for about 30 seconds; You want most of the pieces to still be large, amongst the breadcrumbs.
Drizzle in ½ of the water and toss lightly. Press the mixture together with your fingertips. If a dough clump forms (sometimes there is a formed dough on top with dry bits below), remove it from the bowl and place into a clean container. Taking the pastry out stages means you are less likely to overwork it. Continue drizzling water on the dry bits and gently working it into the flour/butter until it clumps together.
Press the clumps together then flatten into a disc to make it easier to roll out later.
Wrap well and chill for at least 1 hour, but up to 3 days, before rolling out and using as required. Freezes well for 3 months.
Pre-heat oven to 190c fan. (You might need to take it higher or lower depending on your oven!)
For the tart, roll out the dough until it is 3mm thick. Lay it over your tart case (lightly grease with butter if you are not confident it is non-stick.) and press in, paying attention to the edges, leaving overhang whilst you fill it. If the fruit is very frozen or juicy, mix together the flour and caster sugar and cover the base of the tart.
Peel and core the apples. For the base, cut the apples into thin irregular slices, like fallen leaves, and pile up into the tart until it is at least half full. Make neat 0.5-0.75cm slices and fan them out in a spiral pattern. Sprinkle with caster sugar, about 1 tbsp. Trim the overhang of pastry.
Place the tart in the oven on a baking sheet and bake for 45 minutes. After 45 minutes, check if the base is crisp. If not, continue baking for 15-30 minutes or until golden and crisp. The apples should char a little.
Leave to cool for a few minutes then as soon as you can handle it, remove from the tart case and leave to cool completely on a rack. A dollop of creme fraiche, whipped cream or ice cream wouldn’t go amiss.
Very nice when warm but you could serve it cold or make ahead and recrisp. Leftovers will keep at room temp for 1-2 days and can be enjoyed any time of the day.









If we’re going to shout out the farmers wives, I think we need to mention the modern farmers wife Helen Rebanks (wife of James Rebanks, and mother of four, in the Lake District) ❤️
Love this. Thank you. I'm in France now and wish like mad my french husband had a maman or mamie who cooked... alas as much as I love her, she is well-known as an absolutely terrible cook! Heart-breaking for this food lover 🤣