Hello
Welcome to another edition of Kitchen Projects, a recipe and development journal by me, Nicola Lamb.
For today’s edition, I look to the words of Matthew McConaughey in ‘How to lose a guy in 10 days’: “PUDDINGS OF NEW YORK… SAUCE YOURSELVES”. OK, I took a bit of poetic license with the quote there but we got where we needed to go: Self-saucing puddings. Let’s do this.
BTW, it is always so good to see you here! Thank you so much for subscribing. I’m truly grateful to share this space with you. If you’re enjoying this and have someone in mind that you think would like it too, please forward it to them or click the below:
Love
Nicola
PS. Here’s the playlist for this week!
The proof is in the (saucy) pudding
This week, Kitchen Projects is all about making a warm, bubbling pudding that doesn’t feel extravagant for a single household.
Right now, I know making big batch dessert can feel a bit silly. So, to counteract this and not leave you in a pudding-less lurch, I bring you my perfect self saucing pudding in a super scalable format.
And, since we are still in lockdown (sorry to remind you), I thought it would be appropriate for me to add something to the banana bread canon. I’ve been craving a hot dessert to get me through these horrendous sideways rain days and the concept of a self saucing pudding is so inviting.
So… let’s talk self-saucing puddings
If you’re not familiar…. welcome to the club! You are going to like it here. I know that puddings or any sort of hot cake baked in trays then divided into fat squares sometimes have the tendency to give some people school dinner PTSD but hear me out.
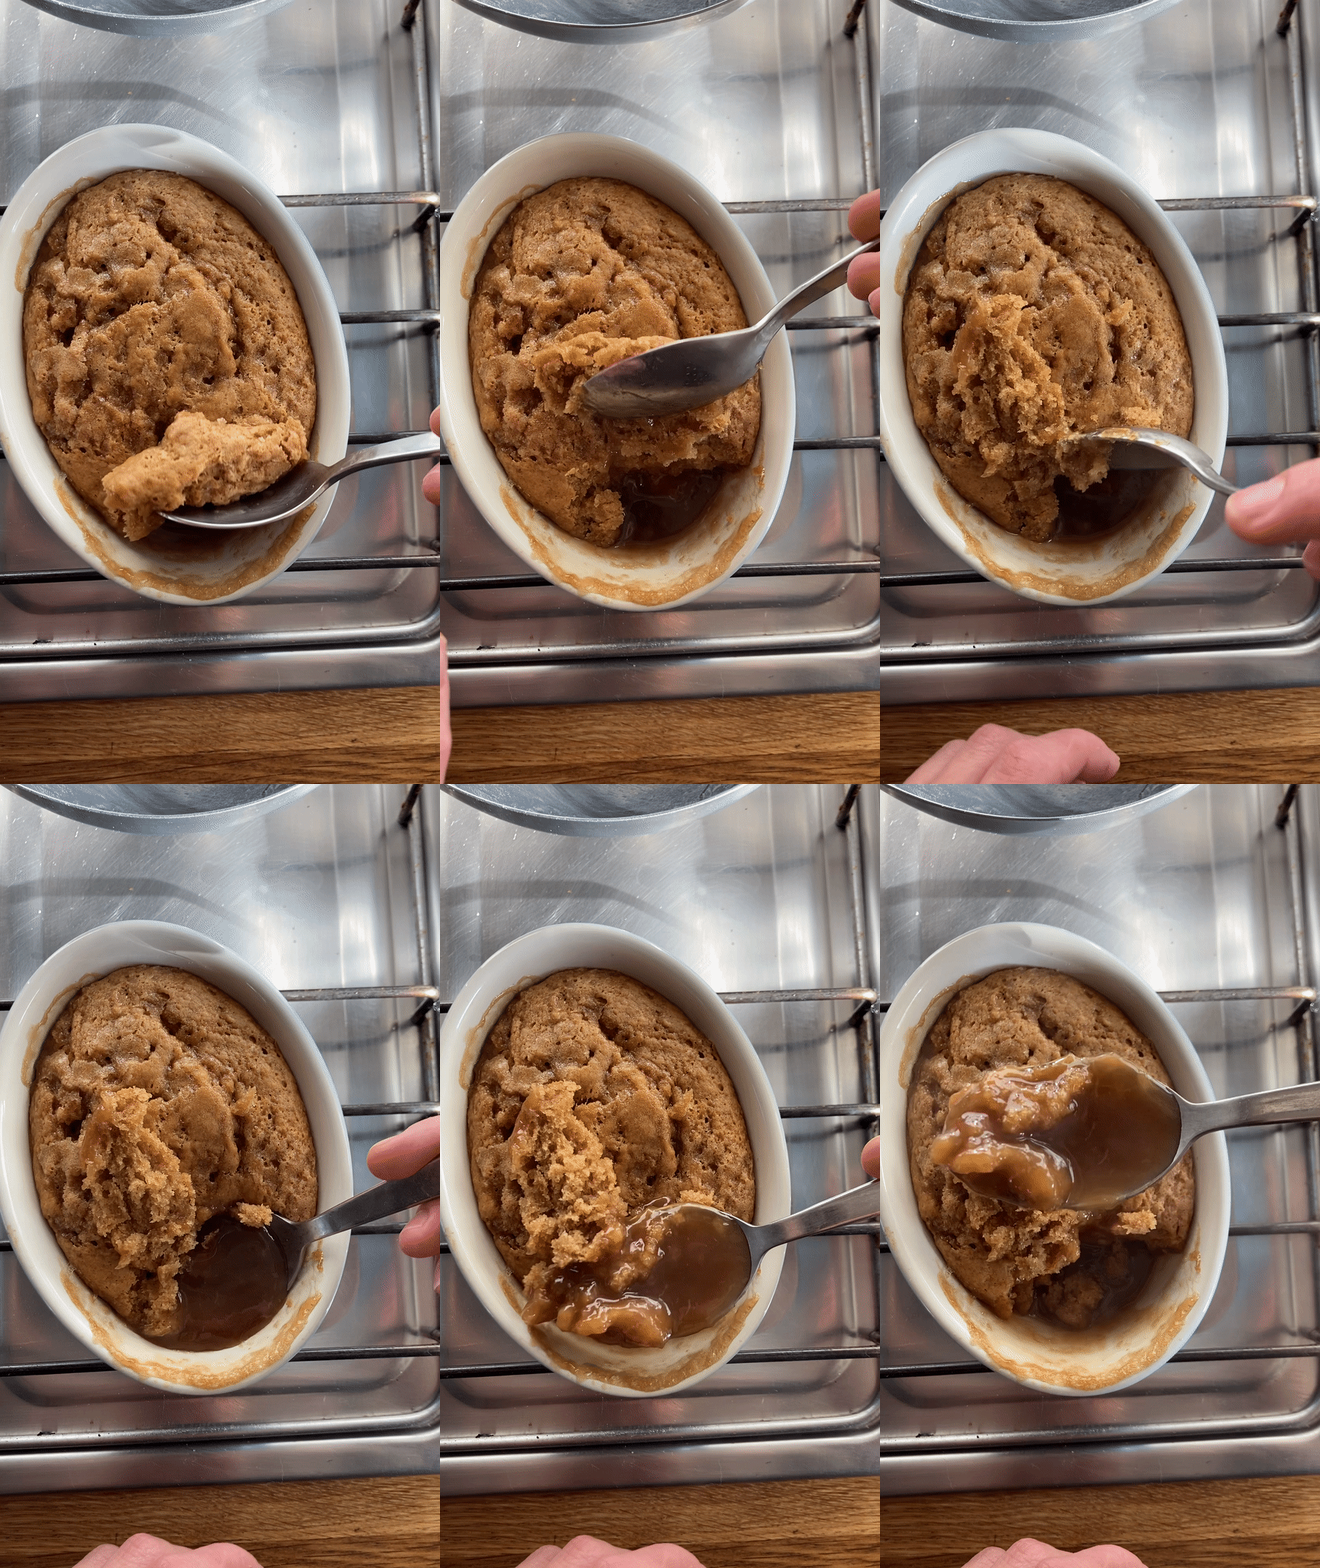
A self saucing pudding is a warm hug of a dessert. You start by making a simple cake batter (moist - soz I know it’s Sunday morning - is the key here) with milk and butter. This is poured into a deep baking dish, after which it is covered in a sugar mixture and, finally, boiling water.
It is then baked in a hot oven - here, the cake rises and the sugar/water mixture melds and sinks leaving a beautiful soft cake floating on a sea of thickened sauce.
The development
To be totally honest with you, for something as supposedly simple as a self-saucing pudding, this development actually drove me a bit mad. I know, I know, sometimes the most simple dishes end up being the most frustrating. This pudding actually gave me a big dose of imposter syndrome.
If you go down the google hole of self saucing puddings, you’ll be delighted to find about 15,000,000 variations on the things. From chocolate to lemon, passionfruit to coffee, rhubarb to vanilla, you have an army of traybakes at your service. You’ll also notice that the self-saucers are touted as being ‘very easy’ dishes. Nigella’s, for example, is titled “easy sticky toffee pudding”. Despite this, it actually took me about four months to finally land on my this recipe. FOUR MONTHS! Easy for some, Nigella, easy for some.
That being said, the technique - once you have the recipe down - is very easy, a one bowl wonder sort of thing. Although I might have gone through an embarrassing quantity of bananas to get to this final one, it was a delicious journey.
The mechanics and sizing
A self-saucing pudding is best served straight from the oven. The sauciness is at risk otherwise as it thickens and cools. These self saucing puddings are magic for feeding a crowd - it’s the sort of fresh-from-the-oven dessert that sits gorgeous and steaming in the middle of a winter dinner party and encourages much delighted ooh-ing and ahh-ing.
Since opportunities to feed crowds are at exactly nil at the moment, I was keen to scale the pudding down to a smaller dish but found that I wasn’t getting a good ratio of sauce to pudding. This ratio became the bane of my pudding existence.
So, let’s deep dive shall we? This newsletter is a result of my obsession to create a warming and comforting pudding to serve two-ish (or, to be honest, just one. I tend to go solo on these pudding adventures sometimes).
The magic ratio
The first time I made this pudding it was great. BUT… no sauce? The bottom of the pudding was quite pleasantly soggy but it definitely wasn’t saucey. I wondered for a while… Does this sauce actually exist? Perhaps the sauce, despite being depicted in hundreds of blogs and youtube videos, is actually a myth. In place of sauce, I’d douse the pudding with double cream. Not a bad result but definitely not a good enough replacement. WHERE DID ALL THE SAUCE GO?!?!
Right. This ratio really did drive me crazy. I did all sorts of iPhone calculator and excel maths to see what the general vibe was in the self-saucing world. The aforementioned Nigella recipe, for example, uses a 1:1 ratio of sauce mixture to pudding. This BBC good food recipe uses 1:2 sauce to pudding. The many blogs I searched offered ratios anywhere from (0.25:1) or even (1.5:1)!
I tested out several ratios which ranged from way too saucy (1.25:1), to still way too saucy (1:1) to bloody hell, where’s the sauce gone? (0.4:1). The magic number I finally landed on was (0.7:1). This ratio was perfect for my ‘small’ single household pudding. And, as you’ll find out next, the baking dish does make a huge difference.
A larger dish or portion will, of course, require a longer baking time overall. In this situation, the water may evaporate more quickly or there may be more sauce reabsorption during the bake. This could merit a higher sauce/cake ratio. However, I’ll have to wait for restrictions to lift for me to properly test it.
The baking dish
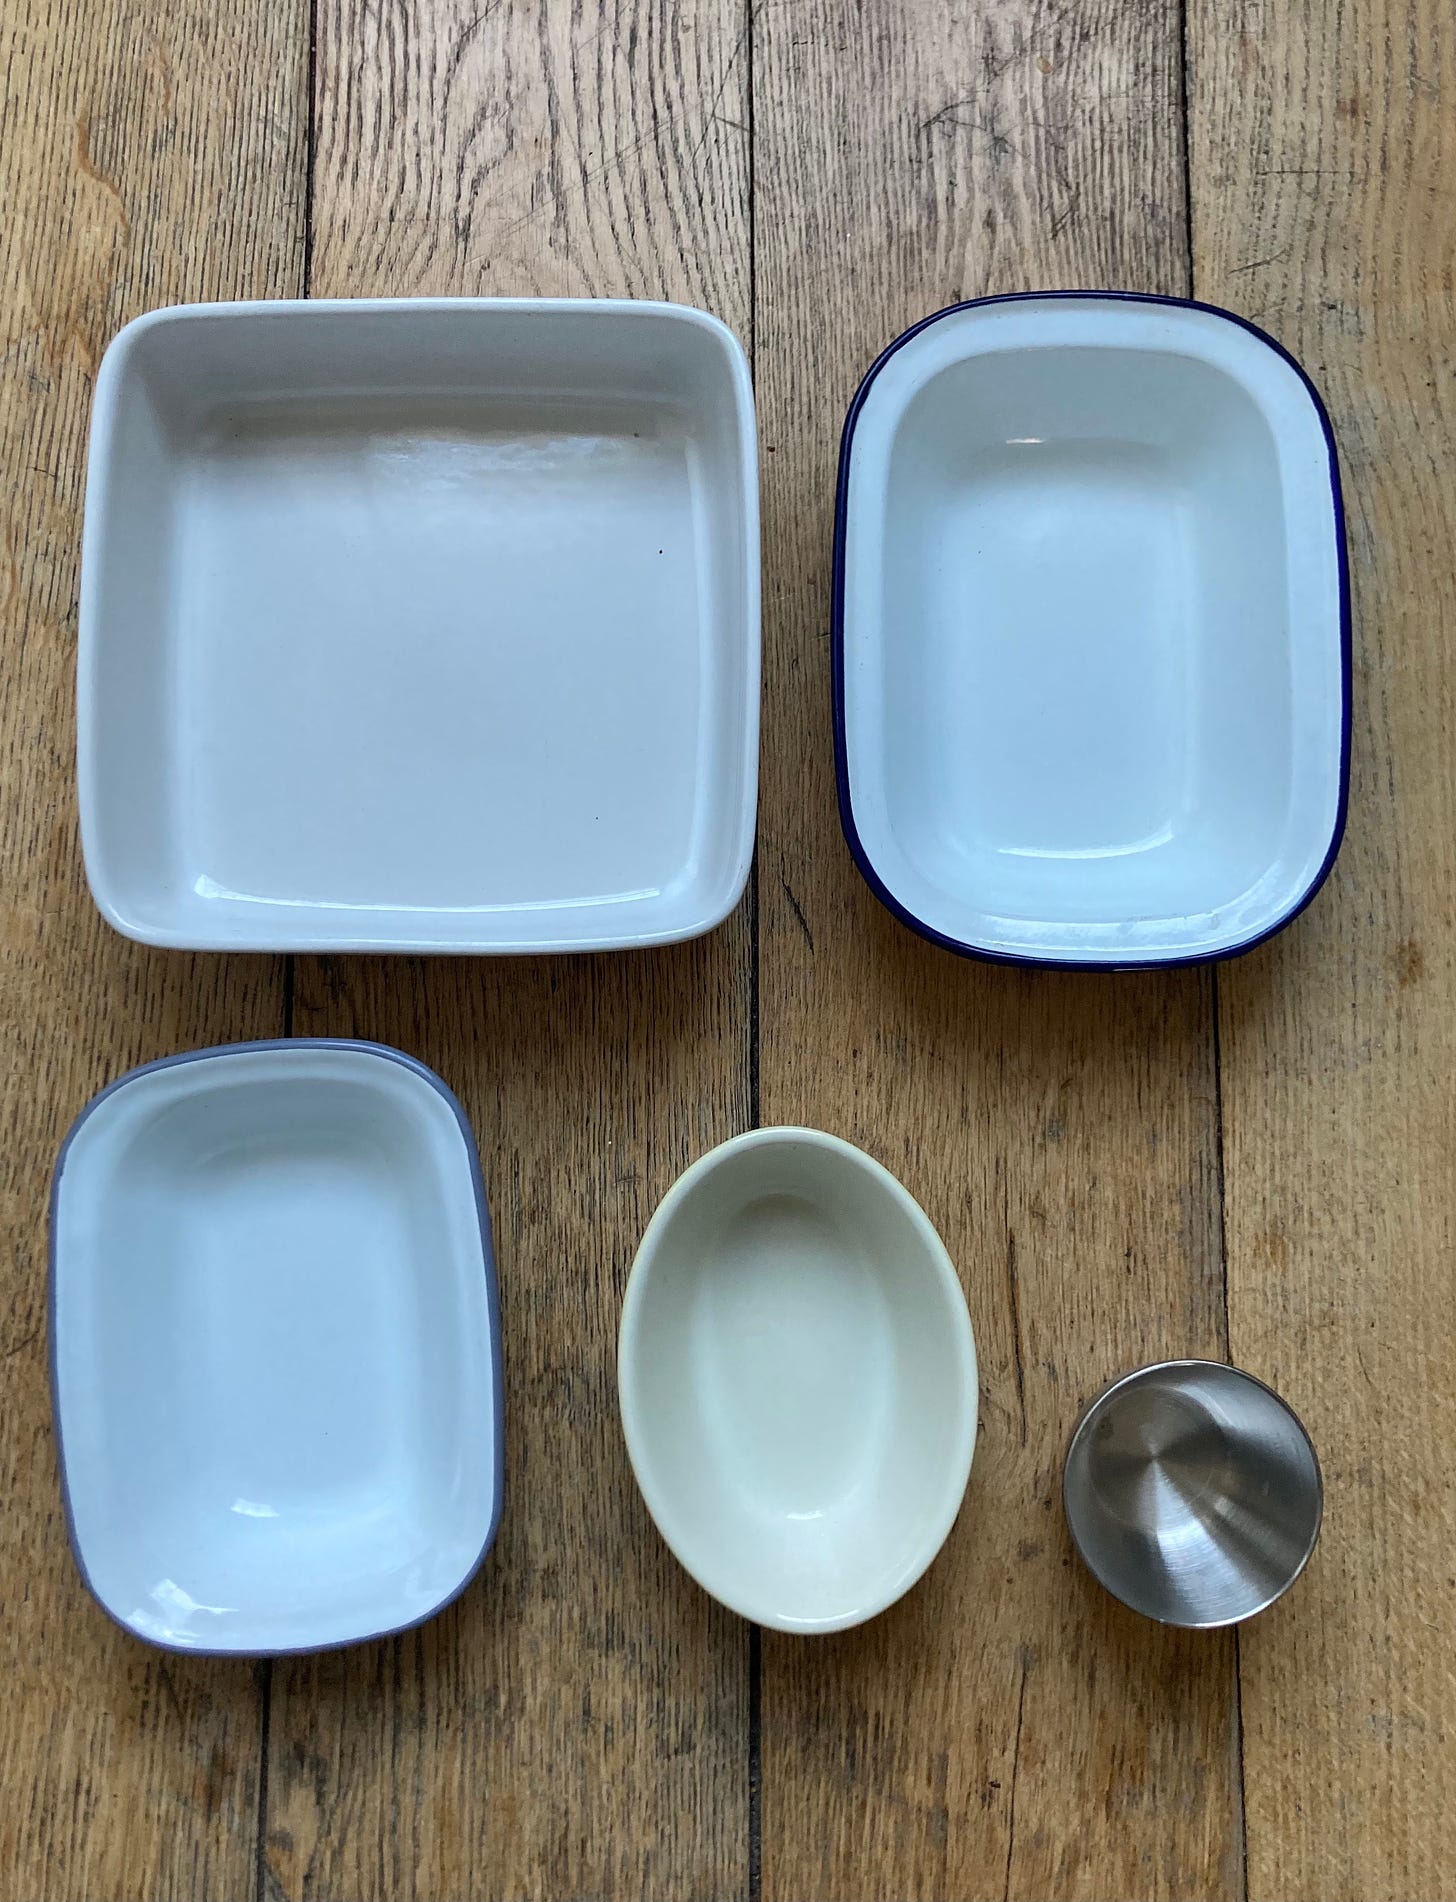
Right everyone. I am NO expert on thermodynamics. But I can tell you for certain that you’re going to get different results depending on what dish you use and its effect on the surface area of your pud.
For best results and to get the most out of the magic ratio, you’re going to want to use a fairly deep dish if you can. It’s not to say that you won’t get good results without it, but a wide flat dish (large surface area), produced far less outrageously saucy results. Thermodynamics in action!
The other benefit of using a deep dish with a smaller surface area is that the layer of sugar for the sauce is thicker. This means the boiling water is less likely to break the surface of the pudding when you pour it on.
I tested my two small puddings in 300ml dishes as below. I used exactly the same quantity of sauce and pudding:
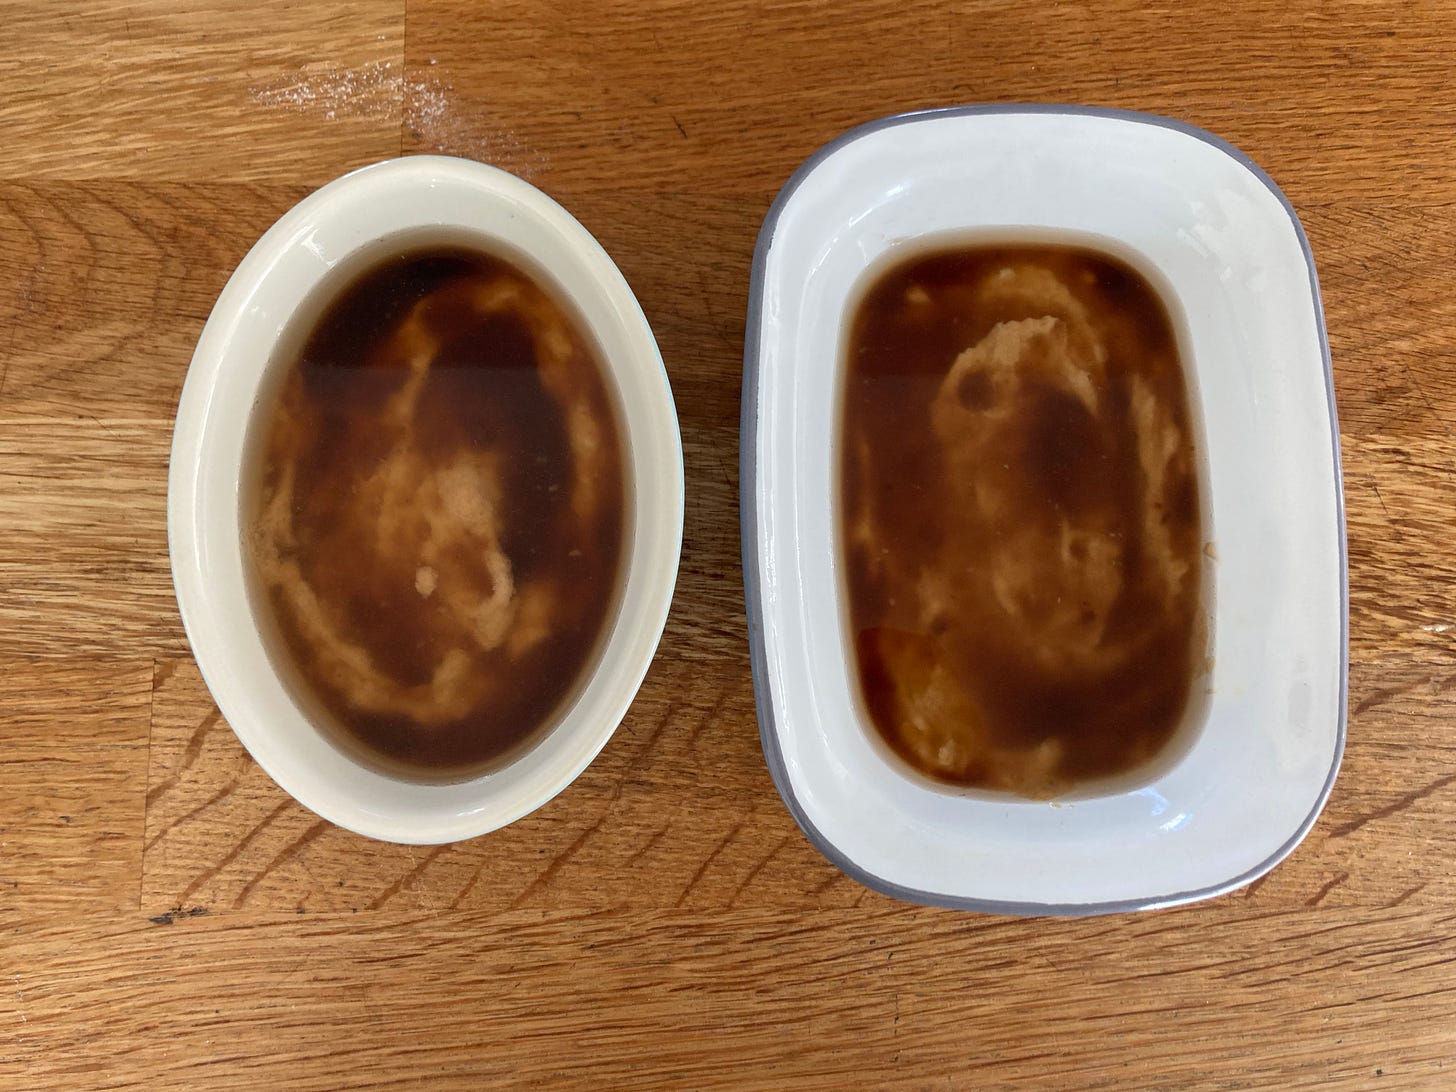
My best results were with a dish with a small exposed surface area and deep sides. I love the falcon dishes but they don’t give you as much sauce as a deeper one. I also reduced my baking time for the flat wide dish by 5-8 mins since the flat/wide surface area bakes much faster.
Check out the differences below:
Low wide dish:
Deeper dish:
I also found the wide-flat puddings need to be eaten pretty much immediately as they come out the ovens before the sauce congeals or reabsorbs, but you have much more time for a deep dish.
Egg, or replacing it
Since I’ve been aiming to scale this recipe down to ultimate pudding easiness, I was getting increasingly frustrated at having to split a whisked egg up into 10g, 20g, or 30g. The egg was really cramping my style.
A breakthrough for me in this situation was realising that a banana would do all the things I needed an egg to do for this situation.
When I was working at Dominique Ansel Bakery in New York, the then executive pastry chef Karys Logue (a real hero and inspiration of mine) told me that the egg was “the greatest nutritional gift” in the whole world. It was in 2014 when the vegan movement was really beginning to gather widespread heat and we were discussing effective replacement of eggs in patisserie. Although a mousse or a meringue may never have a truly equivalent final product without the magic of an egg, a sticky warm oven pudding can certainly do without.
The added benefit, of course, is the extra banana flavour. It brings the bakers percentage of the banana way up to 90%! Which is a wonderful, wonderful thing. You don’t even miss the egg. Plus, this way you can make tiny (if desired) portions because you don’t have to mess around with dividing up an egg, which is usually a foolish pursuit. Win-win!
Raising Agents
I was struggling with the cake ratio until I accidentally used self-raising flour instead of plain flour in one of my tests. To get those significant layers, you need the cake layer to literally lift itself out of the dish, allowing the sugar/water mix to pass through it on its path to sauce-dom.
I was definitely underestimating the amount of raising agents needed - this SR flour mistake lead me to increasing the % of baking powder overall. And, even if you choose to use self-raising flour, you have the option to bolster this even further with a little extra baking powder. It’s just the chemical power needed to get the cake to almost float on top of the sauce.
I know there are some people who are quite sensitive to the flavour of baking powder, so you can cut it slightly (e.g. don’t add the extra baking powder if using SR flour), if you don’t want to.
To cornflour or not to cornflour?
In the initial research phase of the self-saucing pudding, there were two camps: Those who added starch to the sauce and those that didn’t.
Adding starch - usually in the form of cornflour - gelatinises the sauce further and supposedly gives it more body.
During all my tests, I found that adding cornflour to my ‘sauce’ part made it quite jelly like. As I understand it, as the liquid passes through the cake batter, it takes little bits of starch with it and that helps thicken the base sauce. As the pudding cools down, the sauce becomes thicker and more jelly like anyway. So, it is unnecessary, in my opinion, to add further starch.
The sauce technique
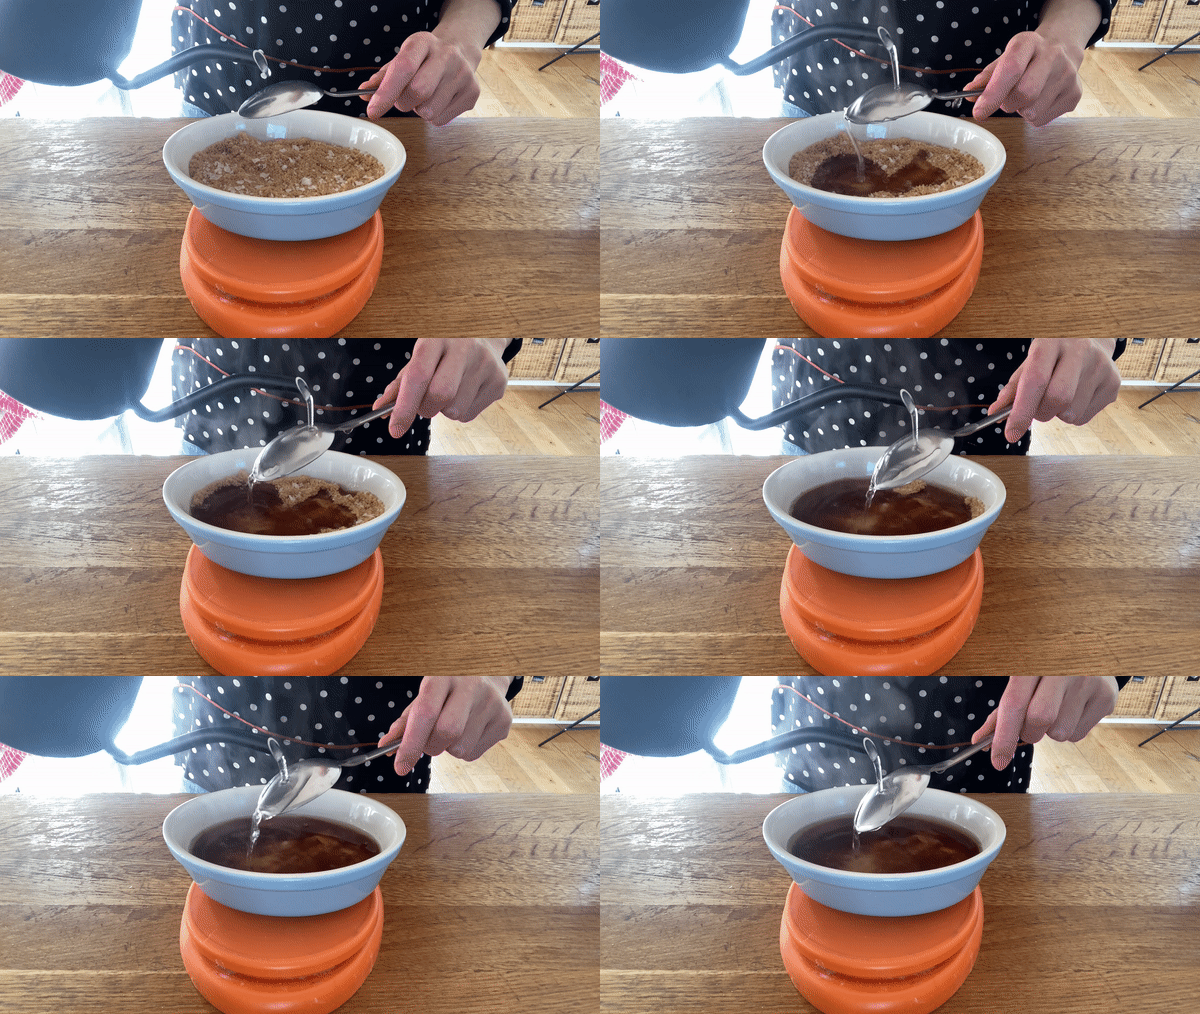
To make the sauce, boiling water is poured over gently over the sugar (which is totally covering the batter), the idea being that the surface of the pudding isn’t penetrated.
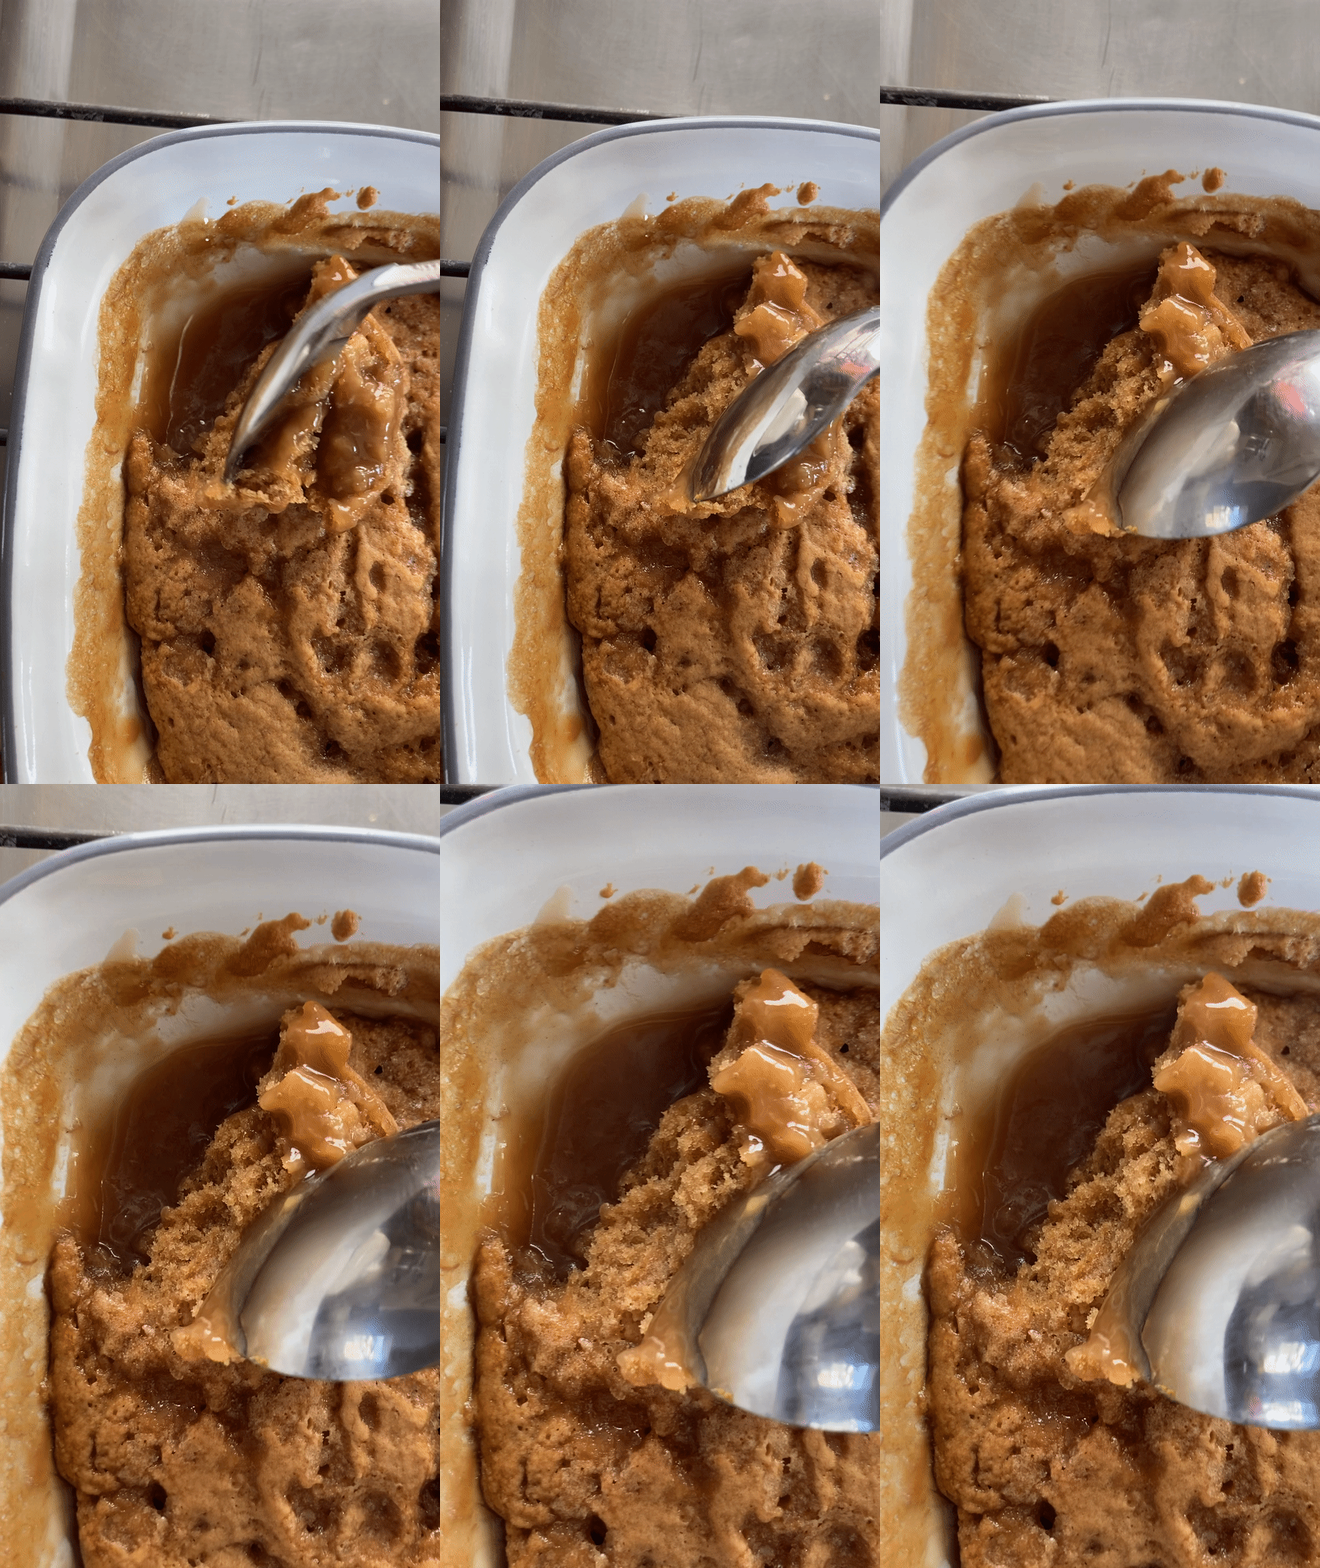
There are a few ways to pour “gently” - through an upturned sieve or an upturned spoon seems to be the most effective. That being said, I have - in my pursuits - broken the surface of the sugar and poured water into the pudding. The result? Some pleasing volcanic-esque eruptions of sauce dotted around the surface.
Substitutions and additions
This is not a fussy pudding. As described above, I’ve already replaced the egg mass with banana and to be honest I think you could swap everything for vegan friendly ingredients and not be unhappy. Now, I haven’t done it myself (I was chatting with the lovely Izy Hossack and she says she is working on a vegan banana and maple self saucing pud, so look out for that too!) so I can’t make any promises but I think you could change the melted butter for coconut oil/olive oil, and the milk for something plant-based, 1:1.
If you wanted to decorate the top with a slice/slices or banana pre-sugar and water stage, you absolutely can! My original take on this dessert included some malt flavours (well, it was ovaltine, or horlicks, depending what I had in stock) so you can feel free to add in a spoonful of whatever makes you happy. Just don’t throw off the ratio too much.
If you are going down the malt route, a tablespoon of malt syrup dissolved in the water for the sauce would be lovely. You make this pudding work for YOU!
The baking time
A final note before we get onto the recipe! I talked to you earlier about the baking dish. Now we can talk about the baking time.
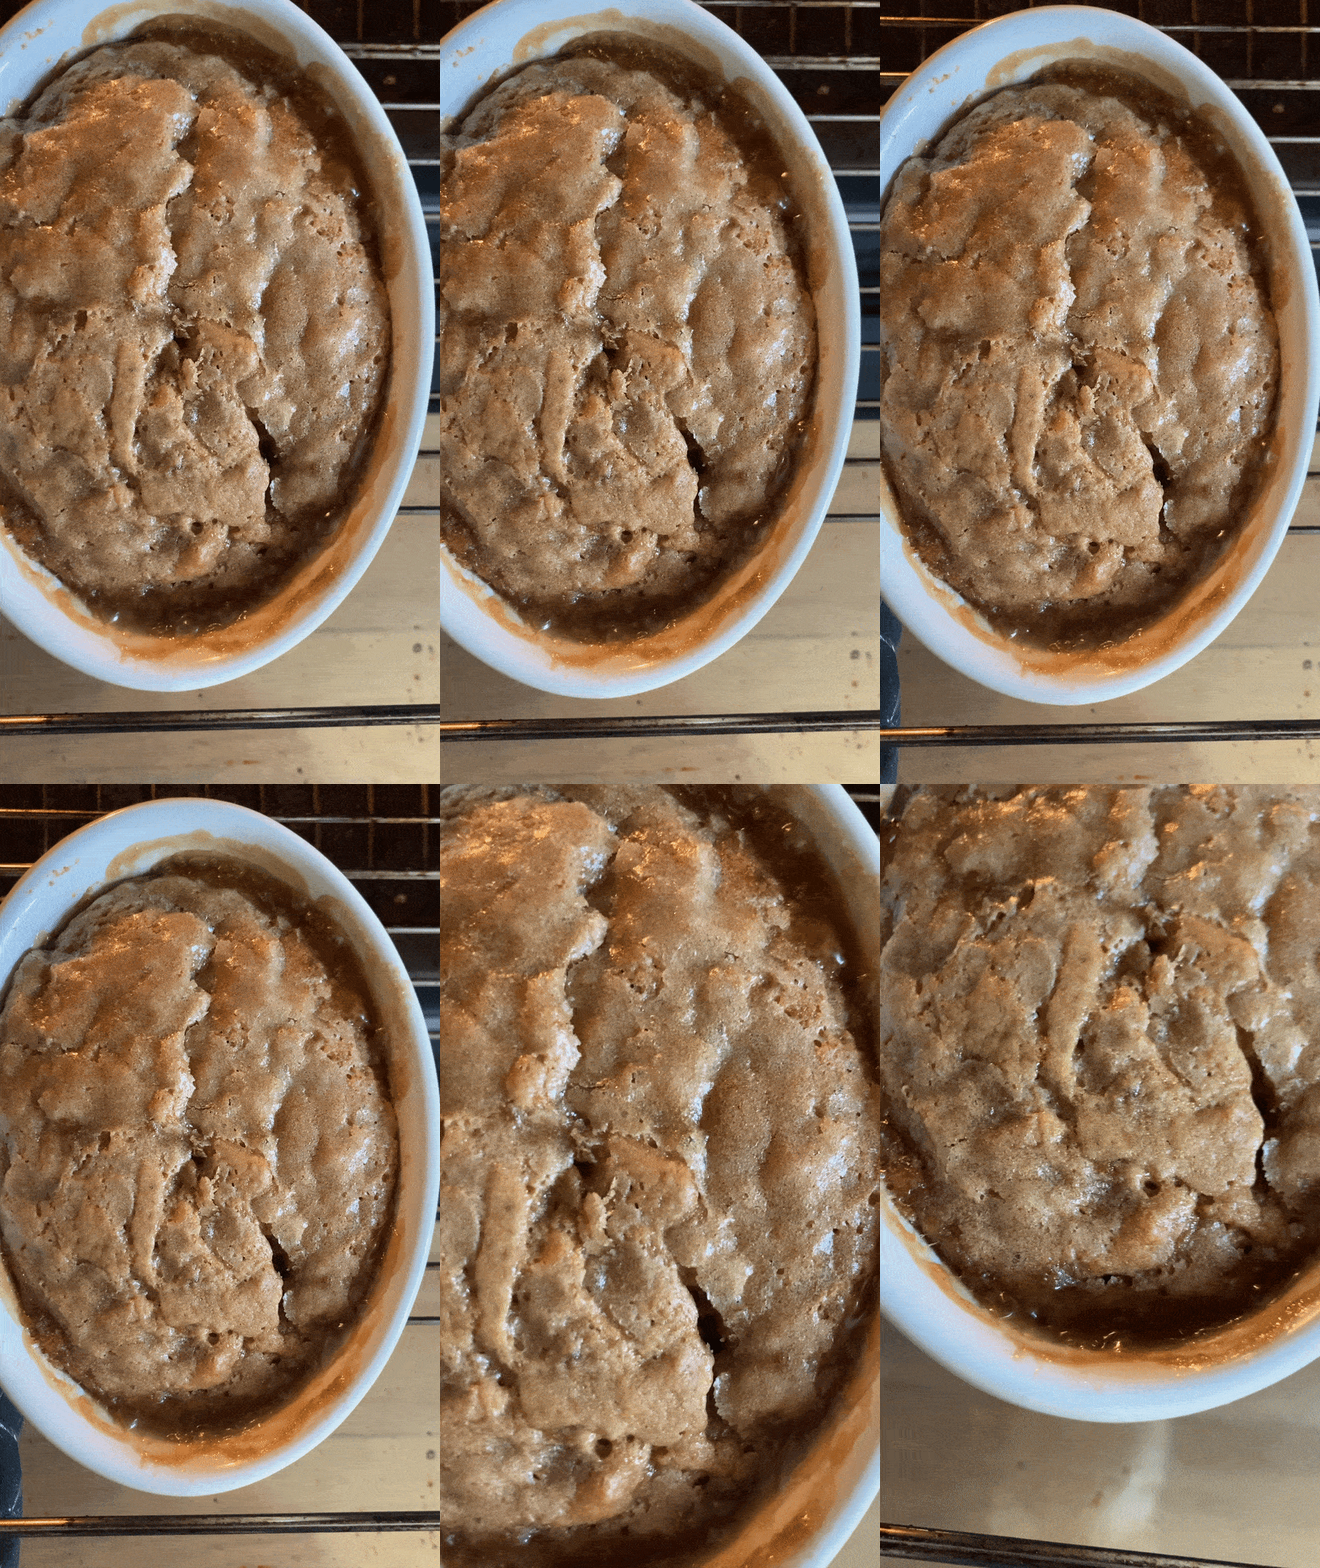
When it comes to baking these puds, you want to bake it long enough that the top gets a bit crisp and the sauce has had time to gather and thicken in the bottom. Even though we want it to be gooey, we need to make sure the cake is properly baked through - you can check this by using the age old skewer test: Simply piece the cake in the centre (about half way in to avoid the sauce) with a skewer or toothpick and if it comes out clean then you’re golden!
For the wider, shallower dish you definitely need less baking time you must check it during baking. Just remember the signs:
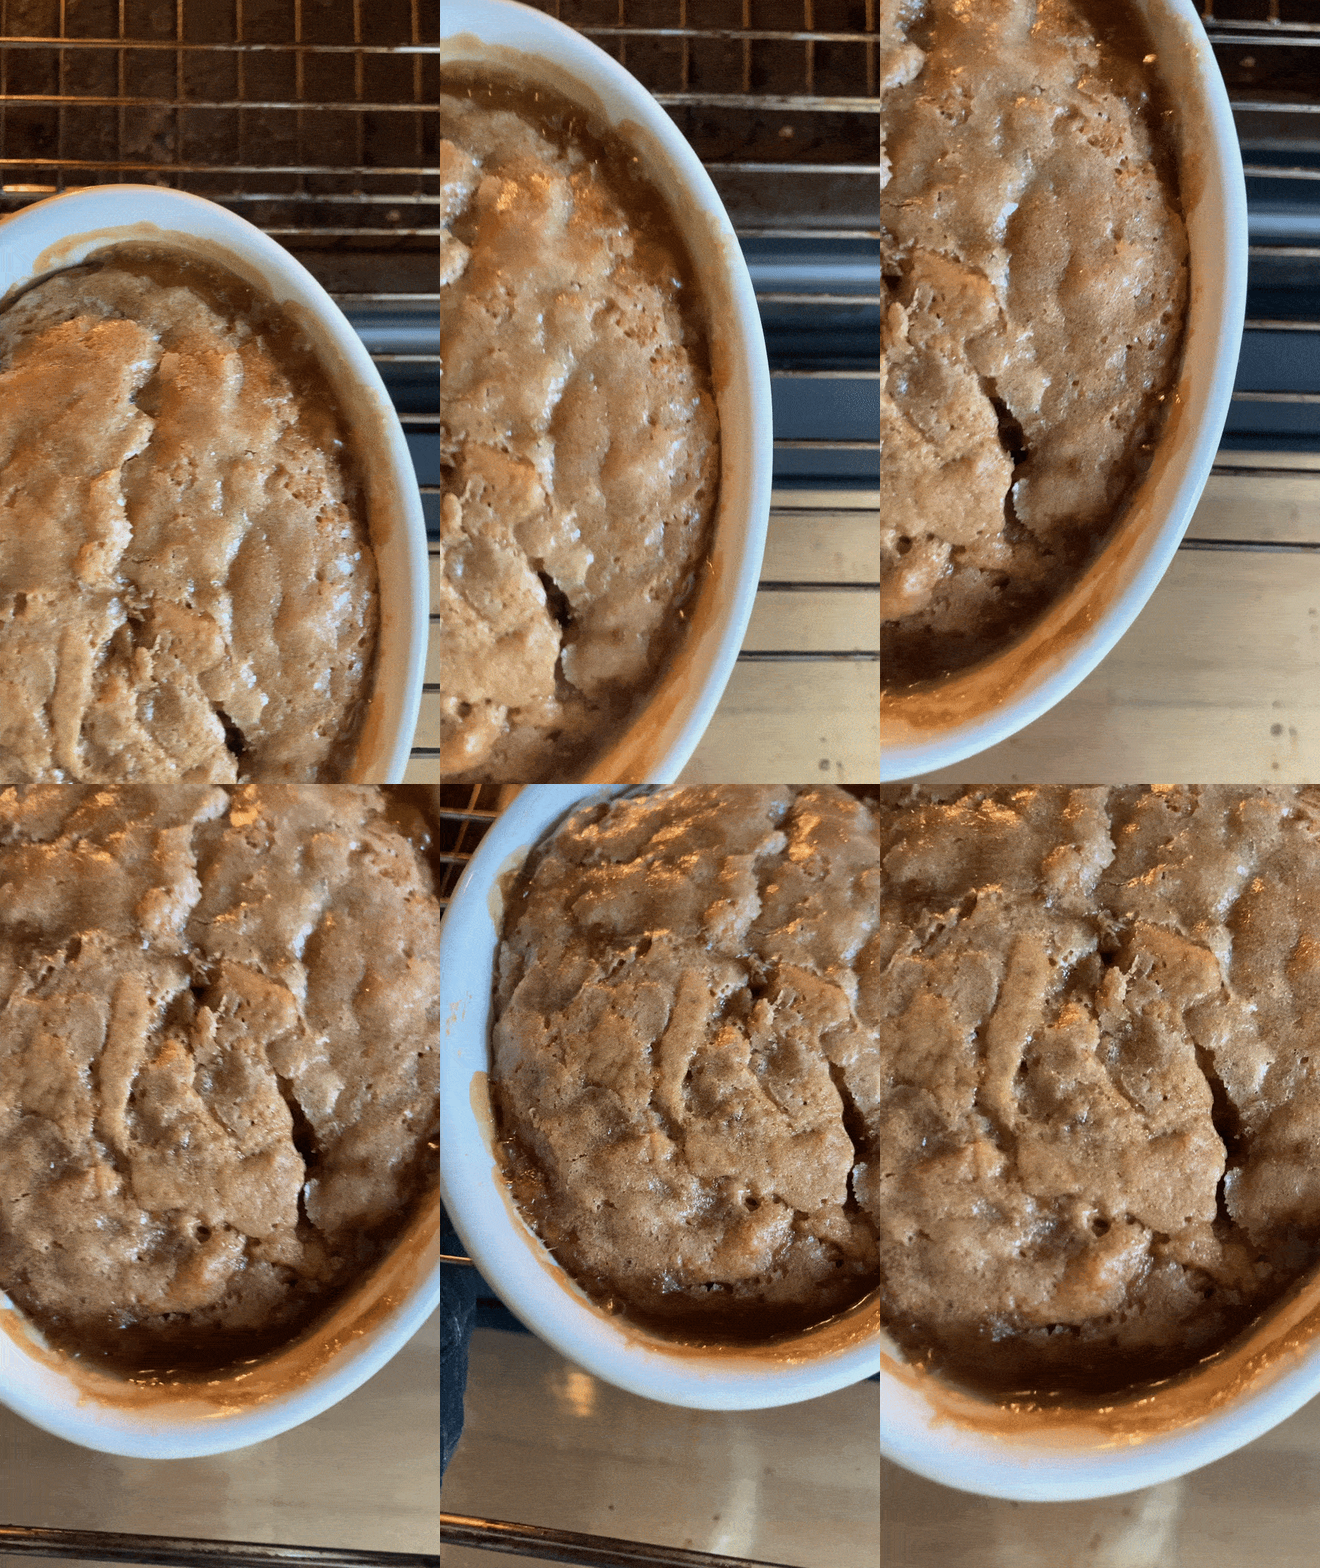
Crispy shiny top (cracked look)
Sauce bubbling around the edges
Skewer comes out clean
Alright, let’s make it!
Ingredients
For a 300ml dish - for 1-2 people!
If you don’t know how many ml your dish it, just fill it with water and then pour that water into a measuring jug. Now you know!
Pudding mixture
20g butter, melted
20g milk
35g banana, mashed (as old and brown as possible, as always!)
40g plain flour
2g (= ½ tsp) baking powder
25g dark brown sugar
1g salt (a pinch)
Sauce
35g light brown sugar
A sprinkle of sea salt to taste
70g boiling water
Additions: I know we covered this earlier, but if desired, you can add 5g-10g of malt powder (like horlicks or ovaltine) to both the pudding mixture and the sauce mixture. You could also mix chocolate chips or toasted nuts into the batter.
You can also lay slices of banana on top of the pudding (pre-sugaring!) if you like. This is a good way to use up a whole banana at a time!
Scaling up and down
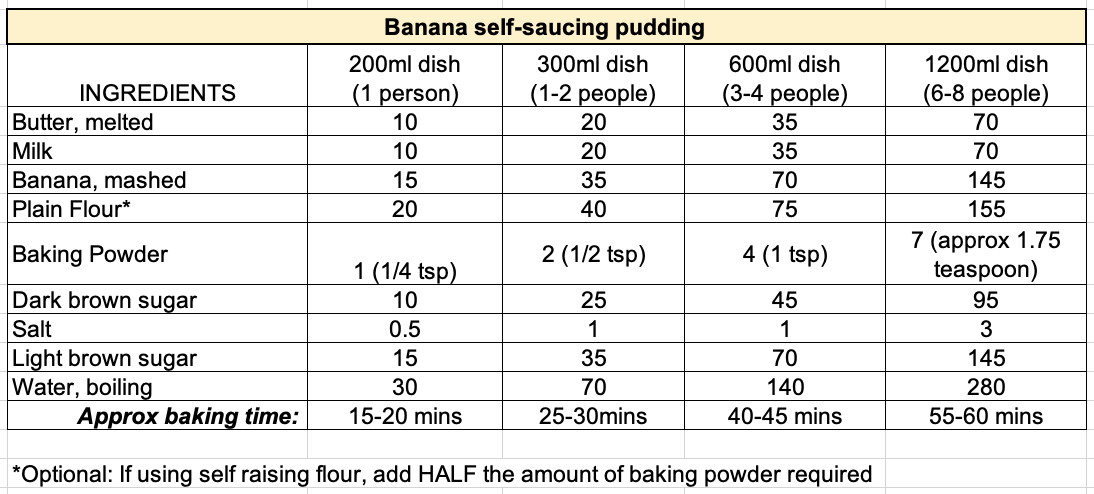
In the table below I’ve outlined the to scale up and down:
The approx baking time is based on a ‘deep dish’. Remember for this pudding it’s important for you to check it regularly to see if its baked. Scroll up for the signs checklist!
Also… re the 1 person dish… although weighing out 10g of butter and 15g banana might feel a bit silly at first, I promise it works a treat! DO IT!!!
Method
Pre-heat oven to 170c (fan)
Mix together melted butter and mashed banana, followed by the sugar
Sift together flour, salt and baking powder and mix into your banana/butter mixture
Finally stir through your milk. You’ll have a loose cake batter
Pour batter into your chosen dish (scroll up for tips on your dish!)
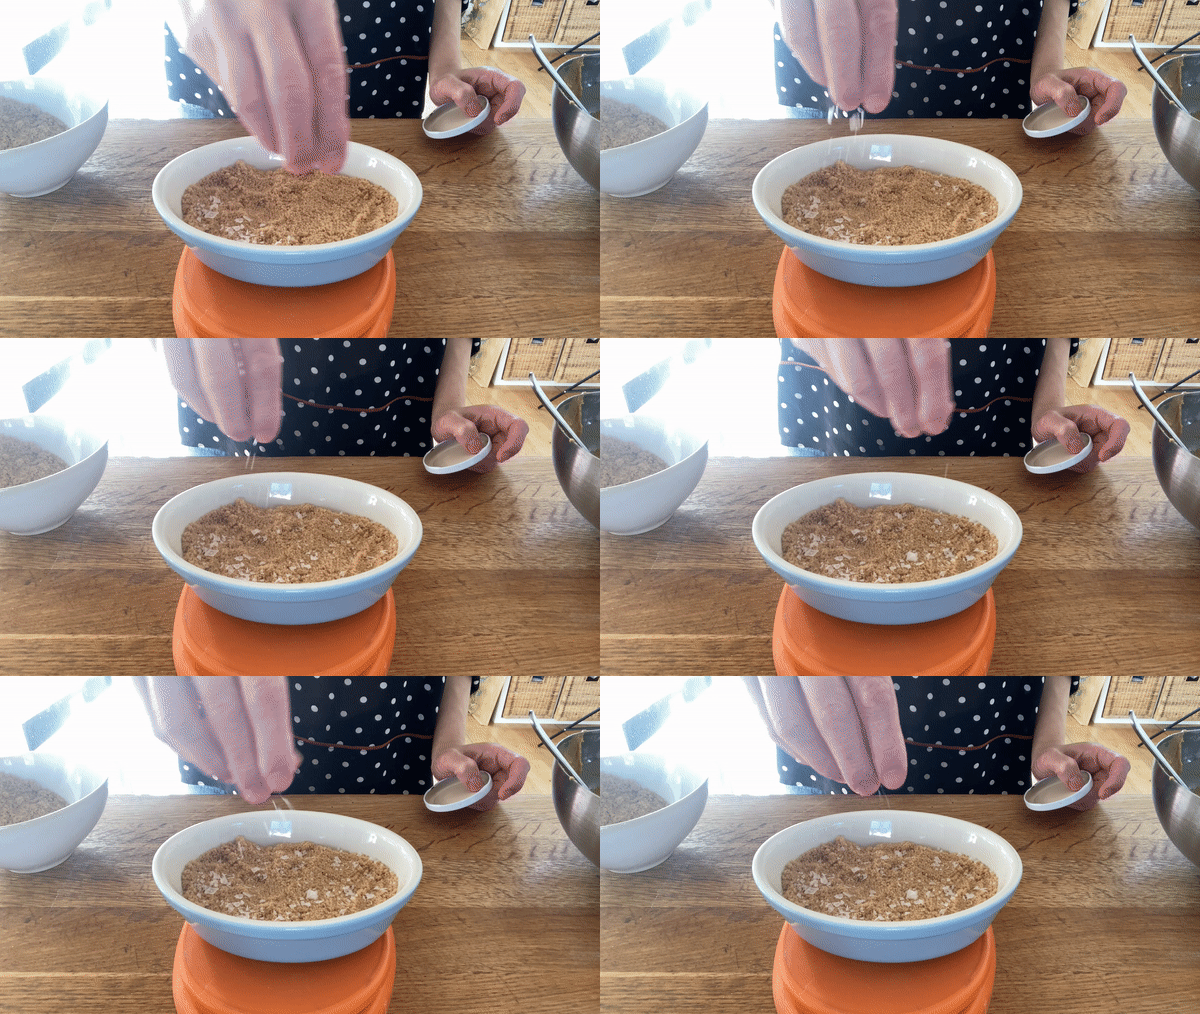
Carefully cover your pudding mixture with an even layer of light brown sugar, followed by a sprinkling of maldon salt - you get to decide how salty caramell-y you want your sauce. Without this final sprinkle of salt the sauce can be a bit sweet, so go for it!
Using an upturned spoon, carefully pour boiling water over your pudding. It’s okay if the surface breaks - you will simply get holes on the surface of your pudding. Not a big deal in the long run
Bake for 22-25 mins (shallow dish) or around 30mins for a deeper dish - check during the baking process and watch out for the signs!
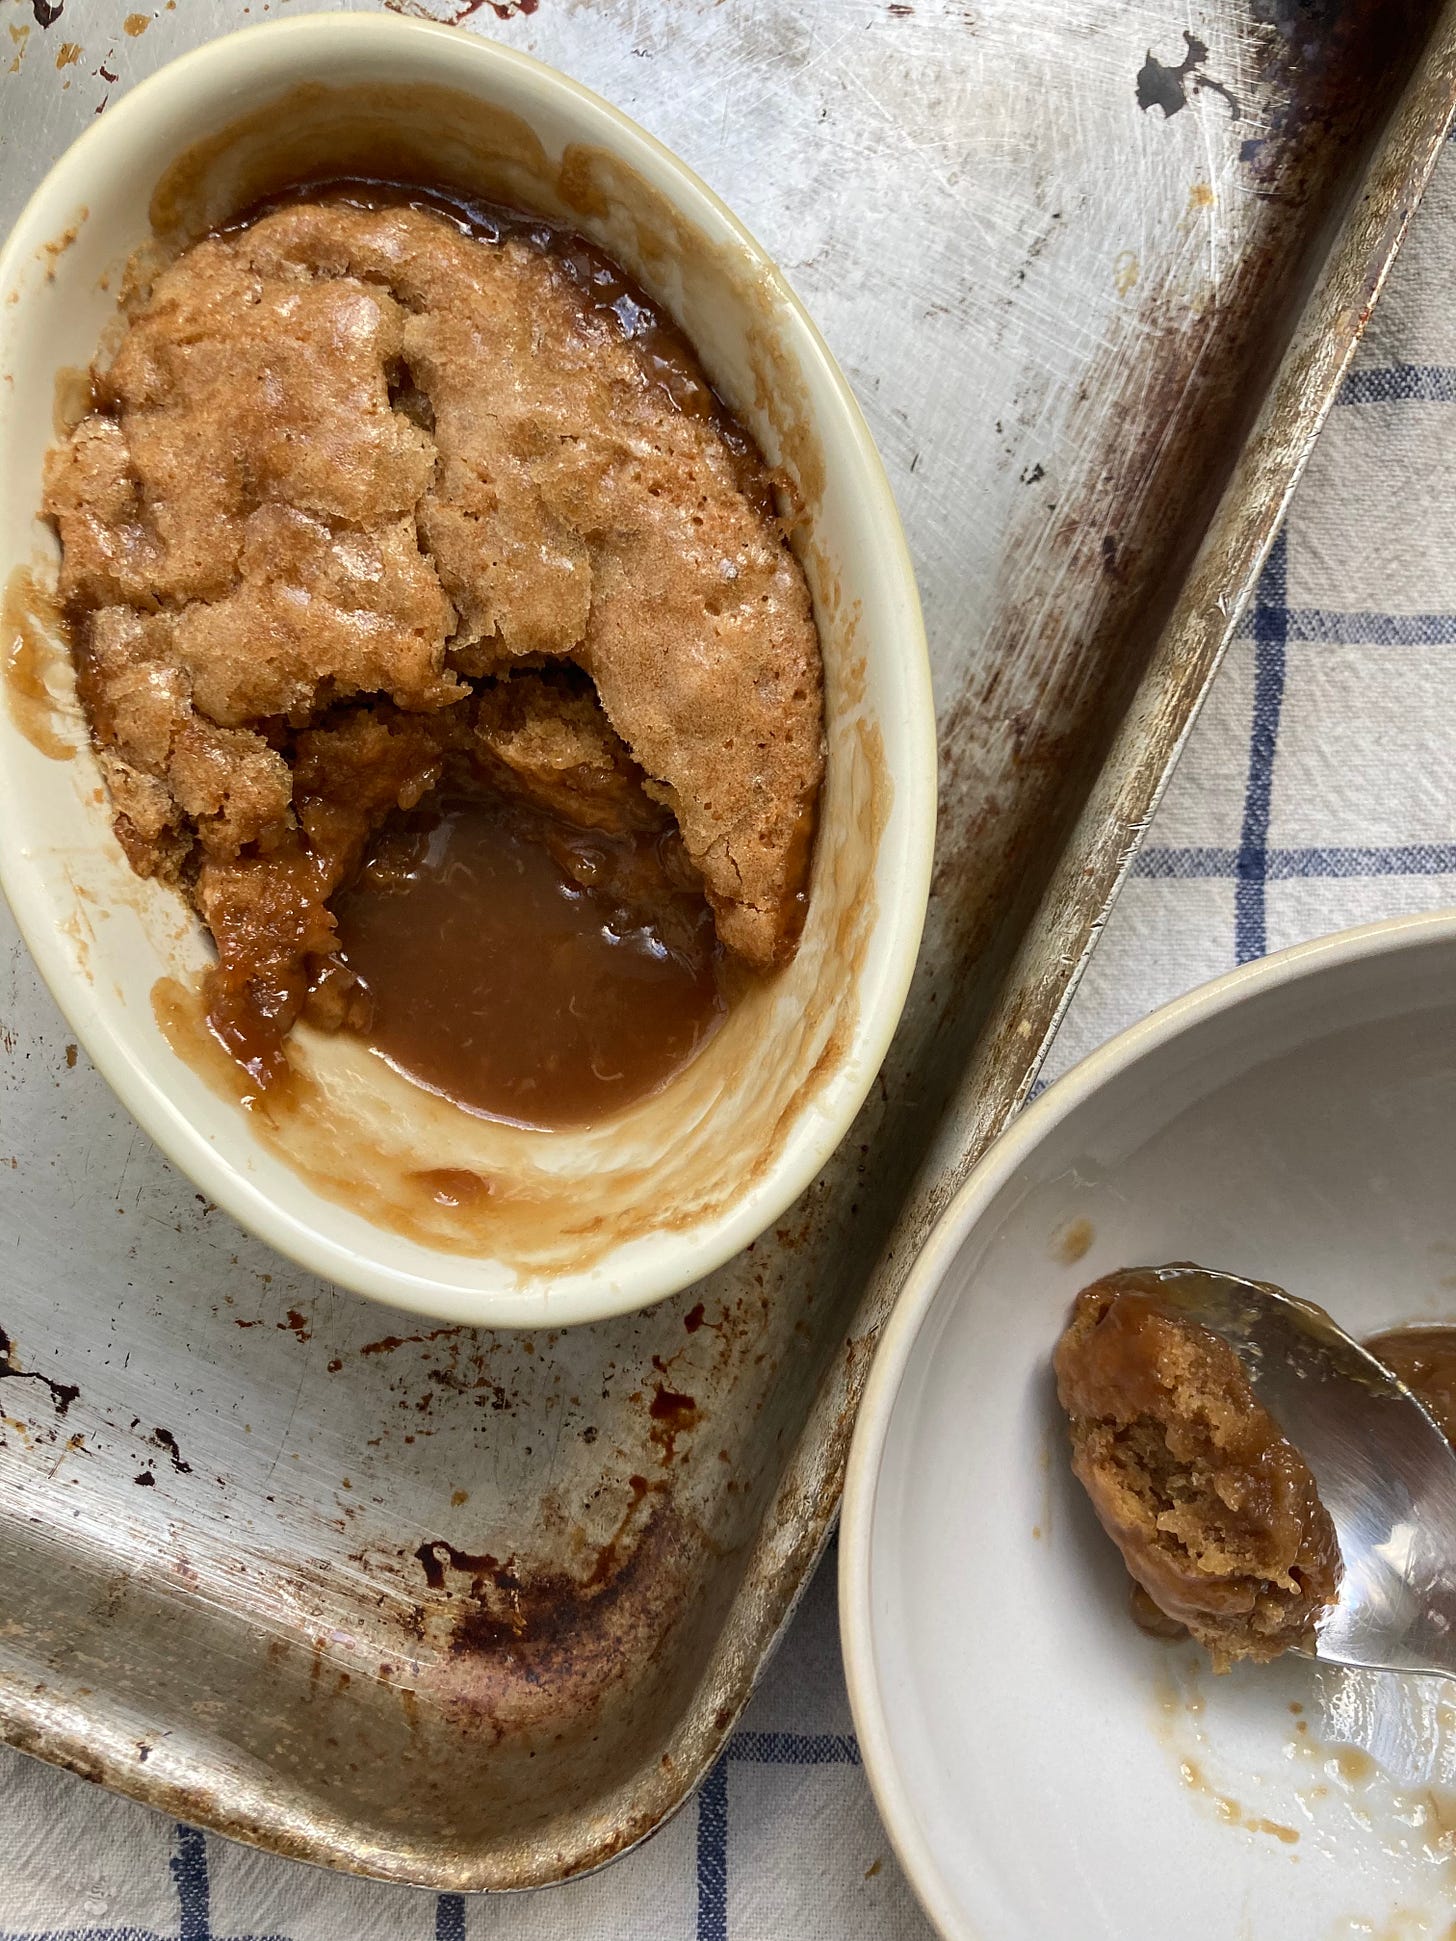
Serve with cream or vanilla ice cream. I reckon this would re-heat well, too. I’ve just never managed to have leftovers:




Just made this 4 years late to the party. Sensational!!!!
Anyone tried this a day in advance? Ie make the batter mix, leave in fridge, then before baking add the boiling water? With a family adding an extra job to Sunday lunch can be a bit much so desserts are always made day before!