Kitchen Project #56: Ganache forever
A chocolate + water plant-based love story
Hello,
Welcome to today’s edition of Kitchen Projects. It’s so wonderful to have you here.
Today we’ll be exploring the world of ganache with a focus on the magic of mixing chocolate with water to create divine and totally vegan chocolate tarts. You’ll feel like a wizard and you’ll have a few recipes up your sleeves for when you’re catering for anyone plant-based in your life.
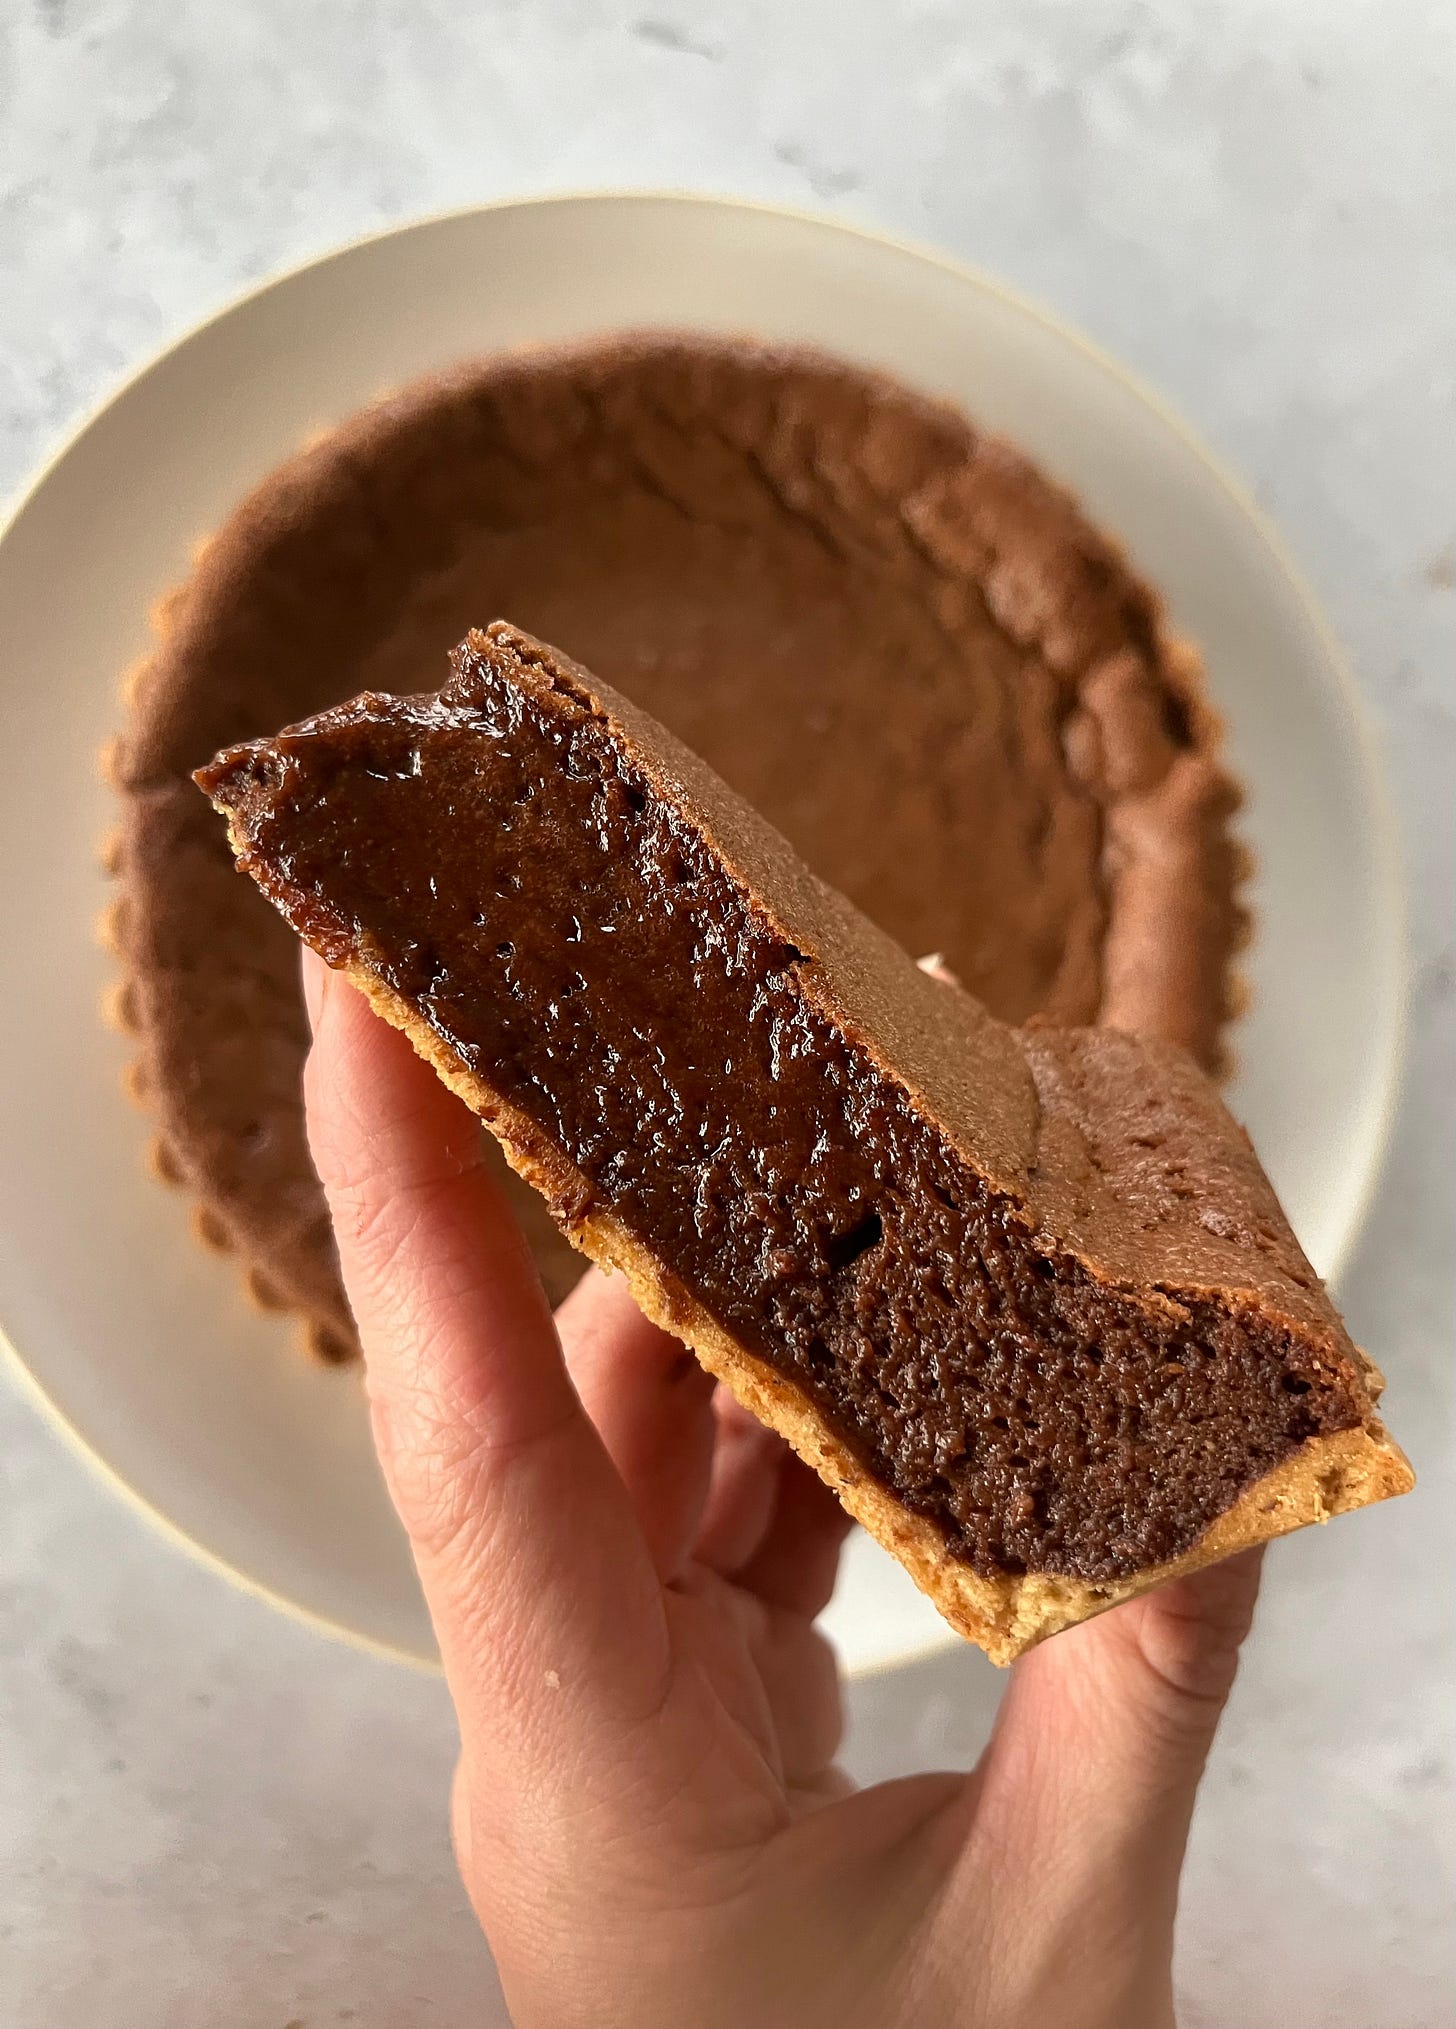
Over on KP+, I’m staying on the chocolate theme and sharing one of my favourite ever recipes: A very-much-not-plant-based-yet-very-much-perfect baked chocolate tart. With only four ingredients, it’ll be your new go-to dessert. Subscribing to KP+ costs just £5 and you get access to lots of extra content, inc the full archive, whilst supporting the writing, so please click here to check it out:
Lots of love,
Nicola
A Pump St. Moment
I’m very excited because I’ve teamed up with Pump St. Chocolate for today’s newsletter. I used their beautiful pistolles to test out the all the ganaches and got to try their new vegan Oat Milk chocolate which is divinely delicious. Pump St are kindly offering a 10% discount to all subscribers of the newsletter - simply visit their website and add ‘KP10’ at check-out. KP+ subscribers will get an exclusive 15% discount code (yay) in the KP+ newsletter today.
As well as this, we’re doing a cute giveaway! To be in with the chance of winning a selection of amazing Pump St. chocolate goodies, just click this link sign up to their mailing list and we’ll pick a random winner next week:
Chocolate & Water: A love story
Ive been wanting to cover this topic for a while and with Valentine’s day coming up I think it’s finally time. I mean, is there anything more romantic than respecting your loved one’s dietary requirements?
Although a simply overwhelming amount of recipes online will only have you mixing cream + chocolate to make ganache, you can make it with any liquid. Including water. Not only is this dietary requirement friendly, it is - in some cases - way better.
Today we are going to bear witness to the ultimate Romeo and Juliet story because Water + Chocolate = Water Ganache. Not only is this divinely delicious, it is SO fun and easy to make and to be honest, really exciting. I’m not sure what it says about my life that pouring water over chocolate gives me a genuine thrill, but even if it's just for the novelty, I highly recommend you give it a go. After we go through the science, I’ll share formulations for truffles as well as my perfect plant-based chocolate pastry recipe and ganache tart filling.
The best thing about it? This technique is SO simple. Got a kettle? Got some sugar? Got some chocolate? Boom, you can make truffles within an hour. Let’s do it.
Over on KP+, I’ve shared one of my favourite EVER and *very much not vegan* recipes - a perfect baked chocolate tart:
Because 1) not all of us have loved ones with dietary requirements and I want you guys to have range and 2) I love dipping into my archives and sharing my go-tos and this one is ridiculously simple and delicious.
Chocolate and water walk into a bar…
I’m sure you’ve heard before that water and chocolate don’t mix? That’s a lie. Well, a white lie. The first time I melted chocolate over a bain-marie, I remember the fear I felt at a drop of water or steam condensing into my mixture - even the smallest drip could destroy it! And that, actually, is true. A tiny drop of *any* liquid is going to seriously mess with your chocolate and cause it to split apart and destroy its ability to temper / properly recrystallise. However, if you were to keep adding water then you’ll be rewarded with a luscious smooth mixture.
So what is seizing?
To understand why chocolate - initially - freaks out when water gets involved, we have to look at what is going on with chocolate in its natural state.
Chocolate is a harmonious blend of cocoa mass, sugar and cocoa butter. It may also have milk solids for milk chocolate, and additional stabilisers. But let’s focus on the holy trinity of flavour (cocoa mass), seasoning (sugar) and fat (cocoa butter): The sugar and cocoa mass are bound by the cocoa butter, holding everything in place in a stable state. There is no water present which is why chocolate is considered ‘dry’ even though it can melt and act like a liquid (weird I know).
Here’s where it gets interesting: As we know with baking, each ingredient's relationship with water is a really important factor. And the harmonious members of the chocolate society all feel differently about it.
Sugar, as we know, is hygroscopic aka LOVES water. Cocoa butter is a fat so it repels/hates water. Cocoa mass is also pretty water loving, too. These differing relationships with water is where it all goes wrong - a small amount of water gets involved with melted chocolate and the previously harmonious ingredients ditch each other to form their own relationships with water. Water and sugar get together and form syrupy clumps - same for the cocoa mass - whilst the water splits up the mixture even further as it tries to get away from the cocoa butter. The result? A grainy, miserable split mixture. And there’s no going back.
BUT, you can go forward - if you keep adding water, the grainy mixture becomes fluid and silky because a new system has formed.
Enter: Ganache!
You can think of ganache as an emulsion or, as Harold McGee suggests, a combination of an emulsion and a suspension aka stuff happily floating about in fluid. In the case of ganache the ‘stuff’ is the dry matter like cocoa mass (which swells, hydrated by water) and cocoa fat, which is floating in a syrup made from the water and sugar from the chocolate.
Therefore, adding more water means that the chocolate stops freaking out: Water in small amounts disrupts the fat-dominated chocolate system, but water in large amounts becomes a dominating player and provides a new framework/”society” for our ingredients to fit into. Instead of the water trying to fit into the fat, the fat relinquishes control and becomes happily suspended in the water.
As a result, you can create interesting and new textures by simply mixing various quantities of chocolate and water. You can also add additional sugar which also contributes to flavour and texture. The water can be anything - fruit juice, wine, plant-based milks etc. I’ll provide you with a few base recipes, but I highly recommend starting with a 1:1 ratio when you’re testing out a new chocolate and adjusting from there. The best thing about ganaches? You can simply melt it down and add more chocolate/water/sugar to suit, it is endlessly fixable.
BTW… A huge thank you to chocolate genius Alistair Birt for talking through some of these concepts with me. I credit Harold McGee’s fantastic ganache section in ‘On Food and Cooking’, in case you want to read deeper into the science.
So.. why does ganache split?
No matter what formulation you’re working with, there’s a chance you have experienced ganache splitting - it’s miserable, greasy and sad. Although it will depend on the recipe you are working with, here are a few reasons / fixes:
Not enough liquid - There simply isn’t enough liquid to suspend the fat - the cocoa mass swells and literally forces the fat out! Add a tsp warm water at a time and watch your ganache become smooth once again
Chocolate is too hot - Chocolate that is too hot will seize and split up, preventing a smooth emulsion even if your formulation is good. Leave it alone and then try stirring again. If it cools too much, warm gently over a bain-marie and stir.
Chocolate is too cold - Dark chocolate will also not play ball if its below a certain temperature. Gently warm on a bain-marie and then stir again.
Comparing cream and water
It’s popular to use cream for ganache (with it’s 60%ish water!), probably because cream is… delicious! Cream, as well as containing water, also provides milk solids for flavour and fat which helps mouthfeel giving ganache a fabulous texture. Let’s break it down a bit:
Take a ‘classic’ ganache of equal parts cream and chocolate, say 100g and 100g, what you are actually mixing is 100g chocolate with 60g water and 40g fat. If you then break-down the chocolate, you’ll see you’re mixing your cream with another series of ingredients - cocoa mass, cocoa butter (fat) and sugar. It’s a whole party. So, with so many factors going on, it stands to reason - scientifically - that a ganache can be made using any liquid and adding different fats - if desired - to refine the texture. This way you can be in complete control of your final ganache and engineer it to be exactly what you want.
I tested a lot of ganaches, but I was particularly fascinated when I compared ones made with equal parts cream and chocolate and one with 30g chocolate, 20g water and 10g coconut fat to “mimic” the cream.
The results? Extremely similar. The dairy ganache was thicker as I mixed it but set up almost exactly the same as the dairy-free ganache, though it was slightly shinier. The flavour was actually pretty similar, so similar that I could hardly tell the difference in a blind taste test and initially ran into trouble identifying them (my hubris meant I hadn’t labelled them!). The dairy-free ganache, due to the coconut fat, dissolved more quickly on the tongue making it feel ‘lighter’ to eat but was also harder in the fridge.
So, that’s the long and short of it. Today I’ll provide you with a formulation for truffles and for a tart filling but I hope you’ll experiment with it. Although there are a few downsides (shelf life which we’ll talk about briefly next), there is so much upside: Water is the simplest of all liquids and lets the flavour of the chocolate truly shine. Chocolate is egotistical, it doesn’t really like playing with others and it really does shine and allows you to present single origin chocolates in their pure flavour state.
Water is so easily infused with additional flavours (hello, tea!) that you can incorporate flavours even more simply and cleanly. Let’s be honest, double cream has a lot going on - you have to battle against the milk fat and solids just to get your flavour message across.
How does chocolate % affect our ganache?
Chocolate gets its character from the cocoa bean itself - this is why cocoa beans harvested in Mexico may taste vastly different from beans harvested in Ghana, for example. That being said, the flavour from the cocoa bean is only one part of the story when it comes to the final chocolate bar
As we’ve covered, chocolate is a harmonious society of cocoa butter, cocoa mass and - usually - sugar. Chocolate is regularly described in terms of percentages. This percentage points to how much of the bar is derived from the cocoa bean - this includes the cocoa butter and cocoa mass. So, a 70% chocolate bar is 70% cocoa bean (fat and mass combined) and 30%.. Other stuff. Other stuff usually includes sugar or milk solids and emulsifiers. Take this Tony’s Chocolonely 70% bar, for example, which has very clear nutritionals. The 70% refers to the cocoa mass and fat and the other 30% is made up from sugar. The fat is solely from the cocoa butter (cocoa butter is 60% saturated and 40% unsaturated fat).
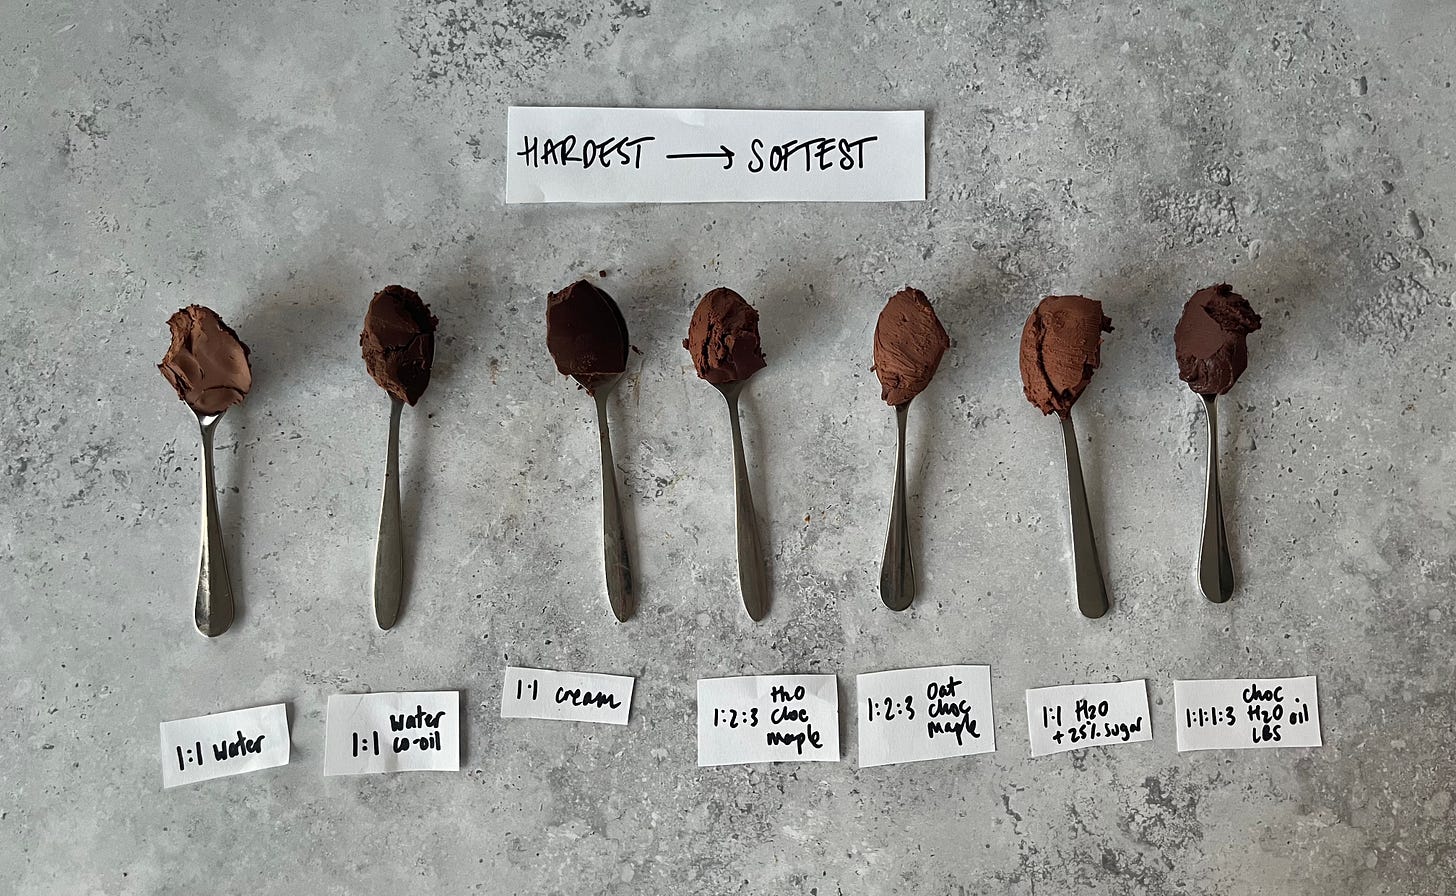
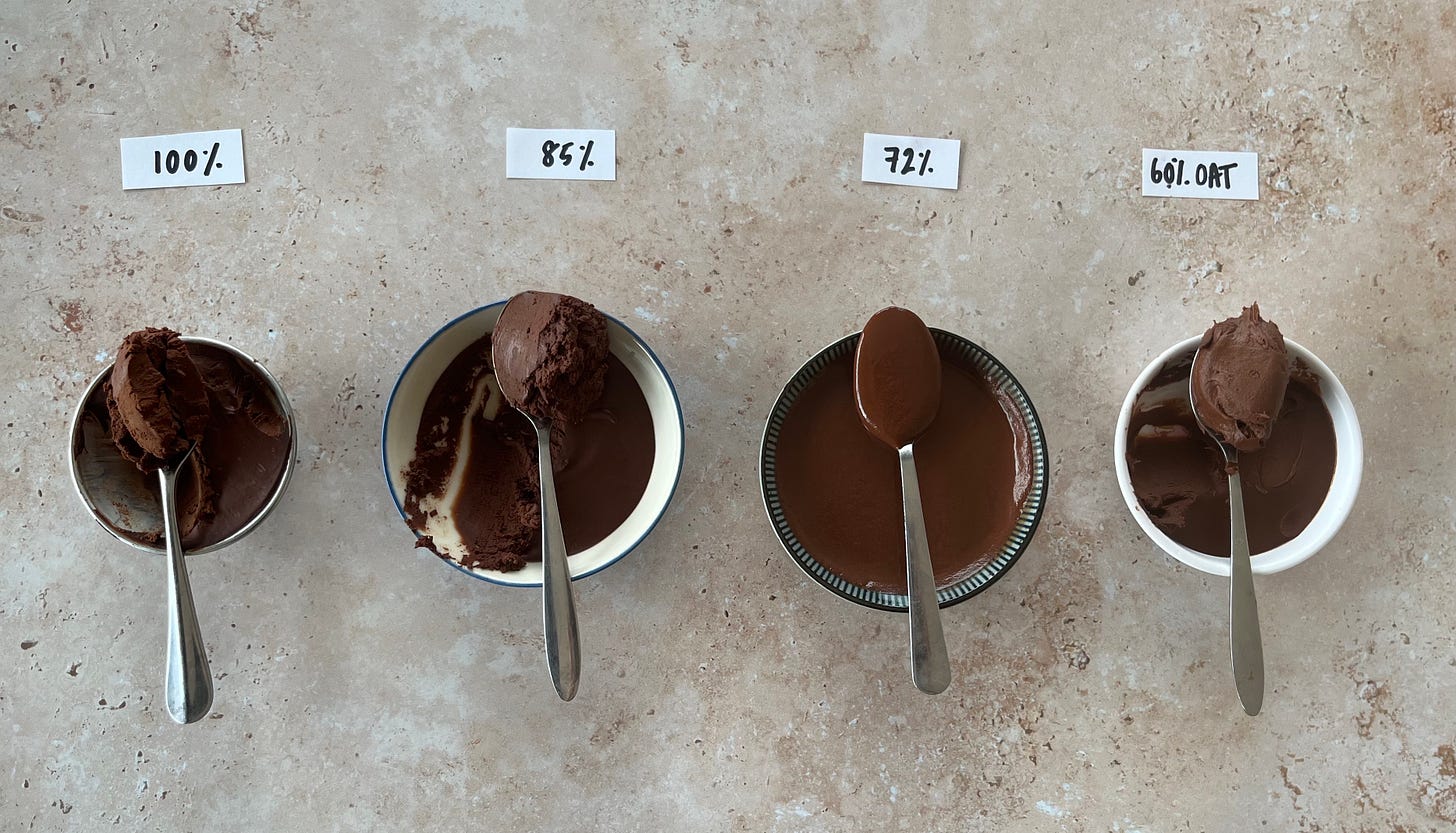
Due to this varying make-up, different textures of ganache may be produced from different % chocolate made with the same ratio. I used Pump Street 100%, 85%, 70% and 60% oat milk:
The 100% and 85% made very similar, thick intense ganaches.
The 60% oat milk made an almost stretchy, chewy ganache.
The 72%, however, didn’t set at all.
From this, I understand that the less ‘body’ aka cocoa mass (or other stuff like oat powder in the oat milk chocolate!) the chocolate has, the less water you need to make a ganache. You see, in lower percentage chocolates, there literally isn’t enough ‘stuff’ to entertain the water. To test this theory, I halved the water for the 70% chocolate and I was able to make a version with comparable texture to the other experiments.
So then, why is it we can make a 1:1 ganache with cream and chocolate usually without thinking? Fat of course! Fat adds body, flavour and stabilises with its big globules.
A testing round-up
I tested a lot of ganache combinations this week. From granular vs. liquid sugars, to acidic vs. neutral liquids, to added oils or plant-based milks, here’s what I found:
Cocoa mass percentage - As we’ve discussed, chocolate with a higher couverture % will make firmer ganaches / need less water to make a ganache. As a rule of thumb, the lower the cocoa solids, the less liquid you need to make a ganache
Acidity - I tested the ganaches with passionfruit juice and I found that acidity did not make a a difference on the set / texture. It was delicious though
Sugar, generally, makes the ganache smoother/softer
A chocolate that already contains a higher sugar content (e.g. milk chocolate) will need less water than a very dark chocolate to create a smooth textured ganache
You can use either granulated or liquid however ganaches made with granulated sugar can become gritty as the ganache warms up - the water loosens its grip on sucrose and it re-crystallises
I loved the results of using a liquid sugar like maple syrup - it added water and sweetens at the same time and there is no crystallisation
Oat milk gives it a lighter and creamier flavour and a softer texture than water
Coconut oil is useful for replacing the butter, giving a melty mouthfeel. It is extremely hard when it comes straight from the fridge but becomes fudgy at room temperature
Although it wasn’t vegan, one of my favourite tests was a simple milk chocolate water ganache, where I mixed 50% water to milk chocolate. Milk chocolate already has a lot of creaminess and sugar so I didn’t need to add much to get a perfect fudgy and fun to eat truffle
A note on shelf life
Chocolate ganache, whilst delicious, doesn’t have a long shelf life. Obviously it’s longer if you keep it in the fridge, but what causes the spoilage? Water movement.
Water movement is the culprit of all spoilage. Why? Well, bacteria needs water to grow. However lots of things contain water and *don’t* mould quickly because water is kept chemically *otherwise engaged*. Sugar is one of the main occupiers of water - this is why jams, which have lots of water, don’t go off - the water is busy being entertained by sugar so mould and bacteria don’t have the environment to grow. It’s the ‘free water’ that causes issues. Free water will act as a personal petri dish to any bacteria that comes along. This is why dried things, like pasta, will last indefinitely, whilst fresh pasta has a short shelf life. And it all comes down to water activity, which is defined by how much of the water is ‘free’, meaning ‘free to take part in bacteria parties’.
Sugar really is our best bet to reduce water activity - chocolatiers have found genius ways of binding the water using different sugars like inverted sugars. As you and I aren’t making chocolates commercially, we don’t have to worry too much about shelf life, but I thought it would be worth giving you a bit of an overview anyway. Chocolatiers really are scientific geniuses - they find ways to massively prolong shelf life with inverted sugars and carefully balanced recipes that keep the water bound tightly. They also keep their recipes properly under wraps, for good reason.
A note on plant based fats
I LOVE coconut, don’t get me wrong, but I do take umbridge with plant-based foods taste of coconut without *meaning* to. Enter: Deodorised coconut oil. Deodorised coconut oil is a bit more expensive but I feel that it really saves the day for vegan baking. Although some preparations will benefit from the coconut flavour, the deodorised coconut oil subs quietly into today’s pastry recipe.
You may have heard of Palm Oil. Palm Oil is really popular because it stays solid at room temperature - it’s really stable and won’t fully liquefy until it gets to about 40 meaning it can give body to products like peanut butter and make them appear ‘creamy’. It’s also cheap and mild in flavour which has made it a popular fat for giant commercial food productions. However, it is environmentally precarious.
Coconut oil begins to liquiefy at 25c (to compare, butter begins melting at 28c and is totally melted by around 35c) but is naturally solid under 21c and extremely firm at lower temps making it quite reliable as a baking fat substitute. Coconut oil has a higher fat content to butter (100% vs 82%ish) and behaves well in the oven, though it doesn’t contain water so it doesn’t create steam in the oven meaning we would have to rely on additional techniques to create extra flakiness or layers.
Alright, let’s do it.
The recipes
I really hope this newsletter acts as a framework for you to try out a few different formulations and play around with water ganaches. I did a lot of noodling around this week and these are some of my favourite ratios. Remember, anything with coconut oil is going to be super firm in the fridge but be much softer at room temp. You may want to play around with serving temps.
DISCLAIMER: Every chocolate is going to give a slightly different result so although the below worked perfectly for me (I used Pump St. 85%), I hope you’ll experiment with what you have on hand - if its higher in sugar, you may want to add less sugar, etc etc. If you are going to follow the recipes below, please try and use a chocolate with high couverture - over 85%. Now the disclaimer is over, let’s to get you started!
A basic truffle formulation (Ve)
Makes 20 small truffles
200g dark chocolate
80g boiling water / fruit juice (Passion fruit juice is amazing!)
30g maple syrup or granular sugar, like caster or dark brown sugar (maple will be a bit softer)
Cocoa powder for dusting
Method
Line a 6inch x 4inch container
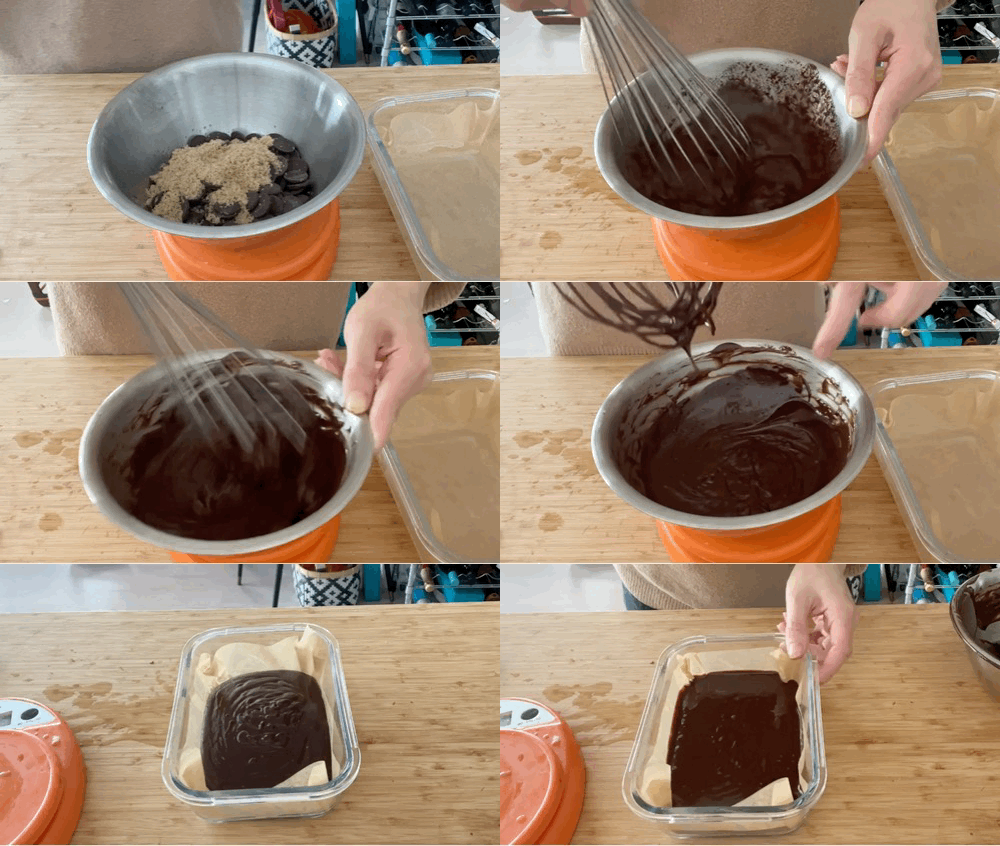
Chop chocolate into small pieces and put into a bowl with sugar. Pour over boiling water
Whisk until melted. If it doesn’t melt, whisk over a bain marie until smooth
Set in a container and leave to cool completely
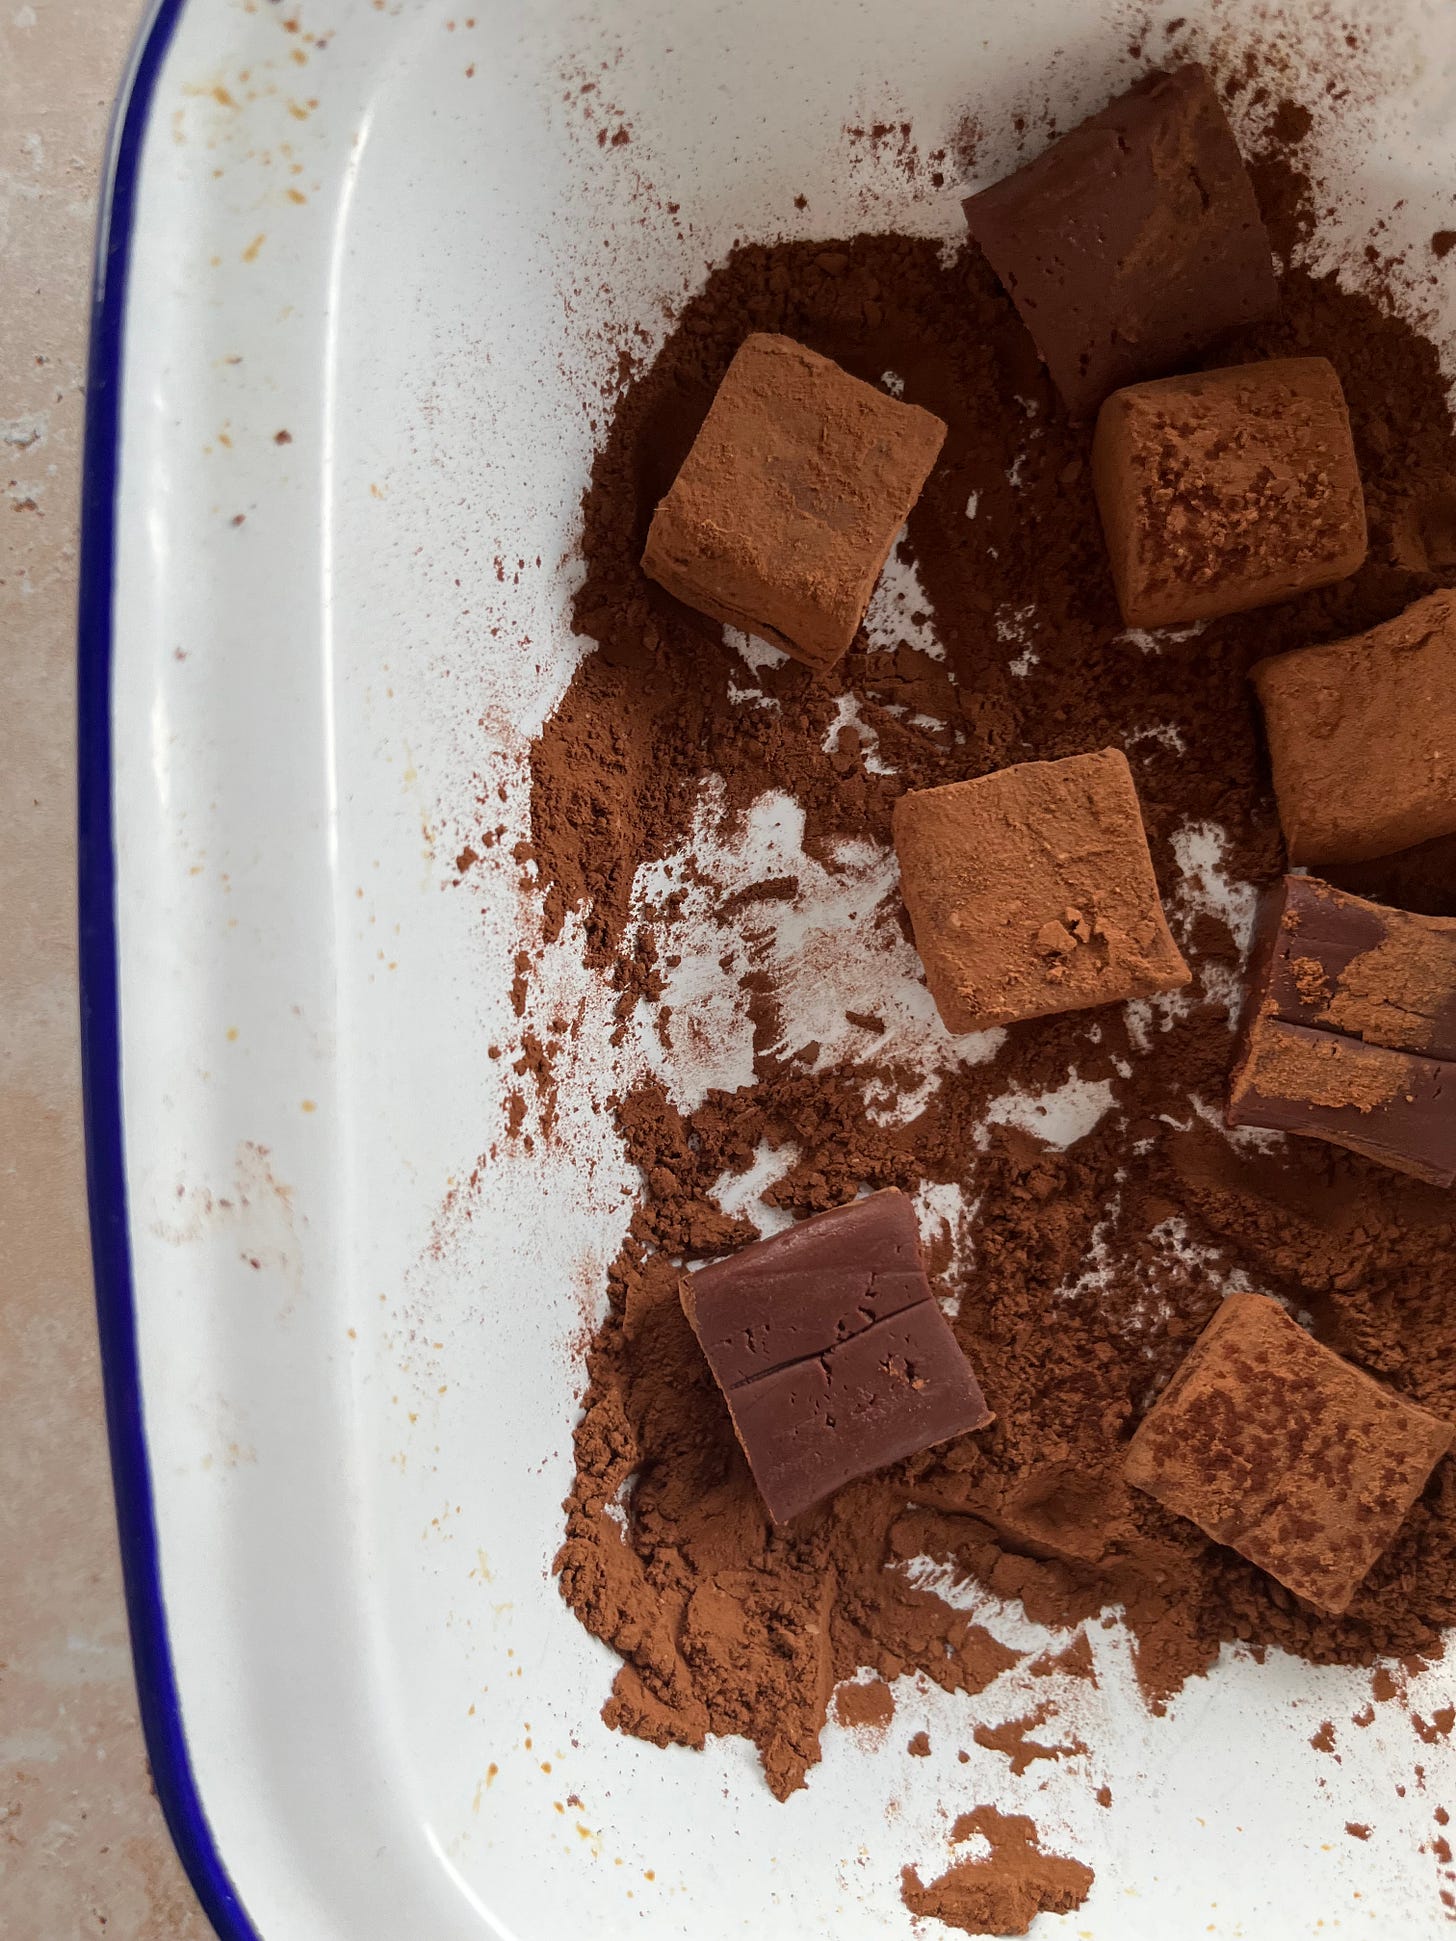
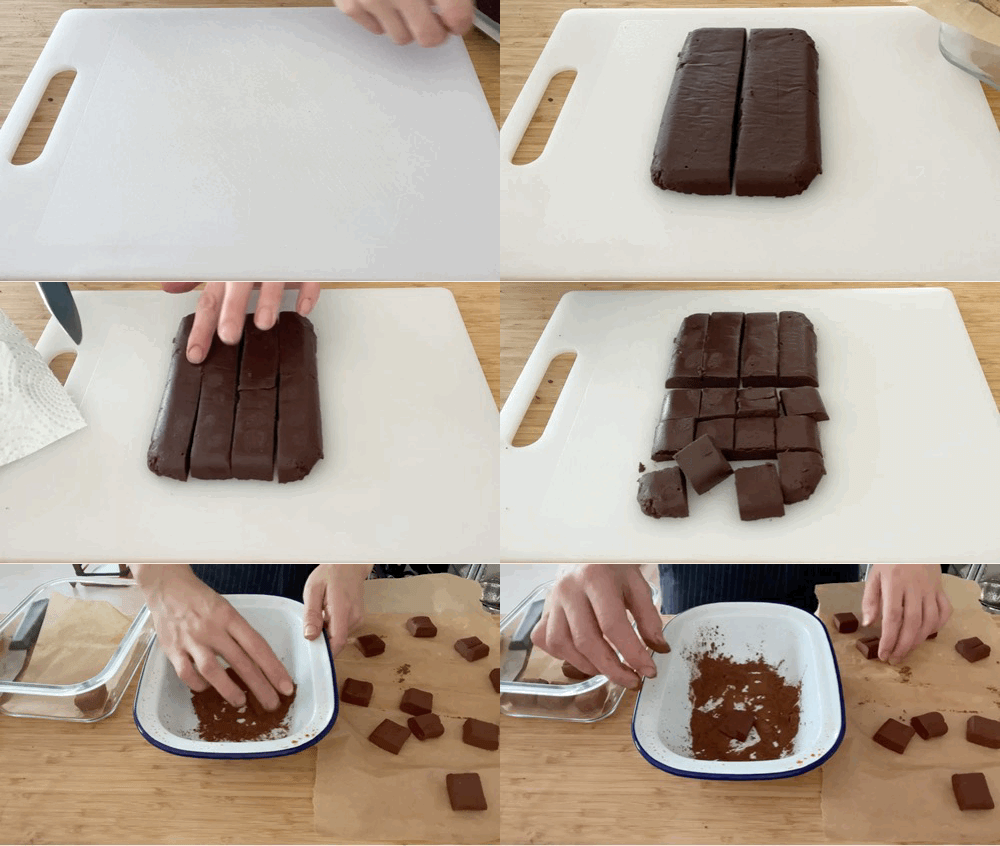
Once cool cut into pieces with a warm knife (I like to do squares) OR you can break into pieces and roll into truffle shape
Roll in cocoa powder
Store in fridge for 1-2 weeks
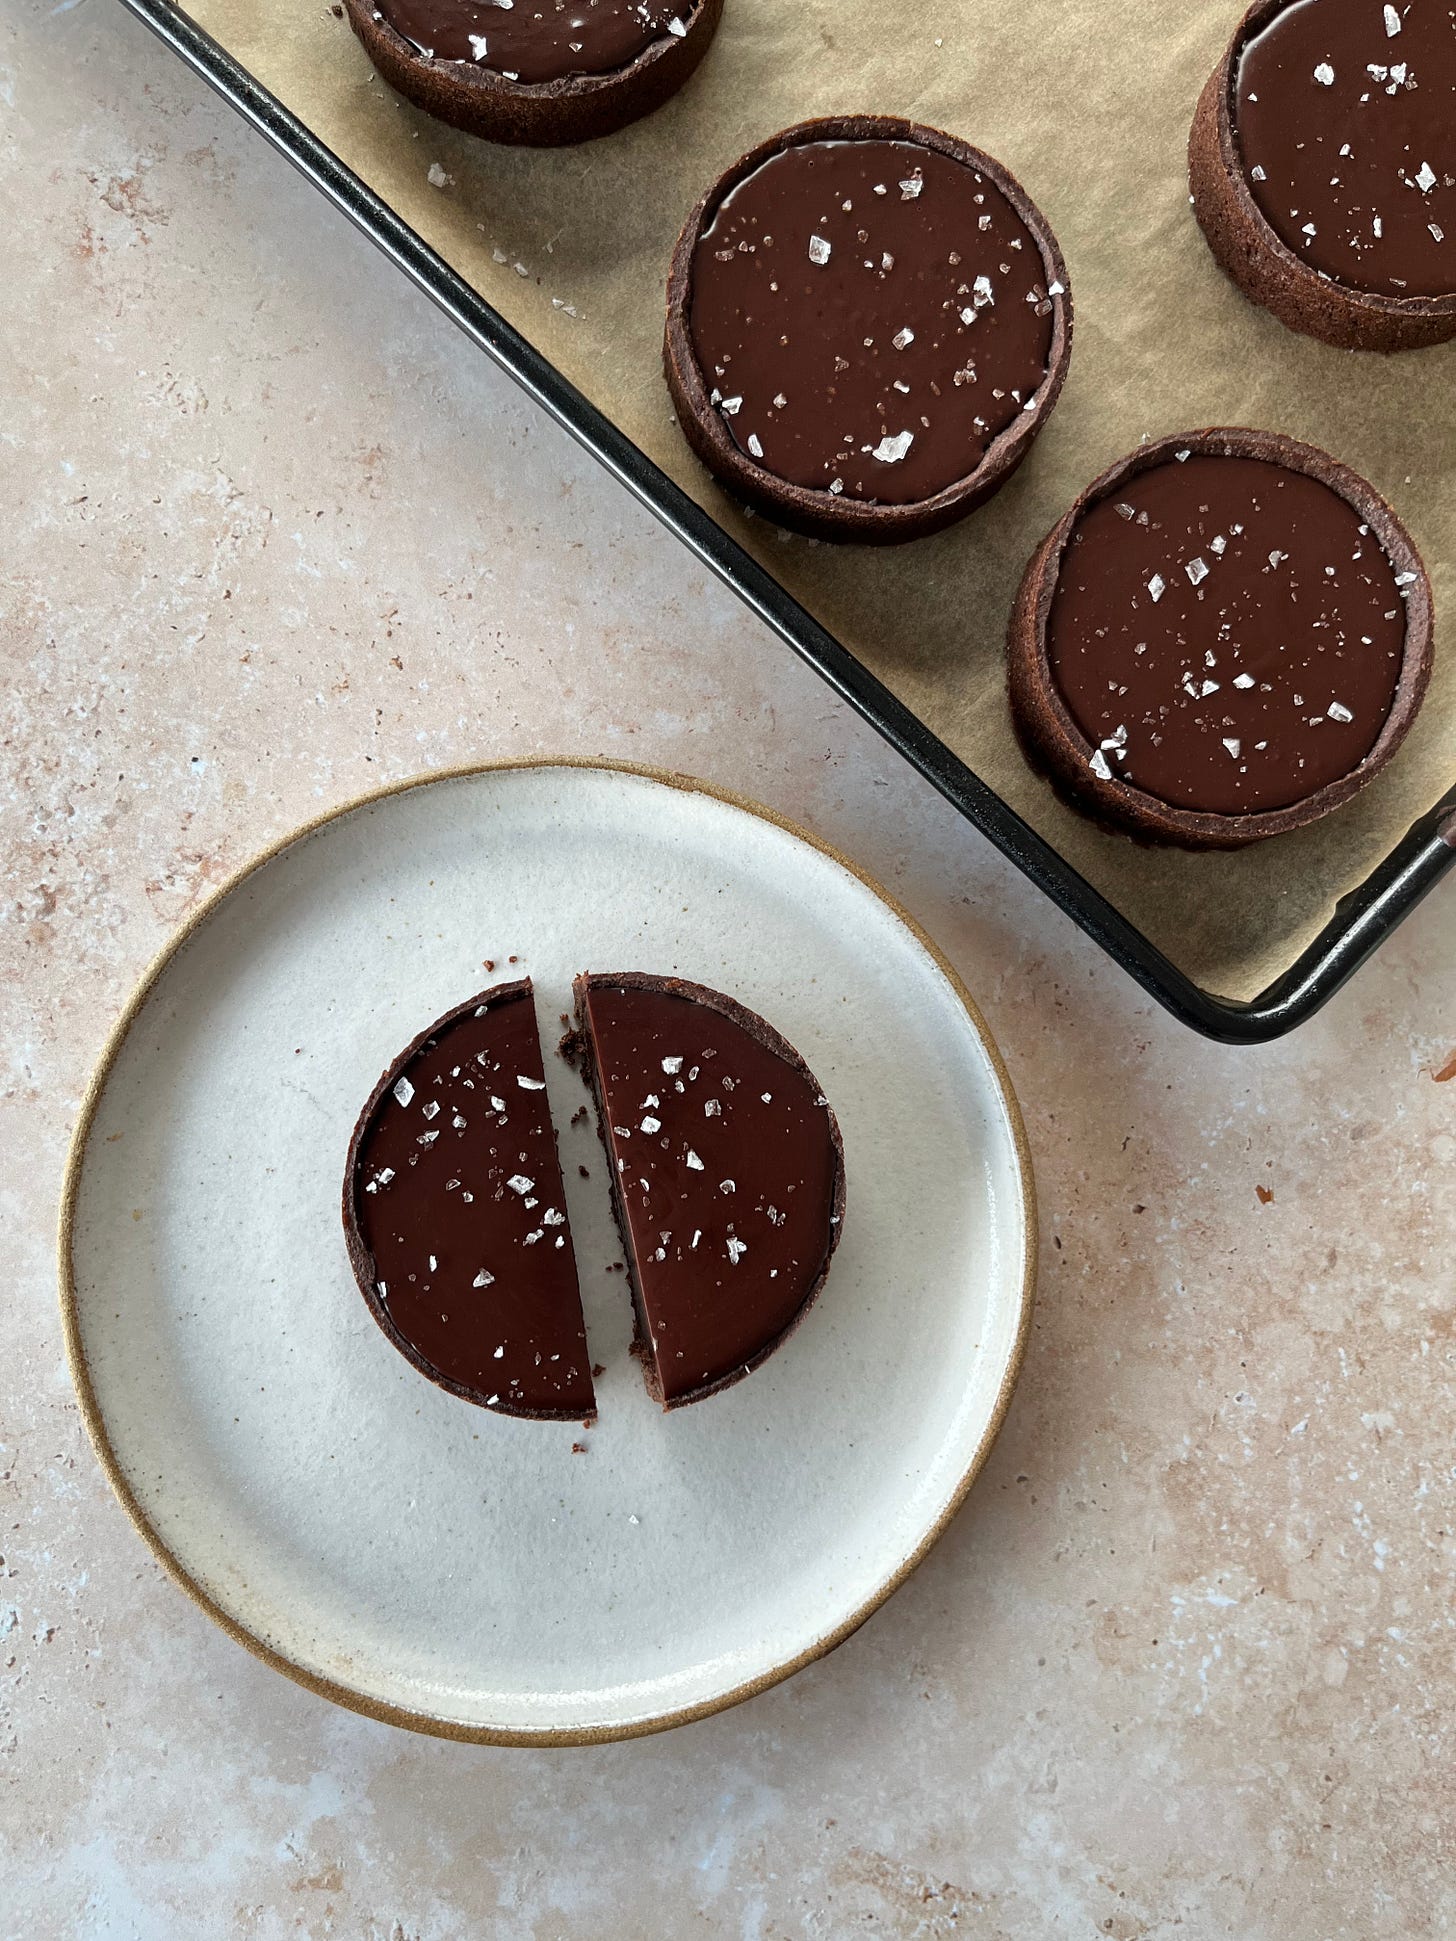
Dense set ganache filling
This makes a lovely filling - soft from the fridge with a 1:1 ratio. Works well with oat milk for creaminess or just plain water - it tastes beautiful and clean.
50g 85%+ dark chocolate
50g water/oat milk
15g maple syrup
¼ tsp salt
Method
Chop chocolate into small pieces and melt over a bain-marie
As it starts to melt, whisk in the oat milk and sugar
Whisk until melted and smooth
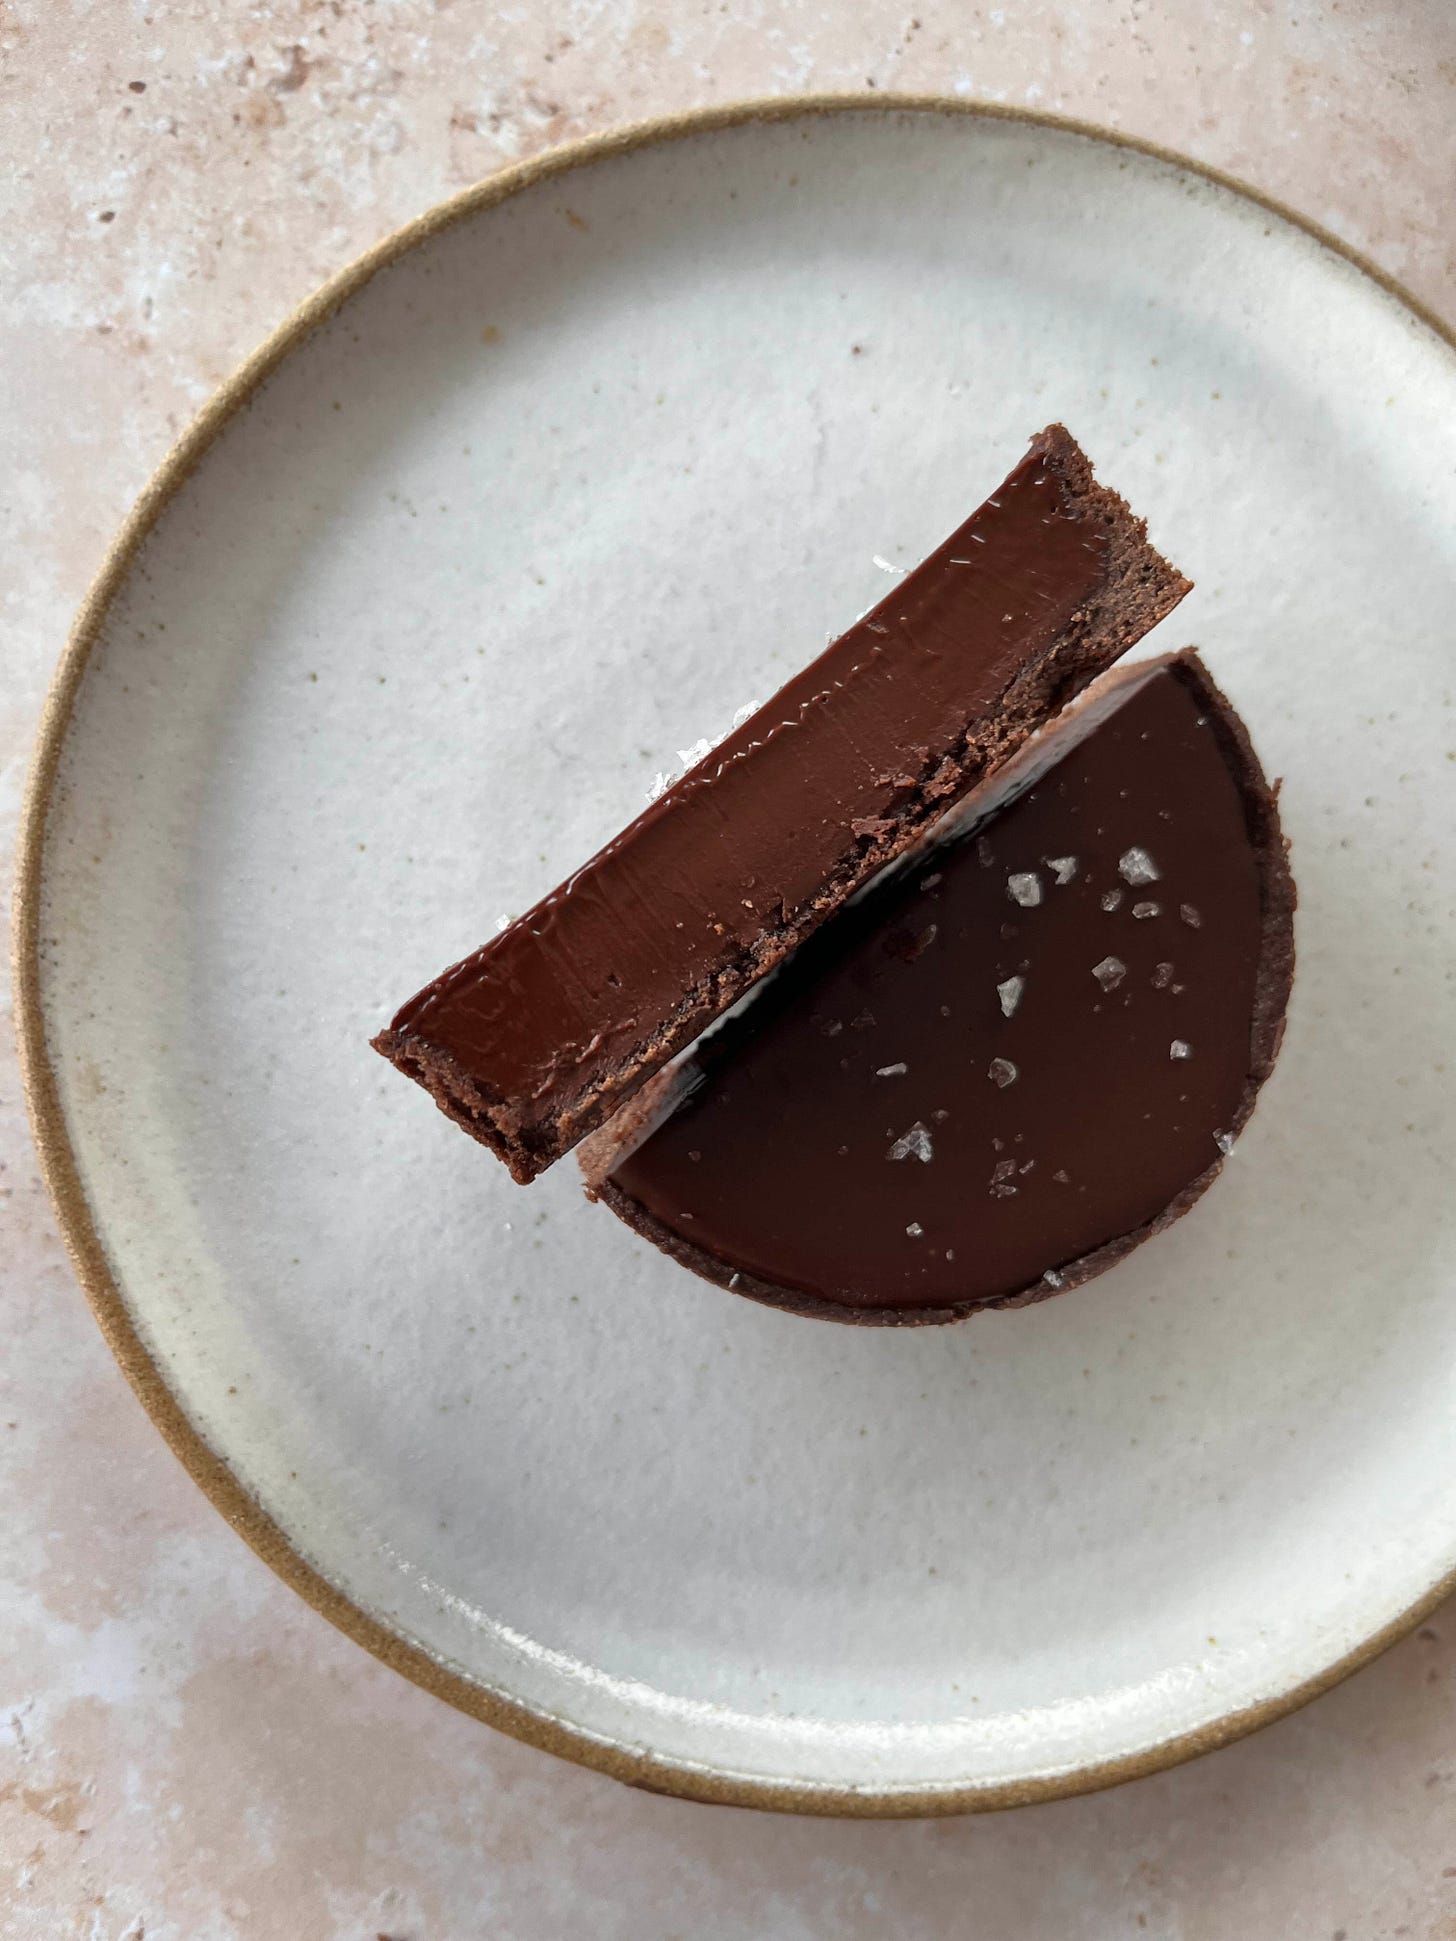
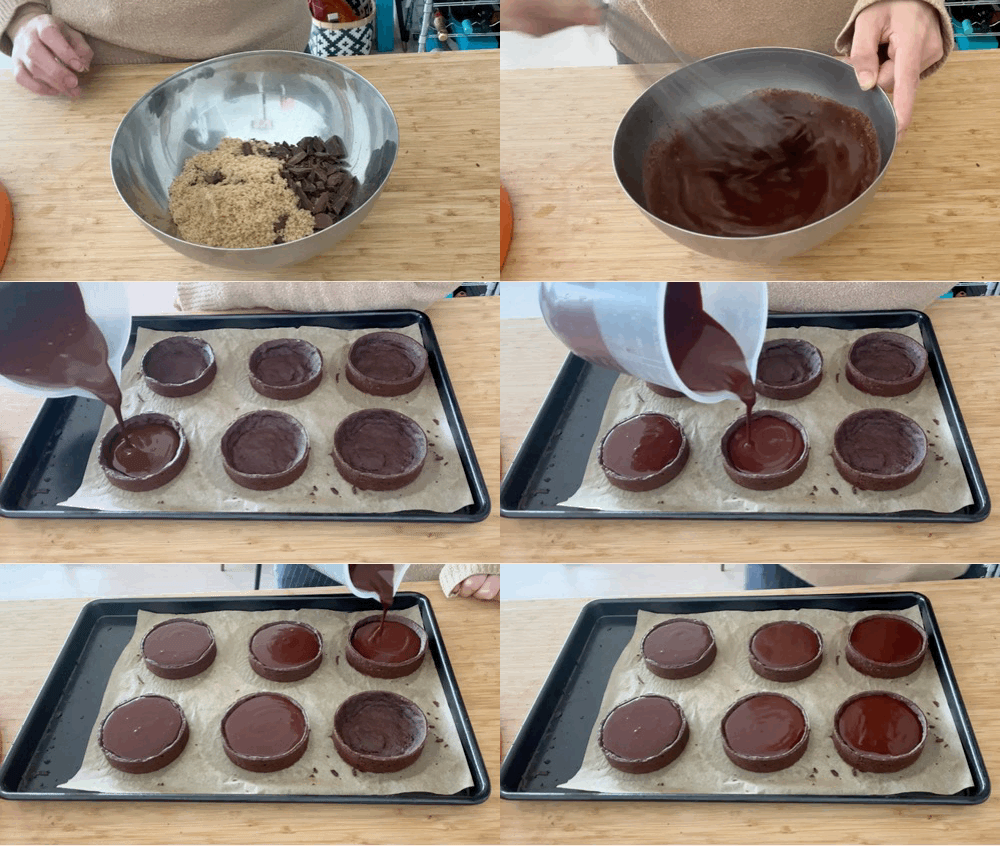
Pour into a container and leave to set completely / pour into tart cases
Just before serving, sprinkle a little flaked salt on top
Ganache tarts are best enjoyed ASAP! At least within 24 hours of making
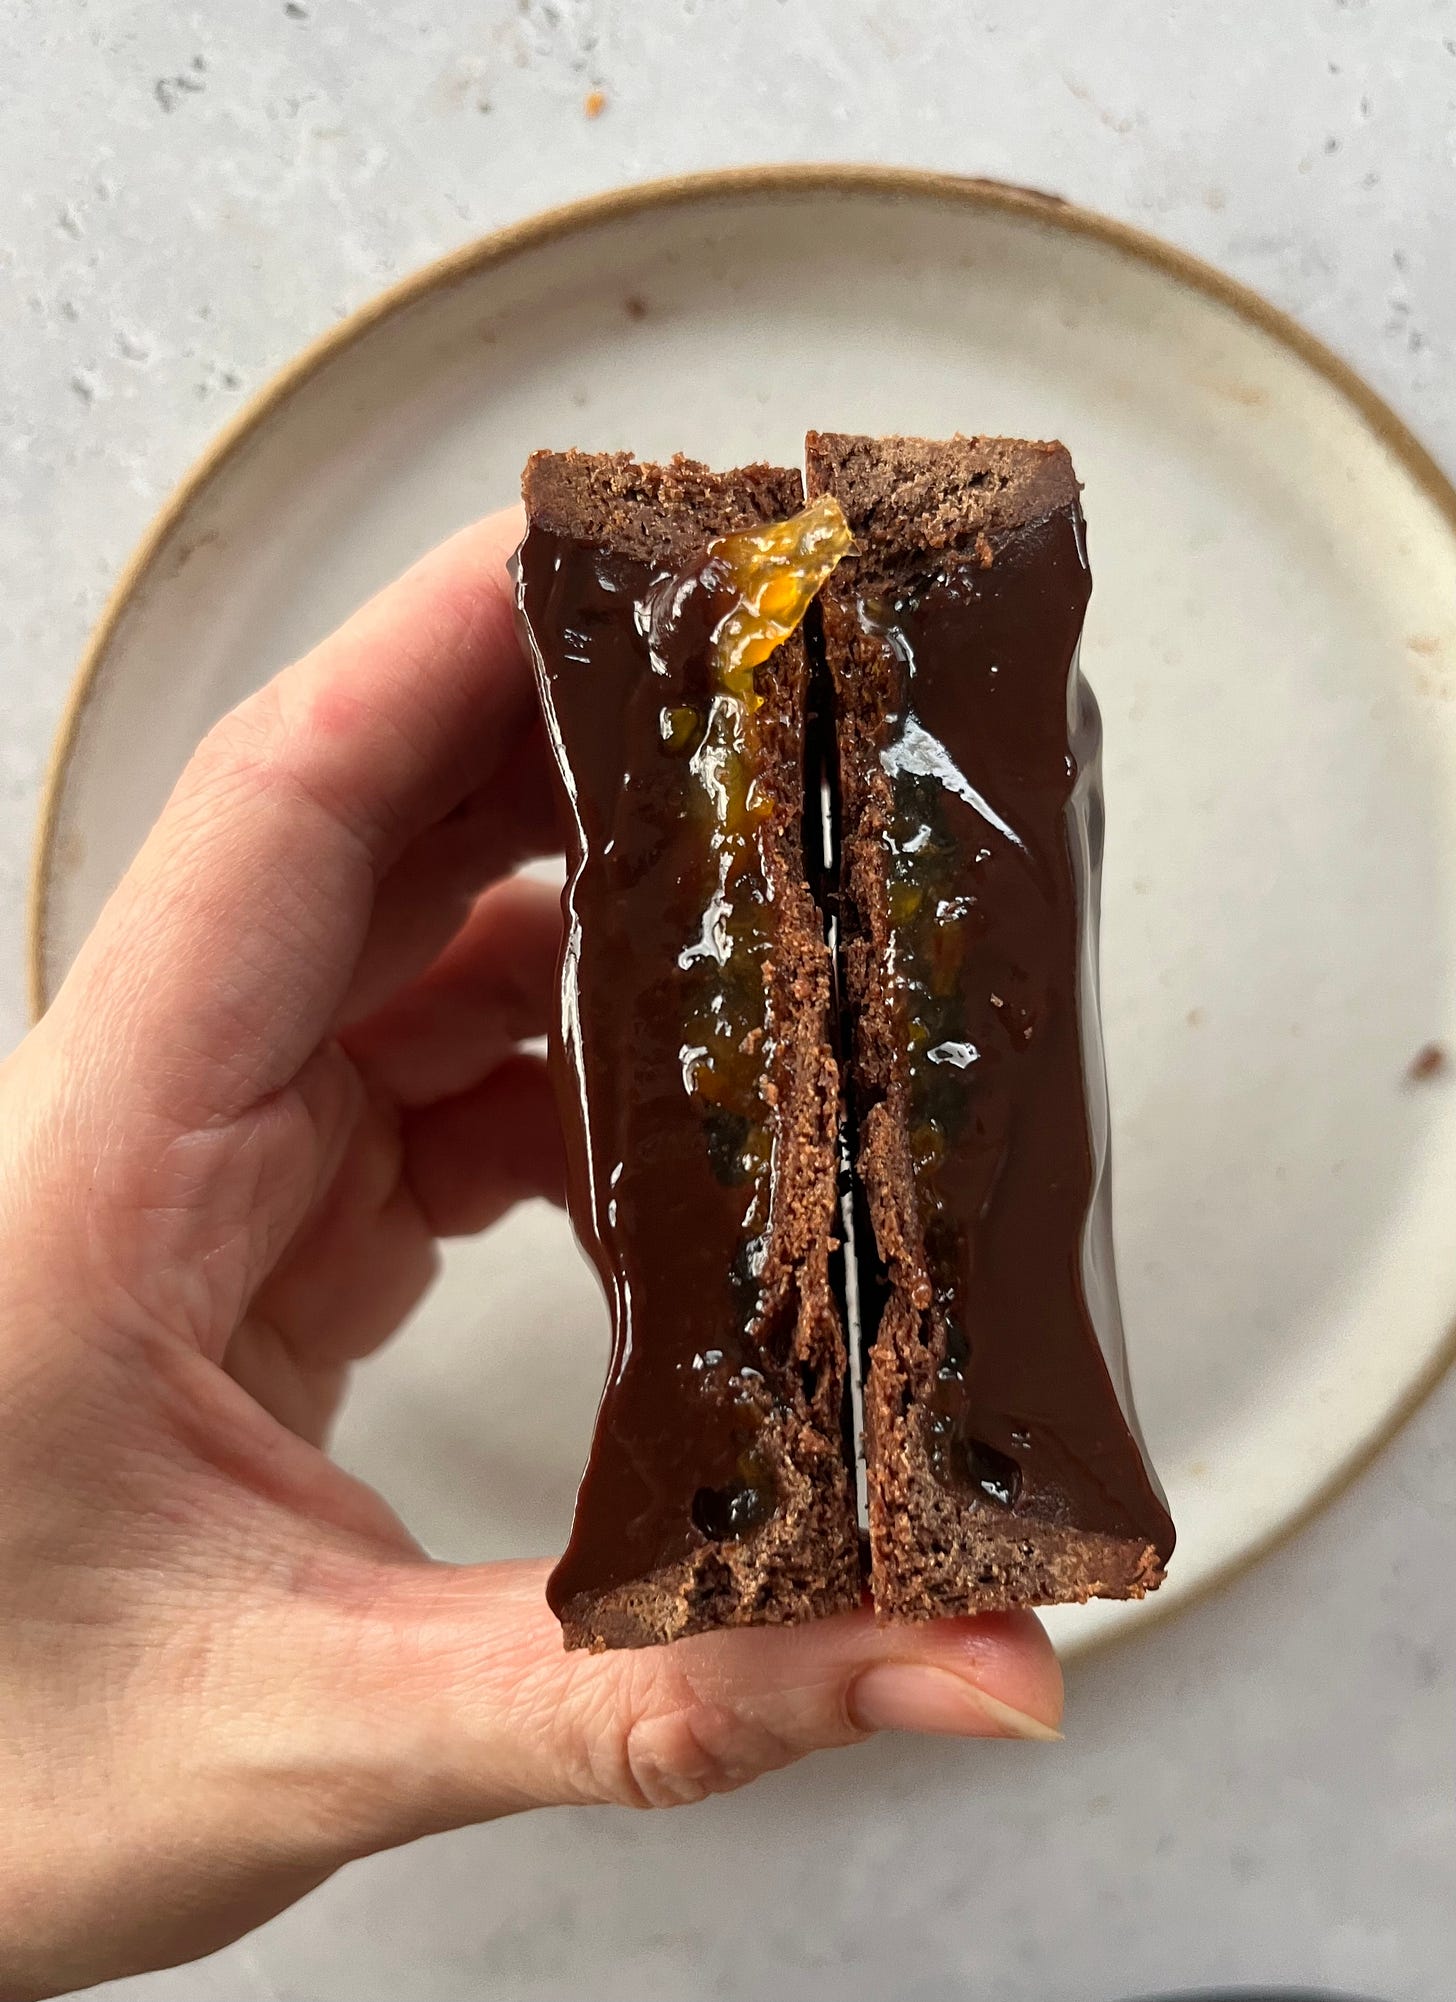
Buttery / fudgy filling
Makes 200g, enough for 4 x small tarts
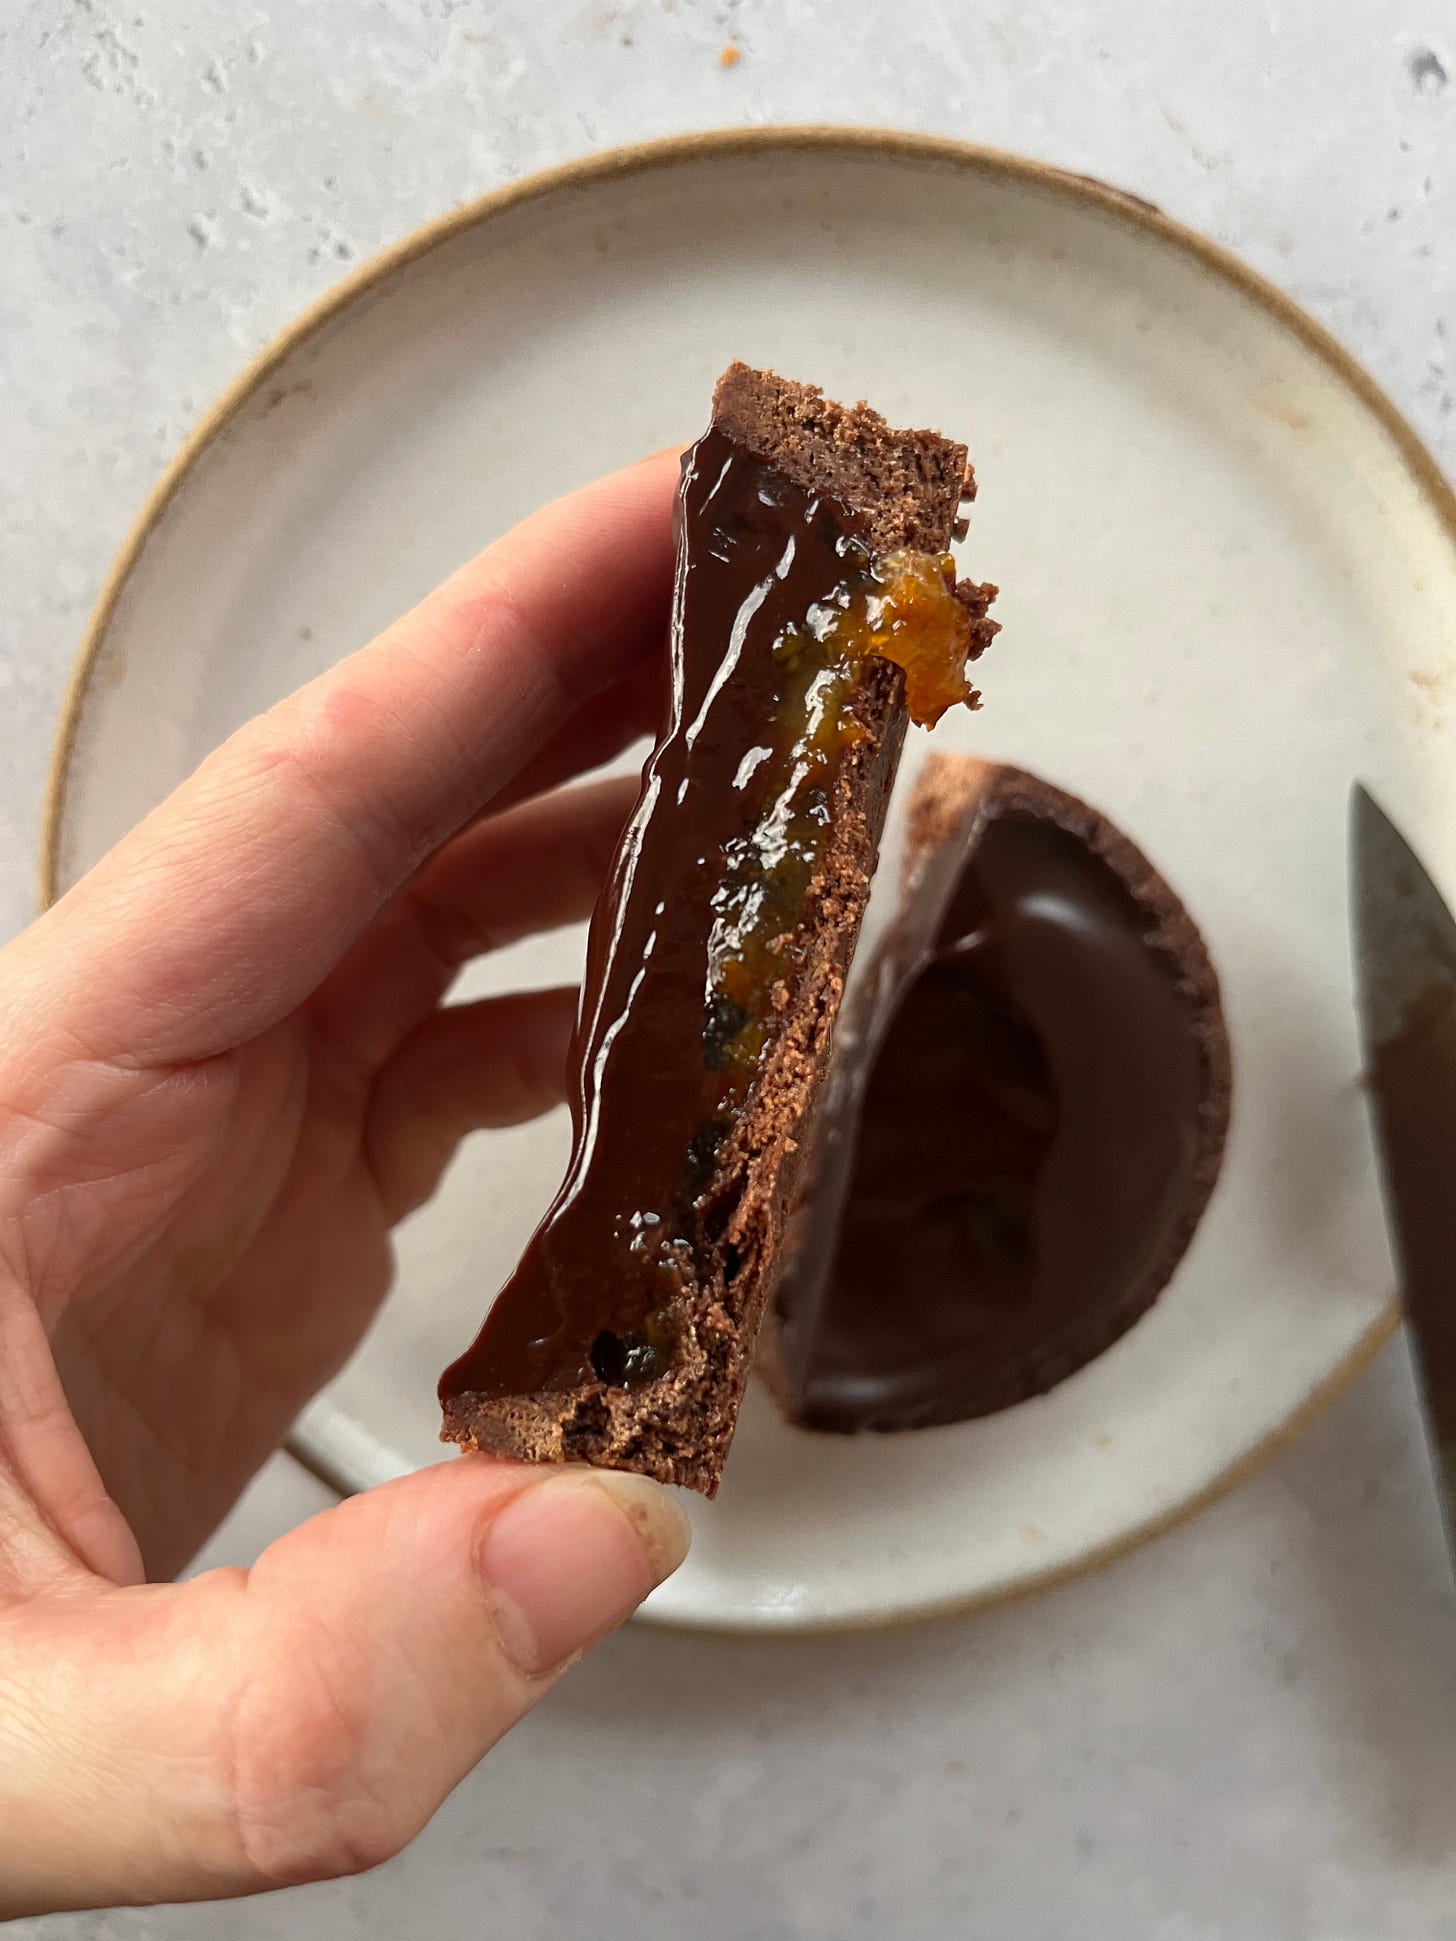
Rich, intense, creamy! Use this formulation for a buttery tart filling with a little marmalade at the base for a jaffa cake esque dream tart. You could also use this as a frosting - just halve the quantity of chocolate and leave to set in the fridge before bringing back to temp to ice your cakes. Due to the coconut oil, this sets up FIRM in the fridge so should be enjoyed at room temperature. Remember, coconut oil is a lot softer than butter at room temp so it might be gooier than you expect.
100g 85%+ dark chocolate (halve if making frosting!)
30g hot water
30g deodorised coconut oil
30g light brown sugar
¼ tsp salt
Method
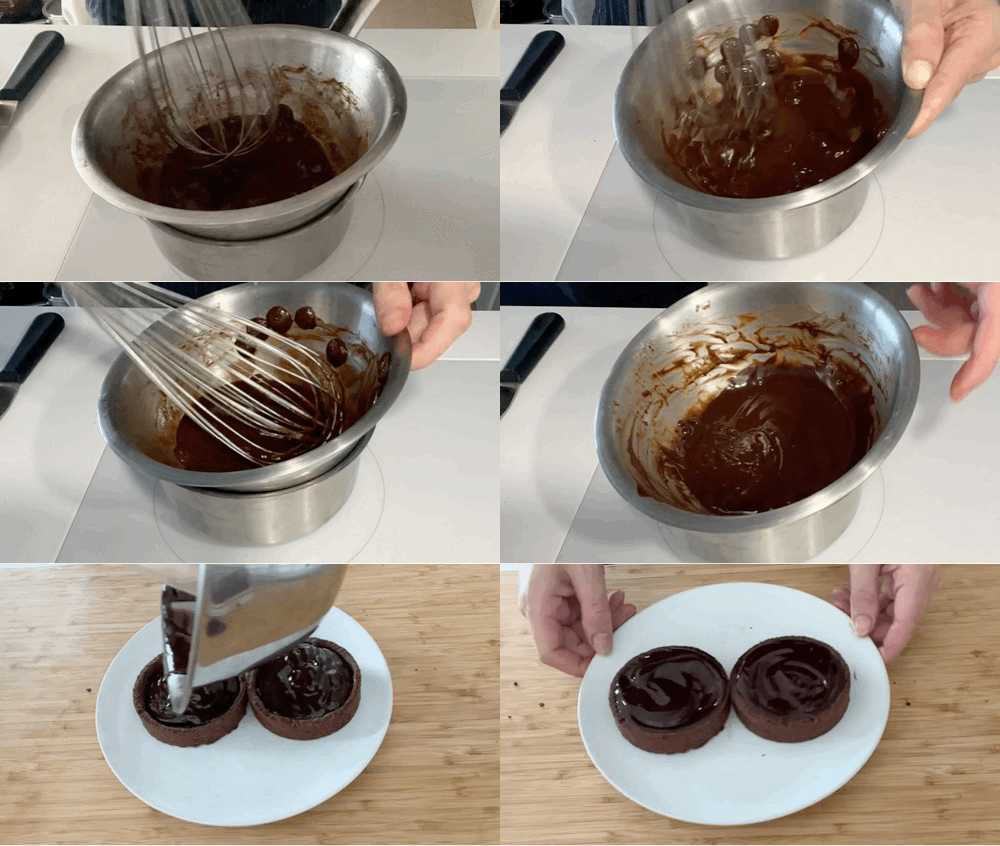
Chop chocolate into small pieces and begin to melt over bain-marie
As it starts to melt, whisk in the hot water, coconut oil and light brown sugar
Whisk until melted and smooth
Pour into a container/tart cases, then give a little flourish on top then leave to set
Serve at room temperature (you may want to set in fridge for 10-15 mins to speed things up)
If using as an icing, leave to set firm then bring gently to room temp to use as an icing (coconut oil sets hard)
These are best eaten on the day made but will last 2 days in the fridge
Chocolate pastry (Ve)
Makes 30g, enough for 6 x small tart cases
145g plain flour
25g cocoa powder
65g dark brown sugar
2g baking powder
½ tsp flaky salt
75g deodorised coconut oil
35-40g water
Method
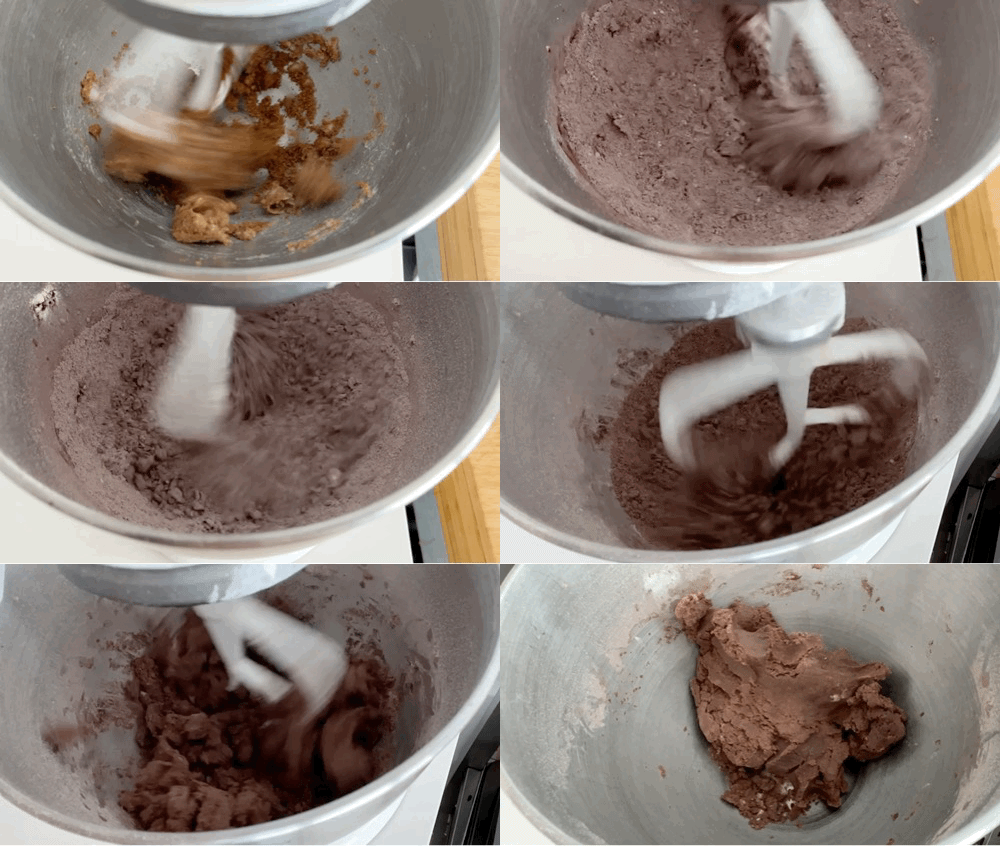
If making in the KitchenAid, paddle coconut oil and sugar together until combined and then add flour and cocoa until breadcrumb-y before adding the water and forming a dough
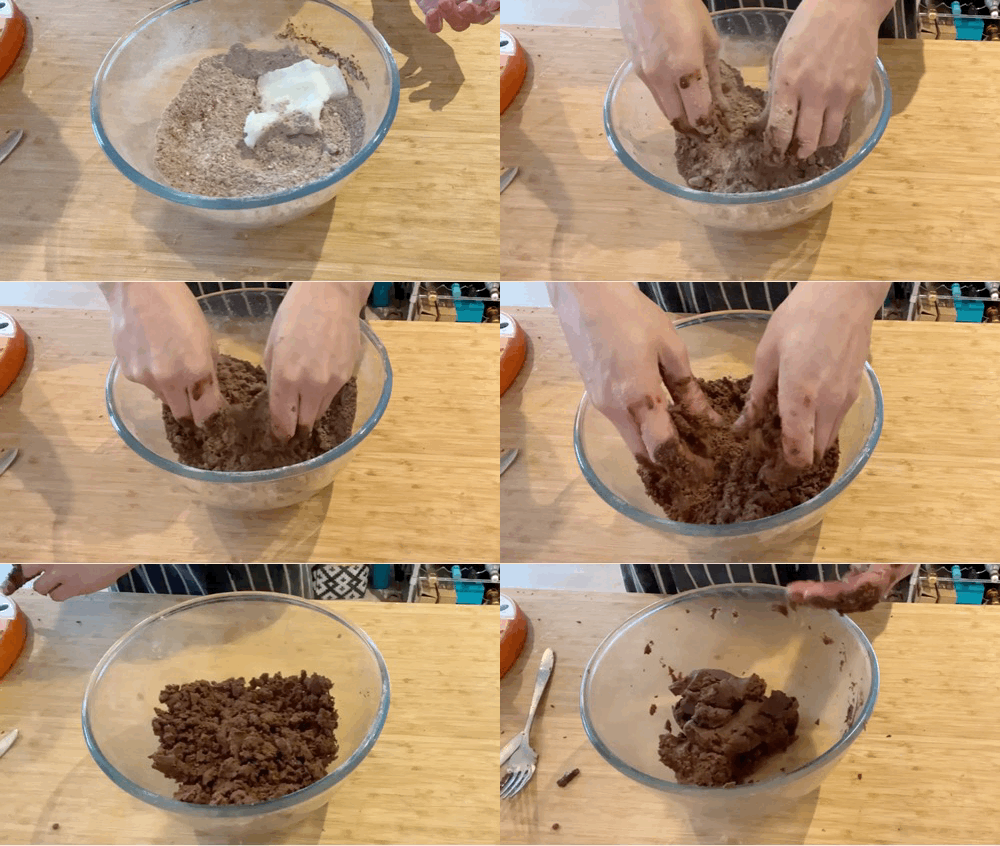
If making by hand, mix dries all together then rub the coconut oil in until its all breadcrumby and well distributed, then mix through the water until a dough forms
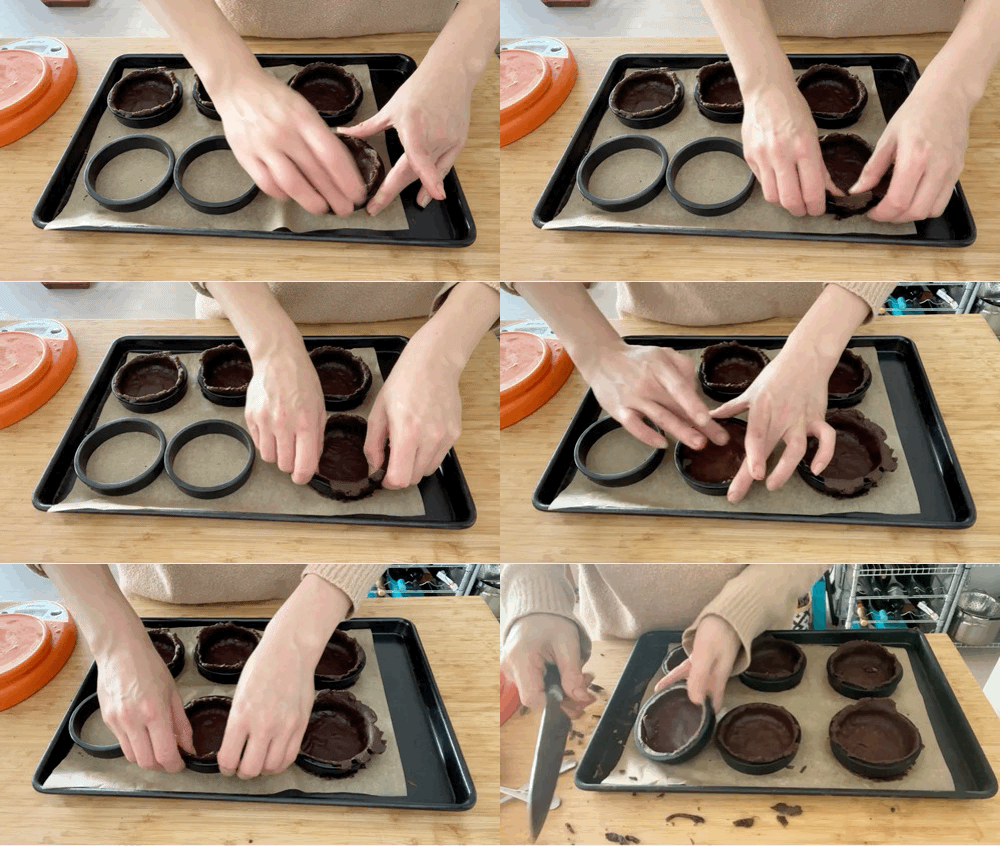
Press into your tart cases, chill for 10 minutes then trim excess before baking
Bake at 170c fan for 15-18 minutes
This pastry is best used as soon as you make it. If you keep it in the fridge, be aware it will be very hard (from the coconut oil) so needs to be kept at room temp for 10-20 mins before using



Hi Nicola, thanks so much for this! I absolutely love your newsletters and always look forward to them! This might be a stupid question but would you be able to replace the coconut oil with olive oil? Big fan of the dark chocolate, olive, flaky salt combination :)
Love your website, Nicola. As a former pastry chef, I love seeing what others do with pastry. I just subscribed.