KP+: The Christmas Biscuit Bonanza continues...
More biscuits inside!
Hello and welcome to today’s edition of KP+. Thank you so much for being here!
We’re going to jump straight back into where we left off on the main newsletter today and let me tell you, there are serious goodies waiting for you below.
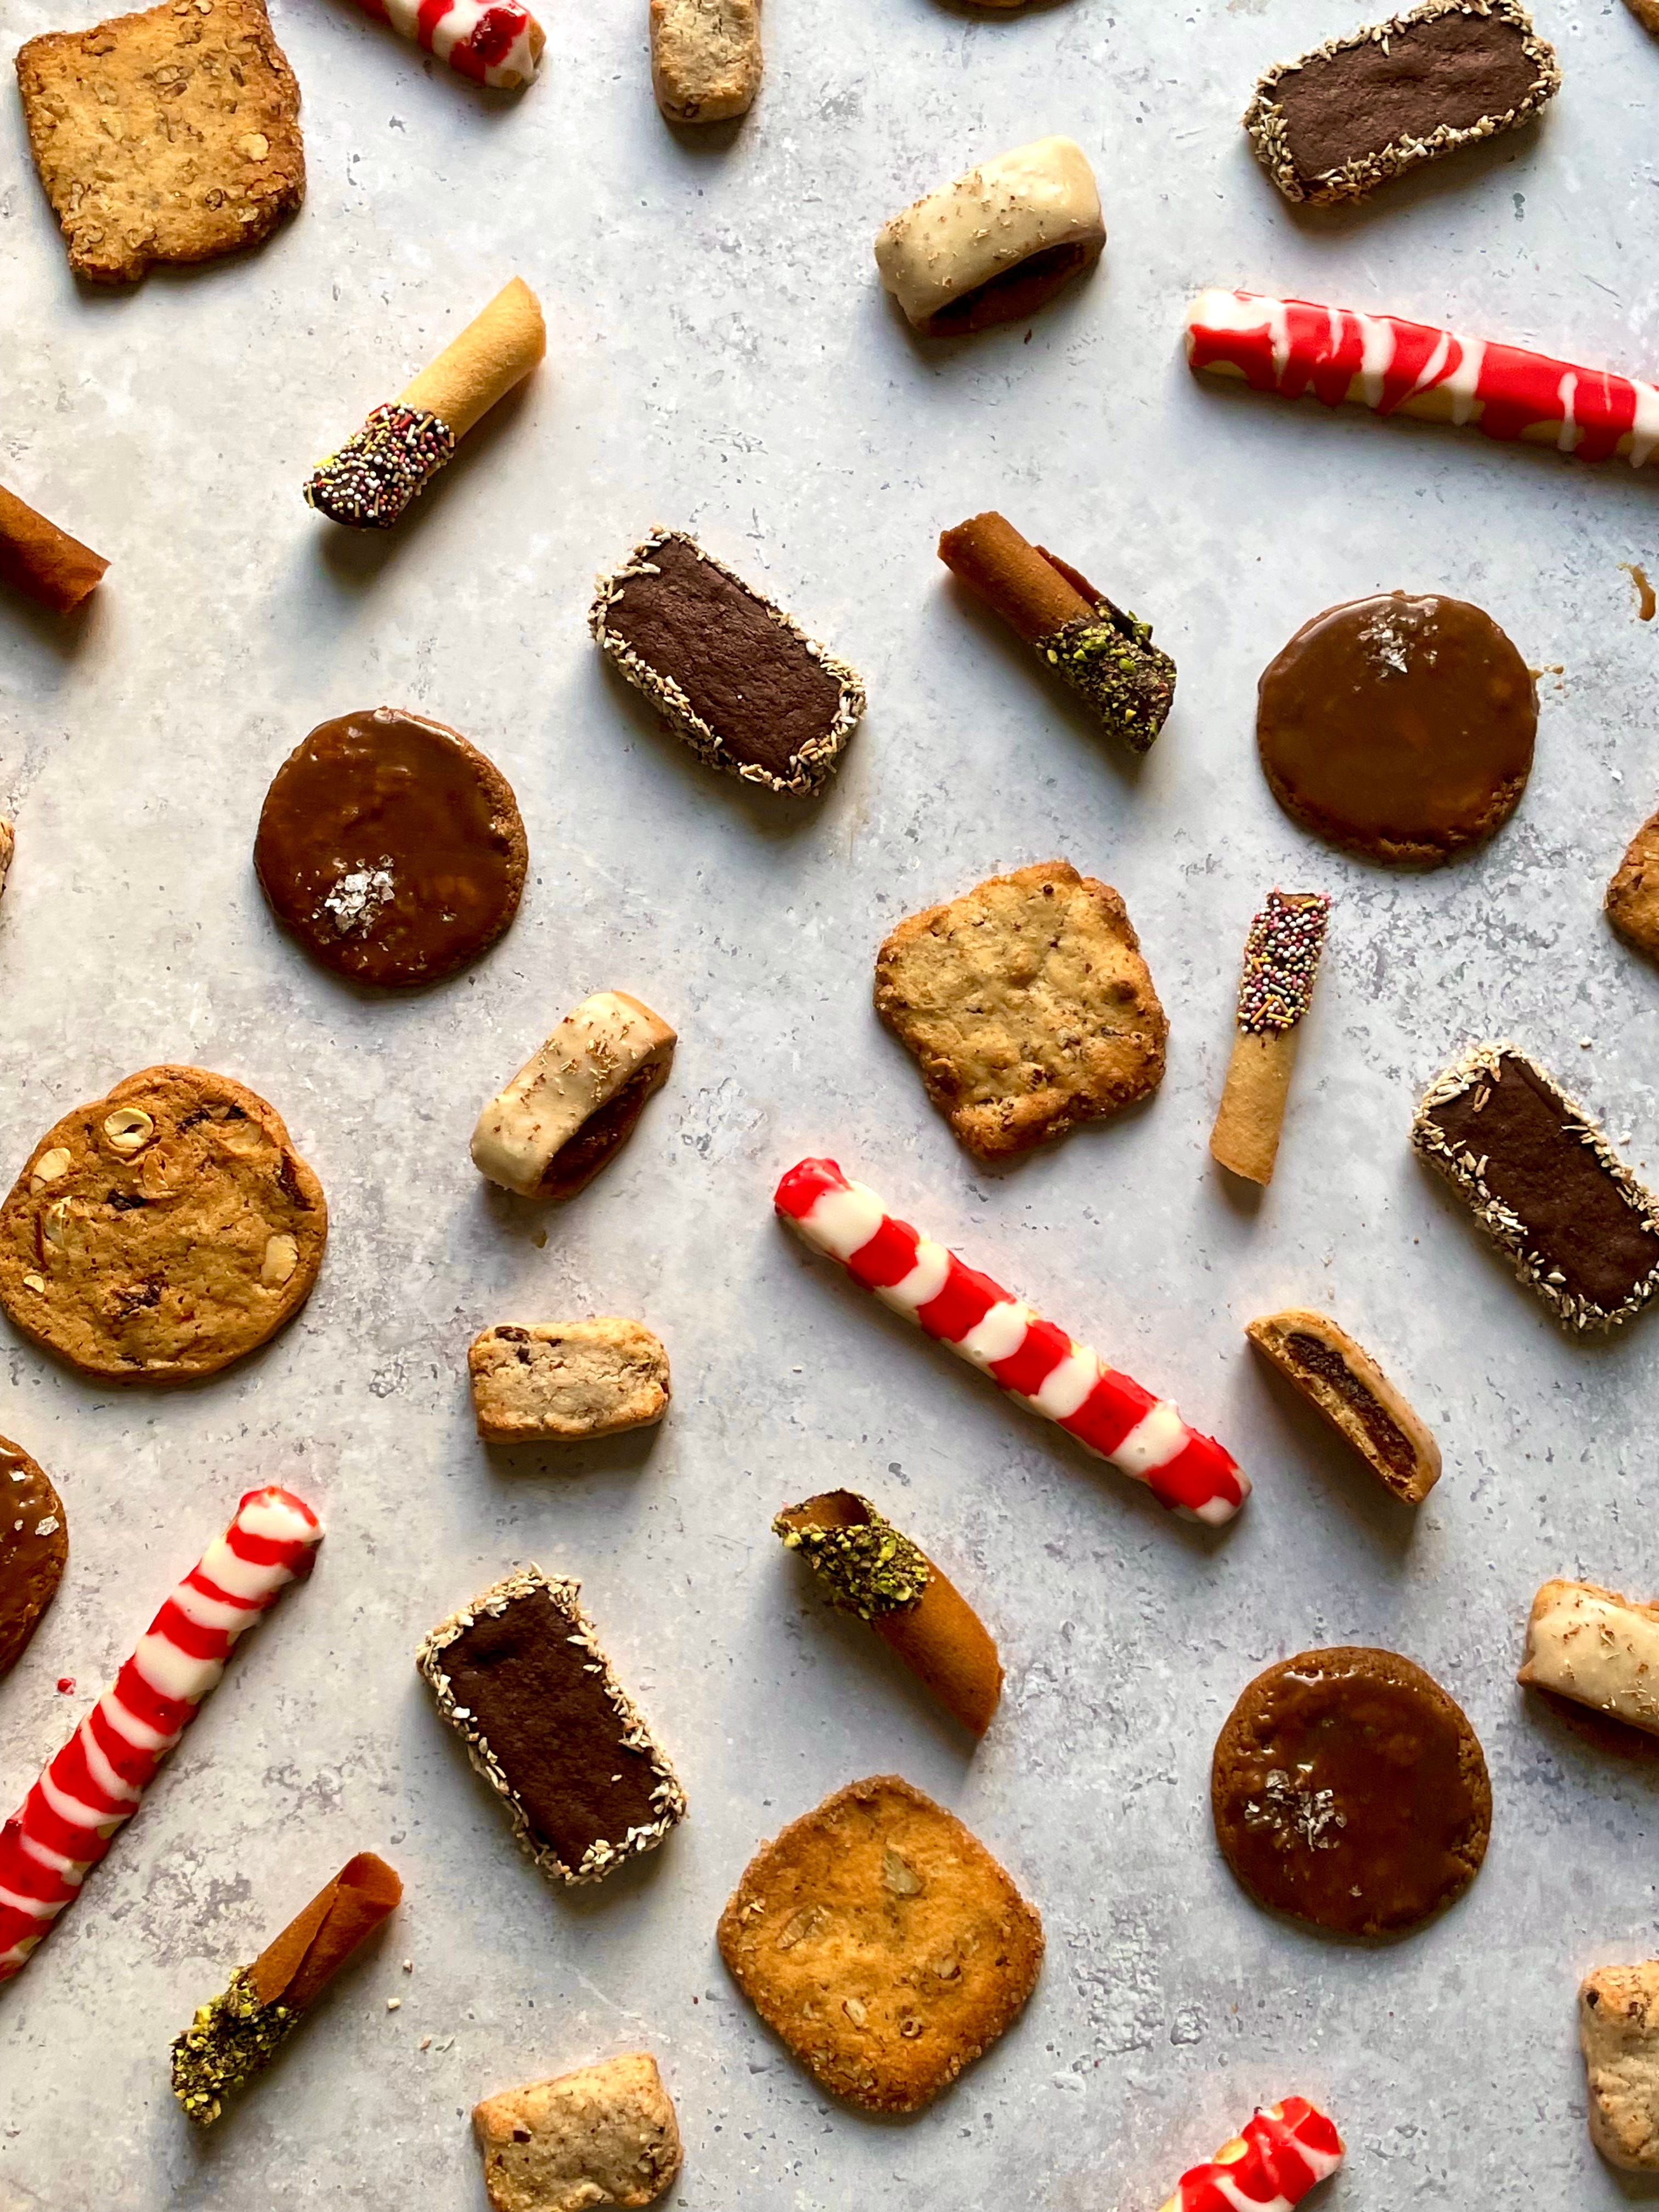
Also, can I just say I’m SO obsessed with making my Christmas biscuit collection pics every year?! And now the KP christmas biscuit archive has over 30 recipes?!?!?! I simply cannot wait. Here’s the links to the 2021 and 2022 editions.
Vanilla & Mocha tuiles
Tuile batter is one of the only recipes I really know off the top of my head, simply equal parts sugar, egg whites, flour and butter - if you're ever in need of a quick biscuit, tuiles are your friend. For today's recipe, I've adjusted the formula slightly to have more sugar so they snap a bit more, but Where do things get more fun? (annoying?) with tuiles is the shaping. Enter the tuile mould, aka any piece of thin plastic you can find with a circle cut in it. You can freestyle the tuiles, but I find it's better to do them all the same size for a neat finish. The batter is easy to adjust - a teaspoon of instant coffee or cocoa powder will transform the batter with very little effort. Adding spice, or browning the butter, would also be a quick route to something new.
There are a few things that bring me straight back into the world of kitchens and bakeries. A glimpse of a giant cling film and blue roll transports me immediately, as does the sight of a tuile mould cut roughly out of a plastic lid. If you don't have plastic container lids available, you might need to go searching in your house (I've heard of ring binder folders giving their lives for tuiles) for something thin and plastic to cut the circles. I trace a circle around an 8cm or 9cm cutter, then stab the middle with a sharp knife, taking the rest out with scissors. If it's not perfectly neat, it's okay, it doesn't notice in the final shape. You do need a silpat mat for these - tuiles don't bake well on baking paper I'm afraid, and can be quite tricky to remove. According to Food52, you can use greased foil. But I've never tried it.
To give these a festive feel, though the curved shape is already quite jolly, dipping these in chocolate is a nice finish. And, this, my friends, is one of the only opportunities I've given myself to add sprinkles so, of course, sprinkles have been added. Merry Christmas.
Rolled tuiles recipe
Makes about 10-11
Ingredients
30g Butter
40g Caster sugar
30g Egg White
30g Plain flour
Pinch of fine salt
Optional: ½ tsp - 1 tsp fine instant coffee powder. ½ tsp vanilla extract, or 1/2 of a vanilla bean plus nuts or sprinkles to decorate.
Preheat your oven to 170°C fan and line a baking sheet with a silpat mat.
Melt the butter. Whisk in the sugar followed by the egg white and finally sift in the flour and stir until well combined, finally adding the pinch of salt. The batter should be homogenous and smooth.
Scoop small amounts of the batter onto the prepared baking sheet. Use the back of a spoon or a spatula to spread the batter into thin, even circles, using a mould if desired.
Bake in the preheated oven for 5-7 minutes or until the edges of the tuiles are golden brown.
Remove the baking sheet from the oven and, while they are still warm and flexible, carefully roll each tuile into a cigar shape. Use a spoon or offset palette to lift the tuile off and help do the first roll - it will be hot!!! careful.
Allow the rolled tuiles to cool completely on a wire rack. They will crisp up as they cool. If desired, dip in chocolate and decorate with chopped nuts or sprinkles.
Soft, sticky toffee cookie
One of the big areas of progress in my life has been accepting soft biscuits into my heart. For a long time, if there was no crunch (except jaffa cakes, natch), I wasn't interested. But I've since been romanced by the tender cookies, and what's more tender than a sticky toffee pudding? Although I wouldn't actually count the sticky toffee pudding as one of my favourite desserts - I love the flavour profile.
The combination of molasses and dates, while sweet, is complex. We start by making a mushy date paste, which is more delicious than it sounds. We combine it with the other ingredients, negating the need for any eggs - the hydration is more than accounted for and any richness lost from omitting egg yolks is more than made up with butter. The result is a chewy, soft cookie that, once glazed with a toffee sauce, is basically a bite-size sticky toffee pudding.
Individual results may vary since our date mushes will probably all reduce at slightly different rates, but don't worry too much about that - whatever happens, you'll get ooey, gooey sticky cookies that are a great tribute to the much-loved dessert. You want to get really good dates for this, make sure they’re really soft & sticky.
Sticky Toffee Cookie Recipe
Makes about 10-12
Date mush
60g Medjool dates (pitted weight)
60g Water
Cookie dough
70g Butter
70g Date mush from above
100g Dark brown sugar
115g Plain Flour
2g Baking Soda (just under 1/2 tsp)
2g Flaky salt
Toffee Glaze
50g Double cream
50g Dark Brown sugar
25g Butter
Pinch flaky salt
Method
For the date mush, chop the dates into small pieces (2cm) and add into a small saucepan with the water. Heat until simmering, then lower the heat gently simmer for 3 minutes. Check and see if you can smoosh the dates easily with a fork, if not continue cooking until the the dates are totally smooshable and soft. It should have the texture of mashed banana.
For the cookie dough, melt the butter and whisk in the dark brown sugar, followed by 70g of date mush. Sift together the plain flour and baking soda, then stir into the butter along with the flaky salt. Stir into a dough and chill for 2 hours.
Preheat oven to 170c fan. Ball dough into 30-35g cookies and place on a baking sheet, leaving room to spread. Bake cookies for 10-12 minutes until set around the edges but still soft in the middle. They will fall a bit when they cool.
For the glaze, heat together all the ingredients and bubble for 3-4 minutes or until slightly thickened and reduced. It will thicken as it cools.
When the glaze has cooled off a bit, is thick but pourable, spoon it onto the cooled cookies, helping spread it to the edges with a spoon. Leave to set for a few minutes, sprinkle with a little salt.
Lasts well at room temp in an airtight container for 2-3 days.
Rich chocolate sandwich biscuit with toasted coconut
This is my take on a bourbon biscuit. It's chocolatey, but crucially, cocoa-y. I love the bitter flavour of cocoa, and always like to add quite a lot to my biscuit dough to get that really deep flavour and colour. I know there will be quite a few people asking me why I've ruined a perfectly good chocolate biscuit with coconut, but you know what? I spent two decades of my life complaining about coconut and then one day, I just woke up and realised, life is too short. The deeply toasted desiccated coconut just works so well against the bitter chocolate. You can, of course, omit the coconut and leave the sandwich biscuits plain.
When you're making a sandwich biscuit that you want to last longer than a few hours, it's crucial to make the filling as dry as possible. Though it's spreadable, it's actually got very little water in it. The combination of butter, cocoa powder, icing sugar (that starch helps suck up any extra moisture!), salt and chocolate is easy to work with and can sit between the biscuits without 'sogging them up'.
Recipe
Biscuit dough
70g Butter
60g Caster sugar
45g Light Brown Sugar
15g Yolk
95g Plain flour
20g Cocoa powder
¼ tsp Baking soda
¼ tsp Salt
Choc filling
110g Butter
20g Cocoa powder
35g Icing sugar
75g Dark chocolate
Pinch fine salt to taste
Optional: 50g-100g Chocolate, melted. Plus toasted desiccated coconut flakes (about 50g toasted at 150c for 10-15 minutes until golden)
Method
Combine the butter and sugar until lightened and creamy - the sugar should be dissolved. Add the egg yolk and stir in until well combined. Sift over the plain flour, cocoa powder and raising agents, followed by the salt, then stir into a dough.
Press the dough between two sheets of paper and roll until its about 2-3mm thick, about 24cm x 34cm. Mark out the biscuits, about 7cm x 3cm. Move onto a tray and chill until firm
Pre-heat oven to 170c fan. Place individual biscuits on a baking tray, leaving a little space for them to spread slightly while baking. Bake for 10-12 minutes until they look dry and crisp. Leave to cool completely.
To mix the filling, beat together the butter, cocoa poder and icing sugar until combined. Melt the chocolate and leave to cool (otherwise the butter will melt) and stir into the butter/cocoa powder mixture. Season with salt to taste. If the warm chocolate has melted the filling too much, cover and place into the fridge. You might need to have a bit of a Goldilocks approach here. You want it to be pipeable.
Move filling into a piping bag and cut a 0.5cm hole in the tip of the piping bag.
Match the biscuits and lay them out on a tray. Zig zag the filling onto the biscuit and place the matching biscuit on top.
If you are dipping the biscuits, chill in the fridge for 30 minutes to firm up the filling. To dip the biscuits, dip each edge in melted, but cooled, chocolate then dip into the toasted coconut flakes.
Store in an airtight container for 5 days at room temp.
Pecan, miso & honey sable
This is a gorgeous, rich biscuit inspired by my pecan tart recipe. I loved the flavour combination so much when I made it a few weeks ago, I wanted to translate it into cookie form. The move here is to slice these really thin and bake til crisp so they have a properly good snap. Dipping in demerara sugar is optional, but the more crunch, the better. Don't be scared to bake these dark - because these are made with honey, which darkens quickly when heated, so you need to hold your nerve.
e! A touch of orange zest really lifts the flavour and helps bring the festive energy,
Ingredients
100g Butter
45g Caster sugar
45g Honey
25g White miso paste
20g Egg yolk
140g Plain flour
¼ tsp Flaky salt
50g Toasted pecans
1/2 orange, zested
Plus, demerara sugar for rolling
Method
Combine softened butter and caster sugar in a mixing bowl, blending until light and fluffy. Add honey and white miso paste, mixing well. Next, add egg yolk into the mixture and beat until well combined.
Sift in plain flour and add flaky salt. Combine until a cohesive dough forms. Fold in the chopped toasted pecans.
Shape into a large, 6-7cm rectangle and wrap well. Chill in the fridge until firm, at least 2 hours or overnight.
Preheat the oven to 160c fan. Slice chilled dough into thin squares and dip each edge in demerara sugar, pressing firmly to help it adhere, and place on a parchment-lined baking tray. Bake until deeply browned, about 12-14 minutes depending on your oven. You might even need to take these to 16 min - just watch them!
Cool the pecan miso sables on a wire rack before serving.


Hi Nicola, OMG these are so good!! how thin should I be slicing them? The first batch, at about 1/8", almost burned at 375 US degrees and 14 minutes, so I took it down to 10. I'm wondering if I should bake at 350 degrees instead?
You had me a tuile!