Hello!
Welcome to another edition of Kitchen Projects, a recipe development and cooking journal by me, Nicola Lamb. I’m a pastry chef and recipe developer and bakery consultant based in London.
Thank you so much for subscribing - I’m so excited to share this space with you. Part toolkit and part love-letter to food, this newsletter is all about taking major pastry deep dives and showing you a behind-the-scenes take on development.
If you’re enjoying this then I’d love it if you shared with your friends:
Love,
Nicola
Kitchen Project #005: Chocolate Cake
HUGE thank you and inspiration shout-out to Landeau, the original creators of this cake
Isn’t chocolate cake just one of life’s great emotion provoking desserts? From the dry chocolate muffins served at my school canteen (we used to lovingly call them ‘shit muffins’ as we tucked into them daily), to the iconic chocolate nemesis I inhaled when visiting The River Cafe in 2018, chocolate cake always manages to provide me comfort however high or low brow it is.
Except once, during my first professional pastry cook trial, where it very nearly became a lifelong foe. It was the first time I’d ever been in a real life kitchen and the first time I’d ever worn chef whites. I was feeling on top of the world. And that’s when they asked me to make a 20kg batch of chocolate cake.
And not just any chocolate cake - this cake had a particularly runny batter, heavy with cocoa and coffee. It was dark, messy and determined to escape. Safe to say only about 15kg of the batter ended up in the oven. The rest was smeared all over me, the mixer and (probably) the other chefs. I looked at the chocolate desolation around me. I’d totally blown it. I was cocoa-bronzed (looking like I’d just had an ill judged and very powdery fake tan) and it dawned on me that my dreams of working in a professional kitchen would have to wait. Chocolate cake? It was dead to me.
After the kitchen (and me) was hosed down, the head chef and I sat down to talk. By some miracle, I was still offered the job. I felt pure elation. Sure, they must have been pretty desperate to have hired the monster that left chocolate footprints (this actually happened and I am still mortified) in their previously pristine kitchen. Tidiness, they said, would come in time.
And they were right. Thankfully my chocolate wrangling ability has greatly improved since then and my relationship with chocolate cake is stronger than ever. Which leads us on to today’s subject: My take on a very special chocolate cake with you, inspired by the Landeau chocolate cake in Lisbon. This is not your run of the mill chocolate cake. This is definitely a level-up.
We’re also going to do a deep dive into cocoa powders - I can’t wait to give you an overview.
So, let’s do this!
P.S. here’s the playlist for this week. Perfect music for eating chocolate cake to.
‘Tell her to get the chocolate cake’
Those are the seven words responsible for this complete and utter obsession.
A few months back, during a particularly fervent nata obsession stage, I reported that my sister Pippa was visiting Lisbon and had been sending me many wanton images of custard tarts from the source itself. After a couple of my jealousy-motivated reposts on Instagram, Annie wrote me a message simply saying ‘tell her to get the chocolate cake’.
And so began my deep dive stalk of the Landeau Chocolate Cake. I had visited Lisbon the year before but had crucially and idiotically missed this cake.
Landeau is a cafe, with three locations around the city, that serves just one thing chocolate cake. You know something is good if they have the confidence to only serve one thing. This is the kind of boldness I completely fall head over heels for.
So… what is it?
Firstly I need to be upfront about the irony of this all - I’m writing a 3000 word newsletter about the Landeau Chocolate Cake without having actually tried it. And, given the whole pandemic thing, it’s not likely i’ll try it anytime soon.
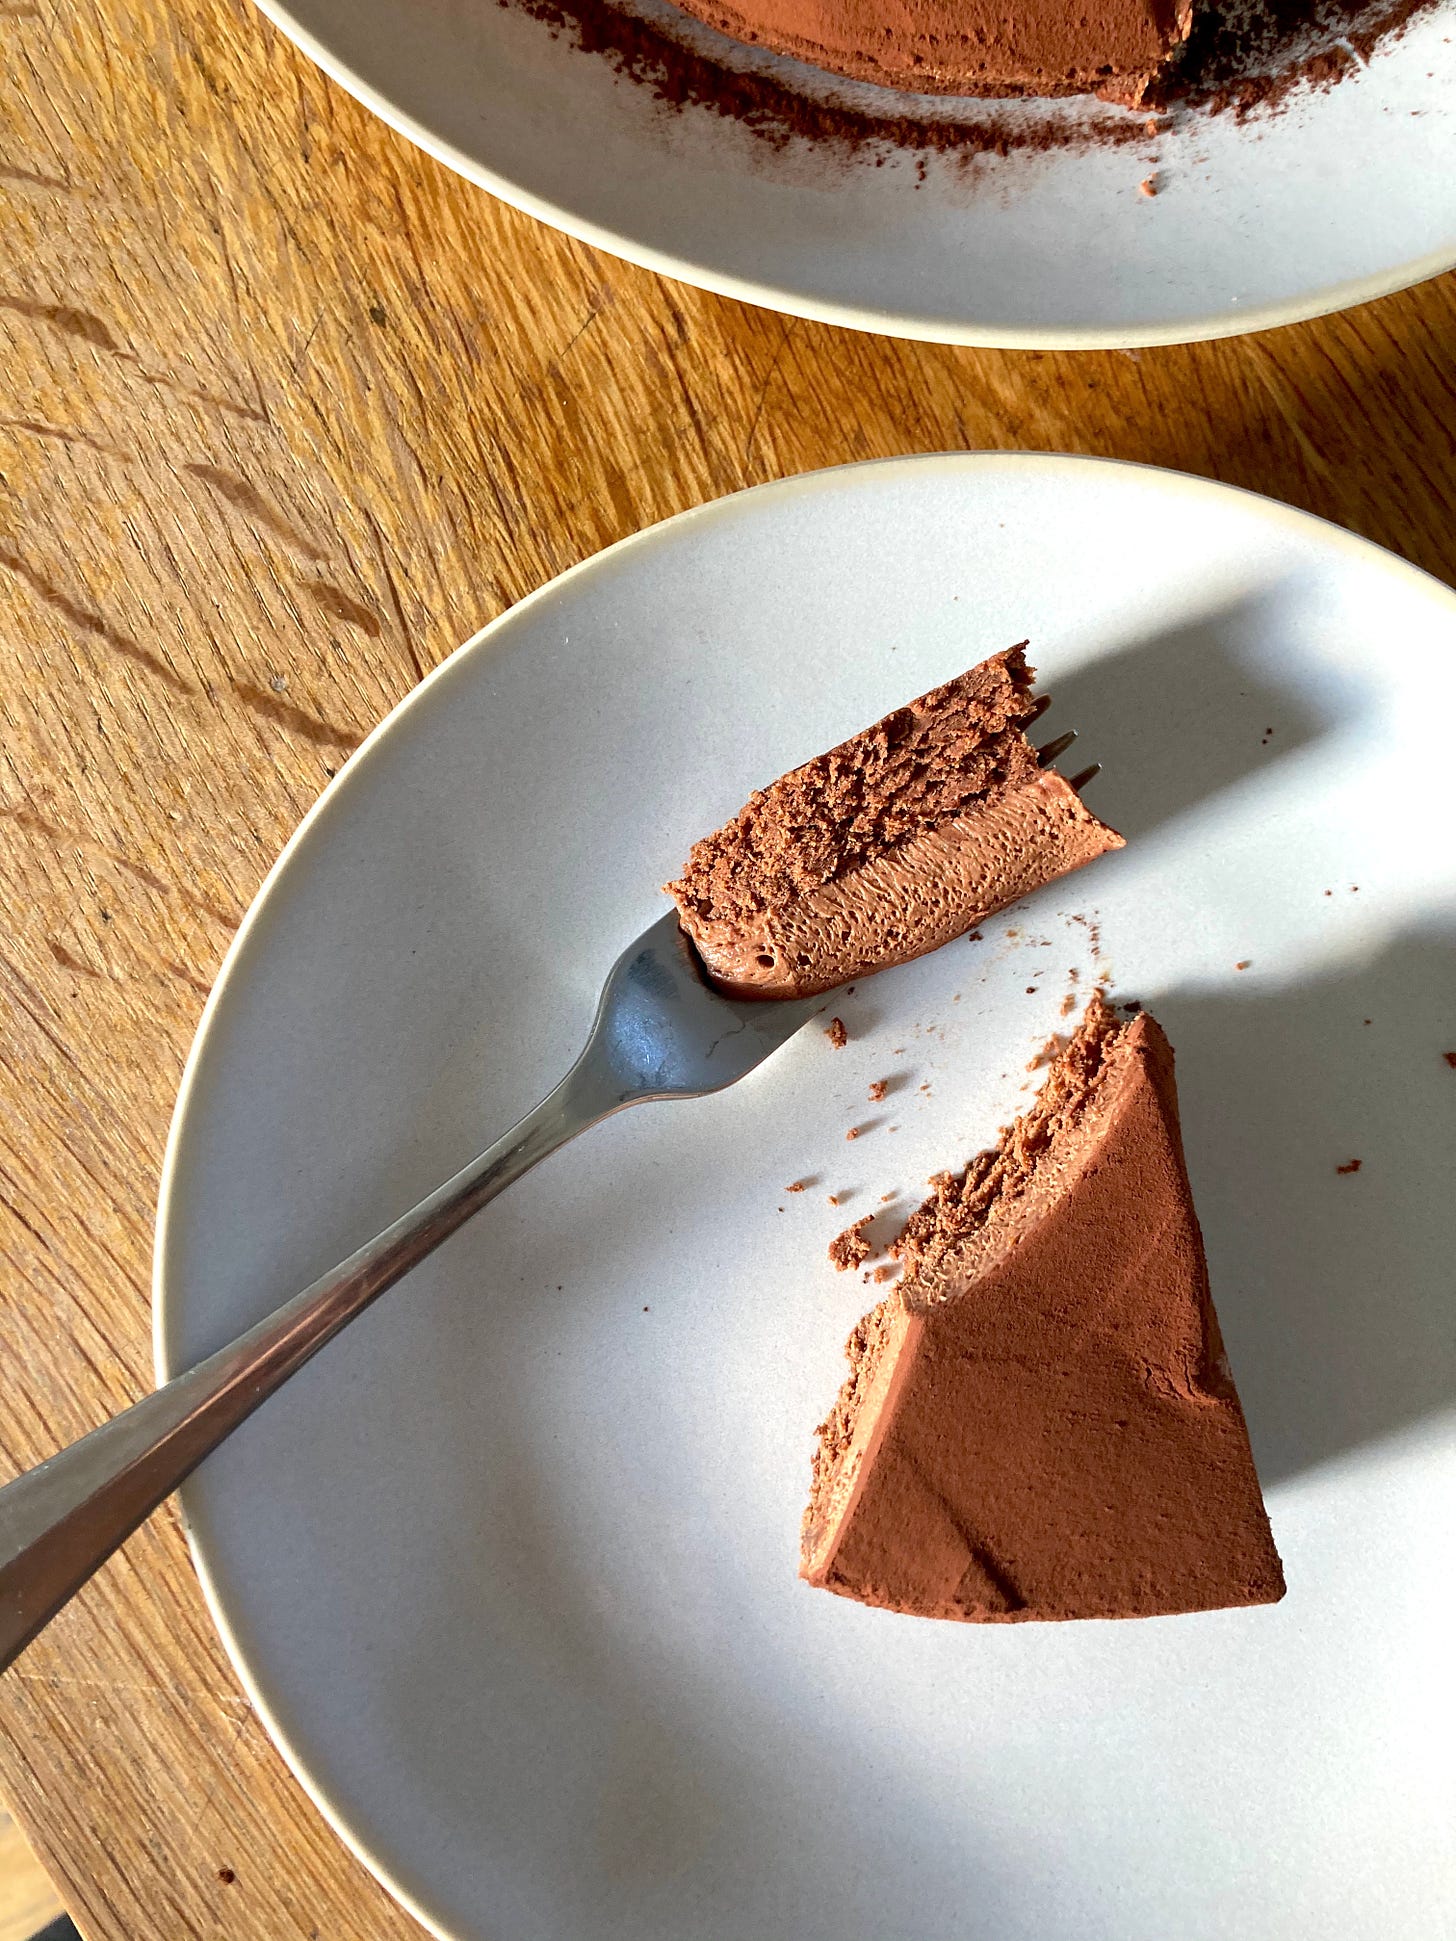
So, what you are witnessing here is a complete guessing game based on a combination of unashamed Instagram and Google stalking. The Landeau chocolate cake is an ultra rich, ultra decadent ode to chocolate. And, to be honest, it’s only 1/3 cake.
From what I can tell, the three layers of the cake are:
A dense layer of fudgy chocolate cake
A moussey layer
A thick dusting of cocoa
To reach this conclusion, I have looked at every image of this chocolate cake on Google, searched every hashtag, and pored over every tagged insta photo. If anyone had tried this mythical cake, I questioned them at length about the texture and flavour of the cake. Without actually trying the cake myself, how was I going to recreate it? Was this a fool's errand?
An intro to Marcel, a helping hand from Dorie
A turning point in my investigation was when my friend Mikkel suggested I look into a Gateau Marcel. I’d never heard of this dessert before but it’s a very clever one: One mother batter that gives birth to two beautiful chocolate-y offspring. The first is baked and the second sits and just… waits it’s turn. Once the first layer is baked and cool, the second is poured on top and left to set. The marcel, like the Landeau, is finished off with cocoa powder.
Until this point, my greatest lead had been from my baking icon Dorie Greenspan who, btw, has actually tried the cake in question. My friend Felicity kindly sent me screenshots of Dorie Greenspan’s take on the cake from the NYTimes food section. Unlike the ‘Marcel’, Dorie makes two separate mixes: The first is a fudgy flourlesss cake and the second is a whipped ganache.
With no disrespect to Dorie, I wasn’t convinced by the use of whipped ganache texture-wise. Having worked in a patisserie that made absolutely everything with whipped ganache, I am probably unfairly avoidant of the stuff (let’s call it whip-pedganache-lash).
V1: Inspo from Marcel
I decided to try the Gateau Marcel method first and adapted a recipe for flourless chocolate cake from my time at Ottolenghi. Knowing that this batter would be the base for both the cake and then the mousse layer, I increased the chocolate and eggs but reduced the butter. Although butter is usually the answer, it is not the key to achieving a light mousse.
First the yolks and sugar were whisked til thick and cocoa powder was folded in, followed by the melted chocolate/butter mix. Finally, I made a french meringue and folded the two mixes together. I weighed half the mix into my tin and baked it at 170c until dry and allowed it to cool before pouring on the reserved mix, which had been waiting on the sidelines (the fridge) for its moment.
I let it all set up, dusted it thickly with cocoa and - as soon as it was humanly possible - I eagerly took a slice. The result? Hmmm… it was pretty darn good… but not quite good enough. Perhaps it was to do with my formulation, but rather than fiddle with the whole recipe in order to nail the two textures, I decided to go the way of Dorie Greenspan and make two separate layers.
This would mean having more overall control on the final textures, as well as being able to vary the chocolate used in both layers, if desired.
V2: Back to the drawing board
For round two I split the attack. Firstly I made the flourless base but this time I didn’t bother whisking the yolks til thick with sugar - I was aiming for a denser cake so didn’t feel the need to incorporate too much air.
I approached the mousse classically, first melting chocolate in a bain-marie then whisking the yolks in. The whites, with a little sugar, were whisked to stiff peaks and then folded into the chocolate mix. Finally, I whipped cream (around ⅓ of the weight of the mix) and folded it in gently to ‘lighten’. The concept of lightening something by adding double cream always makes me smile.
I poured this mousse mix into the tin, waited for it to set and then popped the chocolate cake on top. I demoulded carefully, covered with cocoa powder and took a slice. The result? Yabba-dabba-doo. I truly think this is the most pure chocolate dessert I’ve ever made. Landeau, hats off to you.
After eating two slices in quick succession, I compared my version to some of the insta posts i’d saved and I THINK that this looks pretty darn close. Although I’ll need to taste the real thing to find out. Fingers crossed for 2021.
The chocolate
BOLD STATEMENT ALERT: This dessert kinda lives and dies by the chocolate you use.
I know that sounds a bit dramatic, but I’ve never made a dessert with such incredible ability to purely represent the flavours of the chocolate it is made with.
I usually go for a 70% chocolate. I find that it strikes a much needed balance - bold enough to stand out, sweet enough to play ball with all the other ingredients. It was the perfect fit for my chocolate cake experiments - dependable and delicious.
That being said, now the recipe is locked in, you can totally experiment. The base recipe that I’ve created is quite versatile so you can play around with percentages to make this into your dream chocolate dessert. More of a milk chocolate person? Go for it.
I know chocolate is expensive, but for this recipe it really is worth using something higher quality, or at least something you really love. You’ll really be able to taste it and you’ll be happy you did.
The cocoa
I feel a bit guilty to admit this but I’ve always taken cocoa for granted. I’ve always thought much more about the chocolate than the cocoa powder, usually just grabbing whatever is most readily available. Tastes deep, bitter and… er... chocolatey? Great! Then it’s doing its job, right?
The Landeau chocolate cake has changed me and maybe it’ll change you too. As this cake is finished off with a thick layer of cocoa, the flavour of the powder properly takes center stage.
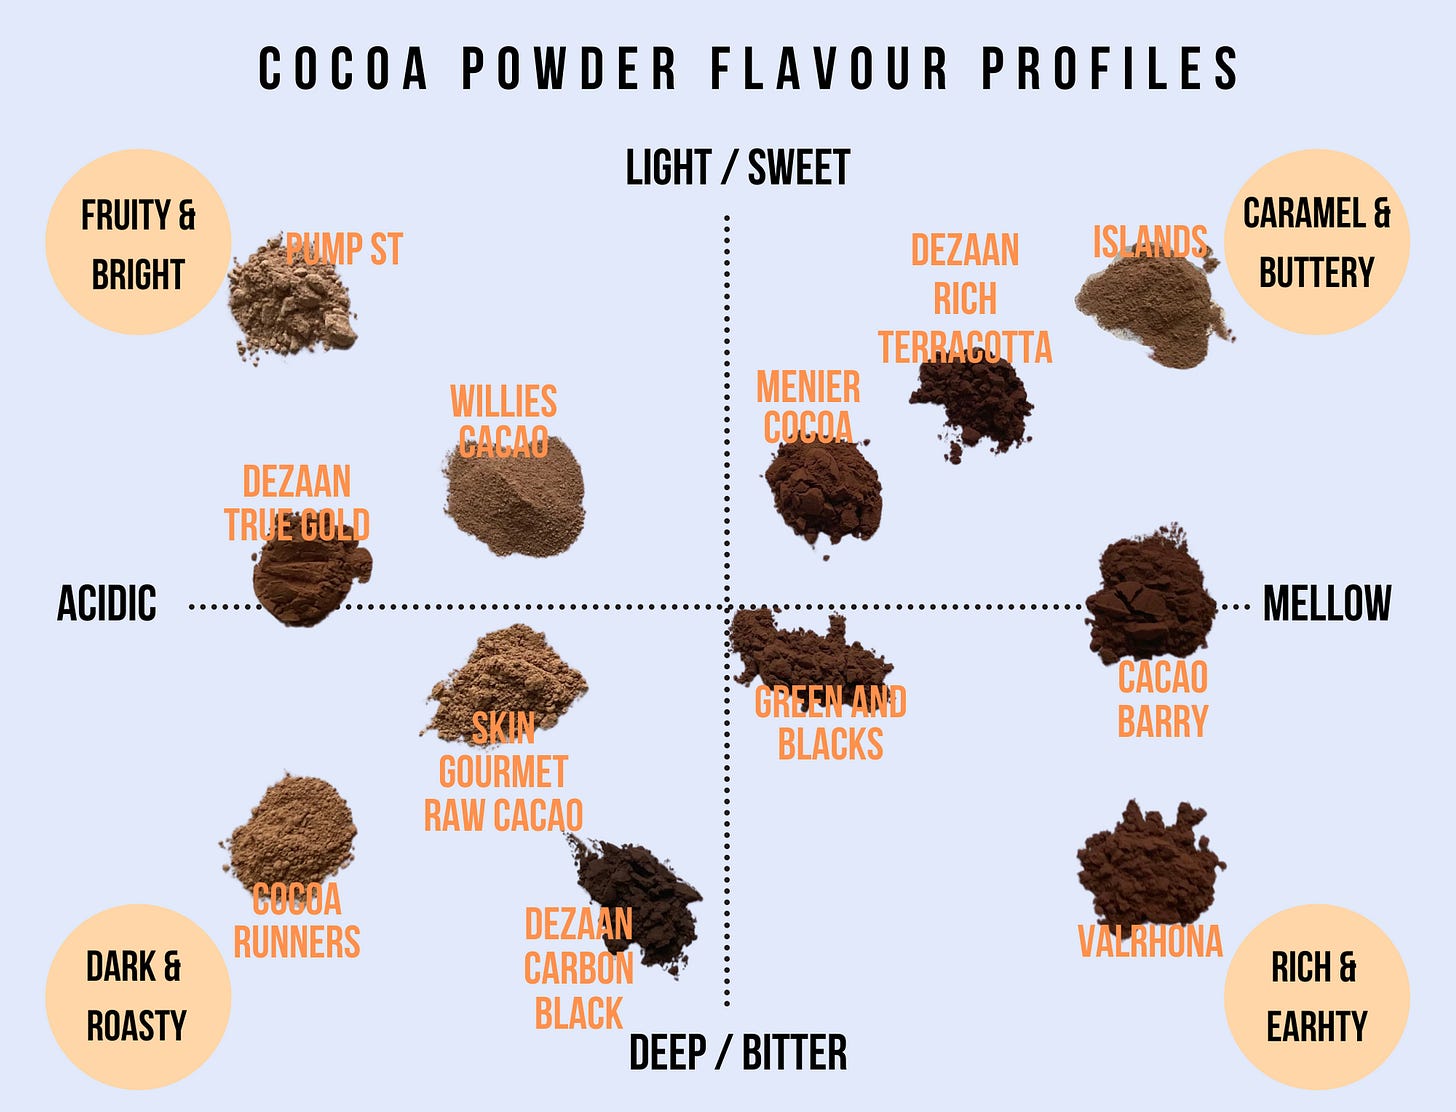
When I first posted this cake, I asked for cocoa powder recommendations and was sent a huge list to try. I tried my best to get as many as possible. Since this cake gives the perfect opportunity to showcase the wide ranging flavours of cocoa powder, it’s a good time to try out something new which suits your personal flavour preference:

A quick aside about the science of cocoa powder... There are two households of cocoa: DUTCH PROCESS and NATURAL (aka non-alkalised).
Cocoa is derived from cocoa beans once the cocoa butter has been removed and is naturally very acidic. In the 19th century, a process ‘the dutch process’ was developed to make it more palatable. This is done by washing the beans in an alkaline solution before roasting. This results in a change in the colour (it becomes much darker) and, of course, the flavour (the pH of the cocoa becomes neutral and the result is more mellow profile), as well as making it more easily dissolved. I also came across a third category - raw cacao powder. Whilst cocoa powder is the result of pressing roasted beans, raw cacao is derived from the cocoa bean PRE-roasting. This means it has the same scientific properties as natural cocoa powder. It will, however, offer you a different flavour profile.
This means that it’s important to consider cocoa powder carefully in certain recipes. In this instance, the cocoa is simply a garnish and thus we are only interested in the flavour. However, when you are mixing a cake or a recipe that is relying on a reaction between an acid (natural cocoa powder) and a raising agent, like bicarbonate of soda, it’s important to use the right cocoa powder. Your recipe SHOULD tell you which type to use, but to be honest, dutch process is the standard go-to, from what I’ve seen.
Not sure what type your cocoa is? Check the ingredients on the back. A dutch processed cocoa may have ‘potassium carbonate’ or ‘alkaliser’ listed as an ingredient, or otherwise have a reference to alkalisation or dutch process. If no information for that exists then you can look at the colour - a sure sign of dutch process is a dark hue.
One last thing - different cocoa powders also have different % of fat in. Low fat cocoa powder is usually 10%-12% whilst high fat is 20%-22% This isn’t always obvious or listed clearly but you can always check the nutritionals though some smaller or more independent brands may not have this info. As you know, fat impacts flavour so seek out the higher % for max flavour!
Full disclosure - I was sent the Raw Gourmet cocoa powder as a gift. All the other cocoa powders I bought. I also ordered a sample pack of cocoa powders from Dezaan - they have a range of 6! Of these, I’ve only included the three most unique, in my opinion. I highly recommend requesting a sample pack. I’m not sure when they will be readily available.
So, what’s the verdict?
Flavour and preference is just so subjective, so I recommend seeking out a couple of these cocoas so you can see for yourself what the differences between a natural and dutch are. However, I will give you my two top picks:
Dutched: Kinda predictable but wow, the Valrhona is so intensely chocolatey and deep that it would bolster any recipe. Green & Blacks and Cacao Barry are very similar but the Valrhona has the edge!
Natural: I absolutely adored the Islands cocoa powder. It has a mellow and buttery flavour profile that surprised me given it is a natural cocoa. All the other natural cocoas had a much more acidic and fruity profile
BTW… I have my sights set on further cocoa powder tests that go beyond it’s function as a garnish - chocolate steamed pudding anyone? Soon!
Alright, let’s make it!
Please note, this recipe contains raw eggs. Eggs are pasteurised and are safe to eat but just so you are aware.
This cake takes a bit of time and tin wrangling and in-and-out-of-the-freezer-ing but it’s worth it. If you have more than 1 x 8inch tin, feel free to use both and make each layer simultaneously.
Kevin, in the comment section, asked whether you could pour the mousse on top of the cake. YES YOU CAN (Thank you Kevin)! The flourless cake may shrink a little which means the mousse layer may fall down the edges and you might not get as neat a finish, but you can go right ahead.
Ingredients
Makes 1 x 8inch cake
Flourless Chocolate Cake layer
3 eggs, separated (80-90g white, 45-50g yolk)
100g caster sugar
100g dark chocolate - your choice!
100g butter
Mousse Layer
150g high quality chocolate
2 egg yolk
2 egg whites (60-70g)
30g caster sugar
140g double cream
Cocoa powder, of your choice, for dusting
Method - flourless chocolate cake
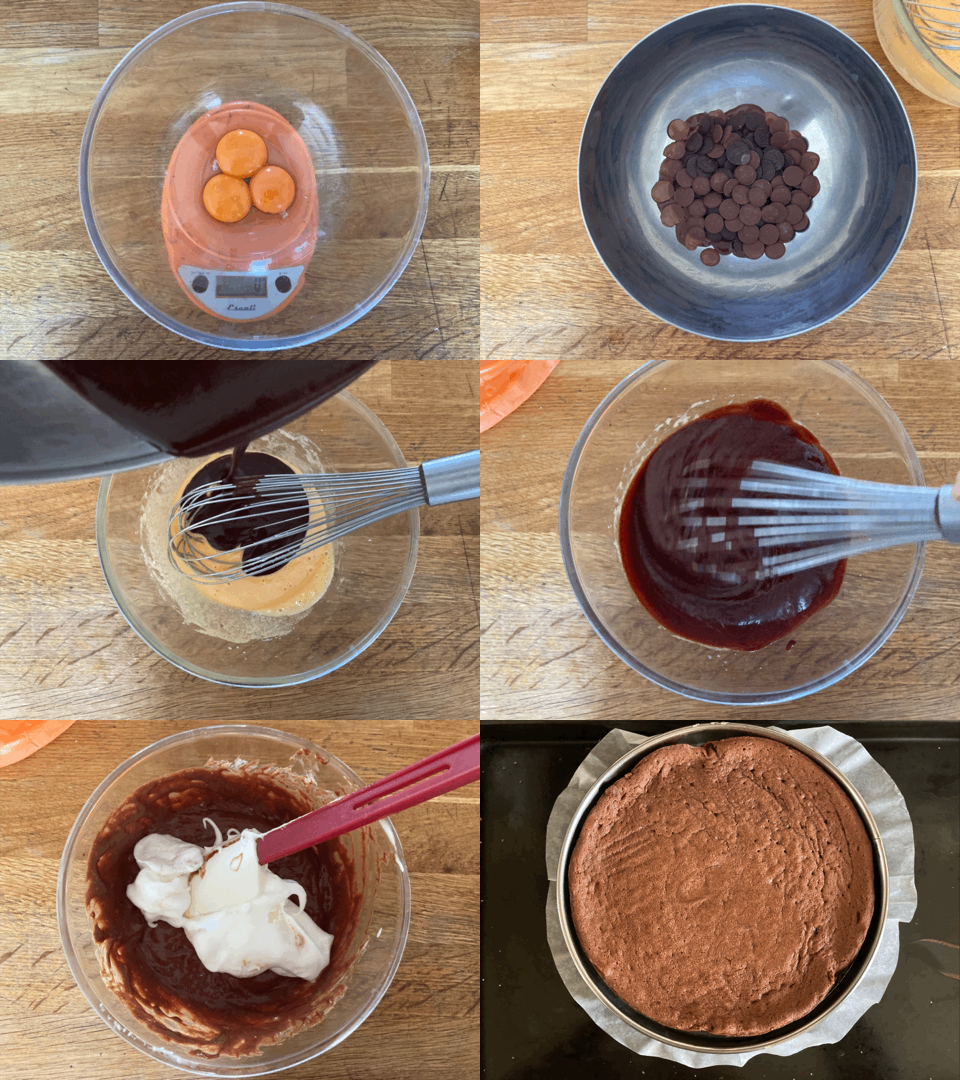
First make the flourless chocolate cake layer. Set the oven to 170c fan and put a circle of baking paper at the bottom of a tin
Whisk your yolks with 1/4 of the sugar just until frothy - this will help them combine better into the chocolate mix
Melt your chocolate and butter over a bain-marie
Once melted, take off the heat immediately and whisk in your yolk/sugar mix
Meanwhile, whisk your egg whites and remaining caster sugar to a stiff meringue
Mix a little of the meringue in with your whisk to ‘loosen’ the batter and then change to a spatula, folding the two mixes together, trying to keep as much air in as possible
Pour mix into cake tin and bake for 15-20mins until dry on top. The cake will be risen and will fall whilst it cools. The key to making a super fudgy flourless chocolate cake is to avoid overbaking. Keep an eye on it and make sure you take it out when it’s dry and puffed
When cool, remove the flourless cake from the tin and wrap it. You may need to run a knife around the edge of the cake to release
You can now freeze the cake for up to 30 days or simply keep it at room temperature until the second layer is ready
Method - mousse
Line your cake tin completely with cling film - lay two pieces of clingfilm in a cross shape on the base, clip the sides in and then bring the sides over the top. Feel free to use acetate if you have it. Baking paper will also work
NB. If you’ve never made a mousse before then.... Welcome! This is a skill you’ll use again and again. Here are my top tips for making a mousse:
Preparation is key! Get all your elements ready and have a spatula and whisk on hand
Don’t panic if things start to get a bit stiff when you add the first yolk - you may shock’ the warm chocolate slightly when you start incorporating cold ingredients (cream, egg whites, yolks!)
Fold ever so tenderly - you want to keep the air
And, most importantly… DO NOT OVERWHIP YOUR CREAM - it needs to be very soft peaks, or a nice ‘dolloping’ texture. This will ensure the mousse doesn’t get too stiff. It’s better to be on the soft side than accidentally having it too thick
Melt the chocolate over a bain-marie. Once melted, take off the heat and set aside
Meanwhile, whisk your egg whites and caster sugar to a stiff meringue
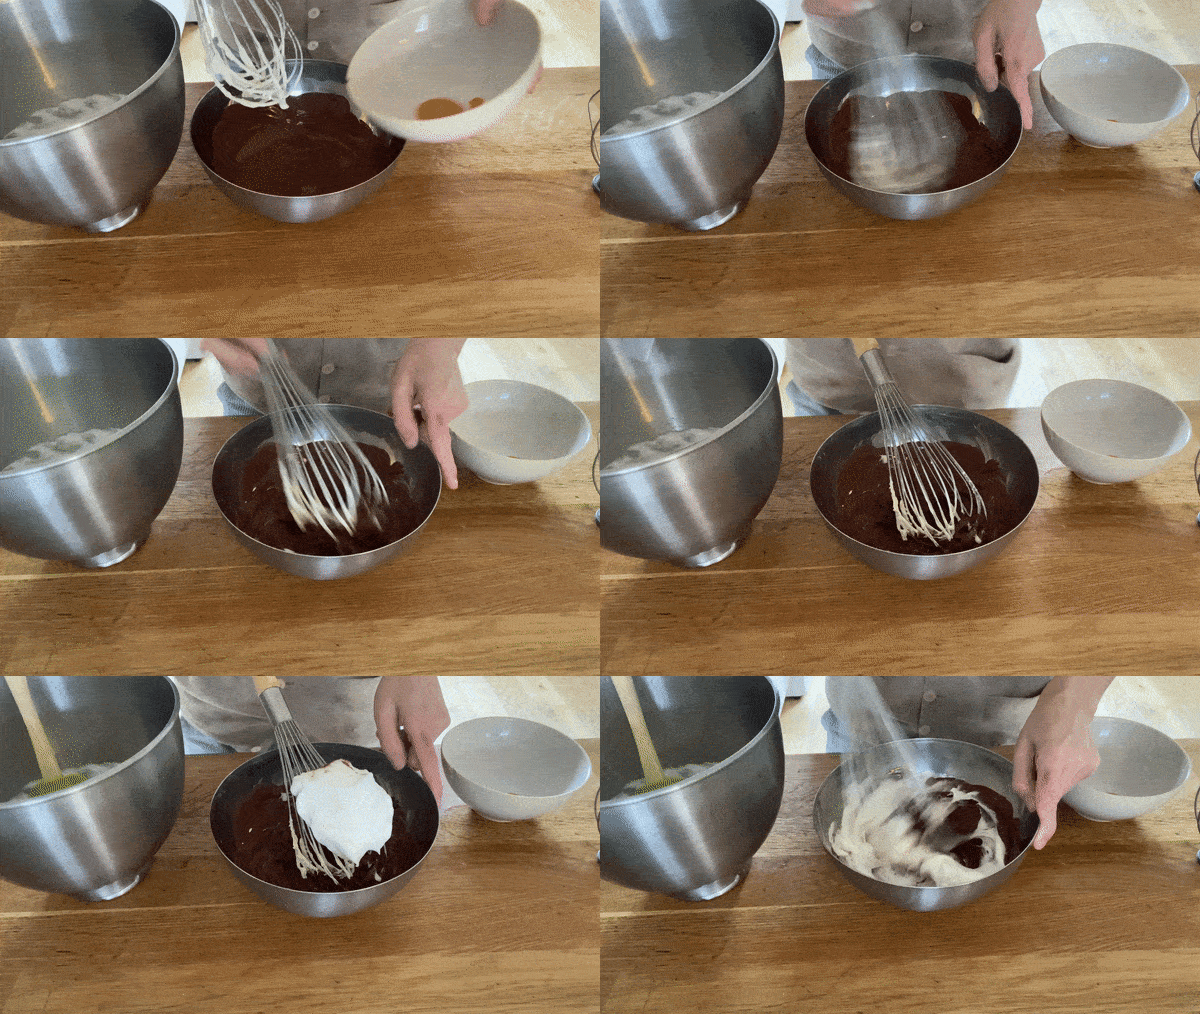
In a separate bowl, whip your cream to soft-medium peaks (check the gif below for the texture)
Start by whisking your egg yolk into the chocolate mix, followed immediately with a 1/3rd of the egg whites. Whisk together to losen the batter, don’t worry about folding at this stage
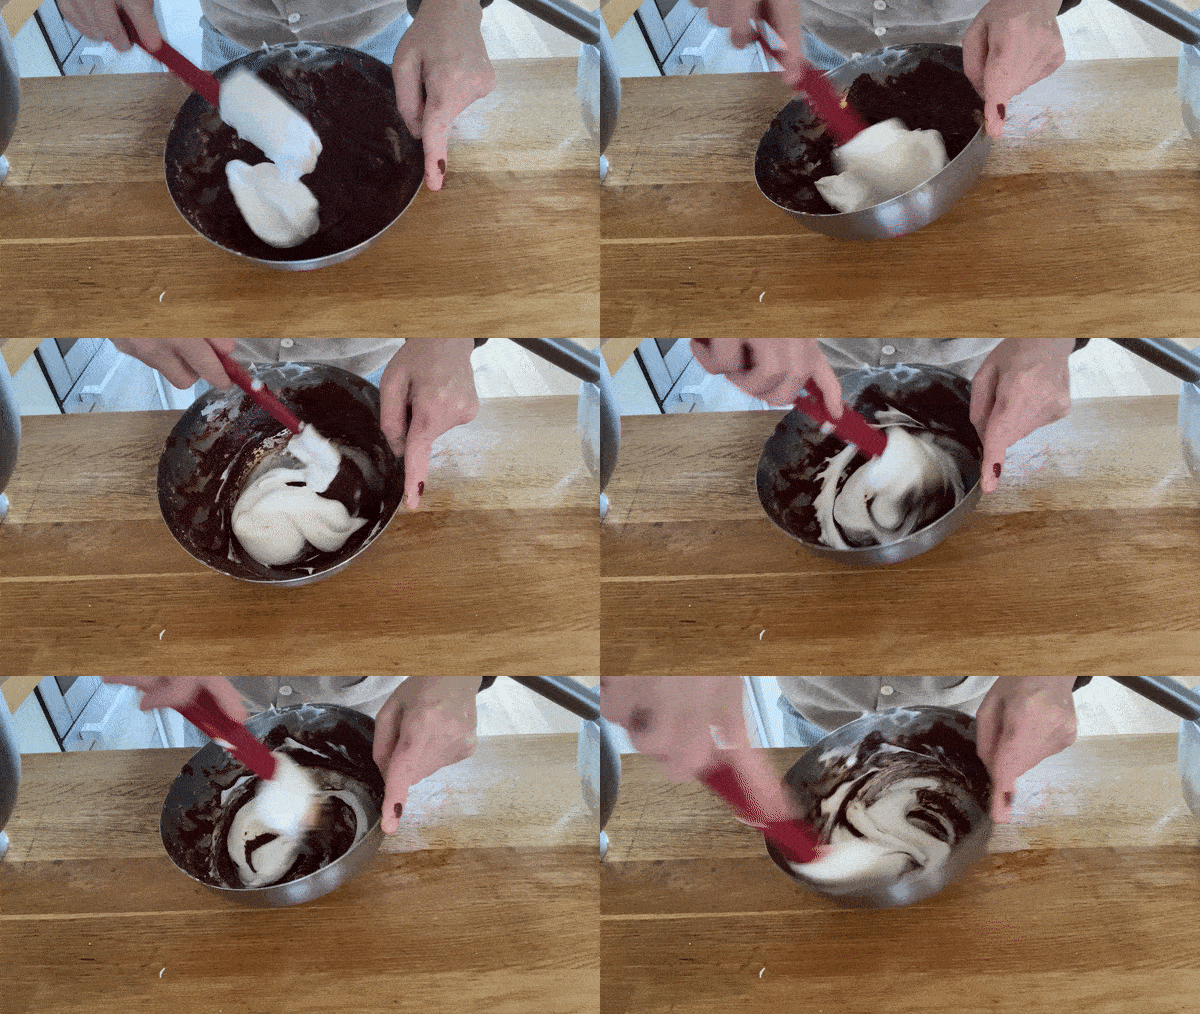
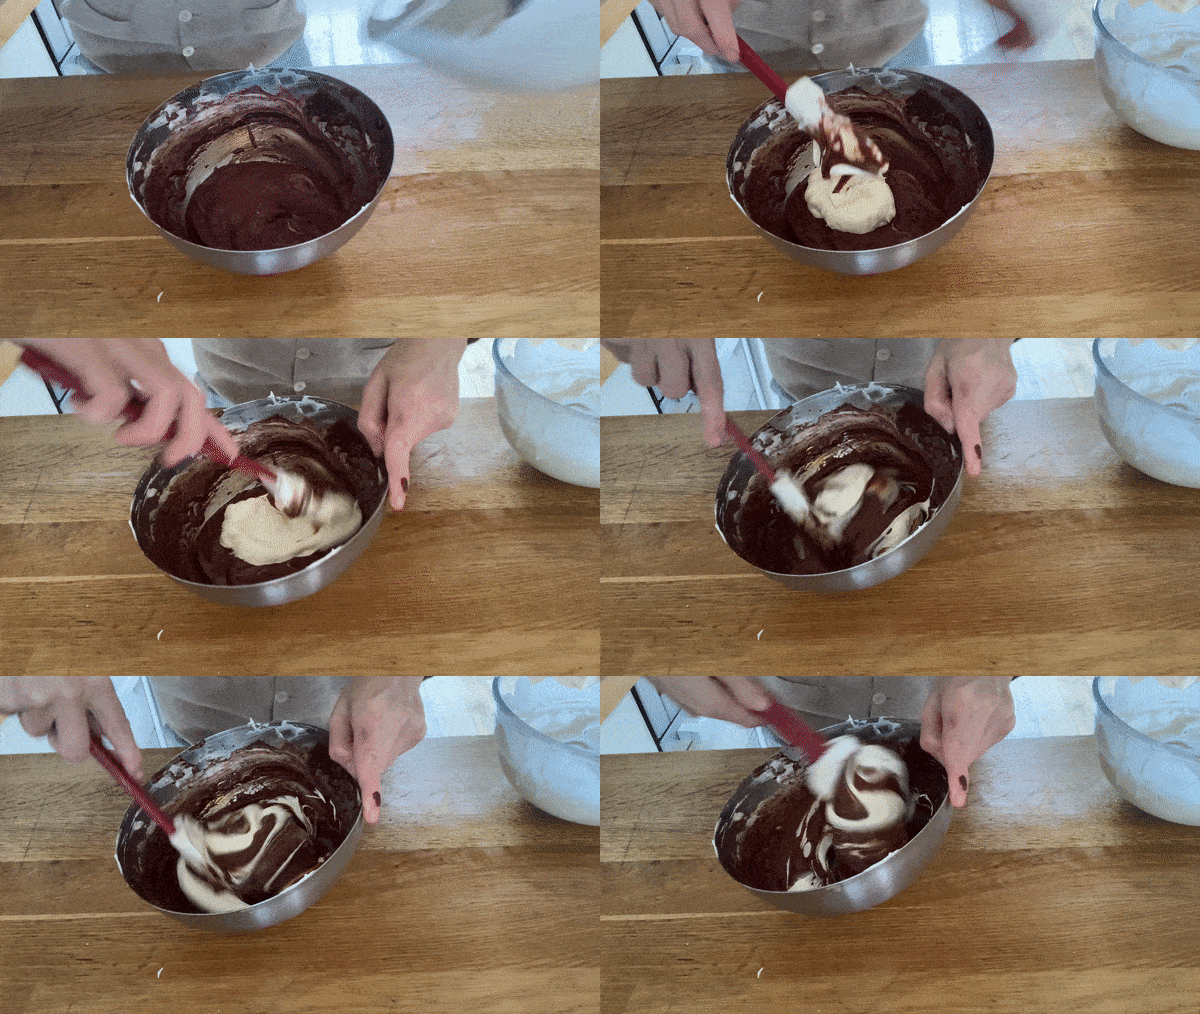
Now change to use the spatula and gently fold in the rest of your whites, 1/3rd at a time
Once there are no streaky bits of white left, it’s time to fold in your cream. Again, go in 1/3rds and incorporate gently
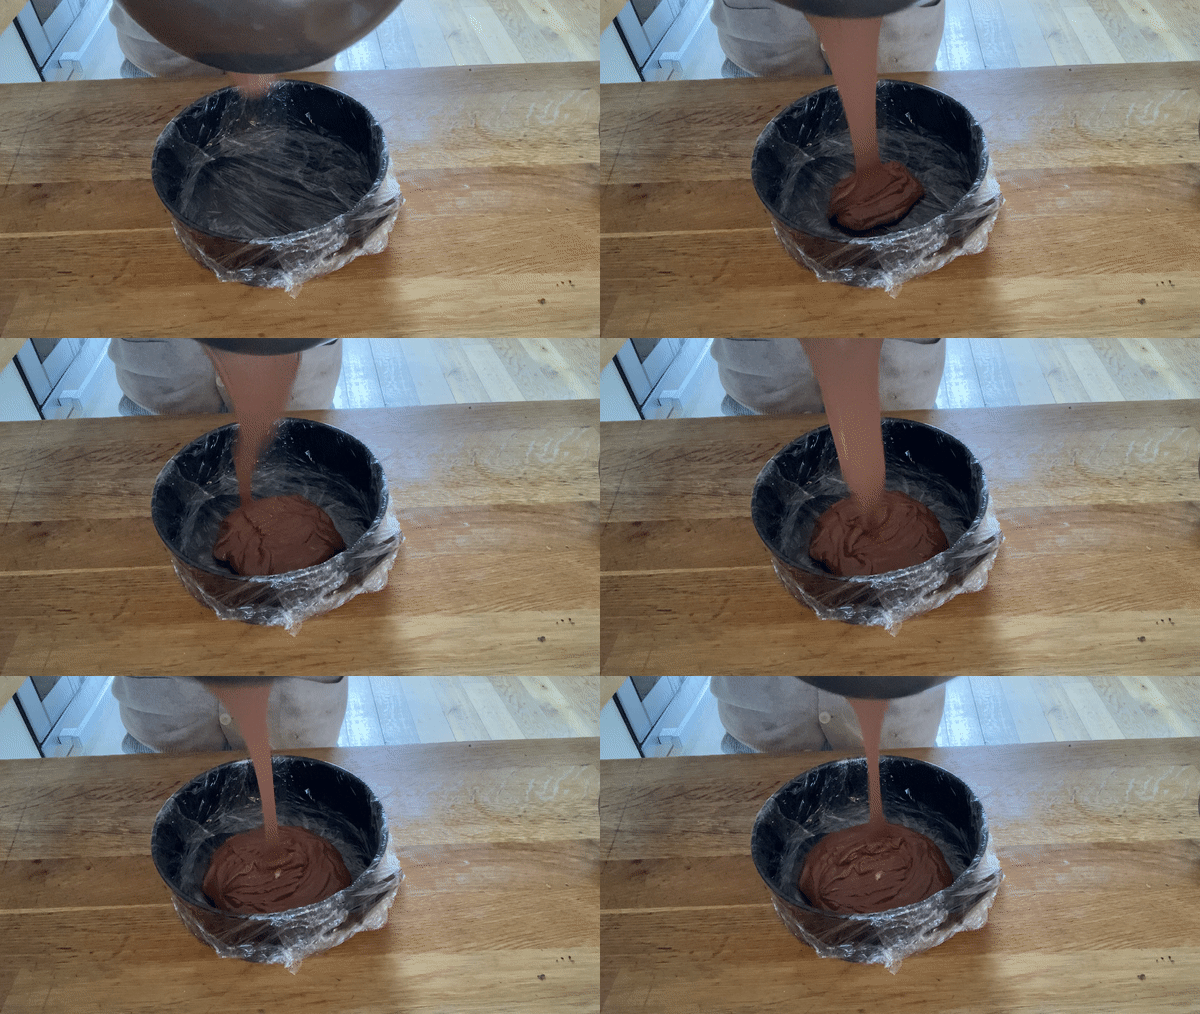
This mousse does set-up fairly quickly, especially since it’s winter here. Pour the mousse into your prepared cake tin and move into the freezer. You can tap it on the side of the bench to spread it out or use an offset spatula
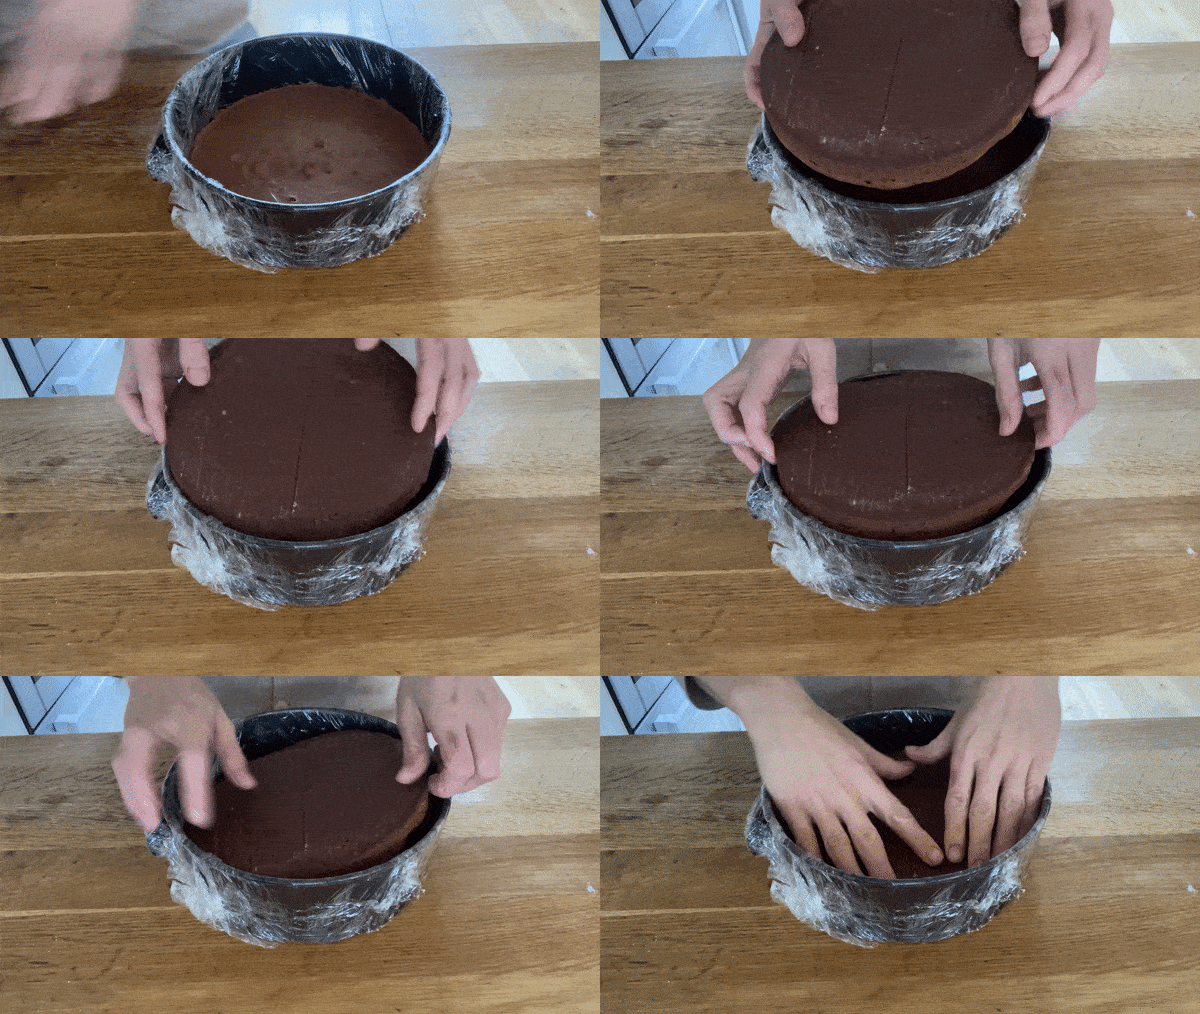
After 30 mins, it should be a little set-up but not frozen. Check by gently touching with your finger - it should feel solid. If so, you can now place your flourless chocolate cake on top
Leave for 1 hour in the freezer. You can wrap the tin and leave this in here for up to 30 days
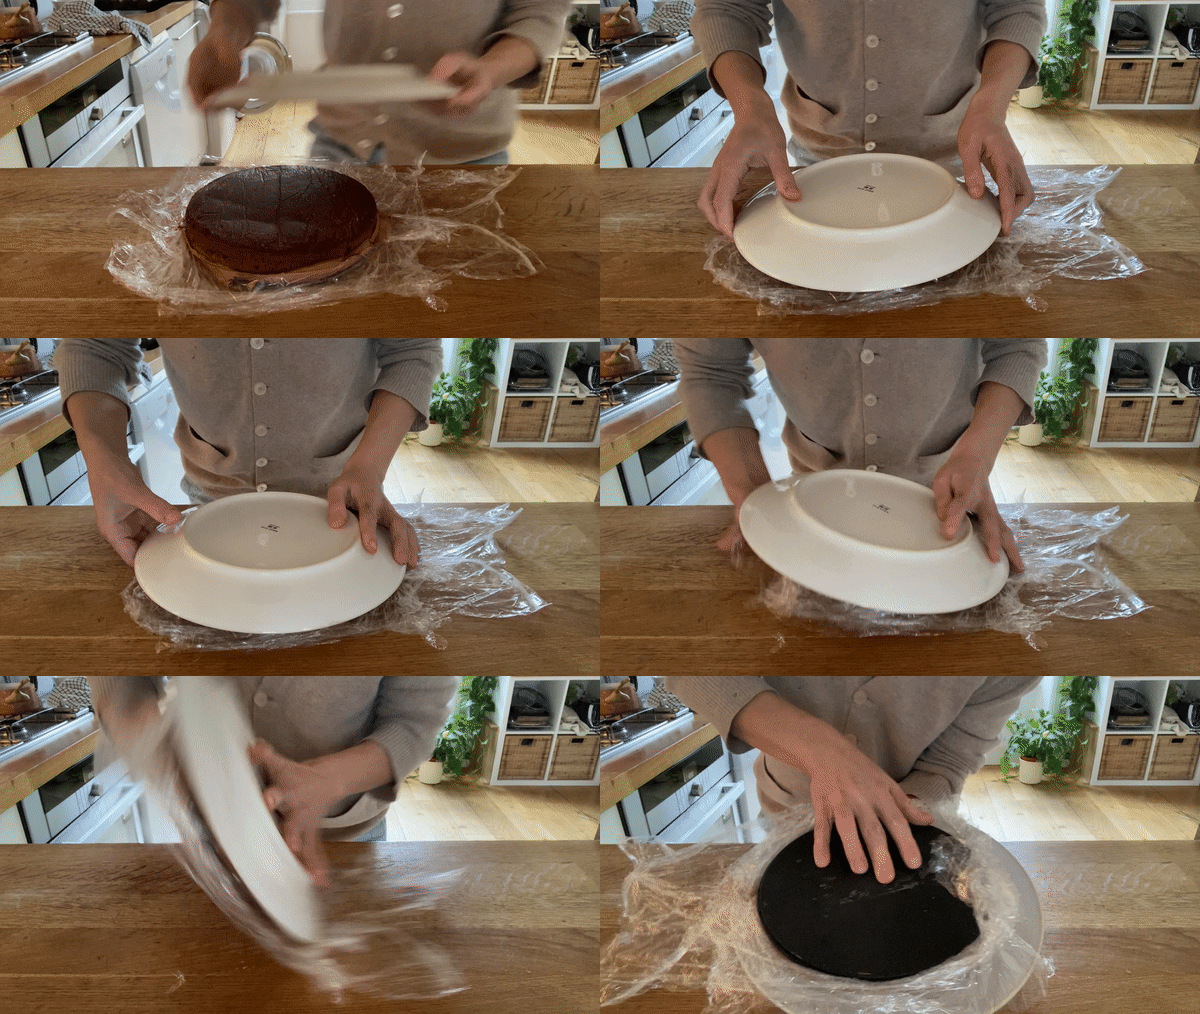
When you are ready to demould, carefully remove the clingfilm, upturn it onto a plate and peel off the rest of the clingfilm vigilantly (seriously, cling film loves to hide so be eagle-eyed!), and put into the fridge to defrost (depending on how long its been in the freezer, somewhere in the range of 1-4 hours)
When you are ready to serve, dust liberally until there is a thick layer of your chosen cocoa powder. And when I say thick, I mean it. You really get to go to town on this cake! It’s quite a challenge to dust the sides, but do your best
Slice (please wipe your knife in-between) and serve!
This cake will stay happily in the fridge for 3 days




Is there any way to substitute double cream? I live in Italy and there's no such thing here, we only have whipped cream - which has a much lower fat content.
P.S. I'm a big fan of your newsletter! Everything you make always looks delicious
Hello! Firstly, thanks for posting this recipe. I can’t wait to try it out.
Secondly, sorry to come to the comments section so late but I have a question about adapting the recipe to include flour in the sponge layer.
When I was recently in Lisbon, I went to taste this cake no less than three times (I should be ashamed but I’m not) and it seemed to me like the cake layer was more of soft sponge than a flourless cake.
I spoke to the staff at the cafe and they confirmed the cake does contain flour, so I’m wondering if there’s a way to adapt your recipe to head more into the sponge territory with a little flour? (I hope it’s not too cheeky to ask!)