Hello,
Welcome to today’s edition of Kitchen Projects. It’s so great to have you here.
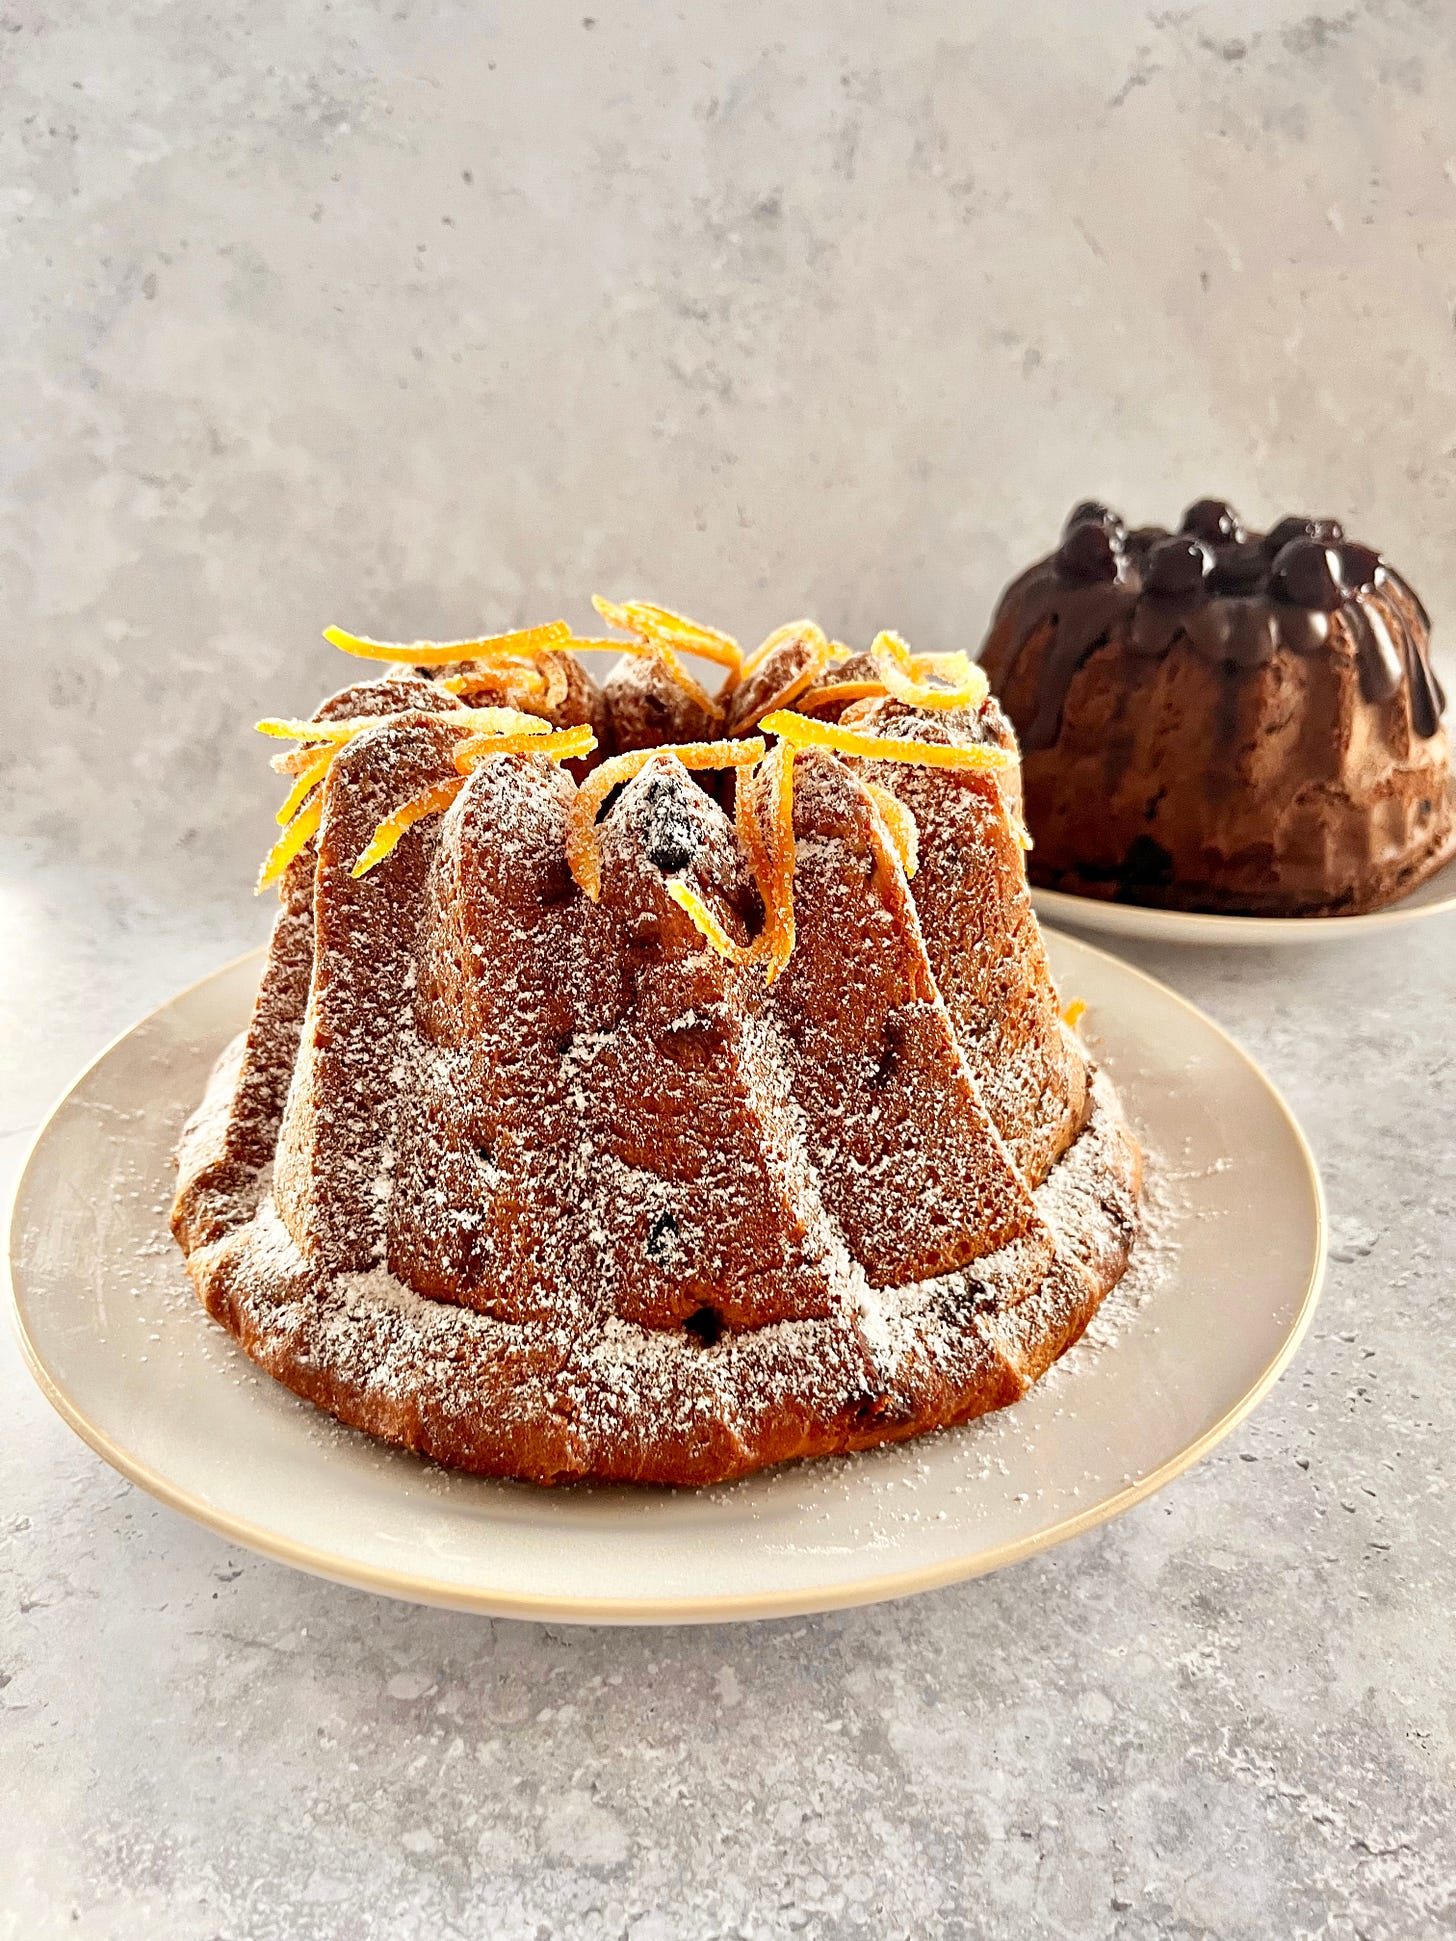
Today, we are getting in the sprit and will be blurring the lines between cake and bread with a beautiful festive kugelhopf.
Over on KP+, I’m sharing a chocolate cherry version of today’s recipe which is enriched with ganache. I’ve also updated the candied fruit edition of KP+ for all your decorating needs.
I launched KP+, the paid version of this newsletter, a few months ago. Over there, you’ll get extra content and recipes, be entered into fun giveaways and have access to community chat threads, the entire archive of recipes and lots more. Subscribing is easy and only costs £5 a month and your support helps make this newsletter happen! So I hope to see you there:
Love,
Nicola
For the love of festive breads (or should that be cakes?)
I’m on a bit of a yeast kick at the moment. There’s something about the cold days and long nights that make me want to get cosy and lovingly tend to a bread over the course of an evening or afternoon.
In the UK, I feel like we have a pretty strict delineation between cake and bread. Even the softest brioche, which has much more in common with a victoria sponge than a bread roll, is likely categorised in the latter. We prefer to think of things like doughnuts and iced buns as bread before we think of them as cake. Yeasted cakes feel, or at least they did to me, a bit.. Er… 18th century?
But that’s not because we are ahead of Europe in our thinking, it’s because we are waaaay behind.
Think of that famous mistranslation - Marie Antoinette’s “Qu'ils mangent de la brioche !” is quoted as “let them eat cake”, which supports the whole bread CAN be cake, if we could be a bit more open minded. Weirdly, we are comfortable calling banana bread ‘bread’, even though it is without a doubt a cake. And what of teacakes? By either description - be it a raisin studded bun or a chocolate covered marshmallow atop a biscuit - is ambiguous but also definitely NOT a cake by any stretch of the imagination.
The defining characteristic of a bread, which I think we struggle to get our head around when it comes to cake, is that it must contain yeast. We’re comfortable with using chemical reactions of baking powder, or baking soda, or aeration via creaming or egg foams to leaven cakes, but for some reason yeast leaves us scratching our heads.
I think yeast has an unfair reputation for being difficult, but in reality it is doing exactly the same as your baking powder or soda. Instead of reacting with an acid to create CO2, the yeast reacts (eats) sugars and ferments which has the by-product CO2. Same, same! Mainstream baking powder was not introduced until the mid 1800s, so it's no surprise many of the breads we know and love should really be considered OG cakes.
Meet the yeast cakes
There are a lot of yeasted cakes out there: Pannetone, which originated in the 1500s, was considered a luxury cake, it’s close-crumbed sister Pandoro, along with Marie’s aforementioned brioche. Kugelhopf, which originated in Austria, is a crown shaped sweet dough. Babka, simply named ‘yeast cake’ at Daniels in Fortune Green, has a divine cakey-ness about it and the beautiful ‘Gateau Battu’ from Picardy - literally the ‘beaten cake’ - is yeast based and firmly in the cake category.
I like to think of today’s recipe as ‘forgiveable fusion’ - we are marrying the technique of gateau battu, with its highly yeasted formulation, with the strategy of pannetone, resulting in the texture of fluffy pandoro, all baked in a kugelhopf tin. This bread pushes the limit of what bread is and really blurs the line between a cake and a loaf - the juicy raisins combined with the chunks of white chocolate are really a delight to eat.
That kugelhopf shape & alternative tins
I’m always looking for ways to use my bundt tin. Although baking a cake in it is lovely, you can get a gorgeous panna cotta from it and today we’ll be using it to make a take on kugelhopf.
Kugelhopf is a pannetone adjacent bread. Although kugelhopf is baked all year round, there is something festive about it - a twirly crown of bread, fit for any centrepiece. Much like a bundt cake, I’m not entirely sure whether kugelhopf refers to a shape as much as it refers to a particular formulation, but I have a beautiful recipe for you today.
I’ve included links to the tins that I use in the recipe. If you don’t have a bundt or kugelhopf mould (understandable) then you could bake this in a regular cake tin. I would use a 6/7inch tin lined with tall greaseproof paper.
Let’s talk pannetone real quick
Pannetone is considered a bit of a unicorn - the mention of the words ‘pannetone season’ strike both fear and joy amongst bakers.
Naturally fermented, these are challenging breads to perfect. Even a rigorous twice-daily (at least) starter feeding schedule - which must be started well in advance of the actual baking of the things - may not guarantee results: The reason why pannetone is seen as such a feat of bread engineering, especially when it is naturally leavened, is the sheer amount of fat and sugar in it, combined with the careful balancing act required to build significant gluten, as well as managing the yeasts so they don’t get overwhelmed before the final performance (the bake, of course). The most outrageous pannetones - those with huge holes/gappy crumbs - have been pushed to the limit. You’ve probably seen it, but pannetones are so rich and fragile that they need to be cooled upside down so as not to immediately collapse. Dramatic or what?
Although I only have a few recipes to compare, the common features are extremely high protein bread flour, high levels of egg yolks (at least eight per pannetone!), an 80%-90% hydration level, handsome quantities of butter plus plenty of fillings. It’s no surprise really that the poor thing can’t hold itself up.
The dough low down
Because I wanted to help you create a festive loaf to give pannetone a run for its money, this thing is gloriously rich. We are packing it full of 50% fat, 40% sugar and coming in at almost 85% hydration. It is surprisingly easy to mix thanks to the technique I’ve borrowed from pannetone making: The two stage mix.
The two stage mix allows us to do several things. Firstly you are limiting the amount of sugar that the yeast is exposed to - as we know, sugar is good for yeast, but not too much of it. Too much sugar can have the effect of damaging yeast. On one hand, the sugar can be too much competition for the yeast as it can absorb too much of the available water, making fermentation sluggish. As well as this, too much sugar can make yeast overactive and produce too much excess alcohol as a byproduct of fermentation, which in turn makes the dough inhabitable and so ‘kills’ the yeast. Dramatic, right?
As well as this, the two stage mix allows us to develop significant gluten. When it comes to enriched doughs, almost everything gets in the way of gluten development. Fats (that’s eggs and butter) have the effect of coating flour in butter, which prevents gluten development.
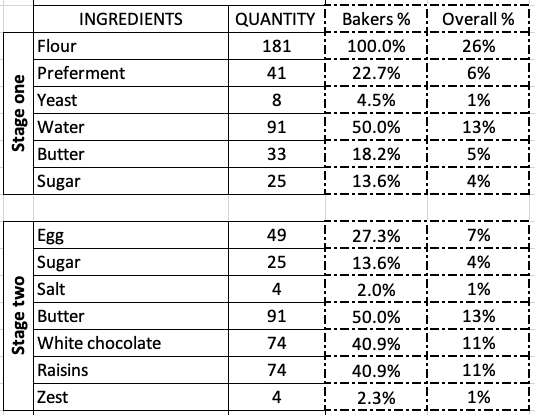
Let’s look at it a bit closer by looking at the breakdown of each dough stage in bakers percentages so we can see what is going on:
Dough, stage 1:
The hydration of the first dough is a very manageable 55%. This means the dough comes together very easily. The sugar is also within the ‘normal’ realms of an enriched dough at just 13%.
The fat is at a relatively low 18% which means it won’t get in the way of gluten development. Adding some of the butter in the first stage means we can add more later without the risks associated. If we were to add all the butter at once - a huge 70%! - there’s a chance we could destabilise the dough too much.
Because of the increased sugar, fat and stress on the dough, we are doubling the standard amount of yeast (1.5% - 2%) in this recipe to 4.5% and we’ll be using a preferment. Although this both contribute to the lift of the dough, they have slightly different roles - the preferment is for flavour and the yeast is for power! I’ve taken inspiration from Gateau Battu recipes for this formulation.
Dough, stage 2:
At this stage, we add egg for flavour, fat and additional moisture, the second lot of sugar, the salt (which had been held back so as not to interfere with fermentation) as well as the majority of the butter.
Although mixing this dough in one go would be possible, more things can go wrong. The large portion of sugar could easily play havoc with the yeasts and the high proportion of butter would affect gluten development. If you were to mix this all in one go, I think it might take almost 30-40 minutes of mixing on a high speed to come together which would almost certainly be the death of my KitchenAid. So this, to me, is the best of both worlds.
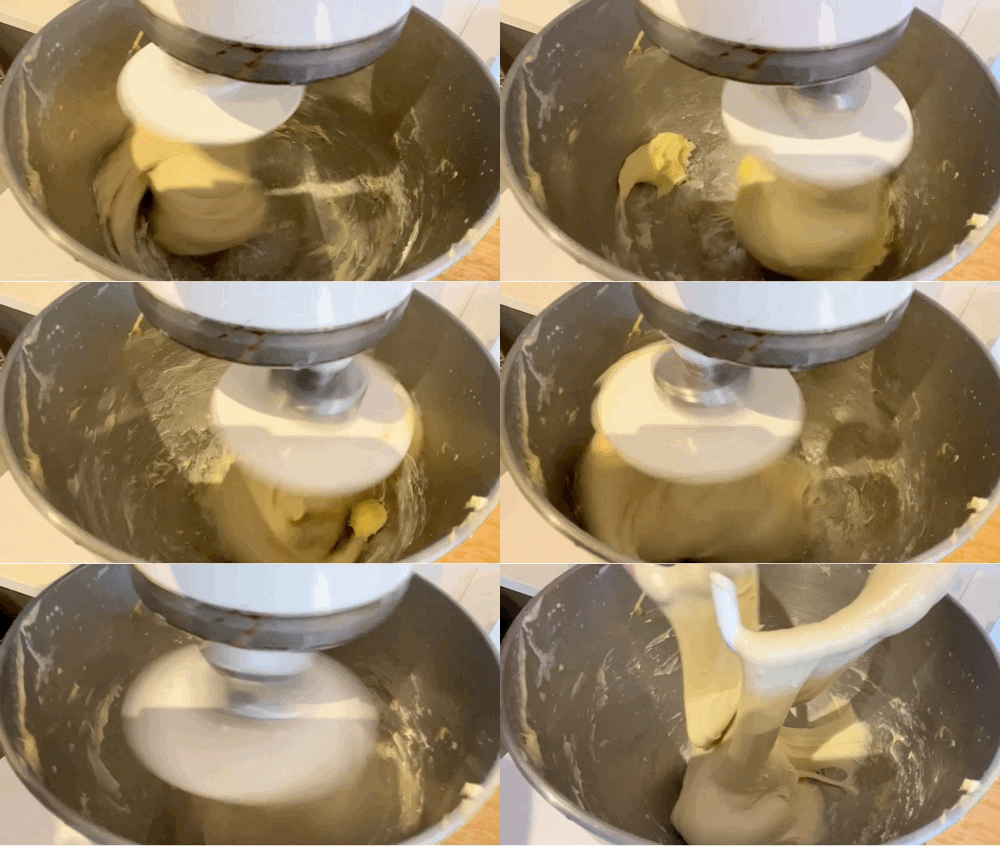
When you have finished mixing this dough, it will likely appear like no dough you’ve ever made before - it’ll be stringy, extremely stretchy and shiny and almost more liquid than solid - it can be quite surprising.
The power of pre-ferments
I know pre-ferments sound ultra sciency and scary, but I promise they’re not. They are low effort and high reward, especially this one. When I was thinking about how to create an airy light dough, I immediately thought about the Neapolitan pizza dough I like to make - it is powered by biga, a stiff pre-ferment. Today’s preferment is the same one that I use for Pizza dough. It’s dry and ugly and won’t look like much, but it really helps this dough out.
We’ve discussed this before, but making a pre-ferment is like giving your dough a kickstart and allows you to build layers of flavour and complexity: the pre-ferment goes into the dough, the dough rises, the dough is shaped, and the dough is risen again before baking.
With the pre-ferment, we’ve been able to sneak in extra hours of flavour building, creating new dimensions of dough-zen, without the worry of over-fermenting that leads to the potential issue of dough structure breakdown. As well as this, you’re also getting to put in a big helping of well-developed gluten. Since gluten develops on its own, you’ll be cutting down on the overall mixing time by including a portion of already developed dough.
Could you make this dough without the preferment? Yes. You could. I would increase the yeast very slightly (which I’ll put details of below) and accept that I will not get quite as much flavour.
Shaping
Even though our tins will be doing most of the work, shaping is still important.
Shaping is an important part of the bread making process because it creates tension in the dough that helps define the final structure. When you’re working with a lower hydration dough, shaping is great, it can even be fun. But when things have a high hydration, it can be a chore and a half.
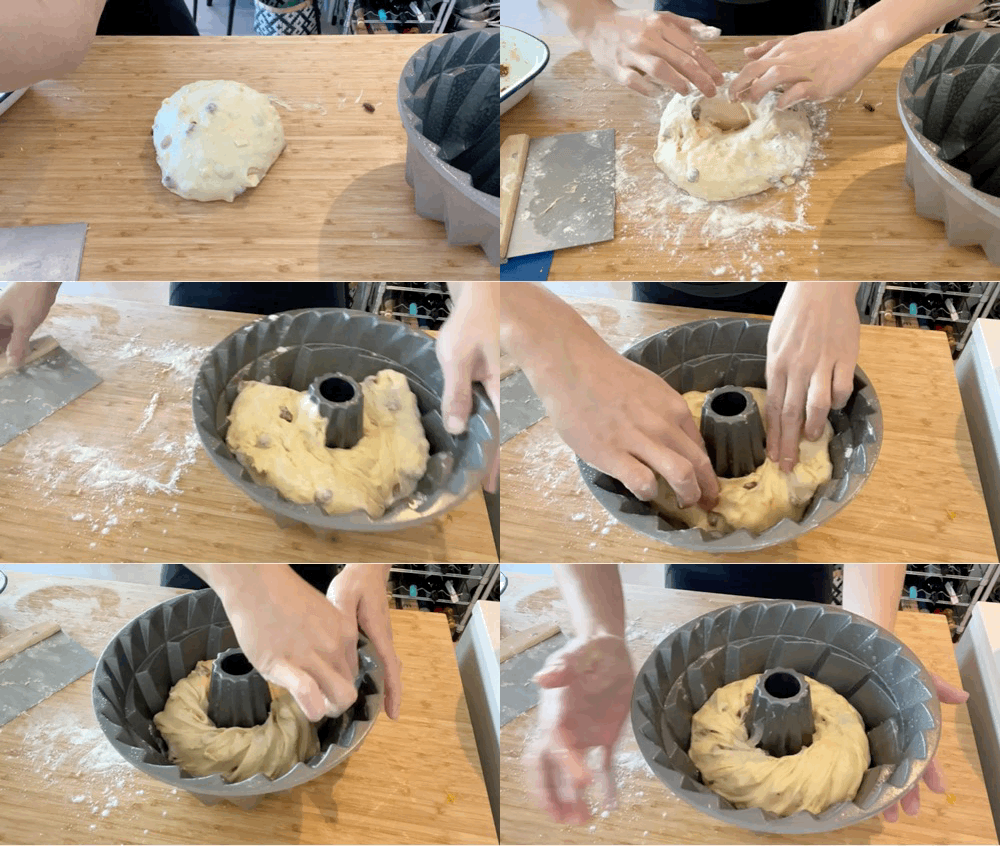
I tried to shape this dough in a few ways but it was pretty infuriating. From rolling it in a sausage and laying it in the pan, to balling it into a round then making a doughnut-esque hole in the middle, I tried it all. But in the end, I found this SO sticky that the easiest thing to do is pour it into the tin and pull it into shape. Not glamorous, but it works.
The other option is to put your dough into the fridge and let it chill. This will allow the butter to solidify/harden which makes it easier to work with.
Alright, let’s make it.
White chocolate, raisin and orange kugelhopf
Want to make a ganache-infused chocolate version? Check out the recipe here.
For details on how to make the candied peel strips, click here.
1 x 7inch kugelhopf (this is the one I have)
For the preferment - 24-48 hours before
40g flour
20g water
1g dry yeast
If you are not using the preferment, increase the yeast to 8g
Dough, first stage
180g strong white bread flour
40g pre-ferment from above
90g water
7g dry yeast
25g sugar
30g butter
Dough, second stage
50g egg
25g sugar
4g salt
90g v soft butter
75g white chocolate, chopped into 0.5cm pieces
75g raisins, soaked in hot water before using
4g orange zest (approx 1 navel orange)
1 x 9inch kugelhopf (this is the one I have)
For the preferment - 24-48 hours before
50g flour
25g water
1g dry yeast
Dough, first stage
260g flour
60g preferment
12g dry yeast
130g water
50g butter
35g sugar
Dough, second stage
70g egg (sorry, x1.5!)
35g sugar
5g salt
130g v. soft butter
100g white chocolate, chopped
100g raisins
8g orange zest
Method - preferment
Mix yeast with flour then add the water and stir in a bowl. It’ll be dry and look very unappetising. This means you’ve made it correctly. Do your best to get all the dry bits involved but don’t worry too much. It is meant to be rough.
Seal in an airtight tub and put in the fridge for 12-48 hours
Method - first dough
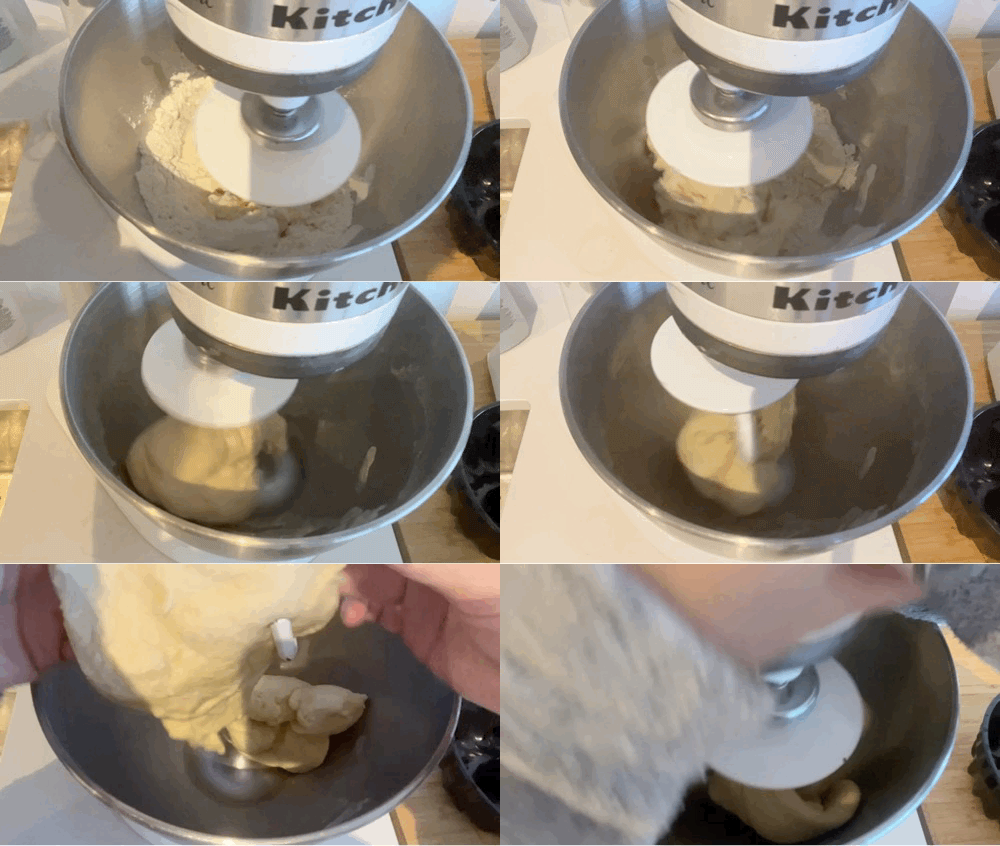
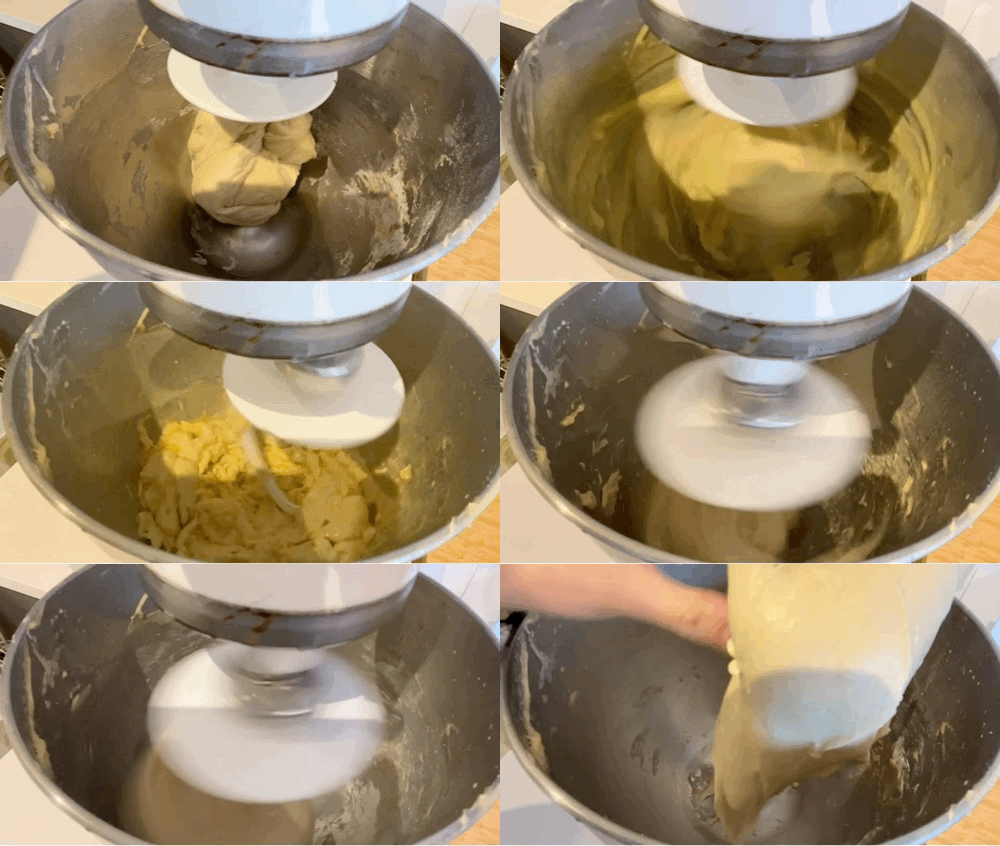
Put all the ingredients for the first dough in the bowl of a KitchenAid fitted with a dough hook
Mix on a medium-high speed until the dough comes together - it should be squishy, soft and well developed. It should take about 5-6 minutes
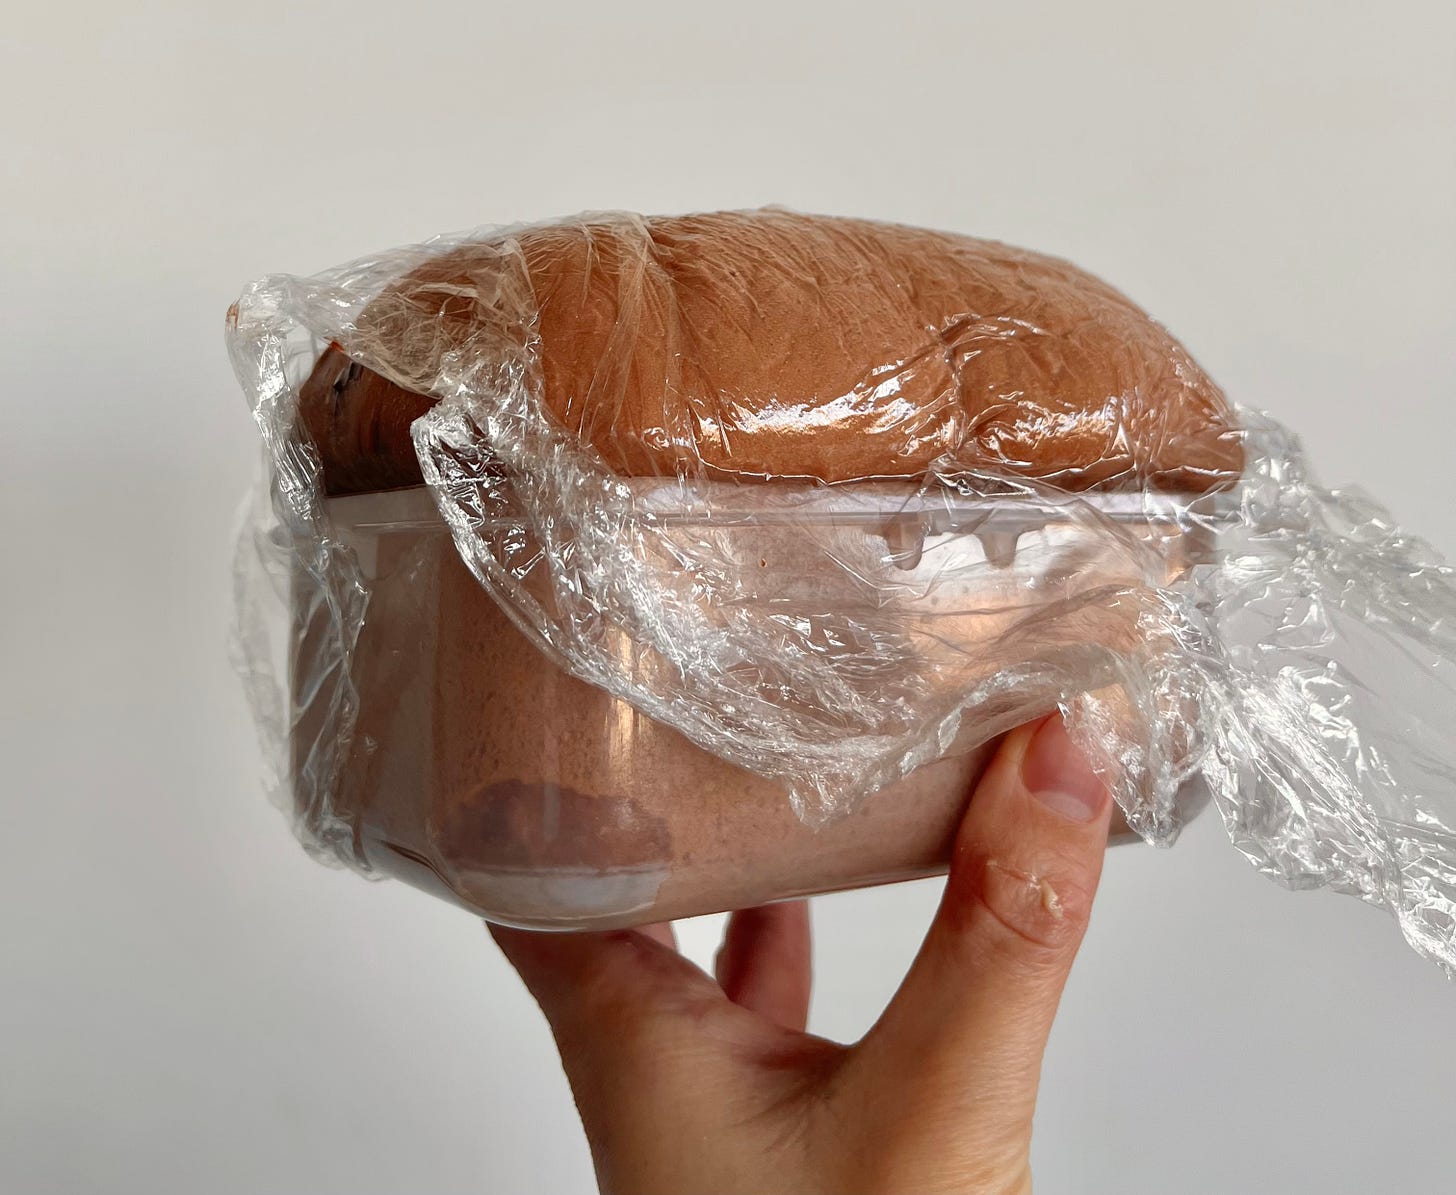
Place the dough into a container then cover with clingfilm
Put aside, somewhere warm if you can, for 1 hour. It should triple in size
Method - second dough
Place the fermented dough into the KitchenAid bowl
Stir with the dough hook then increase speed and add the egg slowly, followed by the sugar. Increase speed to medium
The dough will split apart at first but it will come back together. Once it is pulling away from the sides of the bowl, it’s time to add the butter
Add the butter piece by piece. The dough will be extremely slack and extensible by the time you are finished. Don’t be concerned!
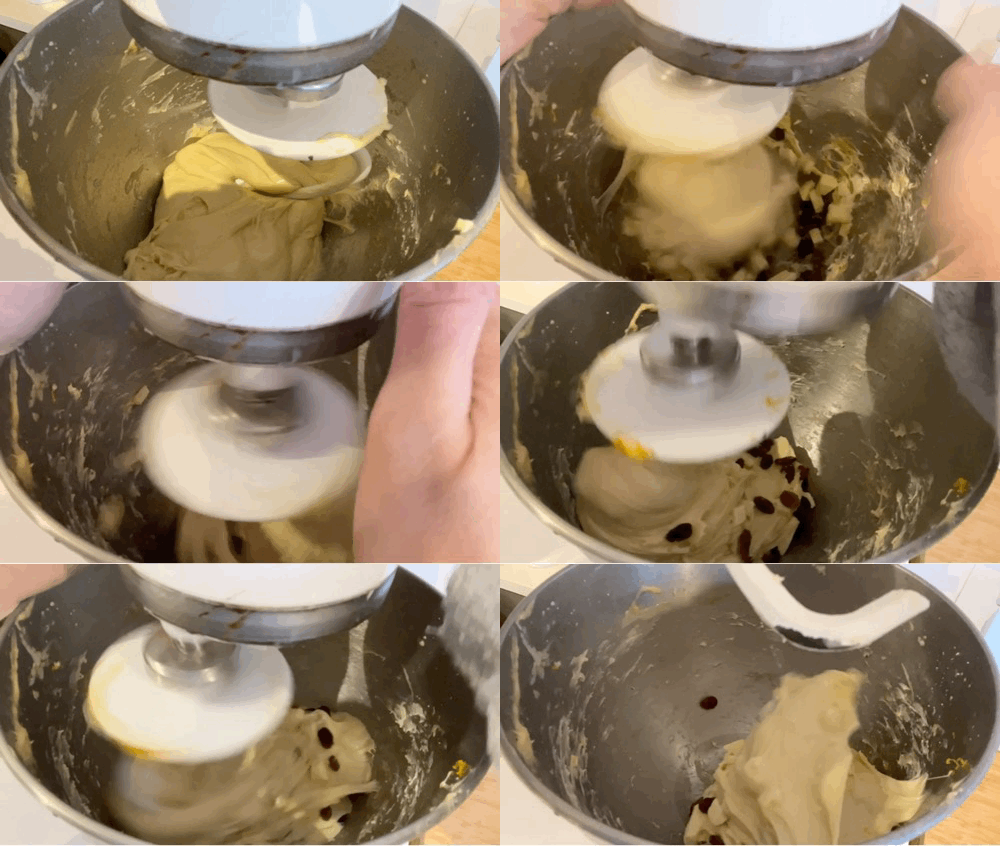
Next add in the orange zest, white chocolate and soaked raisins and use the dough hook on a slow speed to incorporate - you may need to scrape down the bowl and re-incorporate
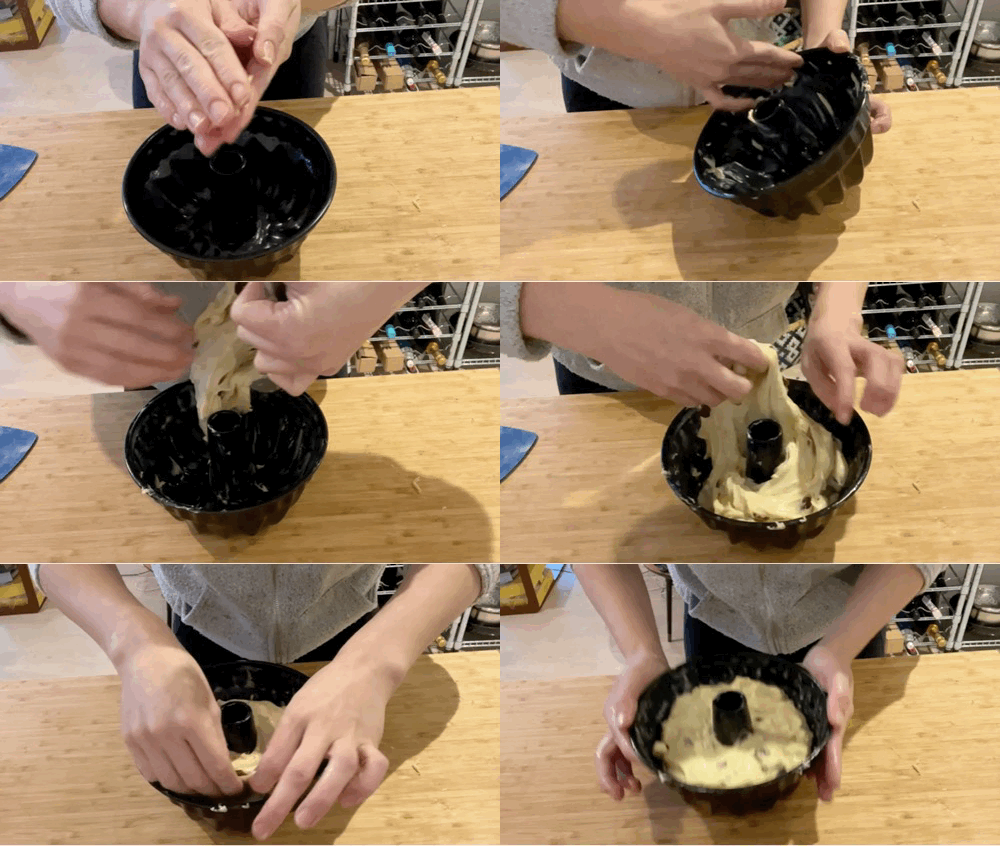
Butter the bundt/kugelhopf tin
Pour the dough into the pan as evenly as possible then spread out using your hands. Having greased hands helps. This doesn’t seem very glamorous but it works!
To neaten it, pull the edges of the dough up into the centre to create a bit of surface tension
You can also shape it by pouring dough onto a floured surface then preshaping it then creating a hole in the middle, like this. It is really hard to work with though, so you’ve been warned!:
Pre-heat oven to 175c fan
Cover and leave for 45 mins - 1 hour. The dough will be extremely puffy and it will have doubled in size
Bake for 30 minutes. You can check internal temp has reached 93c if you want to be sure it is done
Leave to cool in the tin. It may deflate slightly, but don’t worry
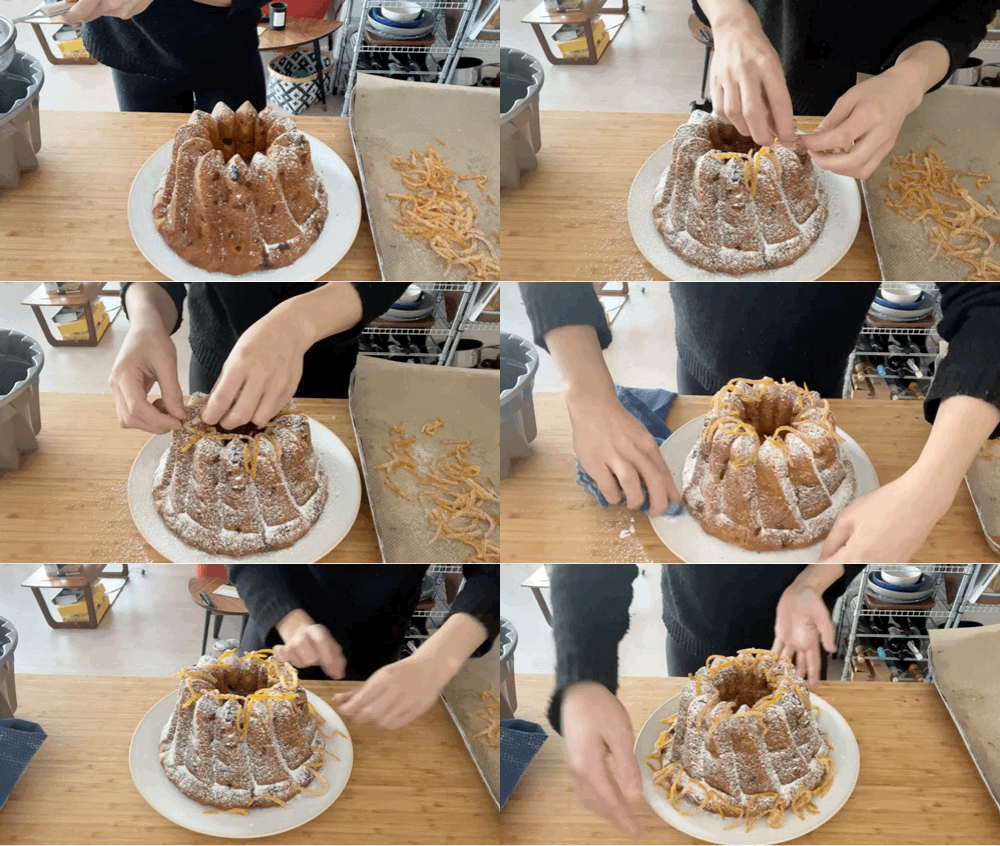
Finish with a dusting of icing sugar and candied orange peel, if desired. Store in an airtight container






Hello - Could I use some of my sourdough starter in place of the preferment, because I want to make it today but I don't want to lose the flavour of the preferment. I Keep my starter quite stiff so I wouldn't be adding too much extra water, if that helps? Thank you
How frustrated will I get if I try to do this by hand....? Looks fab! x