Kitchen Project #27: Tres Leches cake
Ft. HK Milk Tea flavours, lowdown on meringues and all about chiffon
Hello,
Welcome to another edition of Kitchen Projects. Thank you so much for being here.
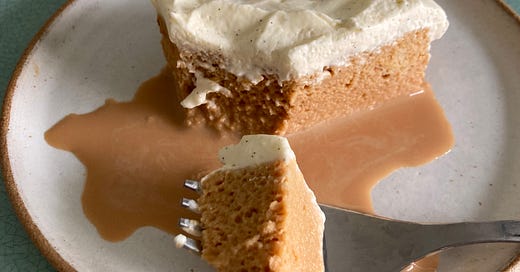
Perfect for a bank holiday weekend, today’s newsletter is all about the wonders of the Tres Leches cake, a super creamy and yet surprisingly refreshing dessert (something about the cold milk makes it actually a perfect summer pud), flavoured with a HK milk tea soak, and finished with a cloud of brown sugar meringue or vanilla chantilly. Heaven.
If you’re enjoying this newsletter, let me tell you about KP+! A few months ago I launched KP+, a paid-version of the newsletter which gives you access to extra recipes, content and chat threads. It’s £5 a month and subscribing is easy - just click here:
I’ve got some fun stuff coming up on KP+ (new chat threads, chocolate basque recipe, toasted flour and honey cake both in the works) as well as some very exciting IRL pastry news (which I hope to announce very very very soon). Right, let’s do this.
Love
Nicola
Learning to speak Tres Leches
I’m on a serious cake kick right now. With all of the pearls earned from last week’s adventure in genoise, I’m turning my focus to another wonderful cake: The Tres Leches.
A few weeks back, I shared on the KP+ ‘No loitering’ thread that I was in the possession of a few too many tins of evaporated and condensed milk. The KP+ gang were quick to remind me that I should 1) not be complaining about this because 2) tres leches cake.
There are surprisingly few UK resources available about Tres Leches cake. Thanks to Hector - who is my official Tres Leches correspondent - I was able to get a few more details on the cake by adding ‘receta’ to my search and going straight to the source of some Mexican and Spanish blogs. Hurrah! Thank you Hector.
I have to admit I’m not super familiar with Tres Leches. Conceptually, I love it: A light sponge soaked with three different milks and topped with something creamy? Yum!
At Happy Endings, I used to make a Tres Leches ice cream sandwich which borrowed the flavour profile, but I’d never actually tried the cake itself. I mean… should it be wet? And anyway, how ‘wet’’ is wet? What should the topping be? Have I soaked it enough?
Although wet cake may take a moment to get your head around, once you’re in the zone, you’ll be there forever. Trust me.
Building it up
When it comes to making Tres Leches you need a soft but sturdy sponge to take on all of that soaking liquid. But, the cake needs to have enough integrity that it can still be sliced, served and enjoyed without looking like a pile of cement.
To maximise the softness of the cake, the sponge needs to be light and airy but not falling apart. This is definitely a job for an egg foam cake (sorry butter cake, you’re just too bloody soft ok and you can’t handle this!).
Although I love a genoise, the firm tight dense structure just isn’t quite right for soaking with milk - the genoise feels more like a cottony cloud that ‘tears’ when you break it apart, rather than the airy soft sponge needed to take on the flavours of milk tea. It’s time that we talked about Chiffon.
Let’s chat chiffon cake
Last week was all about the genoise sponge, a fluffy cake made by whisking whole eggs until the ribbon stage is reached.
This week, we’re delving into the world of chiffon sponges. Rather than whisking whole eggs, a chiffon cake is leavened by a french meringue base - that’s egg whites whipped with sugar only - which is folded gently into the rest of the ingredients. When the cake goes into the oven, the air trapped by the egg whites / meringue base expands rapidly, raising the cake and giving the final texture.
In the chiffon cake family, the differences lie in the treatment of the yolks. Whilst some chiffon cakes whisk the yolks with oil or some sort of fat, some discard the yolks completely. The latter results in a totally lean and towering cake which is sometimes called an Angel Food cake. Whilst the two have similar textures, the Angel Food cake is slightly less rich.
Angel Food cakes are also absolute egg white destroyers - the proportion (thanks to the lack of yolks, butter or oil) of egg whites compared to other ingredients is huge. Although brownies or peach creme caramel are a great use for your leftover egg whites, you can always rely on angel food cake if you really need to get rid of a glut.
How different are chiffon cakes and genoise sponges, really?
Due to the refining of the ribbon stage, I found that the genoise sponge has an overall finer crumb. The chiffon cake crumb is a bit more erratic, too. Whilst the genoise is enriched with butter, we use evaporated milk in this week’s chiffon recipe. Although this isn’t adding fat, it does add a beautiful flavour which helps marry the whole recipe together.
Let’s compare what’s going on with the recipes:
Pretty genetically similar, right?
The lack of fat in the Tres Leches sponge is made up with flavour from the Evaporated milk. When I put the recipe together, I knew I wanted to keep the sugar in a similar range, but have enough sugar to create a sturdy meringue base for the cake. We’ll talk more on that later.
A note on meringues
Like all pastry chefs or home bakers, I’ve made a LOT of meringues.
Meringues were one of the first things that really captured my imagination and heart - it is pure transformation. That’s what I’ve always loved about pastry: Whilst an aubergine will pretty much always look like an aubergine, I love the way baking offers pure metamorphosis of its ingredients. Meringue is the key example of that.
There are so many brilliant resources on the web about meringues - the different types, the foams, the temperatures required - that I’m not going to go deep dive into the methods or history here on Kitchen Projects. People have already done it perfectly, like Cooks Illustrated.
However, I will jump in with a little refresher session. You’ve got three-ISH types of meringue:
French - French represents your basic meringue that everybody starts with - cold egg whites, no fussing, whisked to stiff peaks
Swiss Meringue - your mid-level meringue which involves warming egg whites and sugar over a bain-marie until the sugar is totally dissolved (ideally you want to bring your mix over 80c) and then beating to a stiff peak. The eggs are cooked in this instance
Italian Meringue - This one only seems the hardest because it involves the most equipment - bring sugar syrup up to 118c and then pour it over whisking egg whites and beat until stiff
The Ottolenghi meringue - During my days at Ottolenghi, we used to make those famous meringues by warming the sugar in the oven before whisking into the egg whites, combining the swiss and french techniques. These meringues were always baked anyway so the heating of the sugar was more of a stabilisation technique than a pasteurising or cooking technique
Side note: I have to admit I take an evil delight in the naming of french meringues - I can only imagine that the french, purveyors of patisserie, must be so offended at their namesake being described as ‘basic’.
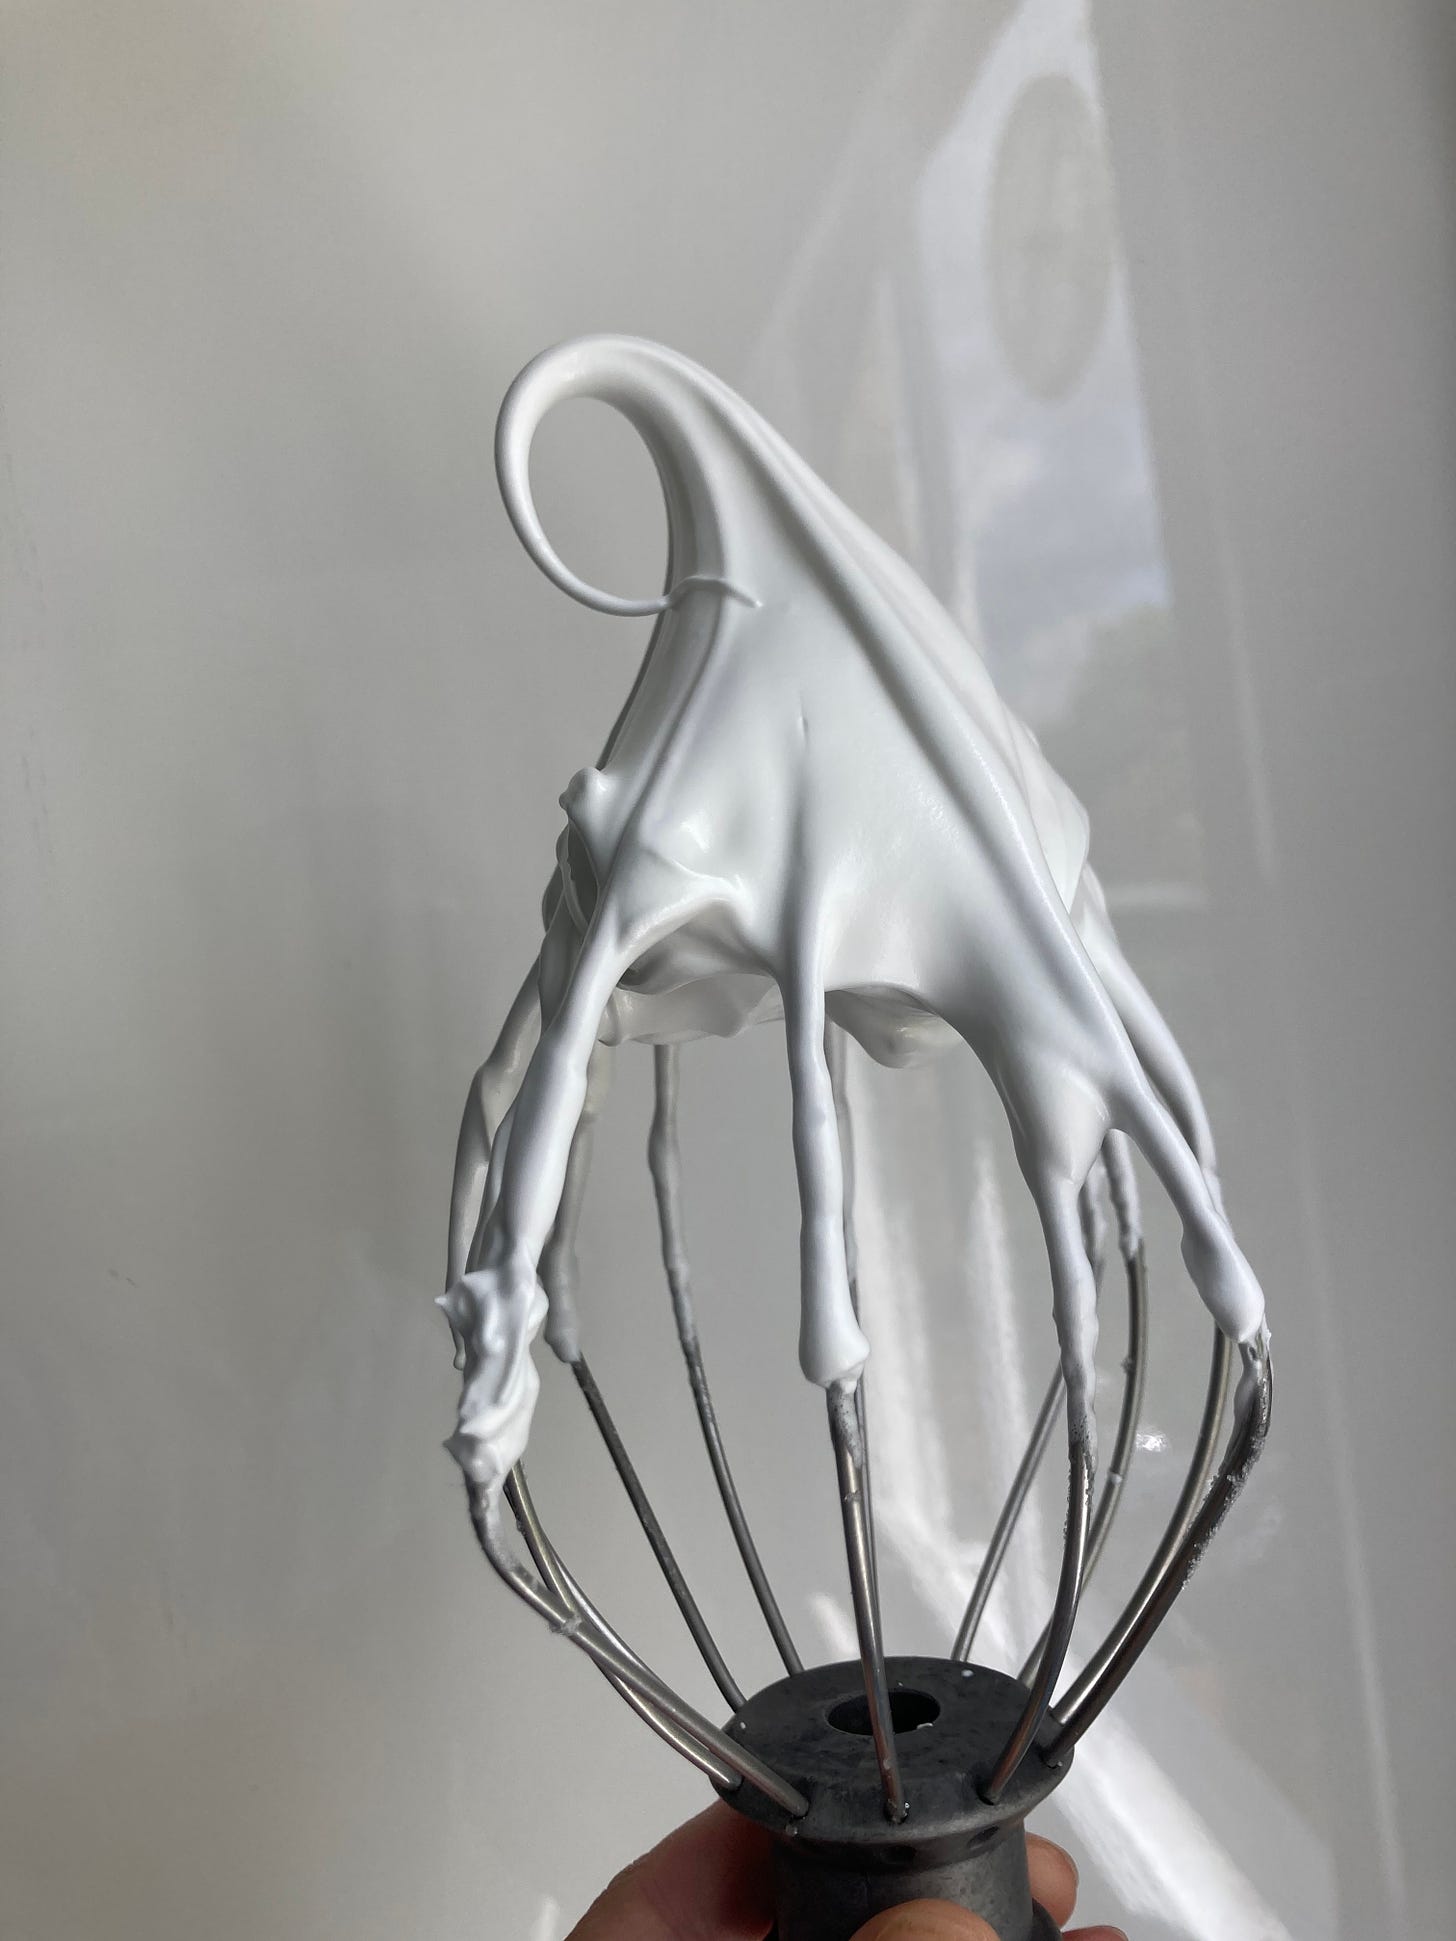
No matter if you’re making a fancy or ‘basic’ meringue, there are still rules to play by to get the best results. You know the deal - a squeaky clean bowl with no trace of yolk or fat and adding your sugar then beating the hell out of it until it's ultra glossy, stiff and you can do the whole lift-the-bowl above your head thing. If you need a bigger refresher, Delia has a great one.
Proportion of sugar in meringues + best practice
Meringues - and french meringues in particular - are amazing. They are the base to so many things: Chiffon cakes, macarons, pavlova, roulades, chocolate mousse and so much more.
Although I understand the basics behind the meringue magic, it’s the quantity of sugar needed to raise a meringue that is an area of confusion for me.
Let’s start at the beginning: If you beat egg whites without a sugar (aka a 1:0 ratio), a voluminous network of air-trapped-by-proteins will appear but it is prone to overbeating (it’ll look kind of chunky). Once sugar is added, a stable chain of proteins will form and create the glossy stable mix that we all know and love. Here the meringue ratio is 1:1.3:
When it comes to sugar, it is playing two roles: First, it’s there to build that shiny stable network and support the proteins to create the glossy structure we know and love. Secondly, it’s flavour. Although you can make a pretty stable meringue with minimal sugar… do you really want to?! Yes, meringues can be awful sweet, but a baked plain egg white isn’t the most alluring.
But what is the correct formulation for a meringue? In every kitchen I’ve worked in, it has been different. From 1:1, to 1:2, to 1:1.5, it’s a bit of a minefield and ranges massively depending on the final product. Let’s have a look at the lay of the land and the final applications to see how they differ:
In general, the trend seems to be: The more standalone the meringue application, the less sugar, so as a rule of thumb, if your meringue is going on to do other things (like being poached in custard, or be the base of a chiffon cake or mousse), the less sugar you need. St John, always subversive, buck the trend here and use the sugariest meringue of all in their floating islands recipe.
Also, surprisingly, there was a 50:50 hit rate on whether or not to include stabilisers. For something rolled or marshmallowy, like pavlova or roulade, cornflour and vinegar always seemed to be included in the recipe. However, whether it was meringue nests or chiffon cake, there was no agreed upon stance.
Understanding the role of acids
When it comes to adding acids, most recipes don’t go into more detail than ‘it makes it more stable’. Although I believe it, the ‘why’ isn’t normally stated. So, I looked to OG food scientist and hero Harold McGee to understand this more deeply:
McGee has done a huge amount of research about the effect of copper bowls on egg whites - according to McGee, during the aeration process of egg whites several types of bonds are formed - the bond between the proteins (what we hear about a lot) but also bonds between sulfur groups. These sulfur bonds are unstable ie. prone to breaking down, so by whipping egg whites in a copper bowl (or indeed, adding an acid) you are interfering with these awkward sulfur compounds and thus making it more stable.
The deal with overbeating
Although it can be hard to over beat egg whites once sugar is involved (sugar really does keep things glossy, stiff and stable!) it can happen - apparently. I’ve never actually experienced this myself, but according to this article, an overbeaten meringue will later weep or become grainy. This is a bit tricky because it can be hard to spot - so, to keep yourself in the safe zone, simply watch your meringue and once it gets to its stiff peak stage, take it off and use it.
While I haven’t experienced overbeaten meringue, I have experienced the yuckyness of a set meringue. Once a meringue has reached its stiff glossy status, it’s good practice to use it pretty quickly and not let it stand.
When left, the foam will begin to set and it becomes a lot harder to use in other recipes. If your timings go a bit squiffy and you find yourself with a meringue but the rest of your recipe isn’t ready, simply put your meringue to mix on a low speed and keep it moving - gently - whilst you get all the other bits prepped.
Sooo… what about raising agents?
Although I’m pretty strict about adding raising agents to genoise sponge (I’m a purist, what can I say), many chiffon cake with a french meringue base do seem to add baking powder or use self raising flour.
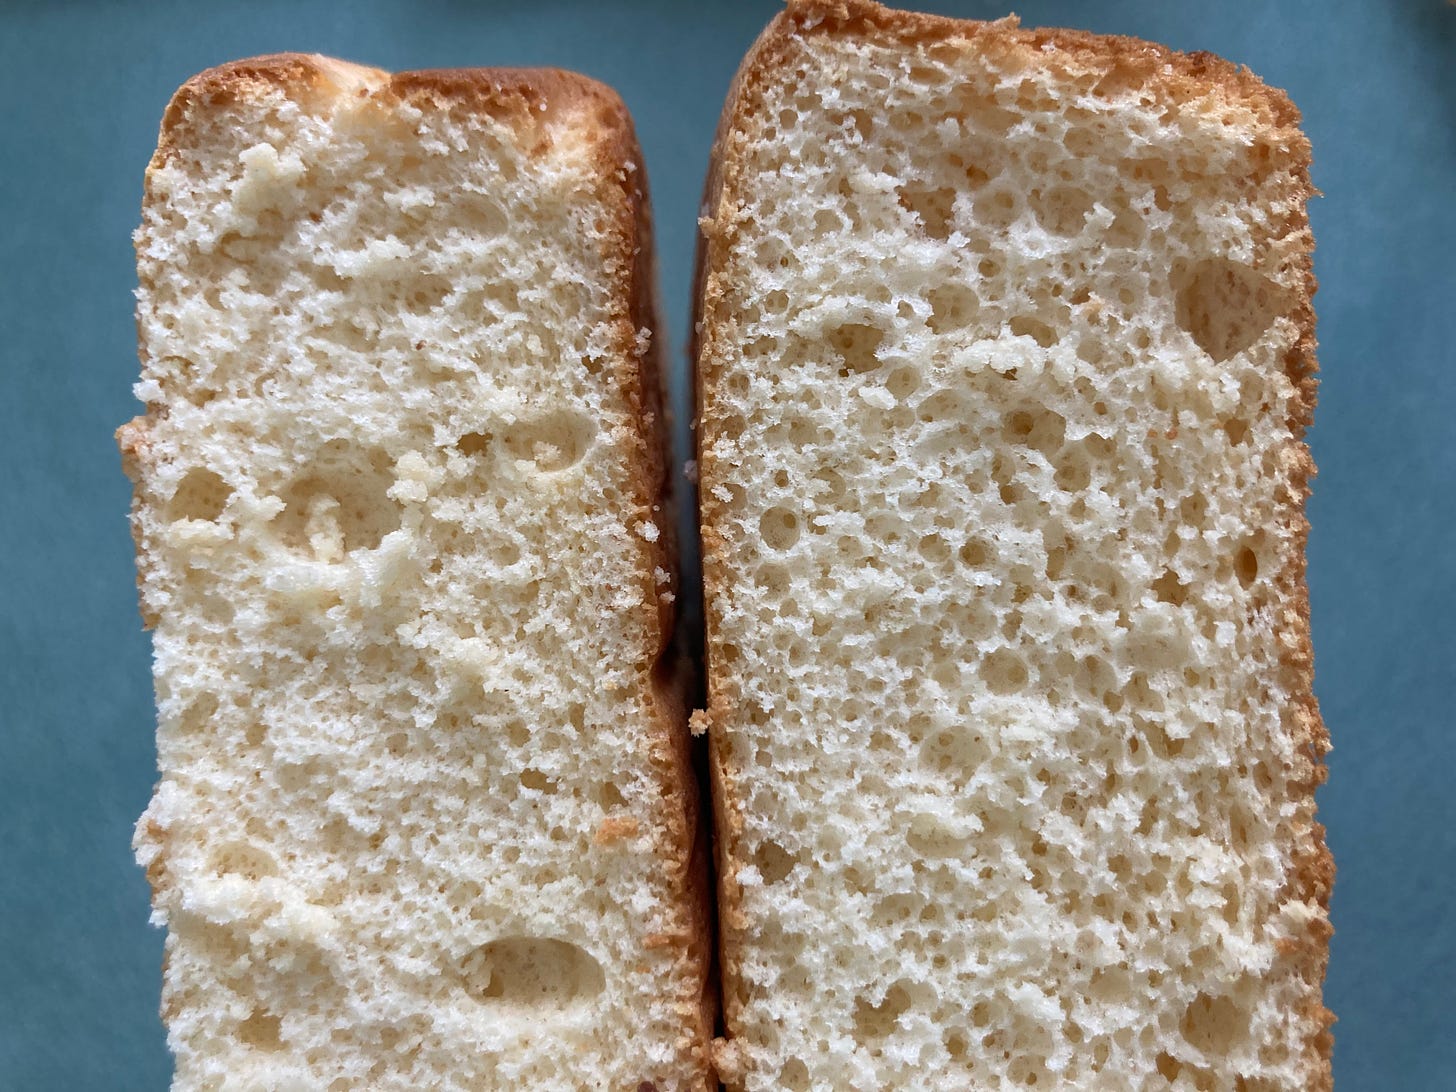
In my mind, I thought a french meringue base + raising agents was going to give me a total skyscraper, so to test this out, I made two cakes - one with and one without raising agents:
Much to my surprise, the cake using baking powder was not head and shoulders in height above the cake leavened solely by egg whites. The biggest difference was the size of the bubbles. The one with raising agents had an identical texture but the holes were just larger overall - much spongier:
Since Tres Leches is all about a cake that is able to capture pockets of that beautiful soaking mixture, I am definitely in favour of the addition of baking powder in this recipe, though it must be said if you forget to add it or if you’ve run out, it’s not going to make a huge world of difference.
About that soak
I have to admit that pouring liquid all over a freshly baked cake did feel alien to me at first. But now I can’t get enough. Getting the quantity of liquid *just right* did prove a challenge.
I went into it blind and mixed up more of the HK milk tea liquid than I thought I would need. In my estimations (having not done ANY field research) I didn’t think I’d need more soak than cake (by weight), right?
WRONG! Now, I’m not sure if I have less leeway for error here since the soaking liquid is a different colour than the cake, but after a few hours in the fridge, it was not evenly soaked at all and I had to go in for a second round. Although it tasted good, the bicolour system (white cake, brown soaking liquid) made it super clear that I had not adequately soaked the cake:
The next time, I came in armed with much more liquid and really went to town on the cake. I poured the milk tea all over it until the cake literally couldn’t absorb anymore. I wrote down the (g) quantity and I was shocked that this cake took on WAY more soak than the actual weight of the cake. Was this normal?!
To compare and contrast, I took to the internet to see what the soak situ was all about. I picked the top couple of hits from both UK and US search terms to get the lay of the land:
What a range! Although I haven’t made any of these cakes - other than my own - I was really surprised at the huge difference between the recipes. I checked in with Hector, my correspondent, who grew up eating Tres Leches cake to discuss what that ideal TL texture should be:
“Too soggy is better than too dry, always! But you want the cake's structural integrity to remain; I think this is also influenced by the type of cake batter used. Lighter sponges will soak up volume differently and also 'age' in a different way to more dense yellow(ish) cakes. I think a tres leches served should have enough extra liquid to provide a slight extra sauce but not be swimming!”
Although I was initially a bit freaked out by the comparatively large proportion of milk soak compared to a lot of the recipes in the UK, I’m pretty confident that this KP recipe ticks the boxes for structure and moisture. Phew.
Oh… and if the idea of wet cake freaks you out but still want to try this out, soak the cake with half the mixture and keep the other half on hand for serving, then you can control the soak-level!
Scaling the sugar back
Tres Leches cake is classically enjoyed with a meringue topping, rather than whipped cream, so I wanted to come up with a meringue topping that wasn’t tooth numbingly sweet but benefitted from that silky meringue texture we all know and love.
Enter: brown sugar.
When it comes to using brown sugar in a meringue, you get access to lots of toasty molasses flavours which work perfectly with the HK milk tea profile. To limit the sweetness, I took inspiration from the egg whites and sugar table and reduced the sugar to 1:1.25. Using the swiss meringue method to make it safe to eat (heat those egg whites up honey!), the result was a firm but resolutely swooshing topping.
If you can’t be bothered making a meringue, this cake is just as good with a swoosh of vanilla chantilly on top, too!
Finding that HK Milk tea flavour
I’ve always loved the taste of HK milk tea. It’s my absolute favourite. If you’re brewing up a batch to drink, the proportion is about 90% water and 10% condensed milk. But for the soak, I needed to adapt this to make it a lot richer, creamier and denser.
To achieve a good texture that still had a significant tea flavour, I turned all the levels UP. This means making a SUPER intense infusion with the tea (its soooo bitter) and then layering up the milk flavours on top of it.
You start by making an hefty infusion of Ceylon tea (though you can use english brekkie if you don’t have ceylon to hand!) and then mellowing it with a combination of evaporated and condensed milk. It’s heaven. I tried infusing the tea directly into milk, rather than water, but I preferred the flavour of the cleanly brewed water infusion.
Once its mixed… taste it! You can add a bit more freshly brewed tea if you want it stronger. Don’t chuck your tea leaves away because you can do a little mini second brew with the if you need.
Adapting and infusing
Infusing is something we do every day - coffee, tea, whatever your jam is, there’s an infusion taking place. HK milk tea works brilliantly in a Tres Leches format because the bitterness of the tea keeps the dessert always *just* on the edge of sweetness
The Tres Leches cake is IDEAL for experimenting with flavours and infusing. You have three distinct areas to play around with - the cake, the soak and the topping.
Imagine a brown sugar cake with a chai soak (yum), or a zesty lime sponge with a coconut milk based soak and a crunchy coconut topping. Go wild!
Let’s do this!
HK Milk Tea Tres Leches
Makes 1 x 8 inch square cake
Cake ingredients:
3 eggs, separated - I use large, it was approximately 110-120g whites. The yolk weight is less important, it should be around 45-55g. Don’t sweat this too much though
120g caster sugar
75g evaporated milk
90g flour
5g baking powder
1.5g salt (⅓ of a tsp)
Milk tea ingredients:
This will make more than you need. You can enjoy the leftover over ice or just serve w the cake!
35g ceylon tea (loose leaf and yes I know this is a LOT but ya need it to get the density right)
430g water
214g whole milk
285g evaporated milk
285g condensed milk
The topping
Vanilla chantilly cream
250g cream
20g whole milk
20g sugar
½ vanilla pod
OR
Brown sugar swiss meringue - you may not use all
70g egg white (2 eggs)
60g dark brown sugar
55g light brown sugar
Cake - method
Pre-heat oven to 170c fan
First separate your eggs
Make a french meringue: Whisk the whites on high speed until generously foamy then turn the mixer down to medium speed (as to avoid sugar explosions!), then add your sugar bit by bit. Turn the speed back up then whip to stiff peaks, about 2-3 minutes
Do not stop whisking the whites until you are ready to start folding or they will begin to set. Once you have reached stiff peaks, turn the mixer down to low and keep it moving but slowly
Whisk egg yolks with evaporated milk and set aside
Sift plain flour and baking powder together and set aside
Fold the egg/milk mixture and dries into the egg whites, carefully folding and alternating. Try not to deflate the mix too much!
Move into your cake tin and bang on the surface several times to even it out. Like we did with the genoise, drop from a height and break any large air bubbles
Bake for 25-30 mins until a knife comes out clean and it feels bouncy and set
Drop the cake from 30cm high once it comes out the oven to prevent shrinking
Leave to cool
Make the soaking liquid
Bring tea leaves and water to the boil then steep for 5-10 minutes
I like to brew my thick milk tea in a cafetiere as I don’t have a fine enough sieve to catch the tea leaves! IF you have a fine sieve, feel free to use that. You will lose a decent volume of water as the tea absorbs a lot
Stir in milk (leche 1), evaporated milk (leche 2) and condensed milk (leche 3) to your tea and taste. It should be super strong but you can always brew a little extra tea and add it - remember, we want the mixture to be quite THICK otherwise it won’t soak nicely into the sponge
Combining the elements
I like to soak my cake upside down - put it into a tray that is larger than the cake so then it has room to breathe/it doesn’t make you go crazy when you try to cut it
As an insurance policy for ensuring the soak gets all the way through, you can stab the cake 20-30 times with a skewer.
Pour around 600-700g of milk tea over your cake - it should look saturated! I usually put mine on a scale to see where I’m at but you basically want to get the cake to a place where it isn’t absorbing anymore. Anything leftover keep for serving!
Leave in the fridge to get even… soakier. I think it’s good after 2 hours but you can also do this two days in advance - the cake should continue to get better over-time, too, as it matures
Finishing it off
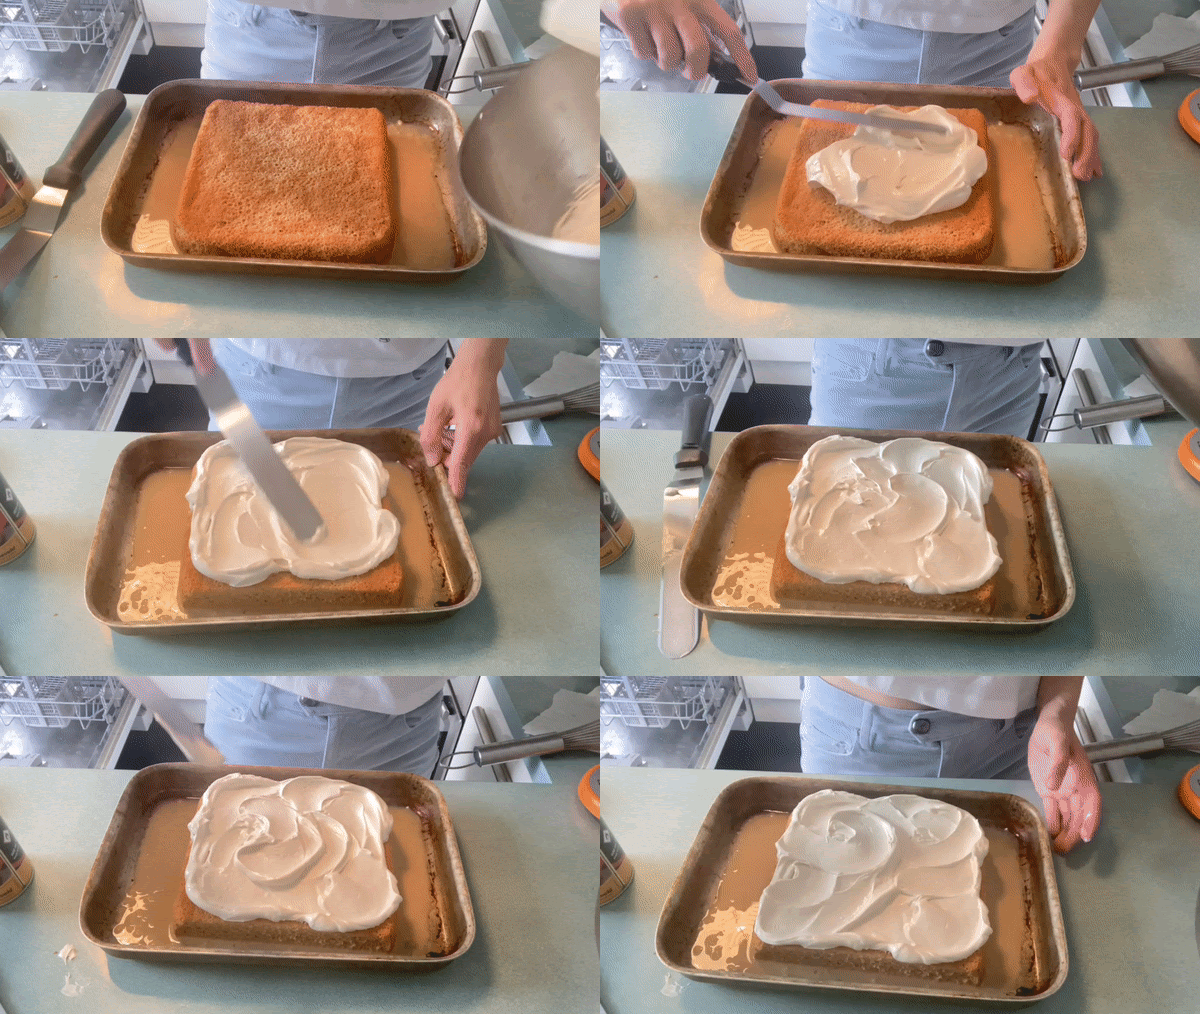
To make the brown sugar meringue topping: Heat the eggs and the two types brown sugar over a bain-marie until it gets to 80c - it’ll look really dark. Whisk it all the time and keep it moving! Once you reach the temp, whip until you get a super thick stiff meringue, about 5-8 mins. Scoop the meringue onto your cake and move it around with a palette knife to get a pretty pattern - you may not use all of the meringue
To make the vanilla chantilly: Whisk the cream, milk, sugar and vanilla beans until soft peaks form. Scoop onto the cake and use your palette knife to make a pattern


Hi Nicola, can you please explain how you calculate the ingredient's percentage? It doesn't look like the Baker's Percentage in which the flour is always 100%. Really looking forward to your response. Thank you so much.
Hi! I know this is an old post but I was wondering if anyone has tried doubling the recipe?