
Kitchen Project #200: Baumkuchen
with Pastry Chef Alessandro Giannatempo!


Hello,
Welcome to today’s edition of Kitchen Projects. Thank you so much for being here.
You may notice that today marks the 200th (!!!) edition of the newsletter. And so I’m VERY excited to be sharing a very special edition and writing debut today… Please welcome pastry chef Alessandro Giannatempo!
Today, Alessandro brings you on a journey with him as he pursues Baumkuchen, the unique German cake that is usually baked… on a rotating spit. After discovering this cake in Japan, where it has become a beloved baked delicacy, Alessandro has developed his own, home-suitable version of the cake for you to enjoy today.
Over on KP+, Alessandro has developed an alternative Baumkuchen for you: Chocolate & Hojicha. WHAT a dream. You can get the recipe here.
What’s KP+? Well, it’s the level-up version of this newsletter. By joining KP+, you will support the writing and research that goes into the newsletter (including the commissioning - and fair payment - of all the writers), join a growing community, access extra content (inc. the entire archive) and more. Subscribing is easy and costs only £6 per month or £50 per year. Why not give it a go? Come and join the gang!
Love,
Nicola
ps. I’m thinking we have a big party for the 250th edition… watch this space ;)
Introducing: Alessandro Giannatempo!
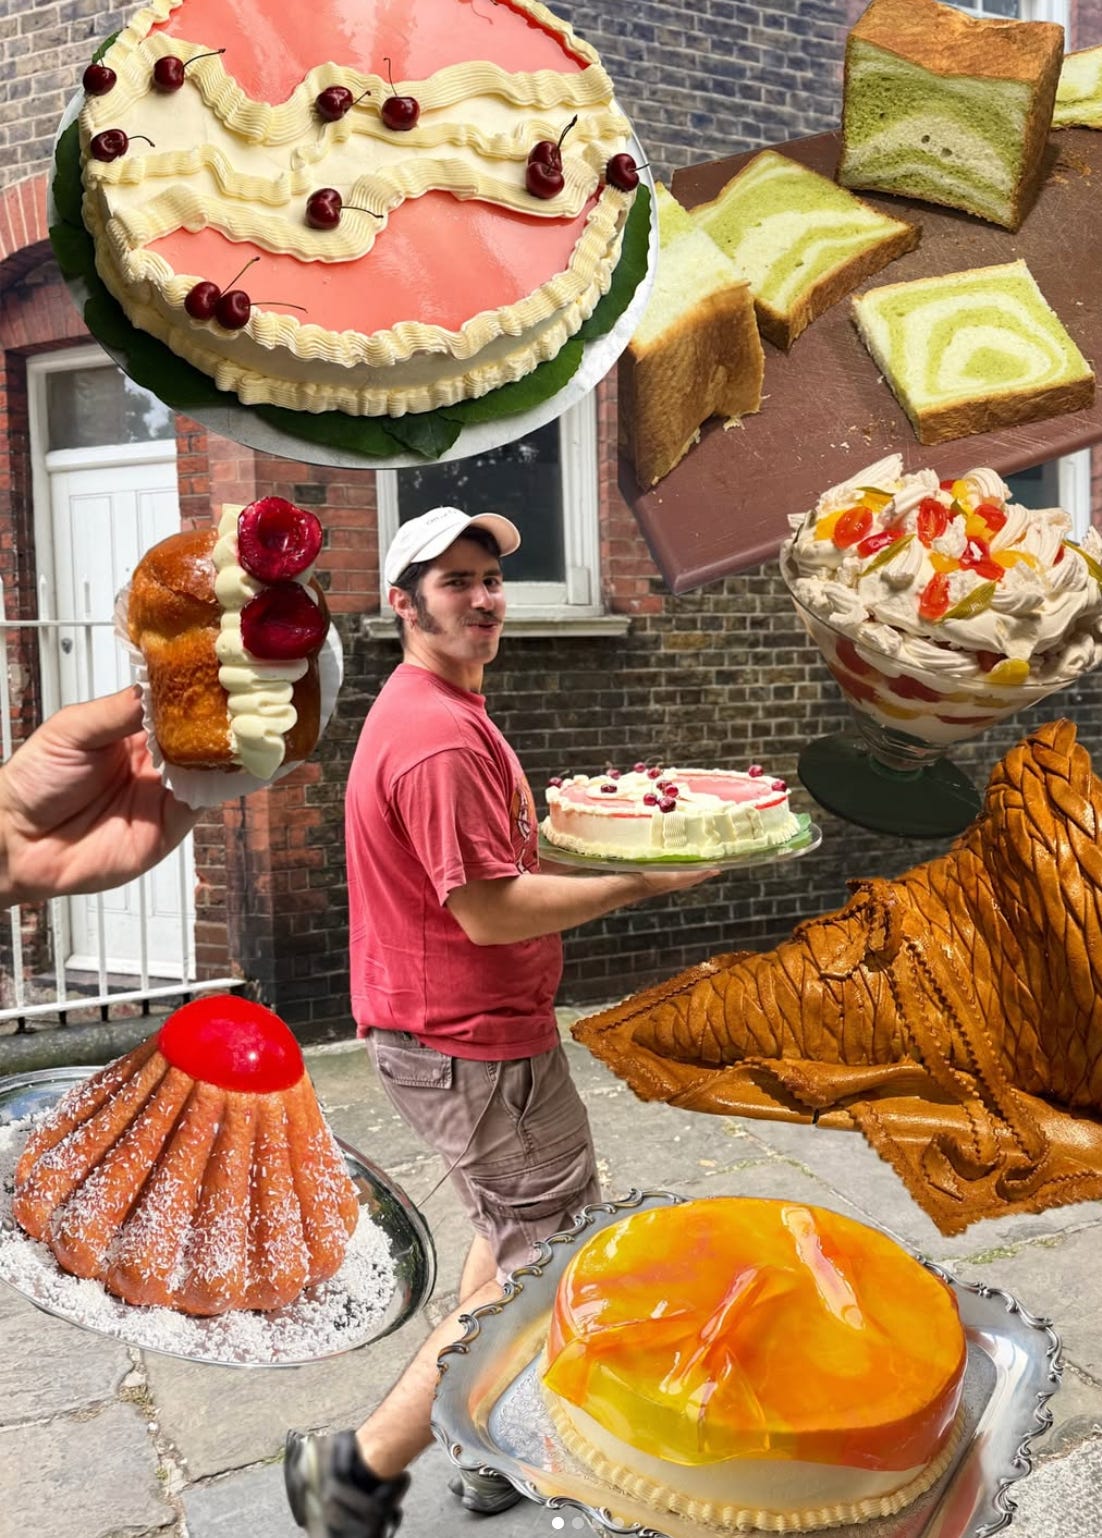
You may already be familiar with London-based Alessandro Giannatempo and his vibrant, evocative style of baking, one of a few pastry chefs who IS MAKING BAKING FUN AGAIN!!! From cakes dripping in jelly, to gingerbread puppet theatres, a truly viral tomato cake of dreams, to snake-shaped puff pastry, Alessandro brings genuine original vision and artistry to his baking. We all benefit from his experimental, bold and genuinely delicious desserts (and savoury cooking) that have a strong point of view and a confident, joy-bringing aesthetic. You really can’t help but smile when you see his work!
As well as recipe development and private commissions, Alessandro often runs workshops, supper clubs and pop-ups (in London, Madrid and Sicily, no less!) which you can find out about via his Instagram.
Earlier this year, after many years working in kitchens, Alessandro took the jump into the world of freelance and I’m so thrilled for you to read his first contribution to Kitchen Projects! Follow Alessandro’s adventures in cake & pastry here.
The Multilayered Story of Baumkuchen
I always knew that a trip to Japan, as a pastry chef, would be pretty life-changing. What really surprised me, however, was falling in love with Baumkuchen, a German cake, in East Asia.
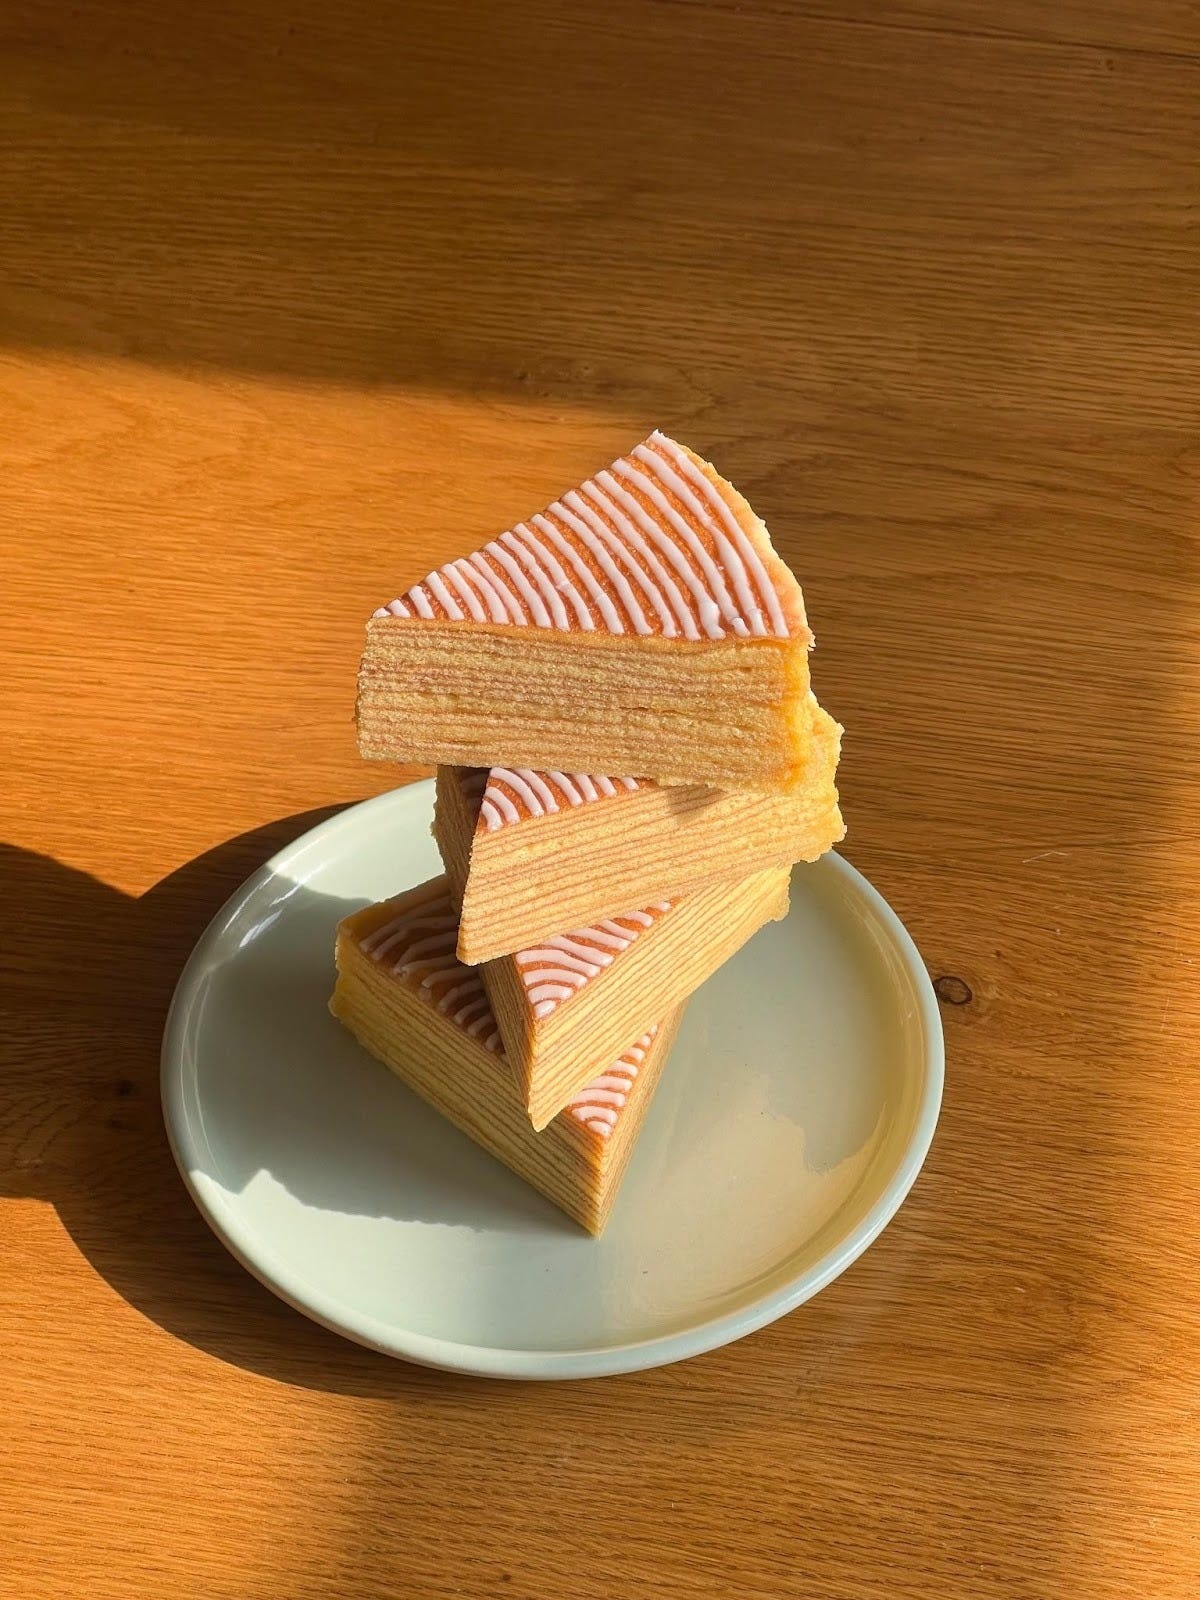
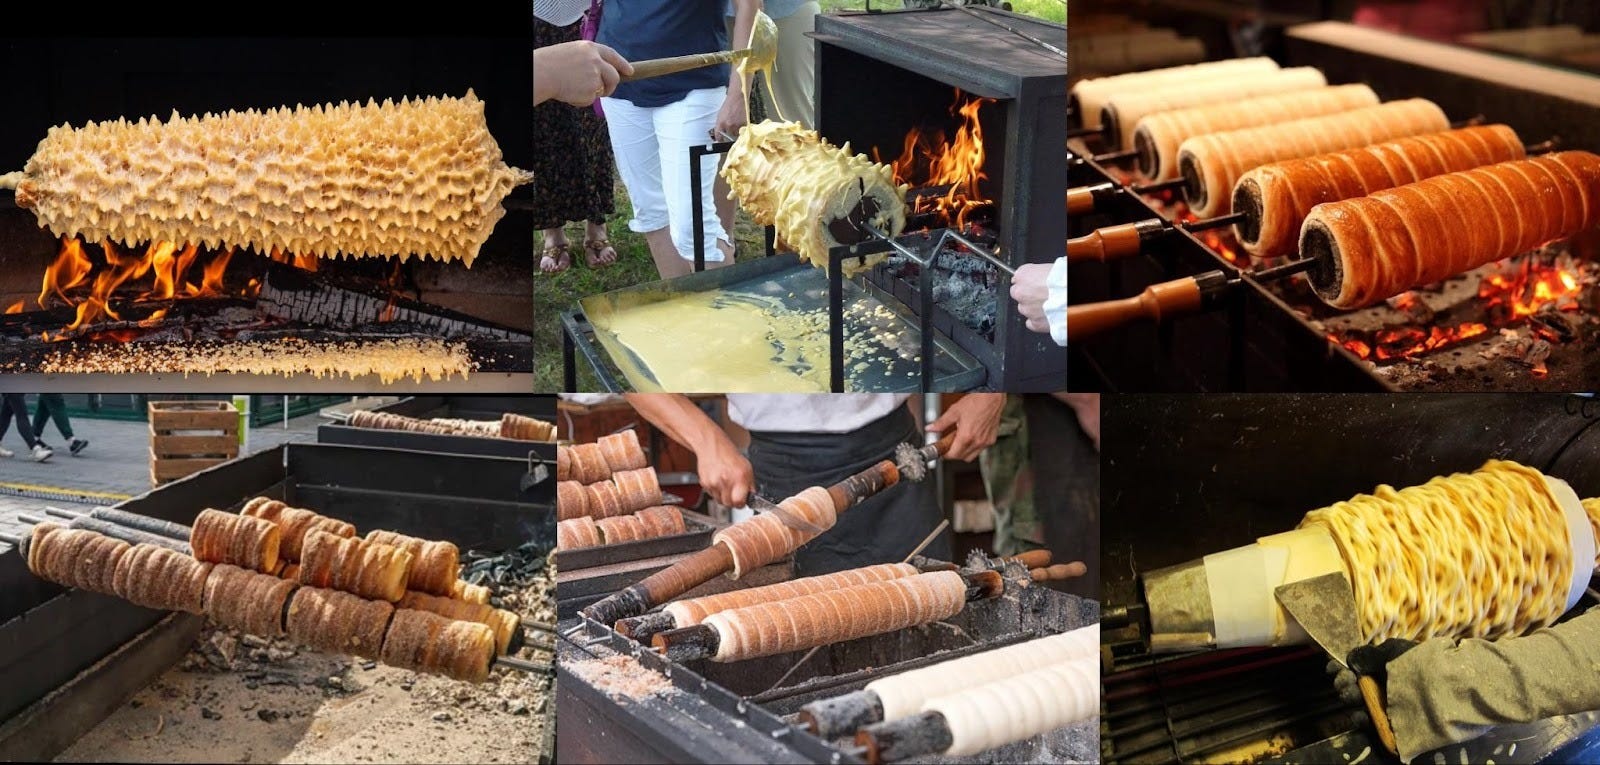
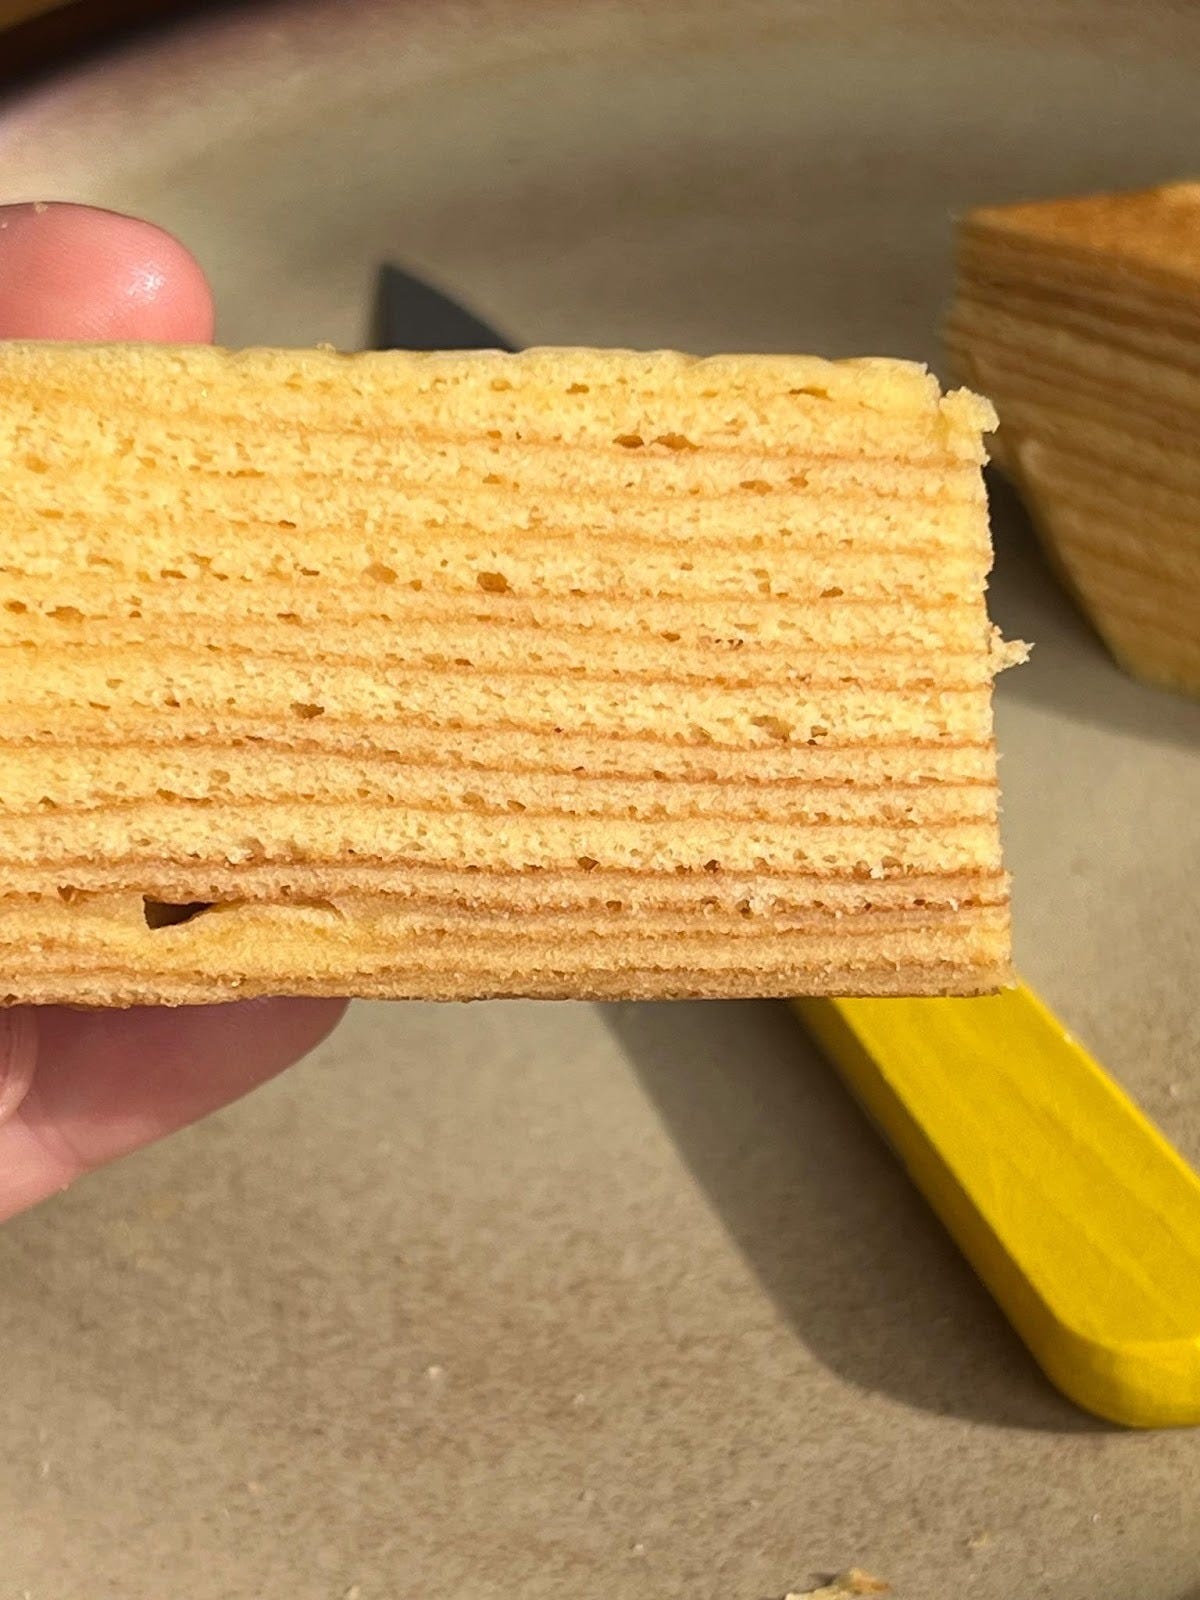
For the uninitiated, Baumkuchen is a layered cake unlike any other. Rather than stacking baked sheets of cakes with filling, baumkuchen is formed by baking thin layers of cake on top of one another, allowing each to set before applying the next. The baking part, which happens on a rotating spit, allows for perfectly even cooking and gives shape to the iconic concentric structure of the cake.
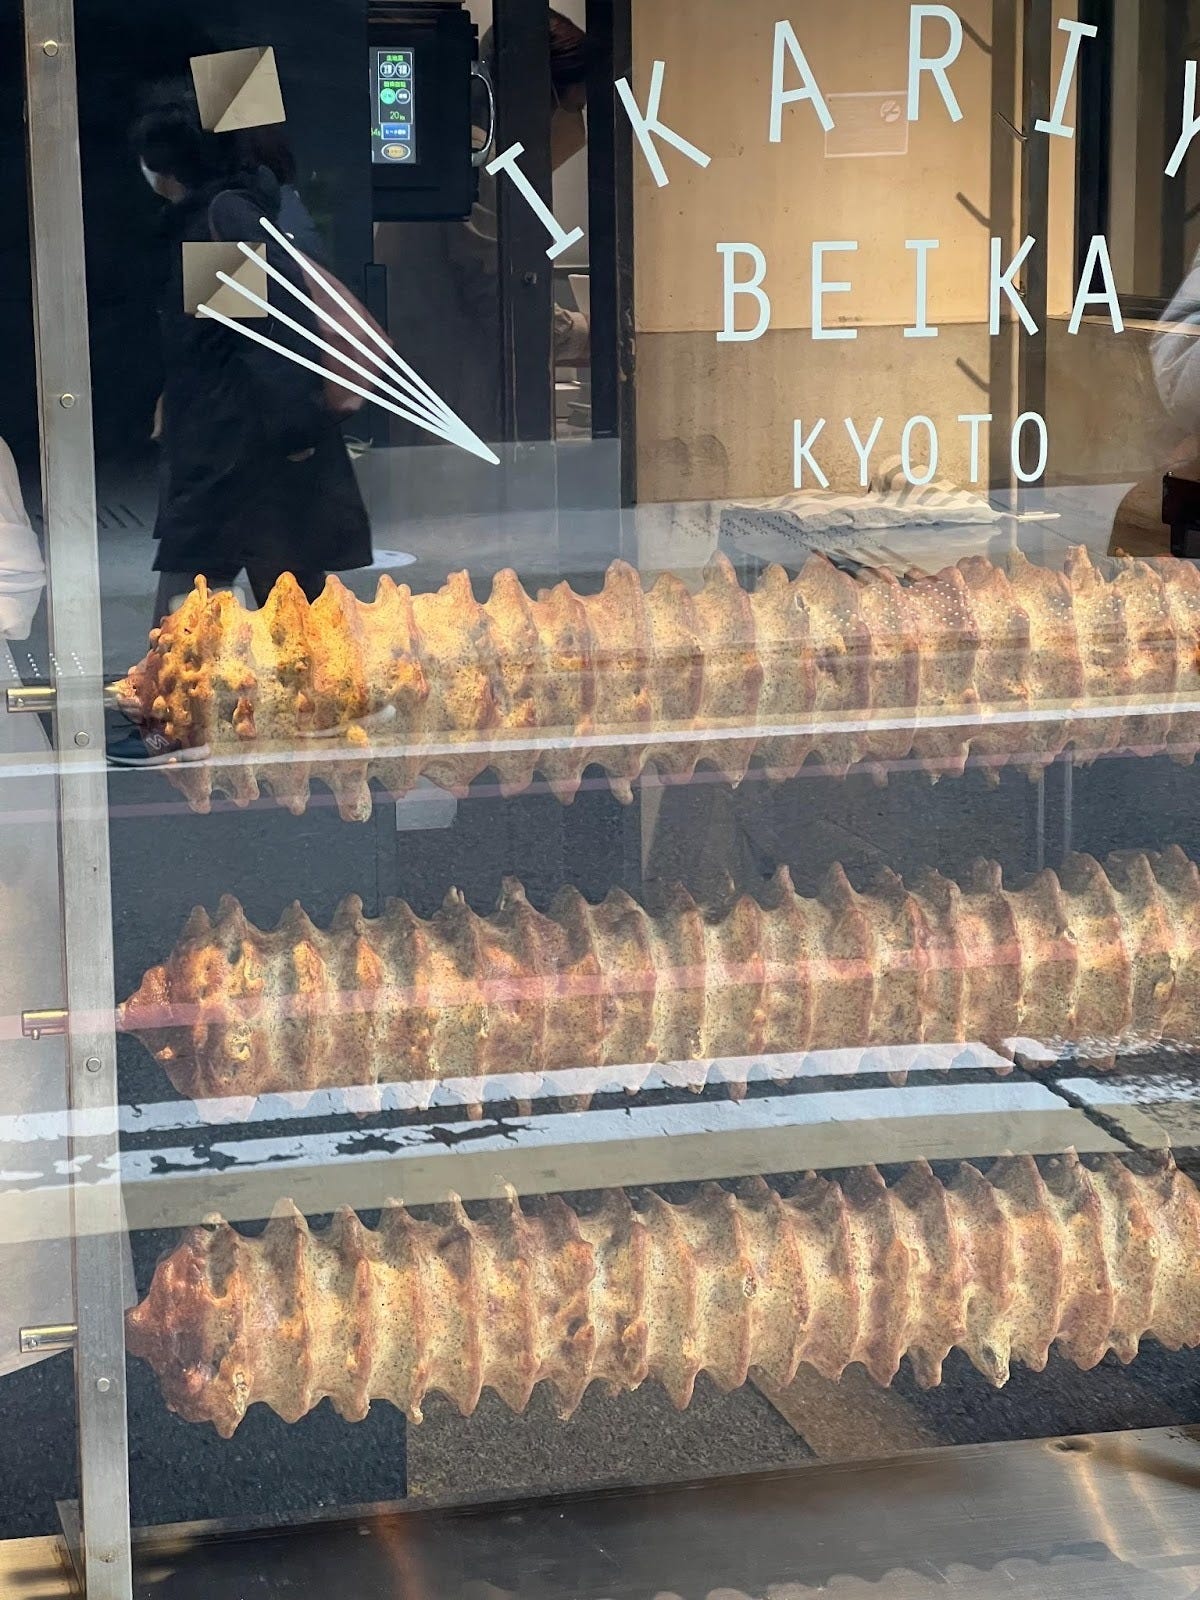
While visiting Kyoto earlier this year, I stumbled upon Ikariya Beika, a small bakery that exclusively bakes these kinds of delicacies. What really struck me was the ultra-soft, moist crumb and the fact that a cake can be flaky! The thin sponge layers that melt in your mouth were quite a revelation; It tasted quintessentially vanilla with hints of cream, in the most beautiful and delicate way – the ultimate yellow sponge cake, IMHO.


I went back to the bakery the following days to try more flavours and decided to taste as many baumkuchen as I could during my weeks across Japan. It wasn’t long until I started fantasising about baking cakes on a rotating spit and wondering how to achieve such a tender and layered sponge cake. The novel obsession (and frankly, also the sugar cravings) started to inhabit my daily thoughts. I needed to know: What actually is Baumkuchen? And how can I bake it at home?
Today on KP+!

Over on KP+, Alessandro has developed an alternative Baumkuchen flavour for you to try: Chocolate and Hojicha, the toasty roasted green tea. You can get the recipe below!
A Brief History of Baumkuchen
Baumkuchen, also known as Tree cake for its multi-layered cross-section, finds its origins in Germany, though it is certainly part of a broader collective European tradition of spit-roasting pastries. While it can be difficult, if not impossible, to trace the exact origins of a dish due to historical contradictions and cultural overlaps, this style of cake has been around for centuries and finds unique expressions in a multitude of cultures: From the ancient Greek obelias to the Lithuanian Šakotis, the Polish Sękacz to the Hungarian Kürtőskalács, the Romanian Baumstriezel “chimney cake” made of a sweet yeasted dough to the Czech and Slovak Trdelník, as well as the French Gâteau à la Broche. You can also find a variety of textures, like the Swedish Spettekaka, which is closer to a crisp meringue texture.
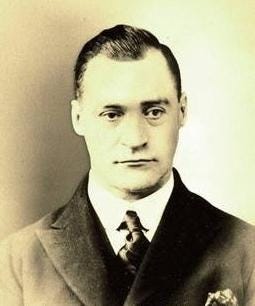
Its ever-evolving nature has found fertile soil in Japan: when German pastry chef Karl Juchheim was arrested in China during WW1and deported as a prisoner-of-war to the island of Ninoshima, he began testing his Baumkuchen recipe in the internment camp. Once the war ended, Juncheim remained in Japan and commercially debuted the German cake at the Hiroshima Prefectural Commercial Exhibition on the 4th of March 1919. This date is celebrated today in Japan as Baumkuchen Day.
The cake grew rapidly in popularity, with adaptations on flavour and texture resulting in a version that is softer and moister than the original. While in Germany the concentrical nature of the form resembles the annual rings of a tree, it has its own special meaning in Japan, where it echoes the sacred Japanese Zen Buddhist symbol Ensō. As a result, enlightenment, prosperity, good luck and longevity became associated with the baked good. Its novelty also played an important role in the Japanese etiquette of gifting, seen as a vital part of Nipponic culture.
Amongst all the variants that I ate across the archipelago, from the commercially produced to the artisanal, my very favourite remains the first one. Ikariya Beika in Kyoto. There was an obvious difference in the quality of ingredients; store-bought often presented additives such as cellulose to retain moisture, processed fats like margarine and shortening, and preservatives. But the crucial “Aha!” moment arrived when I noticed that my favourite, unlike the others, was made exclusively with rice flour! Researching it further, I learned that they use a blend of non-glutinous and glutinous rice from Shiga Prefecture. This mix gifted the Baumkuchen with the melt-in-your-mouth quality I fell in love with. This kind of texture is called fuwa-fuwa in Japanese - an onomatopoeic term used to describe the consistency of something incredibly light and cloudlike.
The Baking, aka The Beginning of The Hero’s Journey
To develop my own Baumkuchen, I knew I’d need to start with a basic sponge recipe, something in the realm of the Chiffon sponges, with whipped eggs for a very fluffy crumb. However, I knew from the get-go that inventing a rotating rod system for a home oven would be well beyond my capabilities, so instead of a concentric structure, I decided to approach it with a vertical technique that involves building layer after layer in a tin and baking it under the broiler in the oven, to attempt to mimic the Baumkuchen spit-roasting high heat.
The first try, even though I had high hopes, ended up being a huge failure. I mean… many variables were working against me. But it’s okay… we’re here for the rideeeee after all, aren’t we?
While the cake was baking, I noticed that each layer would cook and brown with different timings. Sometimes it was a couple of minutes, and other times significantly longer. I persevered despite the obvious signs that something was clearly wrong with my initial plan. At first, the cake came out of the oven looking great. I let it cool for about an hour, but sadly, when I cut into it, my heart shattered (dramatic but true): All that time whipping the egg whites and all that gentle care in folding the batter for a cake that turned out extremely dry, gummy, and dense.
The baumkuchen was way overbaked, and I had to blame the oven. I immediately realised that the first major obstacle would be the baking, even more so the recipe. The inconsistency of heat had reared its ugly head as the main enemy. This led me to start a proper character study of my oven, and my hero’s journey was about to begin. I sat down next to it with a stopwatch and started timing the broiler setting, discovering that the heating would happen in cycles. In my case, the broiler would stay on for a couple of minutes and then go off for what felt like an eternity: eight never-ending minutes !!!
After a little internet browsing, I discovered that it was a totally normal oven mechanism, designed to prevent overheating and to maintain (rather than constantly exceed) high temperatures. So, to avoid overcooking the layers, I started doing a dance with when the cake should and should not be in the oven. The cake layers only bake well when exposed to the direct, radiant heat of the electric coil once it glows red. If the cake gets left in the oven while the broiler starts its cooling process, the sponge would turn rubbery and tough, aka TERRIBLY OVERBAKED.
During my second and third tests (we’ll get to these in a bit) - I learned that by leaving the oven door open while baking the cake, the temperature sensor would not be triggered and the heating cycle would not stop, allowing me to bake the cake without any interruptions! Golden brown and yet soooft. The loophole was found. And the battle was won… for now…
THE RECIPE ITSELF aka The Second Hindrance
Given the epic journey with the oven, I thought this part would be easier. Utterly oblivious, I embarked on a new arduous expedition to formulate the recipe. I started by deciphering the ingredient list of Kyoto’s baumkuchen as a jumping-off point: eggs, sugar, butter, vegetable oil, rice flour, fresh cream, tapioca starch, rice starch, rum, salt, vanilla, baking powder, and emulsifiers. All the elements fall into the category of a classic chiffon cake. I noticed the use of two different starches, but to simplify the process, I decided to stick with tapioca starch. It’s derived from the cassava root and is widely used to achieve a fluffy, light and spongy texture in gluten-free baking.
I started with a base ratio of 6 eggs and then built it from there.
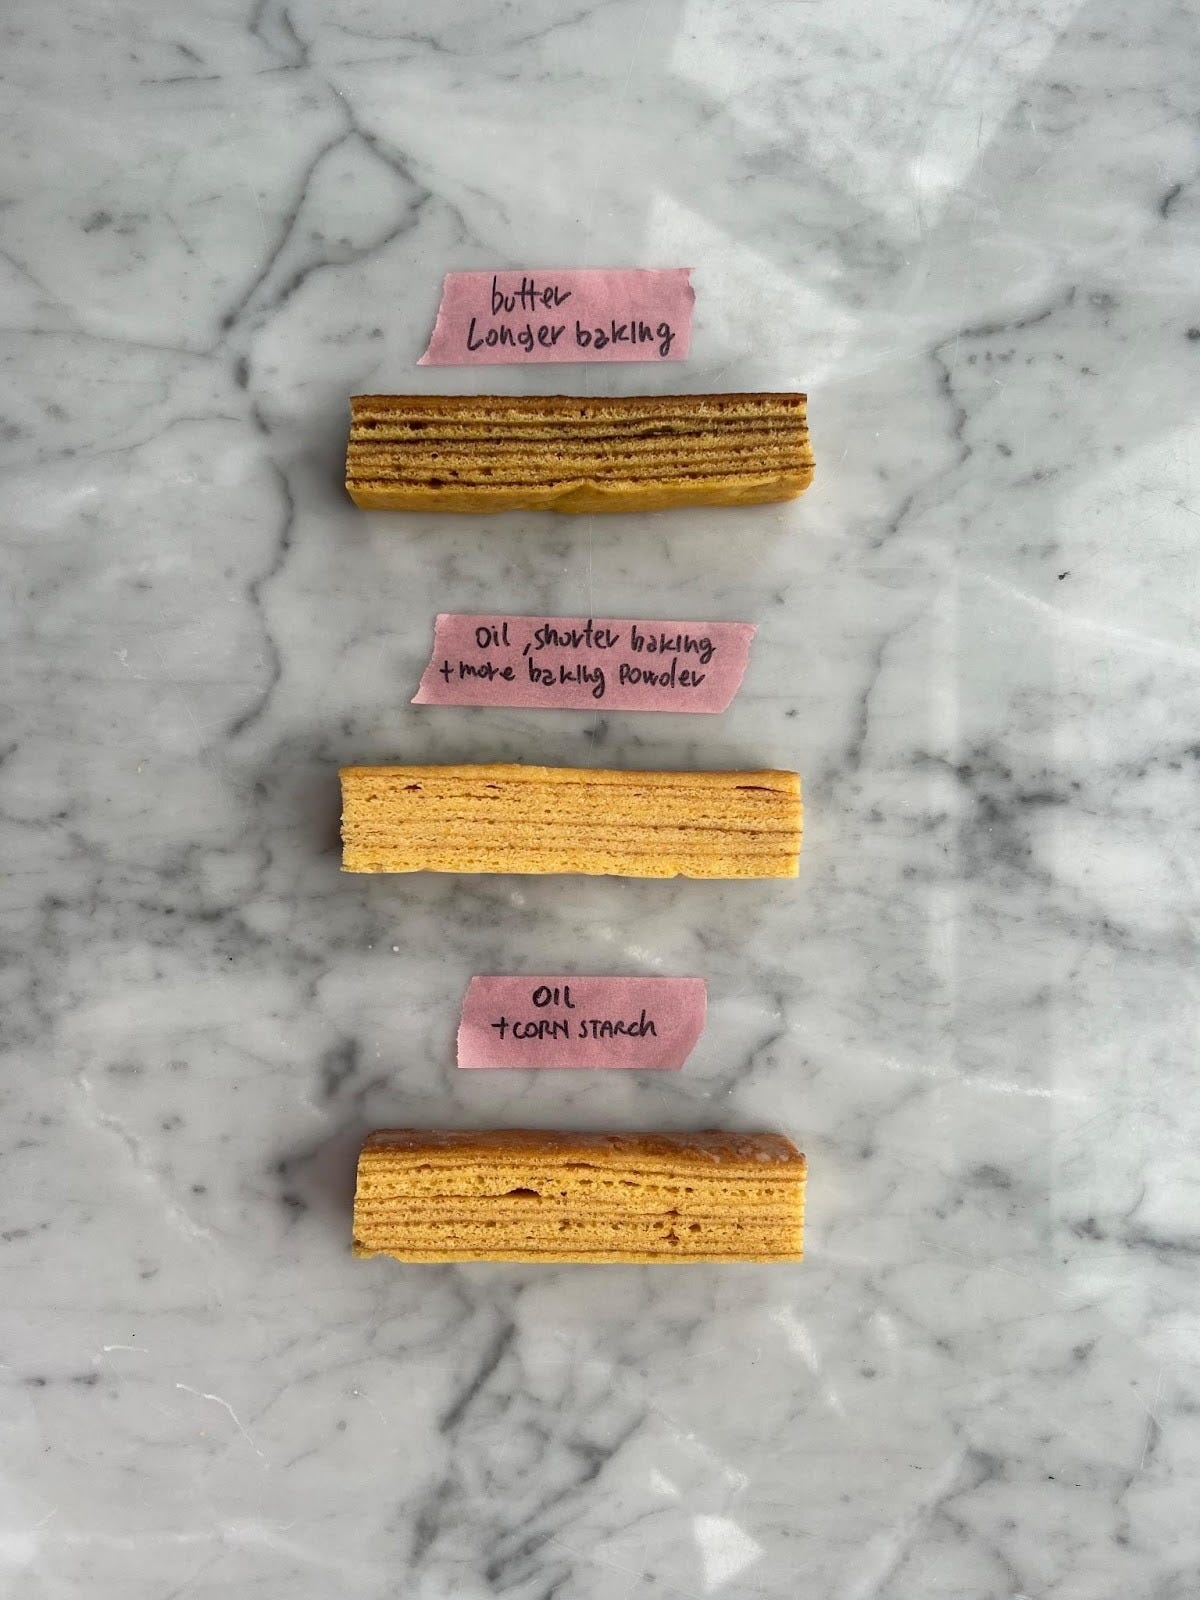
The first attempt had 1 tsp of vanilla, 1 tsp of rum, 100gr double cream, 60gr of melted butter, ½ tsp of fine sea salt, 140gr of sugar, 100gr of rice flour, 20gr of tapioca starch and ½ tsp of baking powder, all baked in a 10-inch tin. It unfortunately resulted in a very dense cake. For the second test, with the goal of a softer crumb, I swapped the butter for oil, increased the baking powder and shortened the baking time for each layer. The result was much better than the first one, but I wasn’t satisfied. For the third trial, I decided to test it with cornstarch instead of tapioca starch, which is easier to find (thinking of you, home bakers), and I hoped it would solve all my problems. I was wrong, pretty wrong.
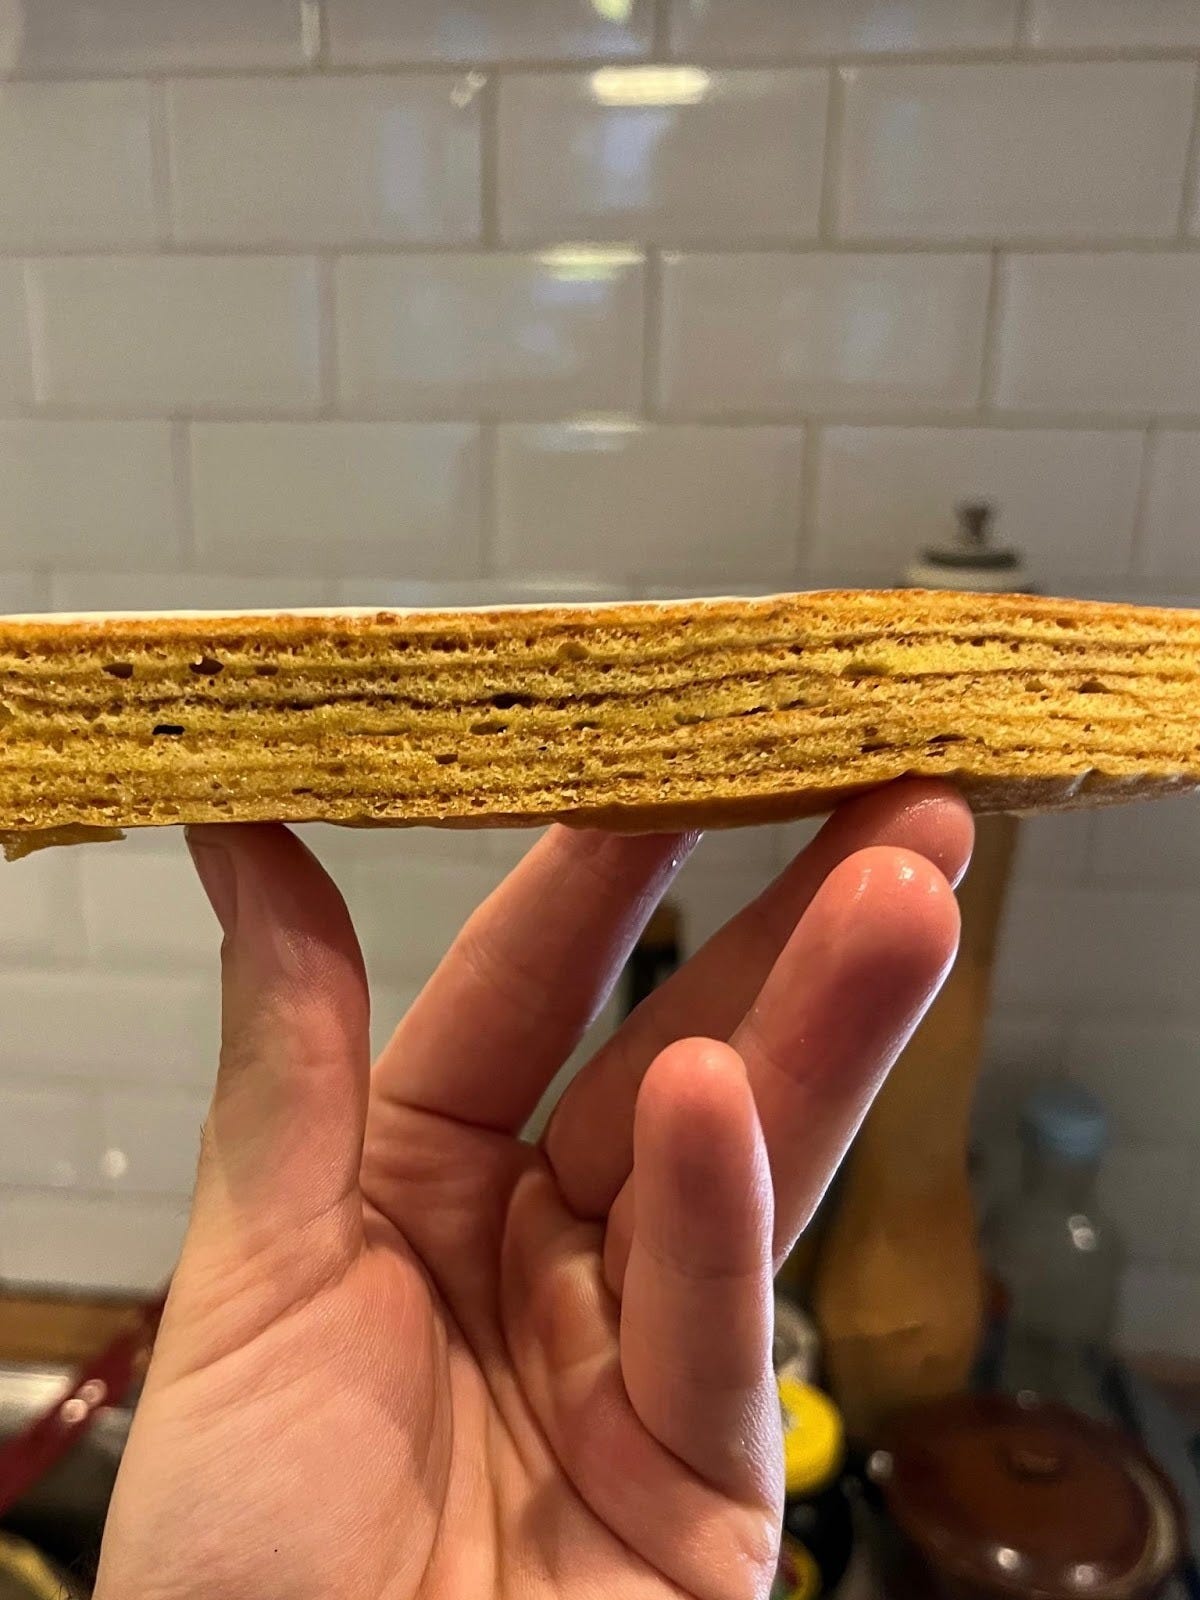
The baumkuchen turned out drier, crumblier, and with a firmer crumb. So for the fourth test, I went back to the second recipe with tapioca starch, my favourite so far. In search of more layers (taller cake) and a more flavourful and moist crumb, I opted for two crucial changes: baking the cake in an 8-inch pan instead of a 10-inch pan and increasing the liquids (cream, rum, vanilla and sugar) and fat. The cake turned out taller, softer and very delicious. I was very happy. I felt like we were almost there.
The downside was that the crumb was now a bit too wet. I overshot it with the additions. I had managed to nearly double the number of layers of the first attempts, but I couldn’t help but notice that the last 4 layers lost too much volume. So, to avoid that, I decanted the cake batter into a new bowl once it was ready, just to make sure no unmixed yolk mixture remained at the bottom.
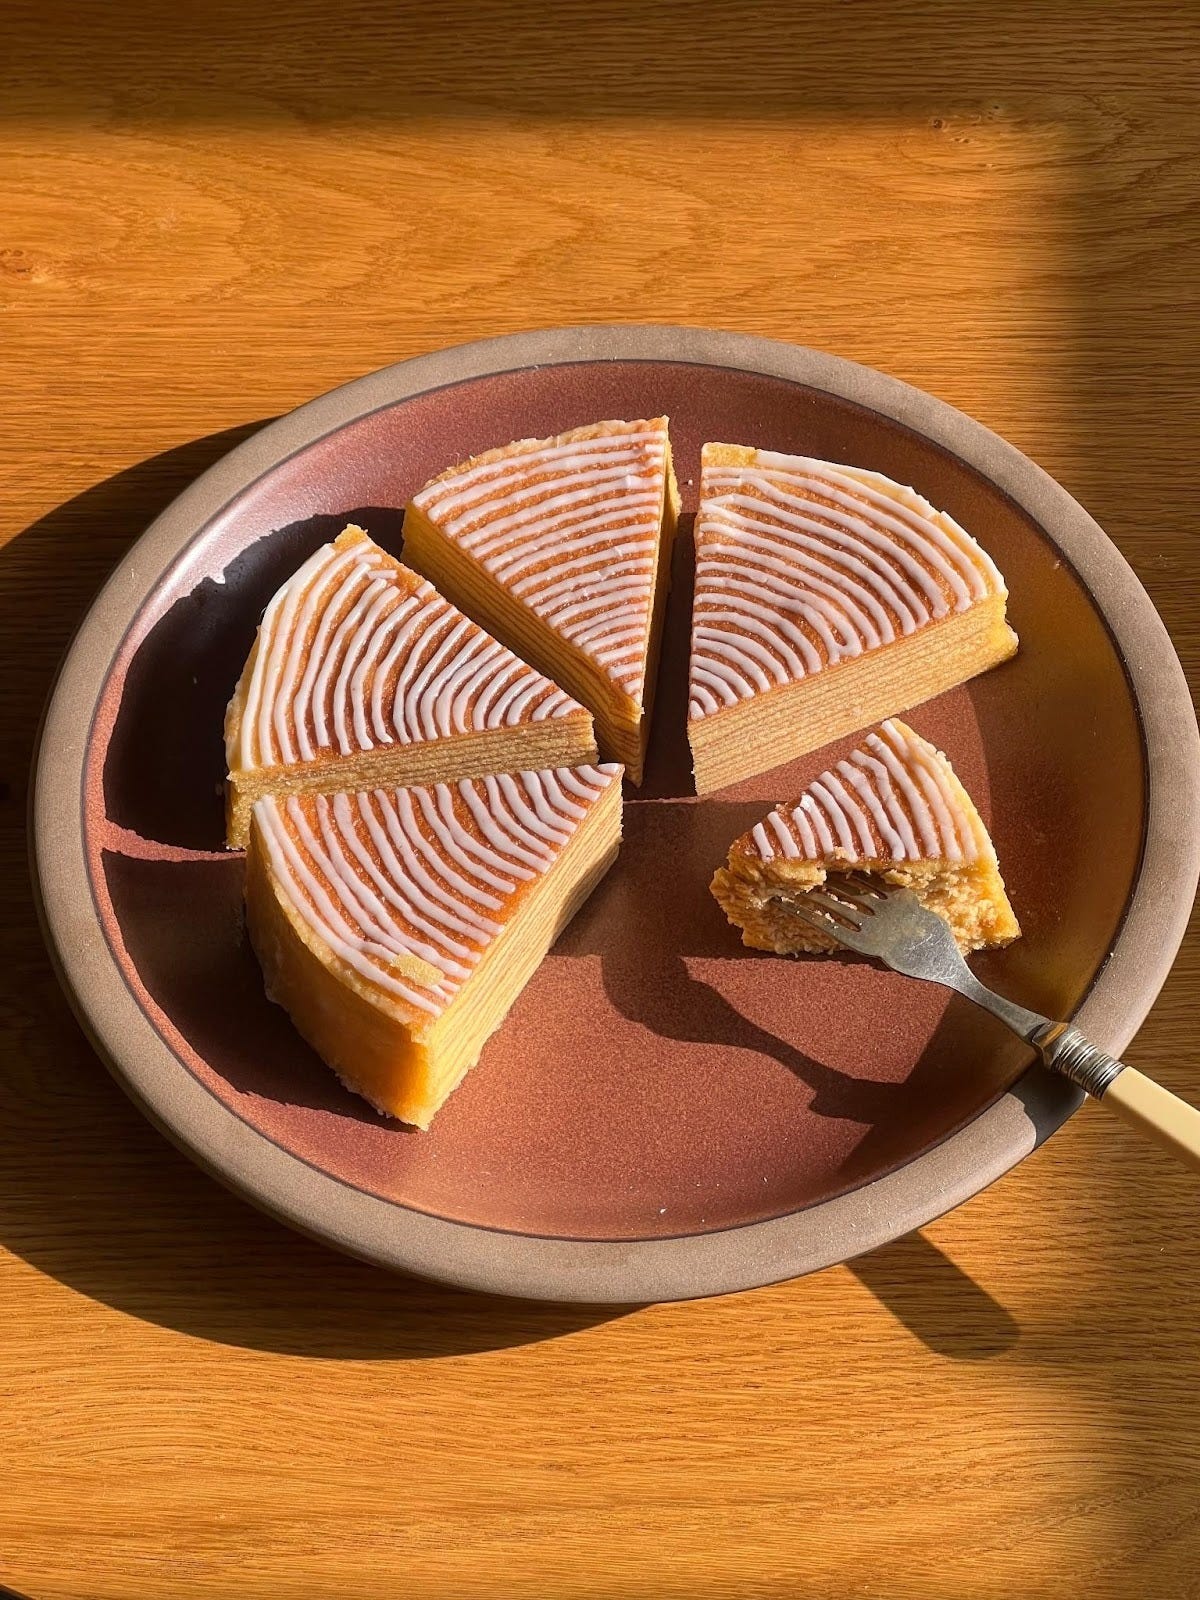
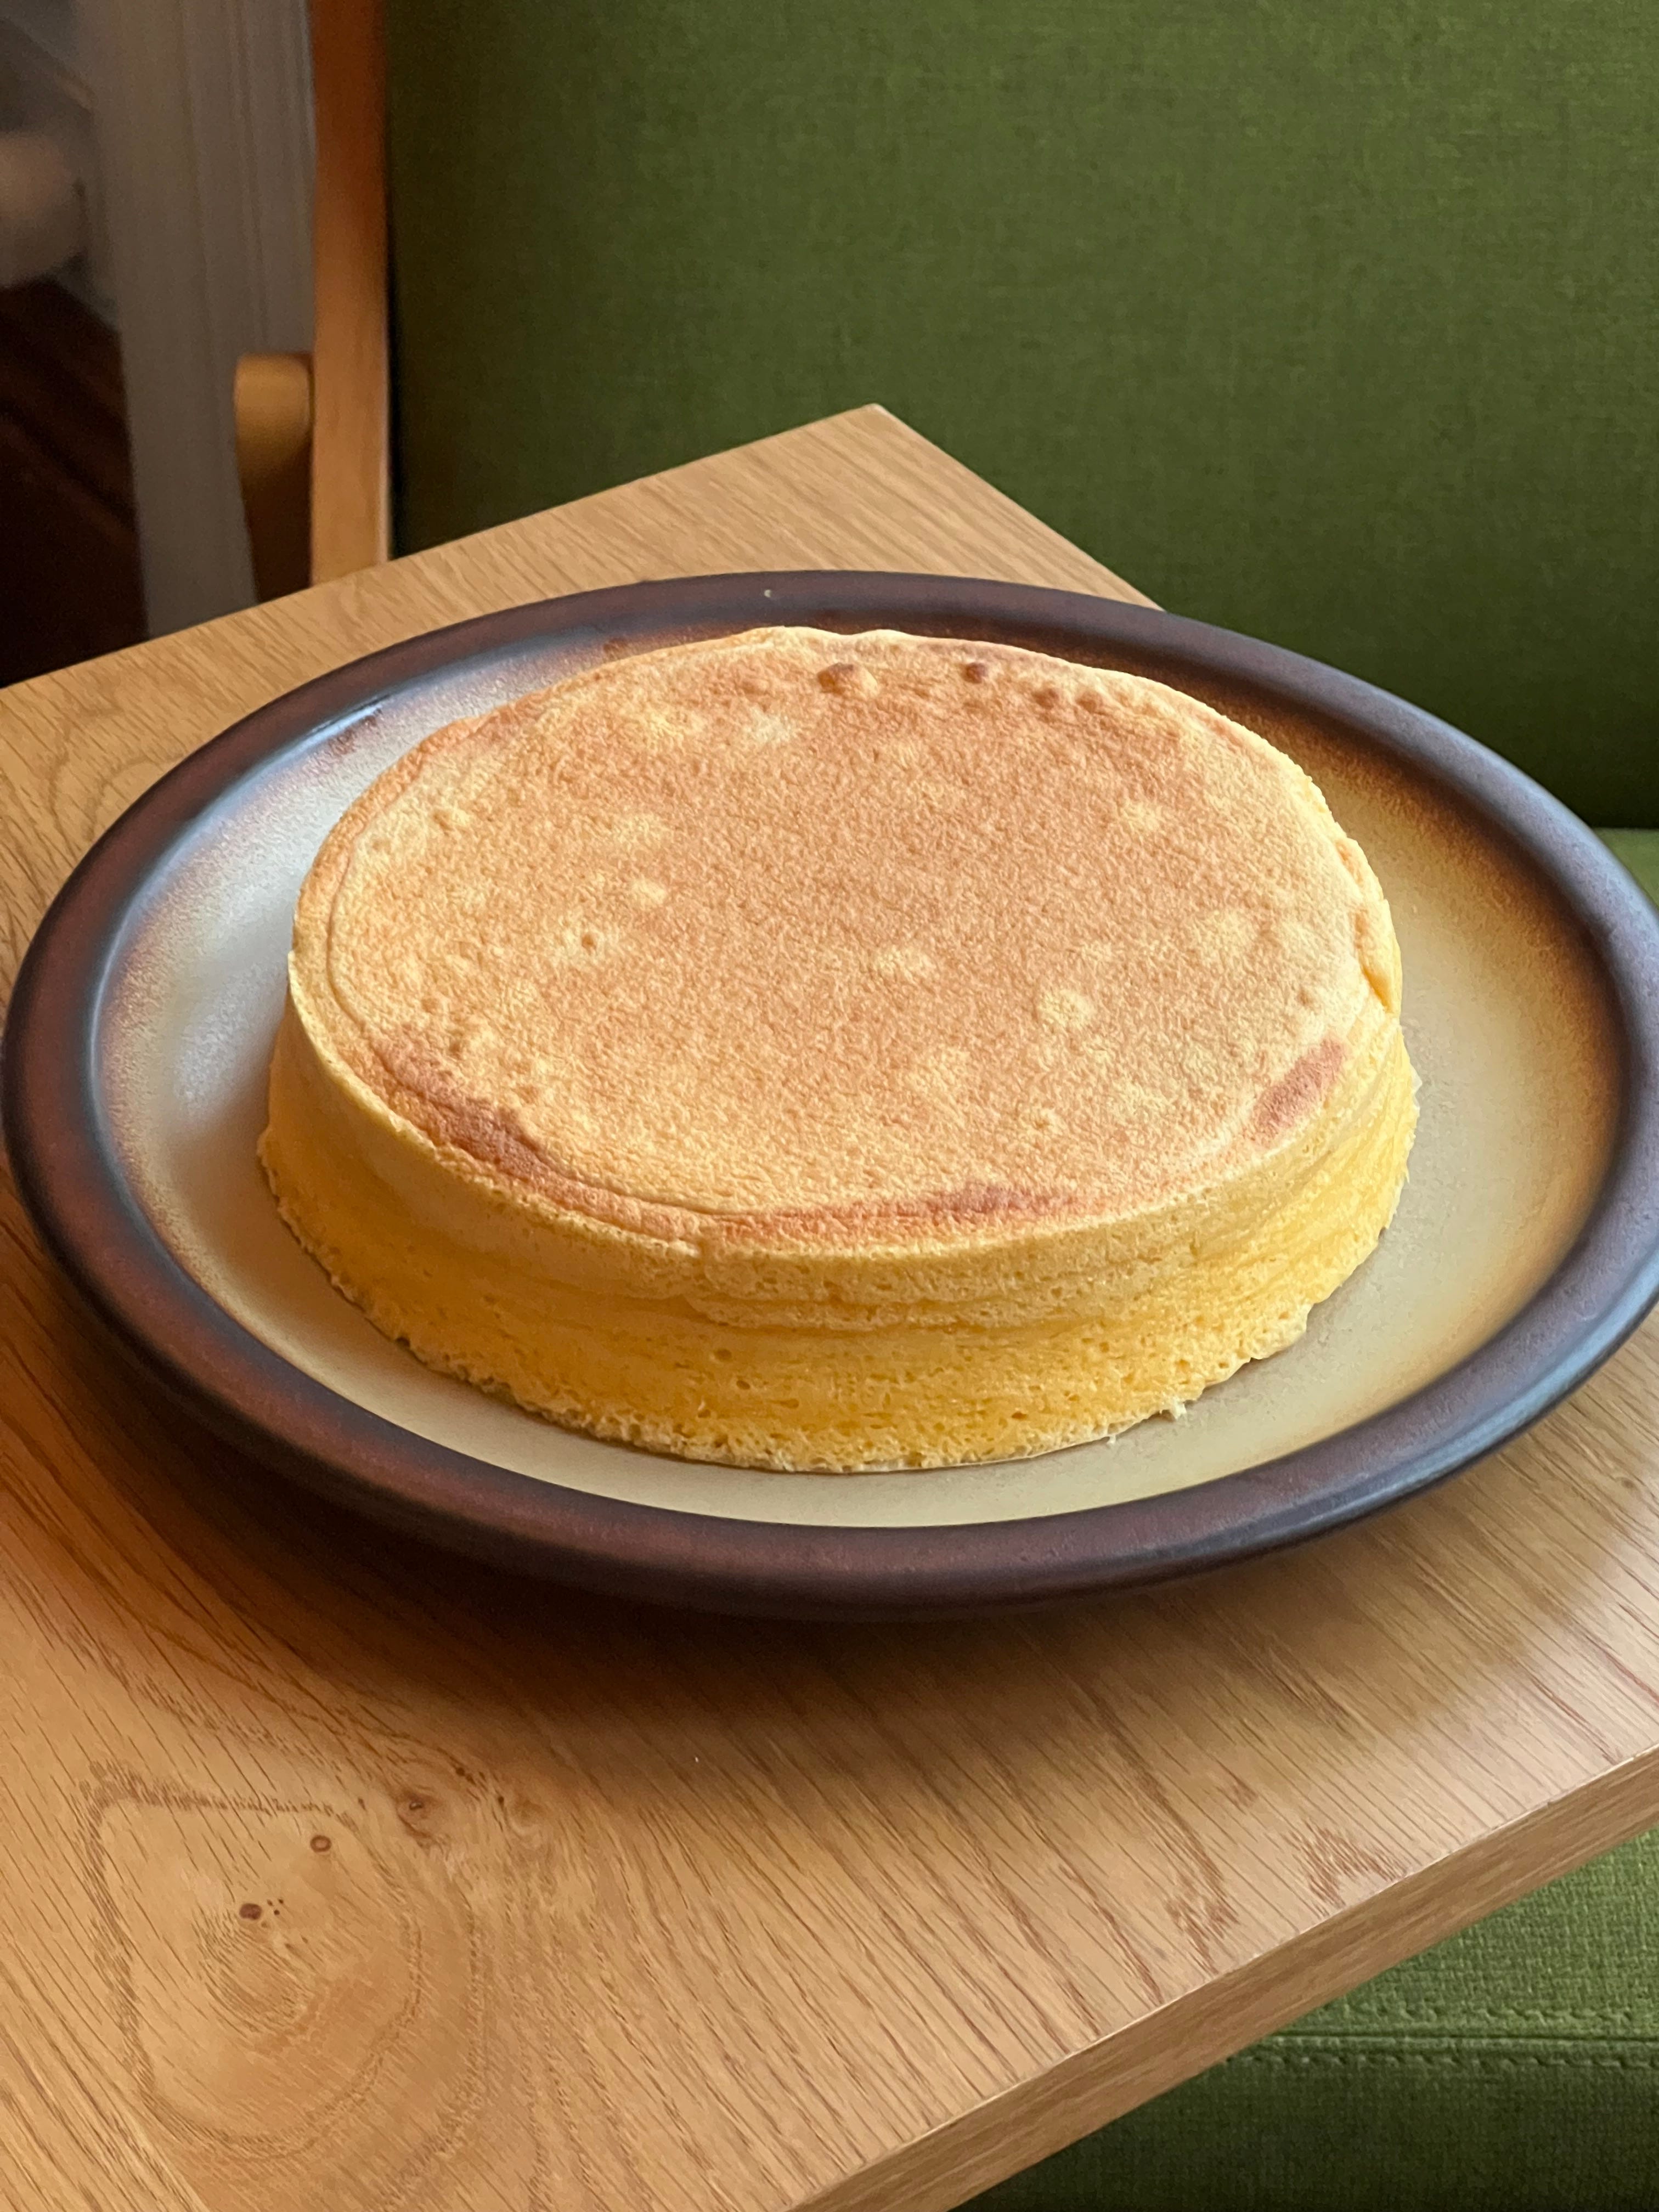
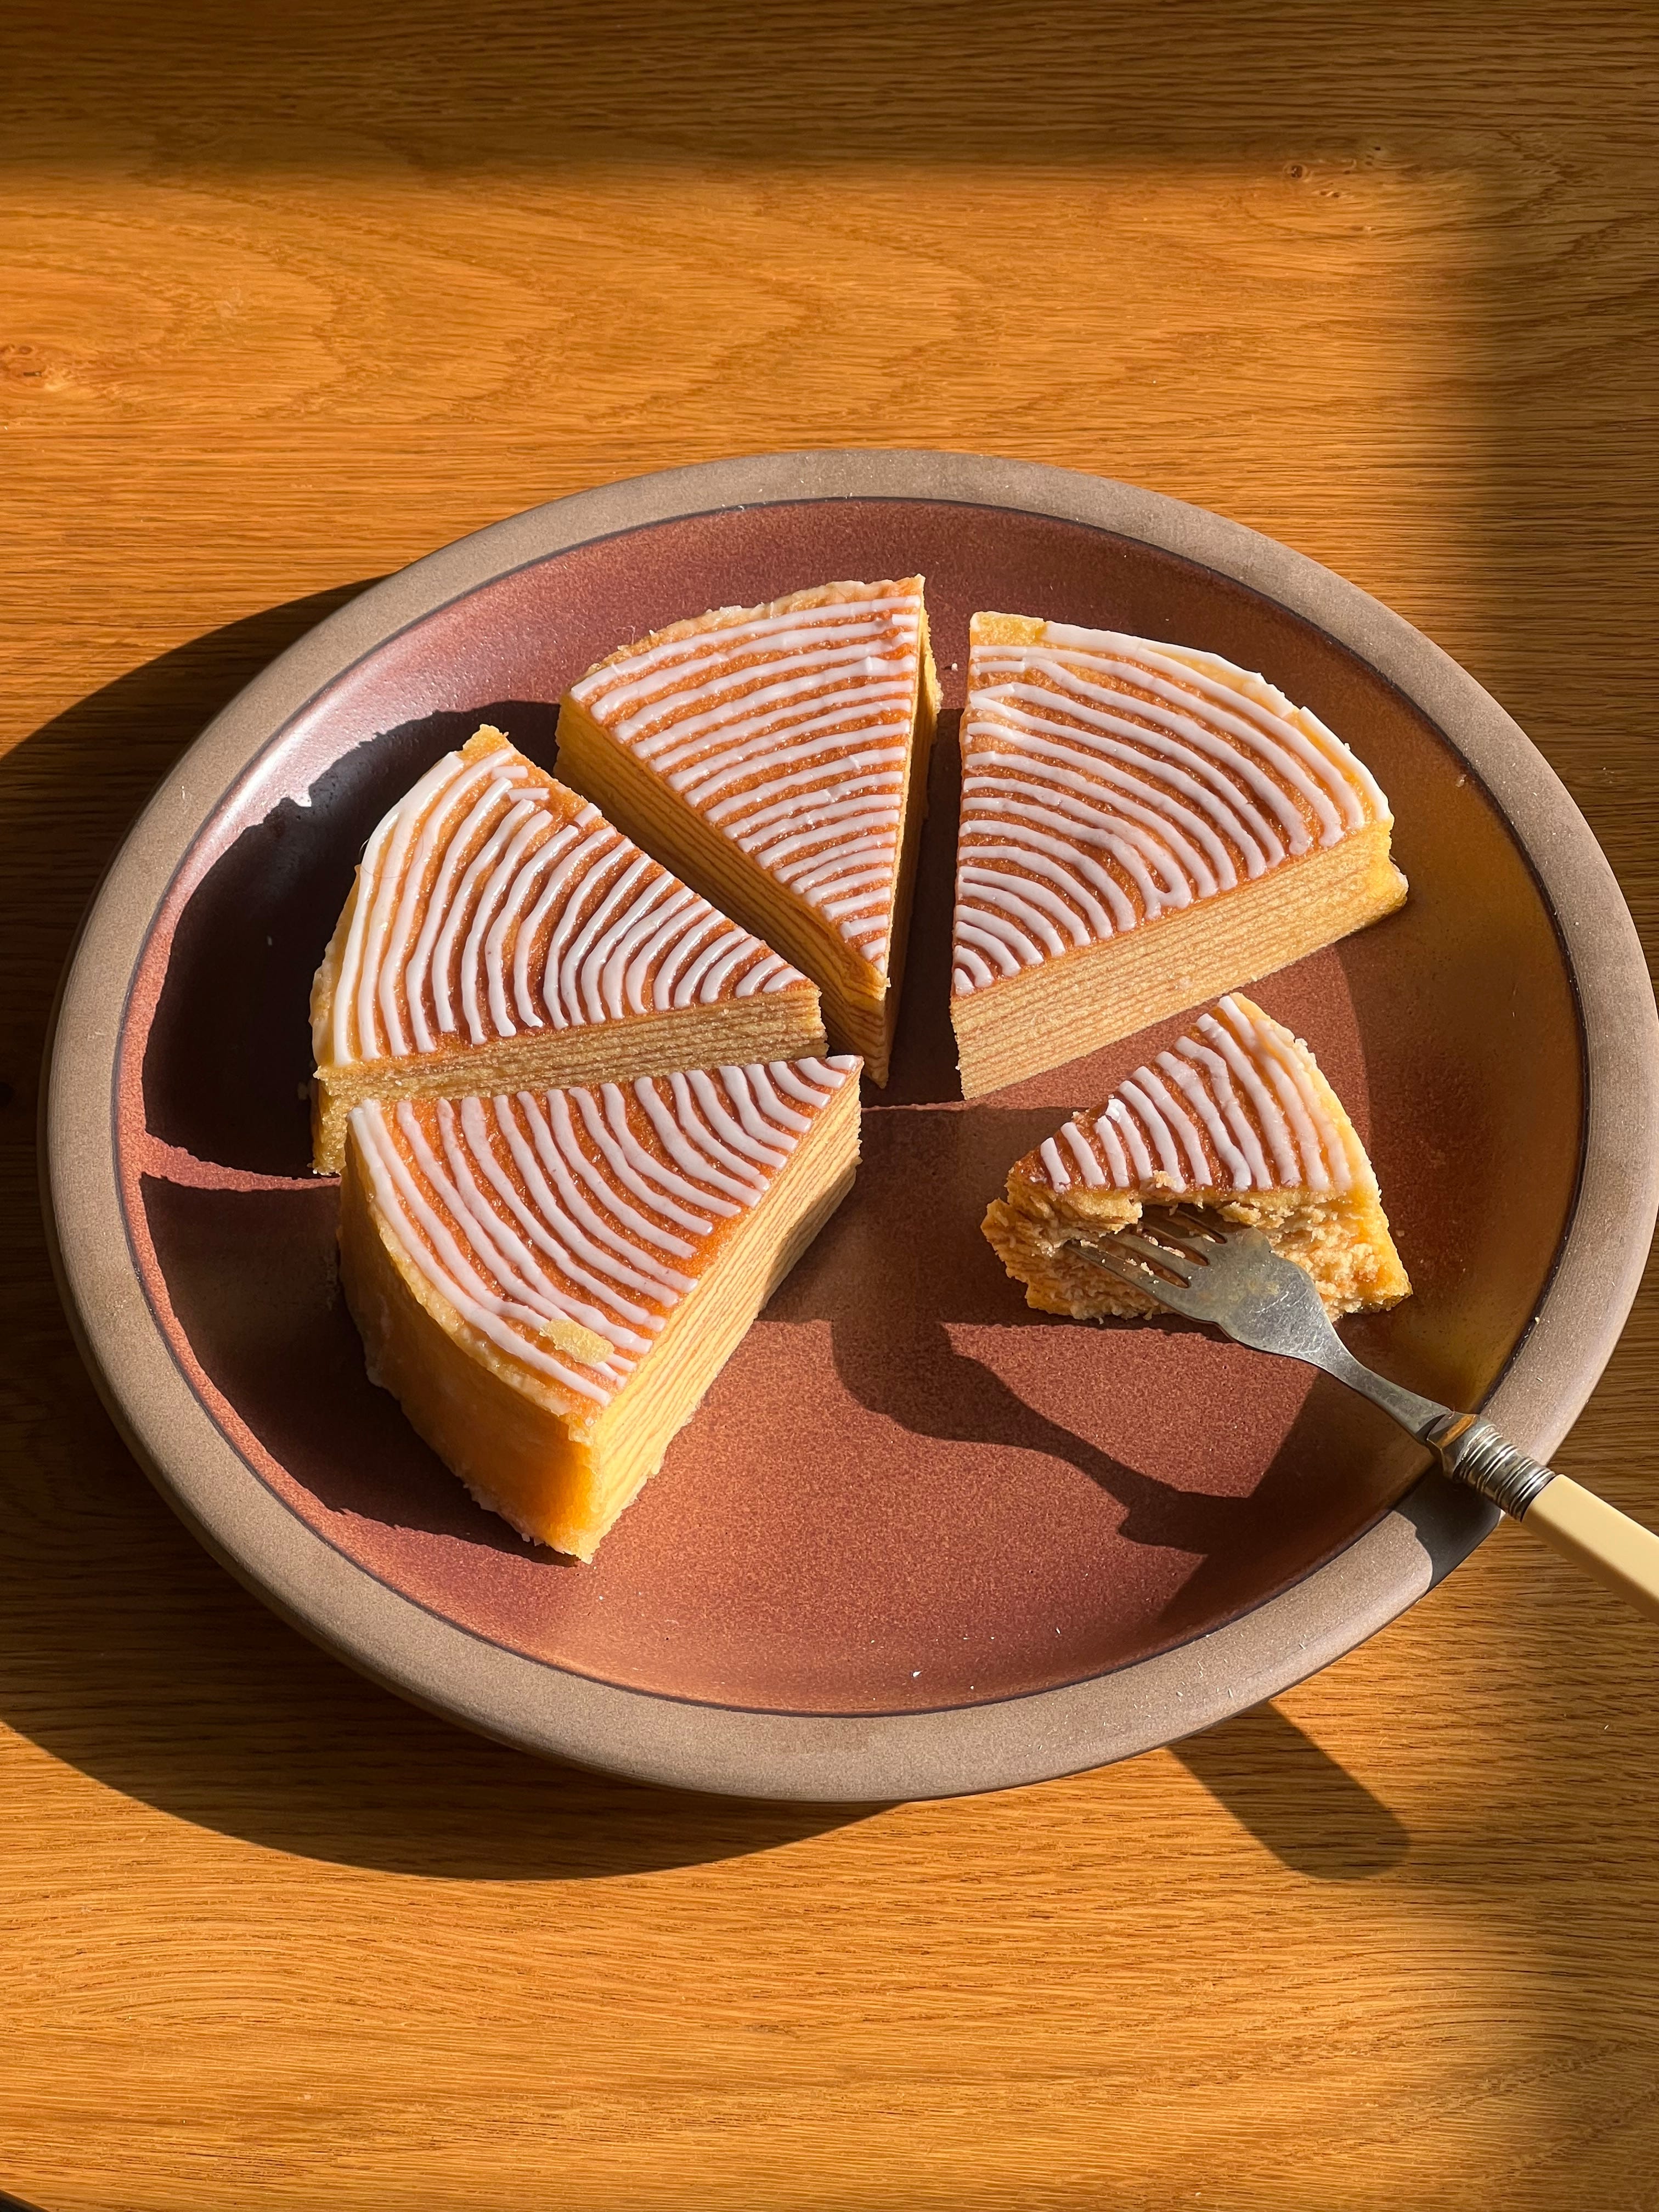
The fifth test turned out to be our recipe! I slightly decreased the liquids and fat and added a bit more salt - and BAM! We got it! As for the glaze, I tried a few times to ice it with a thin coating like the original I ate. But it always looked too unappealing. Instead, I decided to pipe a thicker glaze to mimic the concentric nature of the traditional Baumkuchen. If you don’t feel like piping, totally acceptable; omit this step and simply cover it with icing sugar. The cake really benefits from that little sweet kick. Trust me.
RECIPE: BAUMKUCHEN
Makes 1x 8-inch round cake (the tin is 4 inches tall), serves 6-8
Baumkuchen sponge:
6 Eggs
50g caster sugar (I)
100g caster sugar (II)
110g double cream
75g vegetable oil
¾ tsp fine sea salt (4 grams)
1 Tbsp dark Rum
1 tsp good quality vanilla extract
100g Rice flour
20g Tapioca starch
1 tsp Baking powder
Glaze:
30g icing sugar
¾ tsp water
½ tsp vanilla extract
Method
Line the bottom of the tin with parchment paper.
Divide the eggs. In a medium bowl, whisk the egg yolks by hand with the 50g caster sugar (I) and the salt until pale, about 2 minutes. Add the rum, vanilla extract, oil, double cream and whisk until fully incorporated.
In a different bowl, whisk together the rice flour, tapioca starch and baking powder. Now sift the dry ingredients over the egg yolk mixture and mix until combined.
With the help of a stand mixer or an electric whisk, whisk the egg whites on high speed for about 20 seconds to break them down, then continue whisking on medium speed, gradually adding the caster sugar (II). Keep whisking until you obtain a glossy meringue with stiff peaks.
Preheat the oven to 200 °C with the broiler (grill) on, place a rack closer to the top, and make sure to leave the oven door open.
With the help of a hand whisk, fold the whipped egg whites into the egg yolk mixture in three additions.
Once the broiler electric coil is glowing red, you can start the dance of baking the Baumkuchen. Add 50 grams of the batter into the tin, spreading it into a thin layer with the help of a spatula. Place the tin in the oven, leaving the door open, and bake for about 1.5-2 minutes ( or until you notice it starting to brown). Being extra careful and using a dry kitchen towel, remove the cake from the oven, add 50 grams of the batter, spread it as uniformly as you can and return it to the oven. Bake for 2 minutes more ( or until you notice it starting to brown).
Continue now with the remaining batter. You should get about 13-14 layers. You might need to sacrifice the last bit of batter if it seems too liquidy and runny. It’s okay. We don’t want a rubbery layer anyway.
Let the cake cool in the pan, then transfer it to a plate.
To finish, mix the icing sugar with the vanilla and water to create a paste – you might need to add a bit more icing sugar or a drizzle of water to get a paste that is just thick enough to pipe.
With the help of a piping bag, pipe a spiral starting from the centre outwards. Let the icing dry for about an hour. Cut and serve. The cake will last for about a week, well wrapped, at room temperature. If anything, it will get better with time!
 | A guest post by
|
What temp does the grill / broiler need to be on? And what size eggs? UK large or medium?
Can I omit the rum? And would I need to increase another ingredient to compensate?