Kitchen Project #19: Hot cross custard buns
The trials and tribulations of a seeking a hot cross adjacent bake
Hello!
Welcome to another edition of Kitchen Projects, a recipe development and cooking journal. It’s so lovely to see you here. This week, I’ve been exploring Easter energy doughs. I guess you could say I’ve been having lots of ‘hot cross fun’ (sorry, not sorry).
Last Sunday I opened up Kitchen Projects+ (aka KP+, which I know is reminiscent of the snack nut brand) - thank you SO much to everyone who has joined in. It’s been such a blast chatting on this thread about the future of Kitchen Projects, as well as discussing April cooking projects and ingredients inspo here, too. If you haven’t chimed in yet then please click those links and join in the convo! I’d really love to hear from you.
Here’s a little rundown on what’s coming this week on KP+:
Today I’ve sent out a guide to candying fruit, an essential skill to add to your toolkit! It’s such an important process to nail and I think gets done totally wrong, way too often. Click here to check it out
I’m very excited to announce that the special hot cross bun recipe I developed for my collaboration with Le Swine will be coming out on Wednesday! Hurrah!
Anyway, if you’d like to join the gang then hit the subscribe button below. It would be so great to see you there, too:
Alright, let’s get on with this weeks newsletter. It’s a fun one.
Love,
Nicola
Welcome to the extended hot cross bun family
So, Easter is almost upon us. I’m already excited for the discounted Lindt rabbits come Monday.
This week, I finally got to shout about my limited-edition collaboration with Le Swine, the maker’s of the best bacon butty EVER. A month ago, James (the founder) got in touch and asked me to create the best hot cross bun possible for a special Easter meal kit. The concept of a hot cross bacon bun totally blew my mind and I had so much fun sending James buns back and forth in the post until we got it perfect And guys, it is perfect: an ultra fluffy but still traditional bun that is pillowy enough for you to rest your head on, zesty enough to wake you back up.
*That* recipe is going to drop on Wednesday on KP+ (and the deadline for getting your own meal kits for Easter weekend is coming up, too - click here to order one!) but I obviously wanted to create something special for the Sunday newsletter.
So, I am so overjoyed to present you the hot cross custard swirl! It was a bit of a journey getting to this recipe so I’m pretty excited to share it with you. Let’s do it!
Hot cross buns = ?
SO, we should talk about what makes a hot cross bun... a hot cross bun. First of all, it’s the spicing. A good mixture of ginger, cloves (although not too much… things tend to get really Victorian really quickly), cinnamon and cardamom does the trick for me. Second of all it’s the festive additions – mixed peel and dried fruit, usually a mixture of raisins and sultanas.
With this in mind: what is hot cross bun adjacent? First I thought about cinnamon buns. I love them, but I wasn’t sure they’d be better with raisins in. I considered a pull apart monkey bread style loaf with a richly spiced sugar but again, I wasn’t convinced about the addition of dried fruit. I thought about an Eccles cake style version where I’d make a buttery raisin-y mixture and then surround it with dough and bake it… but, I wasn’t sure it would work without the flaky, sugary puff shards.
And then I thought about the sleeper hit of the century – the pain aux raisin: A total hero of the viennoiserie cabinet, with its perfect marriage of custard, fruit and dough. And as I mused on how unpopular the PAR is, I suddenly remembered an even more undervalued member of the viennoiserie family: The pain suisse.
The pain suisse is a glorious creation – brioche dough is spread with thick custard and covered in chocolate chips. The dough is then folded over on itself and cut into slices. The custard oozes out very seductively when baked and little melty chocolate chips can be seen too. It is such a hit and yet hardly ever seen.
Even though they have both long been cast aside for the scene stealing pain au chocolat, Easter time feels the perfect time to create my ode to the PAR and pain suisse. We all like an underdog, right?
Making a plan of attack!
So, I decided to give it a go: a hot cross bun esque dough - with much less fruit and peel – and finished with custard, more fruit and more peel.
As this was a totally from scratch testing process, there were quite a few failures and I had to make the dough about 7 times before landing on *just* the right formulation.
Pre-game: the dough itself
Knowing I would be putting the spices in the form of either custard or in a butter, I built a new dough recipe from scratch. Since the dough itself would not be spiced, I still wanted it to have a deep distinct flavour. To do this, I decided to use molasses. Pure molasses syrup has such a beautiful intense flavour that used in moderation gives a brilliant dimension of complex sweetness to a dough. You do need to use it with caution as it is quite strong.
If you don’t have molasses, then black treacle, malt syrup or – in a pinch – dark brown sugar would work too. It is worth noting that molasses is 22% water, so if using dark brown sugar it is advisable to replace 20% of the weight with water e.g. if a recipe calls for 100g molasses, you could use 80g dark brown sugar dissolved in 20g water. It isn’t a perfect substitution but it will get you where you need to go.
Since I was going to be spicing the whole thing later with the spiced butter, I didn’t put anything into the dough except orange zest. This felt SO WRONG. An un-spiced HXB dough? It felt like someone should have broken into my kitchen to arrest me. I also slashed the amount of fruit and peel in the dough massively knowing I’d be sprinkling a fair bit on top.
Test 1: Laminated spice butter dough
I was pretty excited about this spice butter concept – I was imagining the butter melting and infusing all the dough around it – dreams.
Once the dough was mixed, I chilled it overnight to make it easier to roll out and laminate the next day. Before rolling it out, I mixed soft butter with ginger, cardamom, cinnamon and mixed spice to make a gorgeous compound butter which I could definitely eat spread on toast. This spiced butter was then smeared all over a thinly rolled out dough and I put a single turn in it before popping it back in the fridge to rest.
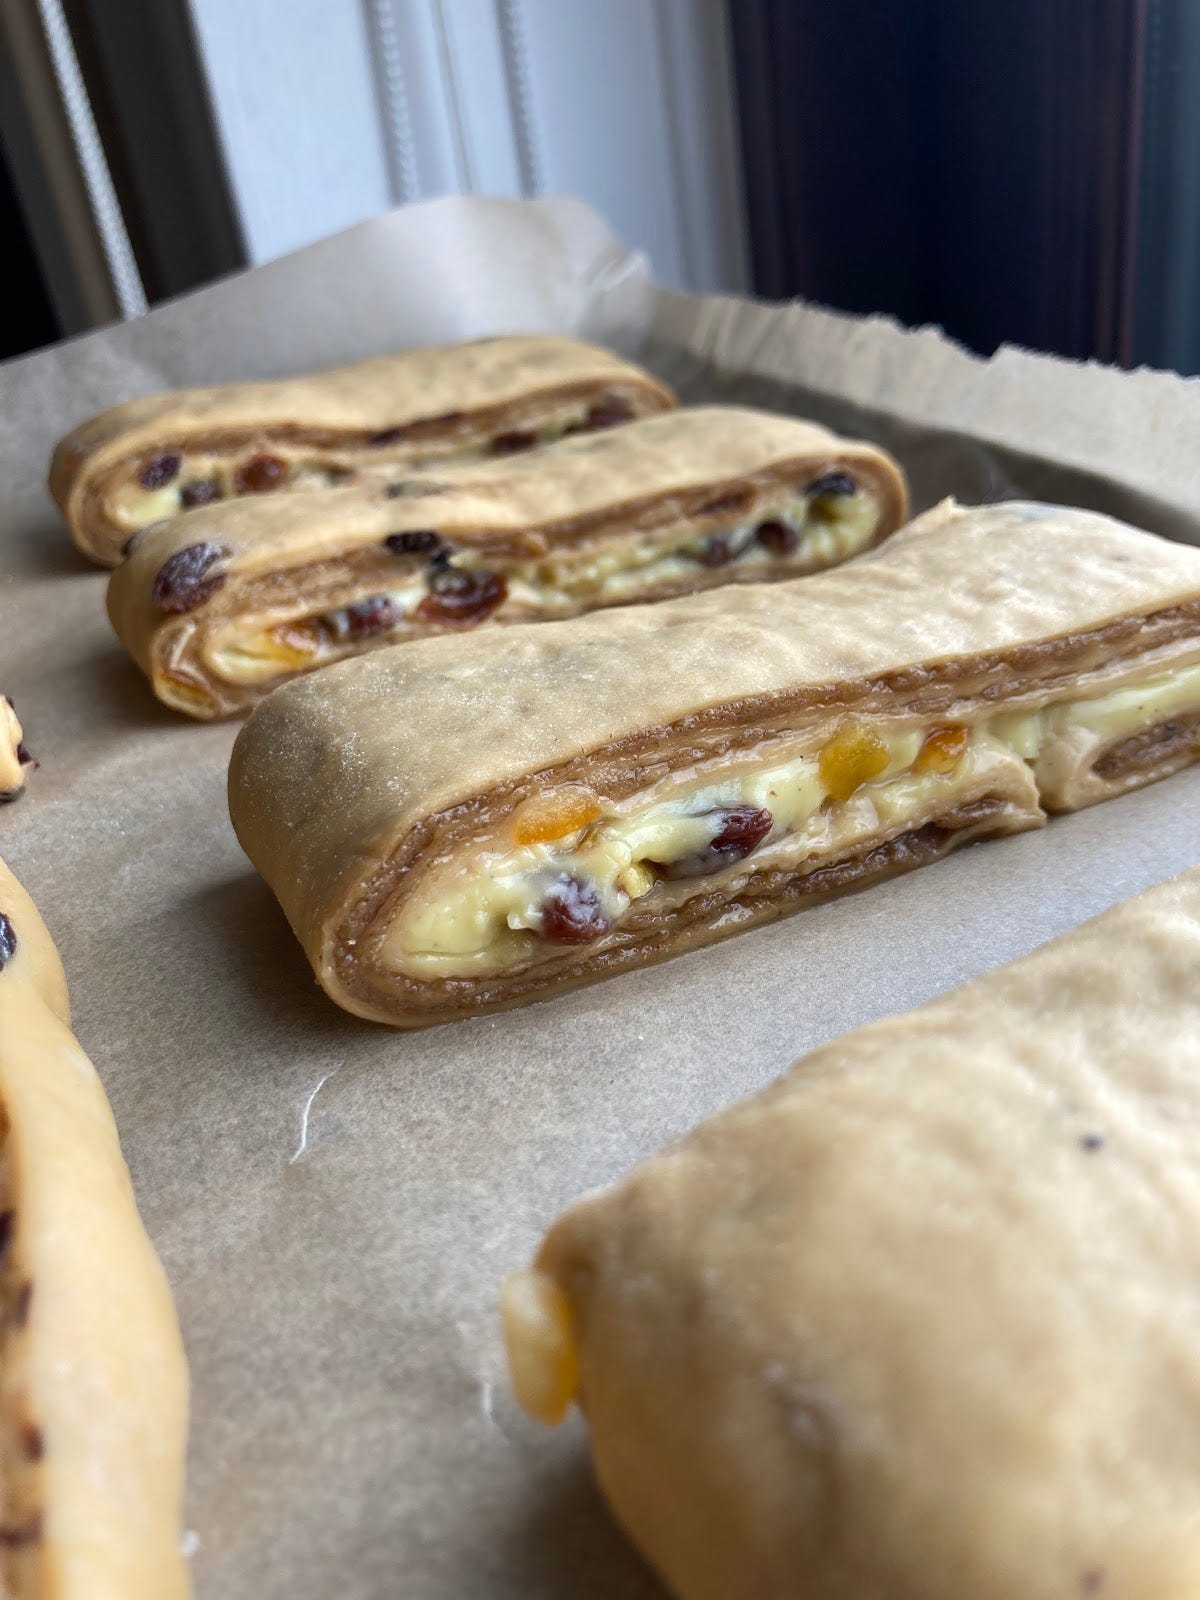
When it was all relaxed and the butter had firmed up (about 30 mins), I rolled it out and covered the dough with my prepped custard, soaked fruit and mixed peel then folded it in two, joining it in the middle. I chilled the whole dough in the freezer so the custard wouldn’t splurge out when cutting into it. This took about 30 mins. I cut and scaled the buns and got them ready to proof:
I was SO excited about baking these. Although I was worried that the spiced butter layer might be a bit thick (I was pretty generous and performing only 1 x single fold means the butter is reasonably thick still when it goes into the oven which can lead to major leakage etc.). I umm’d and ahh’d about whether to put a flour cross on it. I figured NOT. It seemed a bit OTT at the time. I baked them for about 18 mins and here’s the result:
A bit leaky but OMG these were delicious. And actually those leaky bits = crisp cinnamony sugary skirts. Which are great.
Test 2: Spice infused custard time
Instead of spicing the dough OR using a spice butter later on, I thought about whether an infusion of the custard could work well. I decided to spice the custard by simmering whole spices and peels and leaving for 1-2 hours (covered) to infuse, finally turning that into crème pat. I was a bit concerned that it didn’t have enough flavour but LET ME TELL YOU – this spiced custard was SO beautiful. It really knocked my socks off actually – even though it had seemed super subtle at the time.
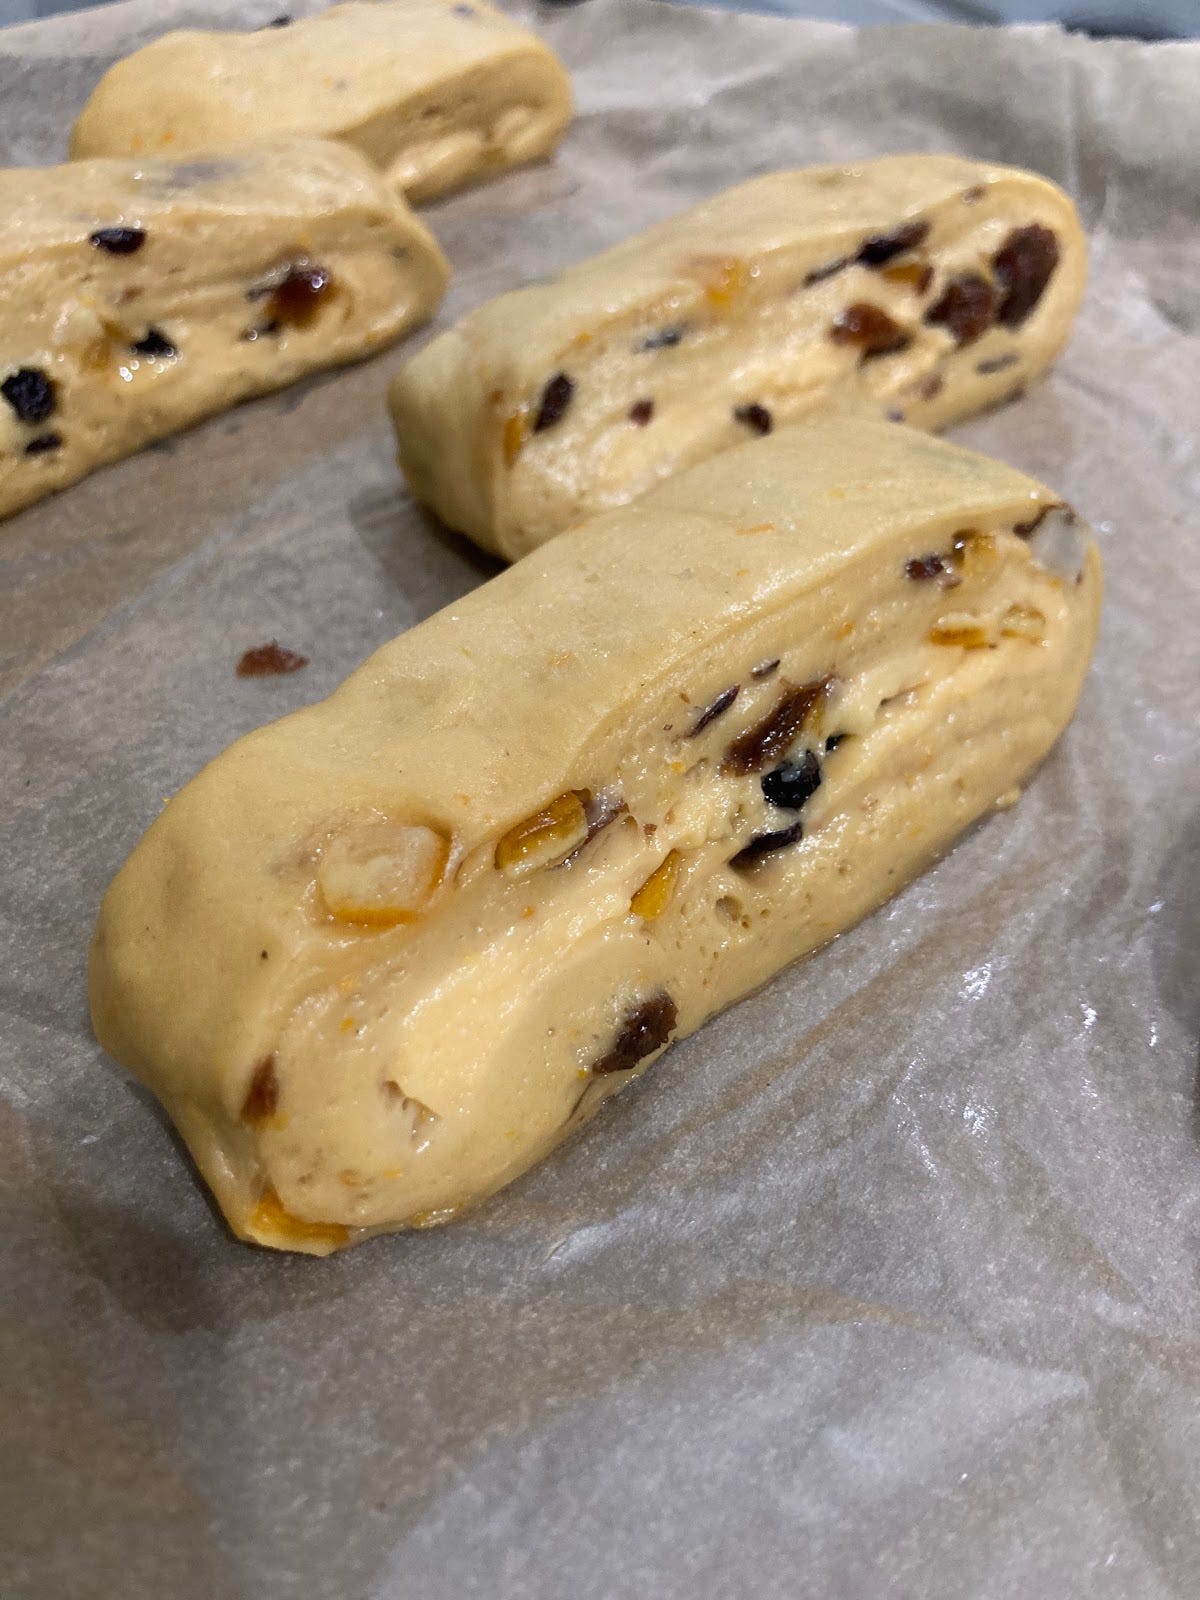
I covered the dough with the custard and proceeded to shape it like a pain suisse and popped in the freezer to chill. The last test, although delicious, had been bloody massive so when I cut this test I tried to go a bit smaller:
Unfortunately, I don’t think I rolled my dough out thin enough because as these proofed they started to be way taller than they were wide. RECIPE FOR DISASTER – I was watching them rise and seeing the dough get more and more unstable as they went. Before I even baked them, I knew these babies were definitely going to fall over in the oven. Well… not all of them:
As much as I was loving the pain suisse shape, it wasn’t perfect. So, I wondered if I could get to where I wanted to go by taking inspo from the Pain Aux Raisin shape and swirl it up instead. I’ll revisit the pain suisse sometime in the future…
Test 3: Le Swirl
I followed all the same steps as Test 2 but instead of making the pain suisse shape, I rolled the dough up into a swirl and sealed at the end. If you are really badass, you can cut the dough immediately but I always prefer to give things a rest in the fridge. Custard splurges really drive me insane.
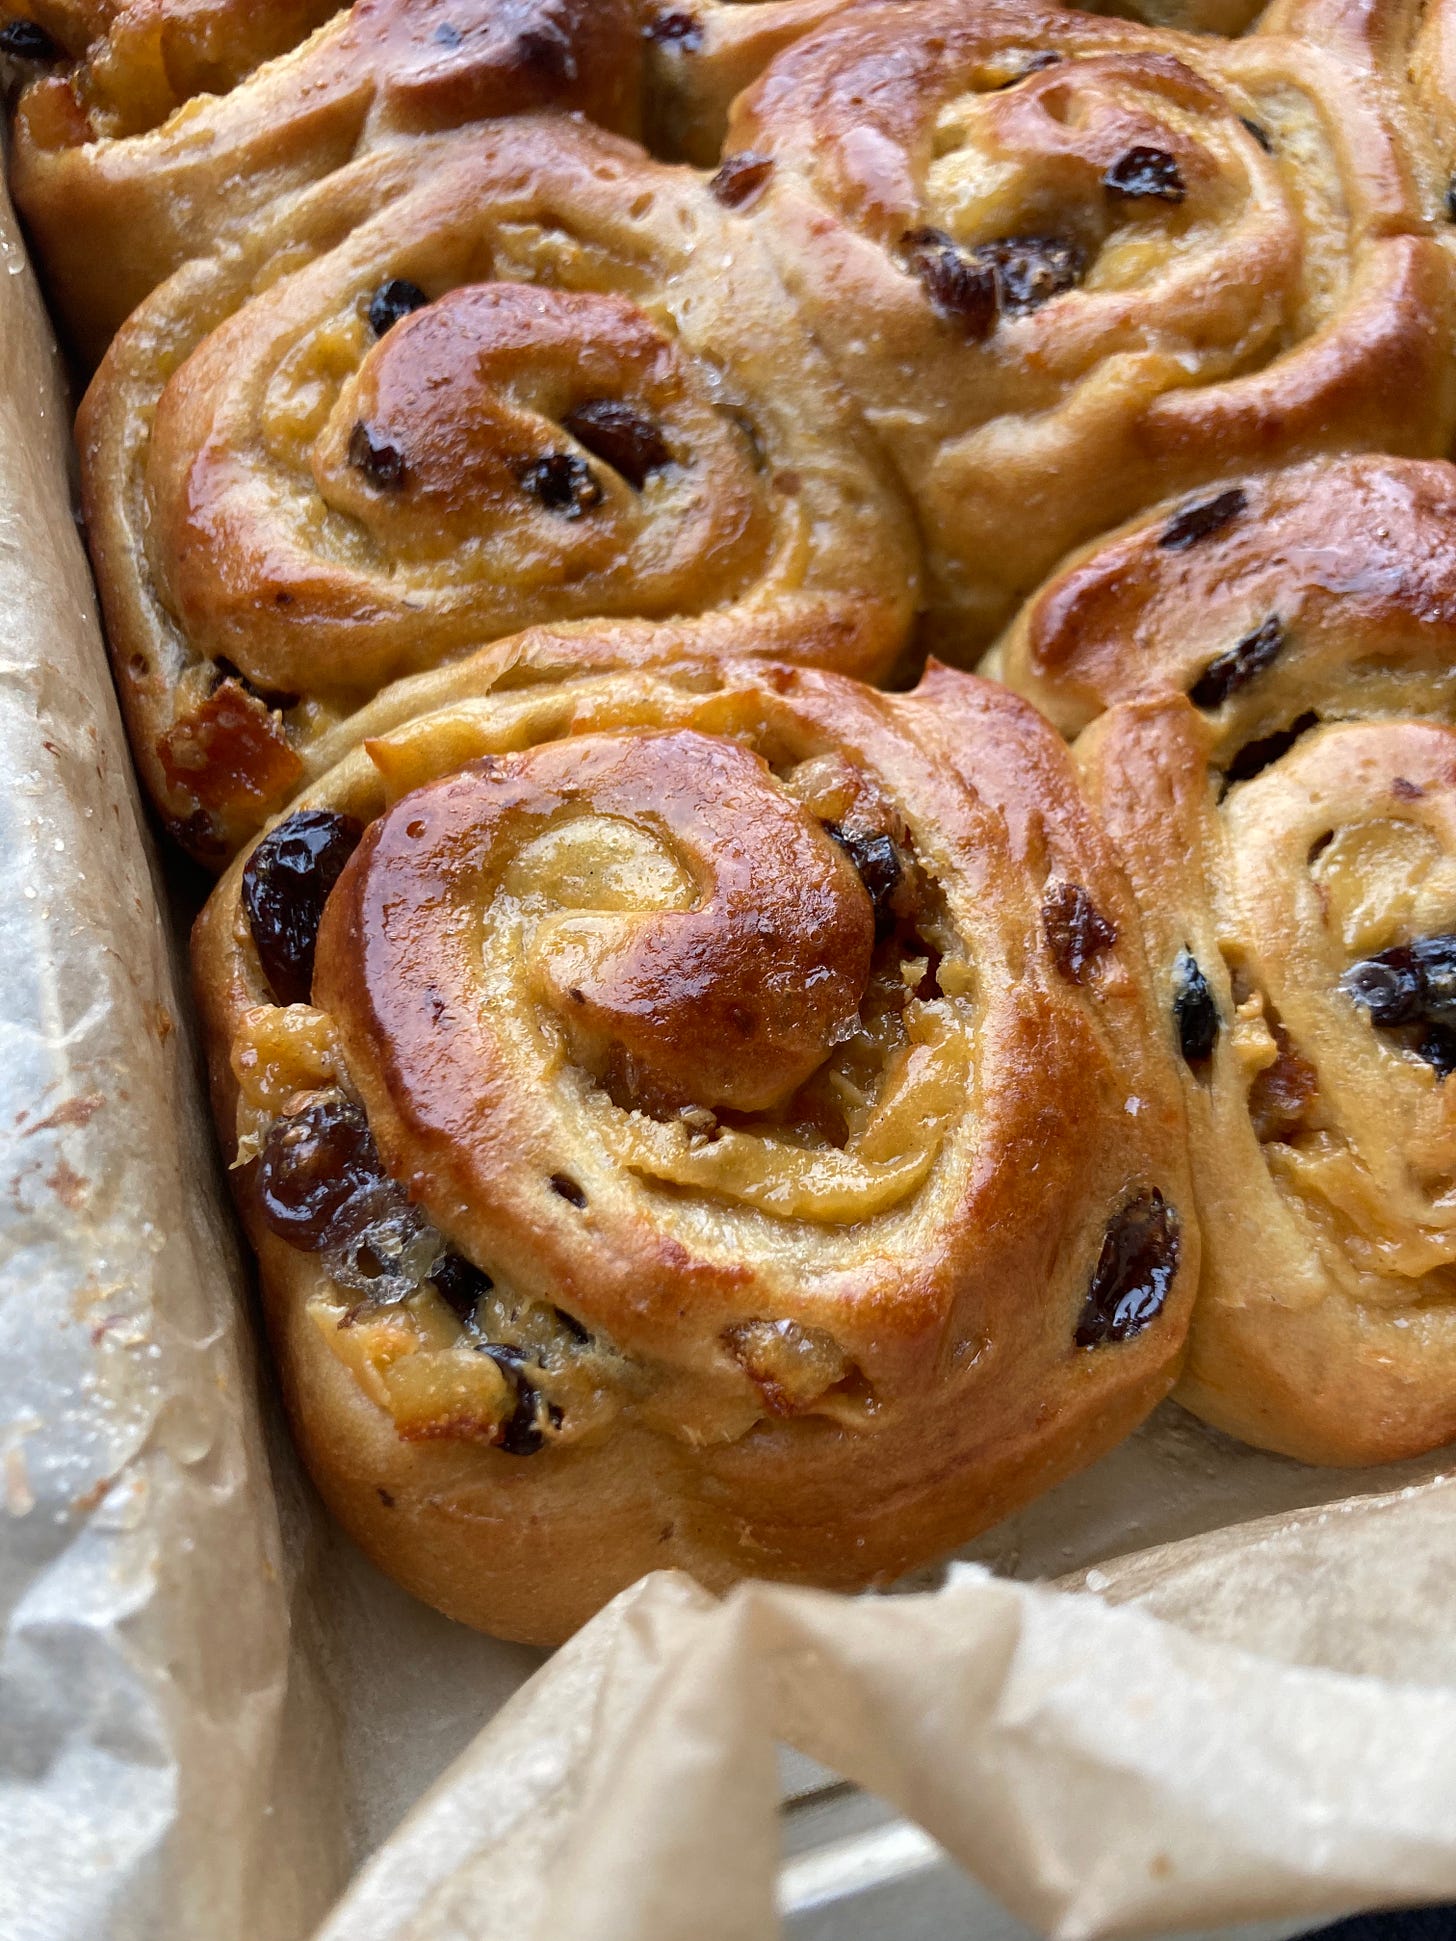
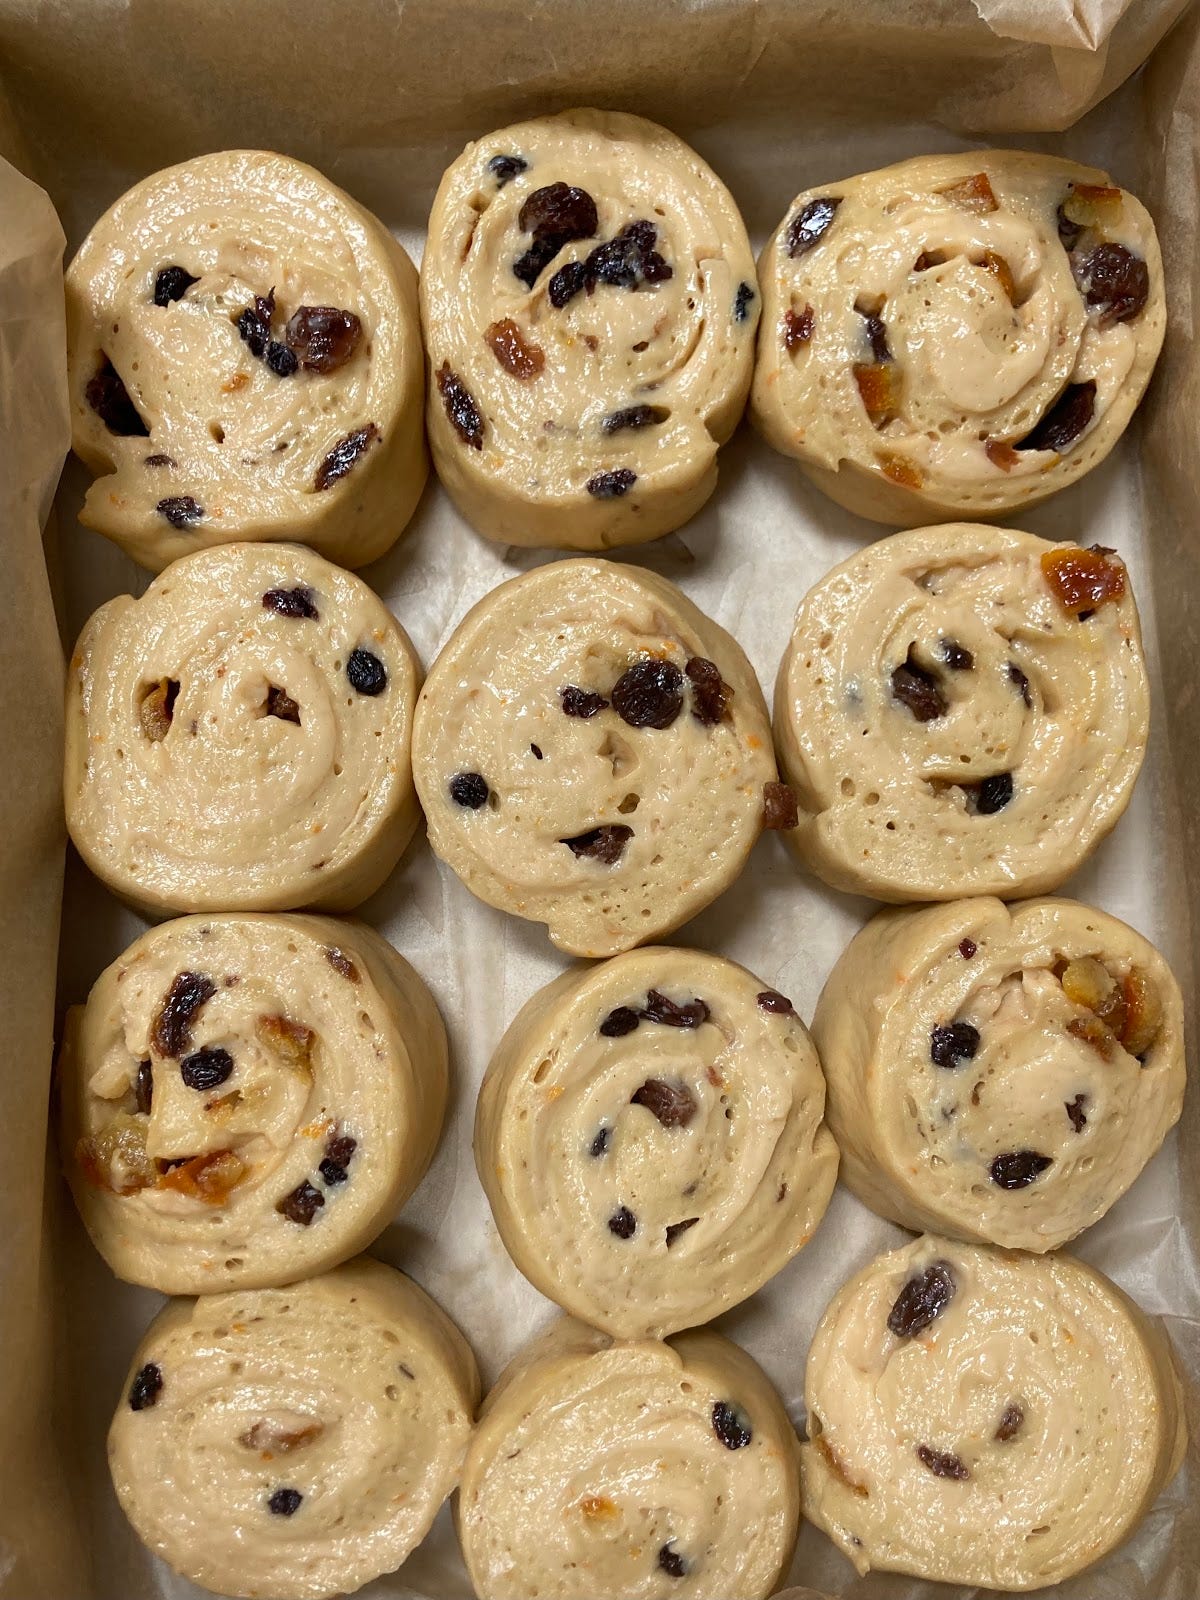
So, once chilled and not flopping about like mad, I cut 1.5 inch ish diameter pieces and laid in a deep sided baking tray, about half an inch apart. These do grow a fair bit, but I wanted to make sure they grew into each other to benefit from those lovely tender edges as much as possible.
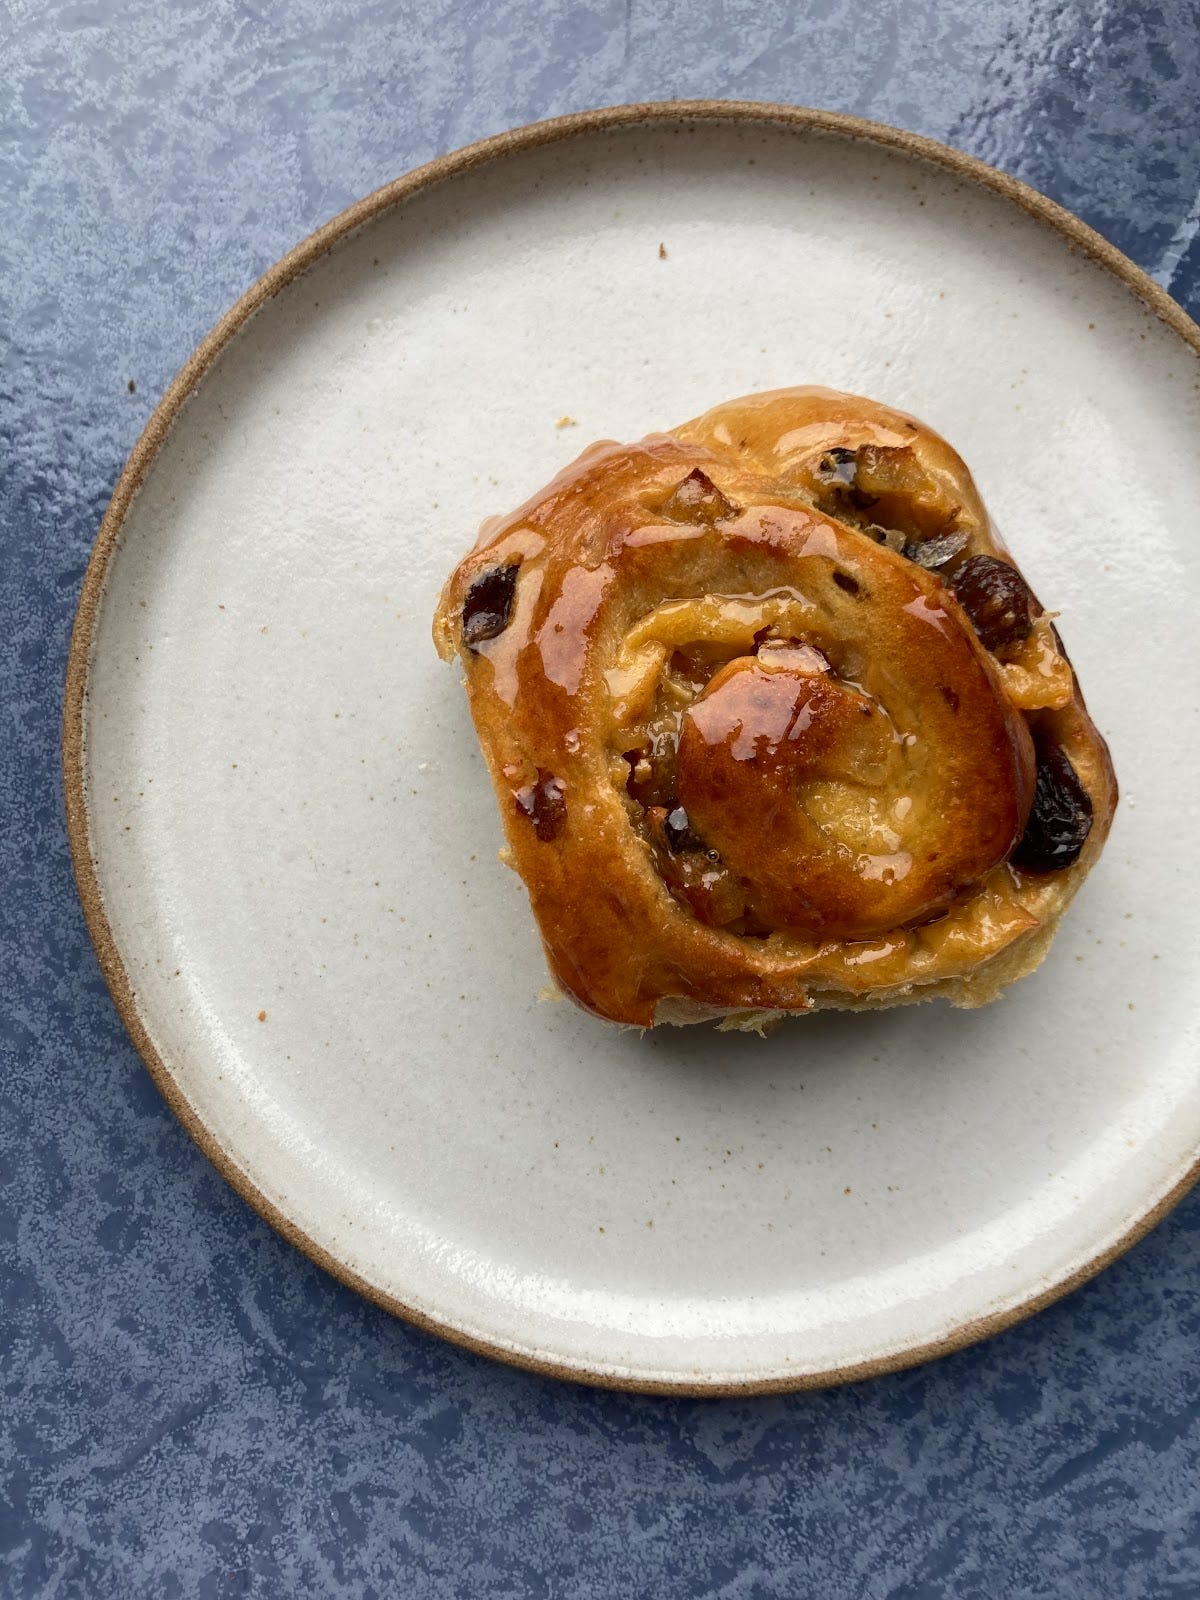
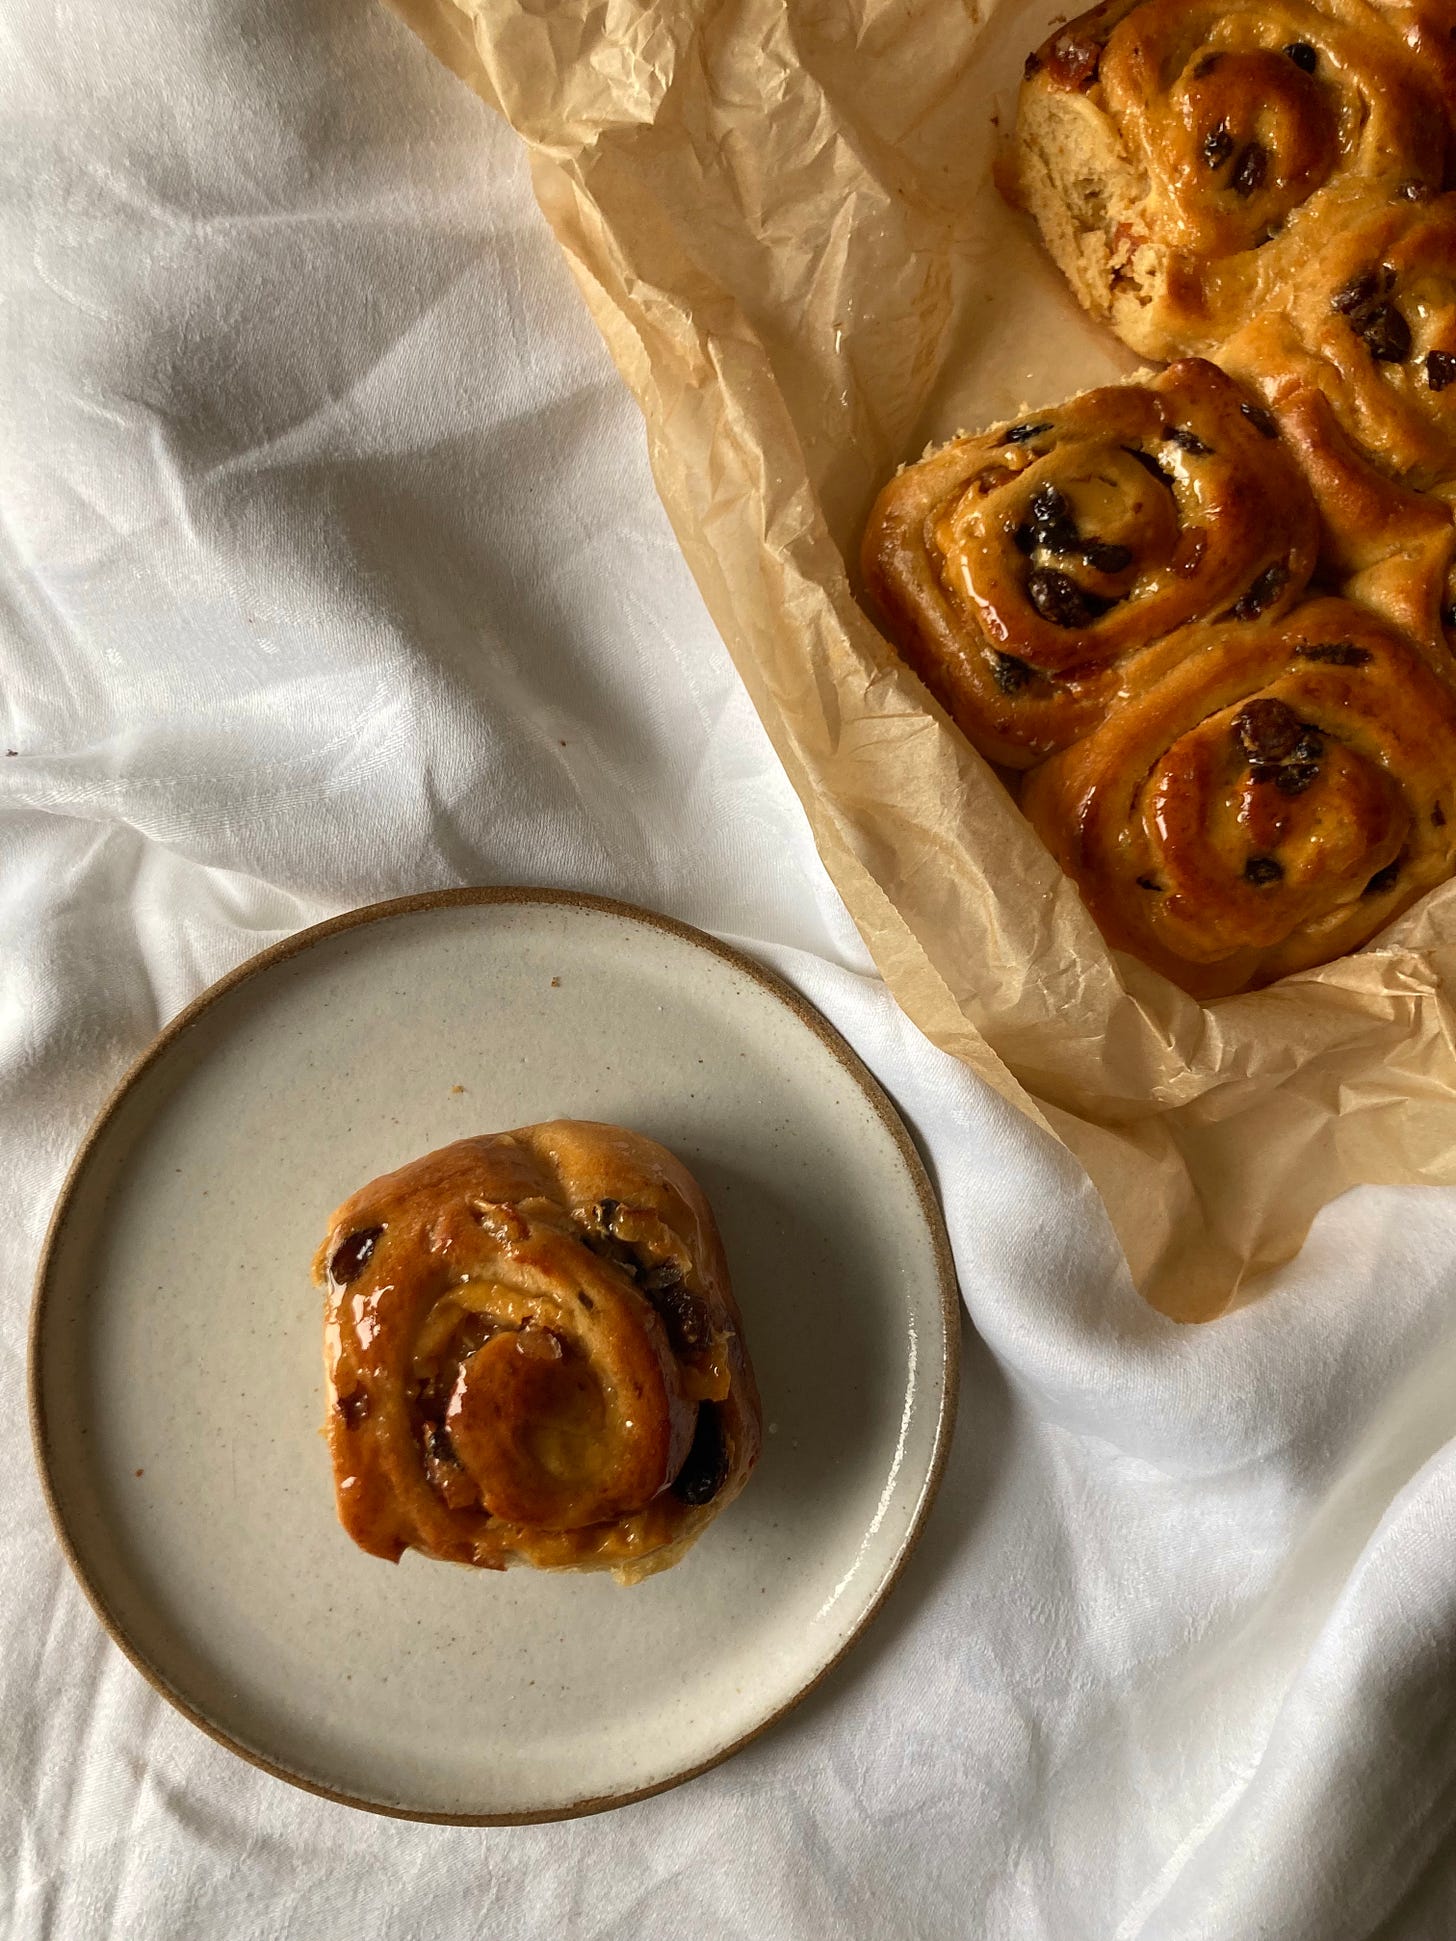
Once baked and warm, I glazed with a simple syrup to give it a bit of shine. I used the syrup leftover from candying my mixed peel which has a lovely orange flavour to it. You could absolutely use jam or something similar here though, if you wanted.
Results:
So, three takes on a concept… which one wins? Well, I actually adored both the roll style and the pain suisse butter layer style. BUT I can only pick one to write about (we can save the other recipe for another time)… so it’s going to be the rolls this week. I love the spiced butter as a technique but I really adored the homely feel of the swirly buns and have to go with my gut feeling on this one!
To glaze or not to glaze, that is the question?
Until these went into the oven, my plan was to simply brush with my peel candying syrup as they left the oven. I really had no intention to glaze them in the style of an American cinnamon roll. But when I saw them all nestled and proofed, I started thinking about whether these would benefit from a frosting sort of thing. Although they already contain custard – which is always the star of the show – I wondered if something bright and light could work.
Being unsure, I took to Instagram stories and read the room. Views on bun icing ranged a LOT. Here’s a couple of my fave takes
“Mostly indifferent – it is more useful as a cover up for when I’ve messed something up’ - @anaytha
“Hells yeah! The best part – otherwise they’re naked!” - Sonia
“DON’T FEEL OKAY ABOUT FROSTING” Zahrah
So, I was very conflicted. VERY. So, I’ve devised something pretty light and not-to-sweet that you can totally drizzle on top – a bit like a danish pastry from a continental breakfast buffet – IF your heart desires it. I am definitely not an expert in the realms of cream cheese frosting, but I threw things together in a bowl until it ‘tasted right’ and scribbled down the measurements as I went. A big pinch of salt is a must. I’ve included the recipe below so you can give it a go if you want!
Alright, let’s make it
Hot cross custard swirly buns
Makes 10-12 buns
General hints and tips about this recipe:
I personally love chilling this dough overnight if possible. It makes it so much easier to work with and roll out. I I think you get a much neater final product but I do know it is quite annoying to have to wait 24 hours to continue with a recipe. That being said, I’ve also had success rolling it out straight after proofing but you do need to roll it quite affirmatively to get it to behave.
Ingredients
Special equipment:
KitchenAid (Although I think you could mix this dough by hand. I will include instructions for mixing by hand)
Dough
265g strong white bread flour
7g dry yeast
30g light brown sugar
10g molasses
7g salt
50g egg (approx one)
45g milk
60g water
½ orange, zested
35g butter, soft
Dried fruit & peel mix (divide in half - first half goes inside dough, second to sprinkle inside)
30g candied mixed peel (to get my guide, click here!)
40g golden raisins
40g sultanas
+ Egg wash
HXB Pastry cream
Milk infusion:
200g whole milk
6g cinnamon sticks
16g ginger, peeled but whole slices about 0.25cm thick
10 cloves (Count them! I’m really anxious about clove flavour - ha)
10g orange peel, thick strips
8g cardamom pods (although I didn’t have any so I just did ½ tsp ground cardamom)
Pastry cream:
200g infused milk from above (re-weigh and top it up to this, very important step)
50g caster sugar
2 x egg yolks (about 36g)
16g cornflour
Cream cheese frosting:
20g orange juice
40g icing sugar (sifted)
80g cream cheese
+orange zest, to taste
+salt to taste
Method
First, let’s make the pastry cream.
Step 1: Infusion
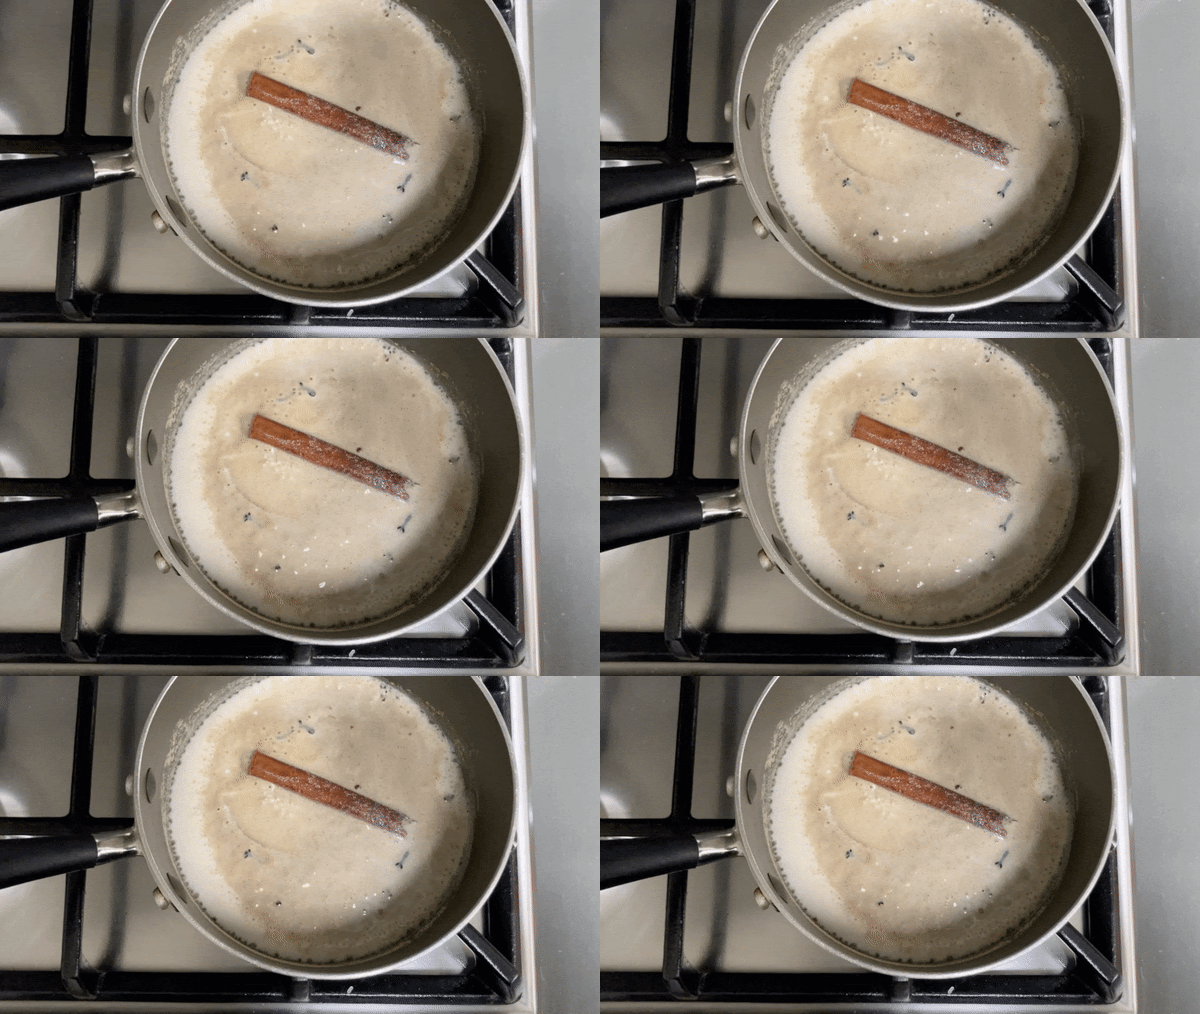
Add spices and aromatics to milk and bring to a simmer
Once bubbling, turn off the heat and cover the saucepan with a lid or clingfilm to seal
Leave for at least 1 hour, 2 if you have time
Strain the mixture and reweigh the liquid
Top up the liquid to weigh 200g before proceeding with the rest of the recipe. If you don’t do this, the ratios will all be off and you’ll get MAD THICK pastry cream
Step 2: Making the pastry cream
Heat milk on the stove until simmering. Whisk egg yolks with cornflour and sugar. Once milk is bubbling, pour a little over the yolks to temper and then return the whole mixture to the stove. Cook – whisking all the time – until the mixture is thick and bubbling
Leave to cool completely before using. You want it to be ultra thick and like a block of jelly! Make sure to cover the surface with clingfilm.
Next up: the dough
First, soak all of your fruit! Put your dried fruit into a bowl and cover with boiling water. Leave for at least 10 mins or until the fruit is soft. Strain and discard the liquid.
In a KitchenAid:
Bloom the yeast according to the manufacturer's instructions
Add milk, water, molasses and the egg to the bottom of your bowl. Next add your flour, salt and rest of the sugar. Make sure the yeast is in there, too!
Mix on a medium speed for about 5 minutes until a dough forms
Rest for 5 mins - this just breaks up the strength building!
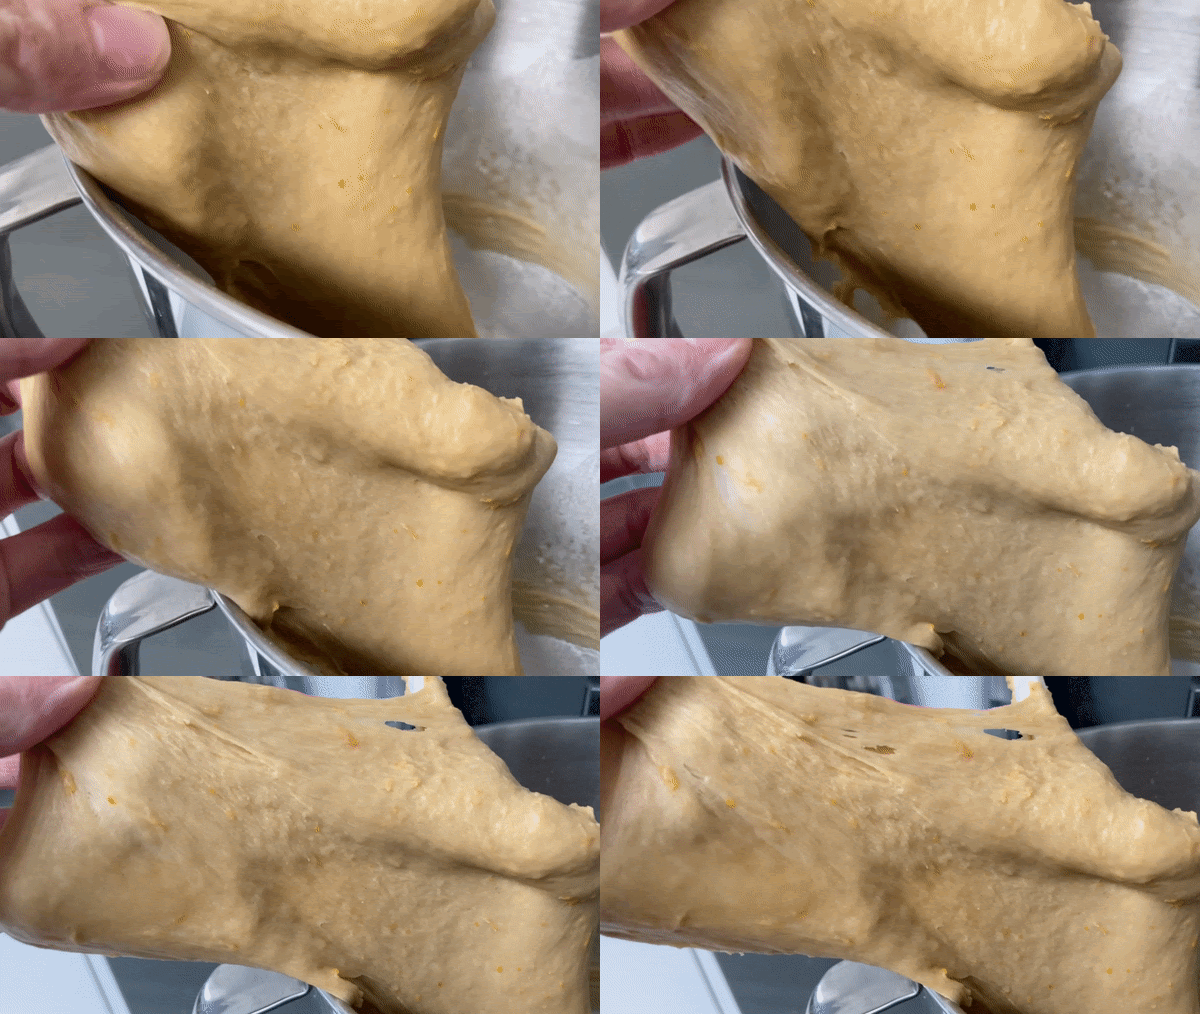
Mix on a medium-high speed until medium-full gluten development is reached
Once you get to this stage, you can add your butter in piece by piece
When the dough is strong, soft and shiny and you have reached full gluten development, chuck your fruit in. Mix until its all combined - don’t turn the speed up too high because it’ll spit fruit all over your bench!
Mixing by hand:
Follow steps 1 and 2 from above. Using a strong spoon or spatula, mix together the wets and dries until a shaggy dough forms. Cover the bowl and leave to rest for 20 mins (this is the autolyse stage)
Tip the dough onto the table and knead the dough for 10 mins. Rest for 5 mins
Continue to knead the dough (using flour if needed) until medium gluten development has been reached
Now smear in the butter and knead for another 10 mins until the dough is strong and shiny. Rest for 5 mins
To add the fruit in, stretch the dough quite thin and sprinkle the fruit and peel. Roll it up and then knead the dough into a ball
Put dough into a clean bowl and cover to proof
Proofing:
Cover your bowl and let the dough proof for 1-2 hours in a warm place until it has doubled
At this stage you can degas the dough in the fridge overnight to roll out and shape the next day
Shaping:
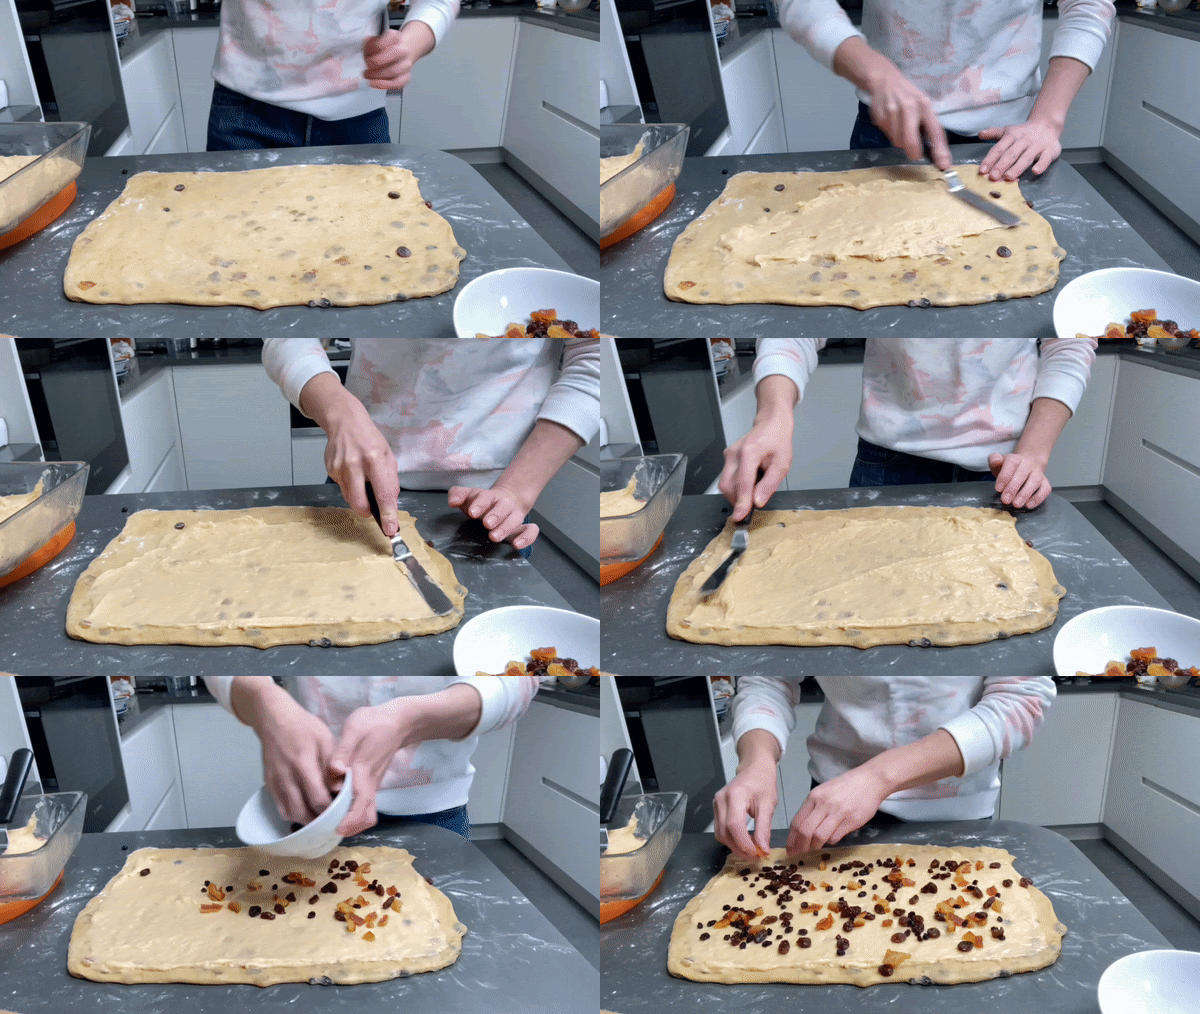
Tip the dough onto a floured surface and roll into a large rectangle, approx 30 x 40cm. It should be about ½ cm thick
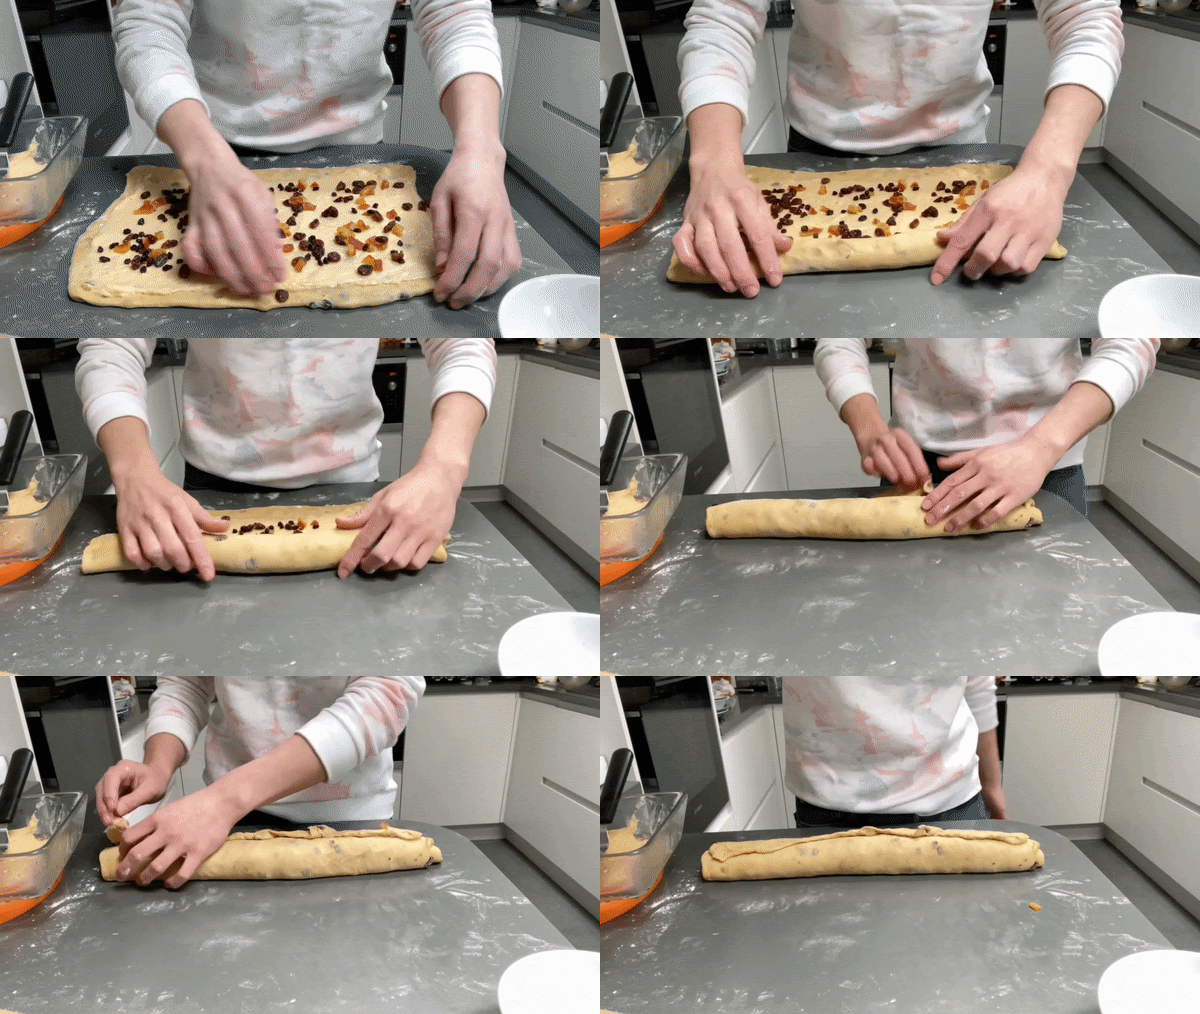
Spread your chilled pastry cream all over the dough, leaving an 1-2 inch border at the bottom
Sprinkle the soaked fruit and mixed peel evenly over the dough
Roll the dough up tightly
Slice the dough in half so you can fit it on a tray. I like to wrap the dough in cling film or baking paper to protect it from the freezer
Place your dough rolls in the freezer for 10-20 mins to firm up. You can cut it right away but I prefer to let it chill to keep things neat
Cutting
Slice your dough logs into approx 1 - 1.5inch slices
Put greaseproof paper in a 9” x 13” inch tin and place your buns fairly close together. I think rows of 3 work really well in this tin size. You could totally bake these in muffin tins too. That would be adorable.
Cover and proof for an hour until puffy
Pre-heat oven to 180c
Egg wash the buns
Bake for approx 22 mins until golden in places. My oven isn’t super even unfortunately
When you take the buns out the oven, brush with a sugar syrup. I use the syrup from my mixed peel candying. You could use jam too!
Eat whilst warm. ESSENTIAL.
To make the glaze:
If desired, make the glaze: Beat the cream cheese until smooth, add sifted sugar and then loosen with the orange juice. Taste and add a little pinch of salt to make it your ideal flavour.
Enjoy! After 6-8 hours, to be extra safe you should really keep these buns in the fridge as they have custard in them. Reheat the buns in the oven before eating










Would black treacle work in place of molasses? Want to make these this weekend, they've been on my to-bake list for nearly two years!
These turned out gorgeous, thanks for the recipe!