Hello
Welcome to another edition of Kitchen Projects.
Before we get into this week’s recipe, I have a little message for you.
When I started Kitchen Projects, my goal was to create an honest account of recipe development in the hope it could be an antidote to all of those Insta-perfect dishes. I also hoped to share some of the knowledge that has been shared with me over the years – pastry knowledge for all!
It’s been an honour to see you cooking from the newsletter and getting your feedback. Knowing that you find it useful means the world. You guys cook my recipes better than I do, honestly, and I’m so grateful to see it.
I’m committed to keeping the weekly Sunday newsletter free to access and ensuring that this remains a resource for everyone. But a few of you have asked how you can support my writing, so I’ve decided to add an option for paid subscriptions (£5 per month). All this means is – if you’re enjoying the newsletters and you’d like to support me, you now can!
If you do decide to subscribe (yay!), I’ll be making some special content/threads for the subscriber community, as well as a dedicated place to discuss what you’d like to see next on Kitchen Projects, so you can become part of the development process! I also have a few ideas of extra fun things that we can do together, like cookbook rundowns, Q&As, kitchen dilemma solving and perhaps few special recipes too.
Like I said, the main Sunday newsletter will remain free to access. But if you’d like to support me financially, then here’s the link to do so:
Hope to see you there. Anyway, let’s get on with this week’s newsletter. I'm really excited about this one.
Love,
Nicola
All about those buns
I really fancied doing something chocolatey this week. I’ve been scavenging cupboards lately and eating the stuff pure (Smarties are my current favourite) so I felt I should probably try to turn this current predilection into something a bit more glam.
Chocolate bread is a sort of confusing topic for me. Growing up, my mum had a bread making machine (which I think she used a single-digit number of times) and I always remember seeing a recipe for chocolate bread in the free instruction manual that came with it. It looked gross. Really gross – dry, burnt, ultra brown stodge.
Maybe that’s unfair as I never tried it, but it looked so unappealing. That stayed with me for a while – I always avoided M&S special edition chocolate hot cross buns and other such things. Although I’d dabble in a choc chip brioche roll (very school trip), I never hankered for it myself.
UNTIL NOW! Things have changed. Two weeks ago, I was talking to my sister and she described a dream she was having about chocolate buns. She said she wanted “a super soft rich chocolate brioche with lots of pieces of chocolate in it, all sorts, but really deeply chocolatey.” And she was really convincing.
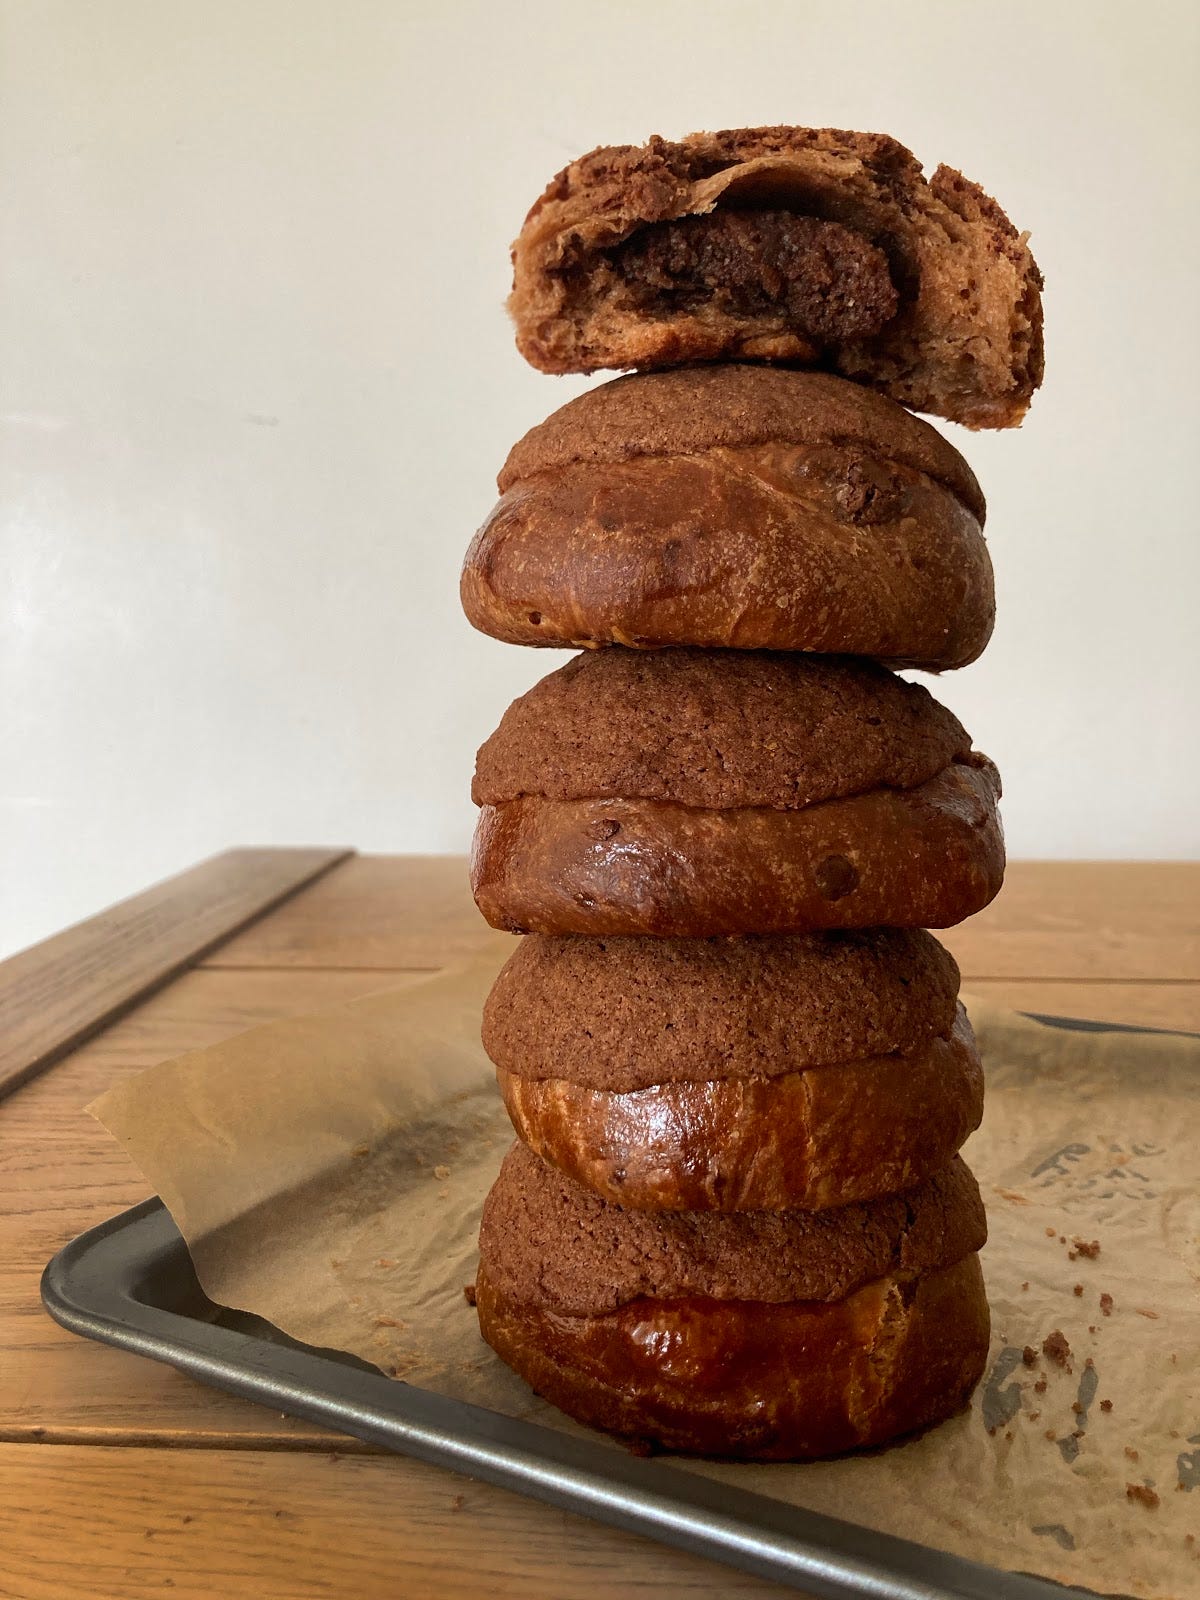
And so here we are: this week, it’s all about beautiful chocolate buns. But we are going to take it up a level and also fill it with a perfect chocolate frangipane and finish with a crackly crust.
Shall we do this?
PS. A playlist about my complicated love affair with chocolate bread here, ofc
Brioche adventures
Brioche is really at the heart of so many wonderful things – doughnuts, tarte tropezienne (Google it, we gonna do a Kitchen Projects on this for SURE), tipsy cake (link to the KP recipe here!), french toast, bread and butter pudding, SANDWICHES, sweet buns, savoury buns and so much more.
But what makes brioche… brioche?
I know we’ve covered it a bit before but today I started to wonder what the requirements were to make something I could legitimately call brioche. I wondered if brioche should really be in a protected class, a bit like champagne.
Brioche comes from the word ‘broyer’ which means ‘to pound’ -–from that I basically take that people have hated mixing brioche by hand since the 17th century. I still haven’t tried doing it myself. NOTE: I don’t like doing too many Kitchen Projects that are restricted by KitchenAids but today’s chocolate brioche adventure definitely requires assistance.
I’ve looked through all of my pastry books and understand this: for brioche to be brioche, it needs a LOT of fat. It also has a higher % of eggs than other enriched doughs. Although cinnamon bun dough has a quantity of fat in, it is nowhere near the 40%-60% that is traditionally associated with brioche.
60%? I KNOW, that seems mad. As you all know, fat = flavour but fat also inhibits gluten. Brioche is known for its tight crumb – thanks to all of the solid fat. This is why it makes such fabulous french toast. It is dry (yet rich) as anything.
Oil v butter
This is something worth mentioning now. A lot of people wonder why their buns or doughs don’t stay fresh – dry fat (like butter) just doesn’t keep things soft in the long-term. Wonder why those yum yums from Sainsburys seem to last FOREVER and stay eternally squishy? OR why those little choc brioche buns in the bakery aisle also stay so bleedin’ soft? Well, let’s discuss.
Take this ingredients list from the Waitrose choc chip brioche for example:
“Wheat flour, dark chocolate chips (14%) (sugar, cocoa mass, cocoa butter, emulsifier sunflower lecithin, flavouring), sugar, pasteurised free range egg, rapeseed oil, water, emulsifier mono- and diglycerides of fatty acids, wheat fibre, yeast, milk powder, flavourings, salt, flour treatment agent ascorbic acid.”
Spot the butter? Nope? Well, it isn’t there. All of these industrial formulations use liquid fats like rapeseed oil or other vegetable oils. I suppose this means that there aren’t strict rules around brioche and it’s ingredients.
We will absolutely talk about making some oil brioches and buns in the future (I got you, guys) but today, it’s all about butter. I know I made using butter sound kind of awful by using words like ‘dry’ and ‘crumbly’. But what we are actually getting for brioche is a very tight, light crumb that almost dissolves on the palate.
It’s due to all of the solid fat, which melts and creates little air pockets around the gluten structure when baking, that brioche gets its fine close crumb. As it cools down, the remaining fat solidifies giving the bread its stretchy and springy quality. Thanks to all the butter, once the shiny crust yields, the result is a bread that has a melt in your mouth quality to it. Even old-ish brioche, made correctly, comes back into its own when you eat it, even if the first bite feels a bit dry.
Let’s talk about mixing
When you’re mixing brioche, the butter isn’t added until the end, after at least medium gluten development has been reached. This is because fat inhibits gluten and those pesky molecules would totally get in the way of any kind of gluten development. Although you could add butter at the beginning, I can’t imagine how long that would make the mixing time. It would eventually come together, but who has got time for that?
Cocoa in brioche
Since cocoa has no gluten, it also prolongs the mixing process if added at the beginning. The first time I made this recipe, I had to mix it on high speed for almost 15-20 mins until it came together. And that was even before I put the butter in.
This was for two reasons:
I had an inappropriately high % of cocoa in the dough (oops!)
The gluten was having to work extra extra hard to hydrate itself (cocoa is a water hog) and work extra hard to form with all that additional cocoa in the way
That’s why this week I devised a better way to mix my chocolate brioche dough. Rather than put cocoa in at the beginning, I mix my brioche to a medium-high development.
As it is mixing, I create a compound butter with the cocoa and butter, which then is added together at the end once gluten has already established itself.
This has two benefits: firstly, the initial mix time is reduced and secondly this action forces me to actually soften my butter.
I act boldly too often – for brioche, it really is essential for optimal emulsification that your butter is properly soft. I sometimes take my butter straight out the fridge, bash it a few times and think ‘oh, that’s soft’ and then wonder why it takes a lifetime for the brioche to come together properly. With the compound butter, you are beating the butter down somewhat so things come together much faster.
Quick note on fat %
I started this week’s recipe with a full on brioche – 50% fat to flour weight. IMHO this was too much to handle so I reduced it to a comfortable 25% meaning today’s recipe is very much a ‘demi’ brioche. To be honest, unless you’re looking at a super traditional recipe, most brioche recipes online are in the demi camp. This means that the brioche isn’t so… overwhelming.
What cocoa?
For this week, I decided to use my favourite natural cocoa powder which is by Islands chocolate. Some of the standard alkalised cocoa powders are so rich and deep that you do want to be aware of this when mixing it in – it will make the whole flavour profile of your buns taste much more intense.
If you want to refresh your memory on the best cocoa powders to use – and when – here’s a link to my previous newsletter where I go deep on cocoa powders. Scroll down and check out the infographic for all the flavour details.
Cocoa does not equal chocolate
Although we’ve covered this before, it’s important to say that cocoa is never going to actually make your dough taste like chocolate. Cocoa is going to make your dough taste like… cocoa! Of course, it’s in the same sort of area, but cocoa does not have the fat or sugar that really makes things feel luxurious like chocolate does. I tried adding melted chocolate to the dough itself but it didn’t make enough of a difference to be worth it. The best result, I found, is to add chocolate chips throughout the dough so you get little bombs of chocolate throughout. Perfect.
Craquelin
When I was putting this recipe together, I really wanted to give it something a little bit extra on top. I’ve long been a fan of craquelin on choux and wondered if it would work on brioche, too. I’ve made melonpan before – we devised a way to use turn croissant scraps into them at Little Bread Pedlar (where I used to work) – and I've seen those famous Malaysian kopi roti buns (OPEN UP WORLD SO I CAN TASTE THESE THINGS FOR REAL), so I know that crunchy top on breads isn’t a brand new idea.
So, I gave it a go: I adapted my base recipe to include cocoa, egg washed my buns and then added a disc of the craquelin on top.
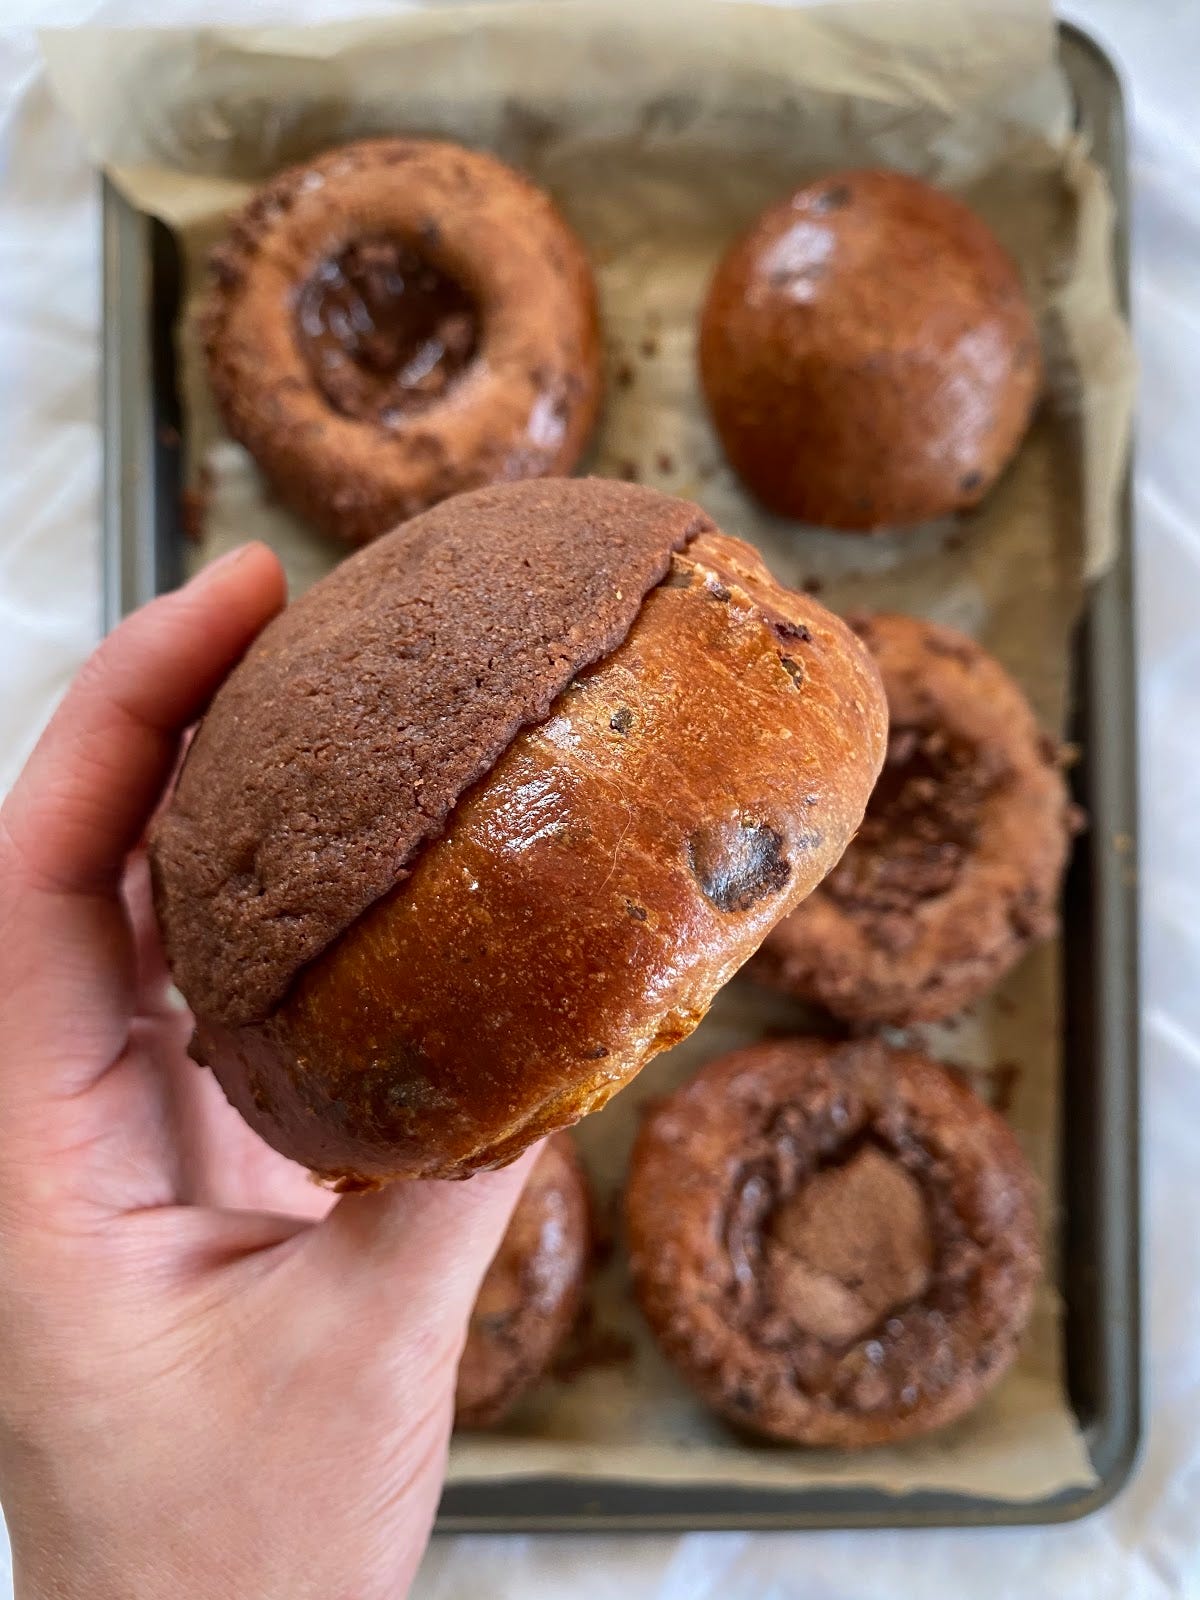
It is ABSOLUTELY MAGIC! I have to say I was slightly surprised when it didn’t spread more but I suppose I should have expected that – choux buns rise so explosively that the craquelin is forced apart. Brioche aren’t quite as dramatic.
I wondered if I should add more to give it the totally covered look but to be honest, I love these the way they are. I love being able to see a bit of the golden brioche underneath.
Welcome to the magic of chocolate frangipane
This. Is. A. Revelation.
One of the best things about working in kitchens is the friends you make. A few years ago, I worked with an incredibly talented pastry chef named Tessa (I’d link her except she doesn’t have a public IG). She is a complete riot – absolute gun in the kitchen and so brilliant, and has exceptional taste. I adore her. Anyway, I really have to dedicate this newsletter to her because she is the person who opened my mind to the possibility of chocolate frangipane.
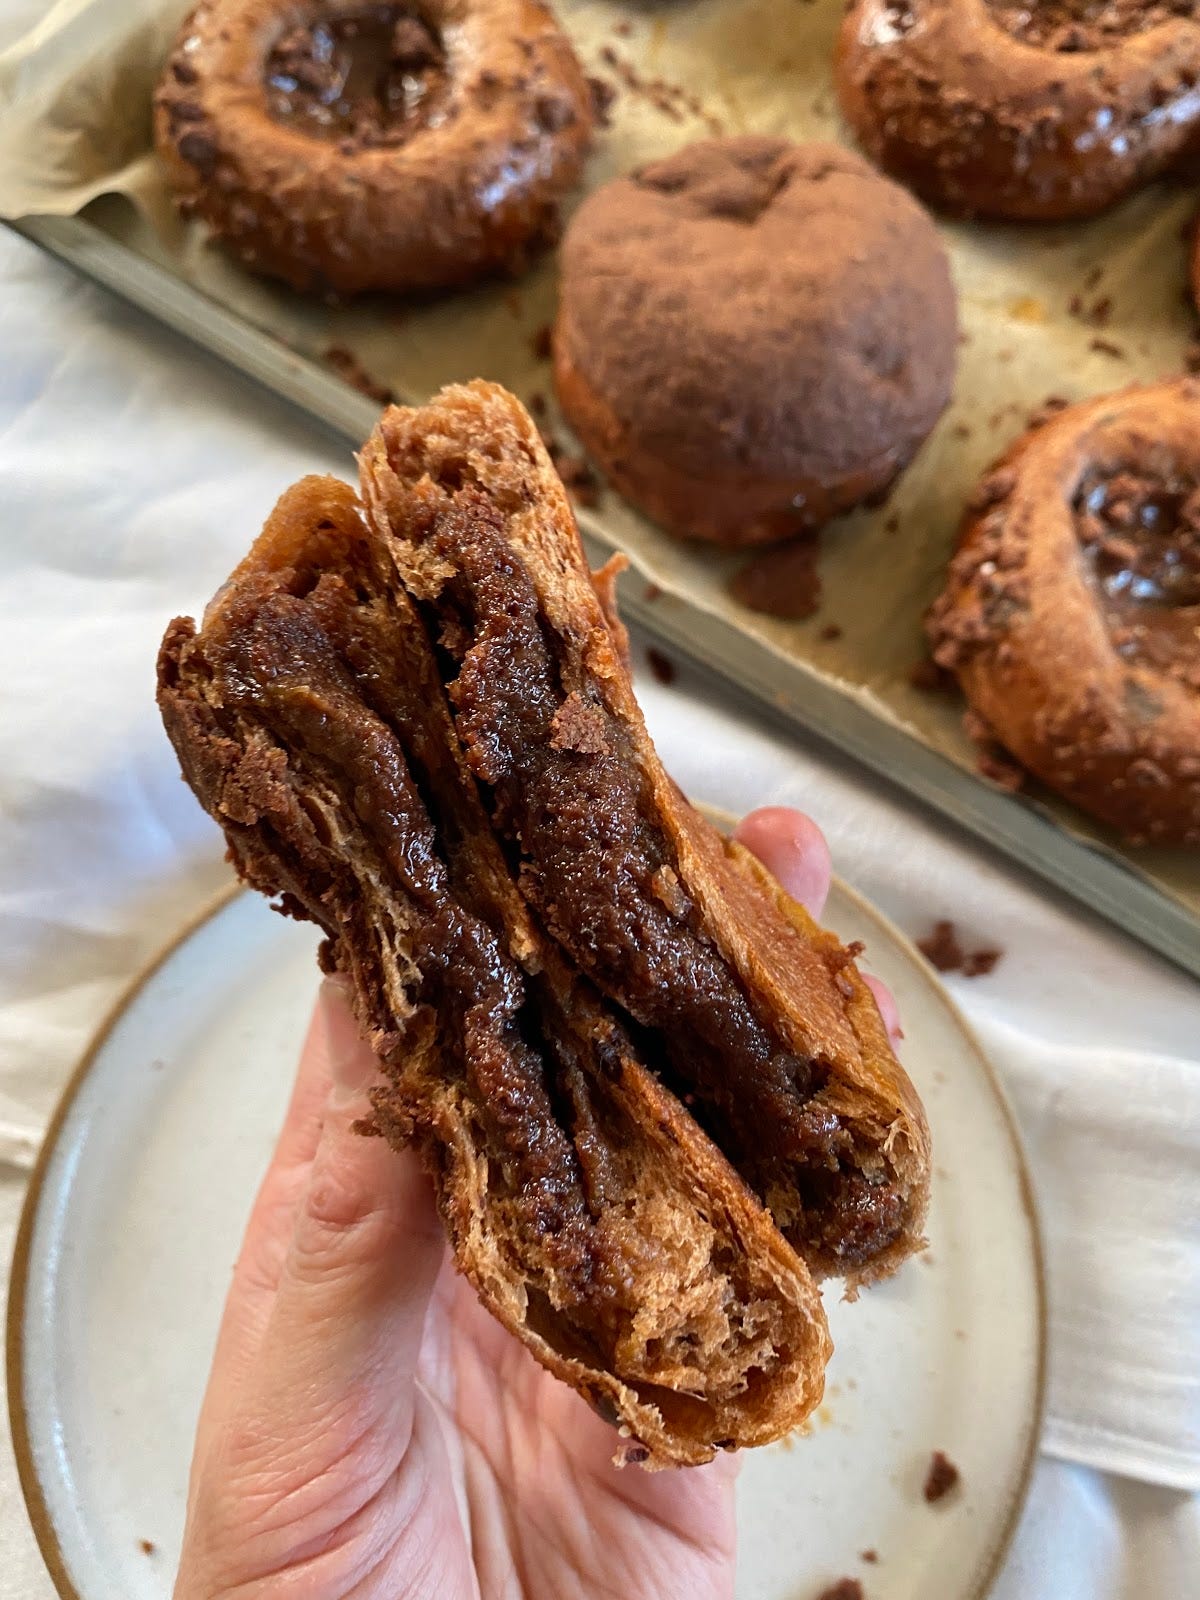
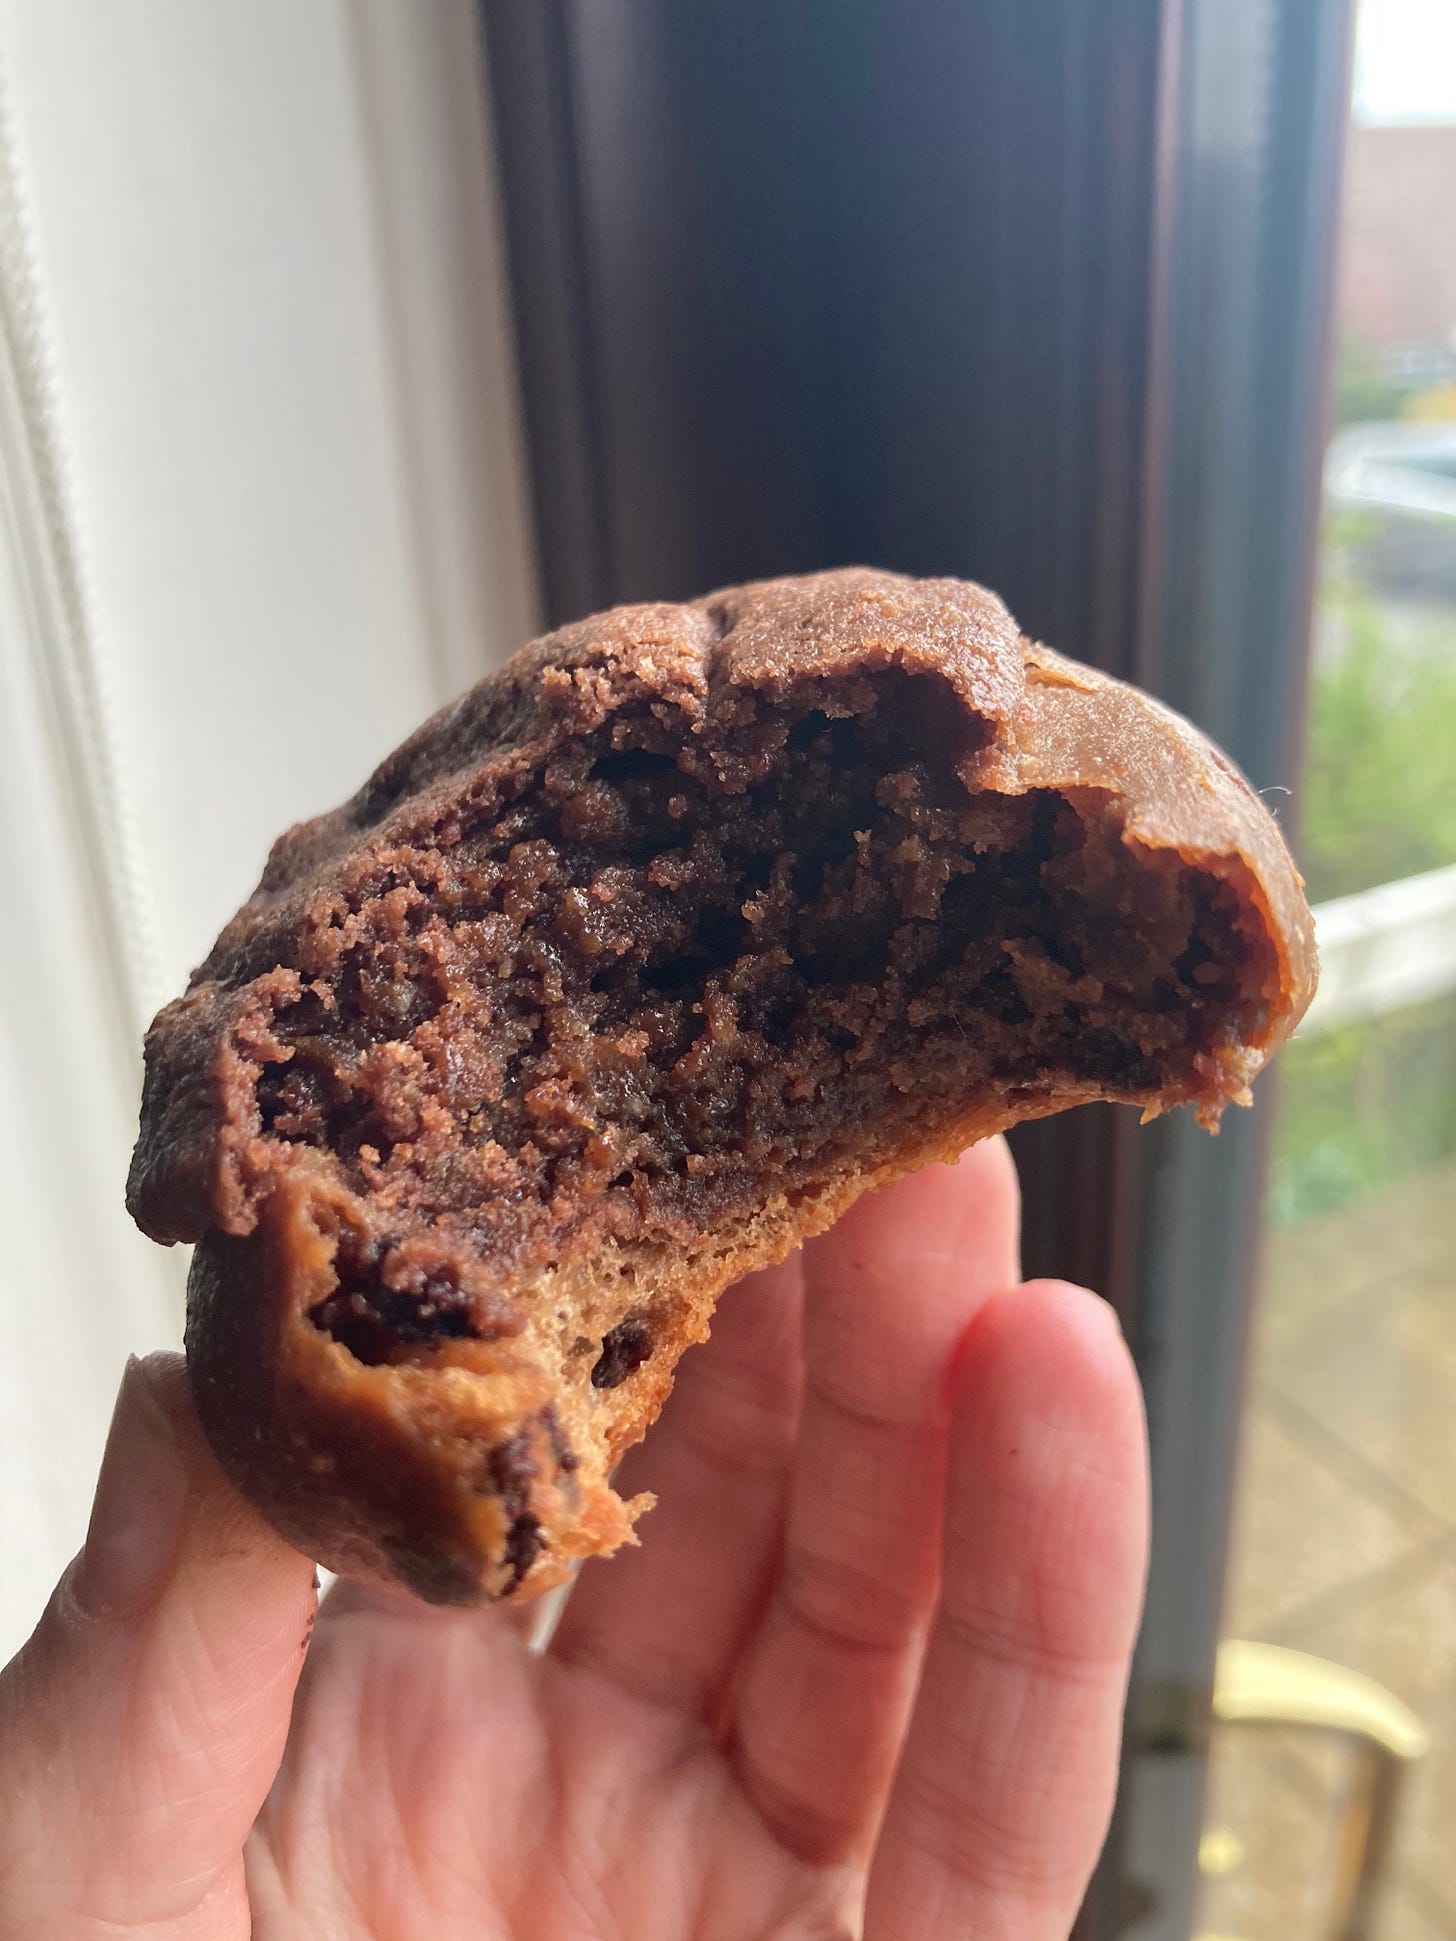
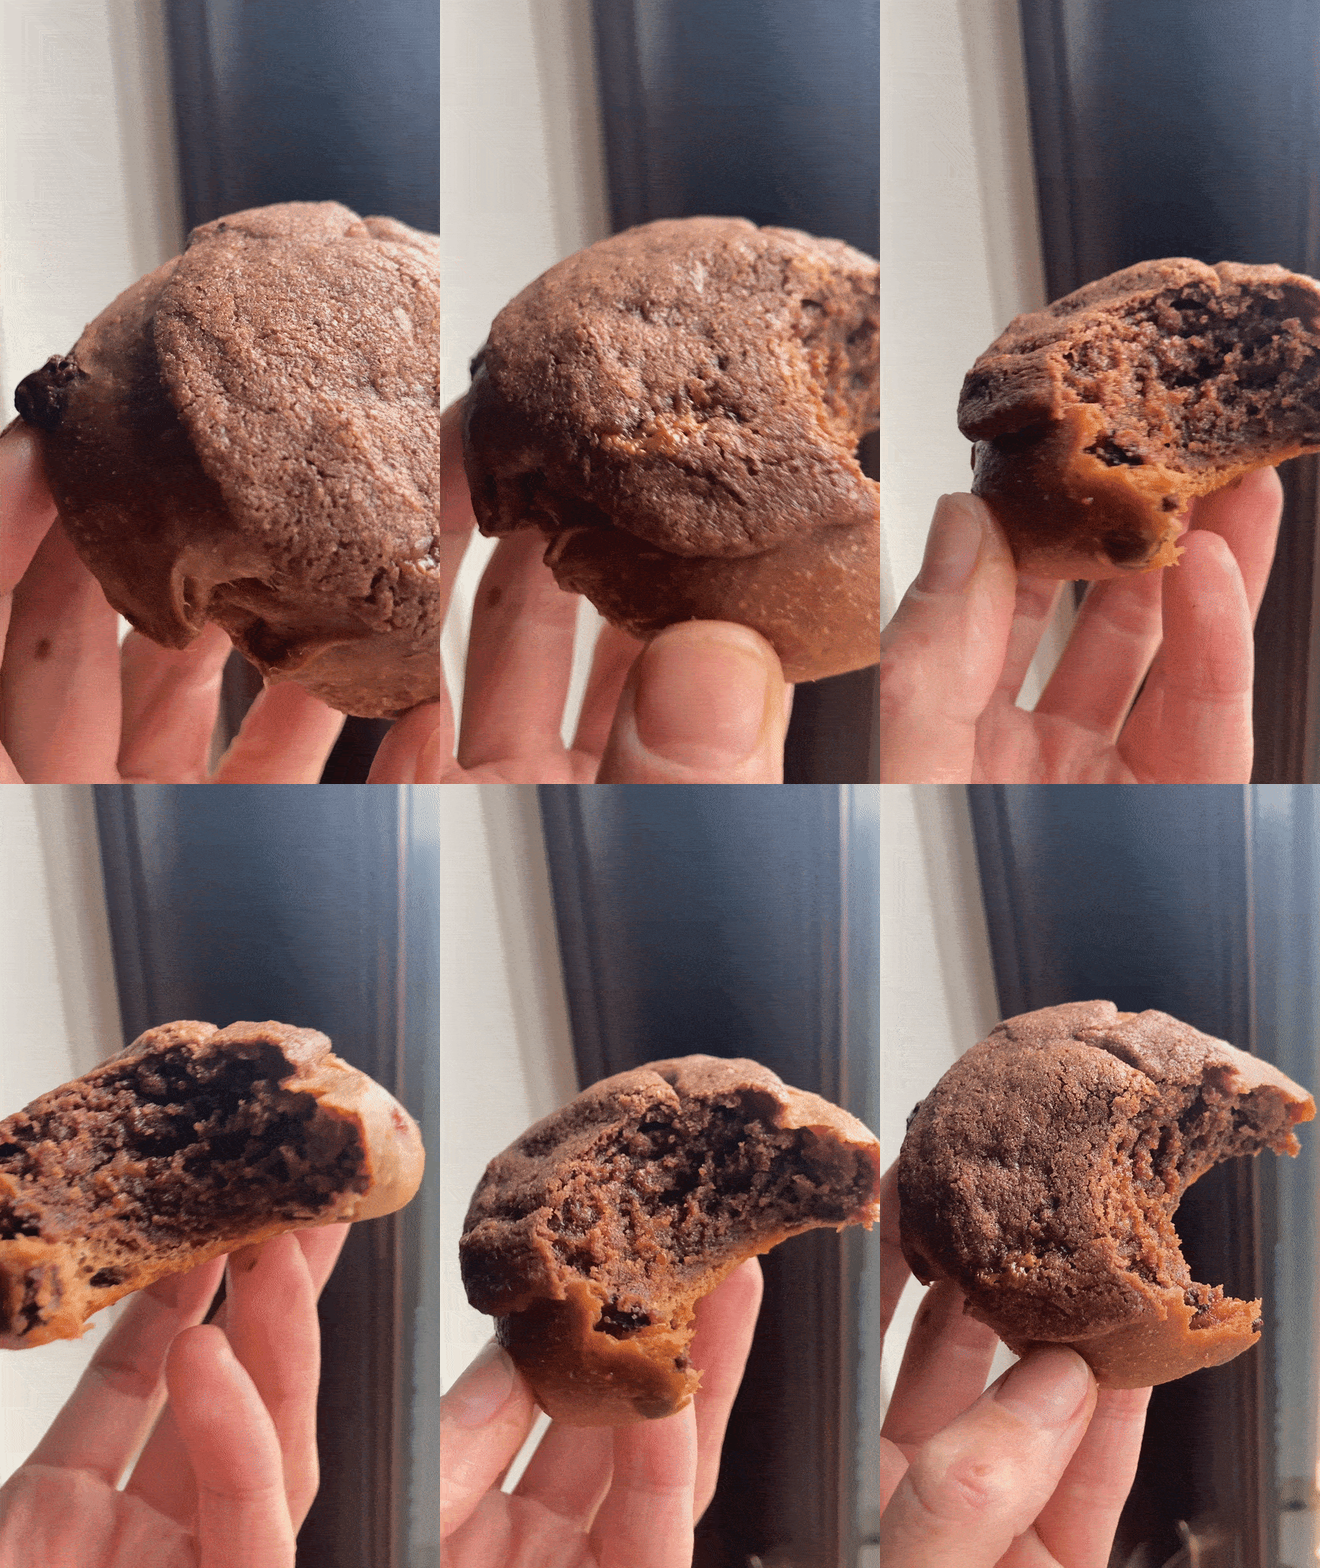
She mentioned it to me last February (!) and it’s taken me over a year to try it. I wish I’d done it sooner because this is absolutely extraordinarily delicious. This really is the star of the show. As well as a little cocoa to give the whole thing depth, melted chocolate is emulsified in at the end. Beautiful. Thank you Tessa.
The almonds give a very slightly boozy flavour when baked inside the brioche and stays so gooey – it is the perfect contrast to the chewy crust of the dough, tender crumb and the sugary hat.
Getting the ratio right
I found my best buns were using approximately 2/3rd weight frangipane to the dough. It looks kind of extreme and it IS rich, so you can definitely reduce to ½ the weight. Try and few combos out and you can always experiment more in the future
Alright. Let’s make it!
Double chocolate frangipane buns
Special Equipment:
Stand mixer
Freezing the buns
Once assembled, you can freeze these buns! Proofing from frozen in the future does take a while (2 hours to defrost at room temp minimum, 2 hours further to proof) but it does mean you can ration out your buns! I wouldn’t keep anything yeasted frozen for longer than 2 weeks. You could also freeze them baked but I think it’s more fun to have fresh buns on top wherever possible.
Ingredients:
Makes 700g, approximately 12 quite big buns. However, as above, freezing is your friend right now!
Chocolate brioche
255g bread flour
25g caster sugar
7g salt
6g yeast
105g milk
2 eggs
80g butter
20g cocoa powder
100g chocolate, chopped into small pieces (0.5cm or smaller is best here). If you are using natural cocoa powder, dark chocolate works best. If you are using something strong and alkalised, milk choc is more appropriate to balance the flavours
Chocolate frangipane
100g butter
100g sugar
50g egg
100g ground almonds
25g plain flour
10g cocoa powder
2g (⅓ tsp ish) salt, to taste
75g dark chocolate, melted
Chocolate Craquelin (makes more than enough, but remember craquelin freezes very well! And any less can be awkward to make)
100g light brown sugar
80g plain flour
20g cocoa powder
100g butter
Method
First: Chocolate frangipane method
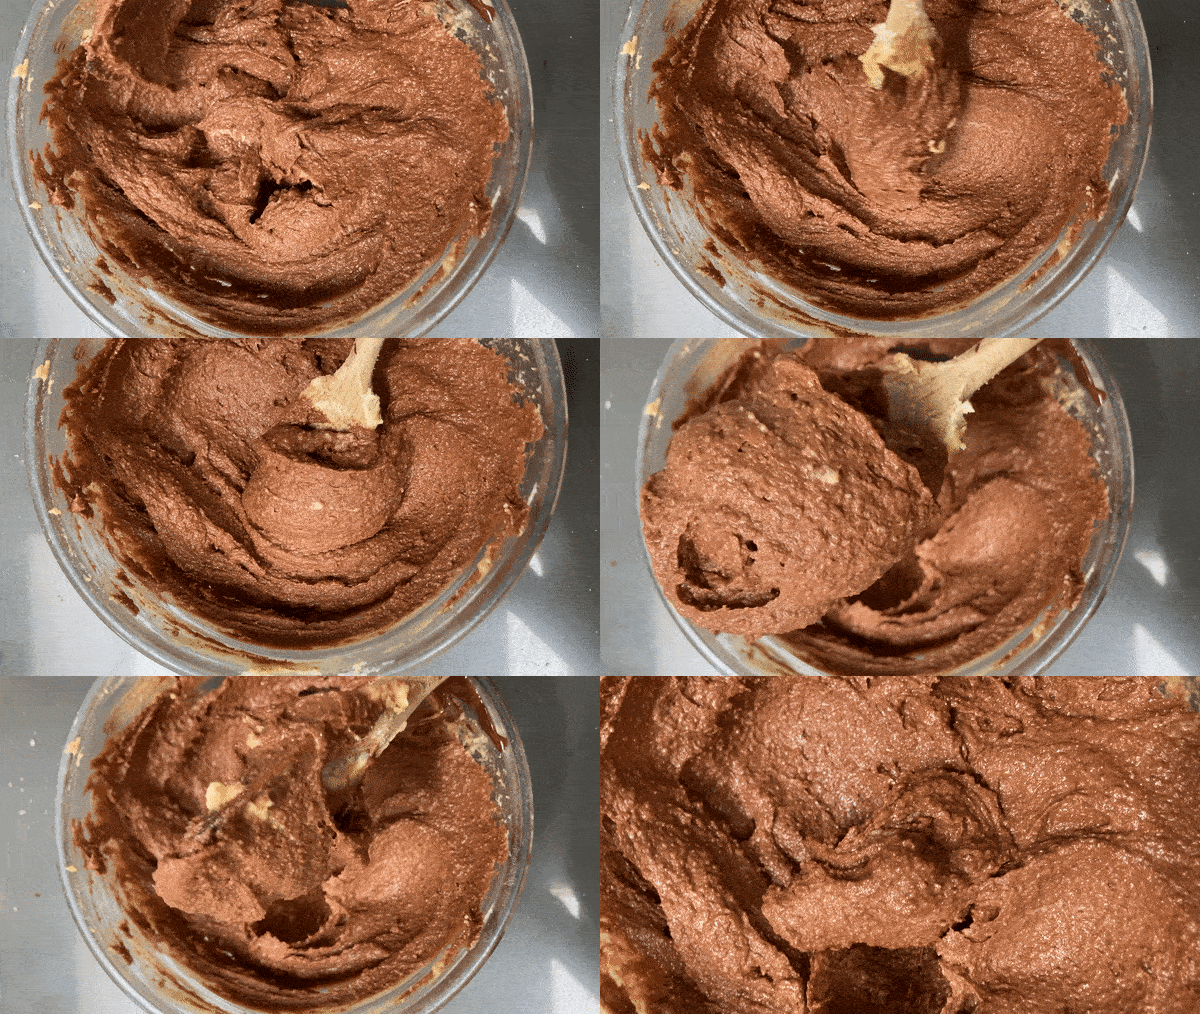
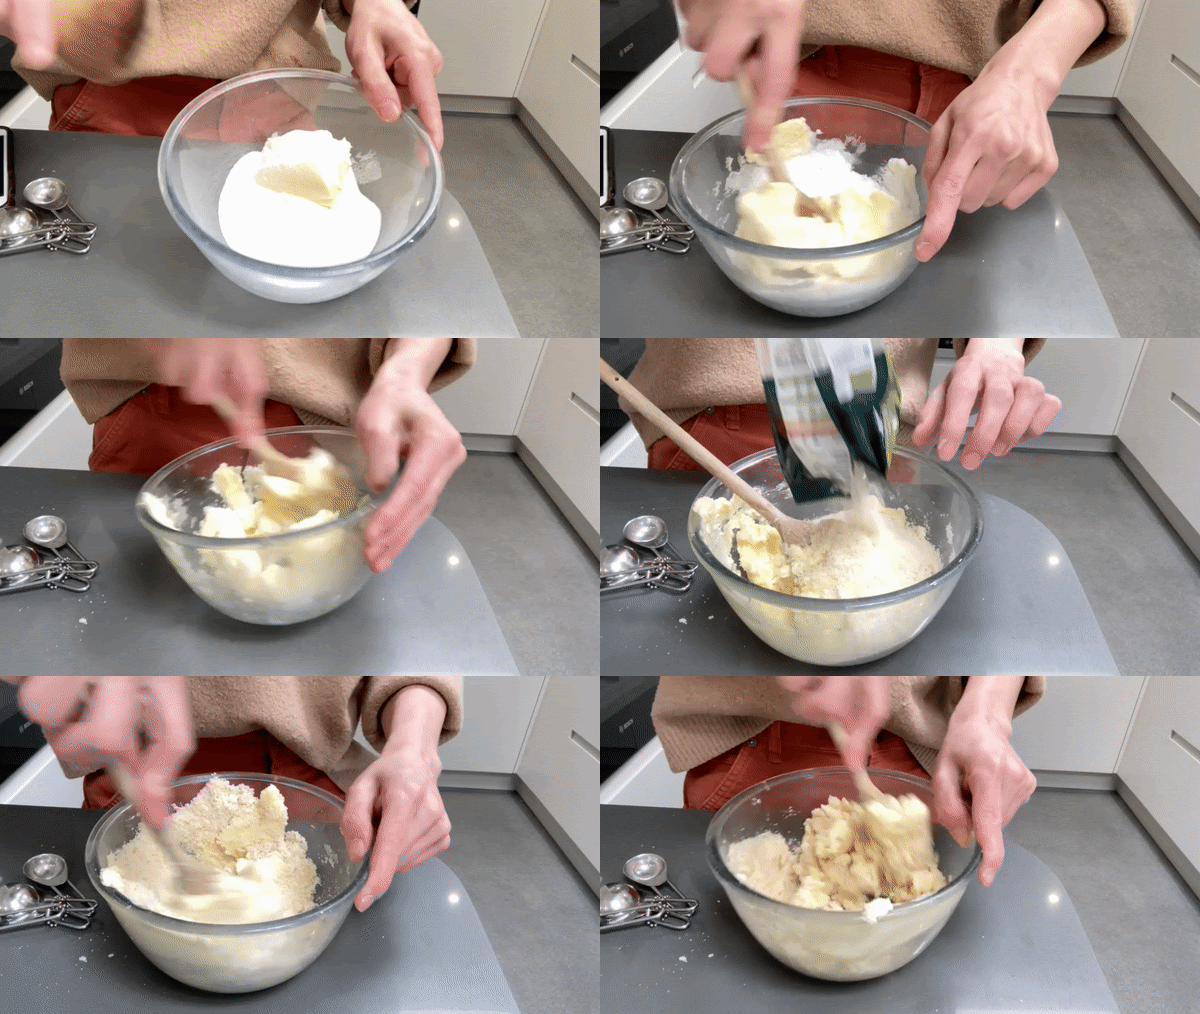
Beat together butter, sugar, almonds and salt until creamy
Next emulsify in the egg – beat until well combined
Now mix in the sifted flour and cocoa powder
Finally, mix in the melted chocolate
Put in a container and leave to chill completely – at least 2 or 3 hours as we want this to be firm yet scoopable! You can hurry this up by putting in freezer if you’re in a pinch
Second: Craquelin method
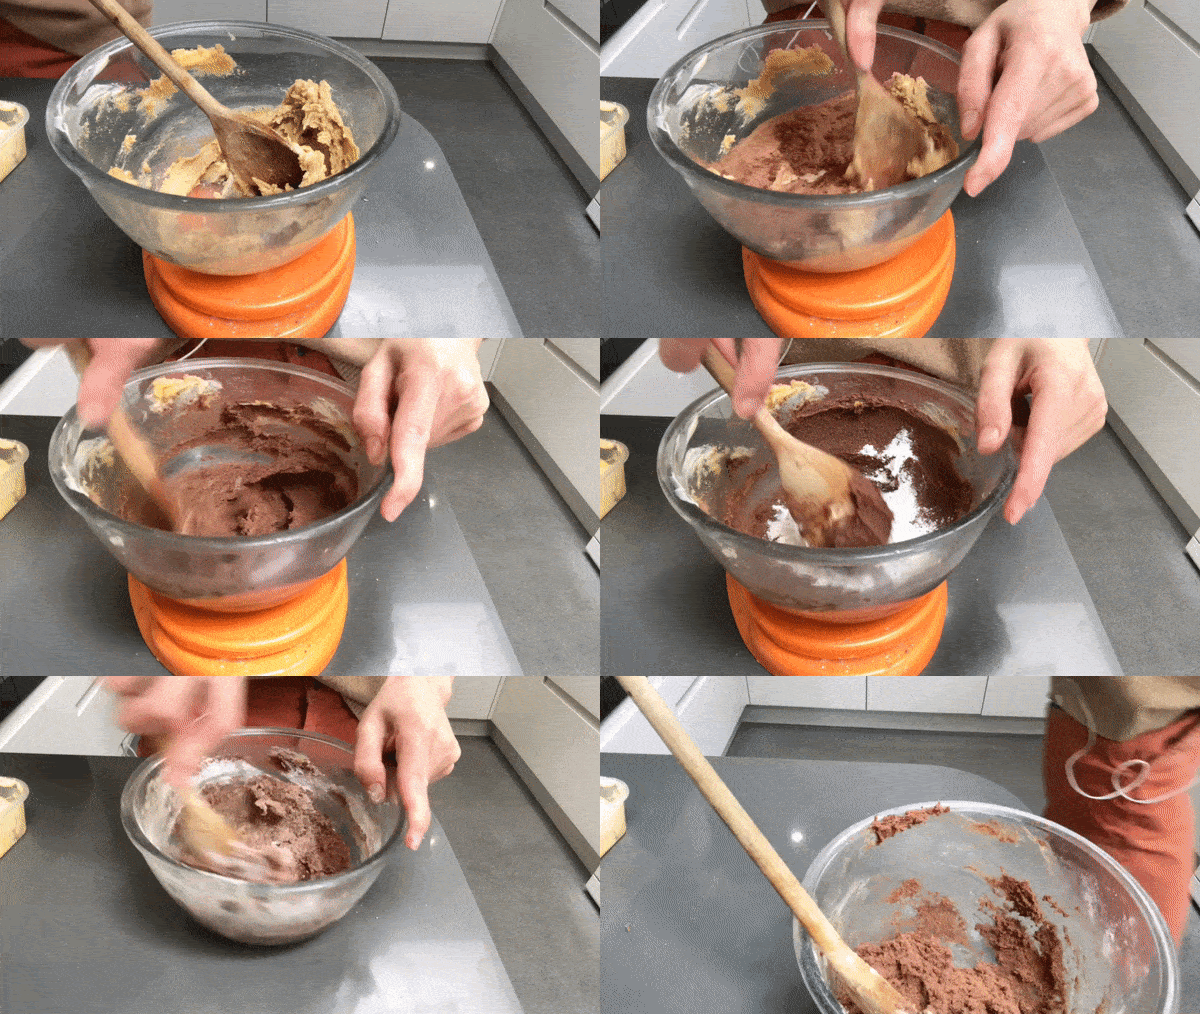
Mix together butter and sugar until creamy and combined – no need to aerate
Next mix in your flour and cocoa
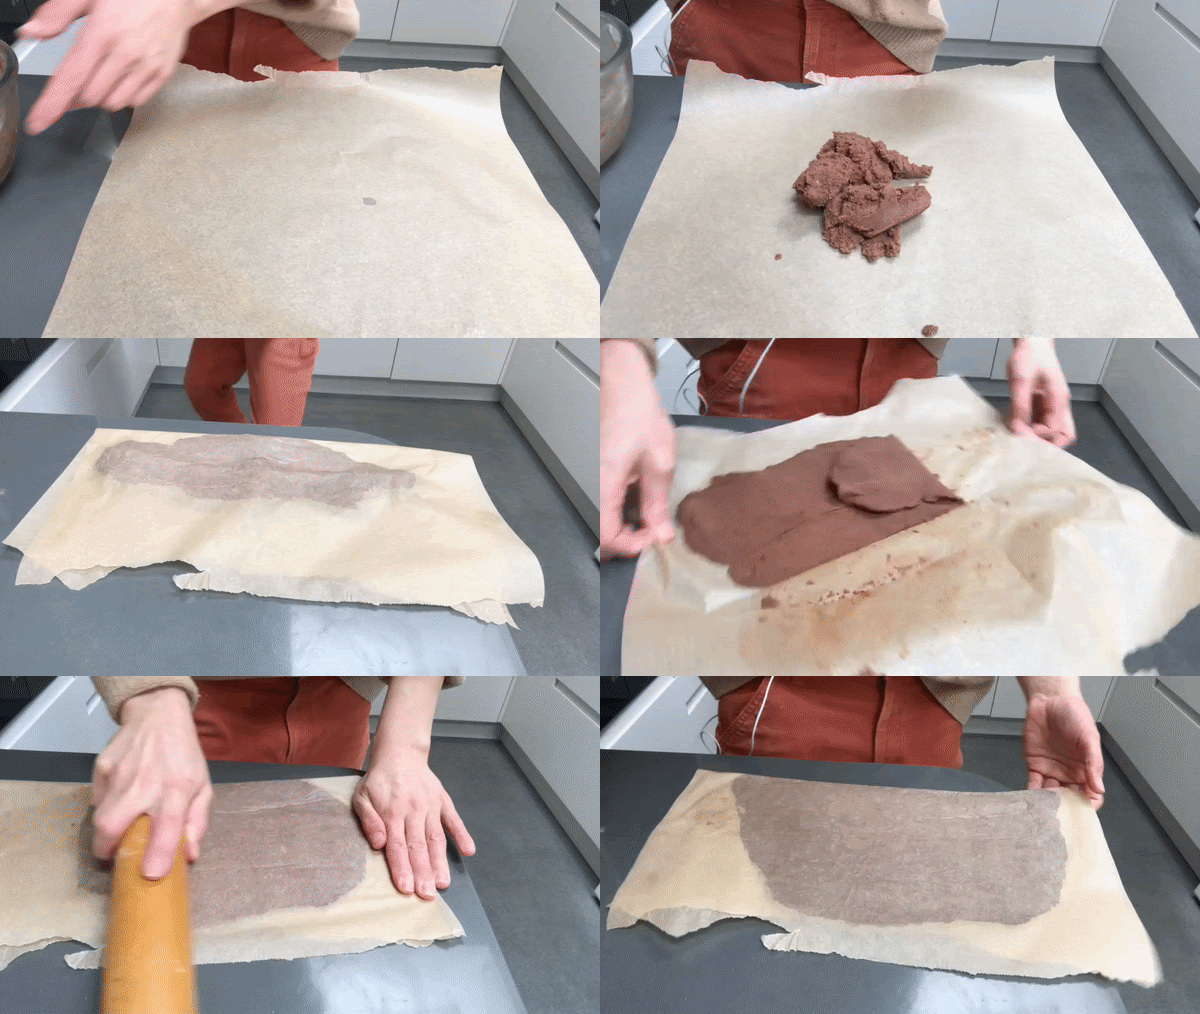
Mix until homogeneous – squish in between two pieces of paper and roll until around 3mm – you want it to be quite thin!
Chill for at least an hour until firm
Finally: the dough
First, check the instructions on the back of your yeast packet and bloom if required!
Mix the dries on a low speed with the dough hook until everything is distributed
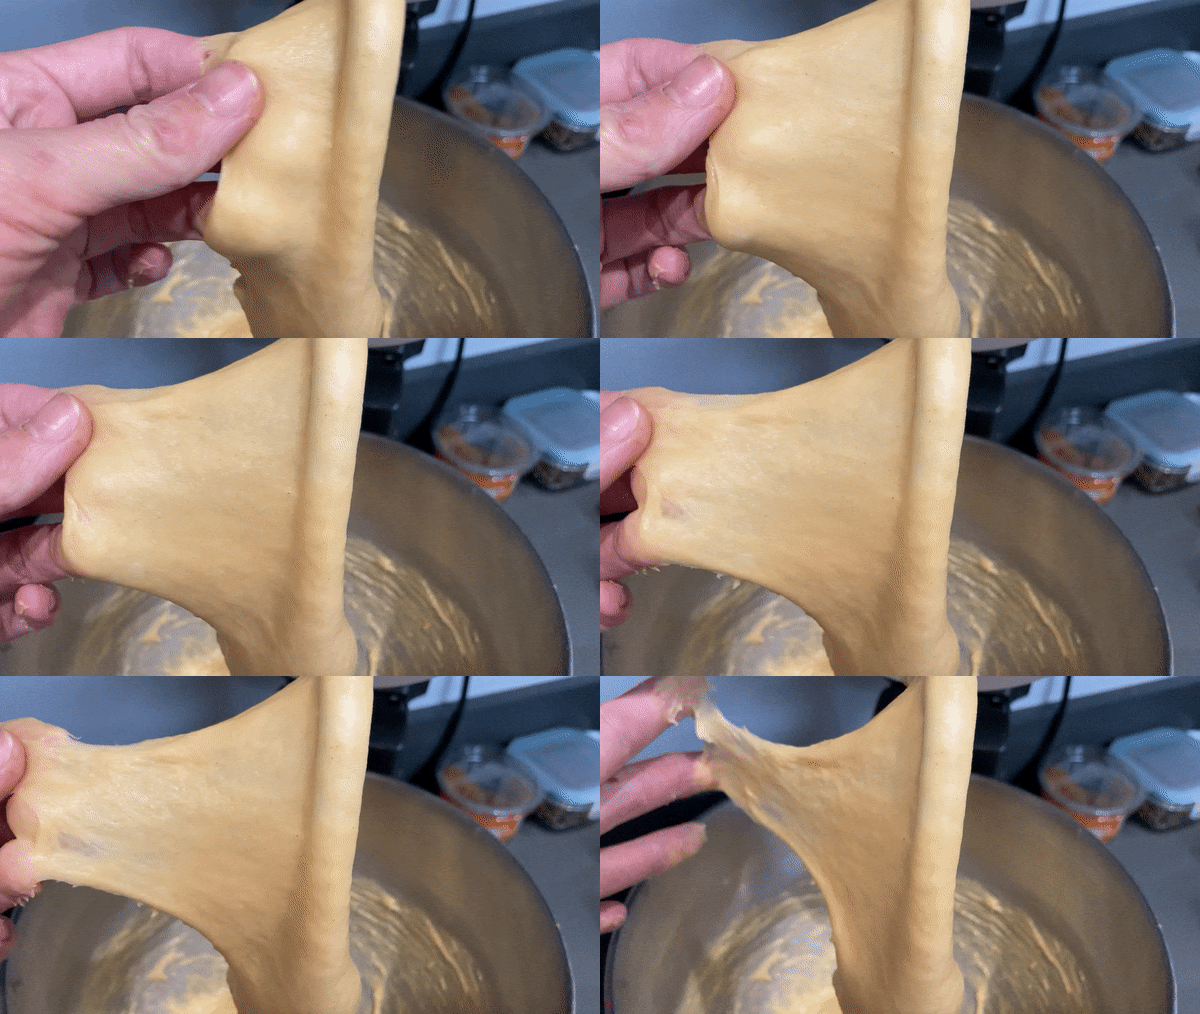
Pour in the wet ingredients and mix on a medium speed for 10-12 mins until medium gluten development (Medium gluten development is when the dough stretches a bit but tears under pressure!)
If it hasn't achieved this development by the 12 min mark, rest for 5 mins (we don’t want it to get too hot) and then continue mixing until medium gluten development is achieved
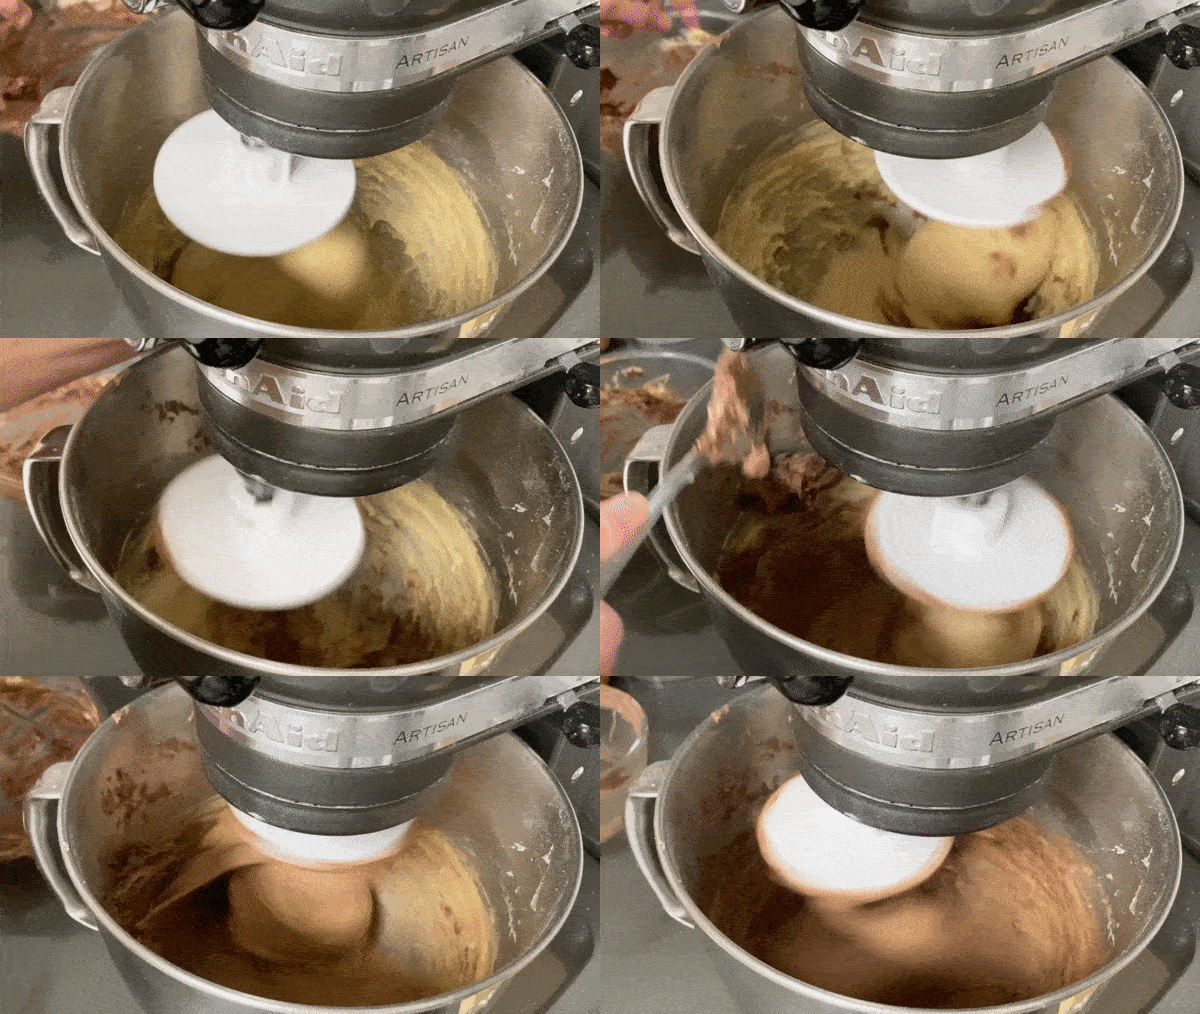
Meanwhile, beat butter and cocoa powder together. You don't need to aerate it in any way, you just want it to be soft
Add in your cocoa/butter mixture piece by piece, ensuring each addition is completely absorbed before moving on with the next
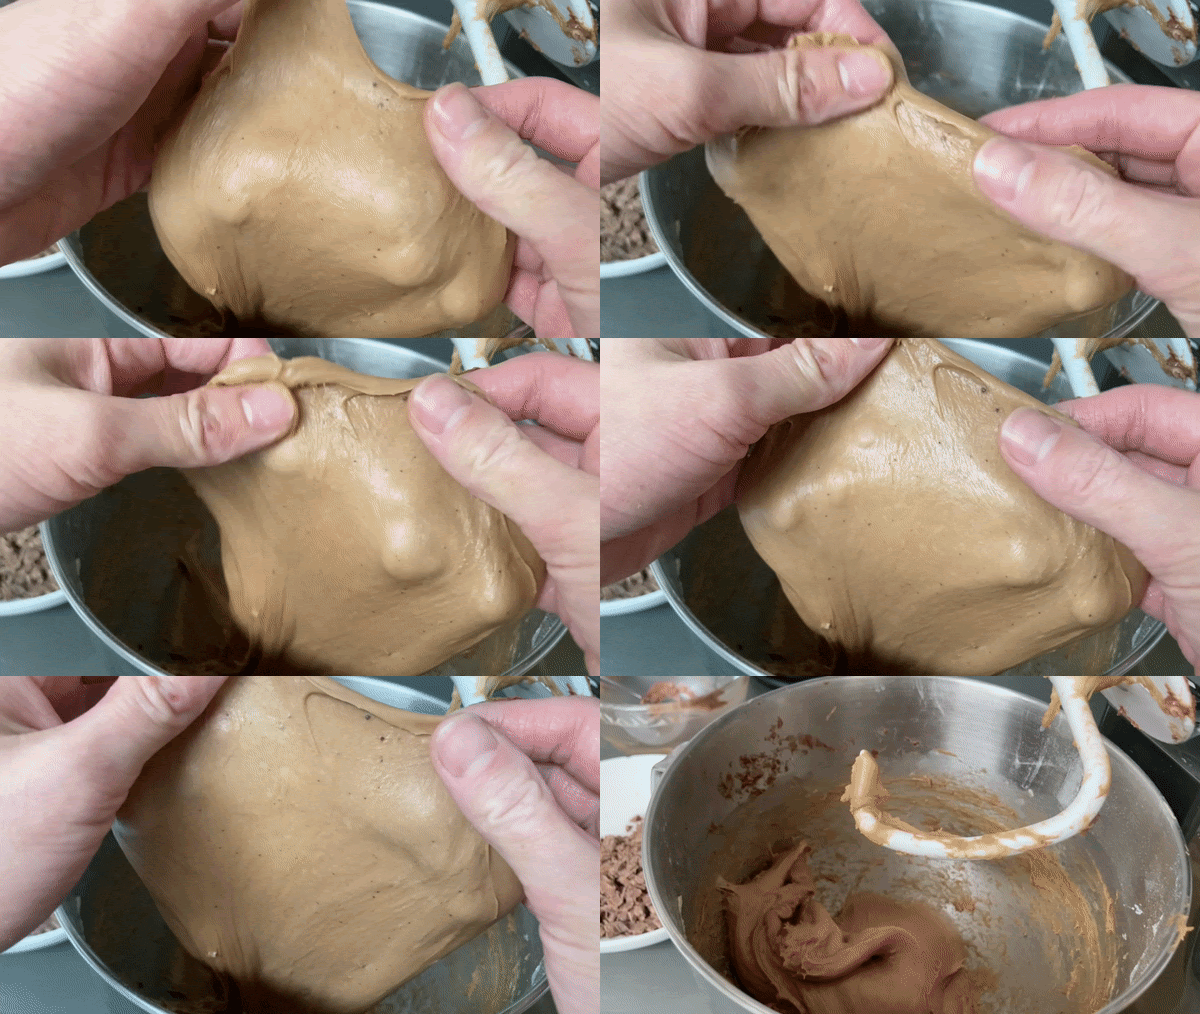
Keep mixing until the dough pulls away from the sides of the bowl and is extremely shiny, soft and stretchy… and now chocolatey!
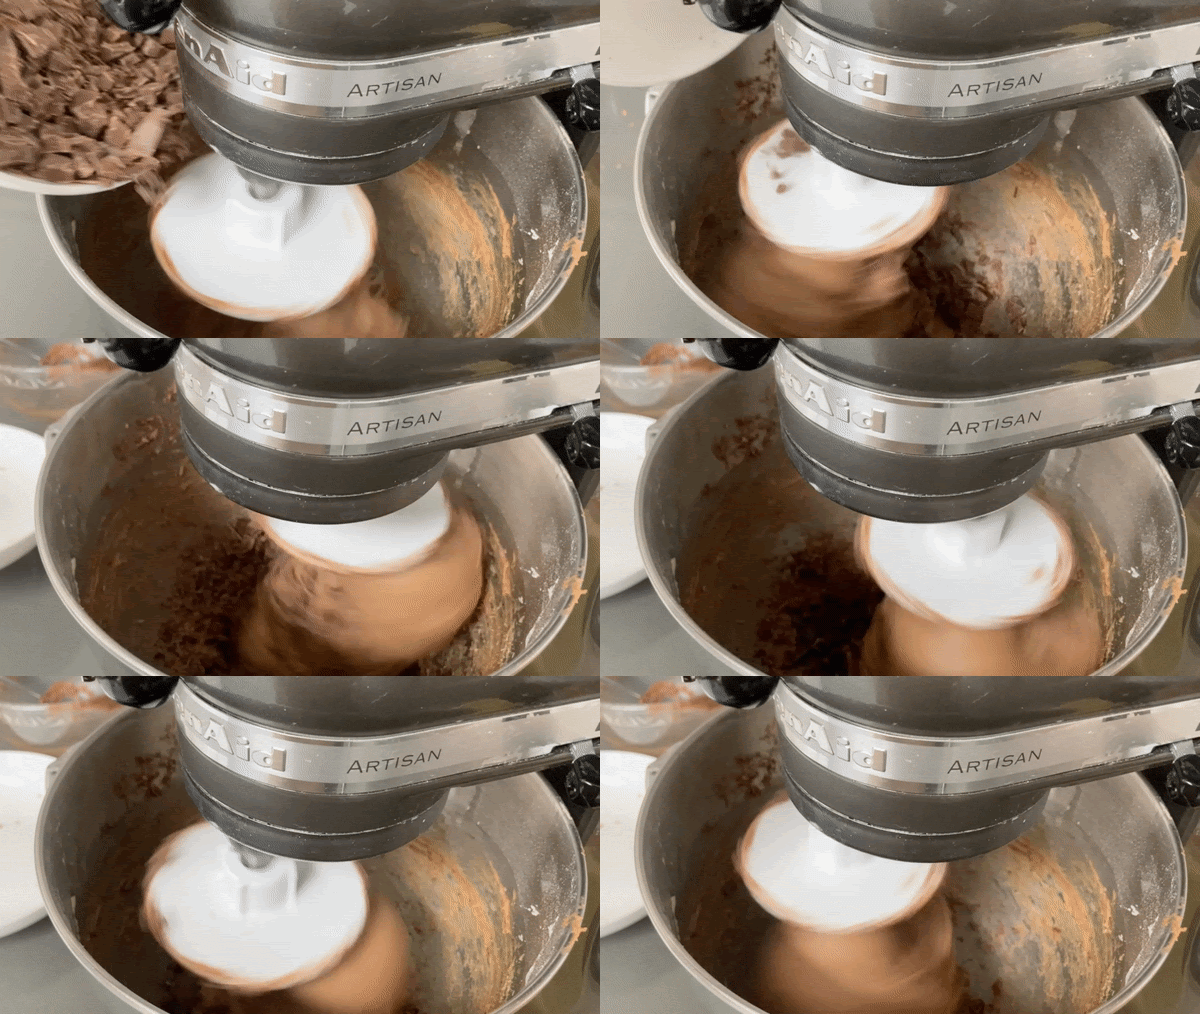
Finally, add in your chocolate chips
Scape down the sides of the bowl and cover – allow to bulk ferment for 1.5-2 hours until super puffy.
Shaping
Empty your dough onto your bench
Divide into 50g balls. If you want to do ‘mini’ buns, then 30g works great, but they are quite annoying to roll and you’ll need to adapt your frangipane ball size accordingly
Pre-shape into balls and leave on the counter for about 10 mins to relax
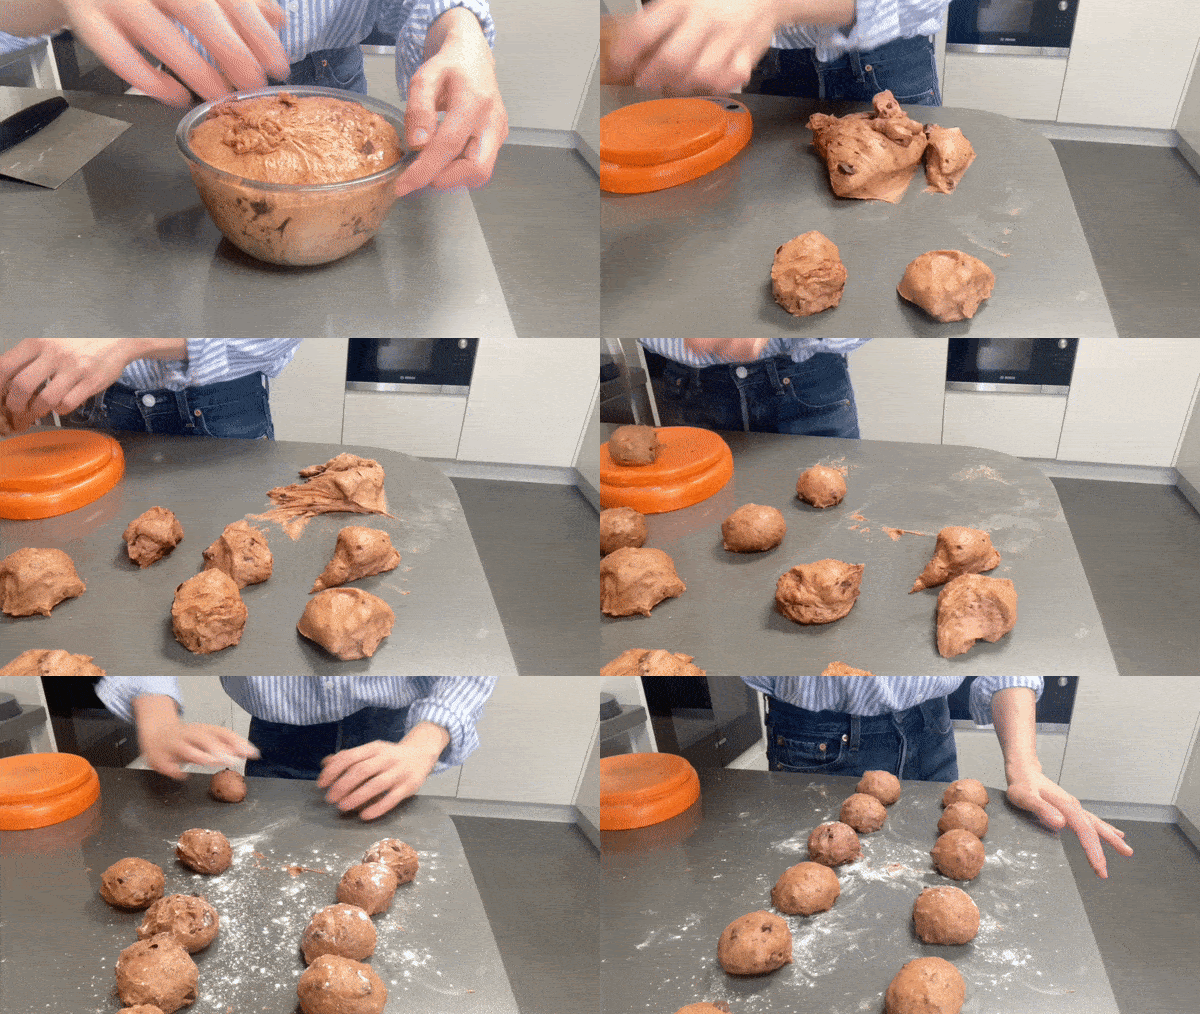
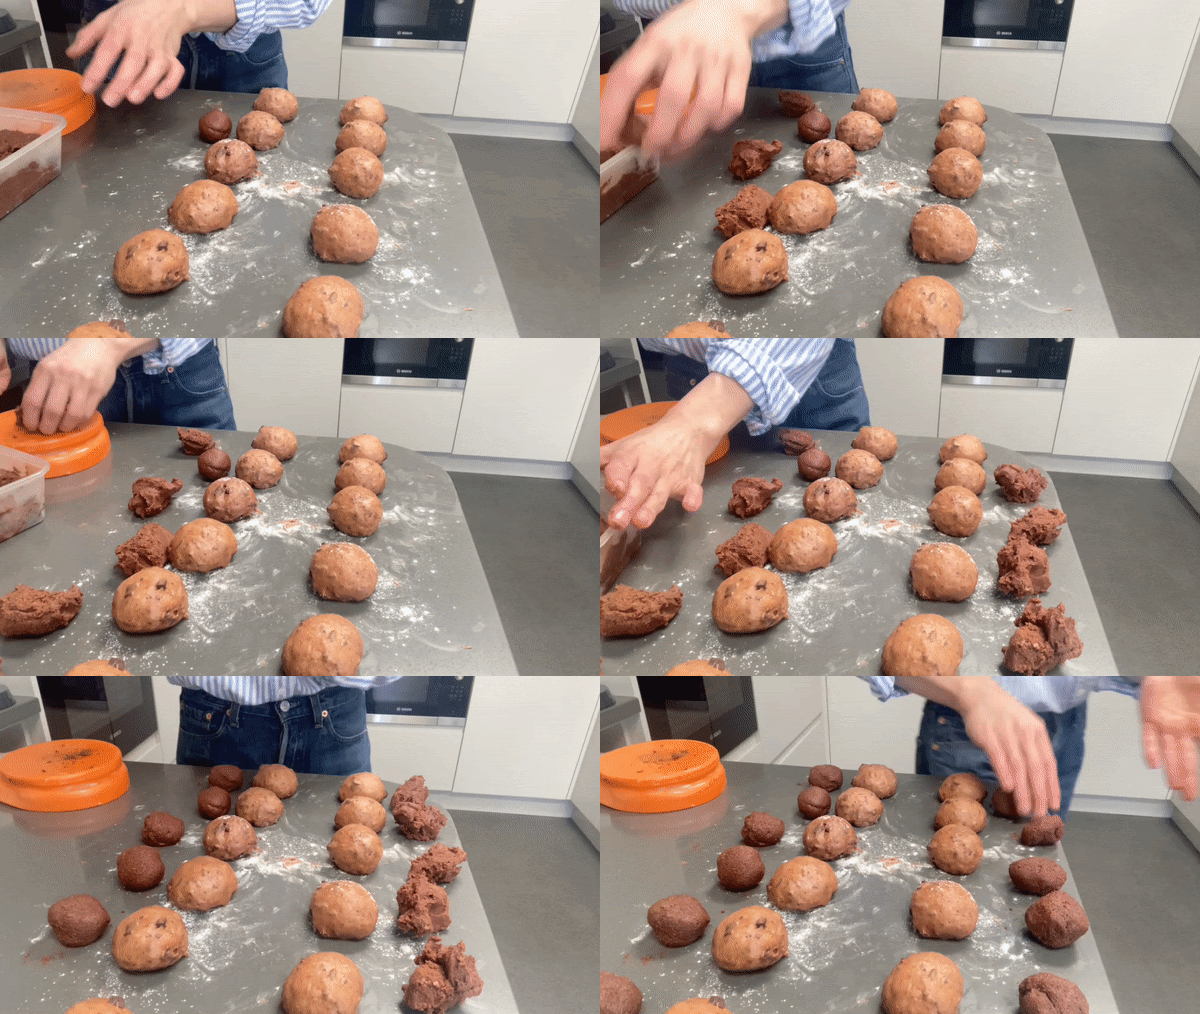
Whilst your dough relaxes, get your frangipane out the fridge. It should be very firm but still pliable. Using a tablespoon measure, scoop 30-35g balls. Use your hands to form into a round, similar to a golf ball. Repeat for all and set aside – if they're a bit soft, put onto a plate and rest in the freezer!
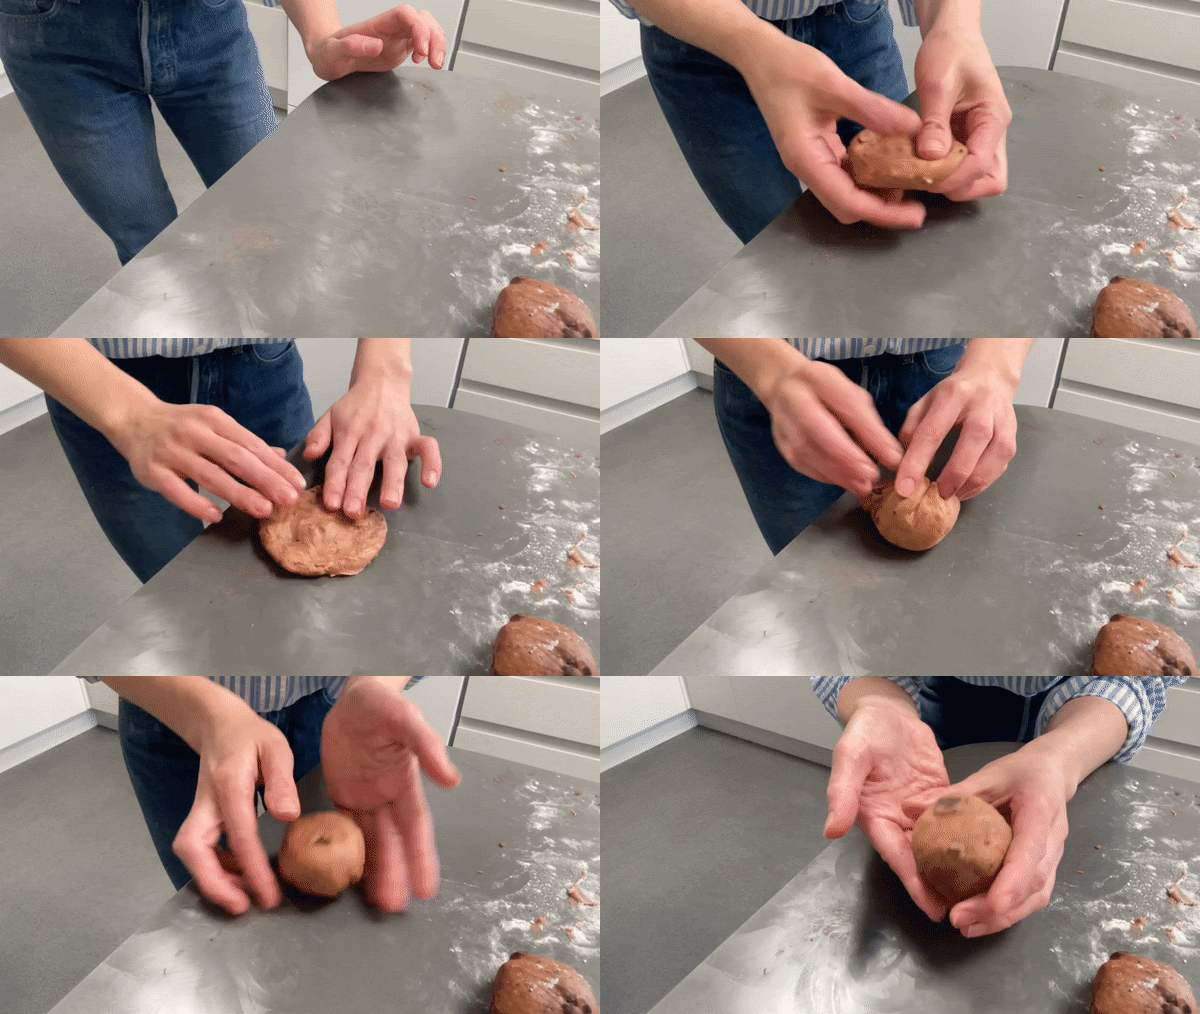
When your dough has relaxed, turn it over and press it into a wider circle
Place a frangipane ball into the middle of the dough and pull the sides up, pinching to close. Gently roll on the counter to close and place on tray. Please don’t grab too hard or the cold frangipane can burst out
Repeat for all of the dough and place onto a tray
Final proof
Let your brioche proof at room temp for about 1.5 hours - cover lightly with cling film to stop a crust from forming. They will be very puffy and expanded. If you touch them they should spring back lightly but still feel full of air
Baking
Pre-heat oven to 180c fan
Egg wash your proofed buns
Finally, get your chocolate craquelin out of the fridge. Let it warm between your hands slightly before you cut shapes
Use a cutter (mine is the 5cm one!) to cut circles of craquelin and place on top of egg washed buns
Bake in the oven for 16-18 mins, depending on your oven. Temp your dough, checking it is over 90c, if you’re not sure
These are great for several days if you keep in a tin. Just rewarm – I’ve enjoyed mine up to 5 days after baking




would it be possible to... babka this? (babka is a verb now apparently) or would the frangipane be too heavy as a filling?
very upset right now that I don't have a kitchen aid :(